We may receive a commission when you use our affiliate links. However, this does not impact our recommendations.
 Get a perfect fit using a shop-made jig.
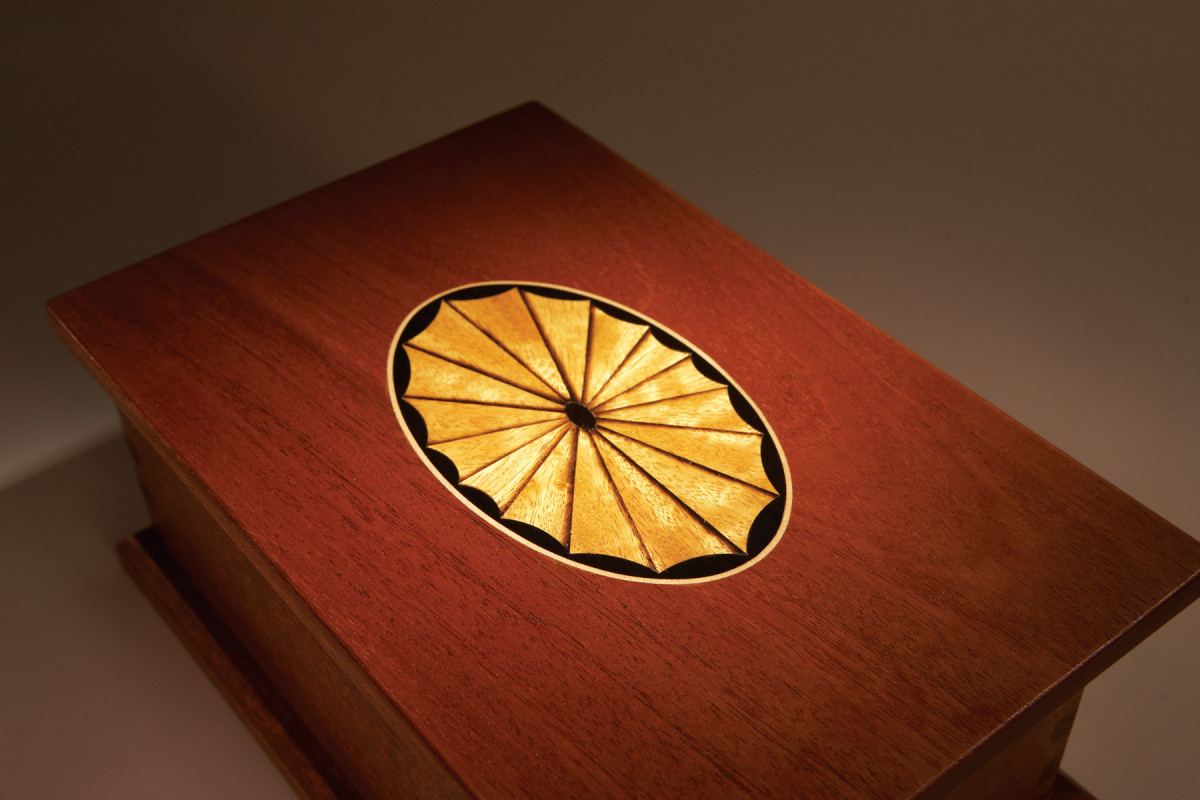
Oval and circular inlays are a time-honored method of adding class to a project, such as the top of a jewelry box. It’s an interesting challenge to make your own inlay, but far easier to select one from a wide range of ready-made designs (see Sources, at bottom).
But how are you going to create a perfectly-sized recess for the inlay? There’s really no room for error on a prominent detail like this–and you wouldn’t want to ruin an inlay using an imprecise technique. Here’s a method for routing the recess that ensures a good fit.
Prepare the inlay
All inlays come with a layer of tape on one side, which helps keep together the various parts of the design. The tape is always placed on the good, or top side, of the inlay. Draw centerlines for the oval or circle on the tape using a combination square.

1. Some inlays have a rectangular border which must be removed. Cut off the border using a sharp knife, guided by a metal straightedge.
Some oval and circular inlays are made with a rectangular or square border, which protects the edges of the design. If your inlay has a border, the first step is to remove it (Photo 1). All the parts of the inlay are glued together, including the border, so the border must be cut off with a very sharp knife. A breakaway utility knife works well–start with a fresh edge. Guide the cuts with a metal straightedge, such as the blade from a combination square. Avoid cutting into the oval border. Make a series of straight cuts–it’s OK if small pieces of the border veneer remain.
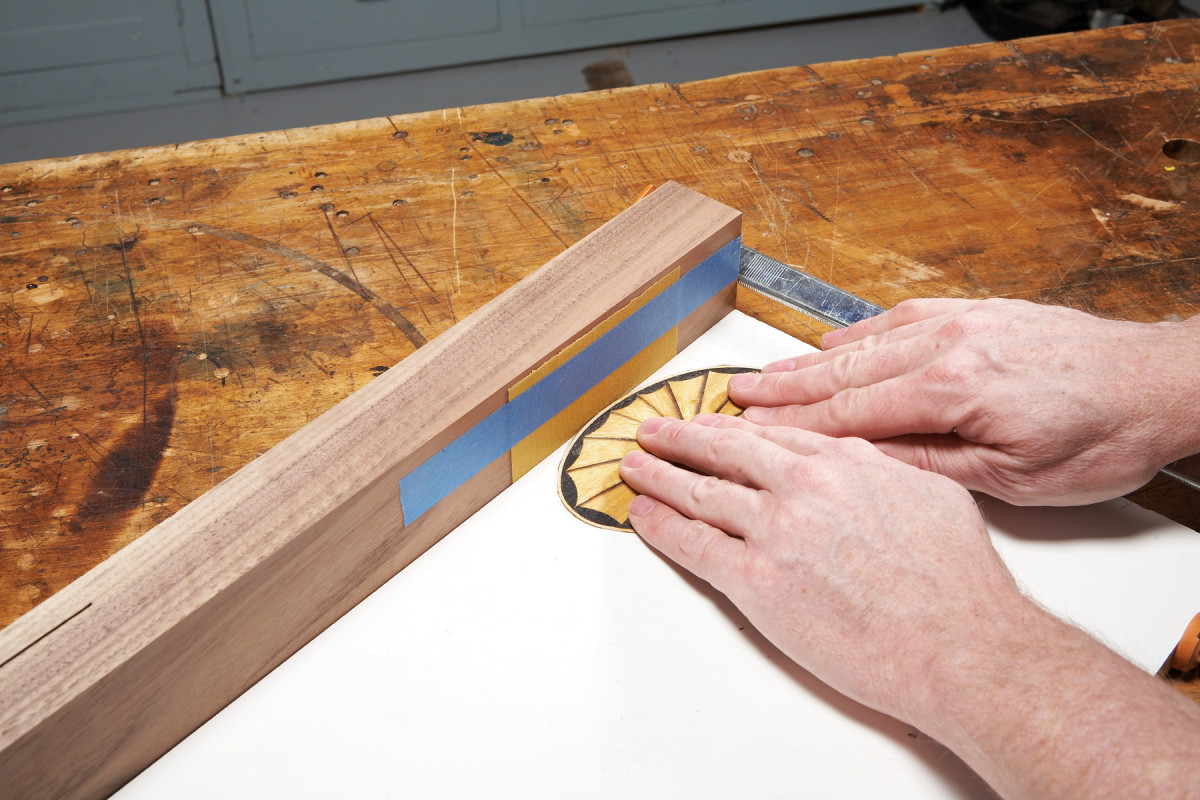
2. Remove remaining bits of border material by sanding the oval on a right-angled block. This ensures that the oval’s edges are square.
Make a small station for sanding the inlay’s edges (Photo 2). First, tape a piece of 150-grit sandpaper to a thick block. Clamp the block to a piece of plywood (melamine works well, because it’s slippery). Sand the inlay by rotating it with your hands–the goal is to make a perfect oval.
Make the template
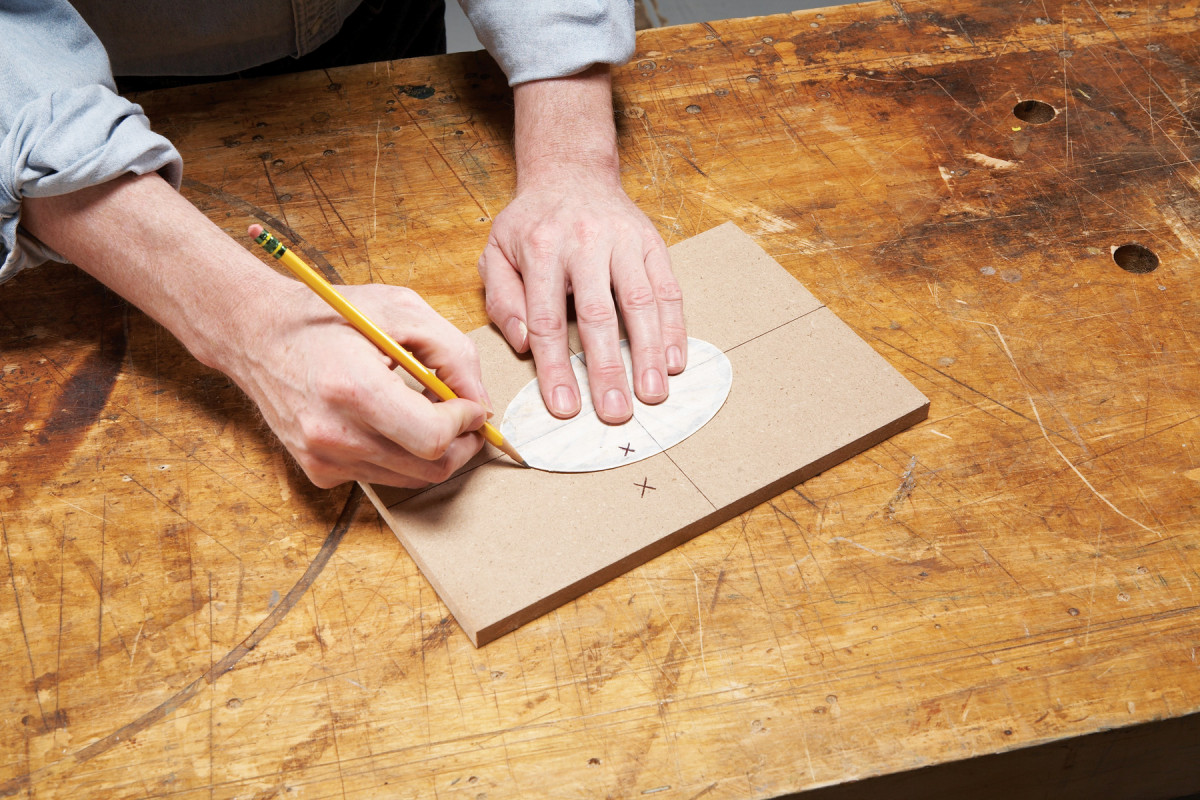
3. Make a router template from MDF. Turn over the inlay, taped side up (this is the show side), and trace around it.
MDF is ideal for making a template because it’s uniform and easy to sand. It can be any thickness (here, I’m using 1/2″ material). Cut the MDF the same size as the piece of wood that you’ll be routing for the inlay.
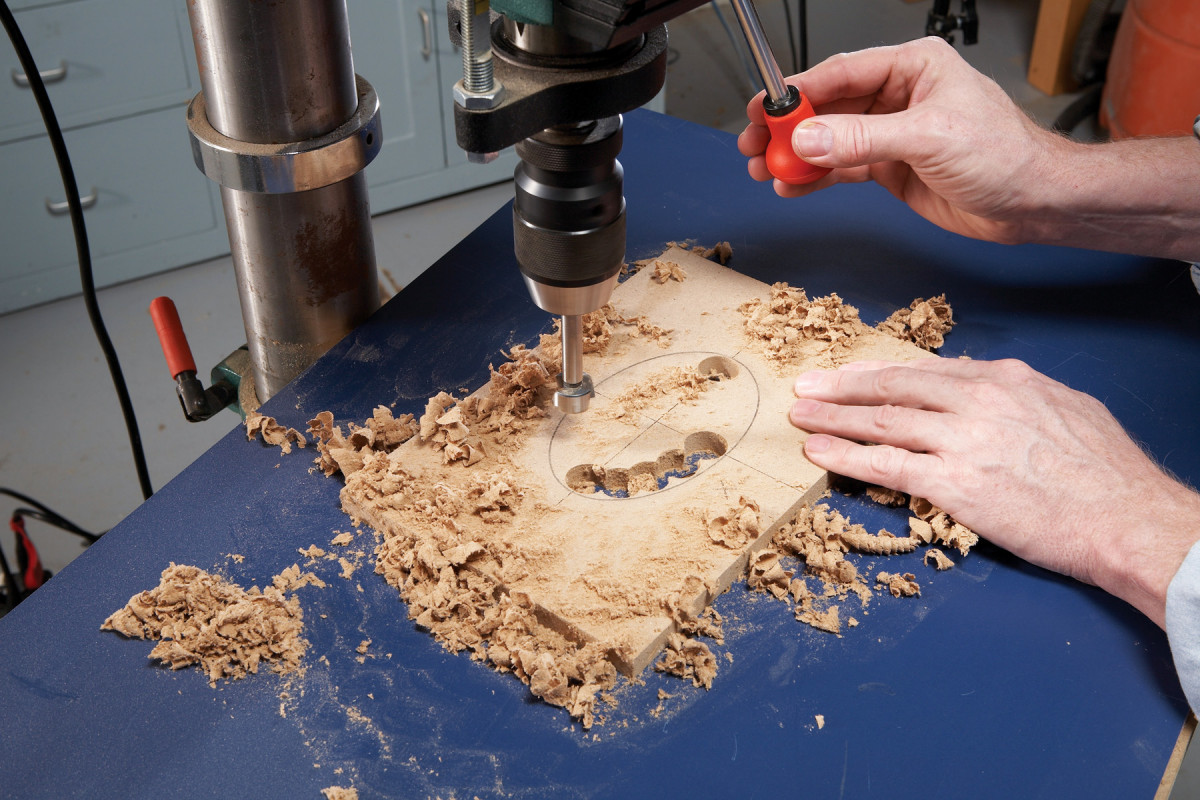
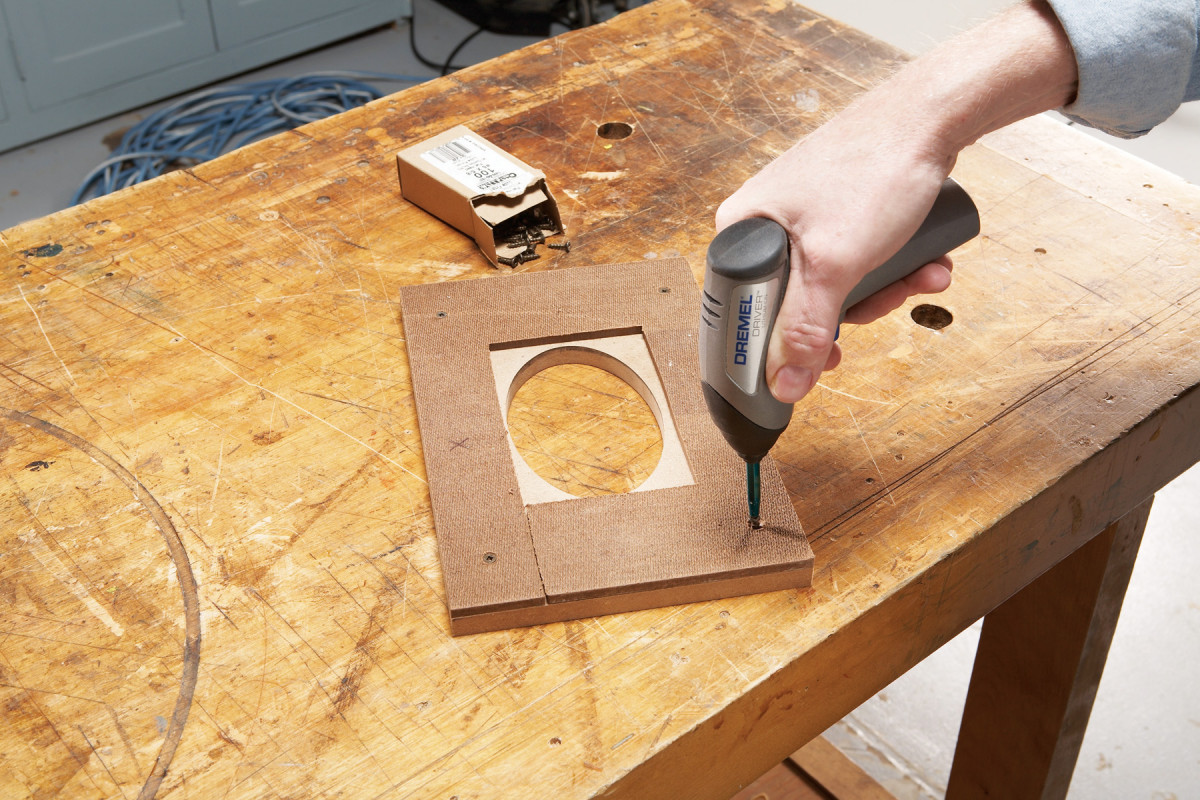
4. Remove most of the waste inside the oval using a Forstner bit in the drill press.
Draw centerlines on the template. The oval won’t be perfectly symmetrical, so mark one portion of the inlay with an “X”, and make the same mark on the template. Align the centerlines of the oval and template and trace around the inlay with a sharp, soft-leaded pencil (Photo 3). Widen the line with a dull pencil.
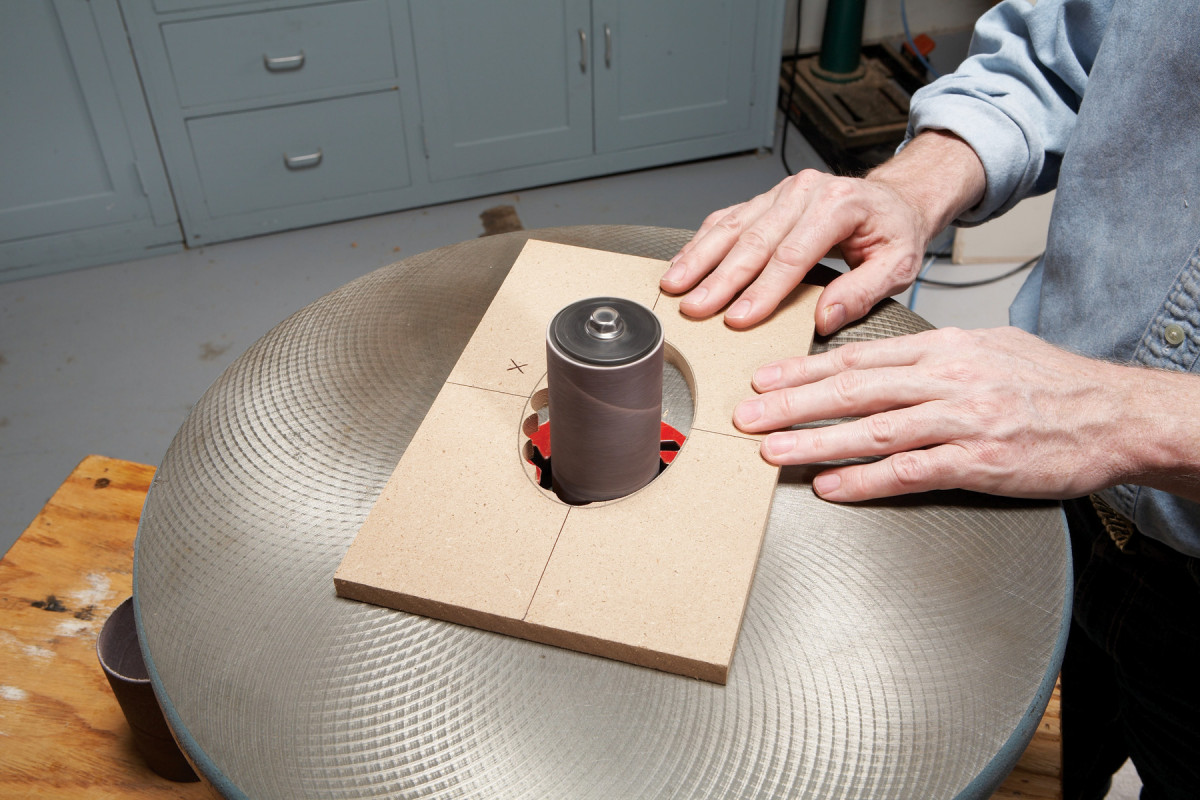
5. Sand up to the pencil line using an oscillating spindle sander or a sanding drum in your drill press.
Remove most of the waste by drilling (Photo 4). Keep the bit at least 1/32″ away from the pencil line. Use a Forstner bit so you can overlap the holes.
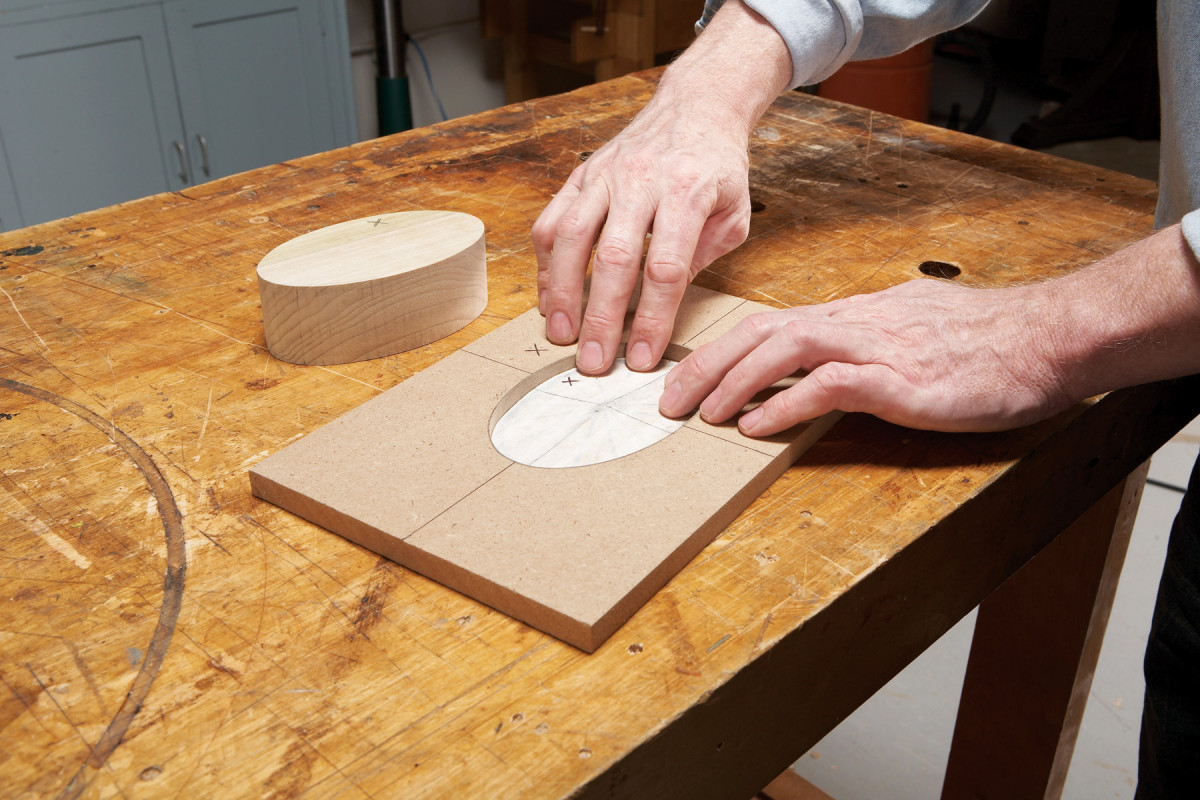
6. Check your progress by placing the oval in the template’s window. Aim for a snug fit, with no gaps.
Now for the picky part. Sand right up to the line–but don’t remove any of the line (Photo 5). Take it easy and frequently check your progress (Photo 6). If you sand too much, it’s probably best to start over with a new template.
Rout the recess
7. Fasten a shim piece to the template’s bottom side. The thickness of this piece is determined by the length of your router bit’s cutting flutes.
You’ll be routing the recess for the inlay with a top-bearing flush-trim bit. Your template will probably have to be shimmed to raise it high enough above the workpiece so the bit can create a shallow recess. I chose a bit with 9/16″ long flutes and made a shim from 1/4″ hardboard (Photo 7), but many combinations of bits and shims will work. Make the shim piece the same size as the template, to help with alignment when clamping the template to the workpiece.
If your router has a small-diameter base, you may have to replace the sub-base with a larger, shop-made sub-base to prevent the router from tipping into the template, and to enable it to reach the middle of the recess.
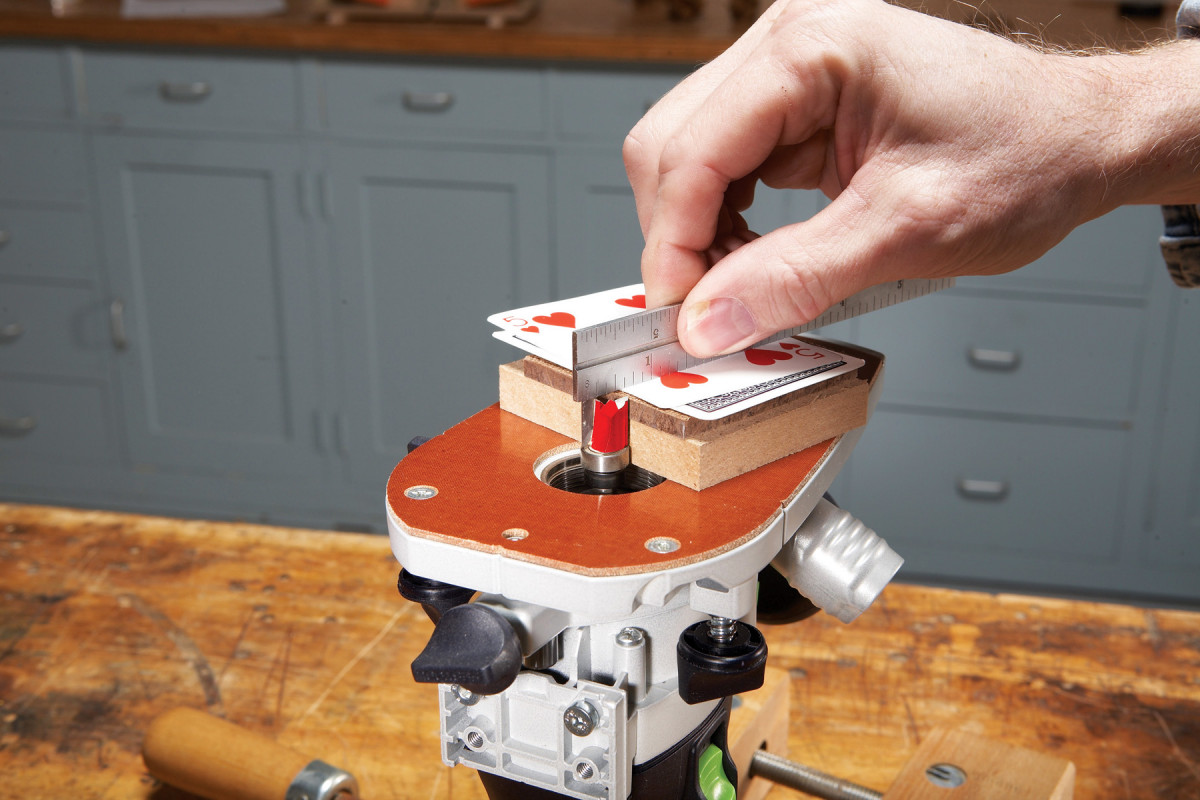
8. Adjust the height of a top-bearing flush-trim router bit. Use scrap pieces, plus a couple of playing cards, to represent the thickness of the template, shim and inlay.
Install the bit in your router. I turn the router upside down to help setting the bit’s height (Photo 8). Place a cutoff from the template and the shim next to the bit to represent their combined thickness. Add two playing cards on top–they’re combined thickness is just a hair thinner than the inlay.
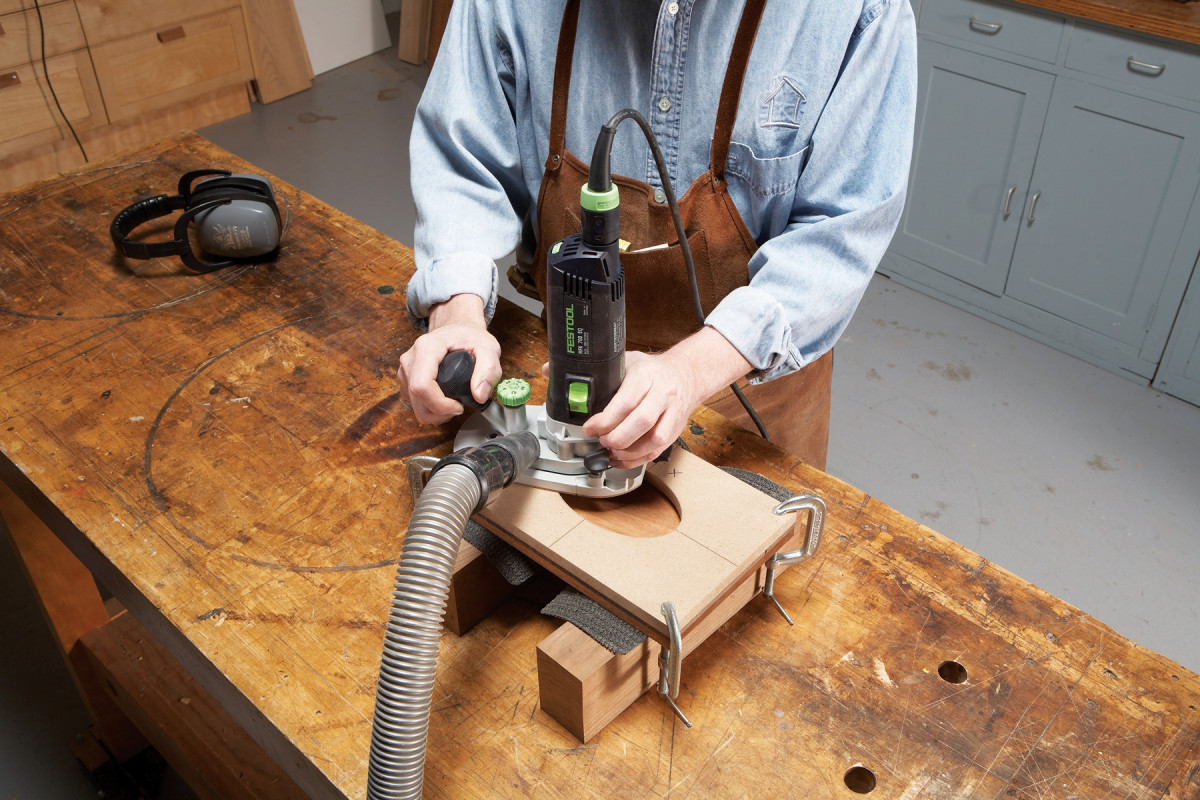
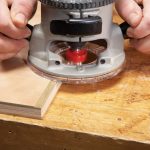
9. Clamp the template to the workpiece and rout a recess for the inlay. Using this bit, the recess will be exactly the same size as the template’s window.
Use a piece of scrap wood to test the router bit’s depth of cut. Clamp the template at all four corners to ensure that the recess is an even depth. Rout a test recess. The inlay (not including the tape) should stand proud of the recess by about the thickness of a sheet of paper. Adjust the bit if necessary, then mark the actual workpiece with an “X” (corresponding with the “X” on the template), and rout the real recess (Photo 9).
Glue the inlay
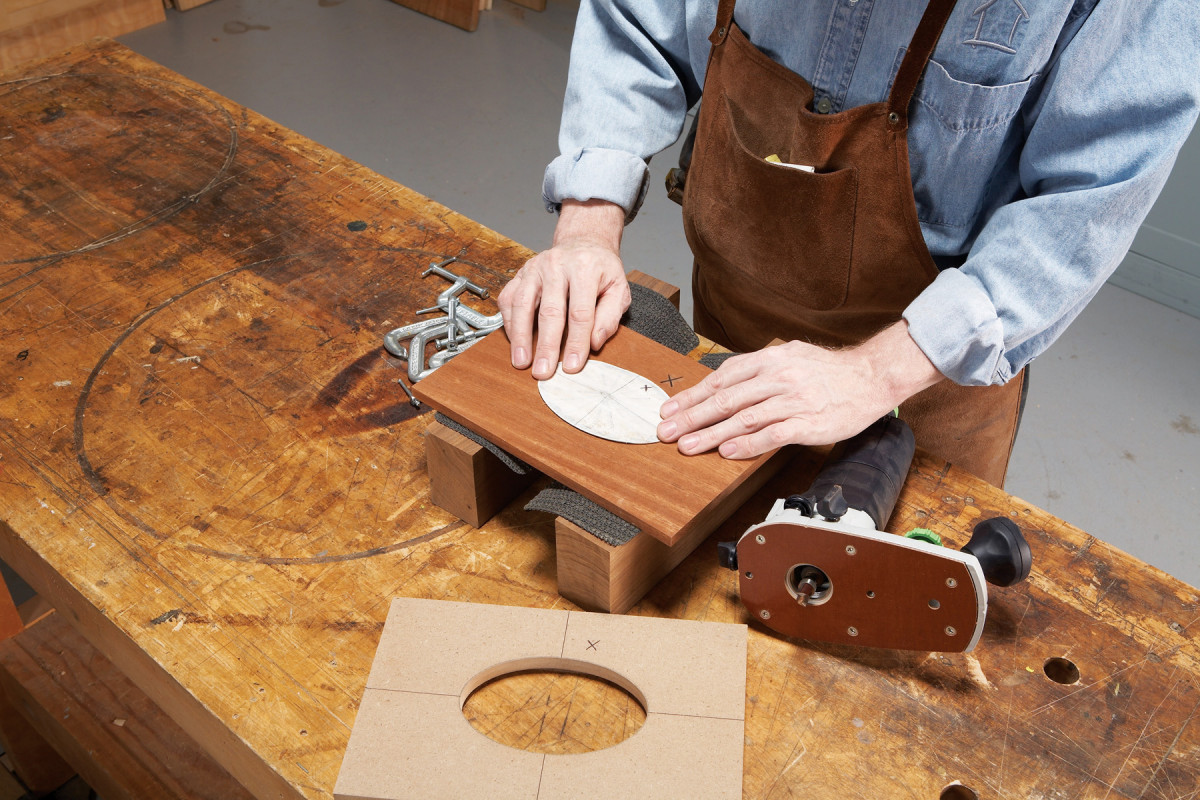
10. Test the fit of the inlay in the recess. If the fit is too tight in spots, sand the inlay’s edges using the right-angle sanding block.
Align the two “X” marks and test the inlay’s fit into the recess (Photo 10). If the inlay is too tight, remove a bit from its edges using the sanding station. Again, take it easy–the goal is for the inlay to drop into the recess using very little pressure.
Make a clamping block that’s about 1/32″ smaller all around than the inlay. Apply a thin coat of yellow glue in the recess–but not on the inlay–and position the inlay in the recess, tape side up. Make sure that the inlay is properly seated all around, then place the block on the inlay and clamp (Photo 11). Remove any squeeze-out and let the glue dry overnight.
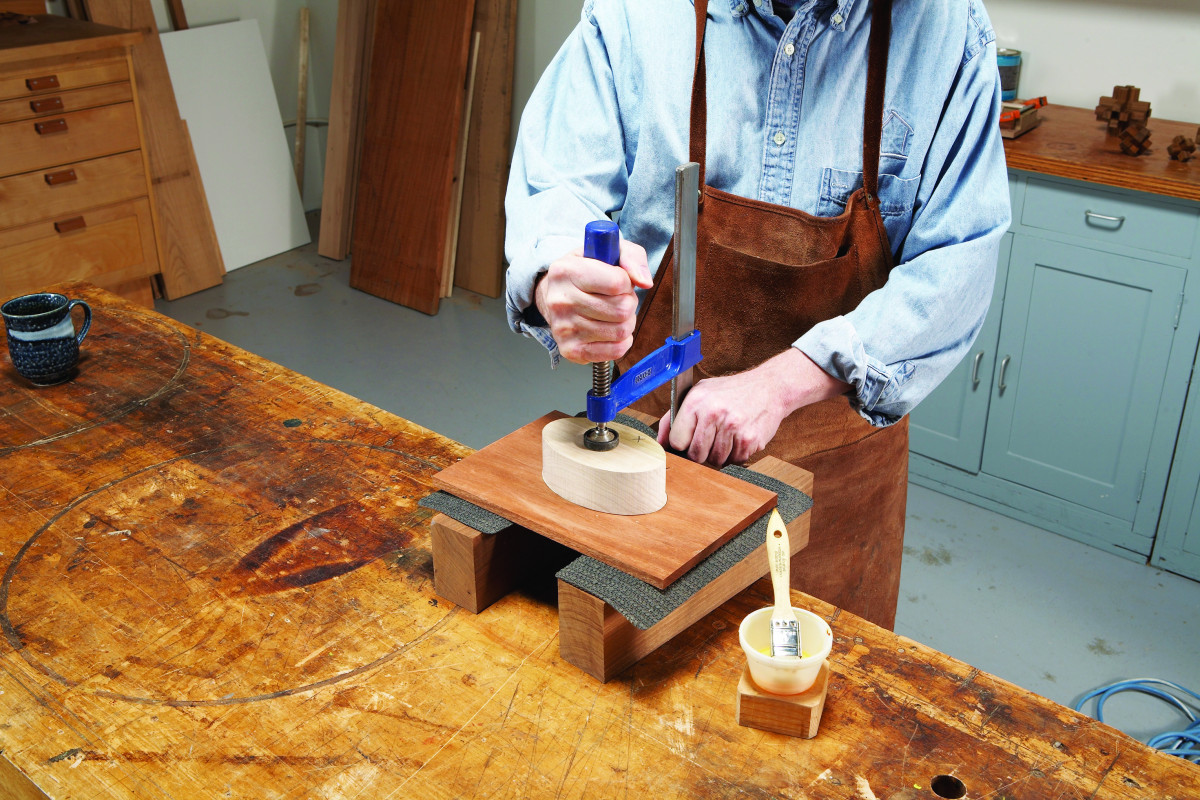
11. Glue the inlay. Apply even pressure by using a thick block that’s just a bit smaller than the inlay.
Remove the tape by slightly moistening it with water (Photo 12). Sand the inlay flush with fine paper (Photo 13).
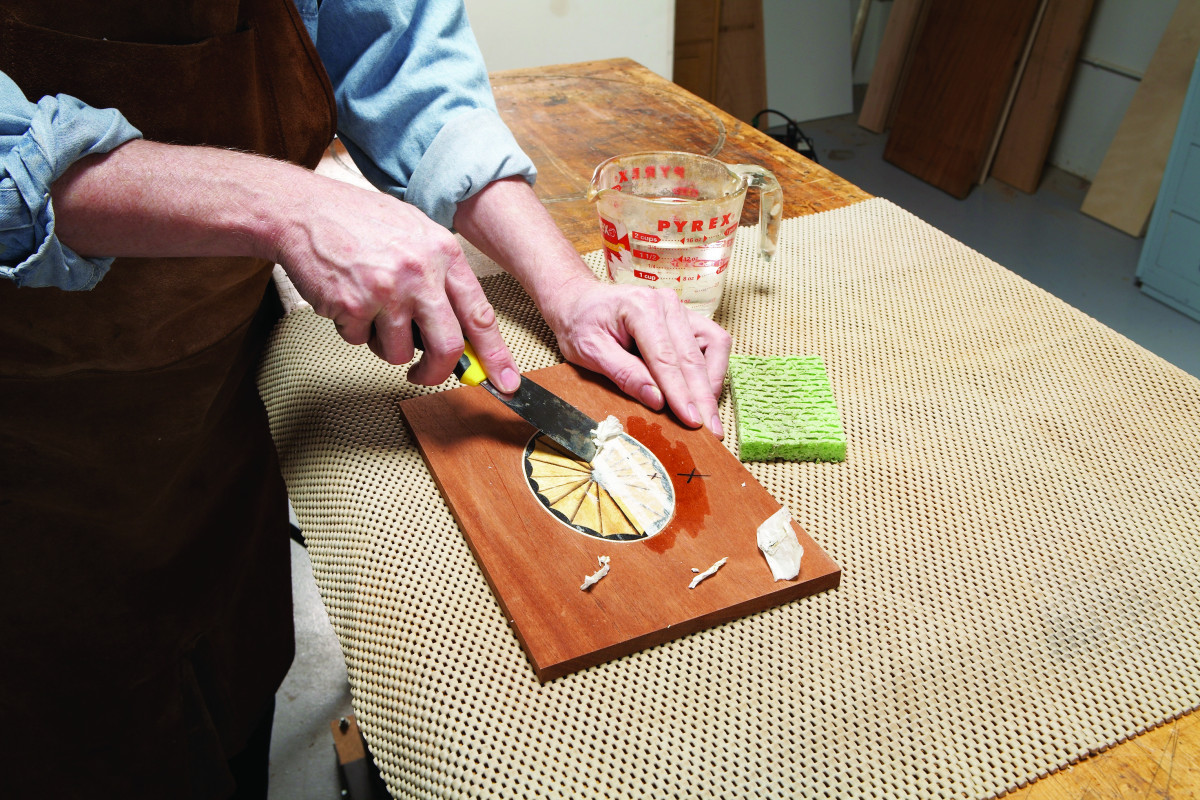
12. Remove the tape by moistening it with a sponge. Wait a minute or two, then scrape off the tape using a dull putty knife.
13. Glue the inlay. Apply even pressure by using a thick block that’s just a bit smaller than the inlay.
Remove the tape by moistening it with a sponge. Wait a minute or two, then scrape off the tape using a dull putty knife.
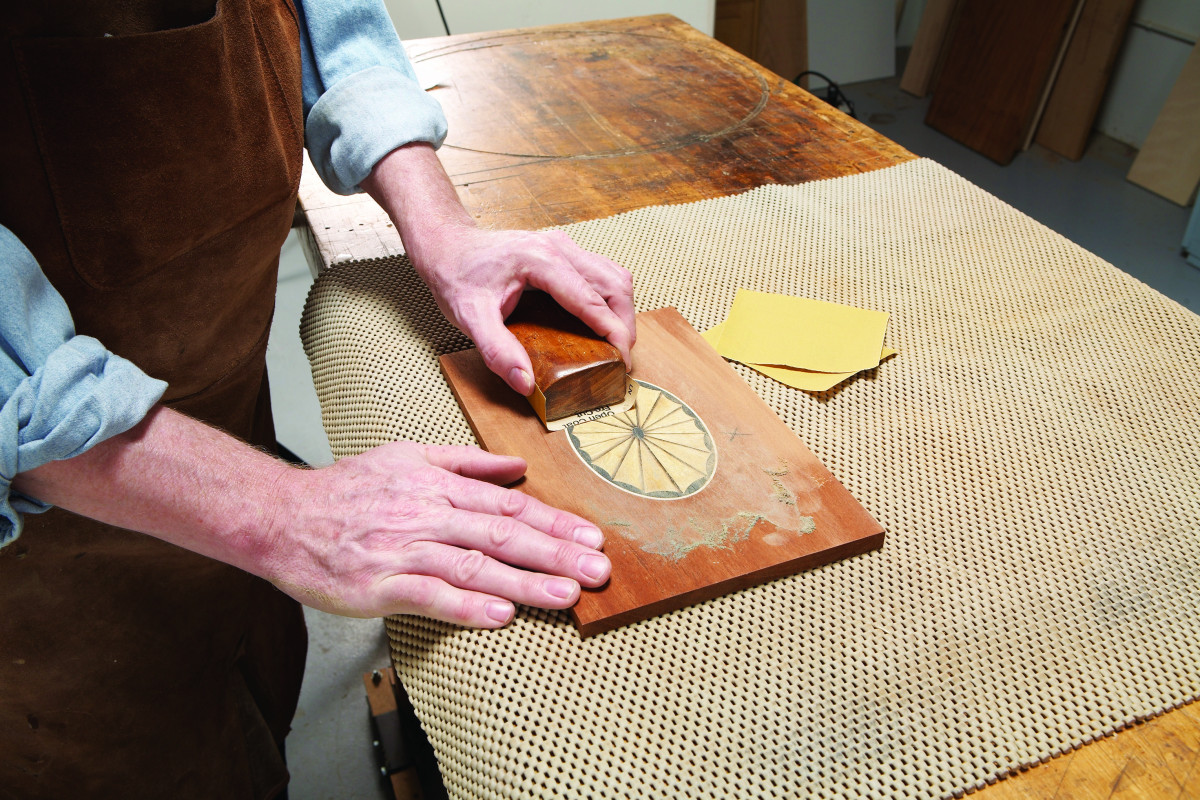
Sand the inlay flush with the surrounding wood. Use 220 grit paper wrapped around a cork-backed block.
Sources
Constantine’s Wood Center Oval Sunburst Design inlay
Freud Top Bearing Flush Trim Bit, #50-107
Here are some supplies and tools we find essential in our everyday work around the shop. We may receive a commission from sales referred by our links; however, we have carefully selected these products for their usefulness and quality.