We may receive a commission when you use our affiliate links. However, this does not impact our recommendations.
Which tools are my favorites? Well, they are divided into a few categories.
Sentimentality & fidelity: These are tools that I inherited from my dad or my grandfather, or that were gifted to me by loved ones and friends, as well as tools that I purchased early on in my woodworking journey and over the years have become my long-term companions.
Merits: New tools that I bought over the course of my career that have earned my trust along the way by performing very well.
Attachment & “paternal” feelings: These are tools that I happened to find in a “free stuff” box on the sidewalk – (believe me this happens quite often!) or tools I won in auctions and had to spend time rehabilitating or restoring.
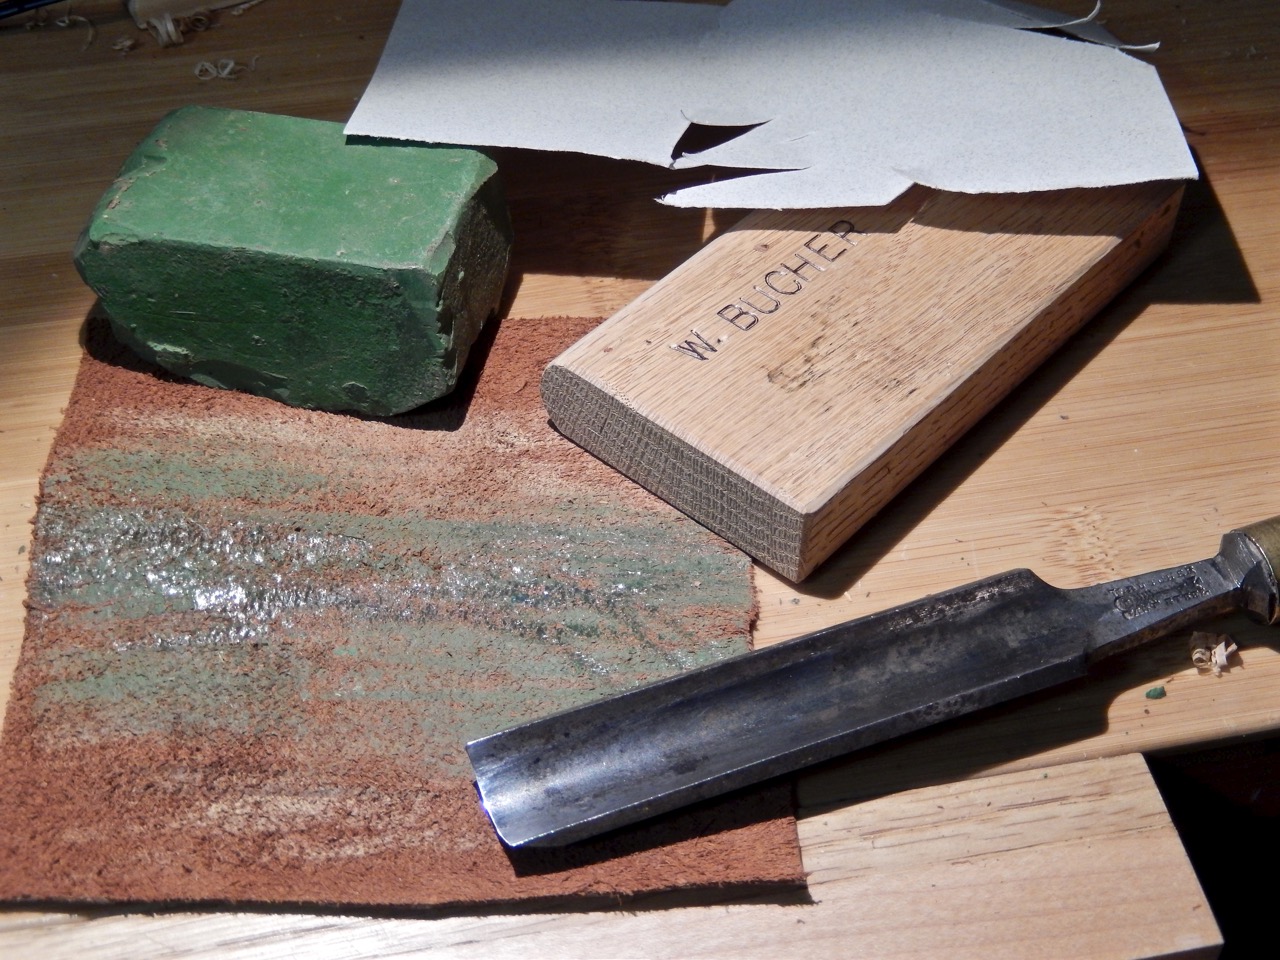
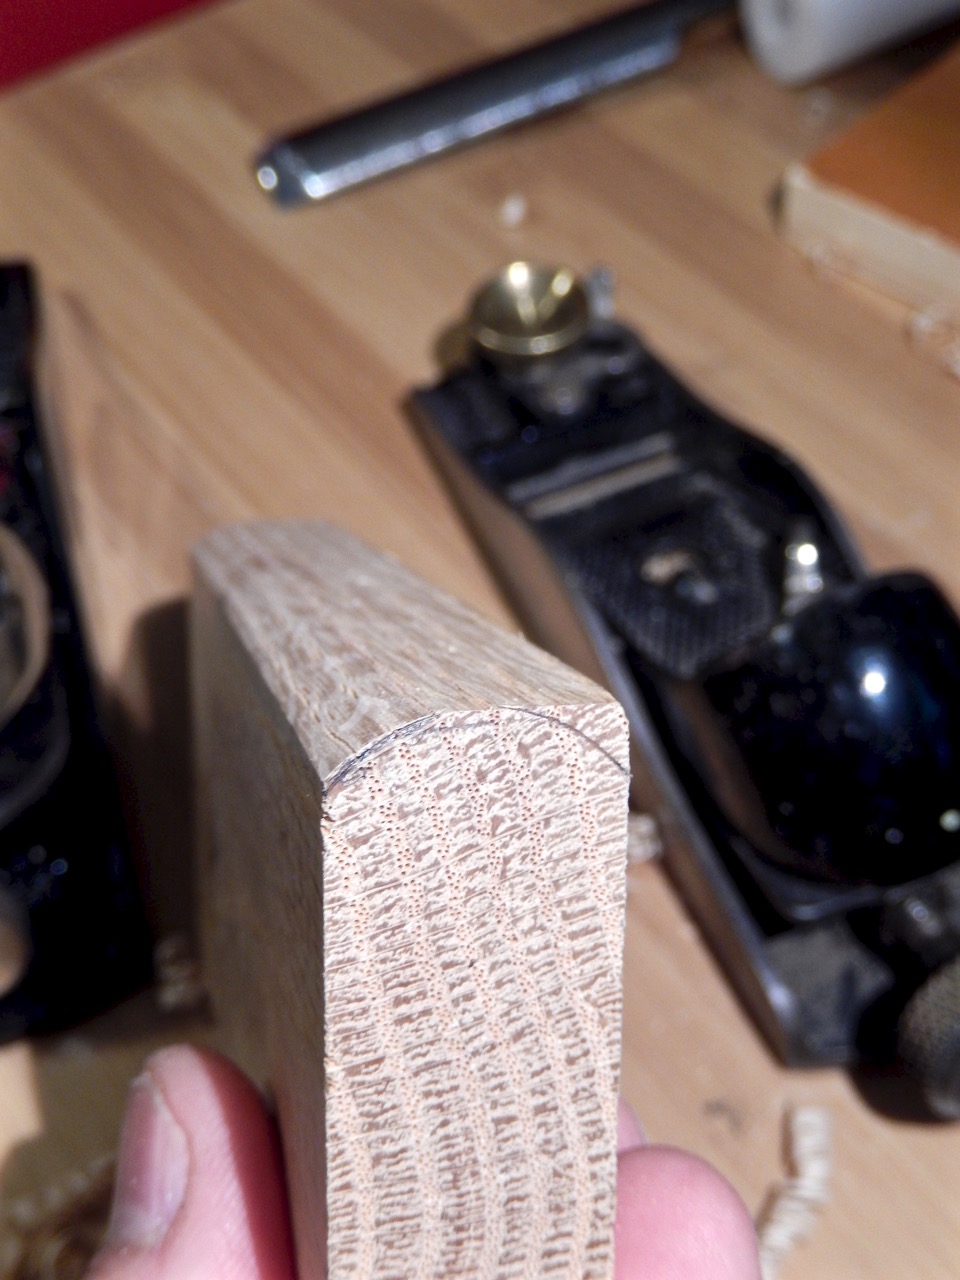
A recent addition to this last group is my W. Butcher gouge. After restoring this gouge’s handle (see my last two posts) and testing it for a while, I knew it would be my best medium-sweep gouge for many years to come. My gouge seems to be a #7 (or #6) sweep, which I find to be the most versatile sweeps in carving – yet another reason why I believe it will become one of the most useful tools I have.
Even the best tool with the most resilient edge requires sharpening and honing. In the case of a gouge, this process demands two distinct abrasion surfaces: one flat, for the bevel; and one convex, for treating the gouge’s inner flute. While the subject of flat sharpening surfaces is often discussed, not as much attention is paid to the convex shape that is needed for final honing. This convex medium is often used as a sharpening agent if the flute possesses deep scratches. Convex honing forms are not restricted to gouge honing. We find them instrumental in the sharpening and honing of other carving edge cutting tools such as adzes, scorps and more.
Here’s how I made a dedicated yet versatile wooden slip form to sharpen and hone the inner flute of my gouge. While there are all kinds of convex forms to sharpen and hone the inner flute of a gouge (diamond stones, waterstones etc), I find that a wooden form covered with abrasive papers first, then a piece of leather for final honing, works best.
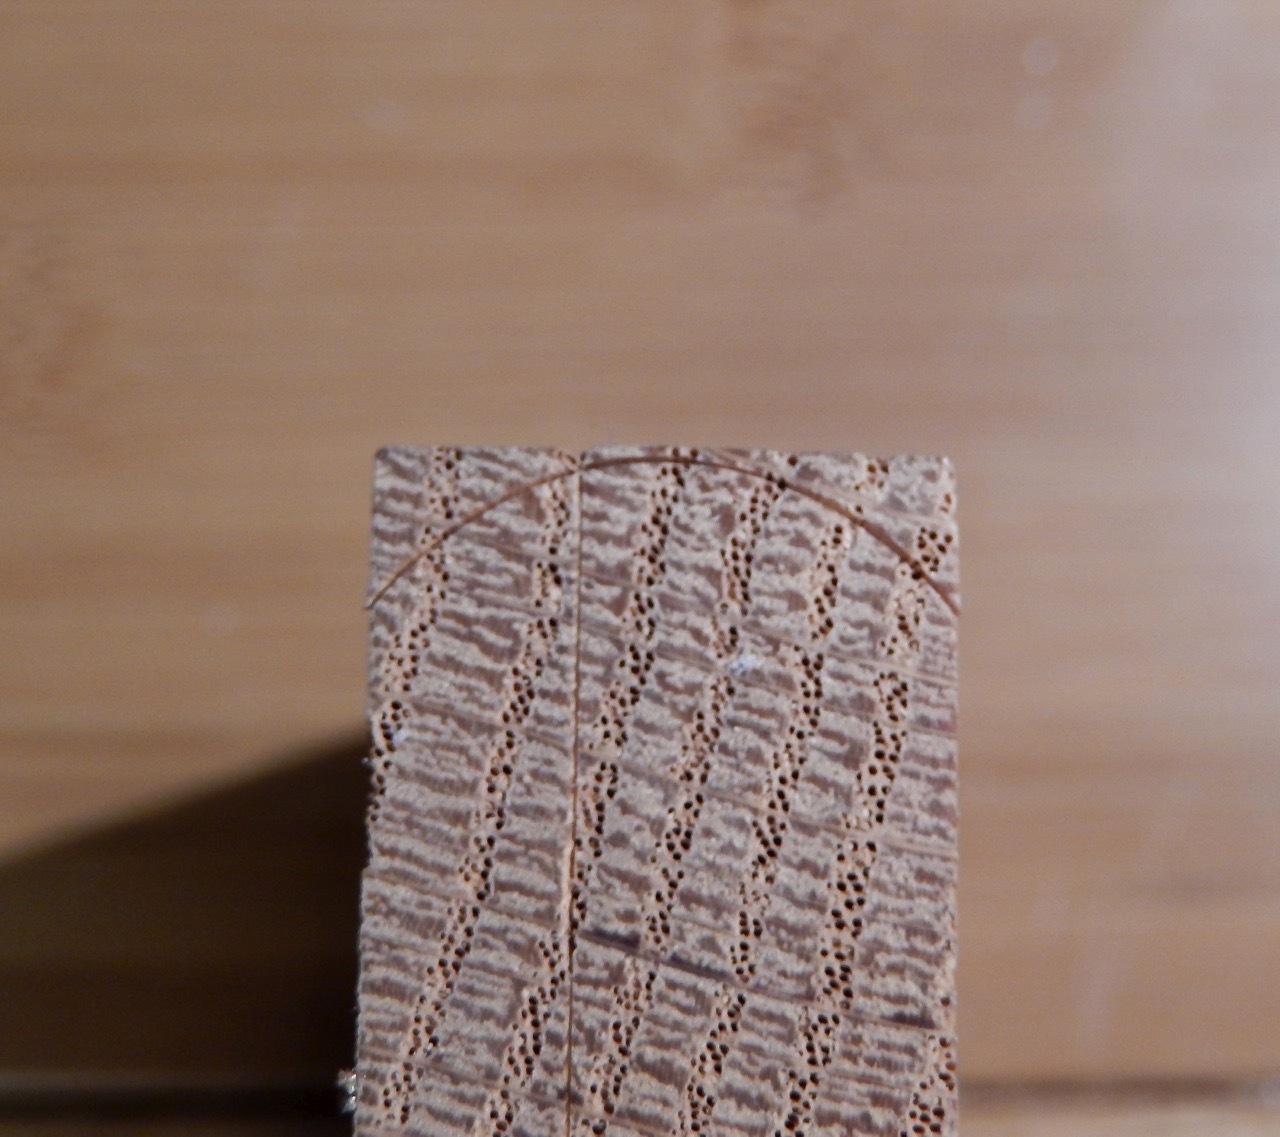
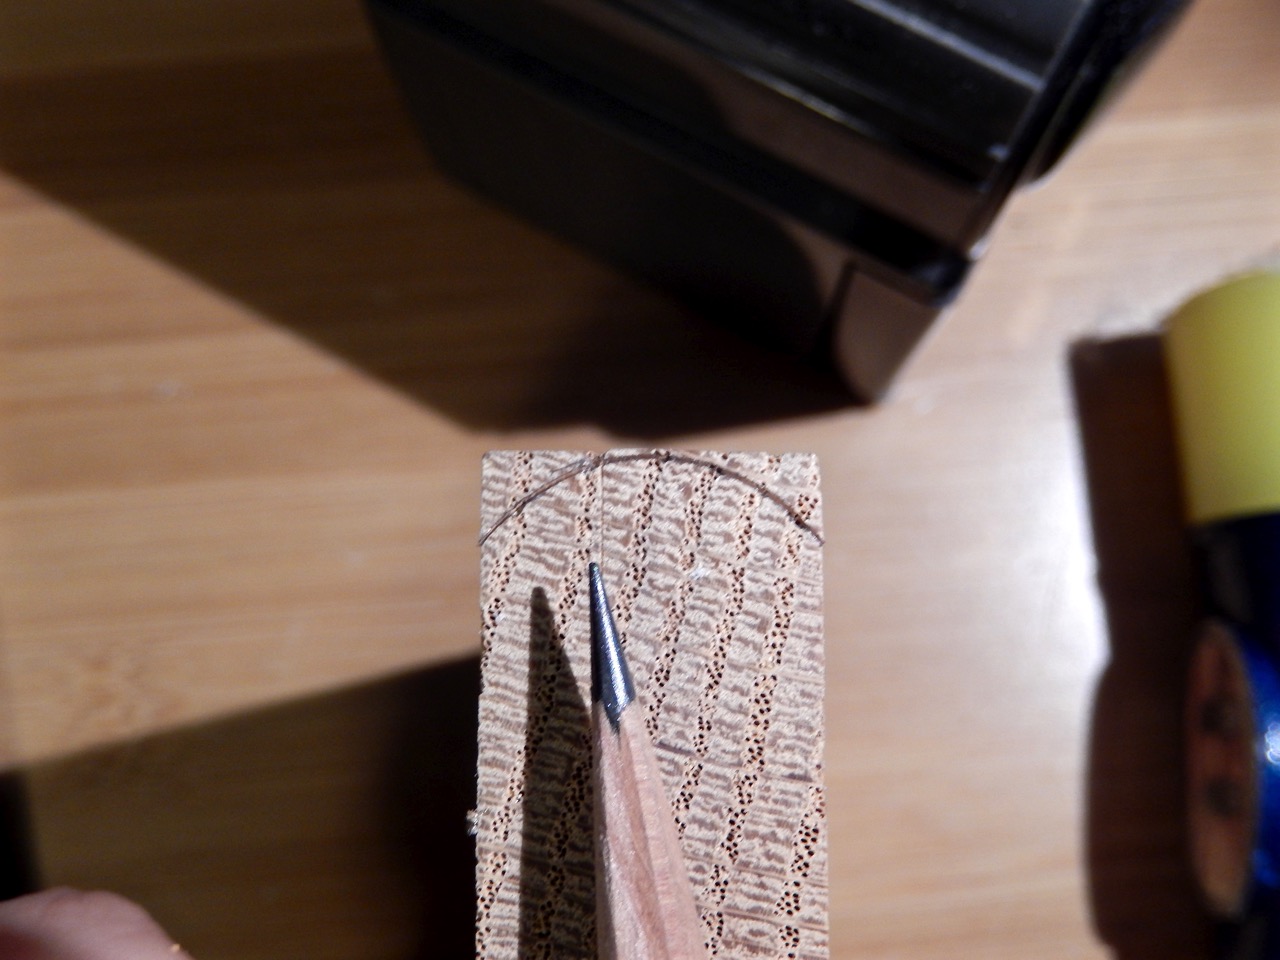
I began making my honing form by choosing a block of wood that had the same width as my gouge. I placed the gouge close to one edge and hit it to indent the carved geometry of the cutting edge, which is the radius of the inner flute. I did this on both ends of my block. Then, I highlighted the crescent indentation with a sharp pencil.
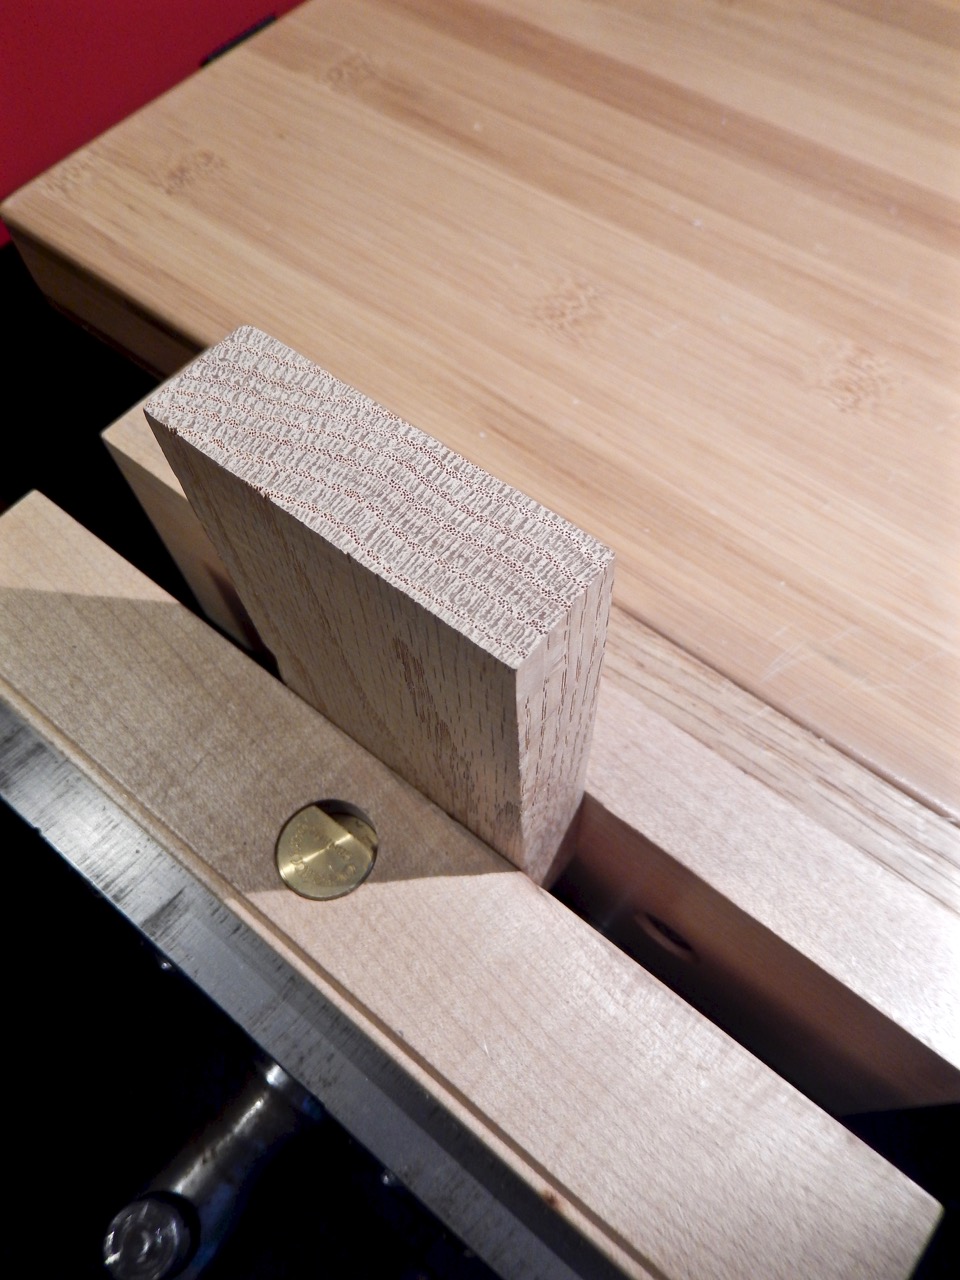
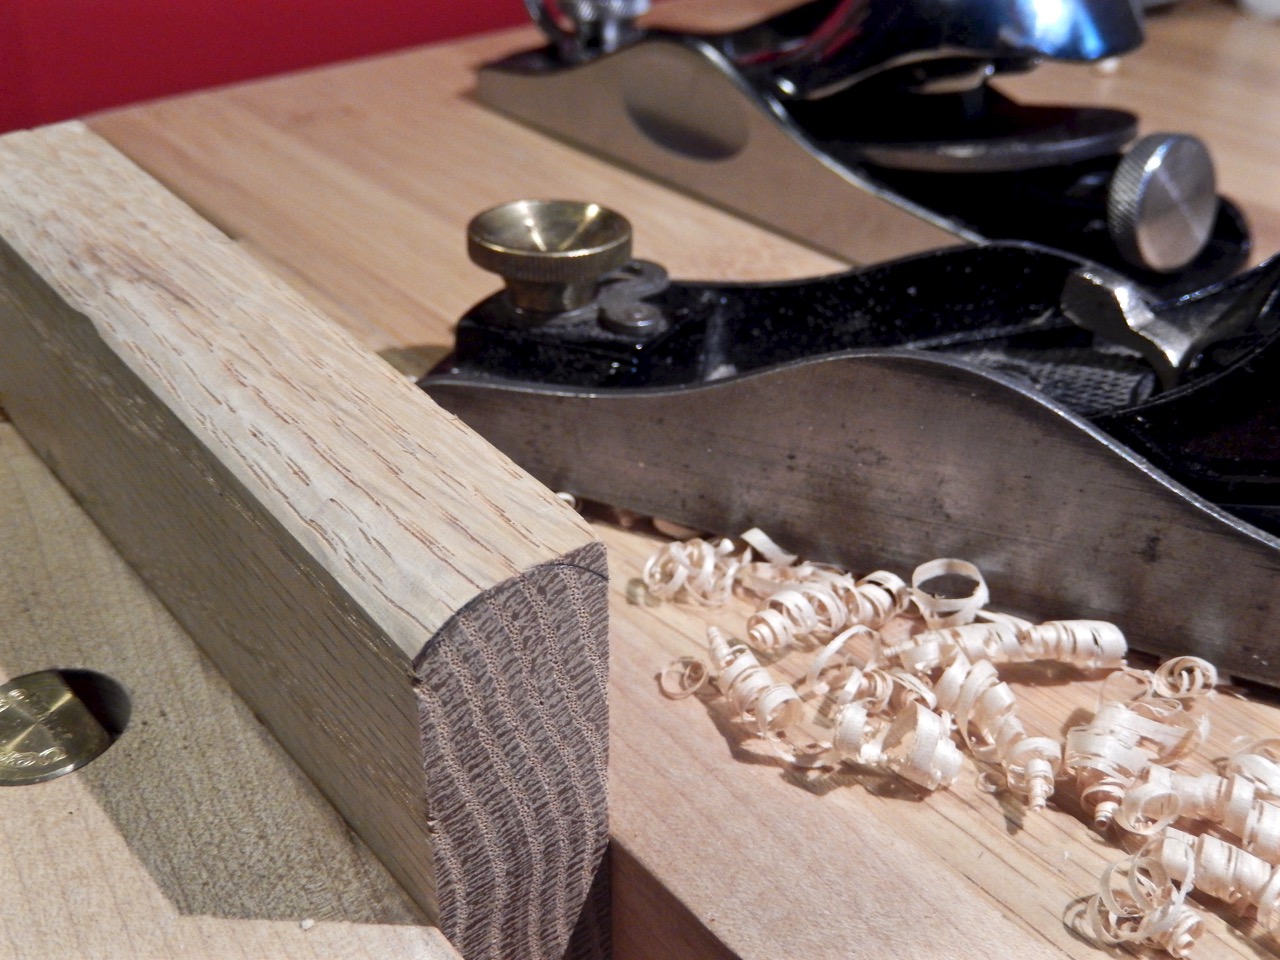
I used oak for my honing form but maple or beech would have been a better choice.

I placed the gouge close to one edge and hit it to indent the carved geometry of the cutting edge
Next, I picked up my block plane and began shaving away the wood’s edges until I got very close to the marked curve.

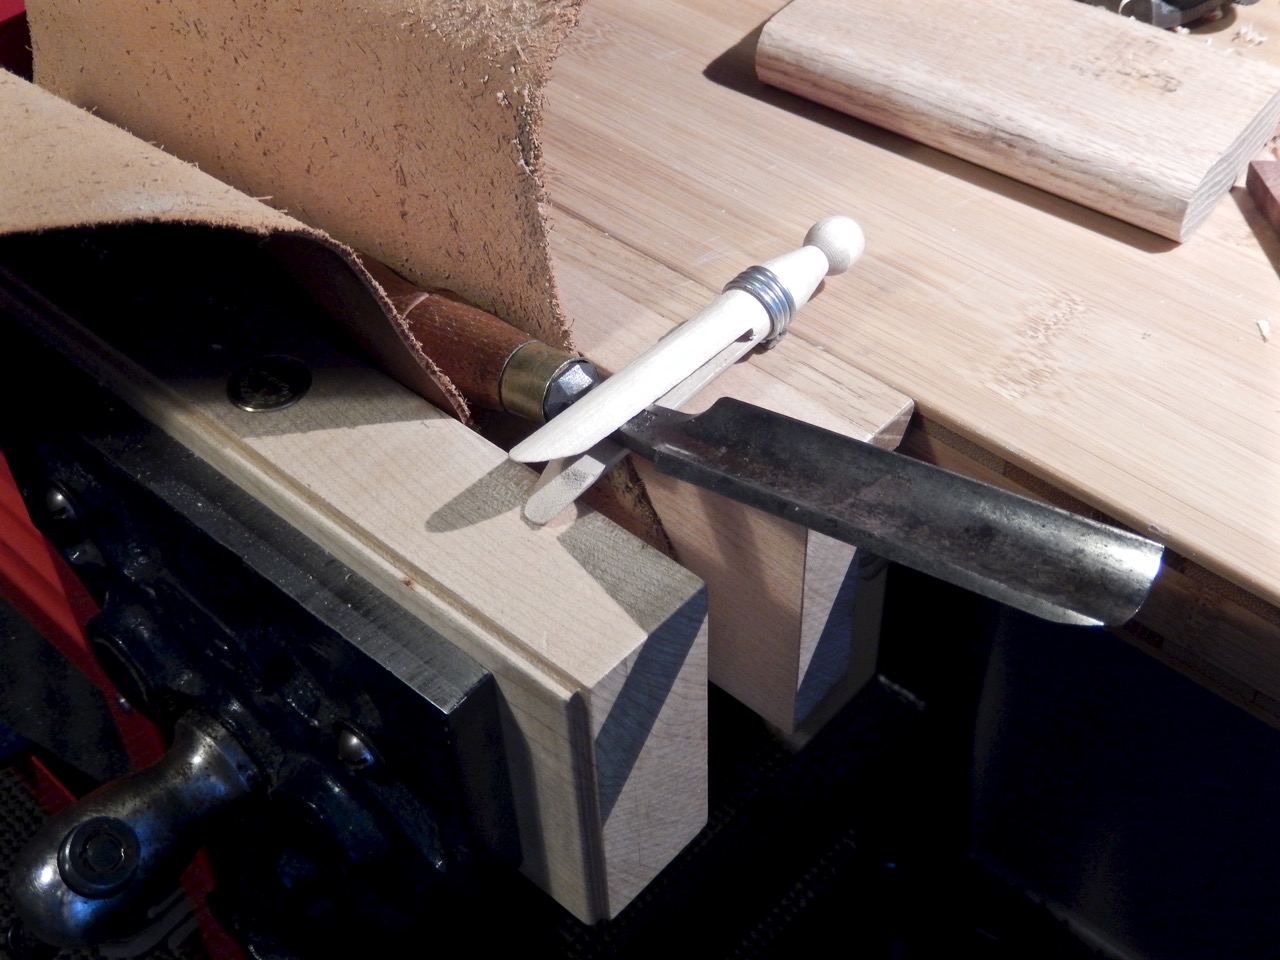
Now comes the part where this technique really stands out: Instead of finishing shaping the block with hand sanding or a file, I placed sandpaper in the inner flute of my gouge and used it as a way to finalize the shaping of the block, working the block back and forth inside the flute. This enabled the flute vault to dictate the final shape of the form that later on will be used to hone it.
The sandpaper technique has another advantage. To have the convex form and the sandpaper that wrapped around it fit exactly, one needs to subtract the thickness of the sandpaper from the radius of the convex form – which is exactly what this fine-tune sanding method helps to create.

Place #150 grit sandpaper (abrasive facing the wooden form) in the gouge’s flute and move the form back and forth against the sandpaper until a uniform convex shape is created.

To use the form as a honing agent, wrap a fine sandpaper (this time with the abrasive facing the gouge’s flute) and work the form as if it was a slipstone.

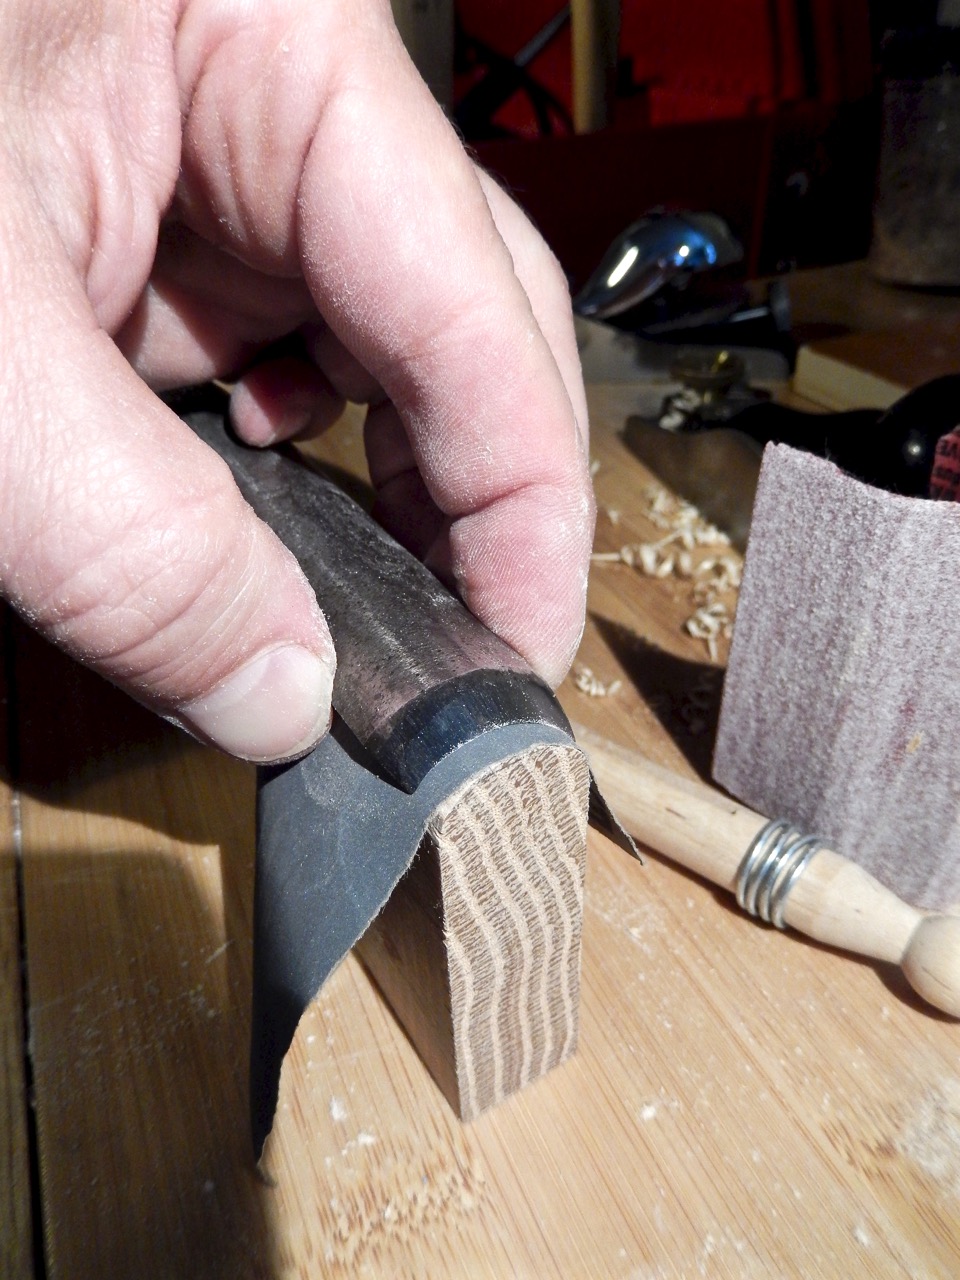
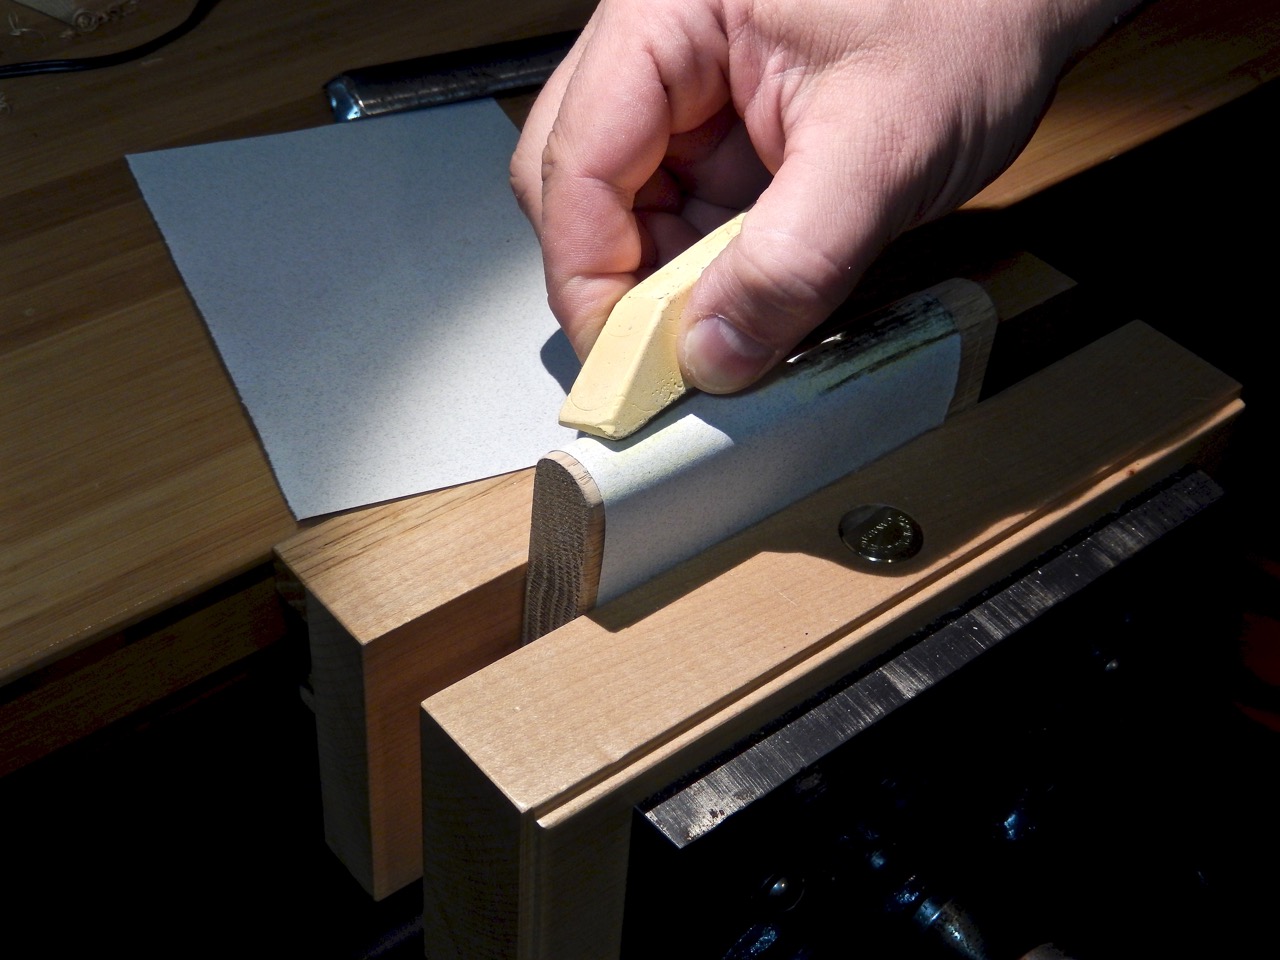
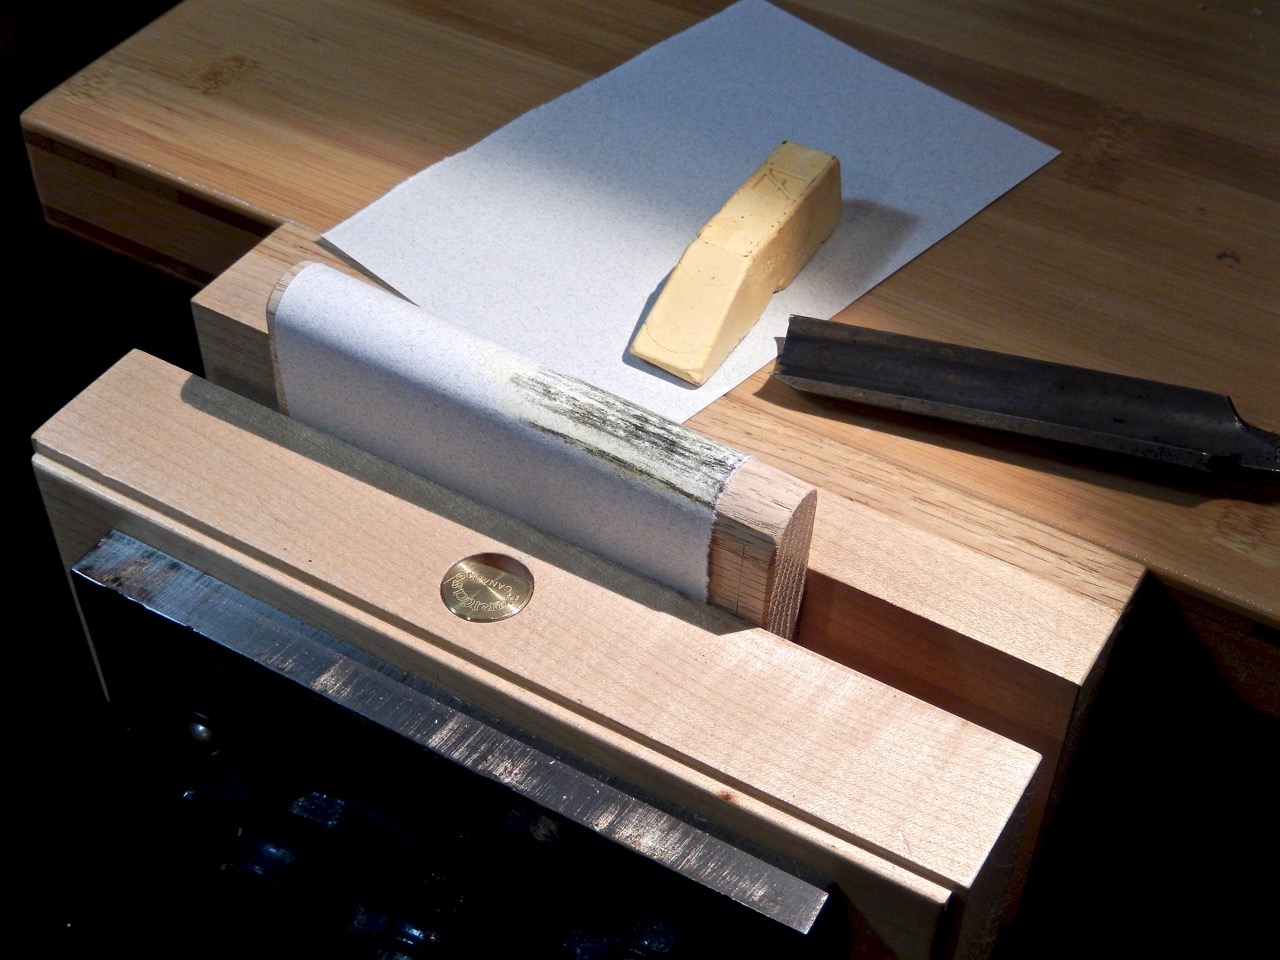
You can wrap around the convex form a variety of sandpapers, first to break the burr (#500 or #600 grit will do) and then for final honing with #1,000 and #2,000 grit. When you decide it is time for polishing, you can choose between charging the wooden honing form with buffing compound or wrapping a piece of charged leather around it and continuing passing the blade over it. (If you don’t have leather you can use canvas or other sturdy cloth – or even thick paper.)
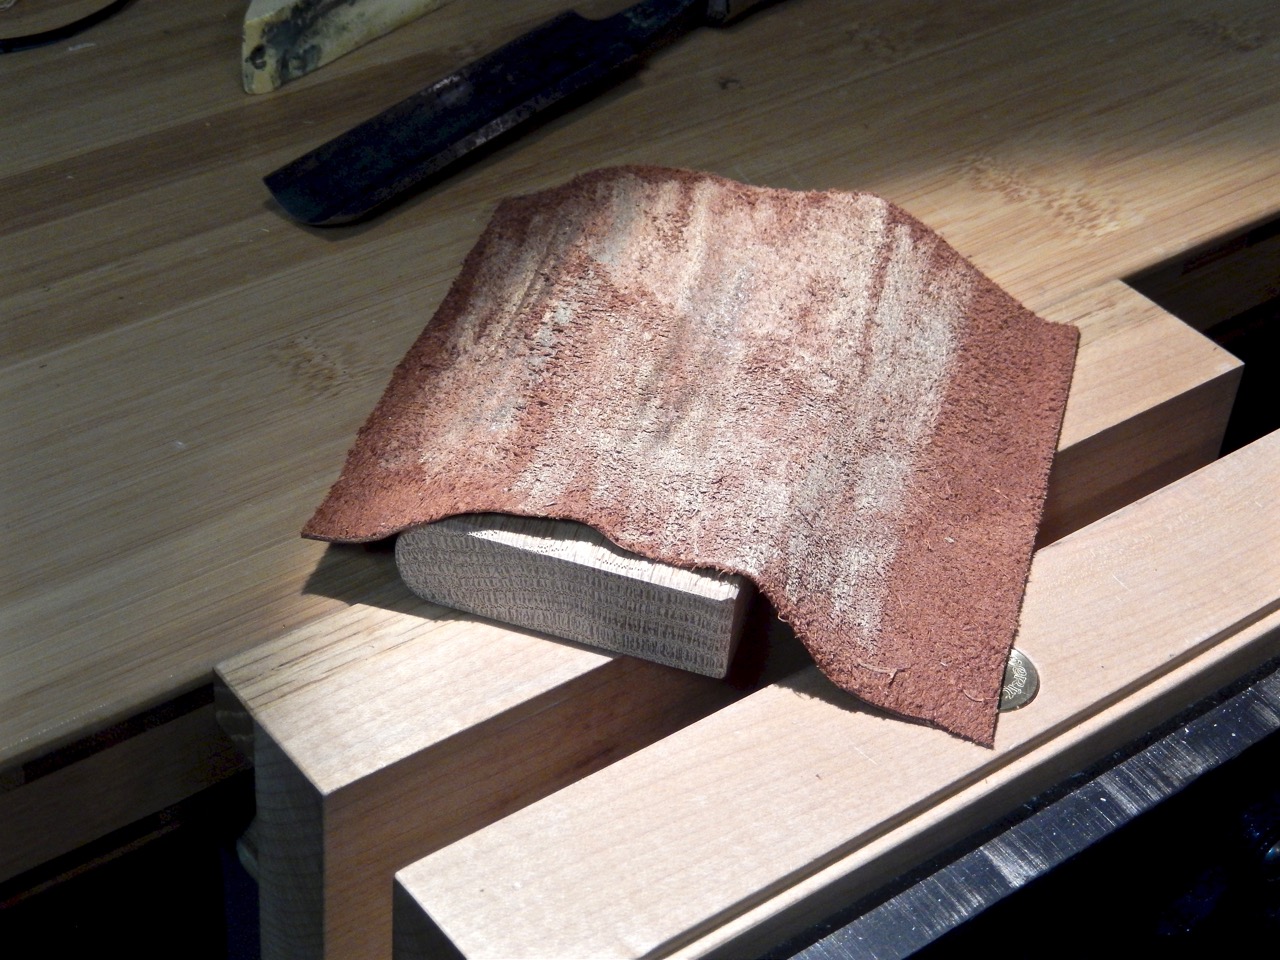
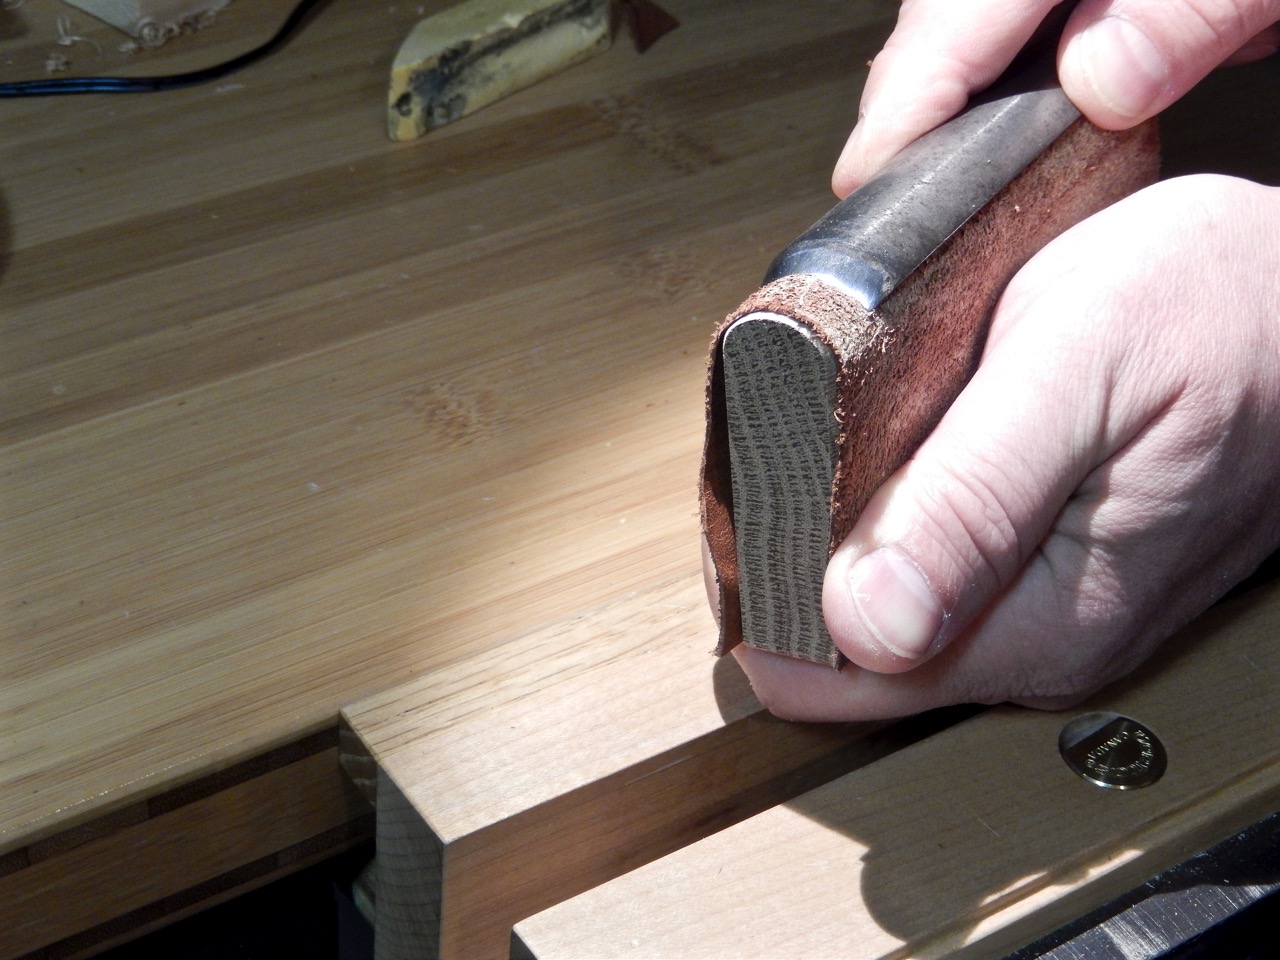
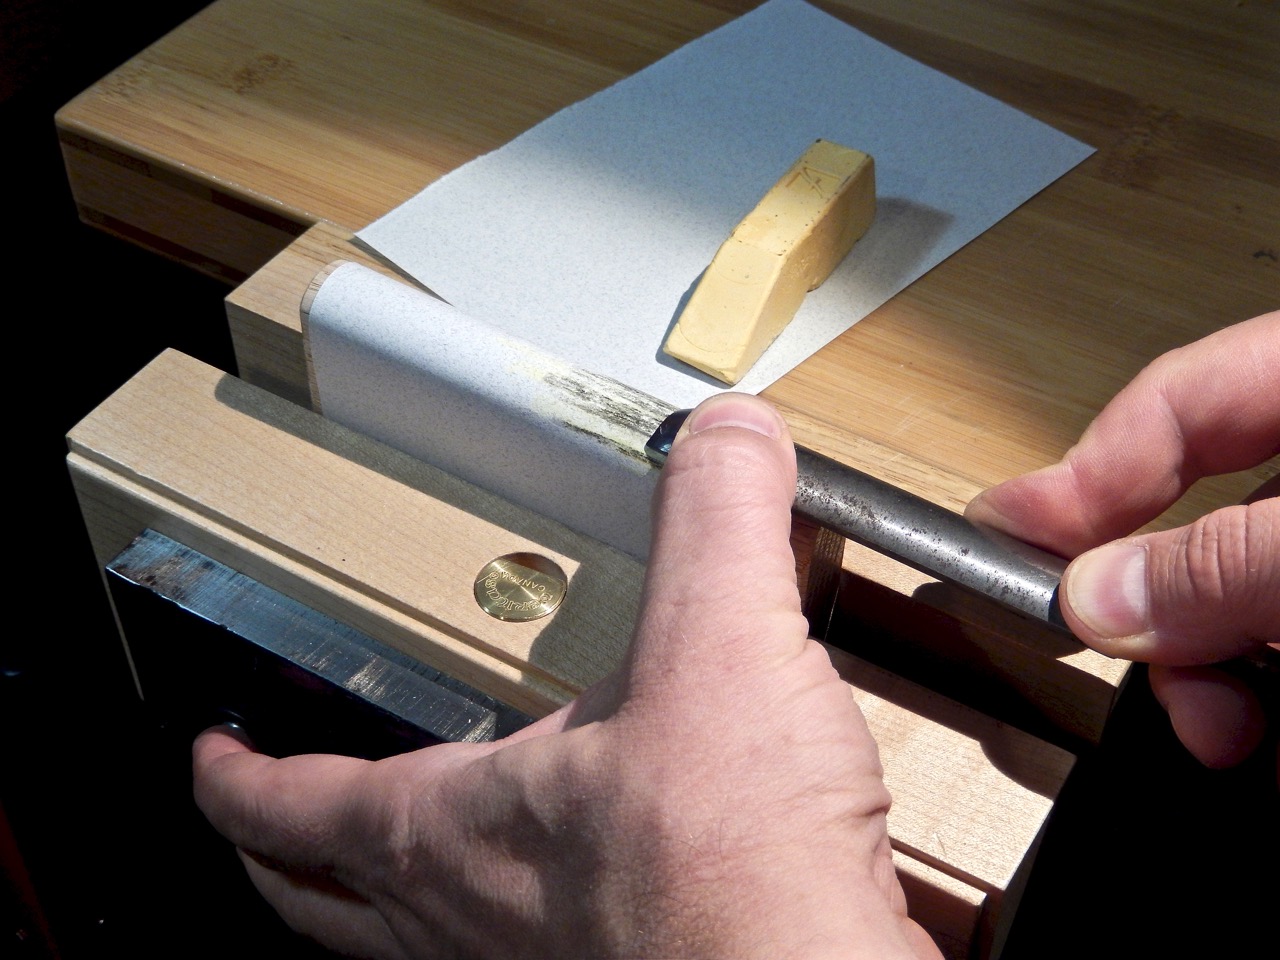
Remember, with sandpaper and strops, one pulls the tool away from the abrasive medium to prevent the blade from digging in through the sandpaper or the leather. You can choose to clamp the form in a vise (it is easier and safer) or to hold it in your hand for a more expedient approach.

Lastly, if your honing form is wide and long, you can use it as the flat surface for sharpening and honing your tool’s bevel. Thus, one block of wood can be your all-around sharpening medium for taking care of your gouges.

While my dedicated honing form fits my W. Butcher perfectly, I will be able to use it as a honing form for many of my other gouges, as long as their sweep is flatter than #7. (That is my #6, #5, #3 and #2 sweeps, on which the flute radius is larger.)
I encourage you to make a few dedicated honing forms for some of your gouges. If each form is made to match a different sweep group, your sharpening and honing experience will be more predictable and less stressful.


Editor’s Note: Need help learning to sharpen? Check our Christopher Schwarz’s video “The Last Word on Sharpening” and Ron Hock’s book “The Perfect Edge.”
Here are some supplies and tools we find essential in our everyday work around the shop. We may receive a commission from sales referred by our links; however, we have carefully selected these products for their usefulness and quality.