We may receive a commission when you use our affiliate links. However, this does not impact our recommendations.
In a search for wide boards, it pays to buy whole logs.
Visitors to my shop often ask where I buy the wide, matched cherry and walnut boards I use for reproducing classic American furniture. Their curiosity ratchets up a notch or two when I tell them that I usually buy logs, not boards.
“Ervin, a local farmer who has a bandsaw mill, saws the logs for me,” I say. “I dry the lumber myself in that old metal barn down the hill.”
That’s when the questions really fly: How do I find those logs? Do I have a kiln? Why not just purchase dried lumber from a retailer?
Let me give you the short answers to those questions first, and then we’ll go into the details. I find the logs through local suppliers—you’ll often find many sources in your area, if you ask around. No, I don’t have a kiln, nor do I need one. I air dry the lumber in that barn, then move the particular boards I need for a project to a corner of my shop, where they continue to dry until they’re ready to be milled.
As for buying wide, dry boards at retail—well, that gets to the heart of the matter. It’s a question of cost and quality. There are a number of very good lumber dealers who stock wide, matched boards that all come from the same tree—but often that wood is expensive! Those dealers must charge you for all the work involved in sawing, grading, stacking and drying the lumber. Doing this work yourself can save a lot of money.
As to quality, I really prefer working with air-dried boards. Some dealers do air dry their wood, or use dehumidification kilns, but most lumber is quickly processed through standard kilns. What’s the difference? In my experience, air-dried lumber doesn’t have the stress that is sometimes present in commercially available kiln-dried lumber, because it dries slowly. Air-dried wood is less prone to warping and requires less effort to work, both with machines and hand tools.
And then there’s the matter of color. Surprisingly, the natural color of air-dried walnut and cherry is much richer than kiln-dried stock. There’s more variation in the color, too—which I like—and the colors are more saturated.
Before you get too excited, let me warn you: Processing lumber from a log is not for everyone. To be honest, it’s a lot of hard work. Green lumber is heavy! It takes time to dig around for a source for good logs. Then you have to find a competent sawyer that can handle them. You’ll need a pickup truck or a trailer to haul the heavy, wet lumber home. And you’ll have to find the space for stacking and drying it.
But weigh all that against the satisfaction of transforming a local tree into a beautiful piece of furniture made with your own hands. It’s worth it.
Finding logs
If you live in a rural area, like me—or even in the suburbs—finding suitable logs isn’t as difficult as it may seem. Over the years I’ve purchased logs from a variety of sources including farmers, small sawmill operators, loggers, tree surgeons and even large, commercial sawmills.
Essentially, I’ve found that the key to finding logs is just to ask around and develop a rapport with local loggers and sawmills.
Many rural areas have small sawmills that keep the local farmers and barn builders supplied with construction lumber. These sawmill operators often have sources for furniture-grade logs as well. Although loggers usually prefer to sell logs by the truckload to large commercial mills, sometimes they are willing to sell a few logs to individuals at the current market price.
Some large commercial mills specialize in oak or some other hardwood. They usually don’t want to deal with small quantities of other woods, so they sell off the few walnut or cherry logs that come through their gates each year.
Selecting suitable logs
Once you find a good source for logs, you’ll need to learn a little about what to look for and what to avoid. Loggers and sawmill operators are typically a friendly bunch. I’ve picked up a lot of helpful information simply by listening to them.
To get the wide boards I need, I look for relatively straight logs that have a large diameter. They should have smooth bark and solid ends.
Large diameter is the most important quality. Beautiful furniture starts with wide, beautifully figured boards. When selecting lumber to construct a desk, for example, I look for pieces that will yield a one-board lid, one-board drawer fronts and wide, bookmatched door panels.
Crooked logs yield narrow lumber; however, if a log has enough length, I may opt to cut it into two shorter sections. Or I may decide to cut off a foot or two and either discard the waste or save it for turning blanks. Eliminating the crook yields wider boards.
A bulge or distortion in the bark, sometimes referred to as a “cat face,” indicates that there is a large encased knot under the bark from a limb. That knot could produce either a lot of tightly figured wood or a lot of waste. You never know.
As trees age, the heartwood at the base of the trunk will begin to decay; large old walnut and cherry trees often have a nest of carpenter ants in the base. However, some of the widest, most beautiful boards in my stash were sawn from logs damaged by insects or rot. Before I buy, I’ll carefully check this type of log to determine the degree of damage. As long as it’s limited to a few inches in the base, damage on the end of a log can be trimmed off before the log is sawn into planks.
No matter how closely you examine a log, you’ll probably be either pleasantly surprised or disappointed after it has been sawn. Logs are like Christmas gifts: You can guess all you want about what’s inside by examining the outside, but you won’t know for certain until you open it.
Sawing the logs
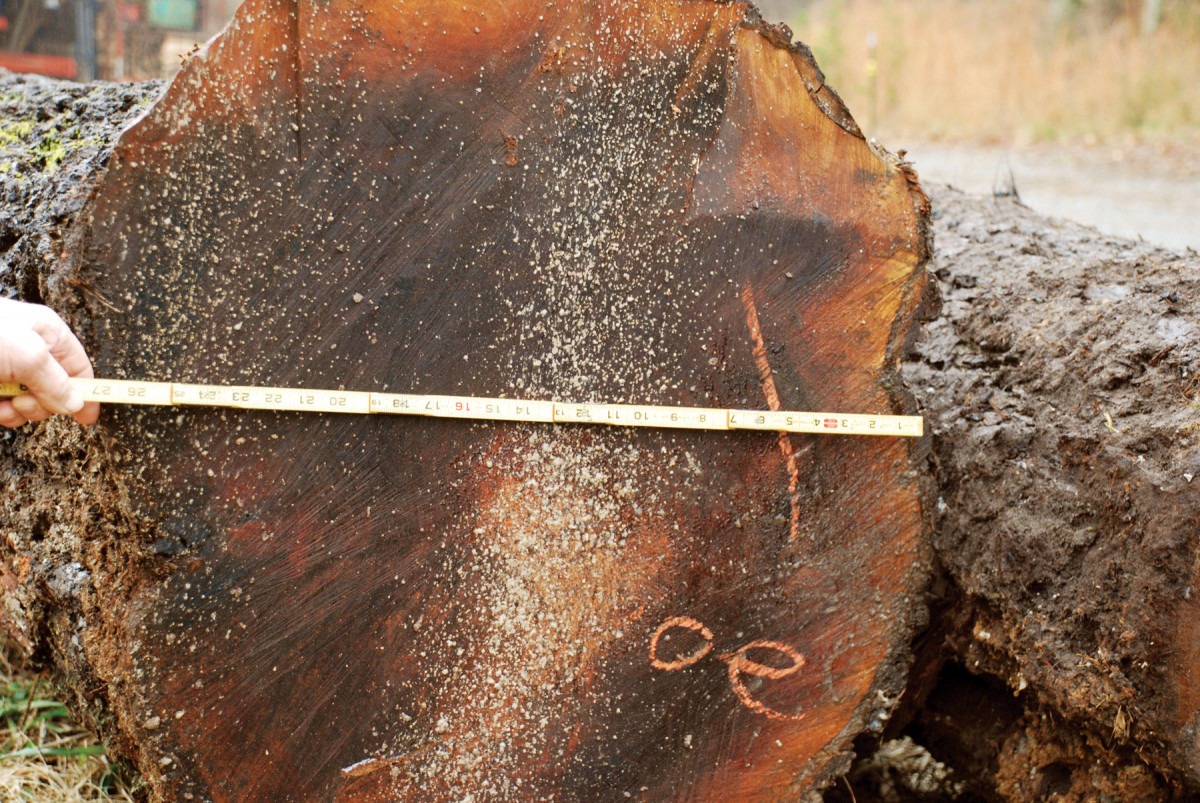
1. For reproducing old furniture, I buy whole logs that are large in diameter. This walnut log came from a local forest and measures 27″ across at the butt end.
Let me tell you the story of two walnut logs that I purchased from a local logger. Both were butt logs, which simply means that they were cut from the stump end of the tree. (Butt logs are the prime part of the tree and typically yield the widest boards with the fewest defects.) They were large in diameter, solid on the ends and had smooth bark (Photo 1). Although I’d rather not haul large logs with my truck (which I’ve done many times), I had the logger drop off the logs at Ervin’s sawmill (Photo 2).
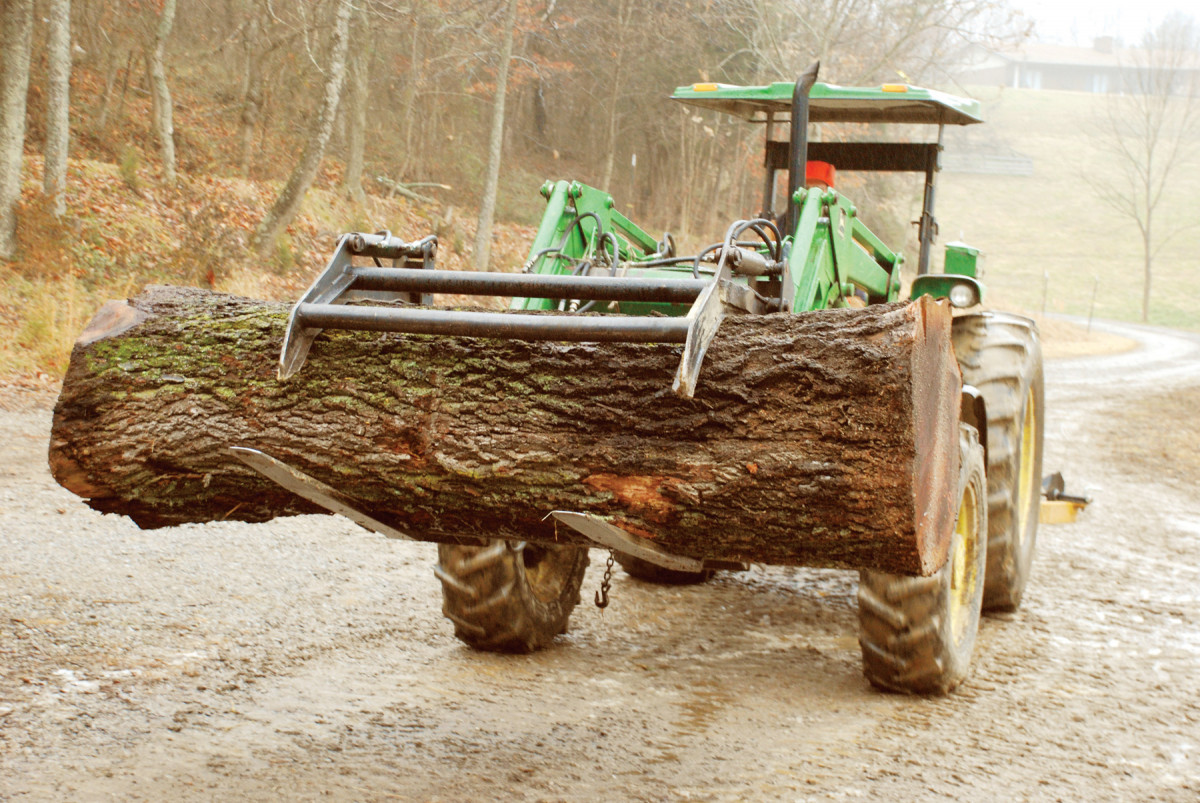
2. Green wood is heavy! Rather than use my truck, I asked the man who cut the log to deliver it to my sawyer using his heavy equipment.
Ervin has a small farm where he raises cattle, cuts hay and operates a bandsaw mill. Ervin has milled a lot of lumber for me over the years, so he knows how I want the log sawn. He begins by squaring the log to remove the bark and most, but not all, of the sapwood (Photo 3). This process also removes the flair, or bell end, at the base of the log. However, it’s important not to remove all of the sapwood from the square, otherwise a lot of width will be lost.
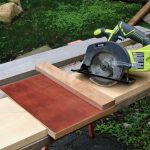
3. A local farmer runs a small bandsaw mill as a side business. First, he cuts the log into a square.
Note the waxy sealer that I applied to the end of the log before sawing. As a log dries, moisture migrates faster from its ends than from its sides. The result is large splits, called checks, at the ends. The sealer slows drying on the ends and helps prevent checking by keeping drying and shrinkage steady and uniform throughout the log. The same holds true for boards. I always make sure that the ends of each board are sealed right after they’re sawn.
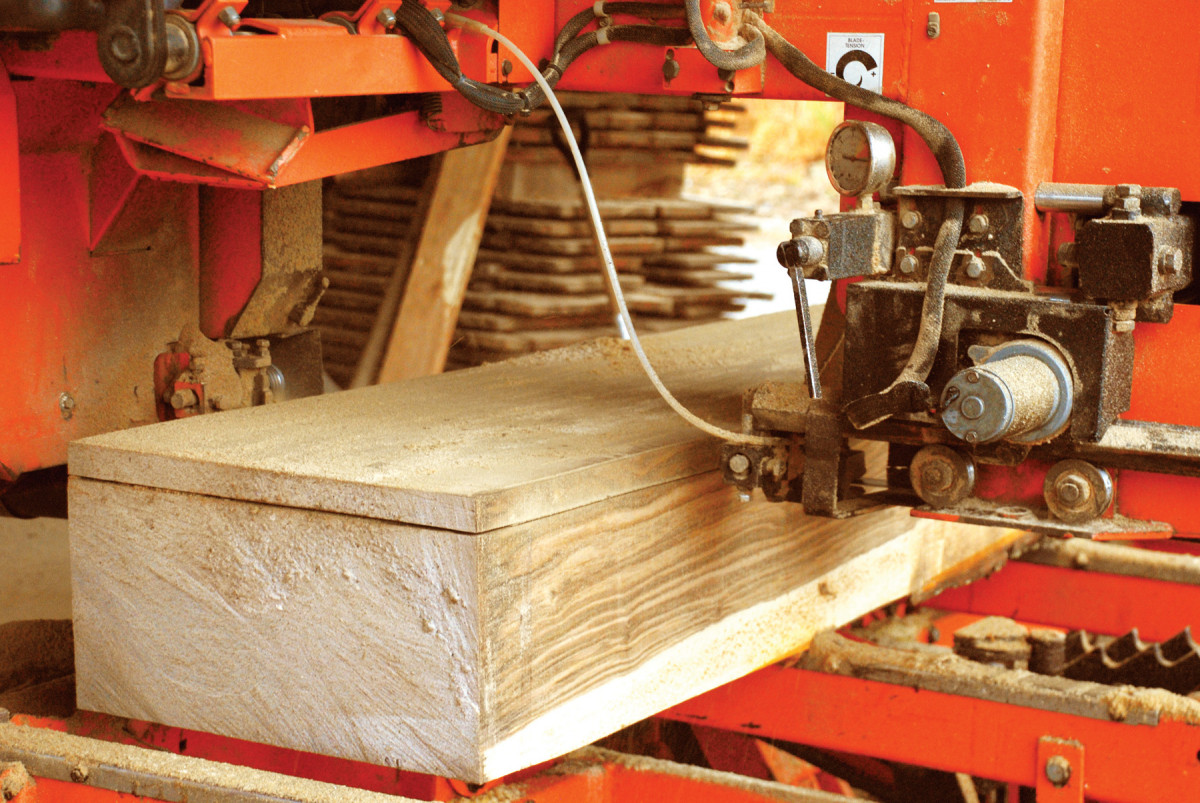
4. Next, the log is sliced into sequential boards by a series of parallel cuts. This method of sawing yields the greatest number of wide boards.
Once the bark and sapwood was trimmed, Ervin made a series of parallel cuts (Photo 4). This method is called “through-and-through” sawing and yields the widest boards. Large, commercial mills typically saw a different way to maximize the number of high-grade boards. They rotate the log to a new “clean” face after a few cuts. The drawback to this method is that it creates a stack of narrow boards. Although through-and-through sawing produces boards with a greater number of knots, each board is wide. Later on, when the dry lumber is cut to length for furniture parts, it’s easy to simply cut parts from in between the knots. Boards created by sawing through-and-through also have more character and, to my eye, appear more natural.
5. Here’s the gold. This log yielded a stack of seven 18″ wide boards and some narrower ones, too. Total cost: about $1.60 per bd. ft.
The first of the two logs yielded a stack of seven 1-1/4″ thick boards 18″ wide and a few narrower boards that are useful for smaller furniture parts (Photo 5). It also yielded quite a number of slabs (boards that are mostly bark) and sapwood trimmings. To the uninitiated, the amount of waste in a log is always a surprise.
The second log was a different story. Unfortunately, barbed wire was embedded about 3′ up its length. This wasn’t totally mysterious: The log must have come from an old tree that once doubled as a fence post. I doubt that the logger knew this because the wire was completely buried under years of growth and was not visible from the outside. To get rid of this nuisance, we had to shorten the log and settle on boards that were just 5′ long.
Even so, my cost for the lumber, including the logs and sawing, came to $1.60 per bd. ft. Not bad for a set of wide, matched premium boards.
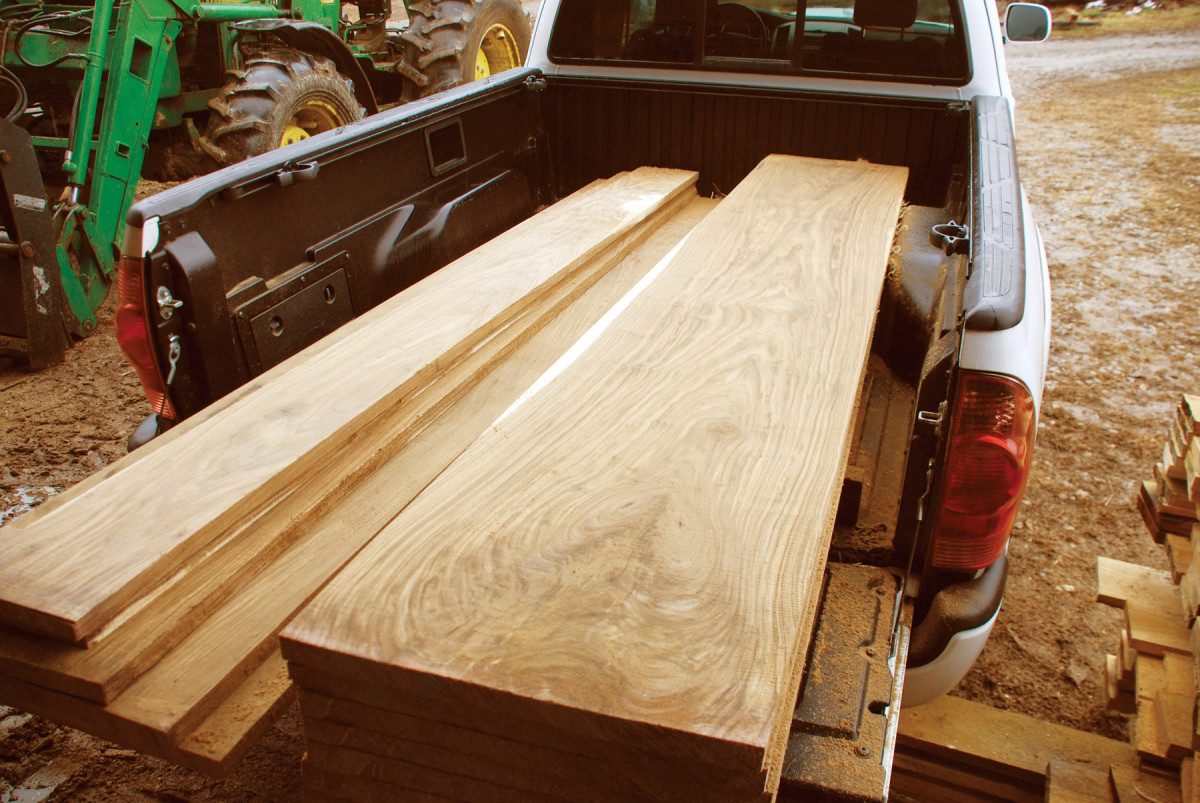
Initial drying
The next step is to haul the cache home and stack it for drying. If lumber dries too quickly it usually warps and cracks severely, sometimes to the point of being rendered useless. If it dries too slowly it can develop mold, which stains the boards. One key to success is to find the best location. My first choice is a well-ventilated shed or barn. A barn keeps the lumber shaded from the harsh summer sun and sheltered from driving rainstorms. However, I’ve stacked green lumber outside and covered the stack with plywood with good results.
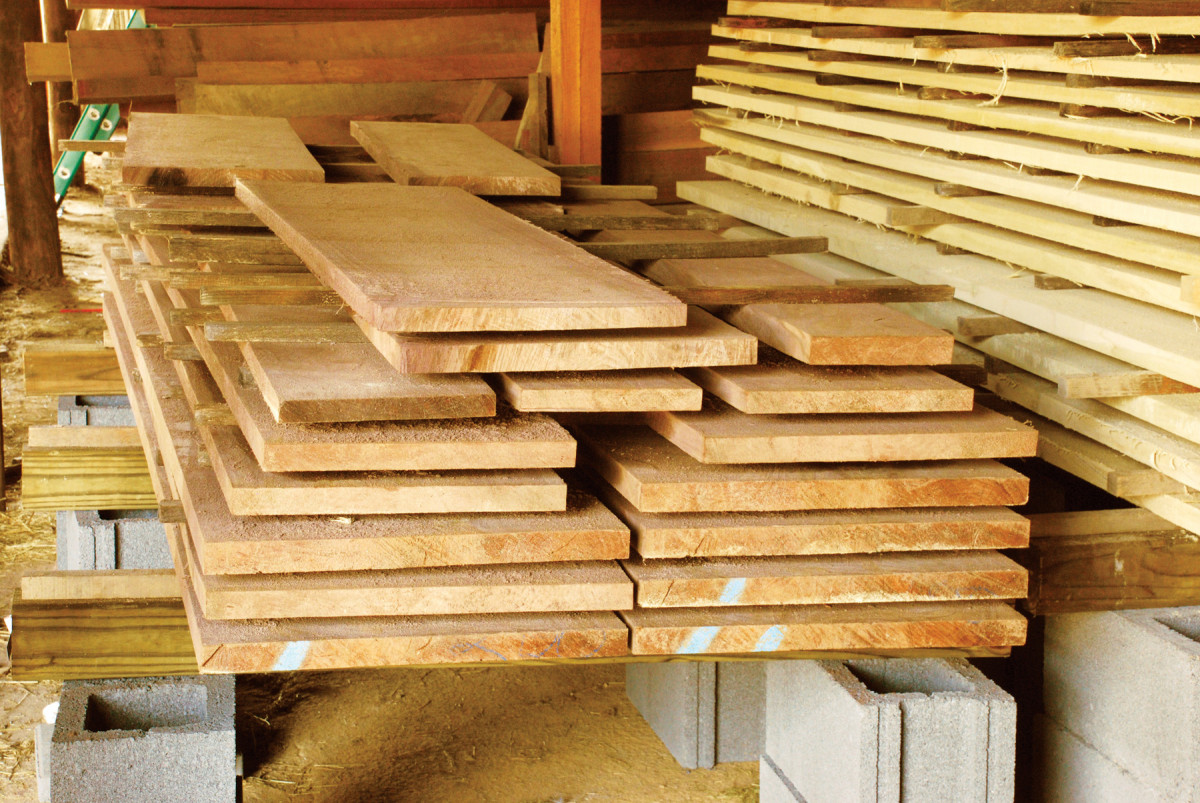
6. The green boards are left to dry in a barn near my shop. They’re raised off the ground and separated by stickers to promote air circulation.
The first step in drying is to build a solid platform to support the lumber (Photo 6). I use stacks of concrete blocks spanned with 4x4s. The blocks provide a solid foundation to bear the heavy weight of the green lumber. They also raise the pile well above the moist ground (my barn has a dirt floor). In order to prevent the lumber from sagging under its own weight, I space the blocks on 3′ centers. I typically create a platform about 4′ wide; this width allows me to easily reach across the pile.
As I stack the boards, I place 1″ x 1″ sticks between them, directly over the 4x4s. By separating the pile’s layers, these “stickers” allow air to circulate around the boards and carry away the moisture emitted as they dry. The stickers must be made from wood that’s already been dried; green stickers may create mold and stain the wood.
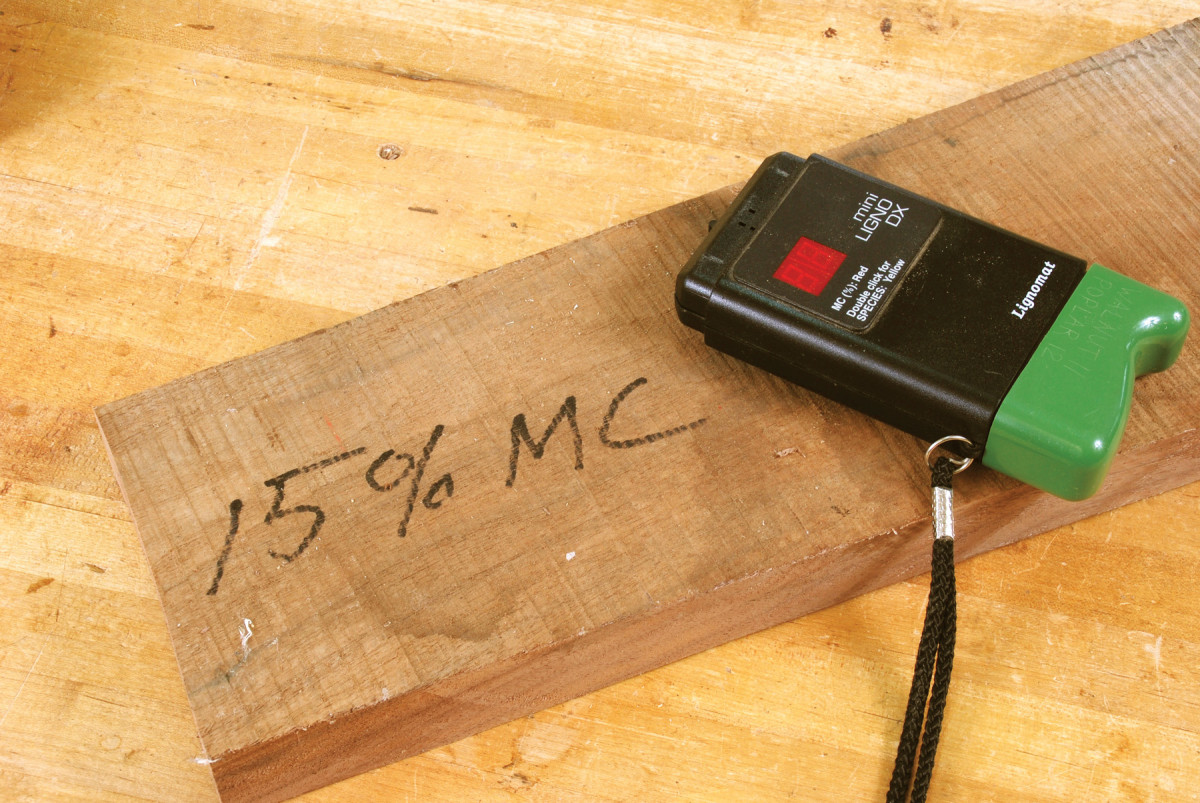
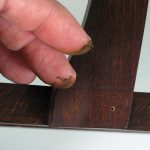
7. Air-drying lumber in my barn will bring the wood down to about 15% moisture content (MC). That’s not dry enough for making fine furniture.
As a rule of thumb, you should allow one year of drying for each inch of thickness. (However, I’ve found that if the tree is cut during the winter months, when the sap is down, drying takes less time.) At this point, the wood will be about as dry as it can get while stored outdoors. In my area, that’s about 15% MC (moisture content). Just to be sure, I check the wood with a moisture meter (Photo 7). At 15%, the wood isn’t dry enough to be turned into furniture, though—I have to bring the MC down even lower.
Final drying
The second and final stage of drying takes place in my shop. Let me explain why this is necessary. As lumber dries, it shrinks and warps. I want the majority of shrinking and warping to occur before I construct a piece of furniture, not after. So it’s important for the moisture content of the lumber to be in balance—in equilibrium—with the environment in which the furniture will eventually reside. And that environment isn’t outdoors, or my barn.
Today’s homes are heated and cooled to an average of 70° to create a comfortable living environment; indoor relative humidity averages 40%. This combination of temperature and humidity creates a moisture content in furniture and other wood products of 6% to 8%. That’s the target. Lumber can be stored in a barn for decades, but it will never get this dry.
A drier environment is required for the final stage. This is why lumber dealers use a kiln to complete the drying process (and to speed it up, which is why kiln-dried lumber is sometimes stressed and pinches the saw blade as you rip it).
But you don’t need a kiln. All you have to do is stack the lumber in a corner of your shop, if the shop is kept at the same temperature and humidity level as your house. (If your shop isn’t heated, or if it’s in a basement, run a dehumidifier to remove some of the moisture from the air. This, in turn, removes moisture from the wood.) You could also stack the wood in a room inside your house—that would be ideal.
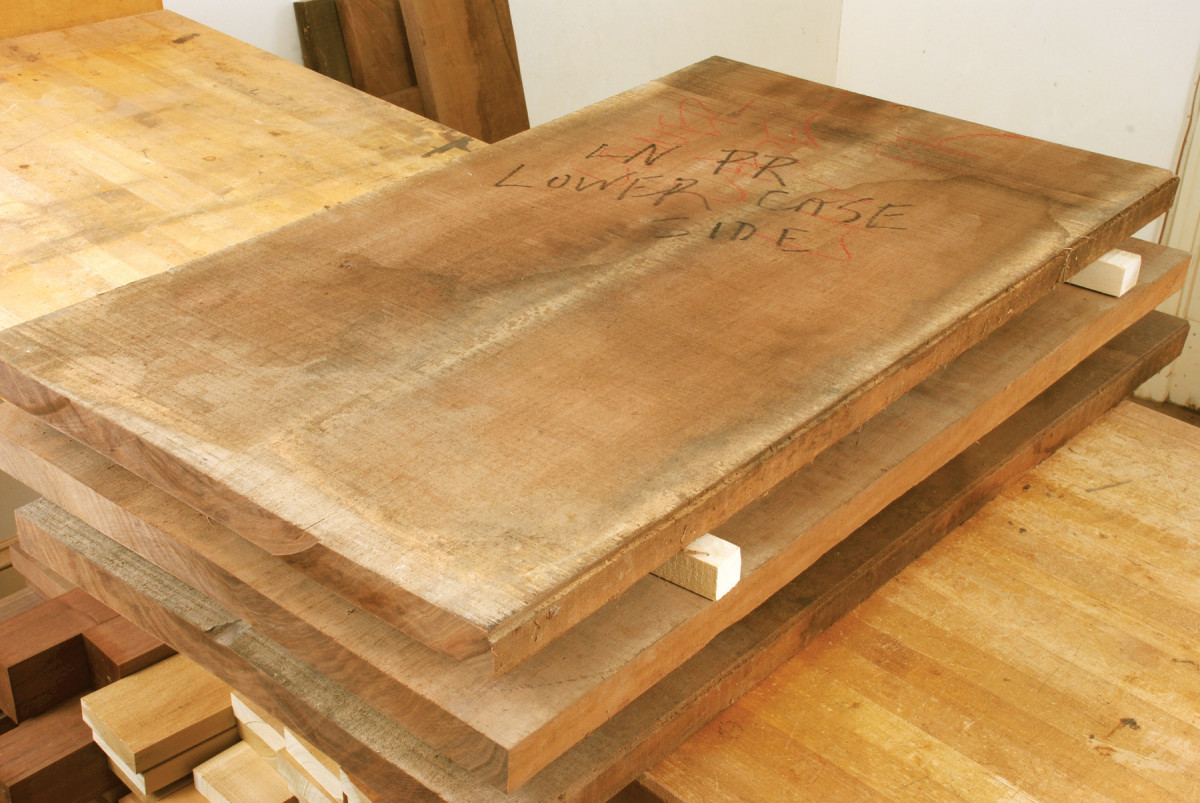
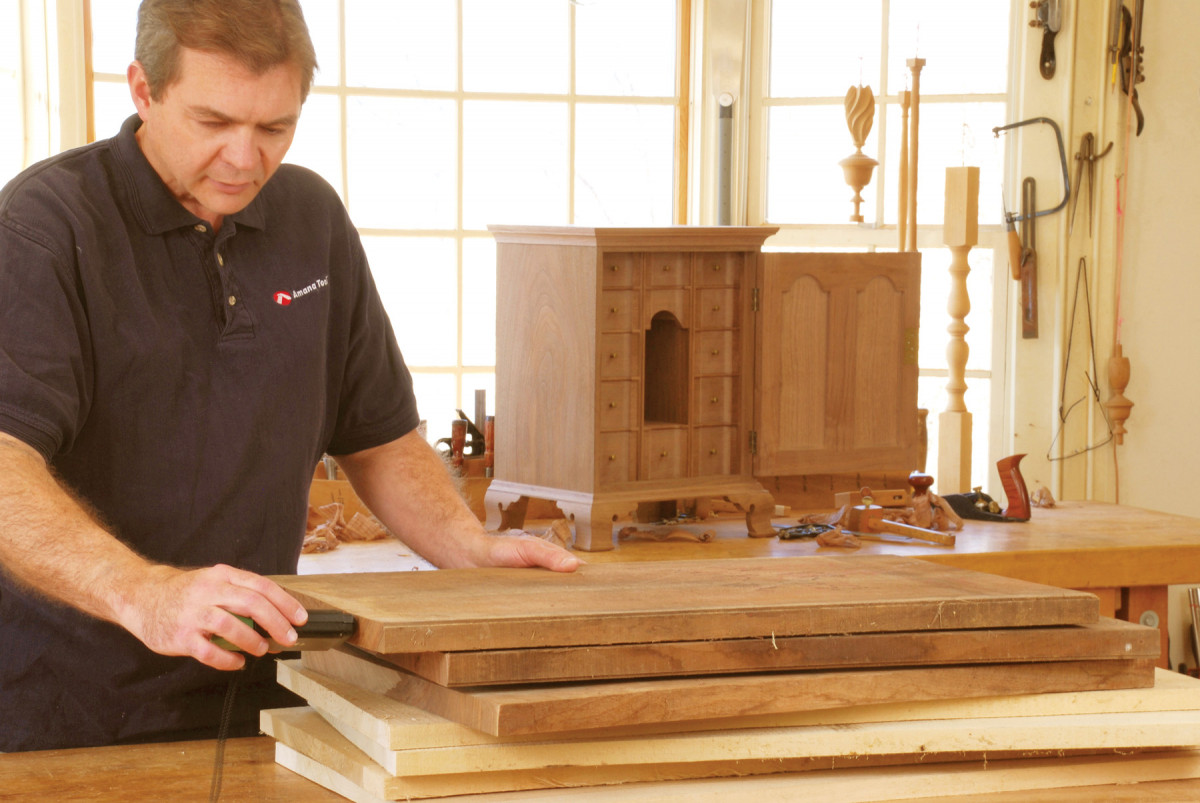
8. I bring the wood indoors to air dry it some more. After a few weeks, the MC should be 6% to 8%, and I’m ready to get to work.
To minimize problems with warping and shrinking, I cut the lumber to a rough length and width (slightly over the final dimensions on the project cut list) before storing it in my shop. I’ll label each piece with the part name and again stack it with stickers to promote drying (Photo 8).
After three or four weeks I check the lumber. I want to know the moisture content of its interior, so I stick the prongs of my moisture meter into the center of a board’s end. If the wood isn’t quite dry enough I wait a little longer. After all that hard work and patient waiting, I want those boards to stay flat and straight!
For A More In-Depth Look: Check out Milling Your Own Lumber from the December 2020 issue!
Here are some supplies and tools we find essential in our everyday work around the shop. We may receive a commission from sales referred by our links; however, we have carefully selected these products for their usefulness and quality.