


We may receive a commission when you use our affiliate links. However, this does not impact our recommendations.
Baffle your friends with perplexing joints
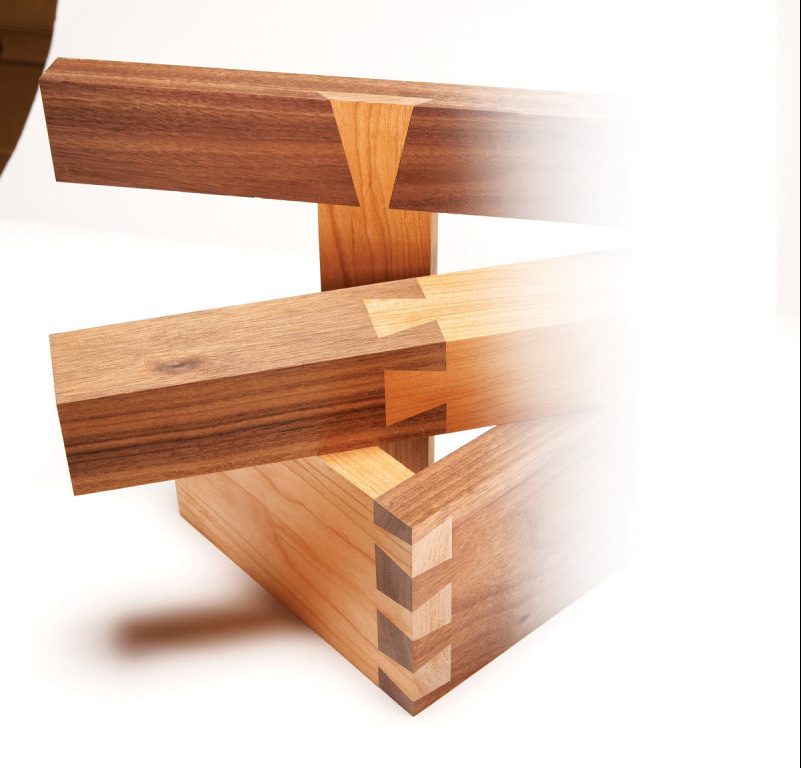
Press a dovetailed board into another board with matching sockets, and you’ve created woodworking’s most iconic joint. The dovetails and sockets wedge the boards together, so the joint can’t pull apart; the only way to disassemble it is to lift the dovetailed board back out of the sockets.
So, what if you can’t lift out the dovetailed board? How do you disassemble the joint? And how would you assemble this joint in the first place? Those are the questions to ask when you show a friend the dovetail joints shown here. These puzzling joints appear to wedge together in more than one plane—an impossible feat for traditional dovetails!
Test your hand tool skills
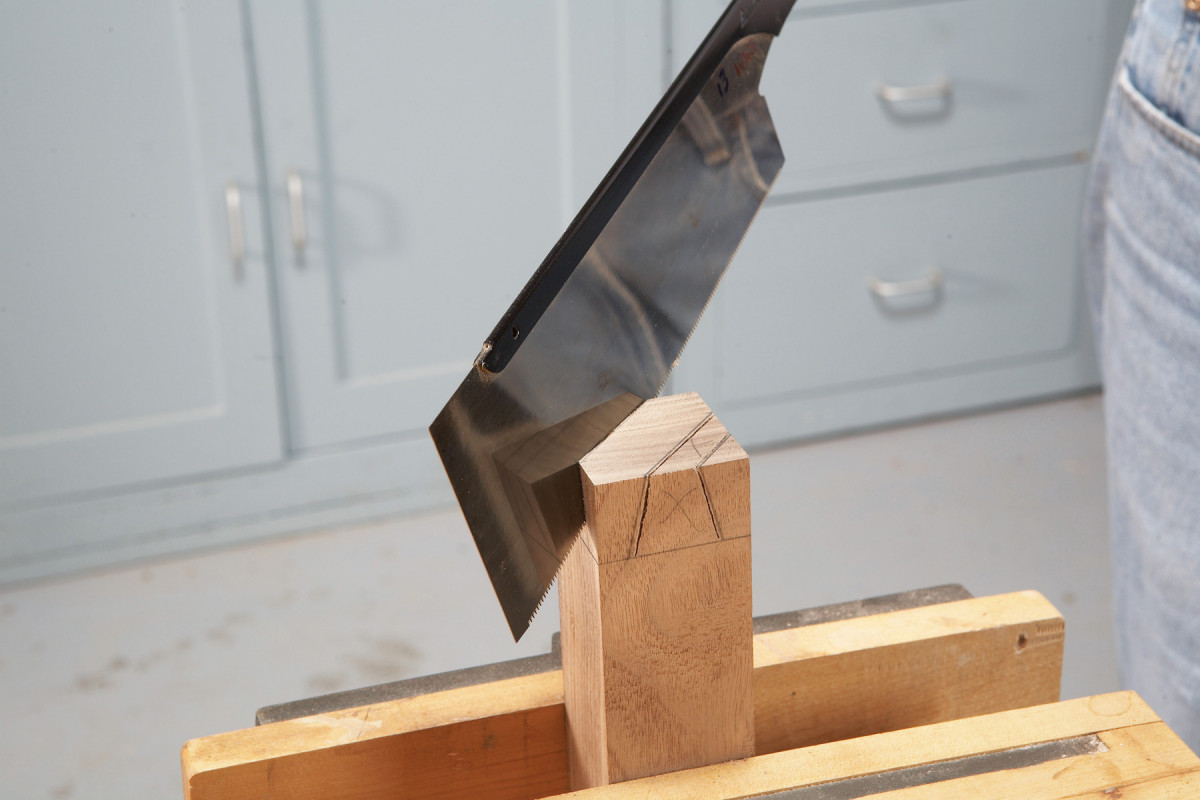
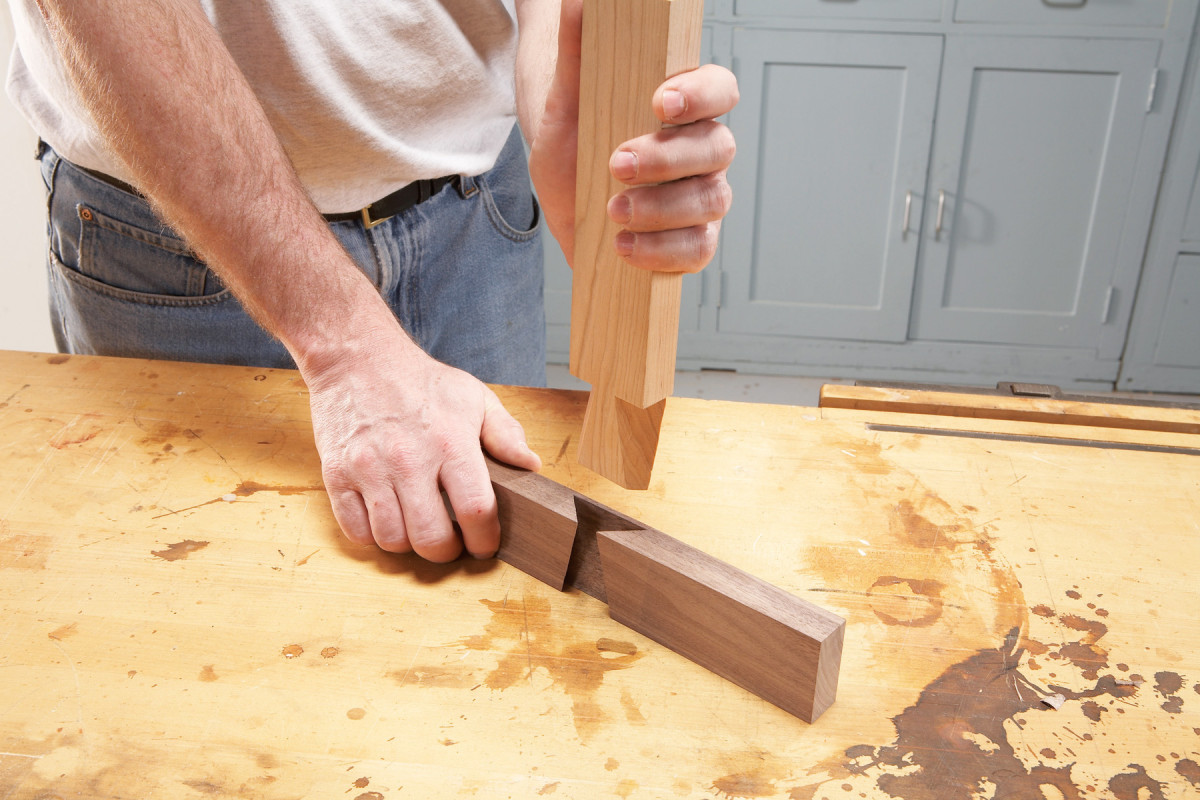
Photo 1. Cut the dovetail cheeks. The best strategy is to stay outside the layout lines.
The secret behind these joints, of course, is that they don’t assemble the traditional way. The first two are elaborate sliding dovetails and the last is a complex pivoting joint. There’s no simple method to machine these joints; they must be cut primarily by hand. And creating them will test your hand-dovetailing skills, because of their compound angles and large joint surfaces.

Photo 2. Remove the waste with a coping saw.
Unlike most wooden puzzles, these joints shouldn’t be constantly assembled and disassembled. The pieces include fragile short grain that can easily break and delicate edges that will quickly show wear. It’s best to glue the joints together as soon as they’ve been satisfactorily fitted.
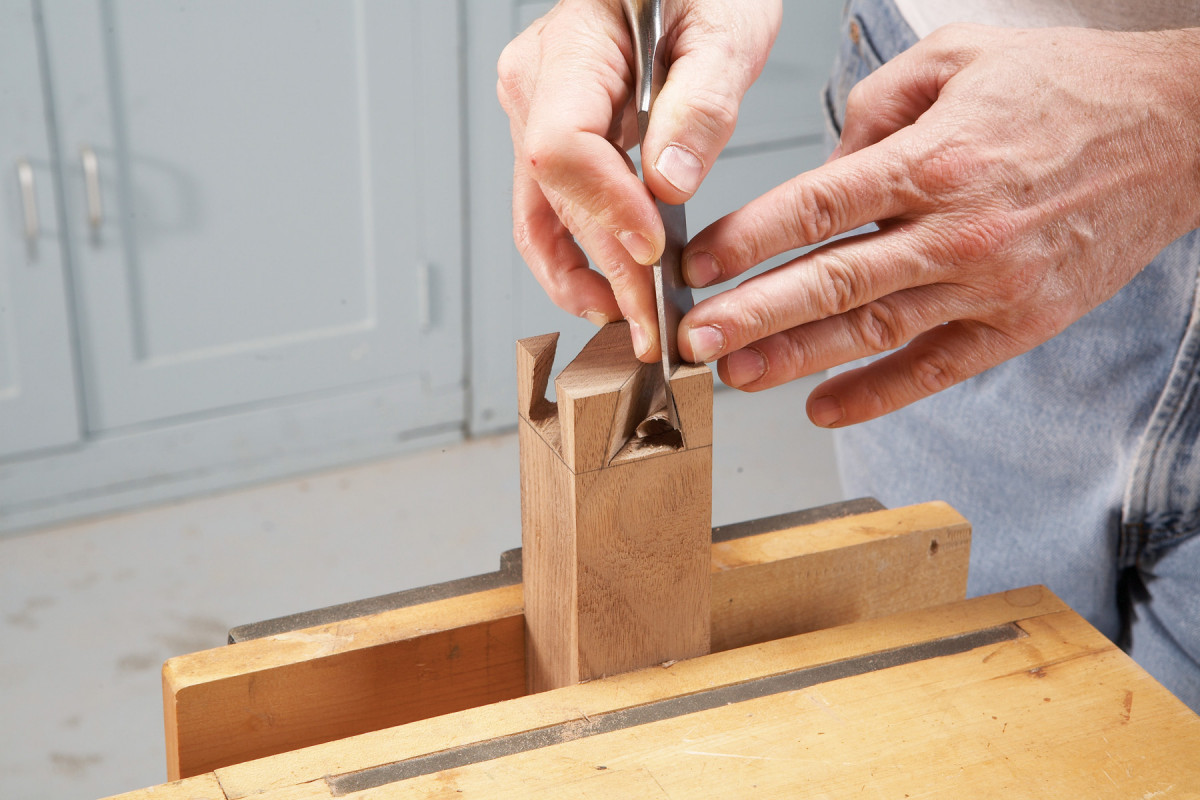
Photo 3. Pare to the lines. Remove the excess material in several thin shavings. This requires a razor-sharp chisel and light, controlled pressure.
You’re bound to make some mistakes, so always start by making a practice joint. Make sure to use stock that is straight-grained on all four sides—it’s difficult to pare against the grain’s slope. Also, it’s a good idea to use hardwood for one piece and softwood for the other. This method is more forgiving, because the softwood piece will conform to the hardwood piece when you assemble the joint. Using hardwood for both pieces requires absolute precision, because there’s no forgiveness: If the pieces don’t fit perfectly, the short grain parts will simply break off.
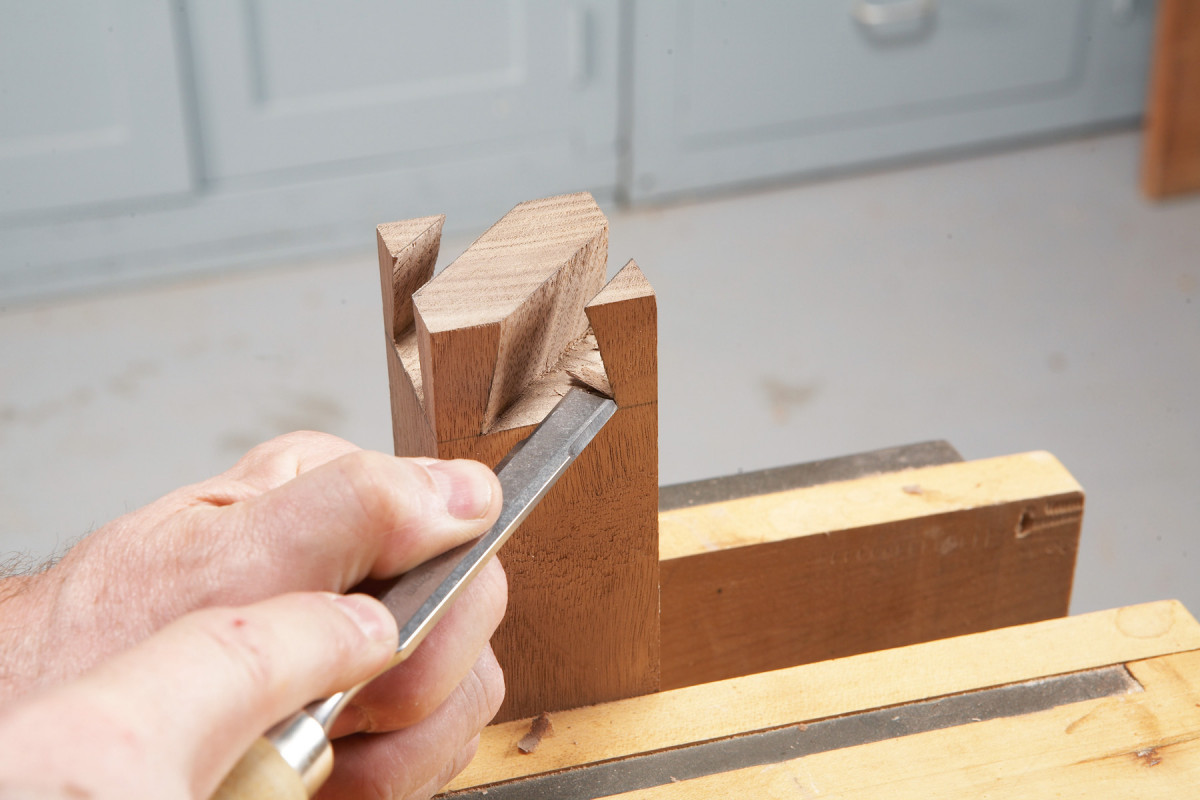
Photo 4. To pare cleanly into the angled corners, bevel the sides of your chisel.
Use the same steps you would follow to cut dovetails by hand to create all three joints. Start with pieces that are cut perfectly square. Lay out the dovetails and sockets on each piece. Clearly mark the waste areas. Make sure your tools are razor sharp. Cut the cheeks first (Photo 1). The safest method is to cut outside the lines. Next, remove the waste (Photo 2). Finish by paring to the line (Photos 3 and 4). It’s best to scribe or knife the layout lines, so you can precisely bed your chisel for paring; if you pencil the lines, make sure they’re crisp and narrow.
The secret to easy assembly
When all of the cheeks and shoulders of these joints are pared absolutely flat, it’s difficult to slide the pieces together, due to friction resulting from the joints’ large surface area. Fortunately, there’s a work-around. The only places where the joints have to fit perfectly are the faces that show. So, to make the pieces slide together more easily, slightly hollow the joint surfaces that don’t show.
Make the pieces
- Lay out the dovetails and sockets. Mark the waste.
- Saw the dovetail cheeks in Piece A and the socket cheeks in Piece B. Sawing these compound angles accurately is tricky, so don’t be a hero: Cut wide of the lines, in the waste area.
- Remove the waste to establish the joint shoulders. Insert the coping saw into one of the cheek cuts, turn the blade and saw to the other cheek cut.
- Pare to the lines. Use a wide chisel to pare the cheeks and a narrow chisel to pare the shoulders. Beveling the sides of the chisels makes it easier to get into the acutely angled corners.
Ease the fit
On this joint, all four faces of both pieces show. To ease the fit, hollow each dovetail cheek on Piece A and the shoulder of each socket on Piece B. Always start paring 1/16″ inside the outside edge, to create a lip. Then pare to the center. When the pieces slide together, the 1/16″ lips at the outside faces will be the only parts of the joint that fit flush.
Devilish Lap Joint
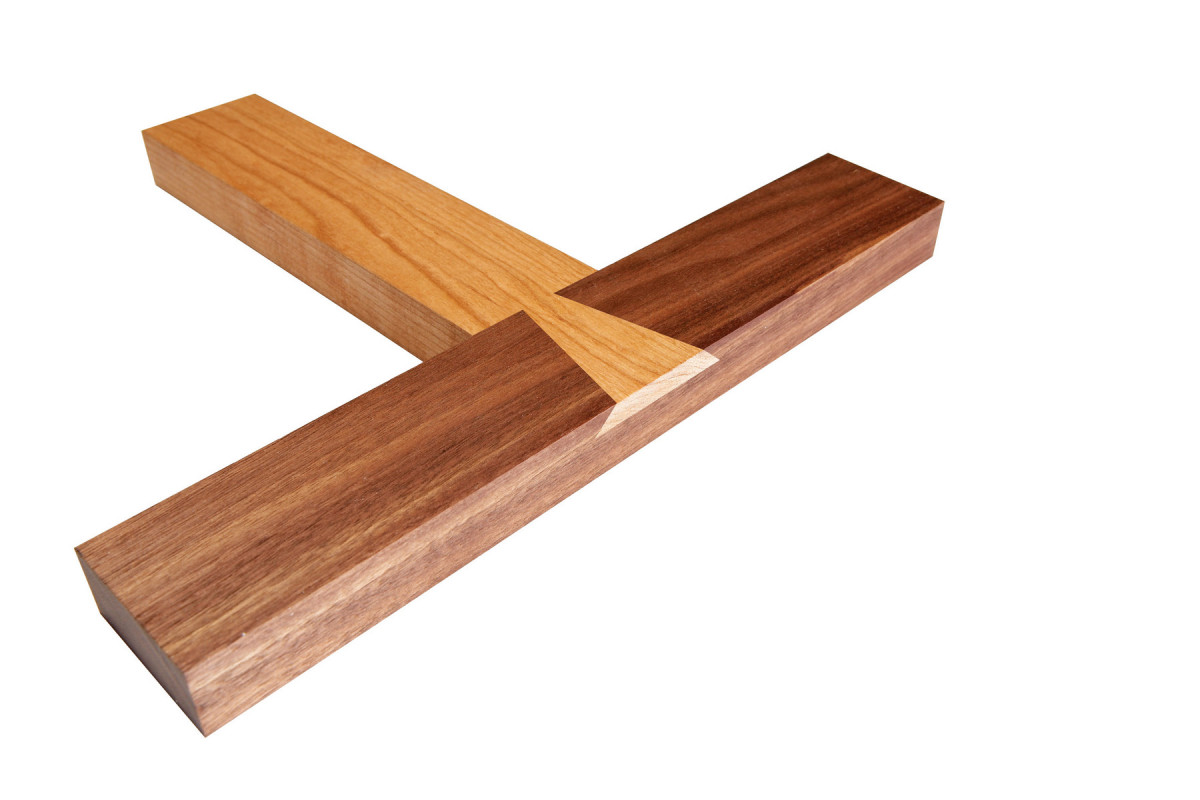 On a typical lap joint, Piece A would simply press into Piece B. Well, that can’t happen here. Neither can the two pieces pull apart. So what gives? A clever version of a tapered sliding dovetail, that’s what (Fig. B).
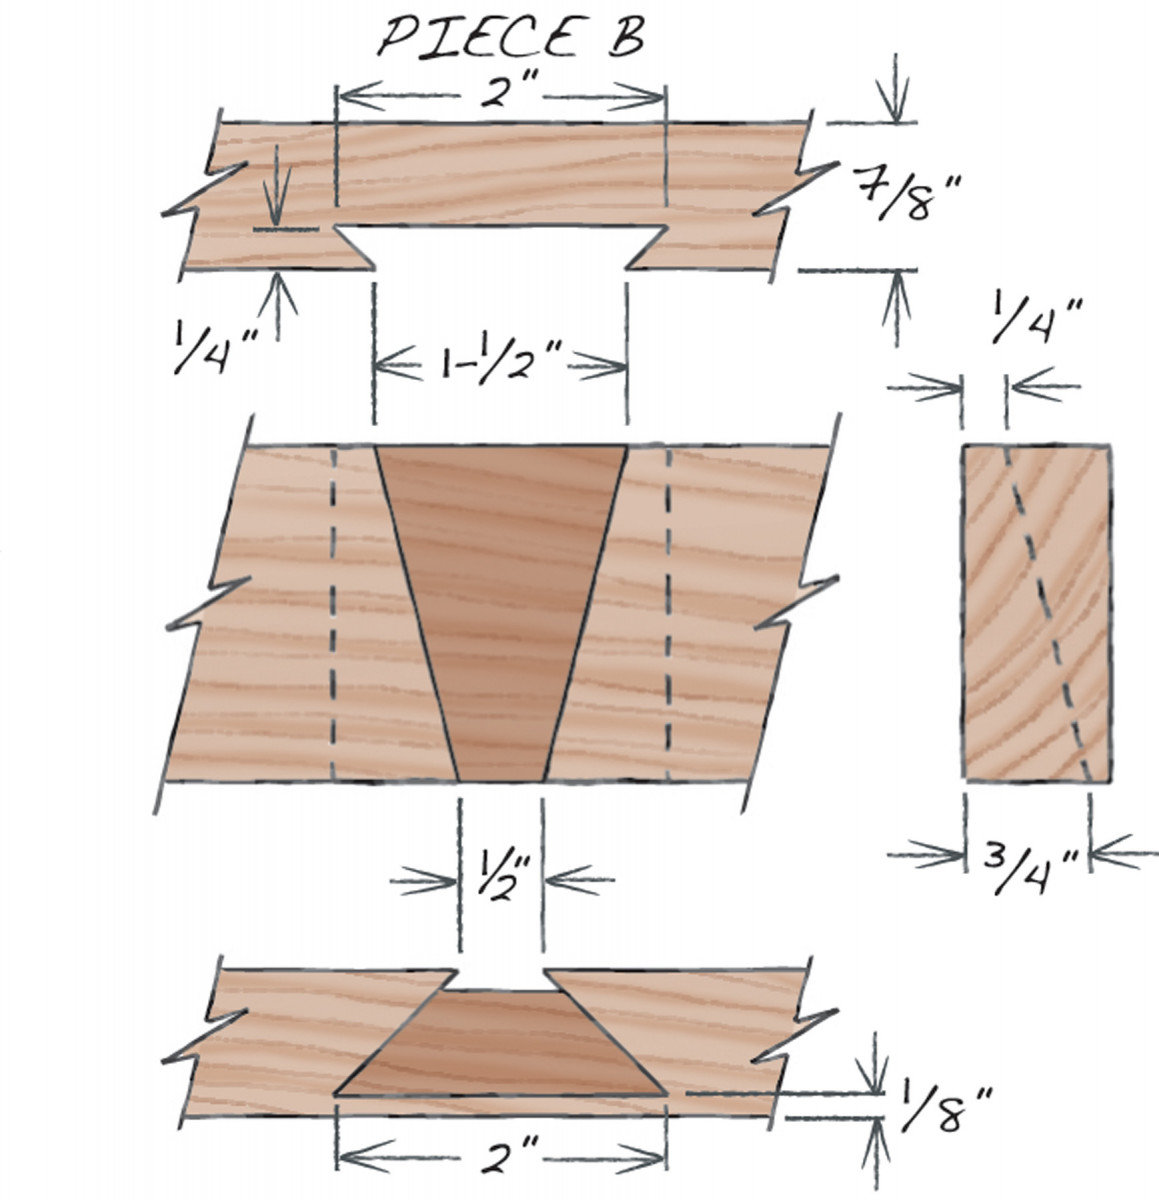
Fig. B.
The dovetailed tenon on Piece A tapers on the bottom, from the shoulder to the end. On the top, its edges slope in the opposite direction, at compound angles. The mortise in Piece B mirrors the tenon on Piece B, sloping up on the bottom, and down and out on the top.
To assemble this joint, insert Piece A into Piece B. The dovetailed tenon is thin at the end, so it fits at the bottom of the mortise. As tenon slides into the mortise, the dovetail on the face of Piece A rises until it’s flush with the face of Piece B.
Make the pieces
Piece A
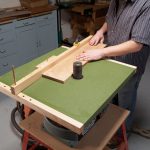
- Lay out the dovetail and mark the waste. Cut the 1/8″ bottom shoulder on the tablesaw.
- Raise and tilt the blade to cut the tenon’s angled bottom face.
- Use a handsaw to crosscut the dovetail’s square shoulders.
- Cut the dovetail’s compound-beveled cheeks.
- Precisely pare the cheeks and shoulders to the layout lines.
Piece B
- Lay out the mortise and mark the waste.
- Saw the angled mortise shoulders, staying wide of the layout lines.
- Make a lengthwise cut in the center of the mortise, to divide the waste in half. Cut deep at the butt end and shallow at the open end, following the slope of the mortise.
- Saw out the waste. Insert the coping saw in the lengthwise cut, turn the blade and saw to one corner. Remove the waste and then saw to the other corner.
- Pare to the lines. When you pare in from the butt end, the acute angles inside the mortise will trap the waste, so be prepared to progress slowly.
What to ease
Fortunately, only the top face and outside end of this joint show; the other hidden joint surfaces can be “adjusted.” The sloped bottom face of Piece A and its beveled dovetail cheeks are the easiest surfaces to access. When you hollow these surfaces, however, do not disturb the narrow wedge-shaped end of the tenon, or the edges of its dovetail-shaped top surface.
Diabolical Corner Joint
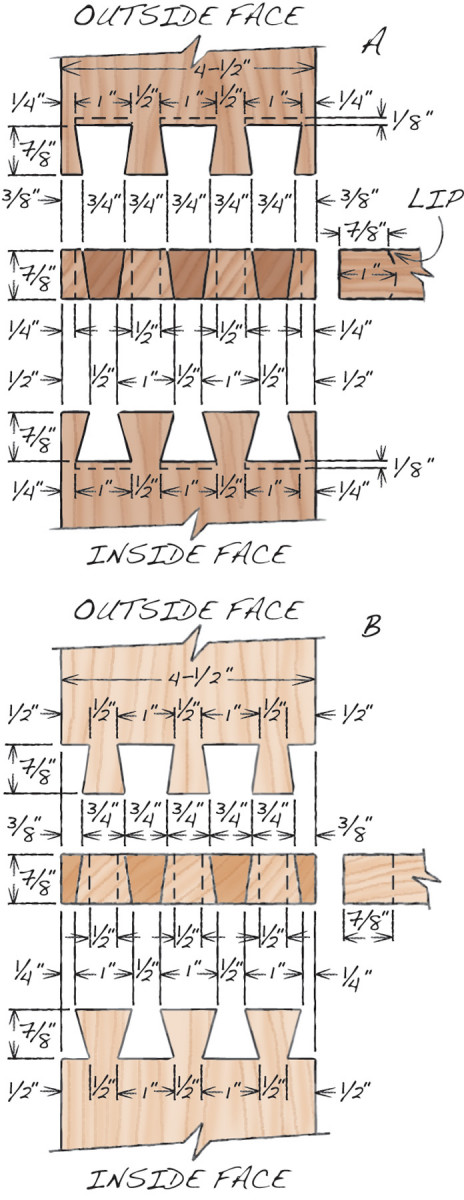
Fig C.
The flared ends of the dovetail pins mean this corner joint can’t disassemble the traditional way. And no evidence of a sliding joint appears on the back side of the joint, so it can’t go together like the double-dovetailed tenon in the previous joint.
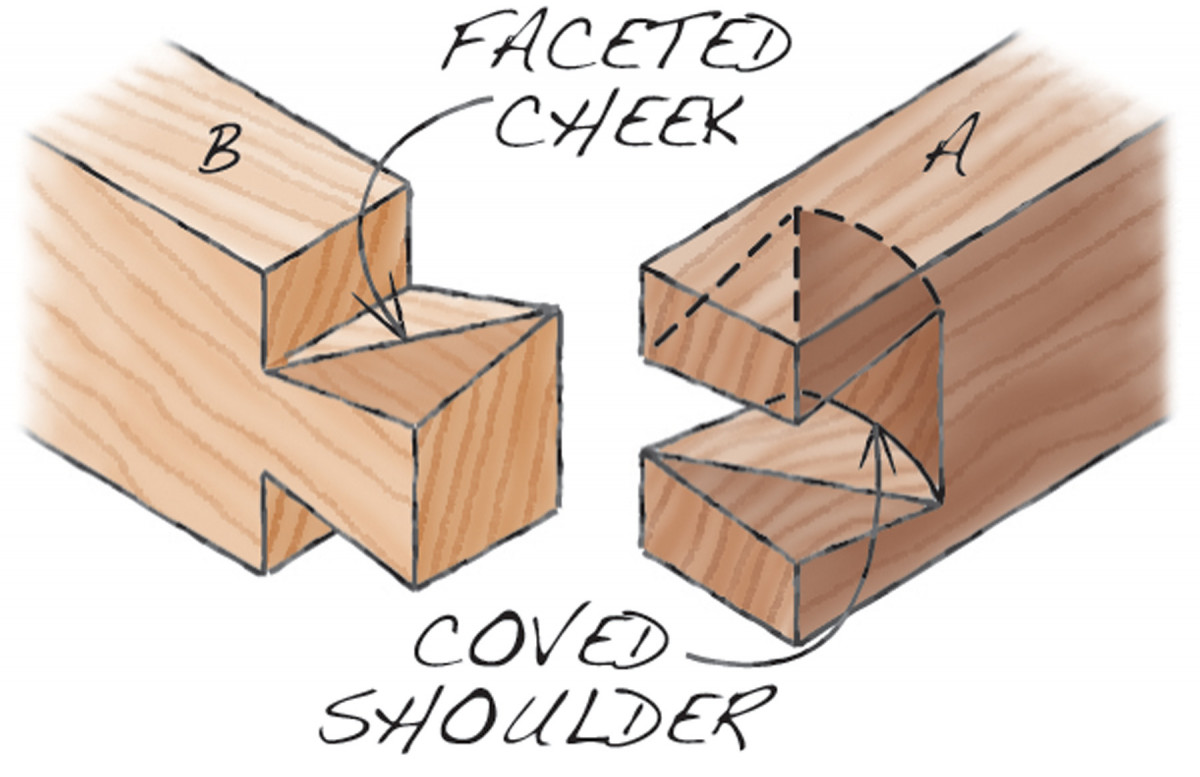
Fig. D.
The secrets are dovetails that slope at three different angles and sockets with coved shoulders (Figs. C and D). They allow the boards to slide together in line and then rotate 90˚ to form the corner. For the record, the slope of the dovetails on the outside face of Piece A matches the sockets on the end of Piece B, the slope of the dovetails on the end of A matches the sockets on the outside face of B, and the slope of the dovetails on the inside face of A matches the sockets on the inside face of B. The coved sockets in Piece A provide clearance for the outside corner of Piece B as the boards pivot.
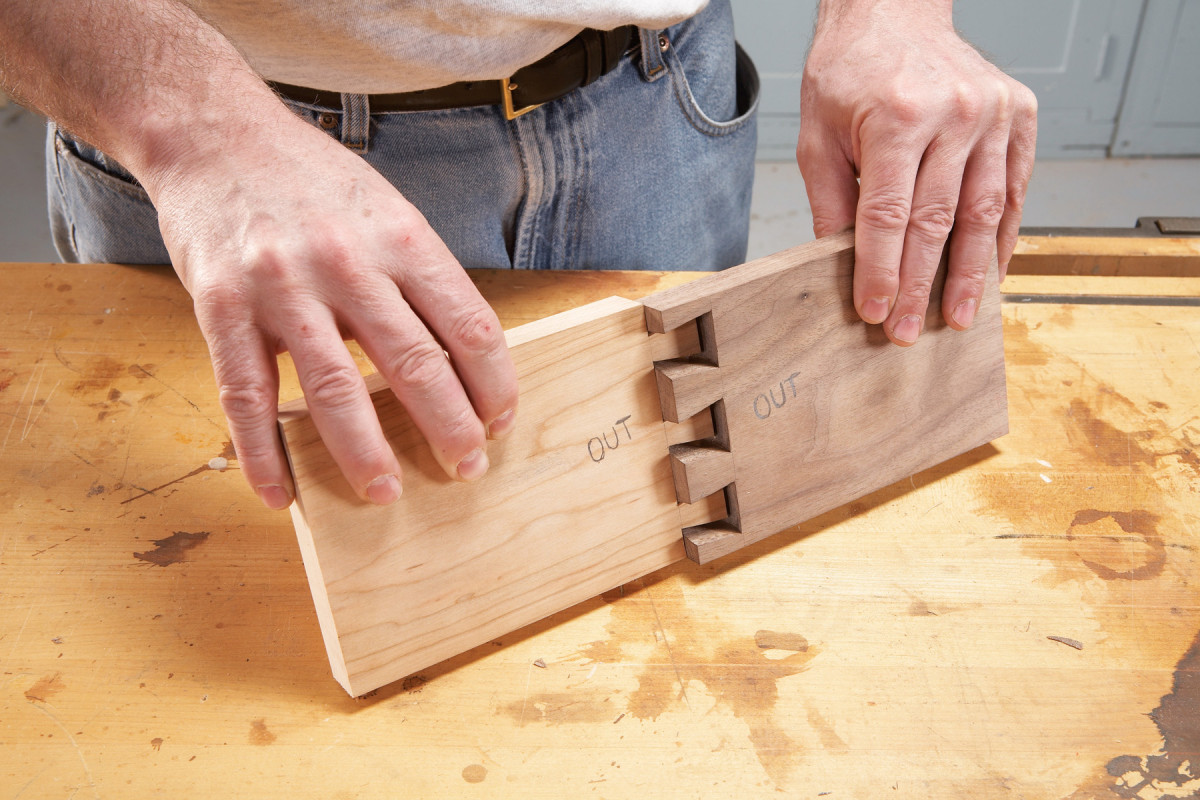
Assemble this joint in two steps. First, with both pieces oriented outside-face out, slide Piece B into Piece A from the back. When the pieces are flush, the dovetails on the outside faces don’t fit.
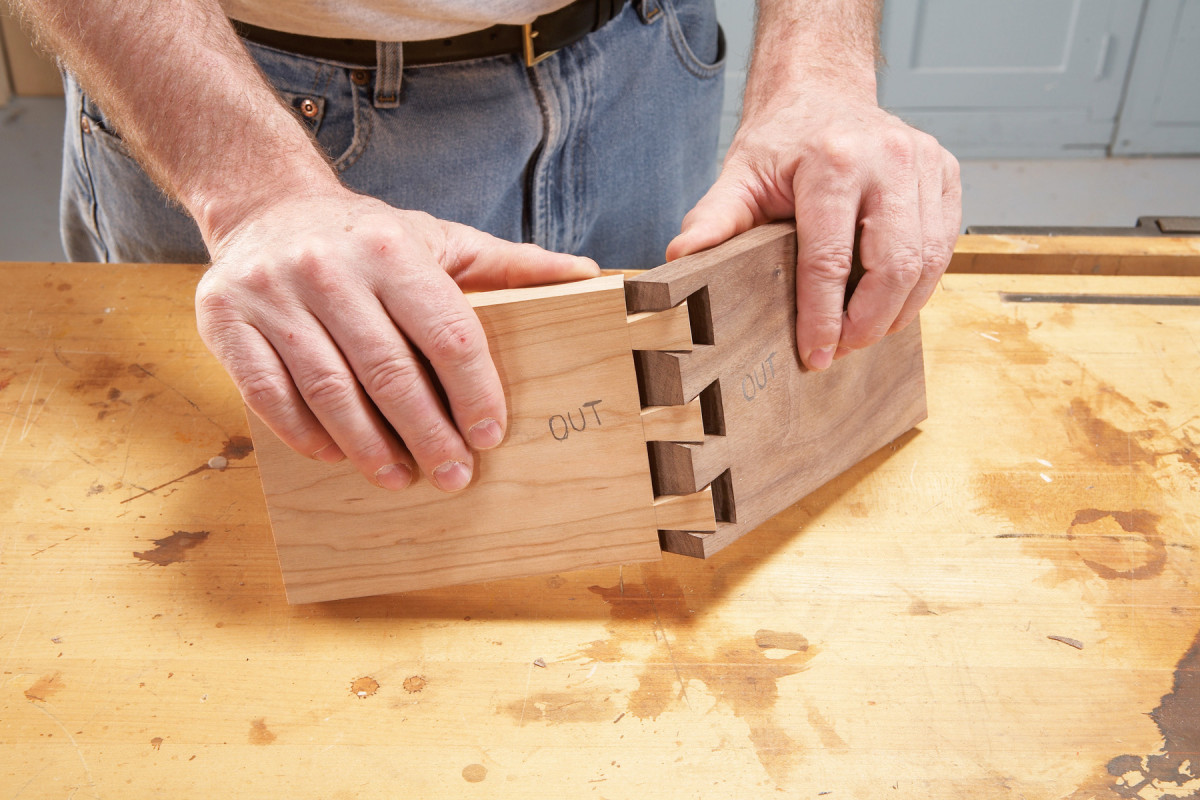
Carefully rotate the pieces to complete the joint. Bear the inside corners of A against the shoulders of B as you rotate.
Make the pieces
Piece B
- Lay out the dovetails and mark the waste.
- Saw the dovetail cheeks, following the layout lines on the end and the outside face. This cut won’t come close to the dovetails on the back face, because they slope more steeply. That’s okay. Use the coping saw to remove the waste.
- Pare to the lines. On the cheeks, work from each face to the center—on the back face, you have to remove more material. Because the front and back slopes differ, the cheeks’ faces will be faceted, rather than flat (Fig. D). Notice that the dovetails on both faces are the same width at the bottom scribe line.
Piece A
Follow the same procedure used to cut Piece B, with this exception: Hollow out the socket shoulders, leaving tiny (1/32″ wide) flat lips at the outside face to seat the joint (Figs. C and D).
Ease the fit
The cuts on the ends and outside faces of both pieces are the ones that show, so they must remain precise. To ease the fit, slightly widen the socket cheeks and shoulders on the back face of A—but do not disturb any dimensions at the end of the board. Gently ease the facet lines. Make sure each socket shoulder in A is hollowed into a fair curve, so the corner of B can rotate through.
Here are some supplies and tools we find essential in our everyday work around the shop. We may receive a commission from sales referred by our links; however, we have carefully selected these products for their usefulness and quality.


I don’t think the Diabolical Corner Joint works. I modeled it in Sketchup and the convex shape of the faceted cheeks always binds. The coved shoulder does not help with this.
They are NOT “dovetails and sockets”. Pins and tails. Have some respect for the proper nomenclature?
Pretty sneaking, sis.