We may receive a commission when you use our affiliate links. However, this does not impact our recommendations.
Think ahead. Small pieces (and large ones) can be cut on the table saw safely and accurately.
There’s no need to fear the most versatile machine in the modern shop.
There are good reasons that the table saw is at the center of many shops. This machine revolutionized the way we make things. And in recent years, it has become the center of controversy on two fronts: safety and accuracy. There is a lot of money to be made scaring woodworkers about table saws, both in manufacturing and in the media.
There has long been a disconnect between the way table saws are used in real life, and the equipment that comes with saws to keep us safe. Also, there is a lot of confusion about techniques for safe operation. Understanding and managing risks is vastly different than operating out of fear.
The first thing to understand about the table saw is that it is indeed capable of inflicting a life-changing injury in the blink of an eye. (There are many other things in our daily lives with equal or greater potential for disaster.) The key is understanding what happens when you flip the switch and push a piece of wood into the spinning blade. It isn’t magic; it’s physics. Even though wood as a material varies from piece to piece, what happens is predictable. If you understand and control the physics, you can work accurately and safely.
The most frequently reported accidents at the table saw (and the most preventable) are the result of the operator not paying attention and coming into contact with the blade. If you can’t focus on what you’re doing while you’re doing it, you probably shouldn’t use a table saw. If you fit that description, you probably shouldn’t drive, either.
What to Worry About
The rising teeth on the back of the blade are perfectly placed to throw wood back at the operator. If the operator loses control, any wood between the spinning blade and a fixed object (most often the saw fence) or any piece that comes into contact with the back of the blade can go flying at a high rate of speed. This (kickback) is the second-most often reported type of injury.
Trapped. Wood caught between the fence and the rising teeth of the blade is likely to be thrown back toward the saw operator.
The piece of wood being cut, or a recently cut scrap, takes off and a hand goes with it, often making contact with the blade. A riving knife guards the back teeth and virtually eliminates the risk of kickback. If your saw has a riving knife it should always be in place.
Guarding the front half of the blade is simple for some operations but nearly impossible for others. Most saws in the United States have guards that get in the way when they are most needed. Giving up control of the work in order to use a guard doesn’t increase safety.
Real-world Solutions
Guarding systems have gotten better in recent years, but there is still room for improvement. If you can use the guard you should – but what about the numerous operations where the guard gets in the way? The key is to use a method that keeps your hands at a safe distance and maintains control of the work through the entire operation.
No help. Pushing stock from near the fence tends to move the opposite corner into the blade, inviting kickback.
For safe and accurate rip cuts, pressure needs to be directed both to the end of the board (to move it into the cut) and toward the fence. If the edge that has just been cut drifts back toward the blade, kickback is likely.
While you want to keep the pushing hand as far from the blade as practical, if that hand is near the center of the board, or slightly to the blade side, you have leverage to keep the far end tight against the fence through the entire cut.
If you push a wide piece with your hand or push stick close to the fence, you not only lose the leverage, you increase the chance of the board drifting toward the blade after it is cut. When the work is narrow, use a push stick – but don’t give up control.
Into the fence. Pushing from near the center of the board increases leverage and keeps the leading edge of the material tight to the fence.
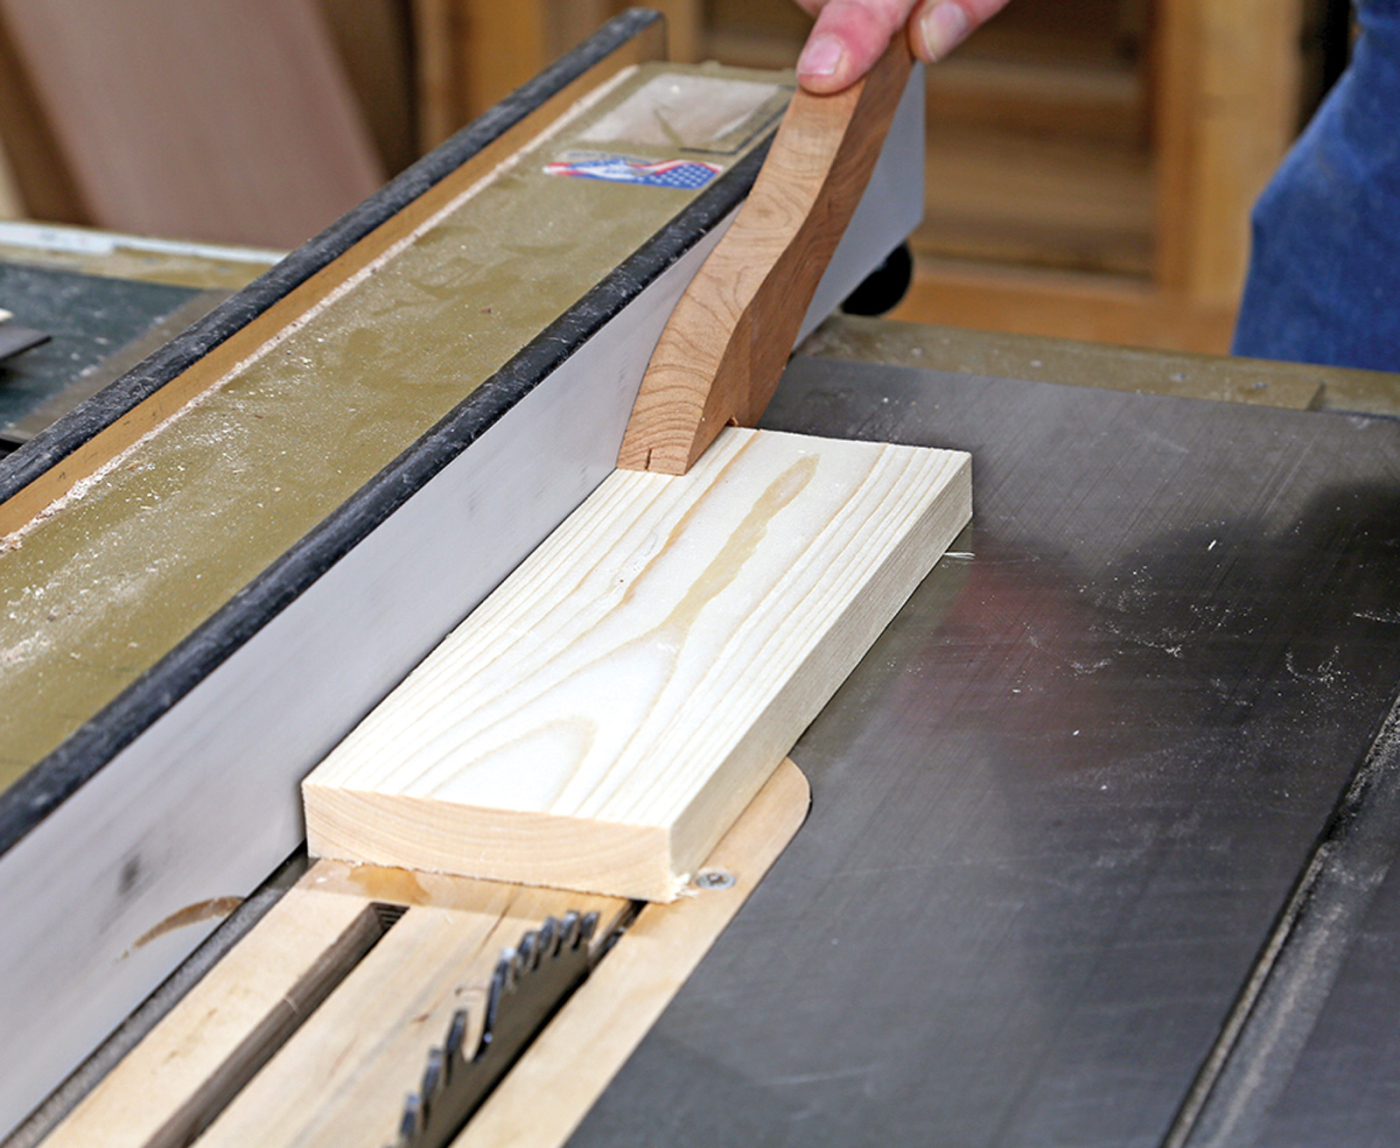
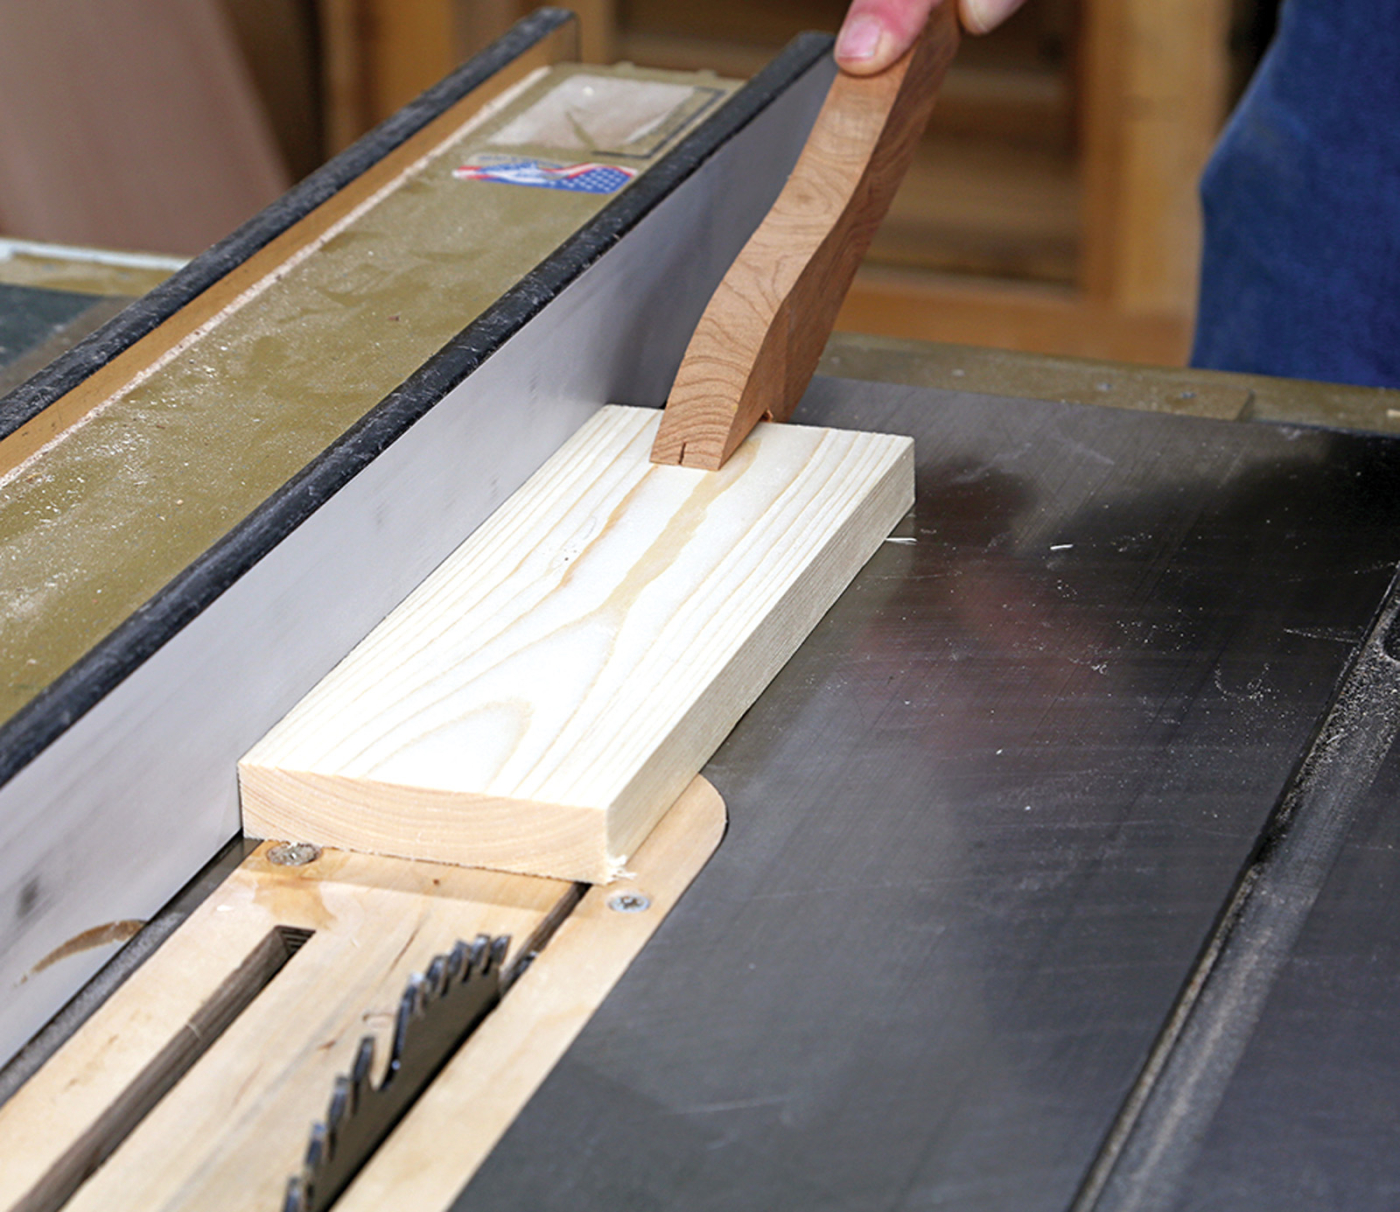
Most push sticks are effective for keeping your hand at a distance but don’t give enough control over the piece being cut. The type of push stick shown at right has extra material ahead of the hook; it provides leverage to hold the work down as well as motive force against the back end.
With any push stick, things get riskier when the work gets the same size or smaller than the stick itself. It’s OK to run the push stick through the blade if you do it in one smooth motion as you cut wood. Don’t sacrifice the work or your safety by removing the push stick or shifting it sideways in the midst of a cut.
Down and forward. This type of push stick holds the work down to the table as well as pushing it into the blade.
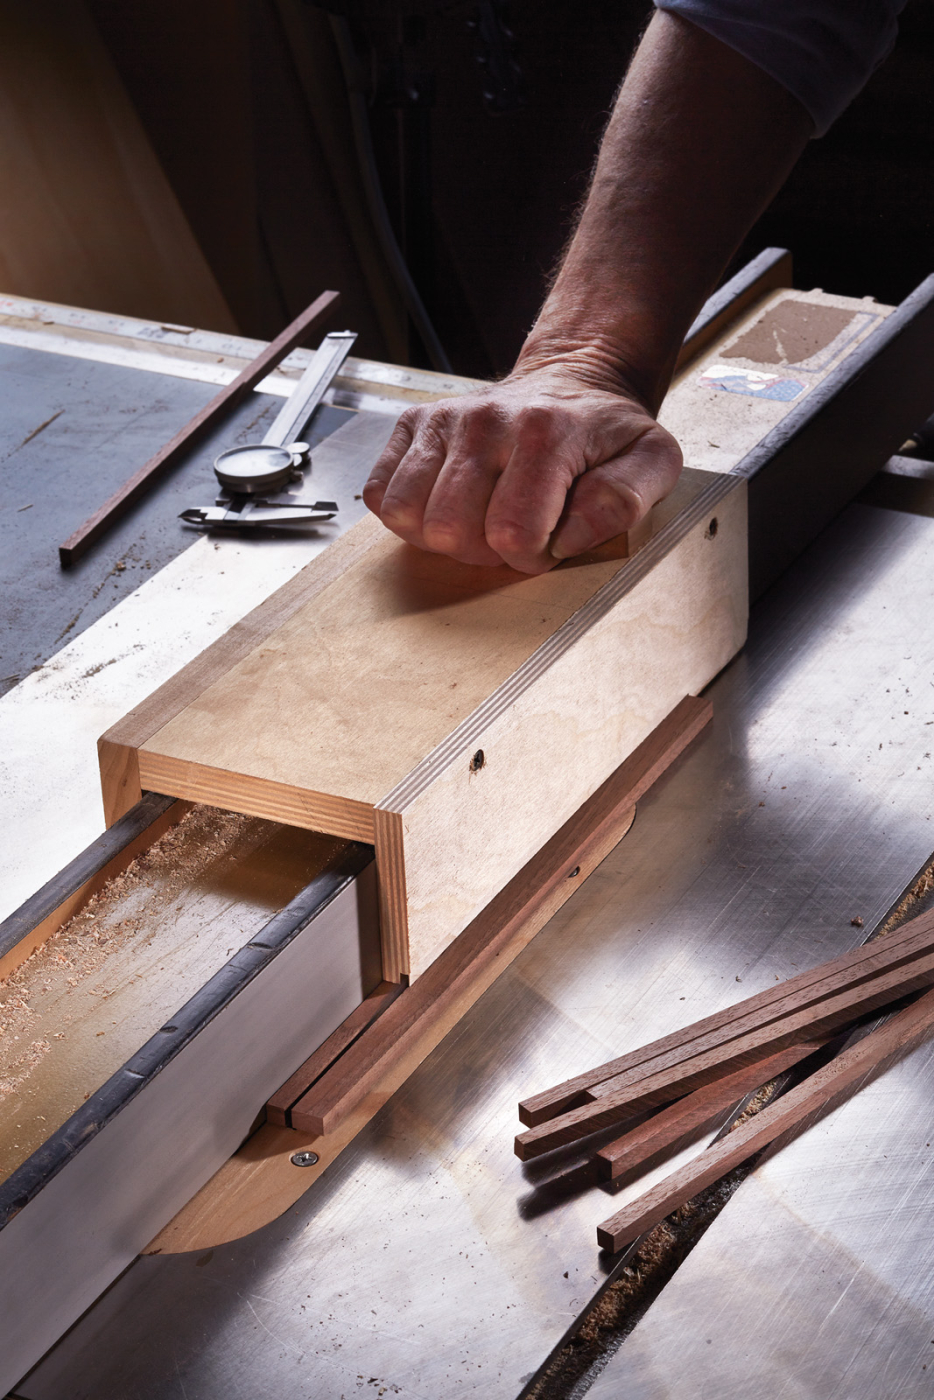
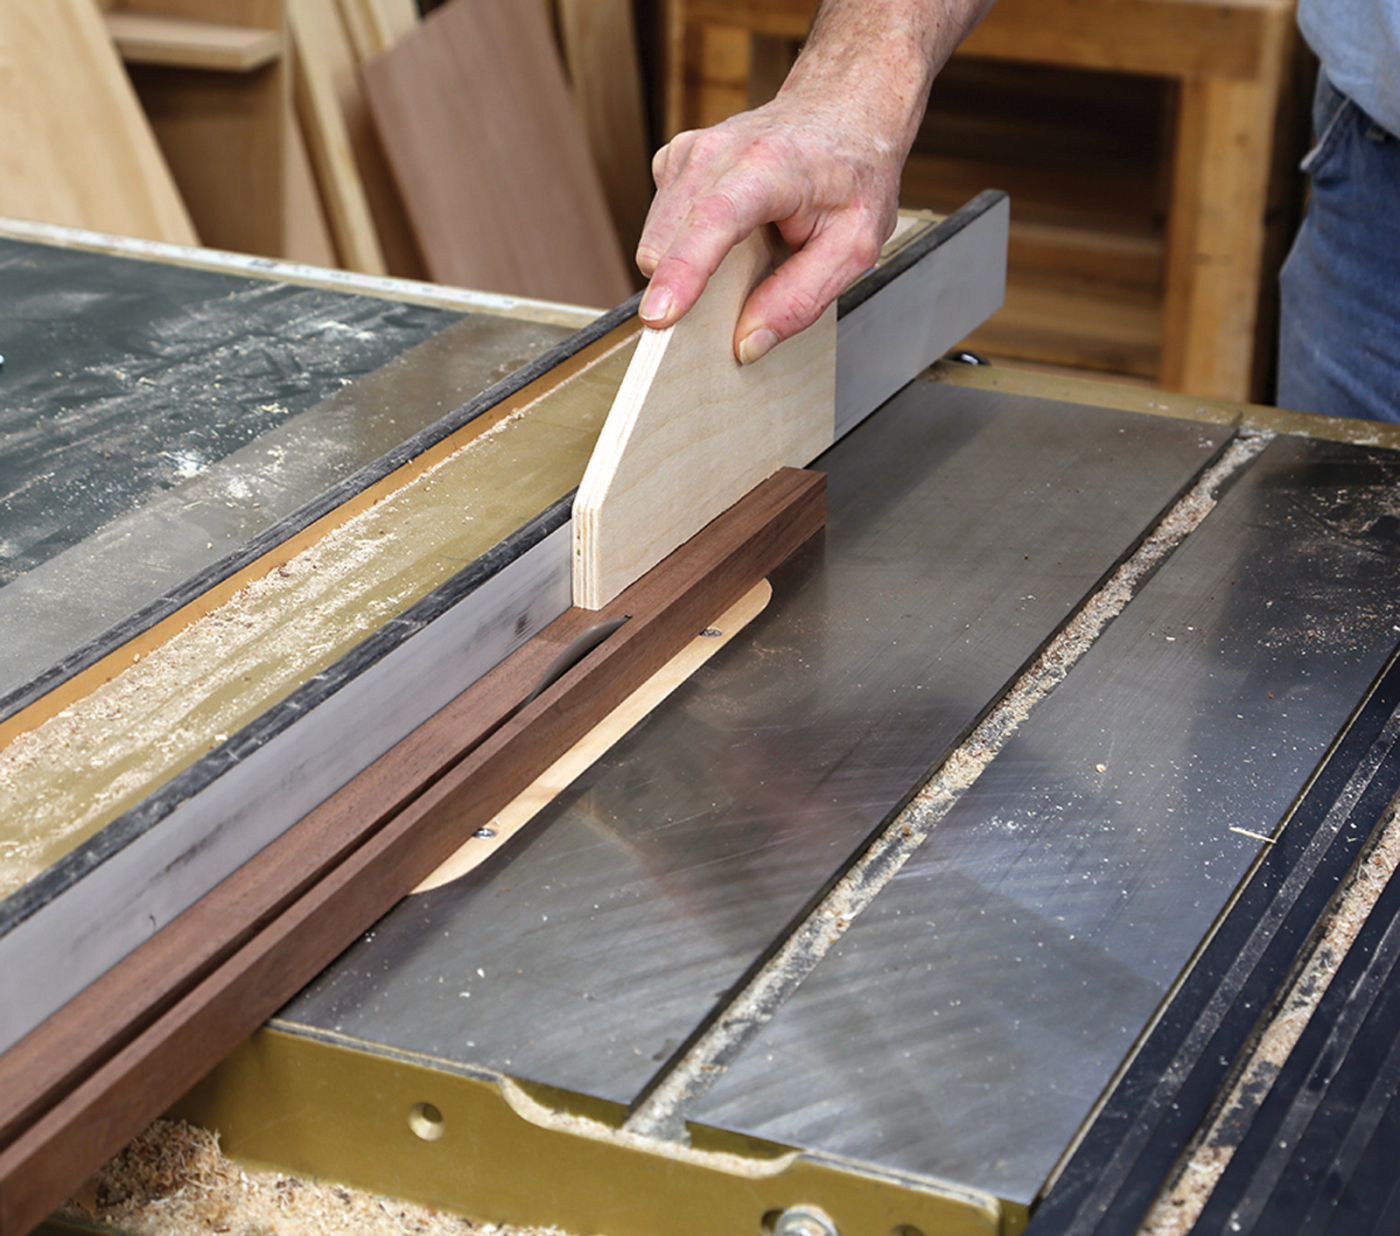
For even more control over narrow pieces, make a push block that rides along the saw fence. The piece on the blade side of the fence can be replaced as the hook erodes from contact with the blade. The distance from the tabletop to the bottom of the notch should be close to, but slightly less than the thickness of the material you are cutting.
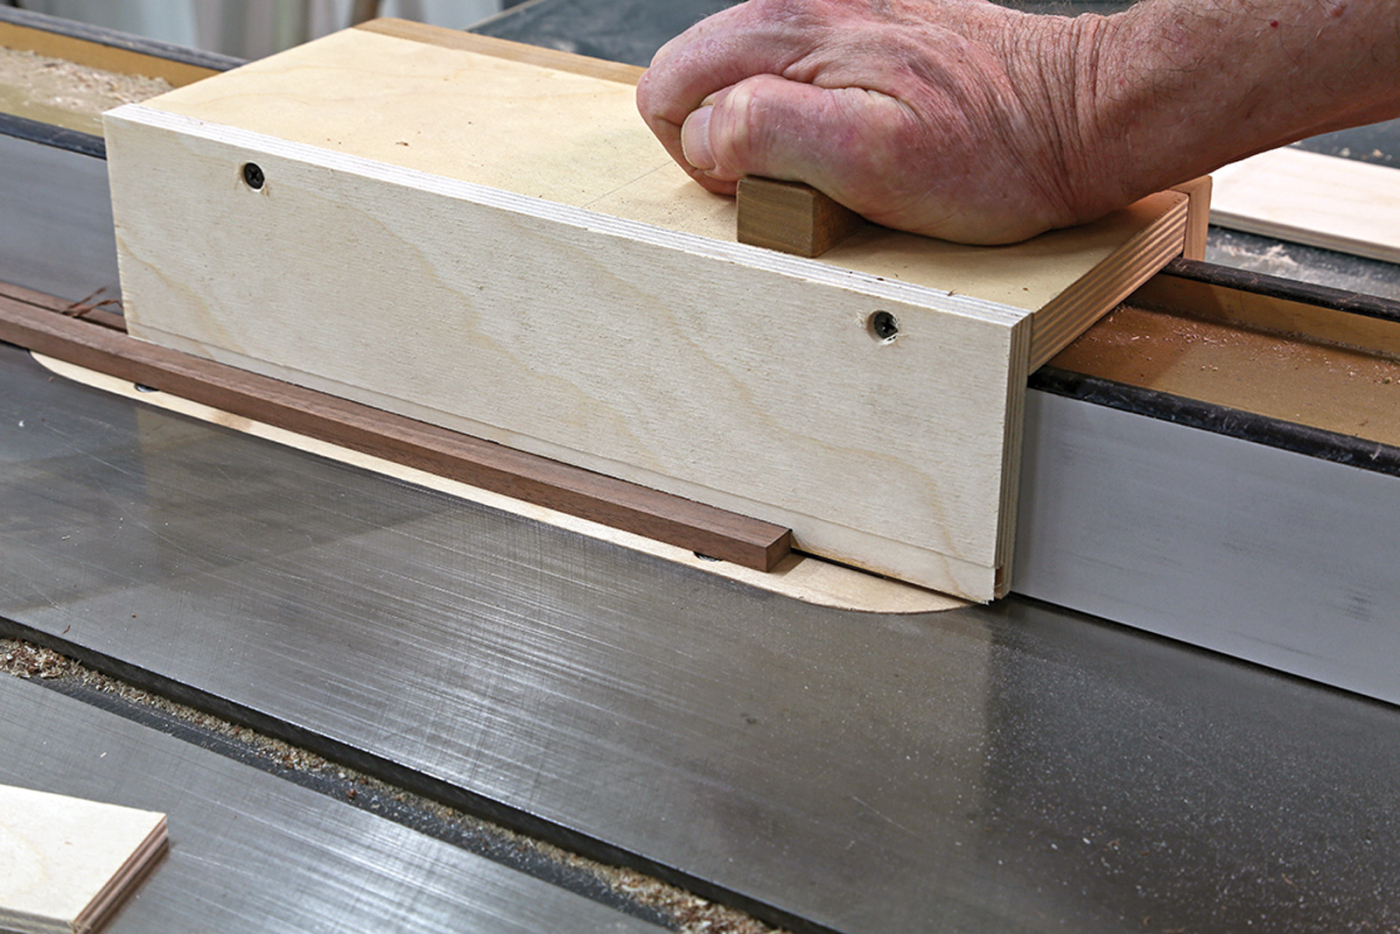
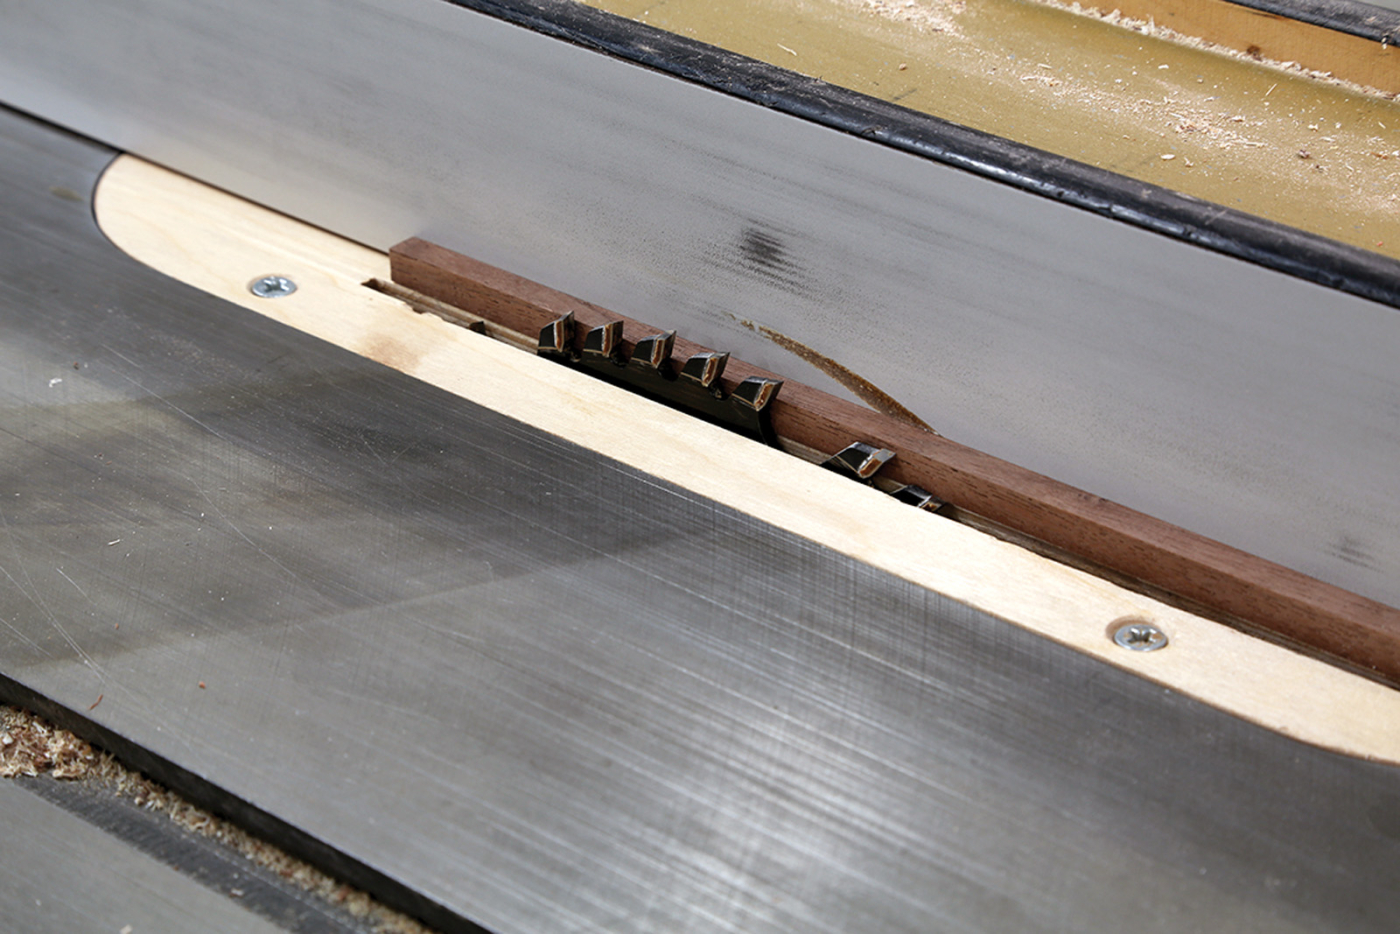
Ride the fence. A pusher that straddles the fence (along with a zero-clearance insert) makes it possible to rip thin pieces safely.
One Hand Washes the Other
Accuracy and safety go hand in hand because the techniques required for precise work improve both control over the piece being cut, and awareness of where the blade and the hands are at all times during operation.
The great advantage of the table saw is accuracy and repeatability. If you don’t want to fiddle with the size of each part of each joint when you make something, this is a game changer. But for accurate cuts to be made again and again there are a couple of conditions to meet, and you want to maintain control over the workpiece before, during and after every cut.
The first thing to do is to make sure that things that are supposed to be square are square, and that things that are supposed to be parallel are parallel. If the fence is leaning in toward the blade it sets up a situation that makes it easier to trap a piece between the fence and the back of the blade.
Good stock preparation is critical. If all the long edges and faces of your material are straight and square before you turn on the table saw, you won’t have to worry about twisted pieces drifting away from the fence or wobbling while you concentrate on making a cut. The quality of your work will improve and the odds of an accident will go down with straight, flat and square stock.
Zero In
A zero-clearance insert is also a good idea, both for safety and accuracy. The saw cut in the insert is useful for locating exactly where the cut will be, and for closing off the open space on either side of the blade to keep thin offcuts from catching in that space.
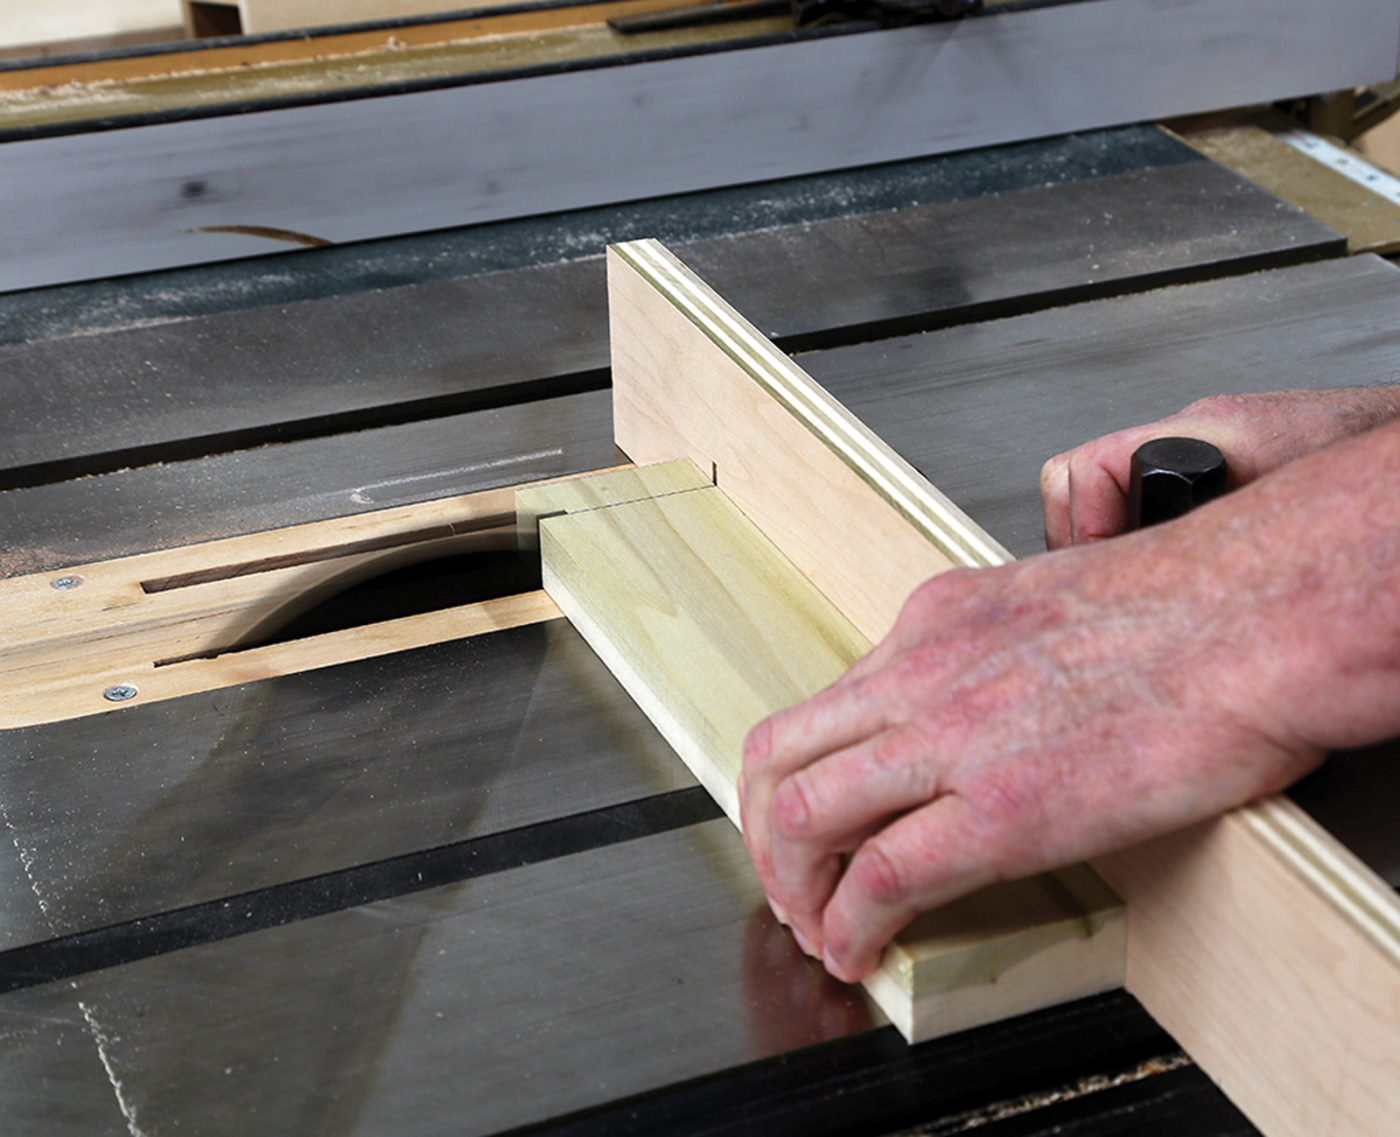
On the mark. A sacrificial board attached to the miter gauge makes it easy to align marks to the path of the blade.
For crosscuts, attach a straight piece of wood to the stock of the miter gauge and run that through the blade. This gives a visual indication of what the path of the blade is, and as long as the cut is fresh it’s a more accurate point to align cuts than the blade itself. If the piece is wide enough and long enough, you can clamp stop-blocks to locate repeated cuts, or clamp the work to keep your hands at a reasonable distance.
Despite what some hand-tool gurus may tell you, using a table saw requires considerable skill. Part of that is in careful operation, but most of the skill is in setting up to cut exactly where you intend to cut. To accomplish this you enter into the realm of the machinist.
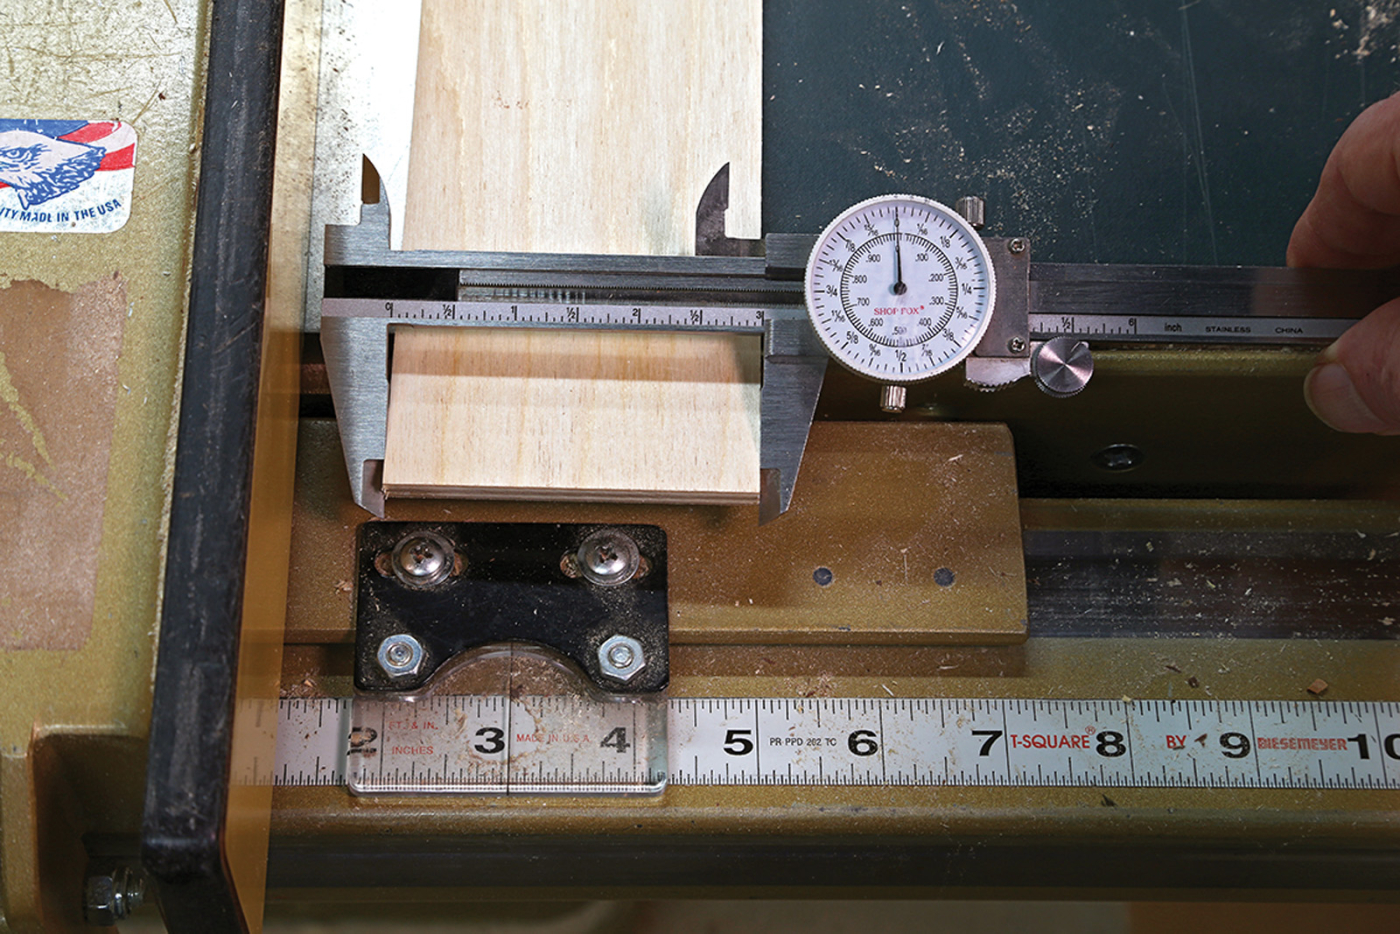
Worth the effort. Calibrating the scale on the saw fence and an overall tune-up ensure that accurate cuts are made on a regular basis.
Don’t rely on measuring the distance from the blade to the fence with a tape measure and don’t trust a cheap square to set the miter gauge to the blade. Make some test cuts and measure the results. With a pair of dial calipers you can adjust the scale on the fence to within a few thousandths of an inch, and an accurate square is also essential. It takes time to dial in the machine, but the reward is the ability to routinely produce precise cuts.
Don’t blame the machine if you don’t have the patience, ability or the necessary tools to measure tiny increments or determine if a cut is square.
There is also a learned skill in thinking the process through. Know your own limits and comfort level. If you get a “funny feeling,” don’t go any further until you are sure of what you are doing. It doesn’t hurt to stop and count your fingers before and after you use your saw.
Here are some supplies and tools we find essential in our everyday work around the shop. We may receive a commission from sales referred by our links; however, we have carefully selected these products for their usefulness and quality.