We may receive a commission when you use our affiliate links. However, this does not impact our recommendations.
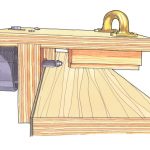
Held fast. You don’t need a tail vise to traverse a board – a notch in a scrap can work wonders. Jam the far end into a planing stop, then secure the other end in the notch. Even as you traverse, this workpiece is going nowhere.
These notched sticks simplify your workholding at the bench.
Workbenches didn’t always have vises. In fact, for most of human history, workbenches around the world were nothing more than a stoutly made table with a few holes. The woodworker kept the work stationary with a combination of pegs, battens, holdfasts, parts of their bodies and a few notched sticks that were sometimes called “doe’s feet.”
I first became fascinated by the doe’s foot after seeing U.K. woodworker Richard Maguire use one in lieu of a tail vise. And after several years of research and trials at my own bench, the doe’s foot has become an indispensable part of my workholding.
It’s a fiendishly clever and simple appliance. And even if you have a workbench with all the bells and whistles, you’ll find a doe’s foot useful in a pinch. Plus, if you ever work on-site without a workbench – or on a picnic table on vacation – the doe’s foot is a lifesaver.
How Does it Work?
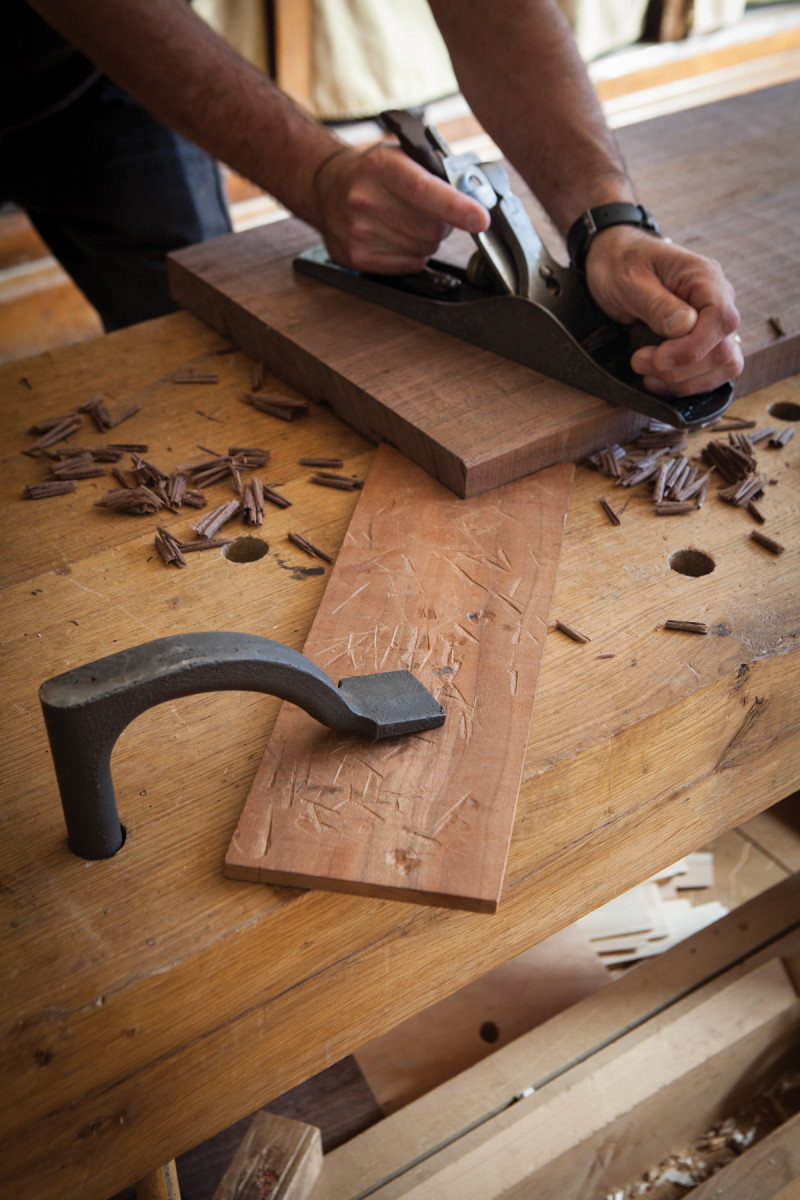
Hard-working toes. The two toes on the end of a doe’s foot can be flat or pointed. I prefer flat because they won’t mark your work and are more robust.
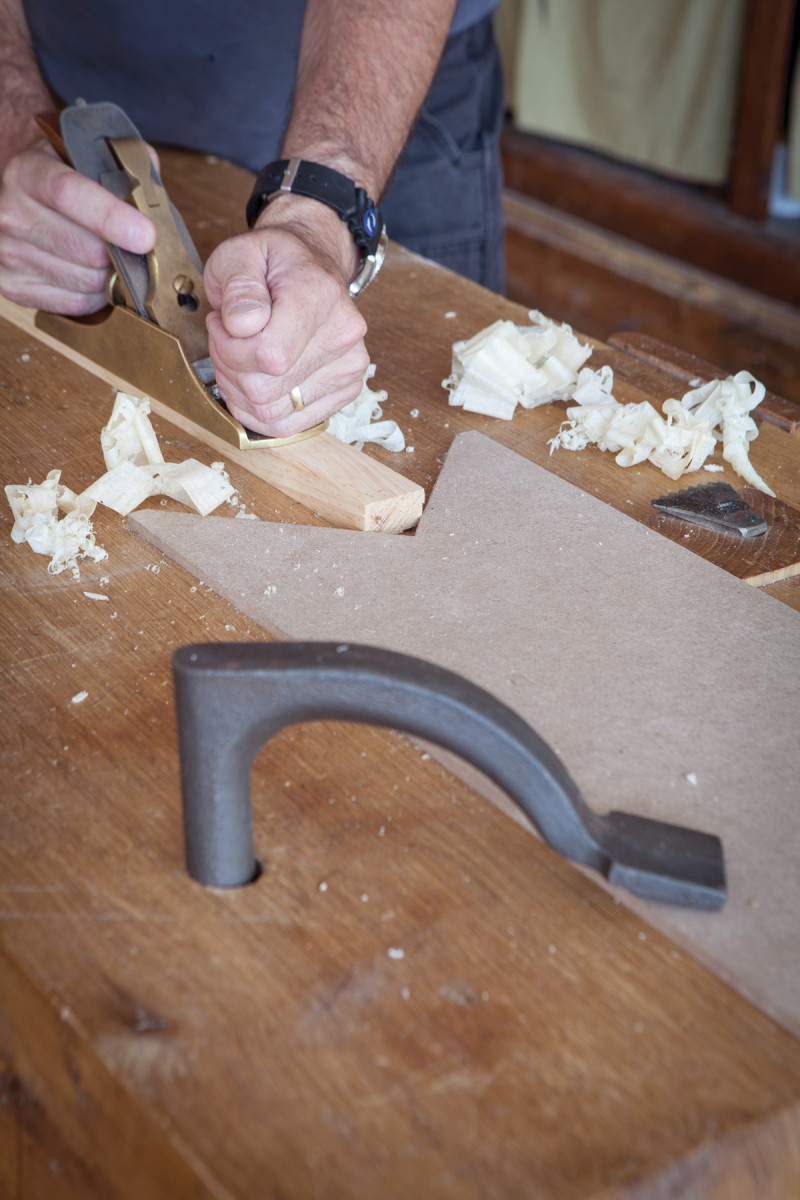
The doe’s foot is simply a piece of wood of almost any size with a 90° notch cut into its end. The device works by allowing your workpiece to get snagged in the notch between the two “toes” of the foot, immobilizing it.
The doe’s foot can be used both in front of the work or behind the work. It can be secured to the benchtop with a holdfast, clamps, pegs or even nails driven through the doe’s foot and into the benchtop.
To get started, I recommend you make one that is 1⁄2” x 7″ x 12″. Cut a 90° notch at one end as shown in the photos that leaves a 1⁄4” flat at the corners. We’ll call these flats the “toes.”
Sure Footing for Your Doe’s Foot
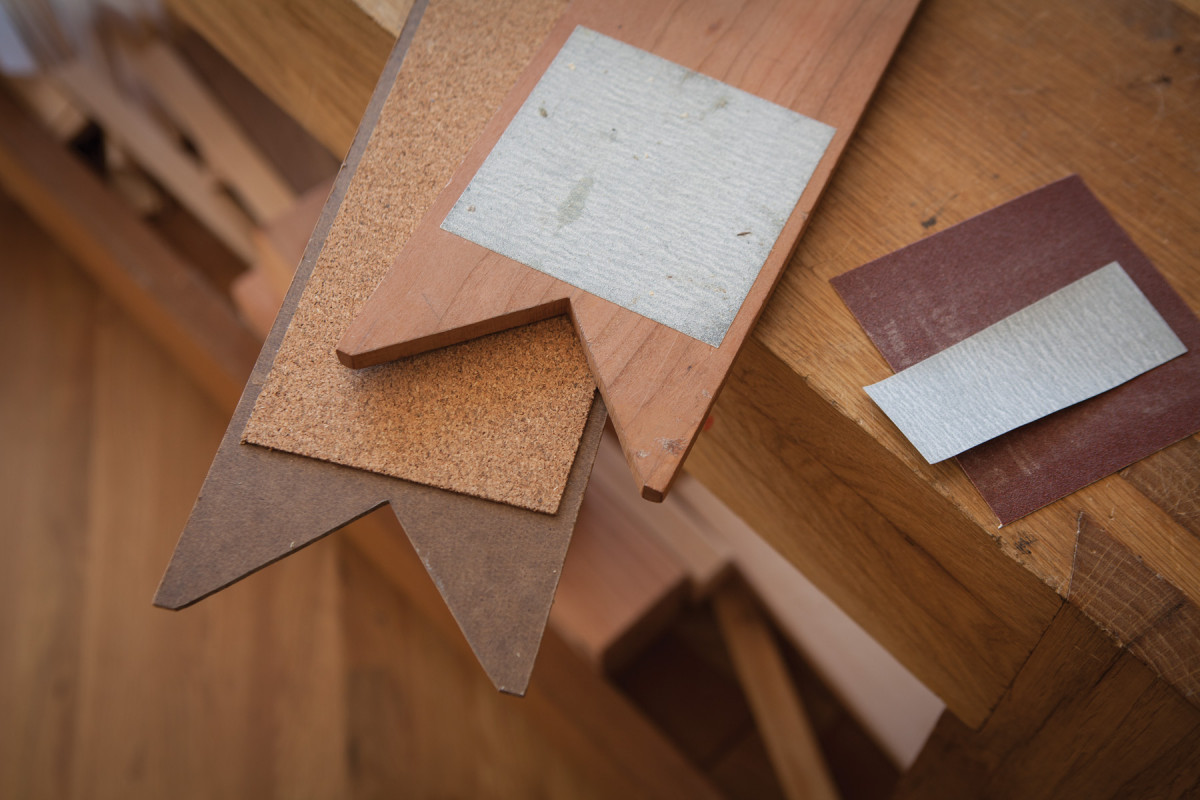
A coarse grip. Sticky-back sandpaper or cork can greatly increase the grip of a doe’s foot on your benchtop.
If your benchtop is slippery for some reason (perhaps you coated it with a film finish), then your doe’s foot appliance might need some extra traction to stay put.
I have found three solutions that don’t involve nails. One: apply sticky-back sandpaper to the underside of your doe’s foot. Any coarse grit will do, such as #80 or #120. Two: apply sticky-back rubberized treads. These usually are applied to the rungs of ladders so the ladder doesn’t get slippery when wet. Three: adhesive-backed cork will work.
These products are available at any decent hardware store.
In Front of the Work
In some old paintings you’ll see the doe’s foot used in front of the work instead of a planing stop. In many ways, I have found the doe’s foot to be more useful than the traditional single-point planing stop. Here’s why.
A single-point stop is great for planing narrow stock; pretty much anything less than 6″ wide is easy to control against the stop. But once you start planing wider stock, things get tricky. You either have to keep moving the stock or skew the plane just right to prevent the wood from spinning on the benchtop.
With a doe’s foot you plane narrow stock by pressing it between the toes. With wider stock you press it against the two toes, forcing the doe’s foot to act as a wide planing stop.
Note that this works when planing boards on their faces or on their edges. The doe’s foot is quite effective for planing narrow boards on their edges.
But what about planing even wider panels, such as an 18″-wide side of a typical chest of drawers? That’s when you move the doe’s foot so it’s behind the work.
Behind the Work
Best foot forward. With the doe’s foot in front of the work it can wedge narrow pieces (above) or support wider work with its tippy- toes (below).
 Some people don’t believe this technique works until they try it. So if you are doubtful, give it a whirl before you dismiss it.
For planing wide panels, push the front of your workpiece against a planing stop (or a doe’s foot). Then place the notch of a doe’s foot against the far corner of the rear of the board. (Look at the photo at the beginning of this article – it’s simpler than my words suggest.) Secure the doe’s foot against the benchtop – I use a holdfast.
Now you can plane the board either with the grain or across the grain. Yup, the doe’s foot is a lifesaver for traversing. Planing across the grain wedges your board against both the planing stop and the doe’s foot like magic.
For me, that was the moment I knew I didn’t need a tail vise. Armed with a couple of doe’s feet and a pair of holdfasts, there’s almost nothing I cannot do to a piece of wood when building furniture.
Here are some supplies and tools we find essential in our everyday work around the shop. We may receive a commission from sales referred by our links; however, we have carefully selected these products for their usefulness and quality.