We may receive a commission when you use our affiliate links. However, this does not impact our recommendations.
You needn’t rely on ready-made patterns to design good-looking gams.
Legs with engaging, flowing three-dimensional curves can add immeasurably to the aesthetic success of such pieces as tables, stands and chests. In this article, using the legs for a small floating-top table as an example, I’ll show a practical method for producing such legs, and how to develop your own designs.
You don’t need the talents of Picasso for this work, but neither is it a paint-by-numbers approach of copying a pre-designed curve laid out on a grid. You will use both your mechanical woodworking skills and your artistic intuition. It is systematic, creative and fun.
Your Wood Has to Be Good
Nifty rifty. Nearly all of the width of the two 8/4 boards here will yield good leg blanks. The 12/4 flatsawn board on top can be ripped into rift sections, as shown by the layout lines.
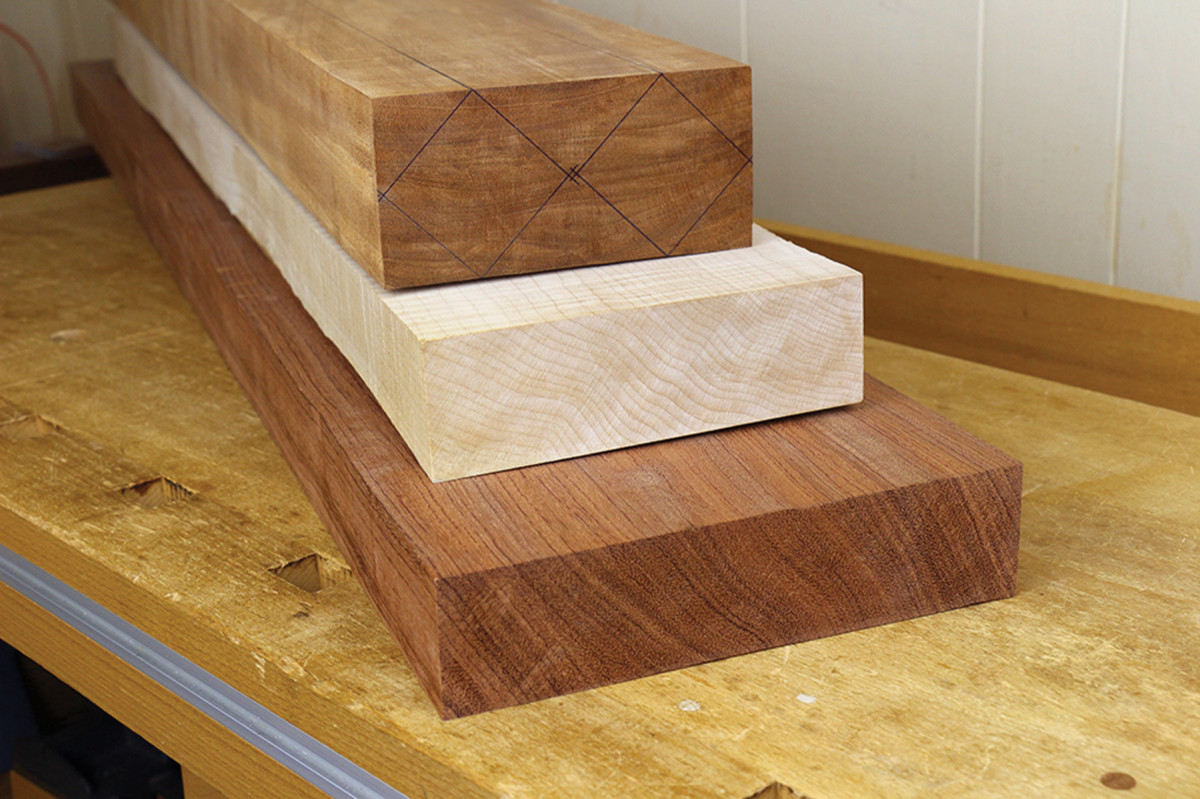
Taking the time for thoughtful wood selection is especially important to produce elegant curved legs for furniture. You want blanks that are straight and milled square in cross section. The best appearance of the finished leg comes from a blank with approximately 45° rift grain. In other words, the annular rings in the end grain should be oriented diagonally across the square cross section of the blank. This produces consistent figure on all four long-grain surfaces.
You can try to choose stock wherein the grain mimics the eventual shape of the leg, but this is difficult to achieve consistently for four legs with three-dimensional concave and convex curves. Rather, straight-grained wood nicely exhibits the designed curves to produce a compelling overall look.
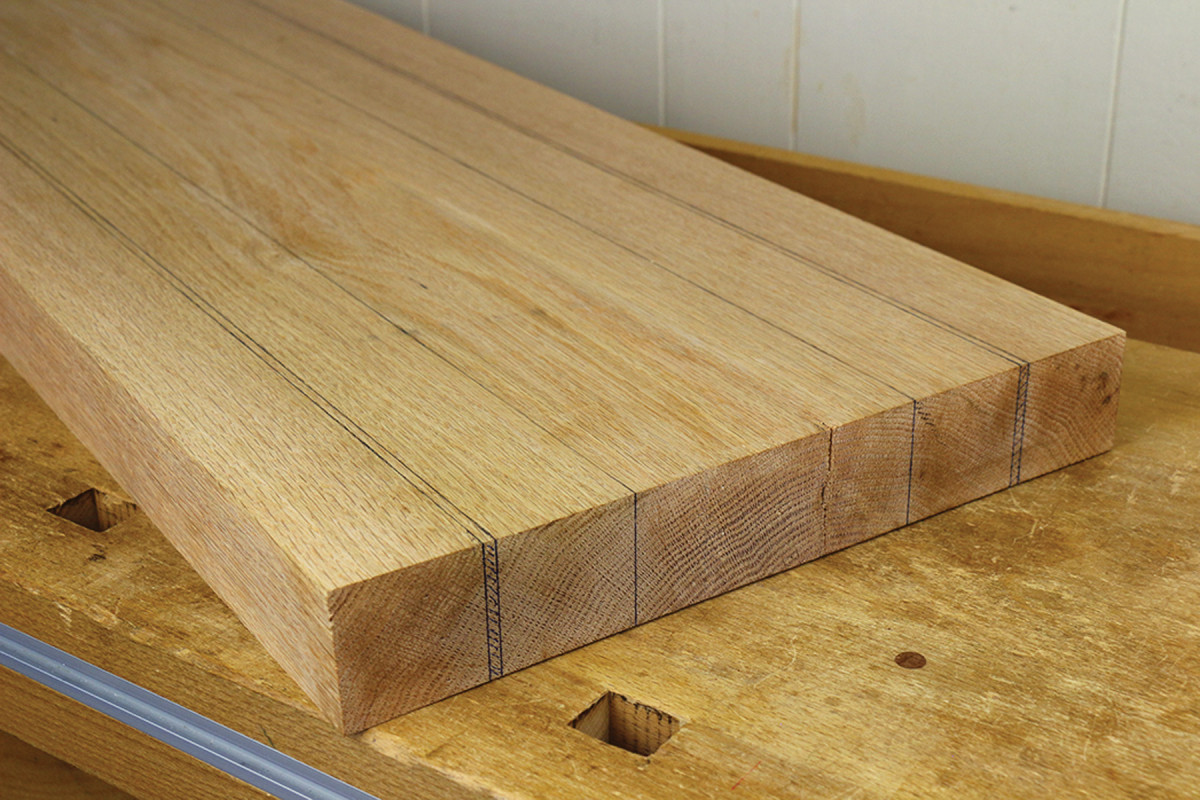
Choose wisely. This wide flat-sawn board contains at least four good leg blanks, shown by the layout lines. Most of the central flat-sawn portion is not suitable.
A thick board with entirely rift-sawn figure is a fortunate find, but a more readily available wide flat-sawn board will usually contain plenty of rift grain toward the edges. Sometimes, a very thick board exhibiting only flat-sawn figure can yield the desired figure by ripping it with angled cuts.
End-grain choices. These three leg blanks, from left to right, produced the corresponding legs shown at right. The dot on each blank indicates the inside corner. I think the blank on the far right exhibits the most pleasing grain.
Remember, too, that you needn’t necessarily accept the rough-sawn edge of the board. You might want to rip a new edge that follows the grain better than did the original edge.
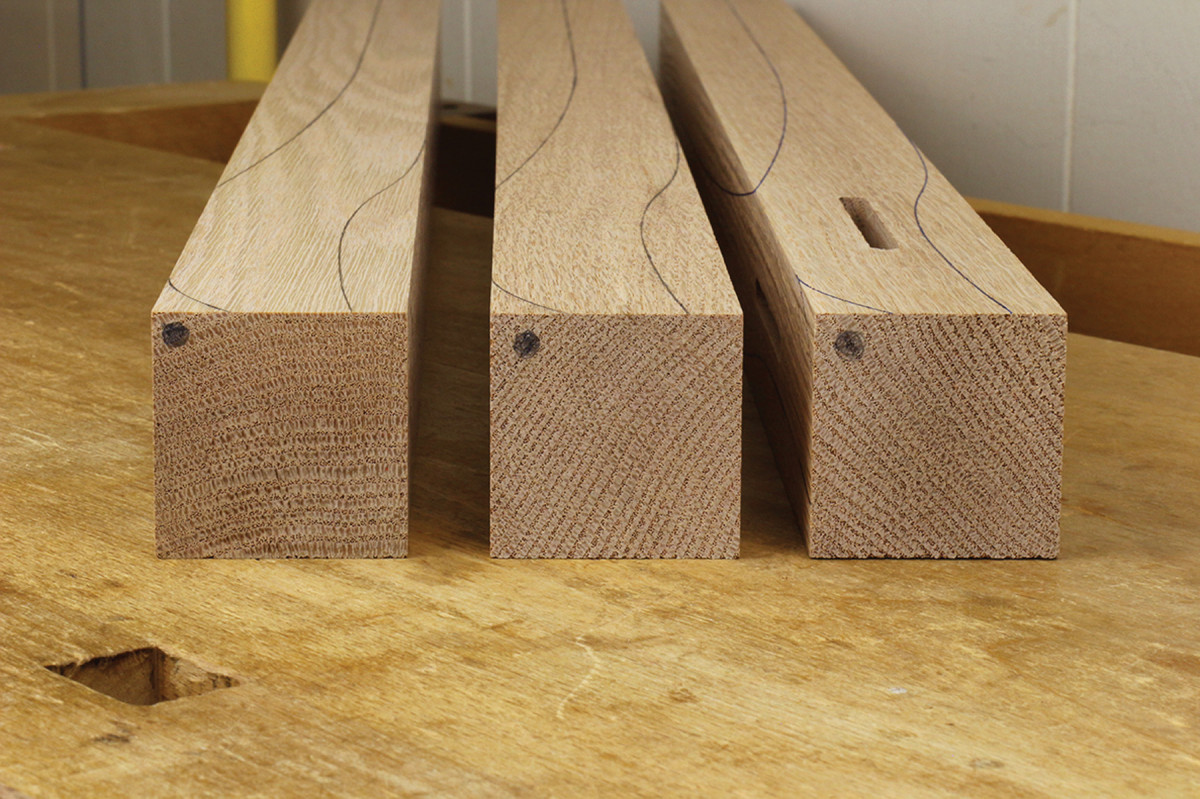
There are two basic possibilities for orienting a squared rift-sawn blank. A pleasing finished leg results when the leg’s annular rings run from the inner corner to the outer corner. When the rings run at 90° to this orientation, the finished appearance is less attractive, at least to my eye.
When breaking down a thick board with initial crosscuts, rips and planing, I take the precaution of checking for a moisture content difference across its thickness. If readings with a pin moisture meter near the surface and at the core differ significantly, avoid surprise distortions by letting the wood equilibrate further before milling it to the final dimensions.
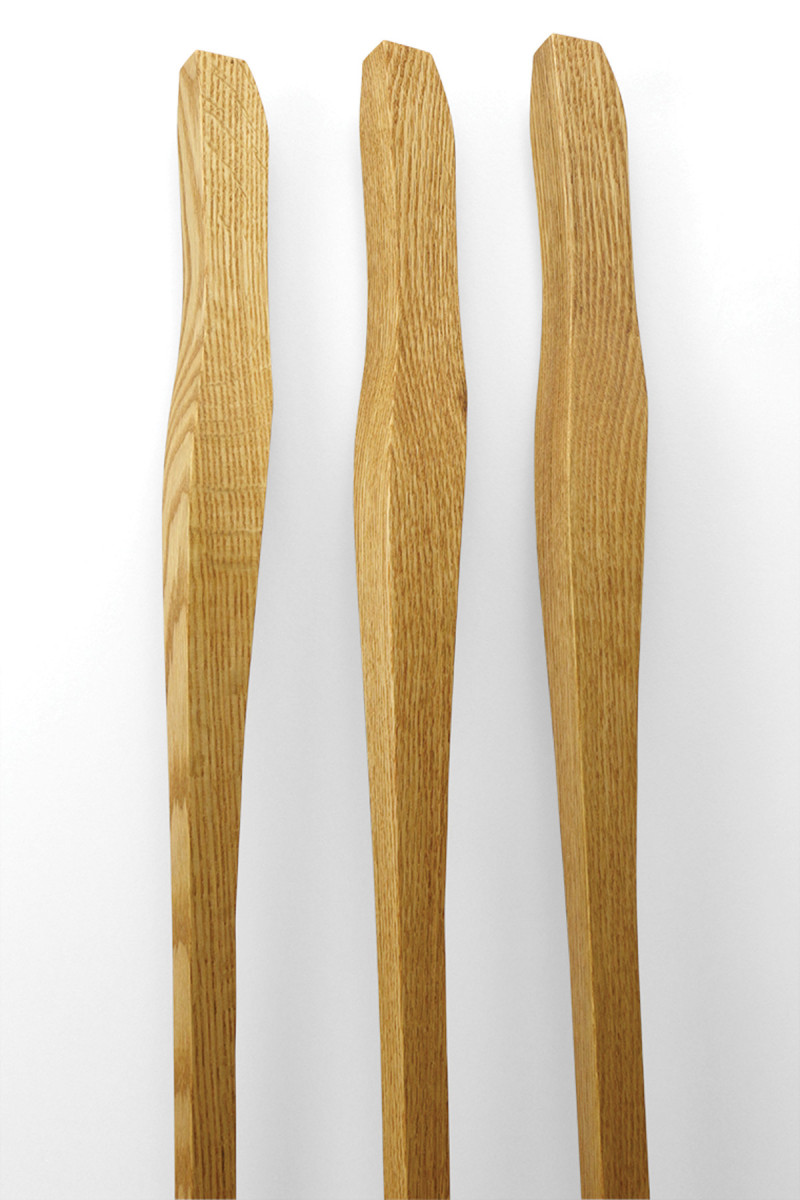
And the results are . . . The leg on the right looks best; I wouldn’t use the other two.
The two inner faces of the blank are the reference faces. Mark them prominently. Before any shaping is done, cut the mortise on these faces. To keep everything oriented, I draw a big dot on the top and bottom end grain at the inner (reference) corner of each leg. Once I have my four legs, I draw a cabinetmaker’s triangle over the end grain of the four legs grouped together as they will be oriented in the table.
Go out of your way to find excellent wood and dissect the boards carefully. This is a major factor in separating your work from run-of-the-mill work.
Drawing to Template
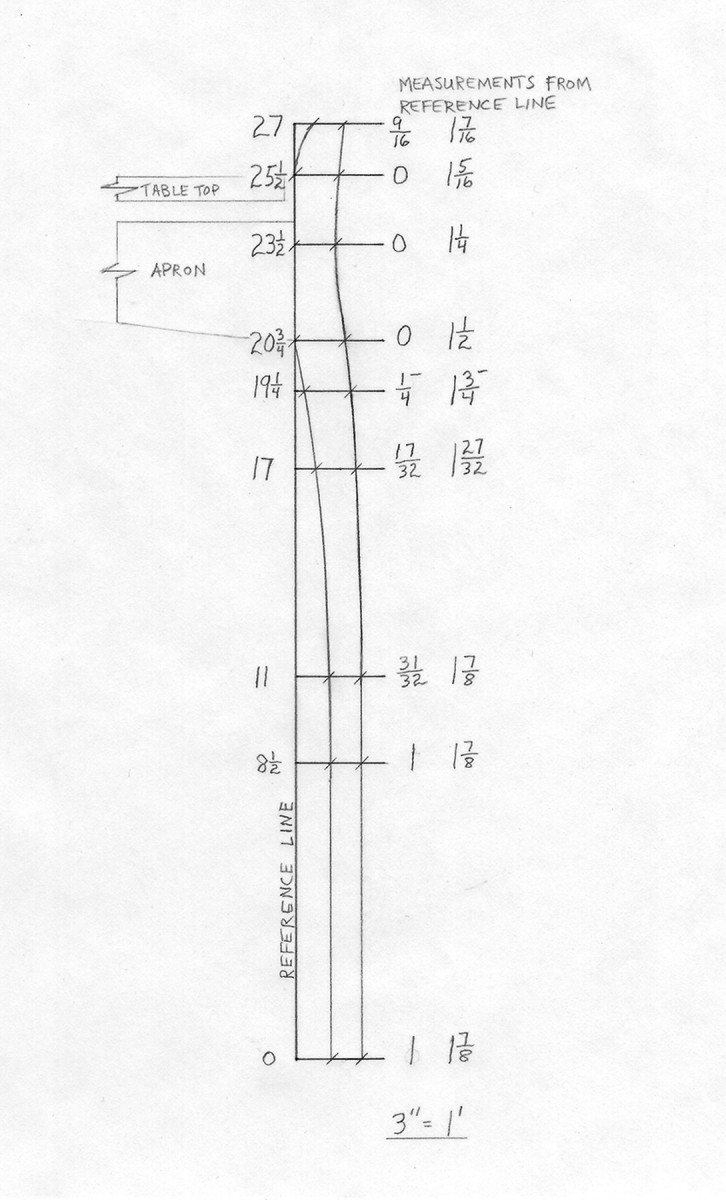
Find your keys. Measure the distance of the leg outline from the reference line at several key points. The distance from the bottom of the leg of each measurement is noted on the left.
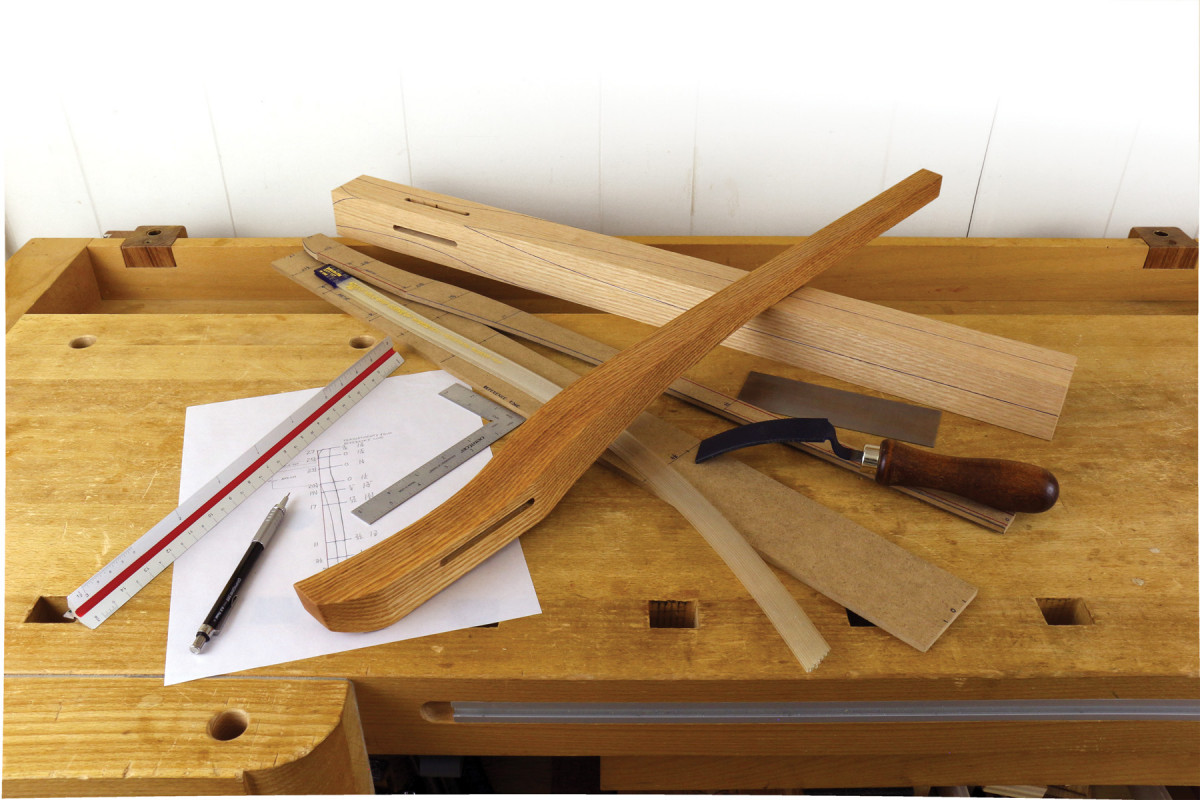
After I’ve selected and milled the blanks, I work from a scale drawing and transfer several key dimensions to produce a full-size template. I’ll use that template to transfer the leg outline onto the wood blanks. (Below, where it will make more sense, I explain how to arrive at the scale drawing itself.)
On the drawing, extend the inner straight edge of the leg, corresponding to where the mortises will be, to the full length of the leg. Using this line as a reference, measure the lines of the leg at several key points: where straight sections begin and end; the peaks and troughs of curves; where a curve reverses (concave/convex); any particularly steep sections of curves; and where the aprons will meet the leg. Note the distance from the bottom of the leg of each of the key measurements.
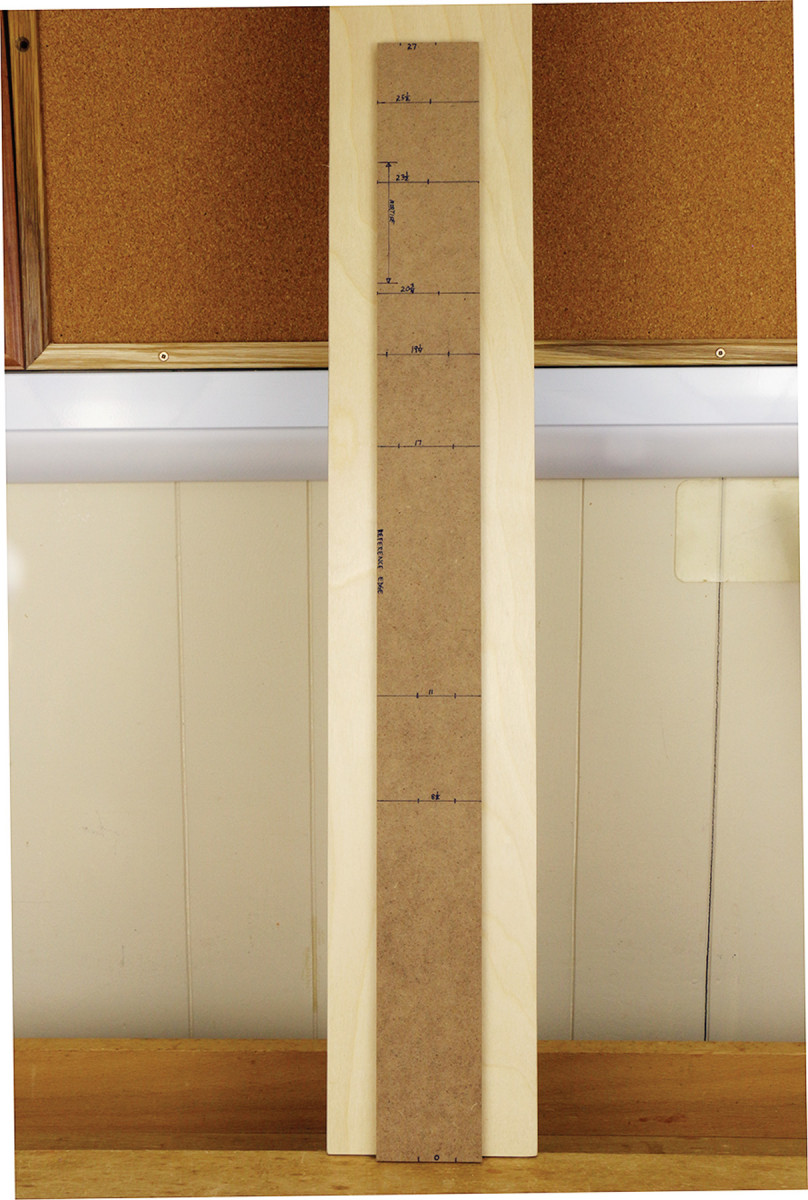
Keyed up. I’ve transferred the key measurements to a piece of MDF.
To make the template, take a narrow piece of 1⁄4“-thick MDF with a straight edge, and cut it to the actual length of the leg. Using the straight edge as the reference, transfer the key measurements obtained from the drawing. Use a straightedge to connect points for any straight sections of the leg. Then I use a marvelous tool – the Acu-Arc flexible curve – to connect the other points to produce the curves.
It is usually easiest to draw in sections. Bend the Acu-Arc and smooth the curve with your fingers. Then hold the formed curve firmly with your spread fingers behind where the other hand will draw the line. You might need to use tape as a third hand on distal portions of the Acu-Arc.
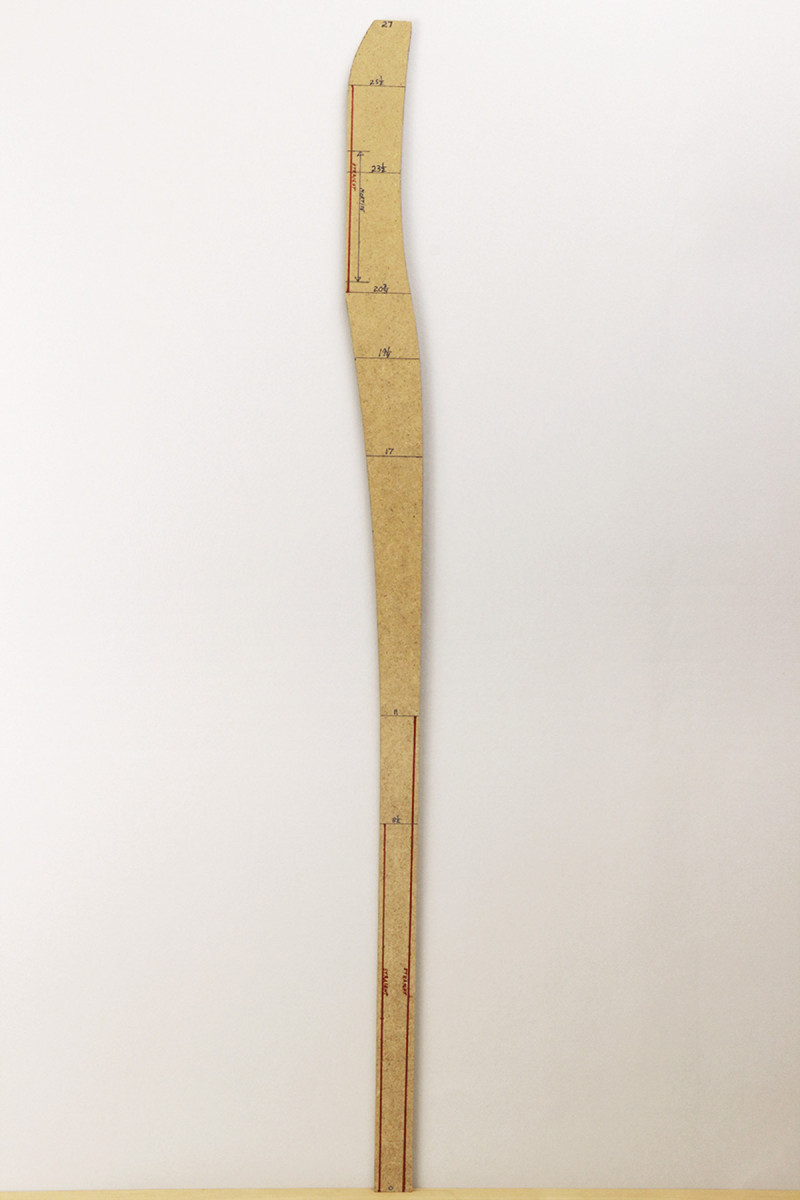
The completed template (the red lines are reminders of the straight sections on my leg design).
Create the template by first sawing close to the layout lines. Next, handplane any straight sections, working to the layout line. Then smooth the curves with rasps, and finish with sandpaper held against moderately firm, curved blocks. Keep the edges of the template square because it will be used on both faces.
For the final template fairing, you should work to the layout lines but ultimately must trust your eye. The key reference measurements were your initial guide, then the layout lines took over – but finish up by judging what simply looks right. A remarkably sensitive way to detect undesired bumps and hollows in a curve is to sight down its length.
Template to Wood to Saw

It’s only fair. The Acu-Arc, made of interlocking, flexible plastic splines, bends into fair curves – no lumps!
Align the reference edge of the template to the inner (reference) corner of the wood blank and trace the leg outline onto one reference face. Do the same for the adjacent reference face. Note that the reference faces are mortised before sawing out the leg shape (you should cut the joinery when the workpiece is square).
Now saw out the leg at a band saw or, for hand-tool enthusiasts, with a frame saw. The 1⁄2” 3 tpi hook-tooth blade that I usually keep on my band saw manages the gradual curves well.
If it looks good… Sight along the curve to look for lumps and hollows.
Saw as close as you reliably can to the layout lines. Note that the lines themselves, as drawn from the template, are actually in waste wood, but preserve the full width of them for later steps. Use good task lighting and make sure each of your eyes has an unobstructed line of sight to the cutting action so you are seeing binocularly. Balance and stabilize your body; do not overreach. Concentrate on feeding the line to the blade but always be aware of keeping your hands well clear of the blade.
After you’ve sawn the outline on one face, reattach the waste pieces in their original alignment with small pieces of double-sided tape placed within the “keeper” wood. This re-establishes the layout lines on the second face to be sawn, and re-establishes support on the opposite face.
After the second round of sawing, remove all the waste pieces, and – a happy moment in woodworking – the leg emerges! Save some of the larger offcuts. With their sawn faces sanded smooth, they may later serve as supports for clamping the leg to the workbench and as clamp pads for gluing up.
Refine Curves & Surfaces
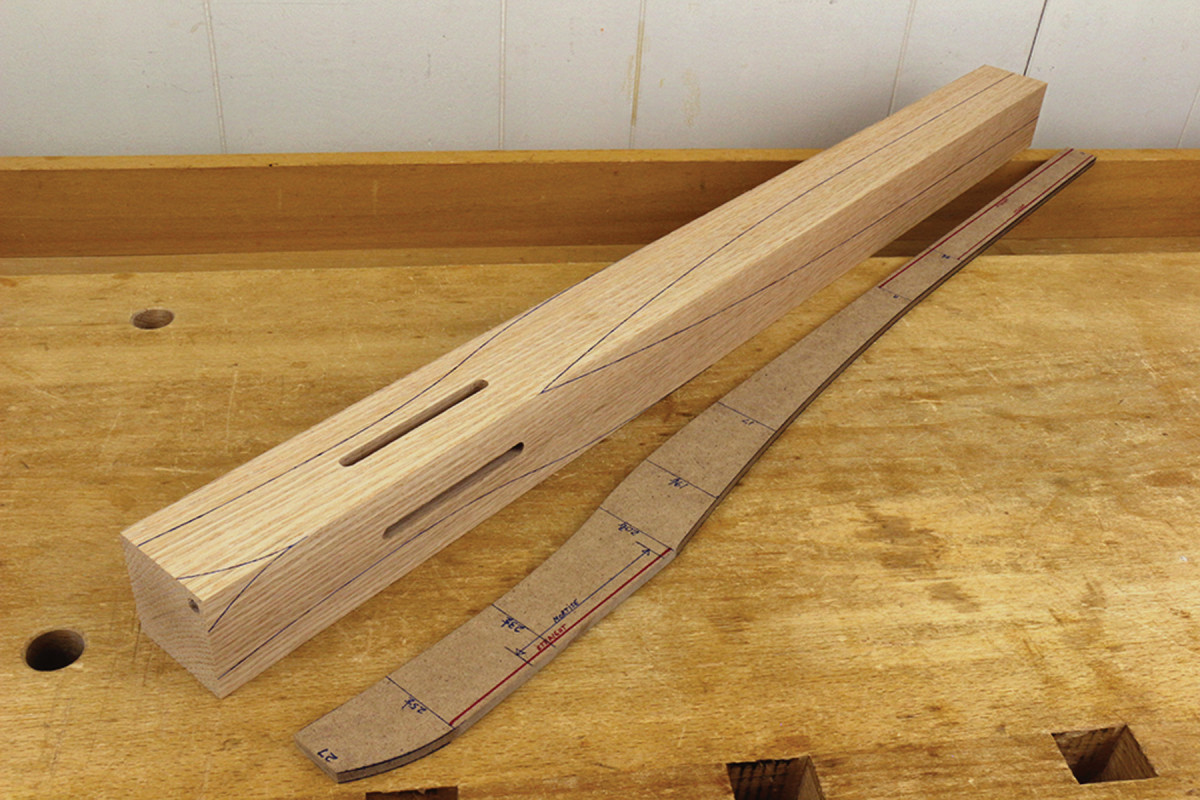
Make your mark. Using the template, mark the leg outline onto the adjacent reference faces of the mortised wood blank.
It’s important to appreciate that shaping and smoothing are two distinct processes. Shaping the curves should be completed before smoothing the surfaces, just as a panel is planed flat before it is finish planed smooth.
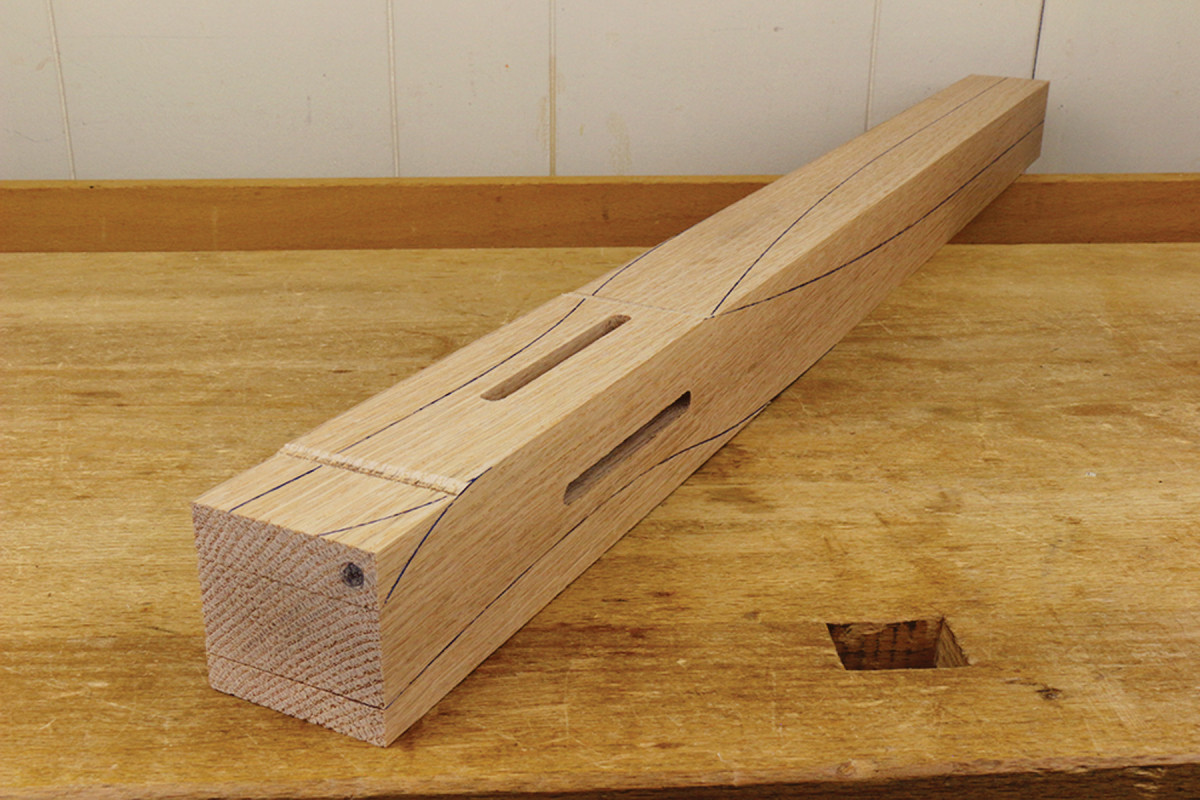
Together again. After sawing the first outline, reconstitute the blank using double-sided tape.
Start by working to the layout lines. Shape the curves using tools that tend to bridge small hollows and mow down bumps. Convex curves are easy to work with flat rasps, float files or a block plane, but concave curves require more specialized tools.
My favorite tools for gradual concave curves are hand-cut curved ironing rasps, in medium and fine grains (available from Auriou and Liogier). You can also use the convex side of a half-round rasp held at a skew, but I suggest you then proceed to the ironing rasps, which will promote truer curves.
Spokeshaves, a compass plane and fixed curved-sole planes are also effective, though can be troublesome on highly figured wood. The inexpensive Surform shaver is suitable for coarse work if your saw cuts are far off.
For smoothing, the card scraper is my primary tool. I also make dedicated curved sanding blocks from wood, add cork facing and apply PSA sandpaper.
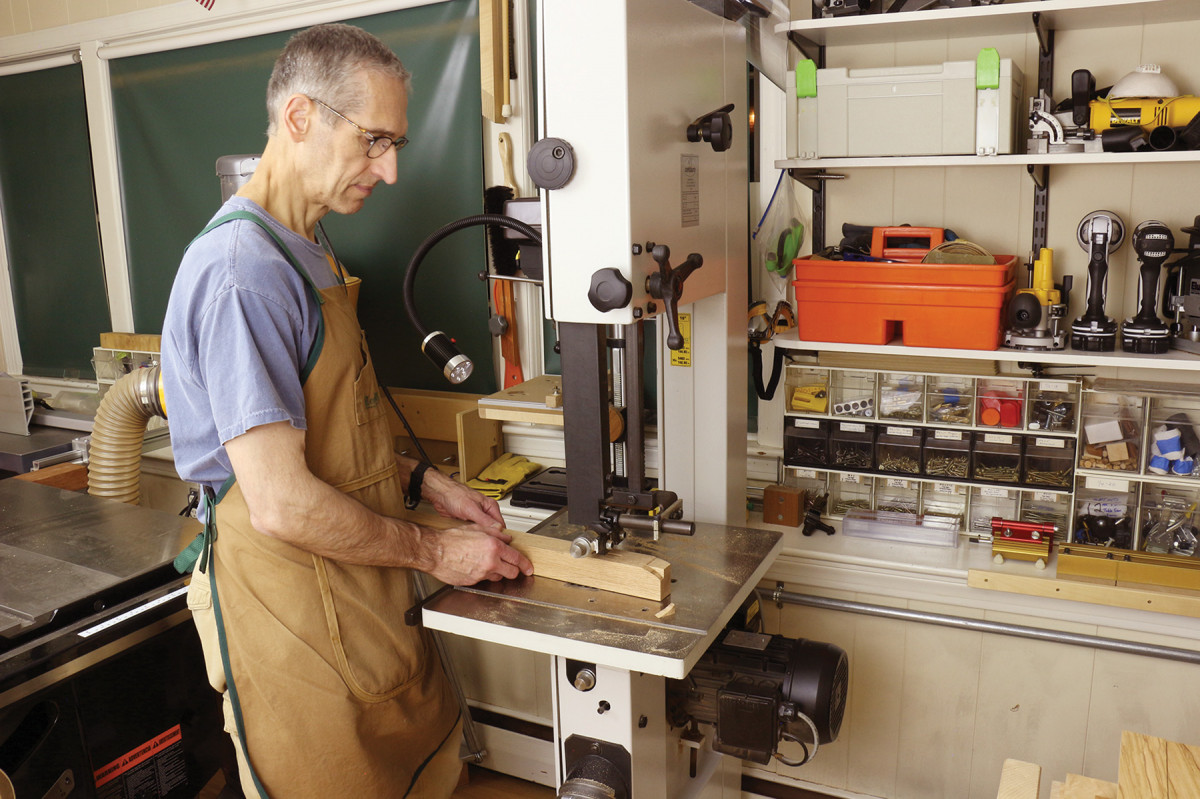
Focus. For accurate cuts, stabilize your body and mind as you saw (and make sure you have proper task lighting).
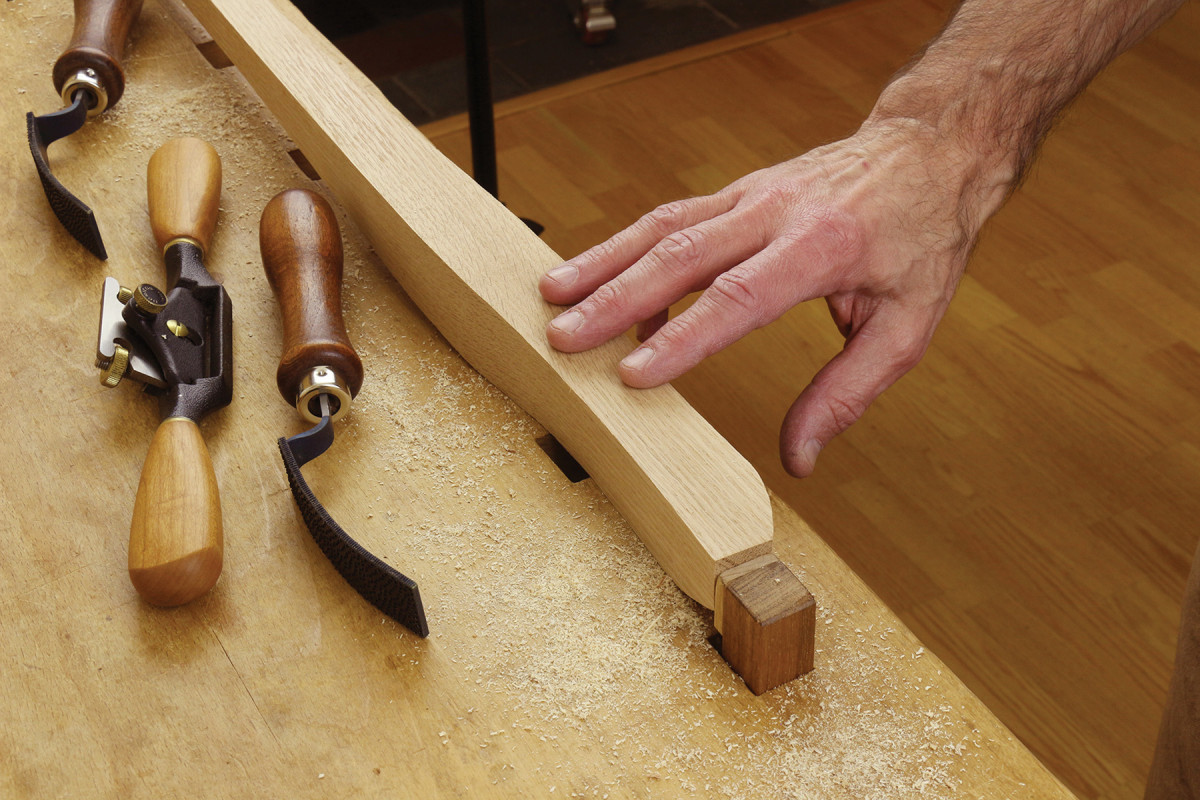
Straight portions of the leg can be trued with regular flat-soled planes, and smoothed by planing, scraping and sanding.
When shaping the curves, once you have worked into the layout lines, forget about them and finish by working intuitively. Sighting along a curve is effective, though it is harder to judge a curve this way in a thick leg than in a thin template. It is also inconvenient to do this frequently because you must either bend awkwardly or release the leg from the workbench and hold it to your eye. Therefore, feel the curve developing under the tool (especially a rasp) and learn to feel a true curve with your fingers.
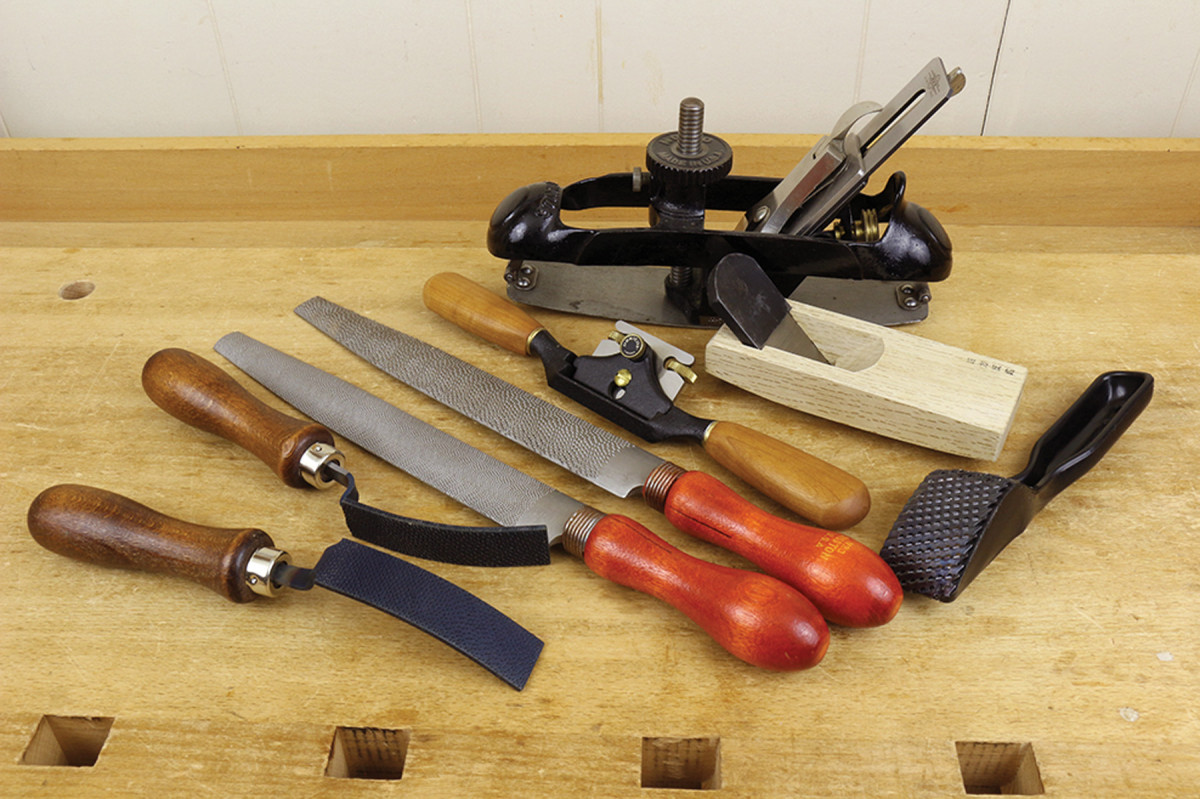
Get in shape first. There are many ways to refine curves. My favorites, ironing rasps, are shown in the left corner. To the right of those are two rasps, a spokeshave, a curved-sole plane and a compass plane. In front at right is a Surform shaver.
Try this: Place your middle three fingers on the flat surface of your workbench, and gently slide them back and forth over a few inches while keeping your index and ring fingers moderately firm letting the middle finger be passive. Feel the flatness. Now immediately transfer your hand to a curve in the leg and similarly feel your fingers riding like a sleigh over the hills. With a bit of practice, you will soon trust your hand and be able to work at a good pace.

Then smooth. After the curves are shaped, I use scrapers extensively, as well as sandpaper attached to shop-made curved sanding blocks.
I hardly ever use an oscillating spindle sander or other powered sander for working the legs. The handwork is more pleasant, controlled and progresses quickly enough.
Designing
So, how do you arrive at that scale drawing from which you started building?
As with designing any piece, gather impressions from anywhere – pieces you see in books, online in an image search, galleries and so forth. Sketch your ideas. Two-dimensional sketches are good enough. Then, take a chance with something that seems like what you want and start by making at least one mock-up.
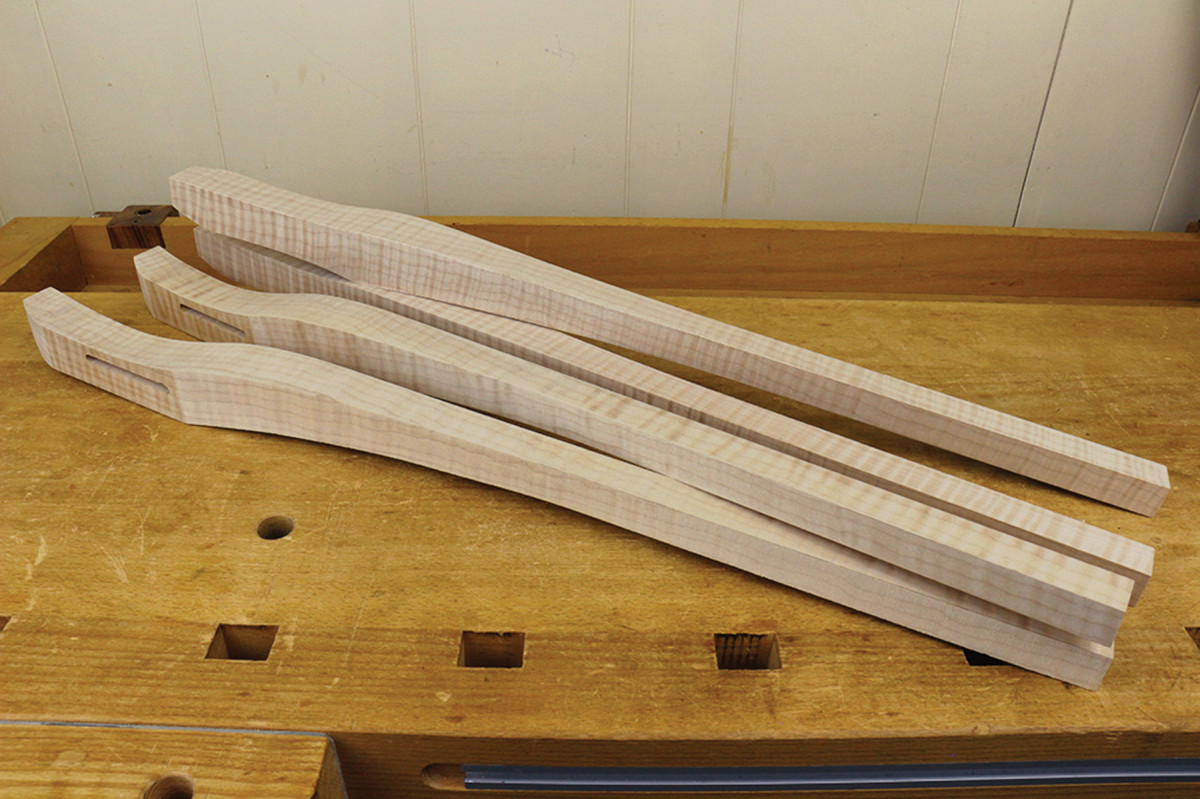
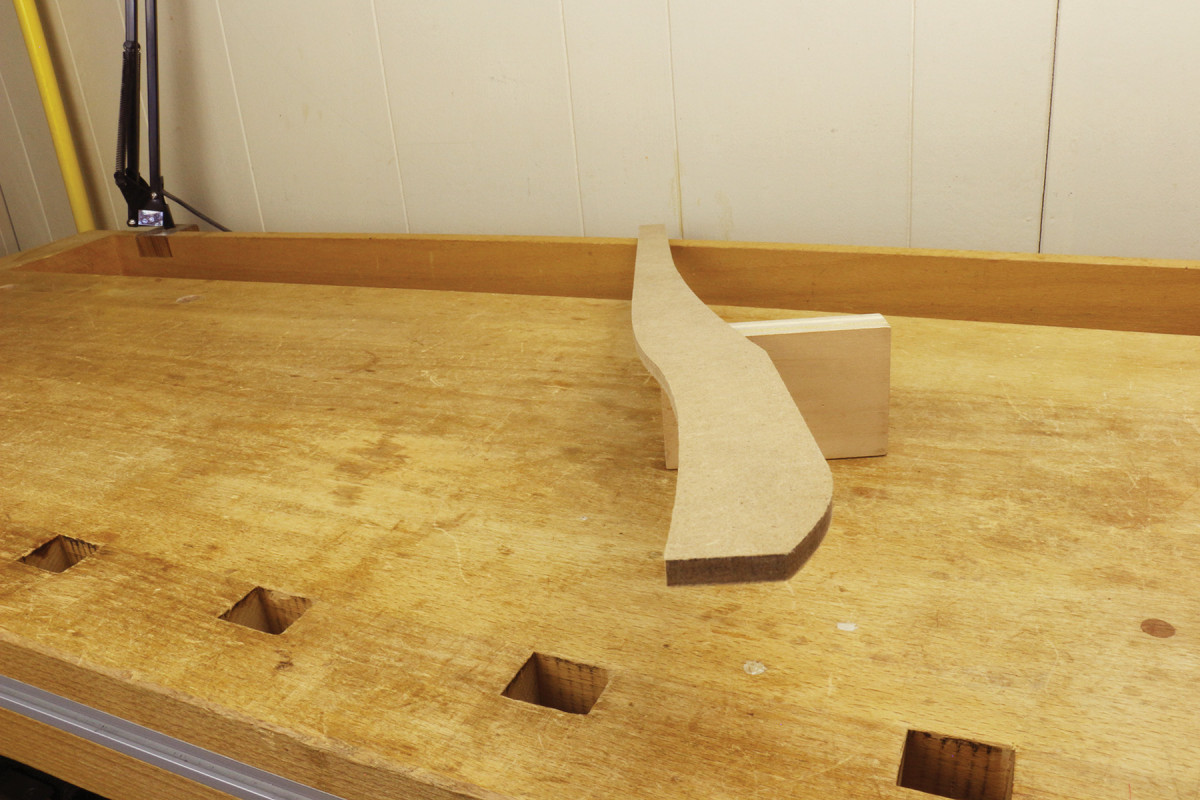
Project to come. I’ll use these four curly maple legs, developed as described in this article, for a floating-top table.
Draw lines directly on a wood blank – I like poplar for this – based on the sketch. Saw out the legs, then use a rough rasp to make alterations. Junk the piece and try again if necessary. This should be easygoing, playful work.
When you have a mock-up that looks good, take measurements at several key points, similar to as described earlier when making a template from a scale drawing. Use the measurements to make a scale drawing of a leg. Make small final alterations if needed.
Trust your feelings. Your fingers know when the curve is right.
Ironically, you have to make legs – mock-up legs – to develop the drawing that will define the actual finished leg. I feel strongly that to design well, one must assess a real, three-dimensional leg: Sense its bulk, observe the curves from different angles and appreciate its visual impact. Paper or CAD drawings do not substitute for a mock-up.
If you are dithering over finalizing the design, remember that what looks right to you is right; you will know when you have arrived. When I am designing a piece, once I have a good leg design, the remainder of the piece seems to fall into place.
Video:” See how to lay out and cut classic cabriole legs in this free video.
Here are some supplies and tools we find essential in our everyday work around the shop. We may receive a commission from sales referred by our links; however, we have carefully selected these products for their usefulness and quality.