We may receive a commission when you use our affiliate links. However, this does not impact our recommendations.
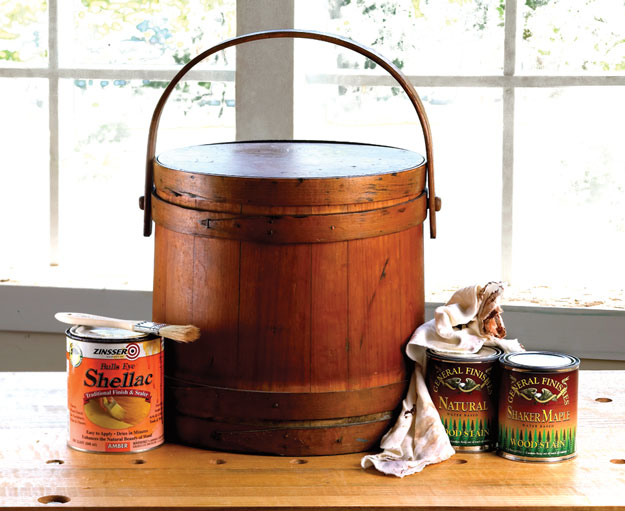
The most sought-after pine finish is a one-day, three-step process. Finding a sample to copy (such as this antique firkin) is a good strategy.
We experimented to find the perfect recipe for this most-requested finish for pine – and it’s as easy as pie.
by Glen D. Huey
from the Autumn 2007 issue of Woodworking Magazine
Pumpkin pine is a developed patina that glows a warm orangy color similar to – you guessed it – a pumpkin.
Ask woodworkers what finish they want to replicate when using white pine as their primary wood in a project, and you’re likely to hear two words: pumpkin pine.
A real pumpkin pine finish has many years of age. Begin with heartwood from Eastern white pine then allow a century of wax, grime and exposure to daylight, and you’ll start to see a patina that displays a golden-orange hue.
Old Growth v. New Growth
Back in the day, Eastern white pine or yellow pine was sought after by woodworkers. It was easy to work, available in very wide boards, had tight growth rings and developed a rich warm patina over time. Who wouldn’t want to use this type of lumber to build furniture – especially with the abundance of white pine in New England and yellow pine in the South.
Today, we don’t often have the opportunity to work with old-growth material. It is salvaged occasionally from sunken logs and old buildings that sacrifice their beams to be resawn into lumber. But for the most part, we use new-growth lumber for woodworking.
Preparing to Finish
Most pine bought today is dimensioned lumber from retail stores. This S4S lumber is sent through sharp knives on jointers and planers at a high feed rate. As a result, milling marks are evident. These marks won’t be completely erased unless you start the sanding process with #120-grit sandpaper. With pine, it’s best to sand to #220 grit, which will help reduce its tendency to blotch. Because pine is a softwood, the progression of each sanding step is quick. It’s also necessary to step through each grit because it becomes evident if grits are skipped when stain is applied. Scratches stand out after applying color.
Three Steps to Pumpkin
With the enlisted aid of my local Rockler salesperson – where the products with which to experiment are close at hand – I began mixing ingredients and ideas to arrive at the pumpkin pine finish.
One of the biggest roadblocks in using pine is how the finish blotches because of variations in grain density. To combat blotching, you could add a wash coat of shellac (shellac thinned with alcohol). If the wash coat is too heavy, new problems are created; the stain won’t penetrate the surface. If the wash coat is too thin, the end result after staining would still be blotchy.
Finding a reliable way to control the blotching caused by the stain is the task. For that, we used a water-base clear stain.
The Pumpkin Pine Formula
The pumpkin pine finishing process begins with a coat of natural stain (no pigment present), then a second layer of pigmented stain that adds color, then two coats of shellac as a topcoat. It’s easy to complete the process in one day.
The formula begins with a coat of General Finishes wood stain in Natural (generalfinishes.com). Don’t be surprised when you open the can. The stain starts as a paste-like goo but dries clear. This product has enough resin in it to partially seal the pine against color penetration, like a wood conditioner. And because it is water-based, it dries faster than oil-based conditioners. The sealing action of this product allows some coloring near the surface of the wood, but it prevents the color from penetrating deeply and blotching.
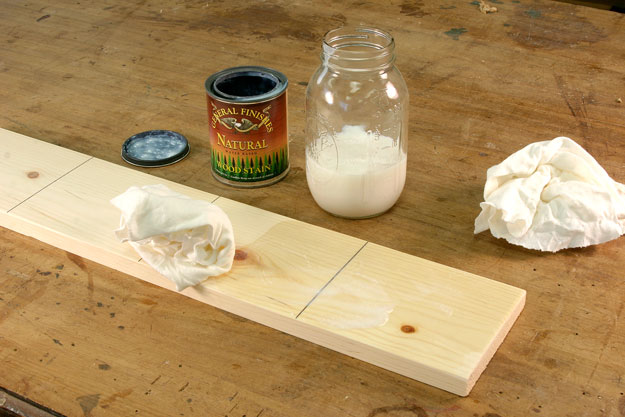
Apply the “Natural” stain with a cotton cloth. Pad it into the pine and wipe away any excess. The stain dries clear.
Simply apply a coat onto the surface of the project with a clean cloth then immediately wipe away the excess stain as you rub the goo into the wood. Remove as much as possible when wiping clean, then allow the piece to dry. Drying takes from two to four hours under ideal conditions. And if conditions aren’t ideal, small projects can be forced dry with a hair dryer or heat gun.
The next layer of stain is also a pasty goo, but with color added. We liked the look of General Finishes Shaker Maple water-based stain. Brush on a coat and rub the stain into the wood by twisting the brush bristles. The twisting action pushes the stain into any small scratches to create a uniform color layer.
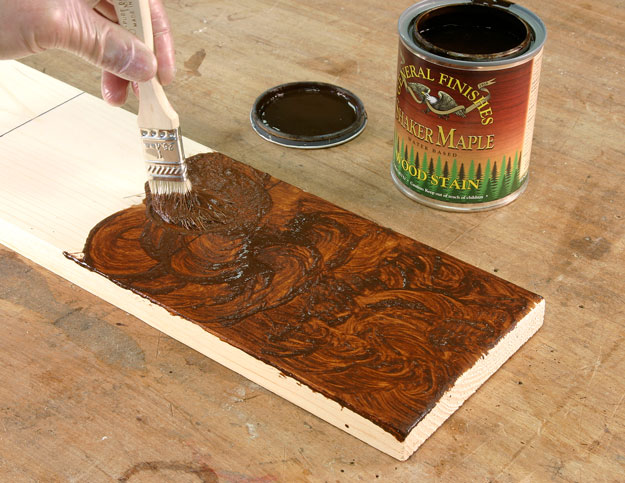
Apply the pigmented stain making sure that it’s worked into the surface. On small pieces, swirling as you apply the stain works best.
Let the pigmented stain sit on the surface for about five minutes then wipe away any excess. Don’t be tentative. This isn’t like a glaze where you wipe selectively to create faux effects. And we’re not trying to even out any mis-matched coloration. Wipe as much stain off as possible and allow the stain to dry for two to four hours.
The Shaker Maple stain adds two important colors. First, it develops the brown shade necessary to present the aged look. Second, it casts a reddish hue onto the piece.
Why do we need the reddish hue? Remember those school days when you studied the primary colors? Yellow and red make orange – or pumpkin, in our case.
The amber shellac delivers the yellow.
Shellac: Is it the Right Stuff?
Shellac isn’t the most durable topcoat, and you should always consider how your project will be used before choosing a topcoat. If you’re finishing a tabletop or an area that will experience a lot of wear, a tougher finish is probably called for. Add a more durable topcoat after the pumpkin finish is achieved – but test it first to make sure that it doesn’t affect the pumpkin pine color.
Before applying the first coat of shellac, use a maroon non-woven abrasive pad to knock down any fibers that raised after applying the first coat of water-based stain.
Zinsser’s amber shellac, ready to use right out of the can, is the topcoat. (I said it was easy.) Check the date of manufacture while at the store. Outdated shellac – it’s definitely good for a year after the date printed on the can – shouldn’t be used because it won’t dry.
You can brush the shellac onto the piece or apply it with a cotton rag. With either option watch for runs or sags in the finish. A run or sag is actually another layer that increases the color build. Because shellac adds color with each layer, any imperfections such as those will show.
Lightly sand the surface with #400-grit sandpaper once the shellac is dry; don’t sand through the earlier finish.
The next coat of shellac delivered the exact look for our pumpkin pine finish and the surface was thick enough to level to a smooth finish.
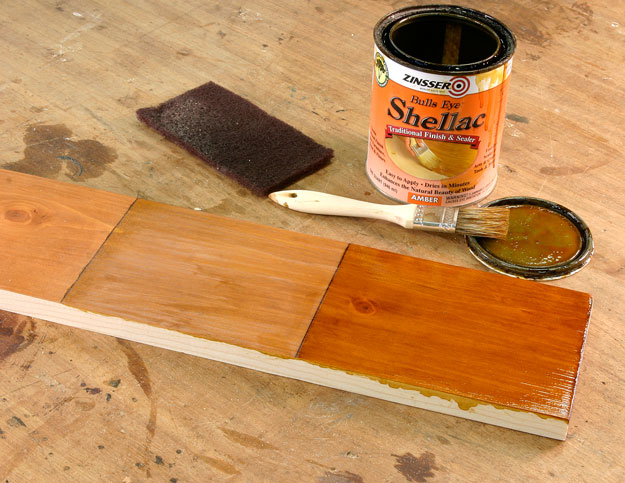
The pumpkin pine color becomes apparent after the second coat of shellac is added. Scuff the surface between shellac coats. If you need an additional coat to build the surface, use a clear or super blonde shellac. Notice the even tone of the stain. This is a result of the first layer of unpigmented stain.
You might need a third layer to build the shellac and ensure a smooth finish. If this is so, use a clear shellac because it adds to the thickness without affecting the color. Apply a third coat directly over the previous coats and remember to sand lightly in between.
Once both the color and the thickness of the finish are reached, sand the piece again with #400-grit sandpaper and apply a good coat of paste wax.
Three readily available products with a one-day stretch in the shop, and you’ll have a finish that comes as close to aged pumpkin pine as anything I’ve tried or seen. PWM
Get all 16 issue of Woodworking Magazine
Here are some supplies and tools we find essential in our everyday work around the shop. We may receive a commission from sales referred by our links; however, we have carefully selected these products for their usefulness and quality.