


We may receive a commission when you use our affiliate links. However, this does not impact our recommendations.
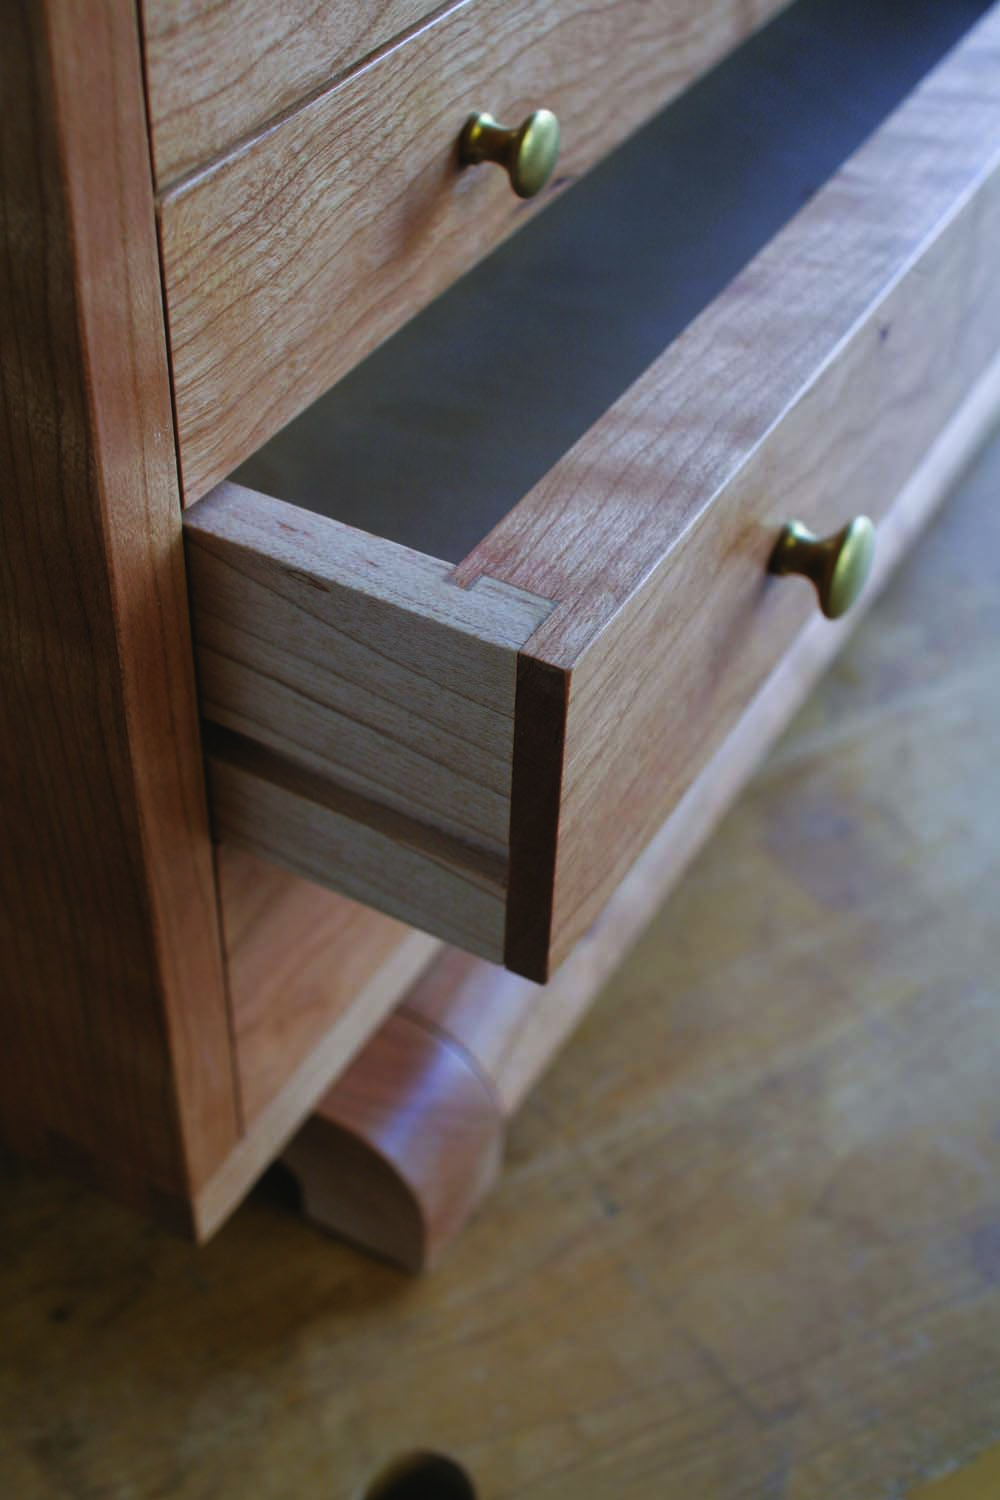
When you slide open a small drawer that fits nice and tight, it’s a pleasure to see well-crafted joints. Small, handcut dovetails answer well, but sawing and chopping them requires a lot of skill and practice. Here’s a joint that’s far easier to make: a half-blind tongue and rabbet. It’s all done on the tablesaw.
This joint is perfect if you’re making a set of drawers of different widths, because width doesn’t matter. You can cut all the sides and all the fronts at the same time.
This joint can easily be adapted for material of any thickness. I’ll show you how to make it for drawers with 3/8″ sides and 3/4″ fronts, the dimensions I used in a small tool chest.

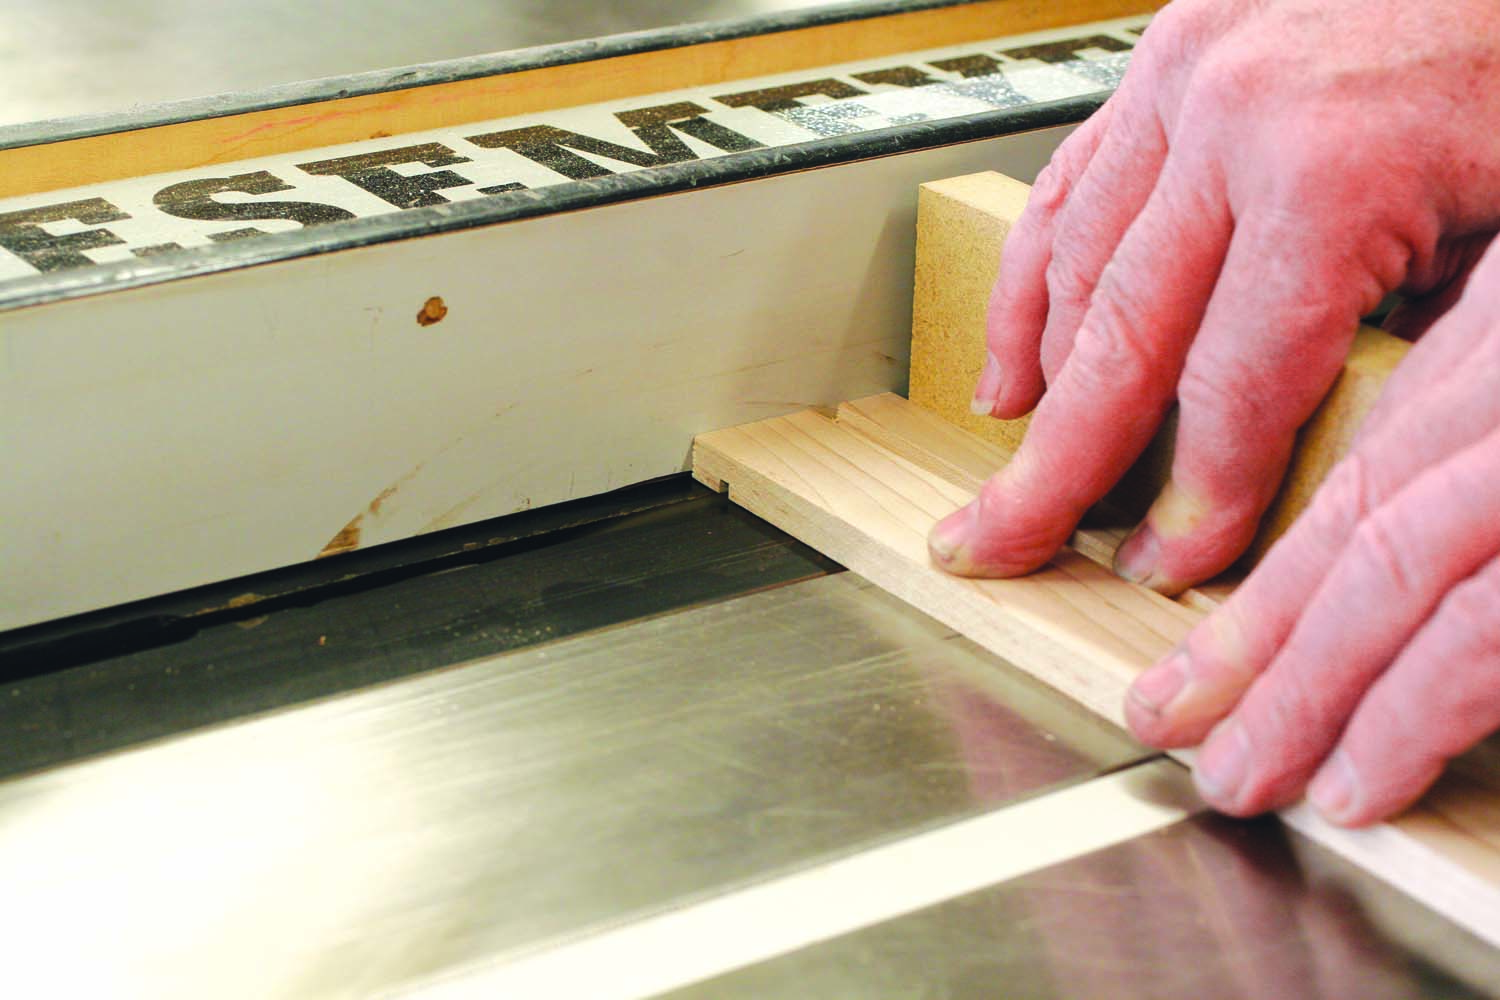
Photo 1. Saw a 1/8″ wide dado across the drawer side, using a standard-kerf crosscut blade.
Start by making a dado cut across the drawer sides (Photo 1). The dado is only 1/8″ wide, so the easiest way to make it is to use a standard-kerf crosscut blade. Set the distance from the blade to the fence at precisely 3/8″.
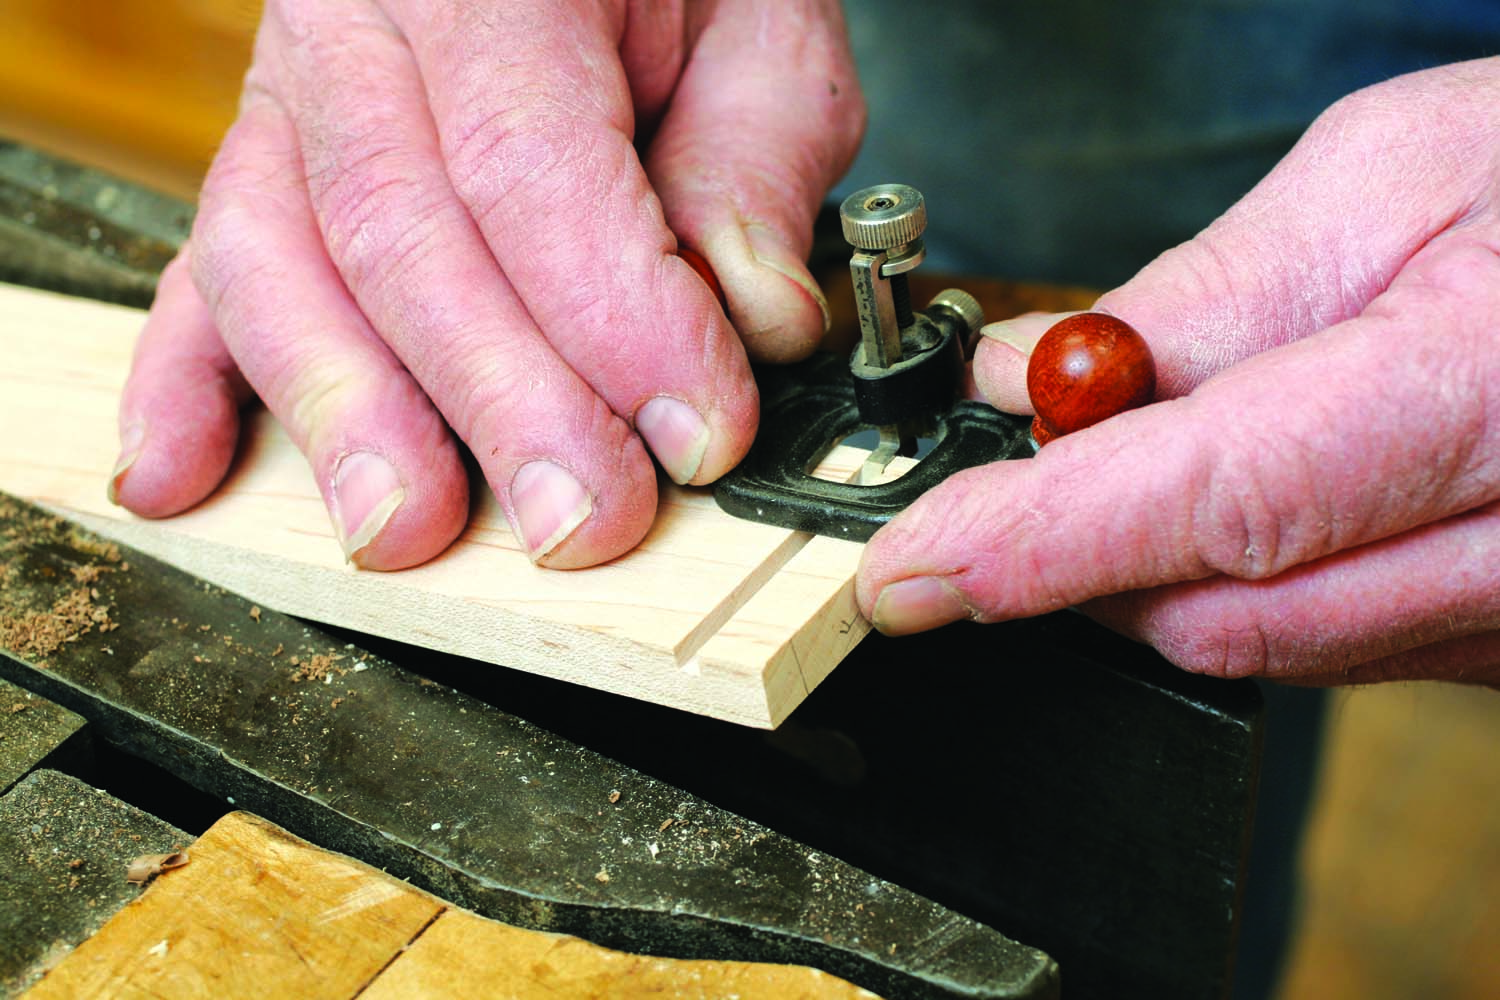
Photo 2. Use a small router to give the dado a flat bottom. This is an optional step.
The cut made by this blade won’t leave a flat bottom, of course, so if you want a joint without any tiny gaps in it you’ll want to plane the dado with a small router (Photo 2).
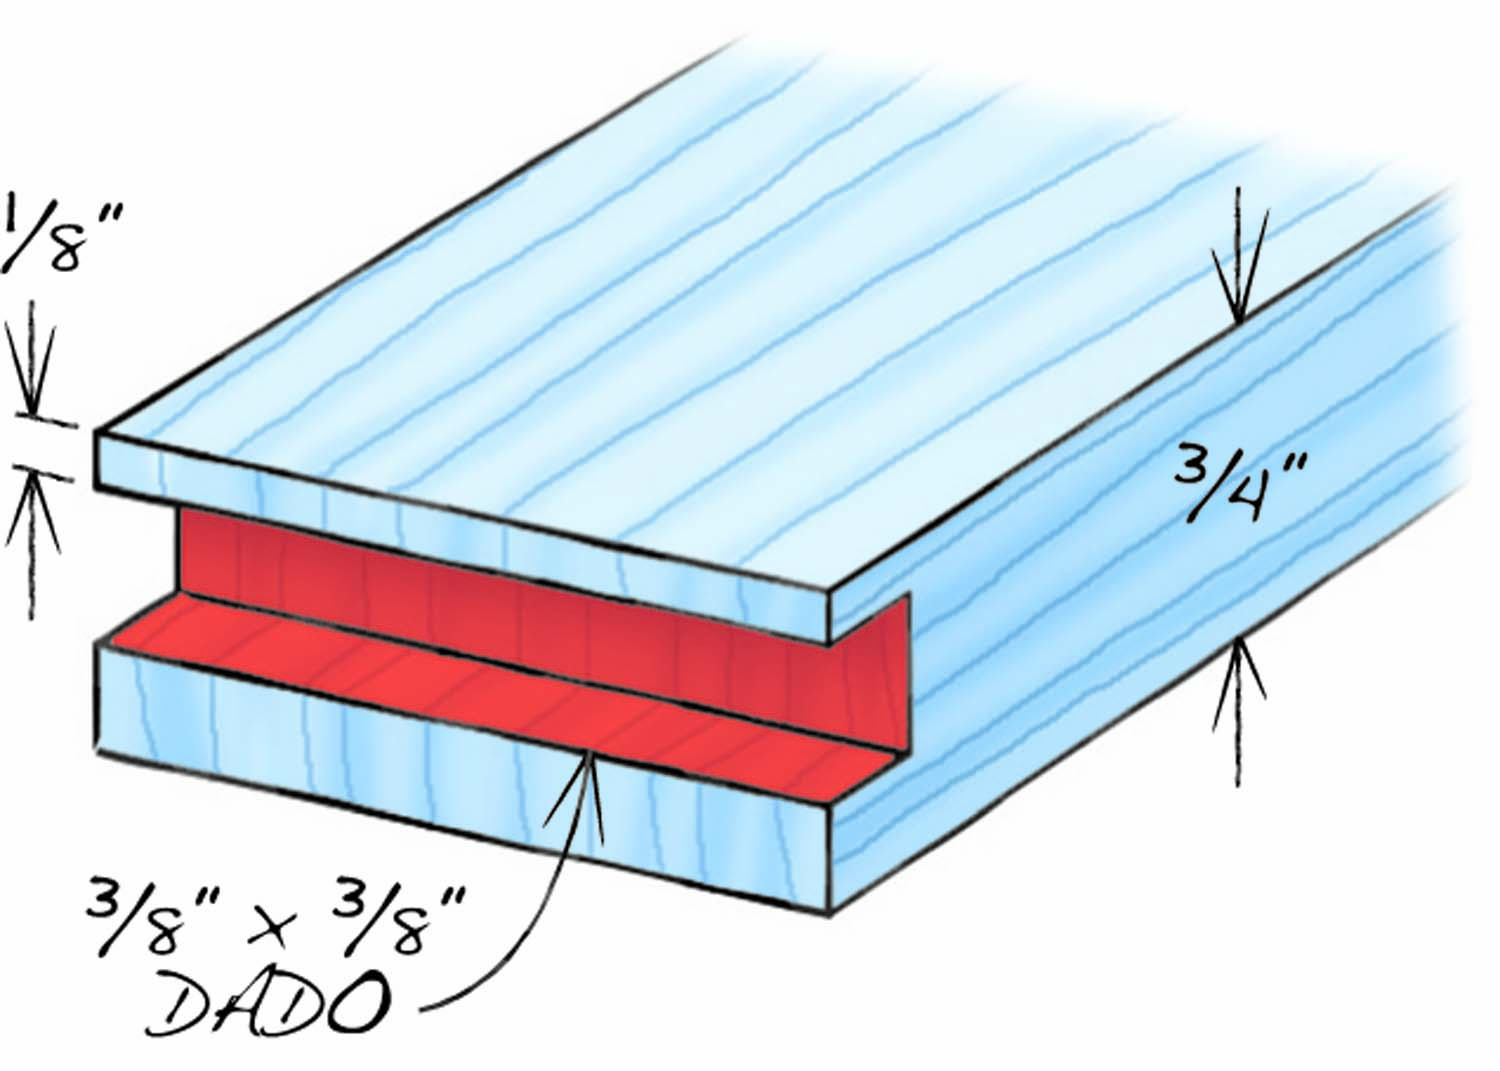
Photo 3. Cut a 3/8″ x 3/8″ dado into the end of the drawer front, using a dado set. Support the piece with a tenoning jig.
Next, cut a dado in the ends of the drawer sides using a dado set (Photo 3). This cut begins to form the joint’s tongue and rabbet. Three measurements are critical, in this order:
1) The width of the dado set. This must equal the distance from the end of the drawer side to the dado. Verify the dado set’s width before you cut any drawer fronts. Make a test cut in a scrap of wood first and place it directly on a drawer side to see if you’ve got it right.
2) The height of the dado set. This must equal the thickness of the drawer side material; here, it’s 3/8″. Again, make a test cut before proceeding.
3) The distance of the dado set to the face of the tenoning jig. This must equal the width of the dado in the drawer side: 1/8″. When you cut the grooves, be sure to place the outside of the drawer front against the face of the tenoning jig.
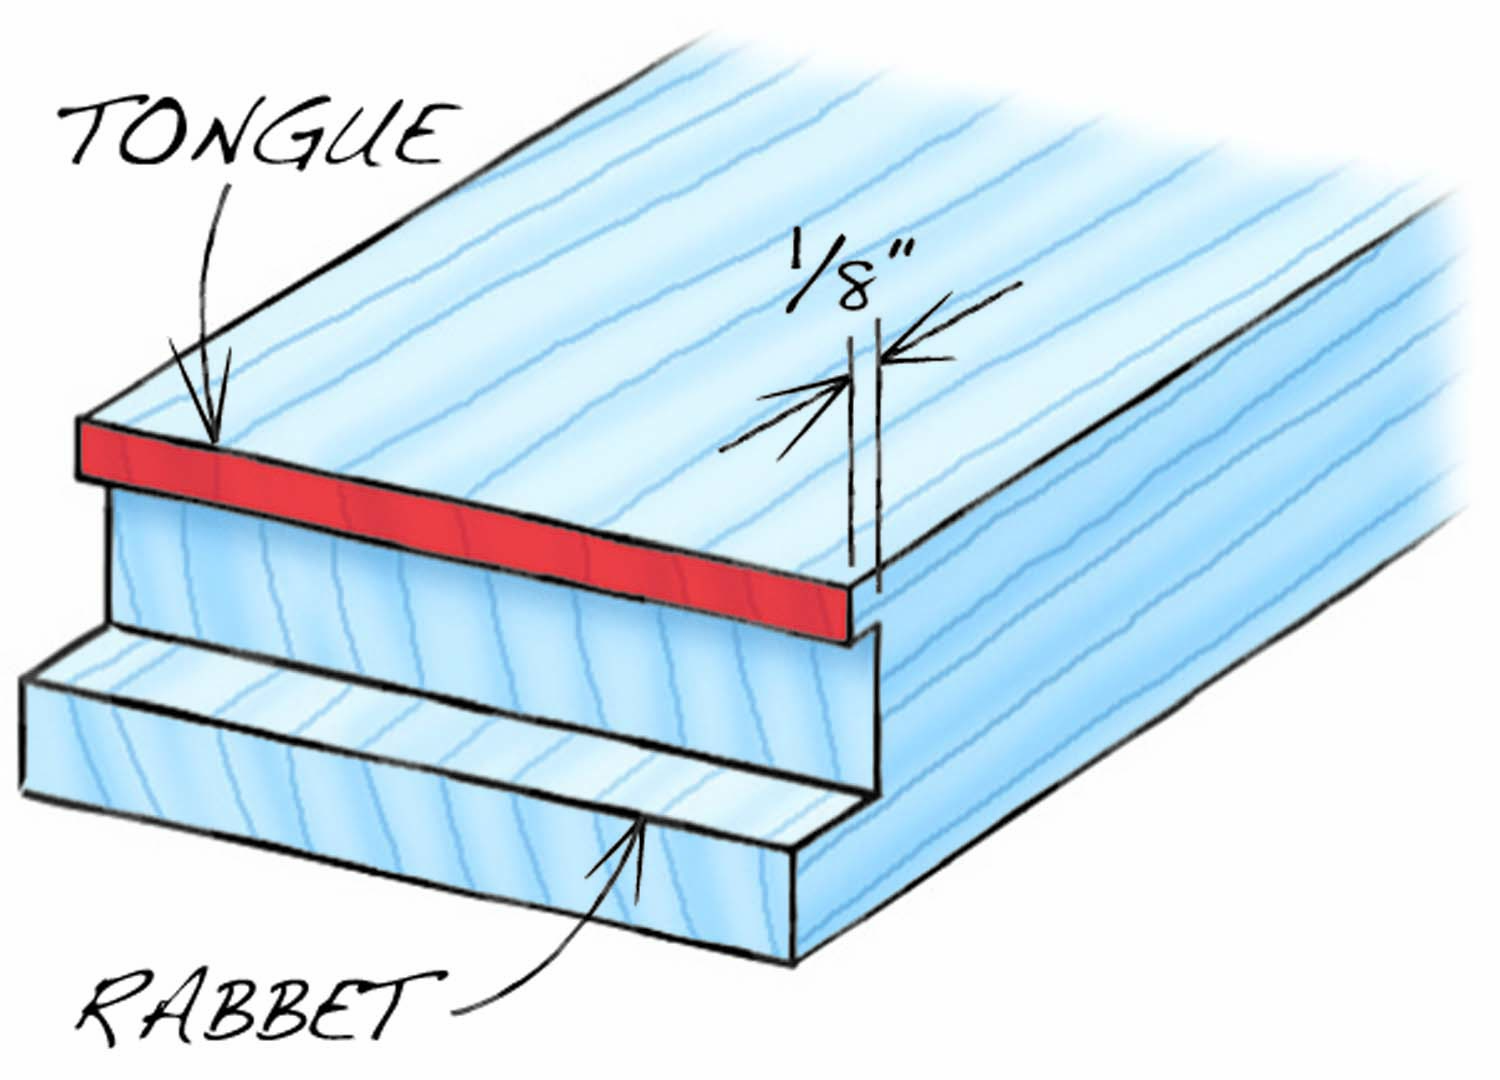
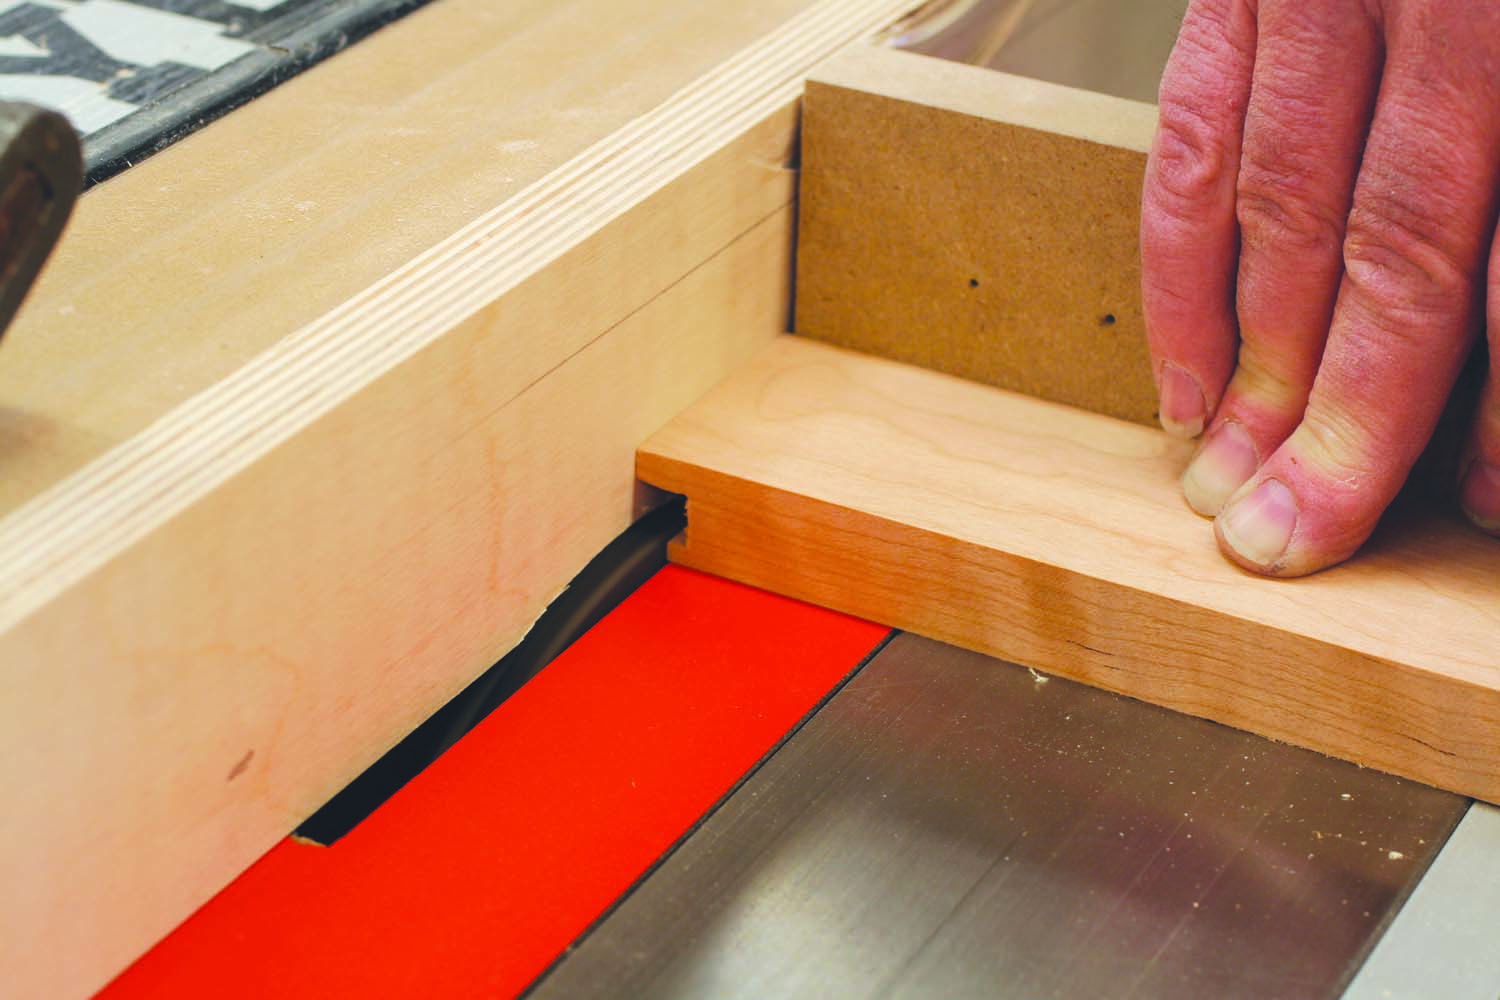
Photo 4. Trim the tongue on the drawer front to exact length, again using the dado set.
Finally, shorten the tongue on the drawer front to fit the drawer side (Photo 4). This completes the tongue and rabbet. It’s best to cut the tongue a bit long at first, then adjust the fence until it fits perfectly.
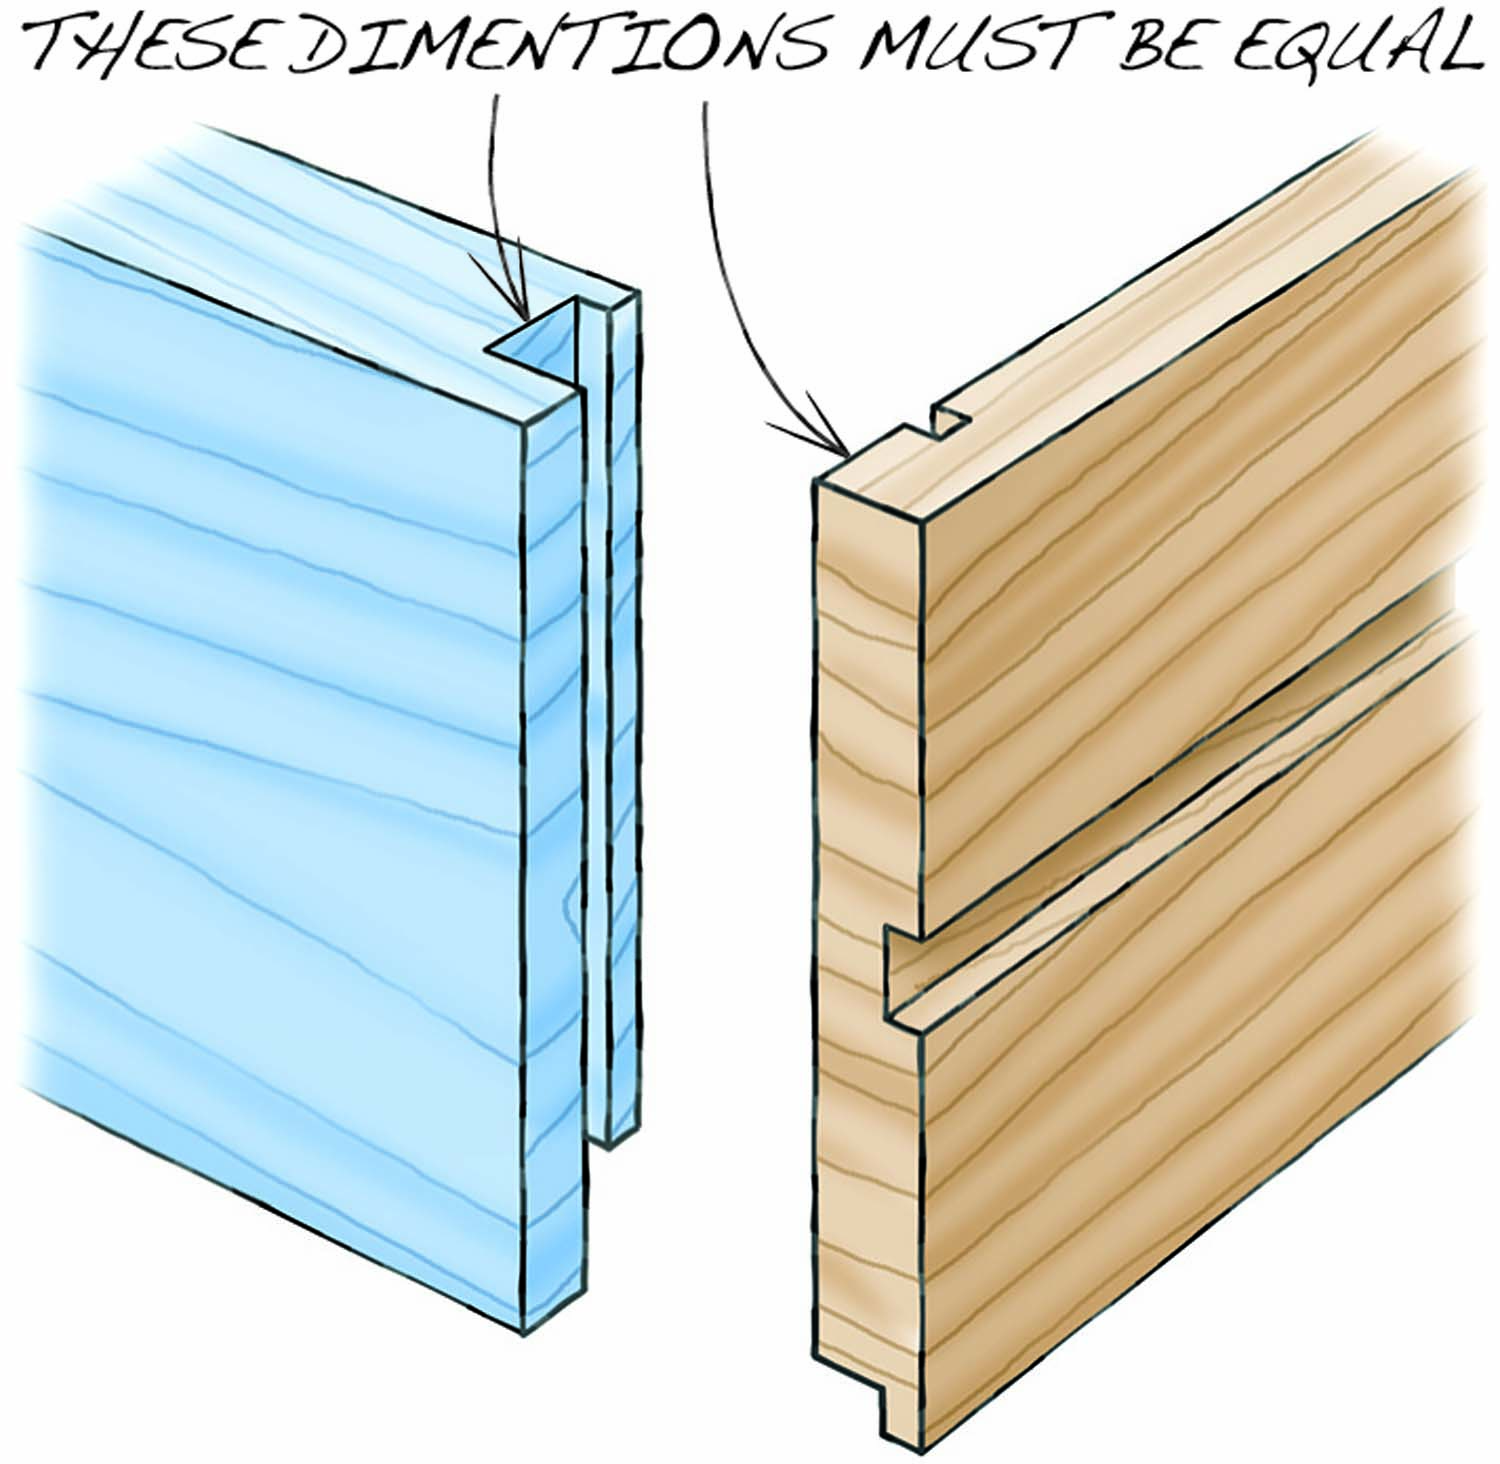

Photo 5. Both parts interlock to form a strong drawer joint.
The drawer front and side should lock together, without any gaps (Photo 5).
Here are some supplies and tools we find essential in our everyday work around the shop. We may receive a commission from sales referred by our links; however, we have carefully selected these products for their usefulness and quality.


