We may receive a commission when you use our affiliate links. However, this does not impact our recommendations.
If you’re unhappy with how your stained finish is turning out, the problem might be in the way that you’re sanding. Follow these tips and you’ll be good as gold!
Go E-Z on the R-O
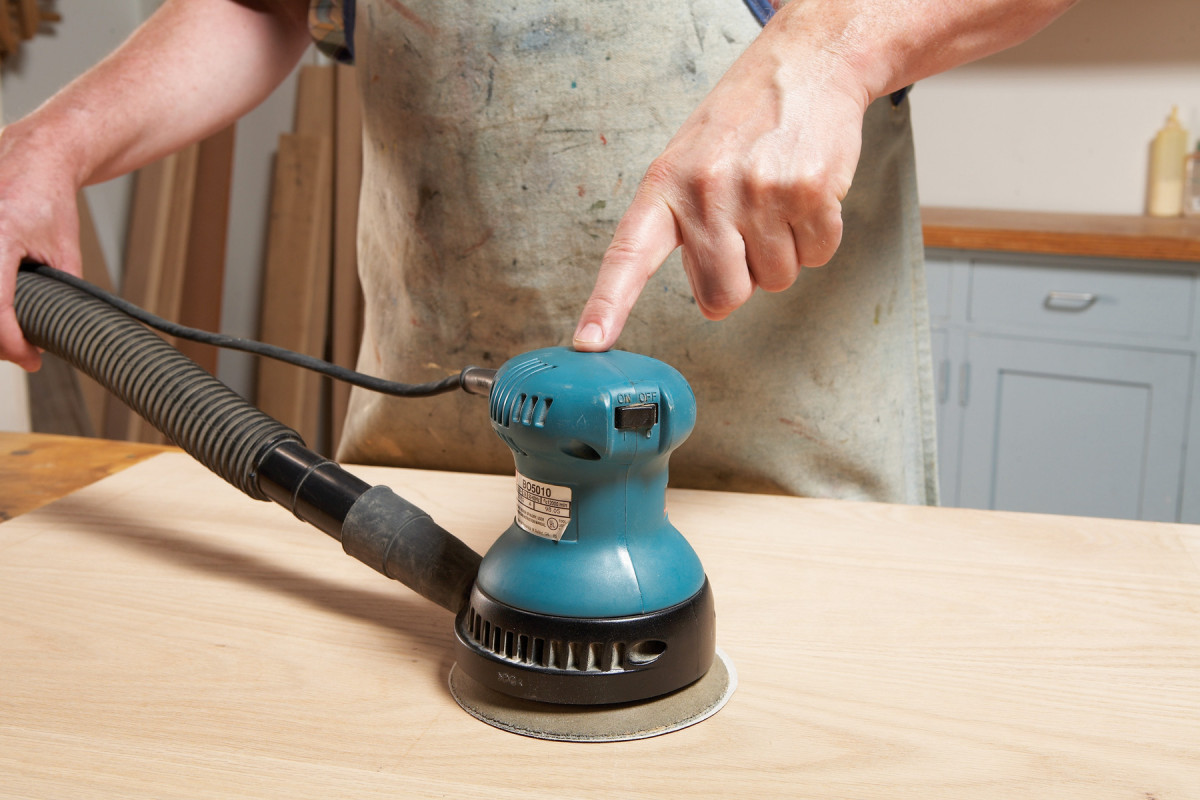 Random-orbit sanders employ a dual-action motion (the disc rotates and oscillates) to create a uniform scratch pattern that minimizes visible scratches. Bearing down and moving fast while using this type of sander feels natural, but it’s the wrong thing to do because it disrupts the sander’s dual-action motion and creates uneven scratch patterns. Noticeable scratch marks are the unfortunate result. To keep scratch marks at bay, random-orbit sander manufacturers recommend moving the sander very slowly, about 5 to 10 seconds to cover 6″, and applying only light pressure, about 2 to 4 lbs., which is about the weight of your arm.
Always Sand by Hand
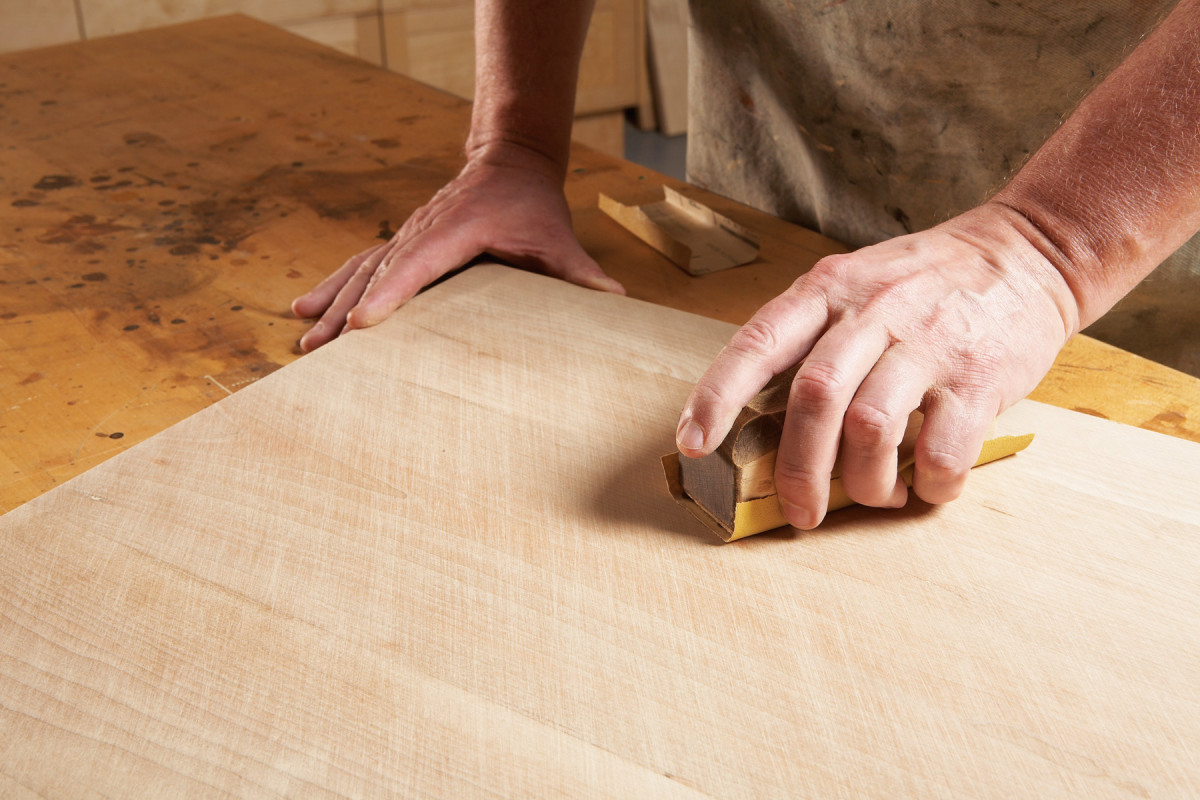
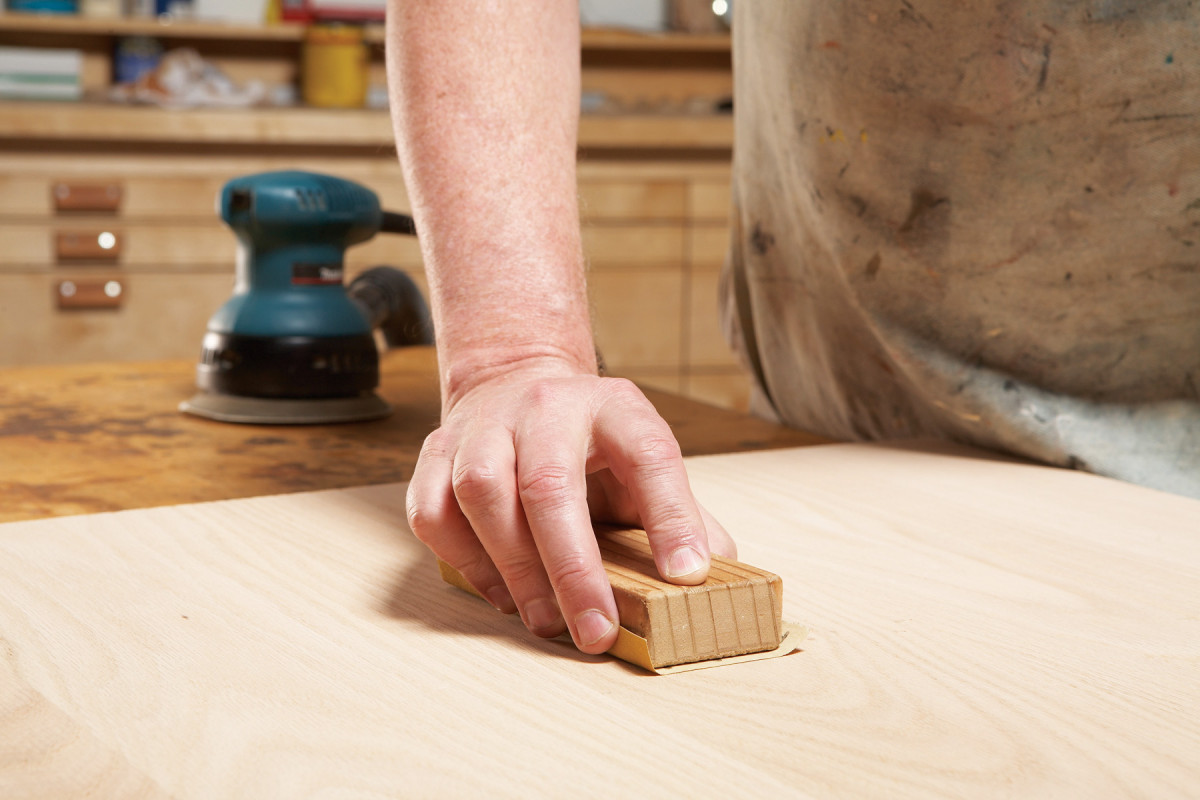 Hand sanding with the grain should always be your last step before applying stain. Power sanding may be a real time-saver, but it rarely leaves surfaces that are entirely scratch-free. Hand sanding after power sanding aligns all the sanding scratches so that the grain will help to hide them. Bearing down when you sand by hand is OK. In fact, it speeds up the process. Using a cork-faced sanding block helps to evenly distribute the sanding pressure. Start with the same grit size that you used for your last round of power sanding. If visible scratches from power sanding remain after hand sanding, switch to slightly coarser grit and start again.
Know When to Quit
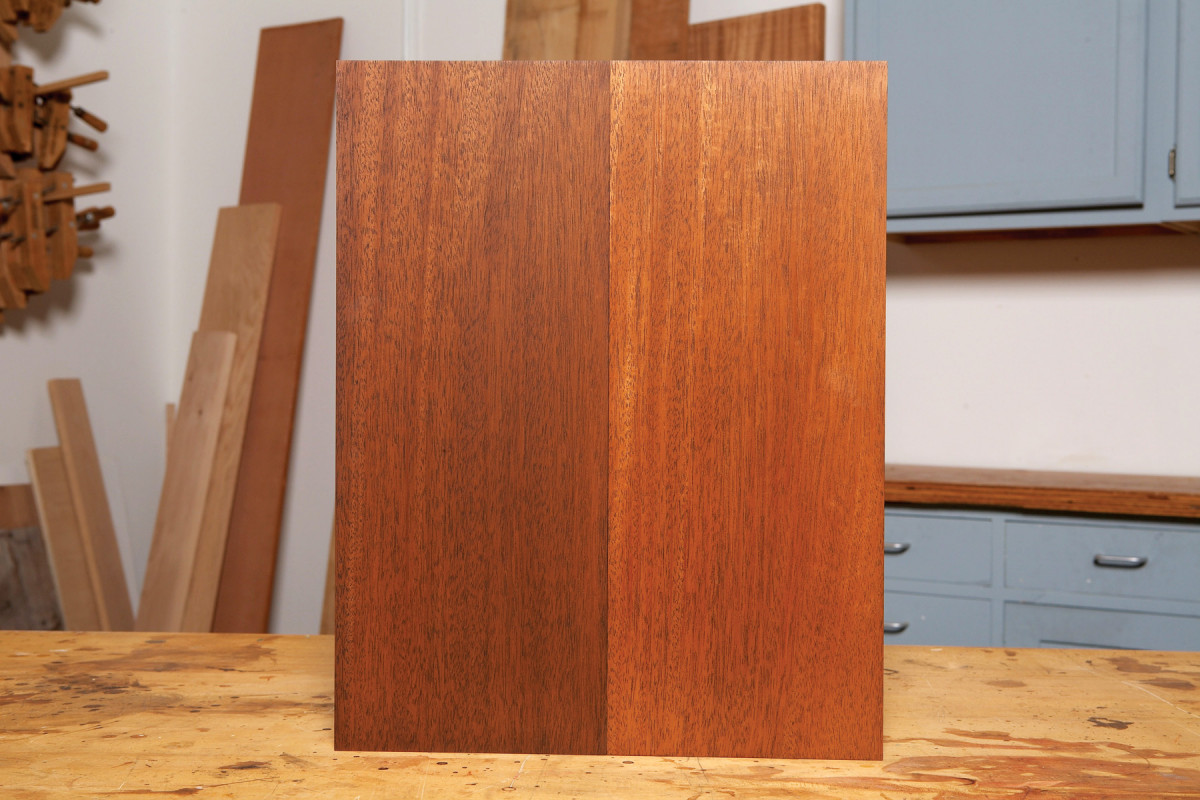 Sanding to super-fine grits makes wood look great under a clear oil finish, but it can cause problems if you plan to use stain. Most oil-based stains contain pigments, which color wood by lodging in pores and other crevices in the surface—such as sanding scratches. As these crevices decrease in size, the stain becomes less effective. Many stain manufacturers recommend finish sanding to 220 grit at most and stopping at a lower grit for a darker color. The samples at right show the difference in stain penetration on mahogany between stopping at 180 grit (left) and sanding to 320 grit (right).
Sand Diagonally
 An old-school method for eliminating visible scratch marks is to purposefully make them visible by sanding across the grain as you work your way through the grits. After sanding diagonally in one direction, change to finer grit and sand diagonally in the opposite direction until the scratches from the previous grit disappear. Step up another grit and sand with the grain until all the diagonal scratches are gone.
Pre-sand and Pre-stain
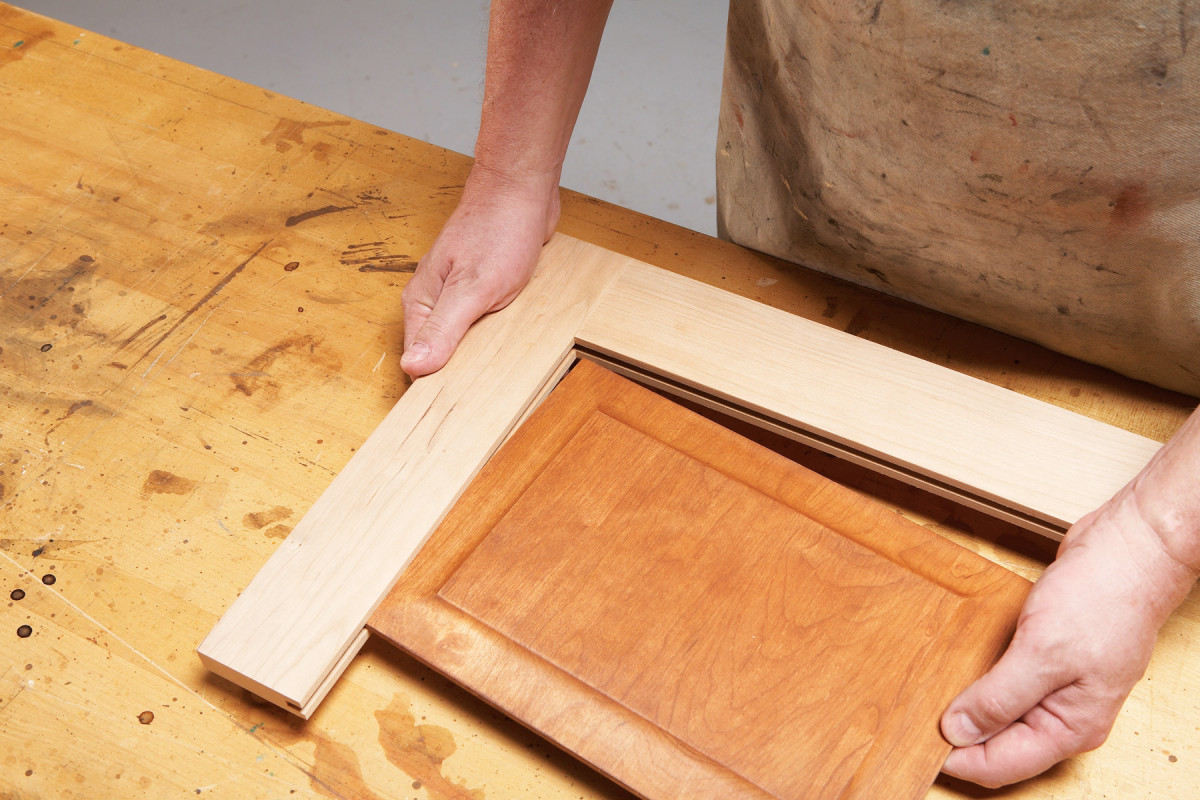 Want to create a finishing time bomb? Just wait to sand and stain frame-and-panel structures after they’re assembled. During the heating season, the panel is likely to shrink because of the lower humidity, exposing a strip of unfinished wood at one or both edges. To hide the panel’s seasonal movement, sand, stain and finish it before assembling the frame-and-panel structure.
Sand the Stiles Last
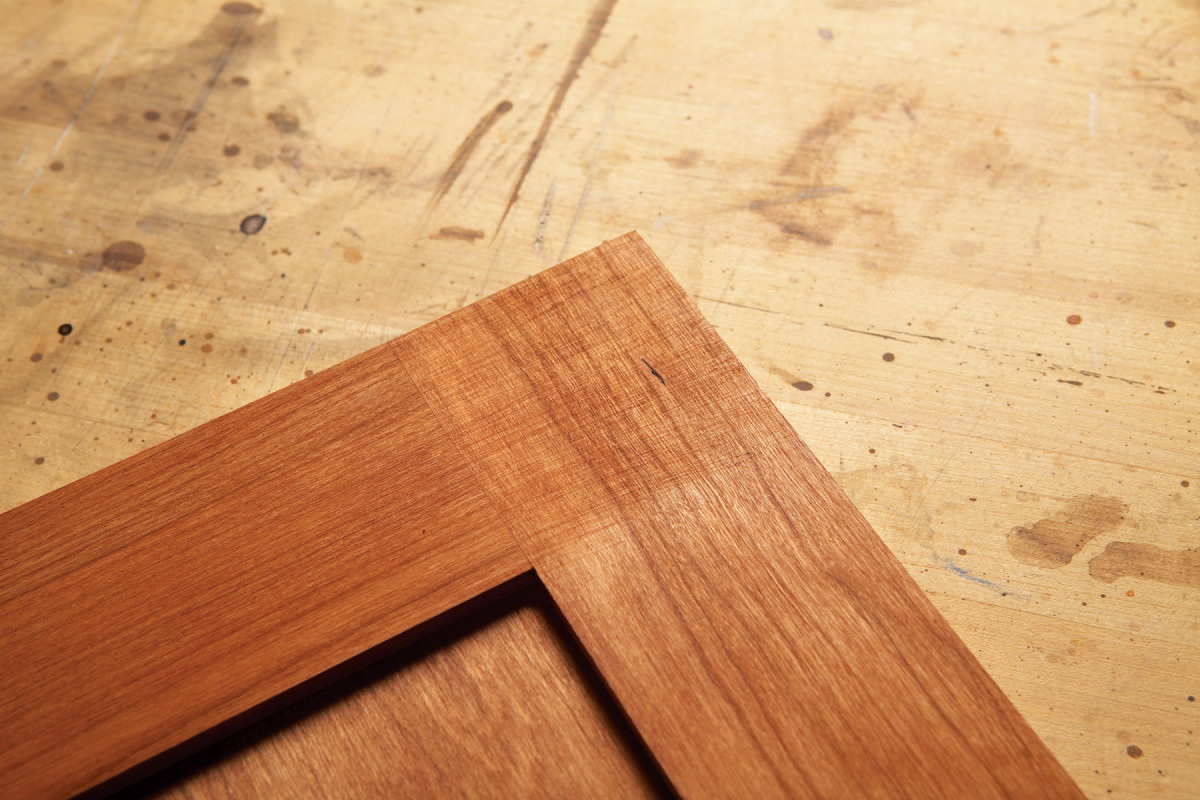 Beware of sanding across joints on stile-and-rail and face-frame assemblies. The goal of sanding by hand is to hide scratches by aligning them with the grain. But going too far on these joints makes the scratches stand out like a sore thumb. To avoid this problem, simply sand the stiles last—and when you sand the stiles, be careful not to cross the joint line, or you’ll leave unsightly cross-grain scratches on the end of the rail. On miter joints, sand to the joint line from each direction.
Know When to Sand Further
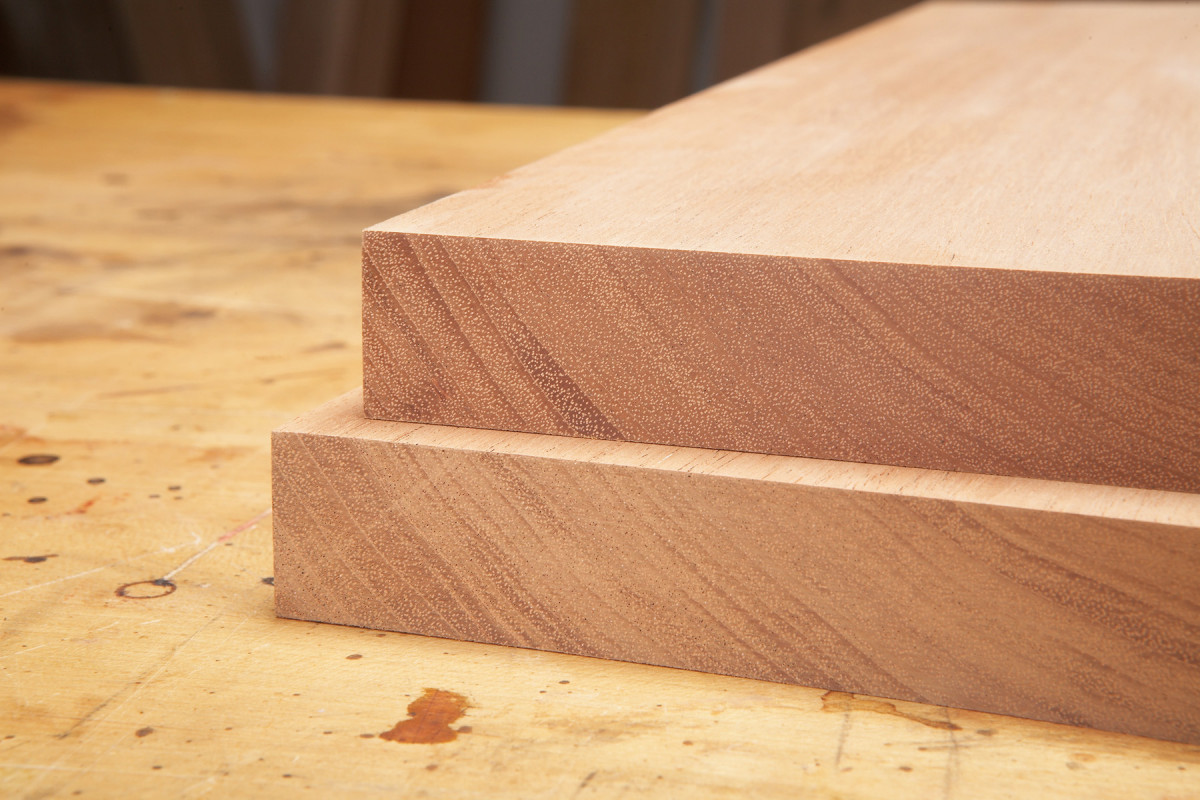 One way to keep end grain from going dark when stain is applied is to sand it to finer grit than the face grain. On most woods, the end grain is considerably harder than the face grain, which makes sanding scratches and other crevices harder to remove. As a result, the end grain looks darker when it’s stained.
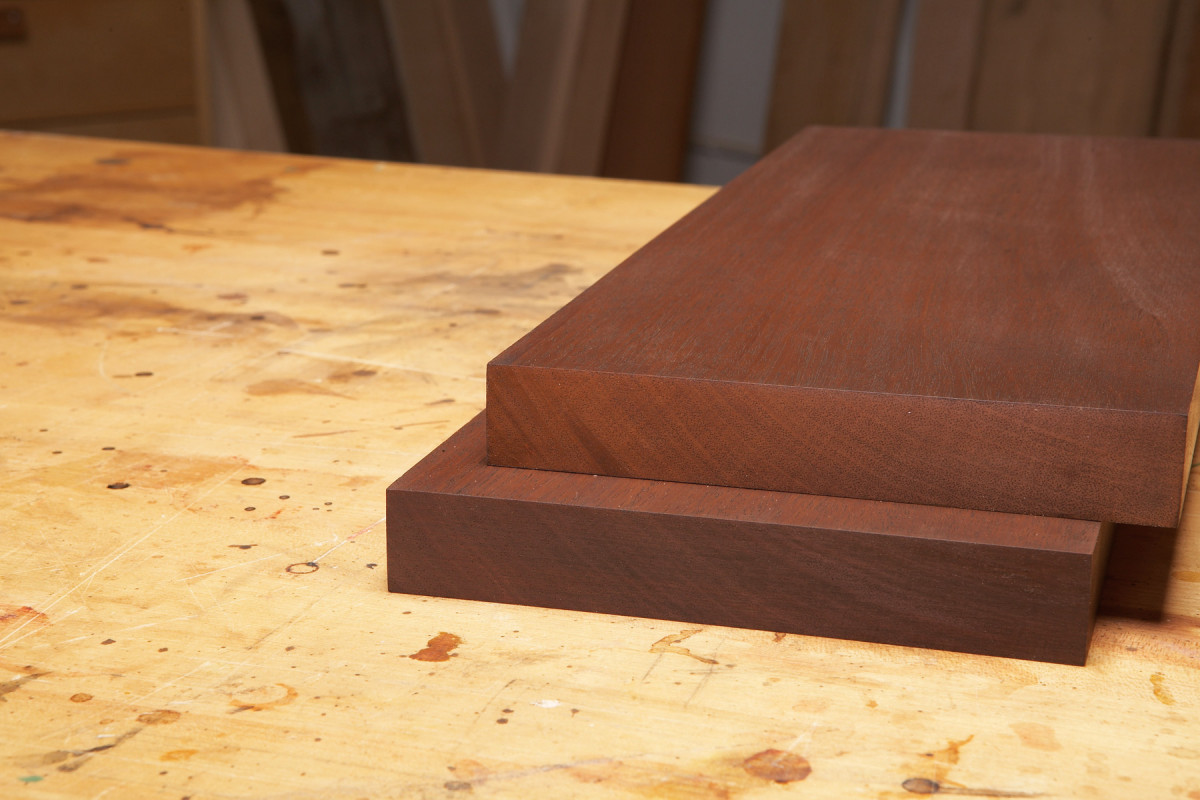 On the samples shown here (top), the end grain and face grain on the bottom board have both been sanded to 180 grit, while the top board’s end grain has been sanded to 320 grit to completely remove the sanding scratches. When stain is applied (bottom), it’s clear that the extra sanding pays off: The end grain’s color is much more similar to the face grain. The end grain looks better, too—whether it’s stained or under a clear finish—because the annual ring structure shows clearly and distinctly.
Moldings Require Sanding
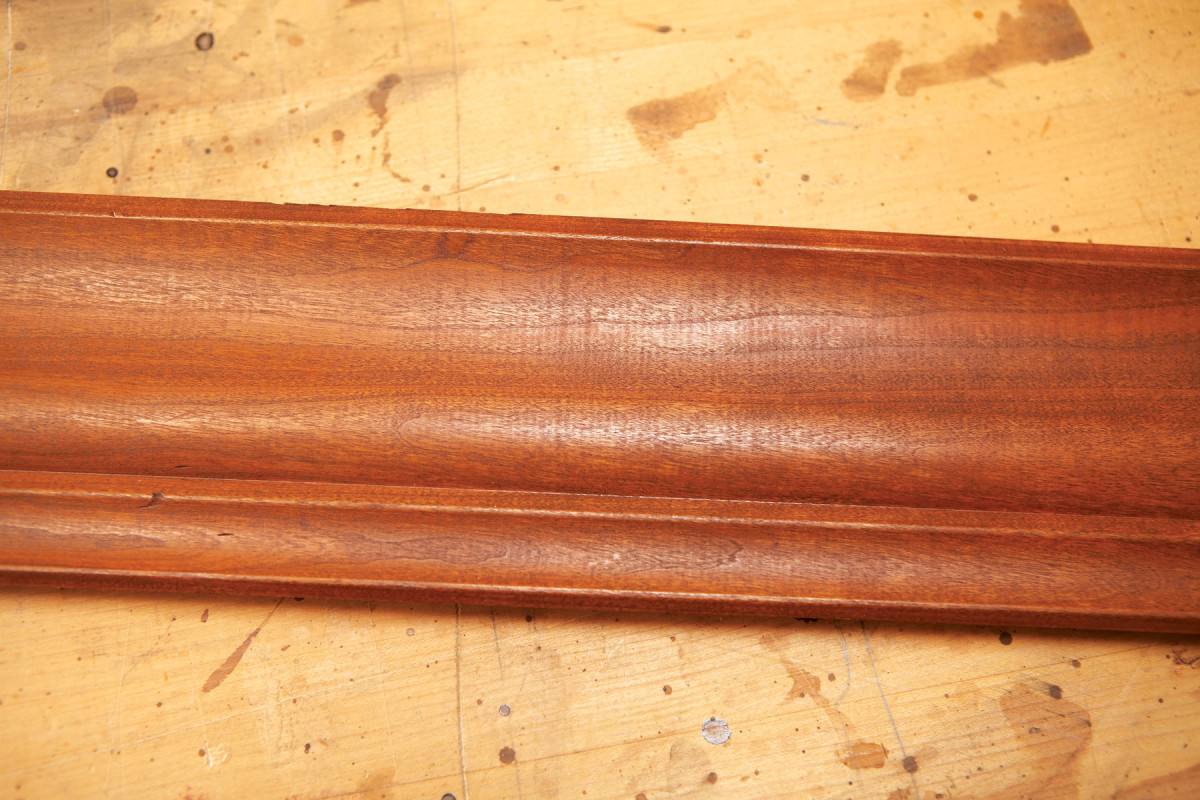 Resist the temptation to stain moldings without sanding them. Even if they feel smooth, moldings often contain milling marks on the raw wood. These marks can be very hard to see because of the wood’s grain and the molding’s curved surfaces. But if you don’t eliminate them by sanding, they’ll show up as bands of parallel lines when you stain.
Raise the Grain
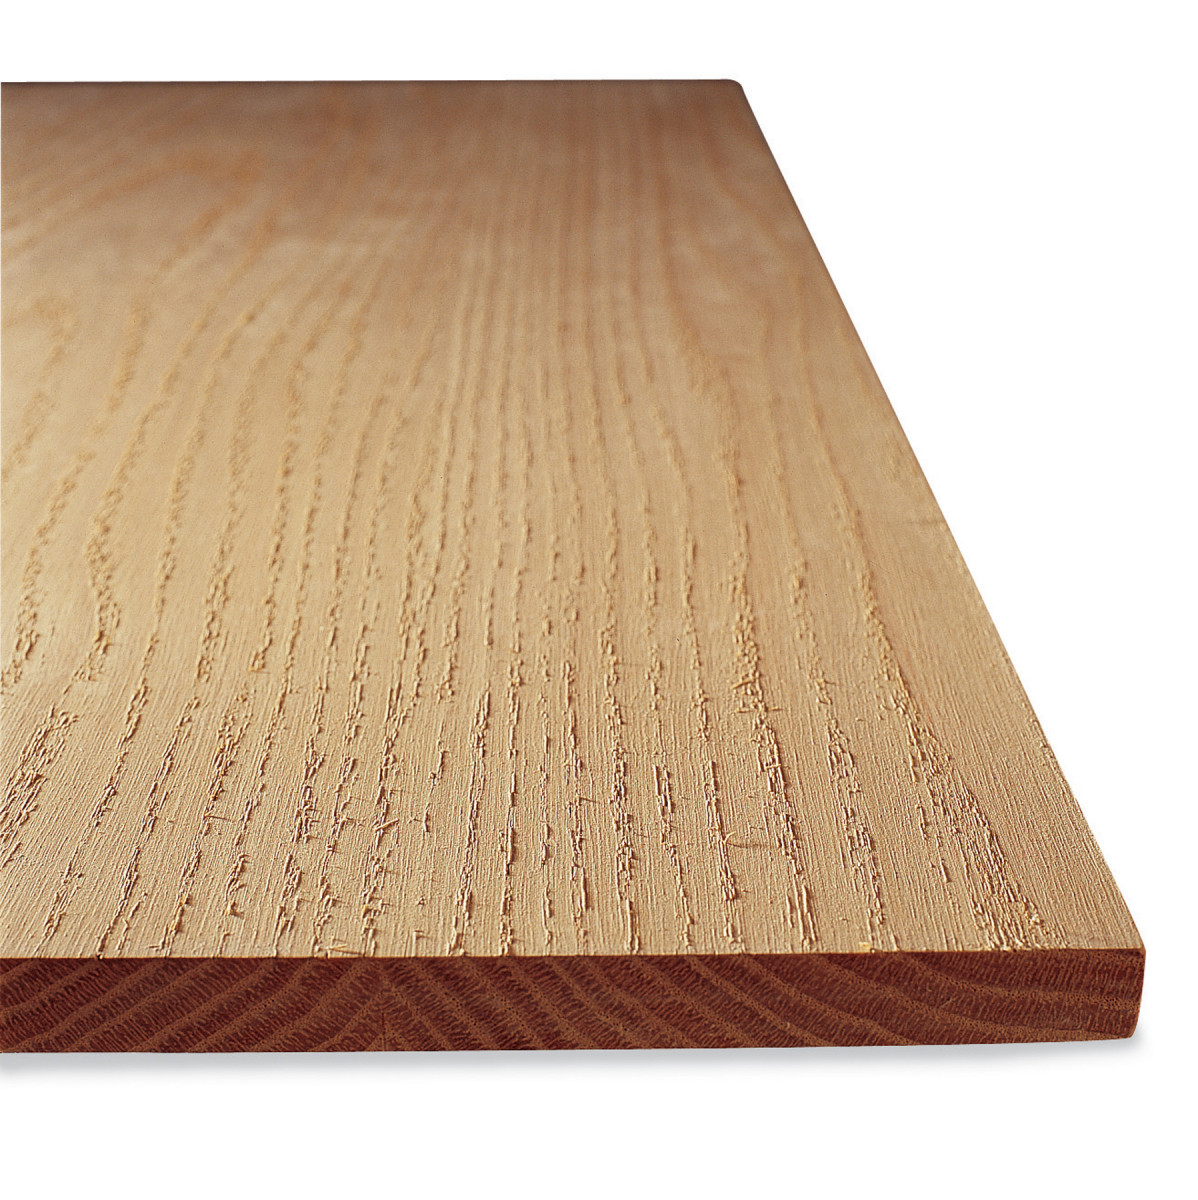 Water-based dyes and stains often leave a rough surface because they cause wood fibers bent over by sanding to swell and stand up. The best way to avoid this problem is to preemptively raise and flatten the grain. Then it won’t happen when stain is applied. Dampen the wood and let it dry. Then smooth the surface by sanding very lightly with the same grit used for final sanding.
Buy Colored Sandpaper
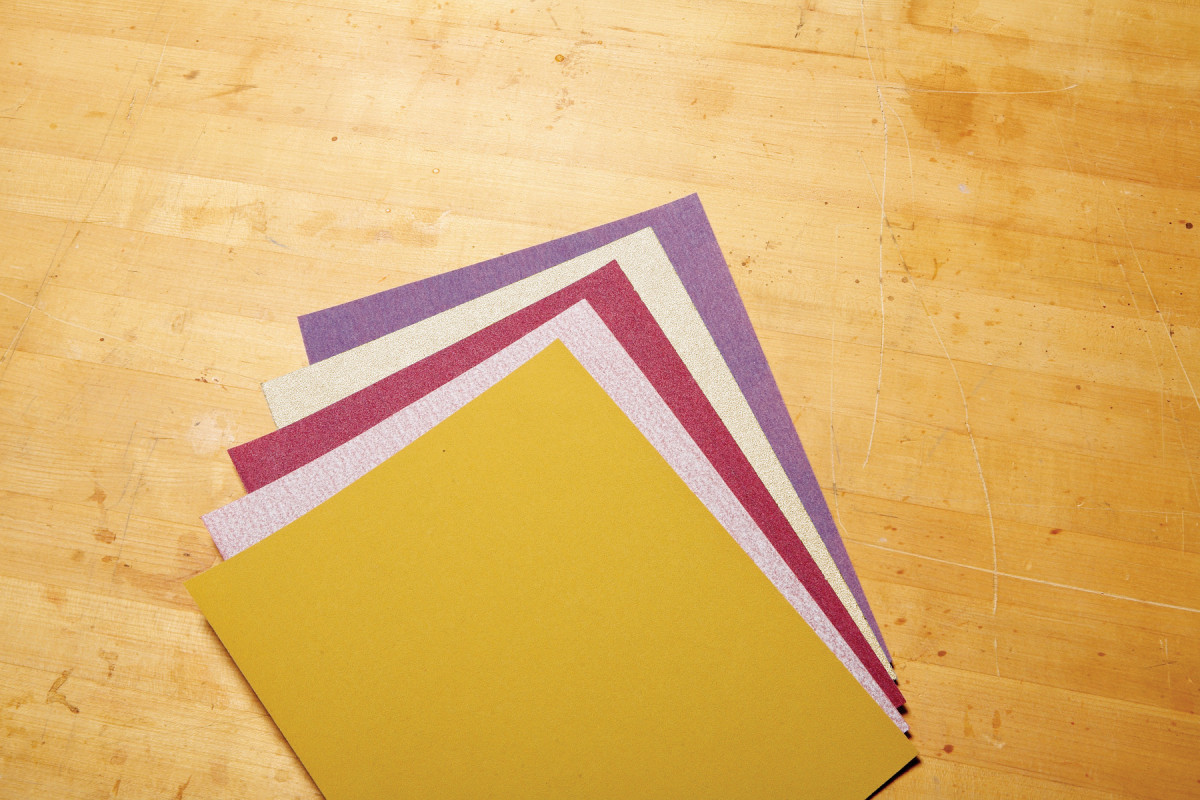 The best material for sanding unfinished wood is made with premium aluminum oxide abrasive that’s graded for consistent size, applied in an open coat, resin-bonded to a flexible lightweight backing and covered with an anti-clogging material. So how do you choose the right stuff? Many manufacturers use color to brand their top-quality sheets, so one easy way is to look for paper that’s a distinctive color. Norton 3X and 3M Pro Grade are two such examples. Ironically, sandpaper in shades of brown—the color of sand—is often made with garnet abrasive, which dulls much more quickly than aluminum oxide, so it isn’t the best choice. This paper isn’t likely to be covered with an anti-clogging material, either.
Here are some supplies and tools we find essential in our everyday work around the shop. We may receive a commission from sales referred by our links; however, we have carefully selected these products for their usefulness and quality.