We may receive a commission when you use our affiliate links. However, this does not impact our recommendations.
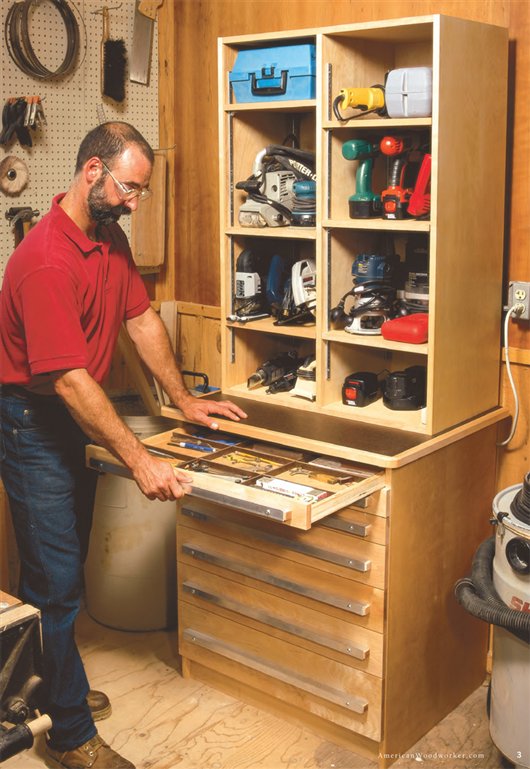
Tool Cabinet
Tons of flexible storage for today's woodworking tools.
By George Vondriska and Dave Munkittrick
|
Old tool chests made by the masters
utilized every square inch of space
with custom-fit nooks and crannies
for all of their hand tools. Today’s
woodworker needs a different kind of storage
space, geared toward power tools. Our
tool chest is just the ticket. It offers a massive
amount of storage space that can be customized
to adapt to your ever-changing arsenal
of power tools.
The drawers are inexpensive and easy to
make. We built them without mechanical
slides and saved about $100. Even without
the slides, the drawers extend just shy of full
length and glide like a dream.
We’ll also introduce you to a timesaving
technique for edge-banding casework. This
technique eliminates the hassle of cutting
and fitting edge banding one piece at a time,
plus the nuisance of trying to sand the edge
banding flush with the plywood carcase.
|
|

You may also like…
Modular Shop Cabinets
Giant Shop Cabinet
Hyperorganize Your Shop
|
|
Our tool chest features cubbies for routers,
sanders, a plate joiner and cordless drills.
The drawers below store the supplies these
tools depend on, plus the usual assortment of
hand tools. The step-back design yields a small
work surface where bits and sandpaper can be
changed on the spot. Adjustable shelves above
allow you to reconfigure the power-tool storage
as you replace old tools and add new ones.
|
|
Click any image to view a larger version.

|
|
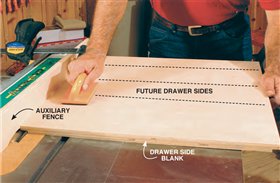
1. Rabbet the ends of both drawer blanks. It’s easier and more accurate to
rabbet seven drawer sides at a time and then rip the blanks to final size. Go
ahead and rabbet the case sides while you’re at it.
|
|
|
|
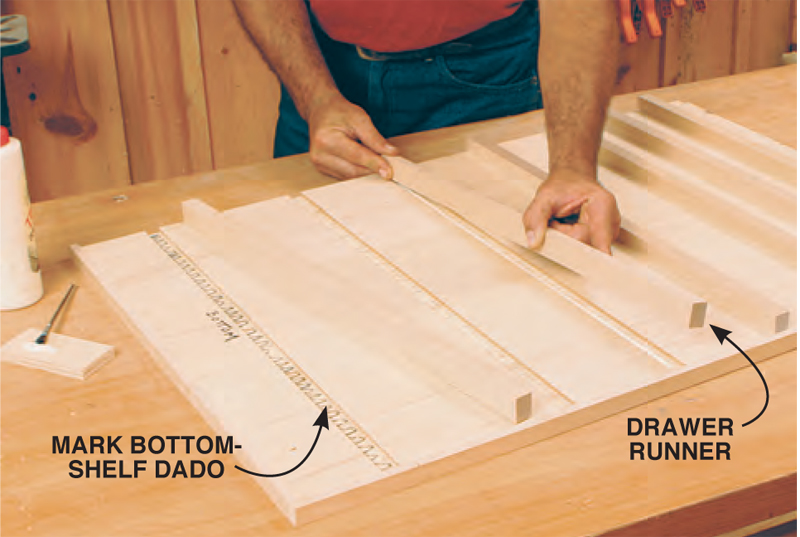
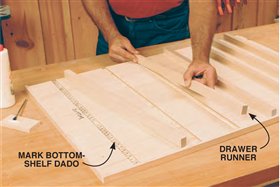
2. Dado the case sides for the drawer runners and the
bottom shelf. Label the top and bottom to make sure you
get the dadoes located correctly (see Fig. A).
|
|
|
|
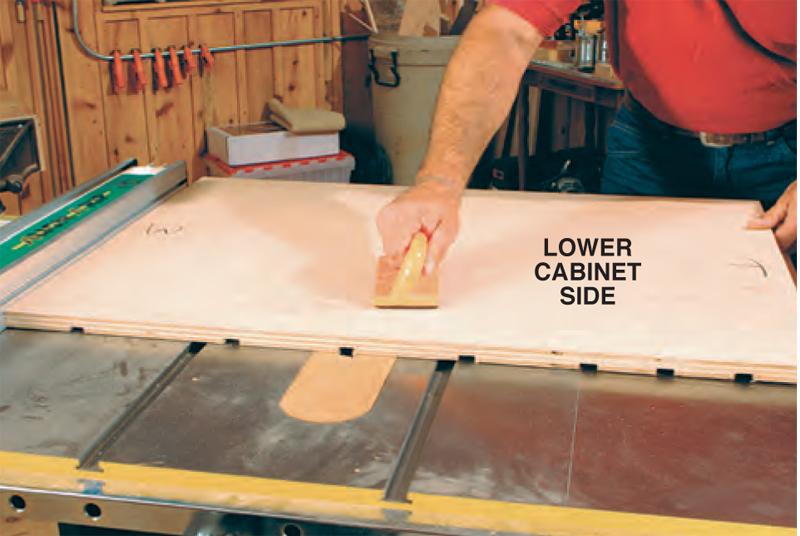
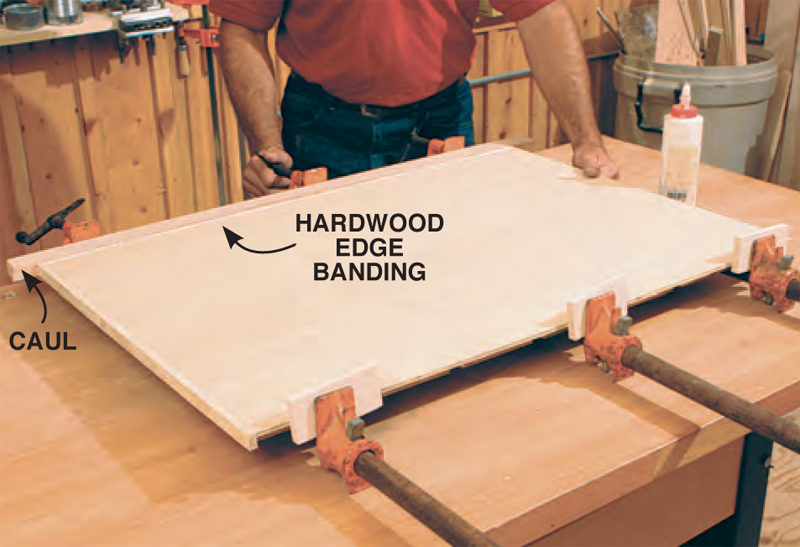
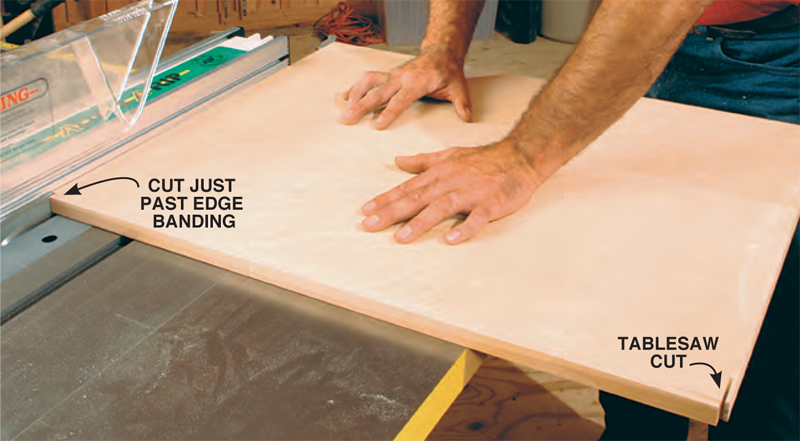
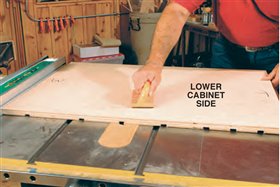
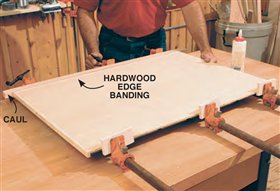
3. Use clamps and a caul to add hardwood edge
banding to the plywood after the dadoes and rabbets
are cut. Don’t forget to edge-band the bottom of the
lower cabinet sides. They act like skids and protect the fragile
plywood ends.
|
|
|
|
4. Glue the drawer runners into the carcase
sides. Mark the dado for the bottom shelf so you don’t
accidentally glue a runner in the wrong place.
|
|
|
|
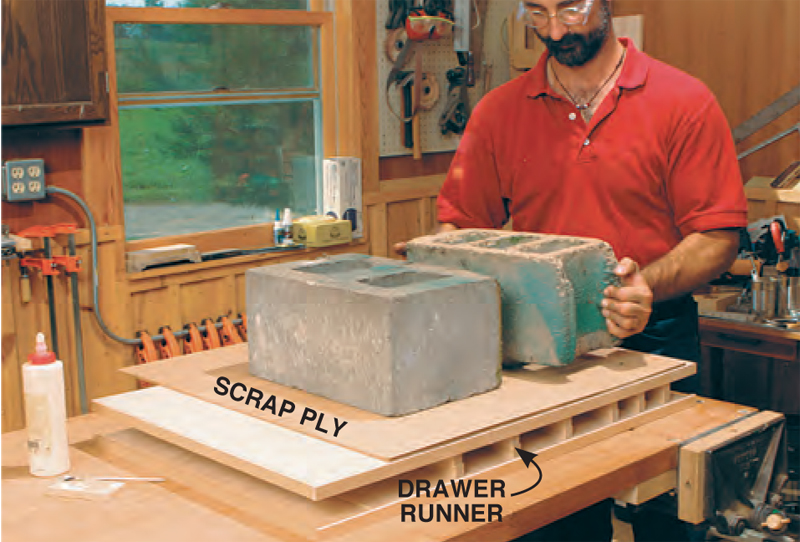
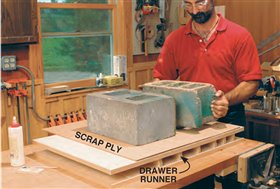
5. Add weights to the two sides set face to face to
ensure the runners are seated completely in the dadoes. Use
some scrap plywood to protect the case side from your weights.
|
|
|
|
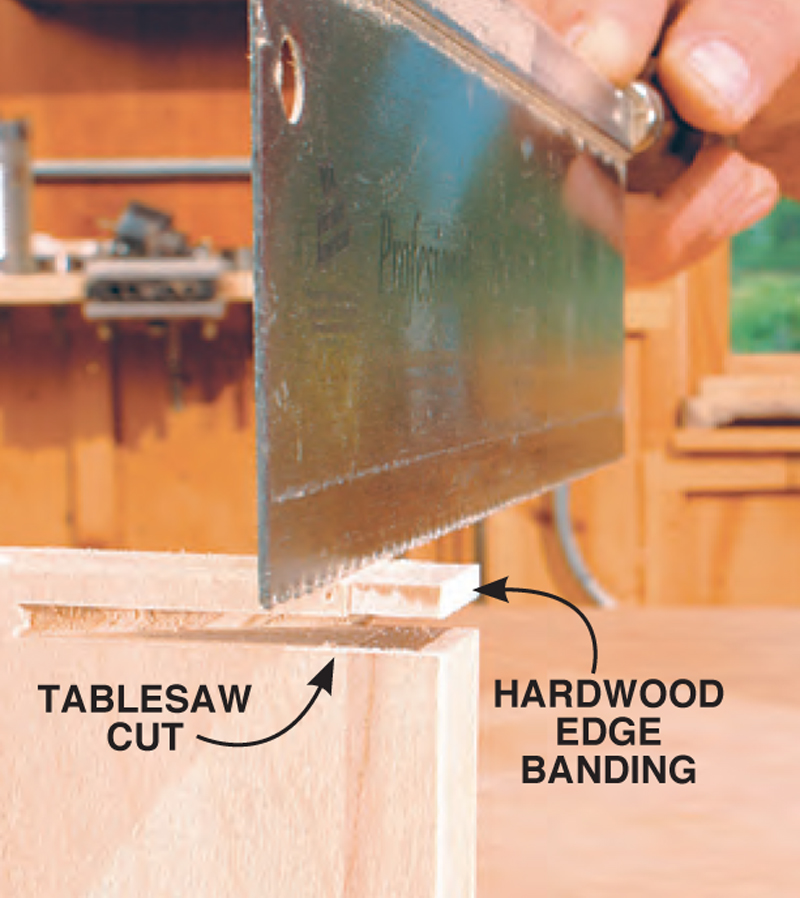
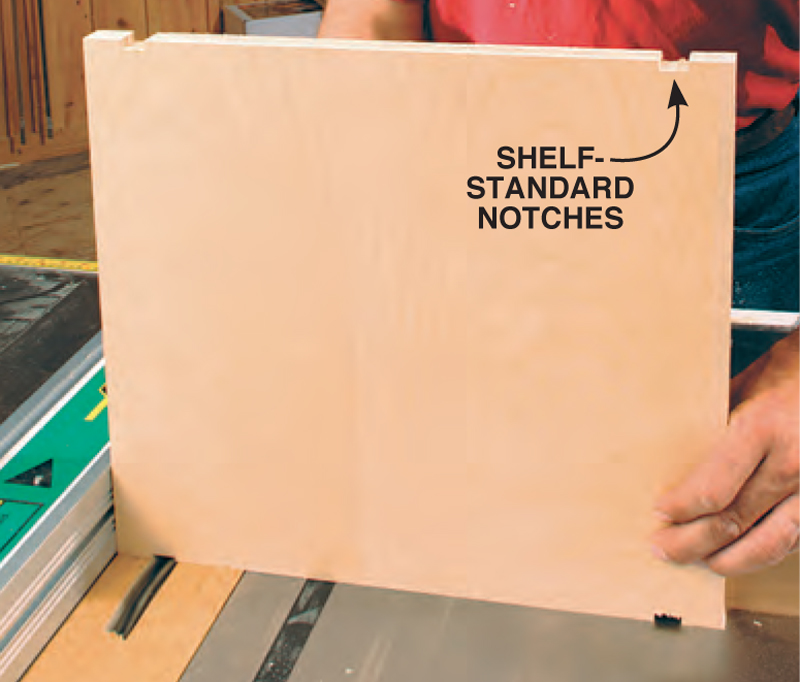
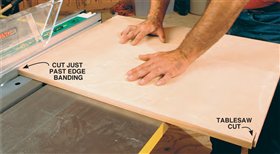
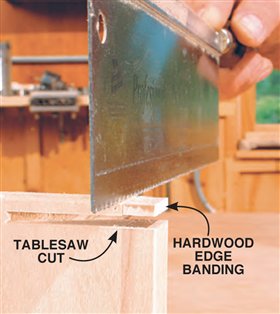
6. Notch the shelves and dividers on the tablesaw, so they fit into the case
sides perfectly (see Fig. C, below). Position the tablesaw fence 1/4-in. from the
outside edge of the saw blade. Make test cuts in scrap and fine-tune the fence until the
joint is perfect. Push the part into the saw far enough to cut the hardwood edge banding.
Then, turn off the saw, flip the part over and cut the other corner.
|
|
|
|
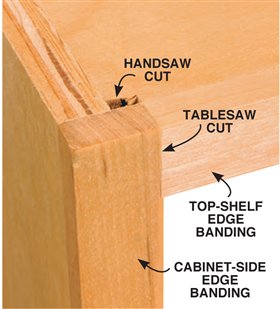
7. Finish the notch with a
handsaw. There’s no need to be
fussy here—just cut behind the hardwood
edge banding.
|
|
|
|
8. Careful notching of the edge
banding creates a perfect fit
between the mating parts. The notched
shelves allow you to sand the hardwood
edge banding flush to the plywood parts
before assembly.
|
|
|
|
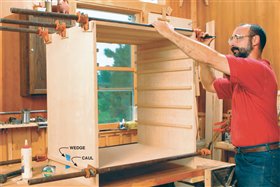
9. Assemble the upper and lower cabinets with glue and clamps. A caul with a cardboard wedge helps distribute
clamping pressure across the bottom shelf. Measure diagonals to check for square.
|
|
|
|
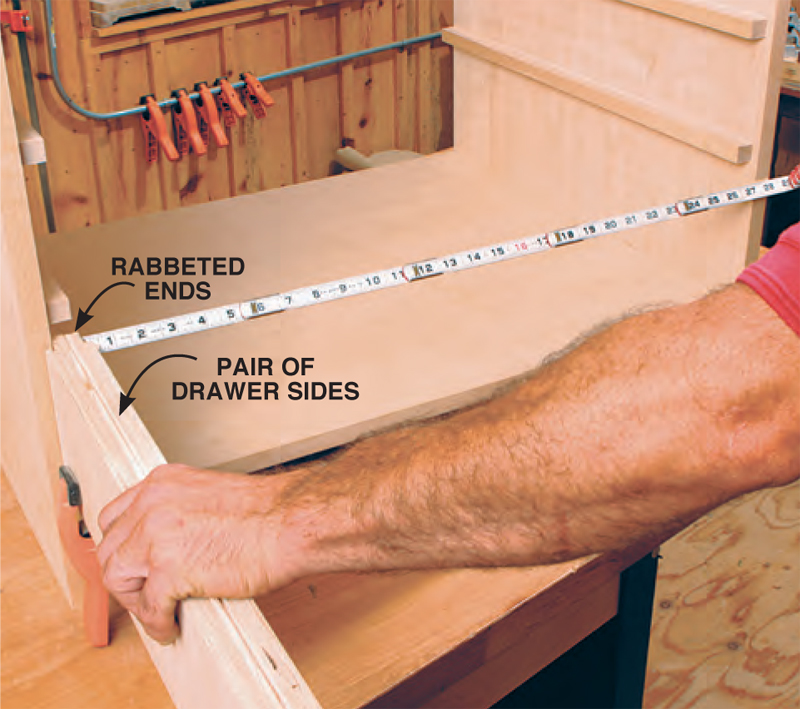
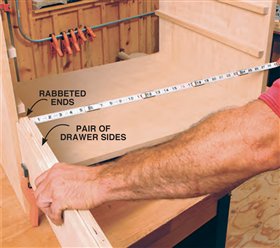
10. Measure the cabinet opening minus the rabbeted
ends of a pair of drawer sides to determine the exact
length of your drawer fronts and backs. Hold the sides back to back
so one rabbet fits over the cabinet side; then subtract 1/8 in. from
this measurement. In this case, measuring off of assembled parts is
more accurate than working out the dimension mathematically.
|
|
|
|
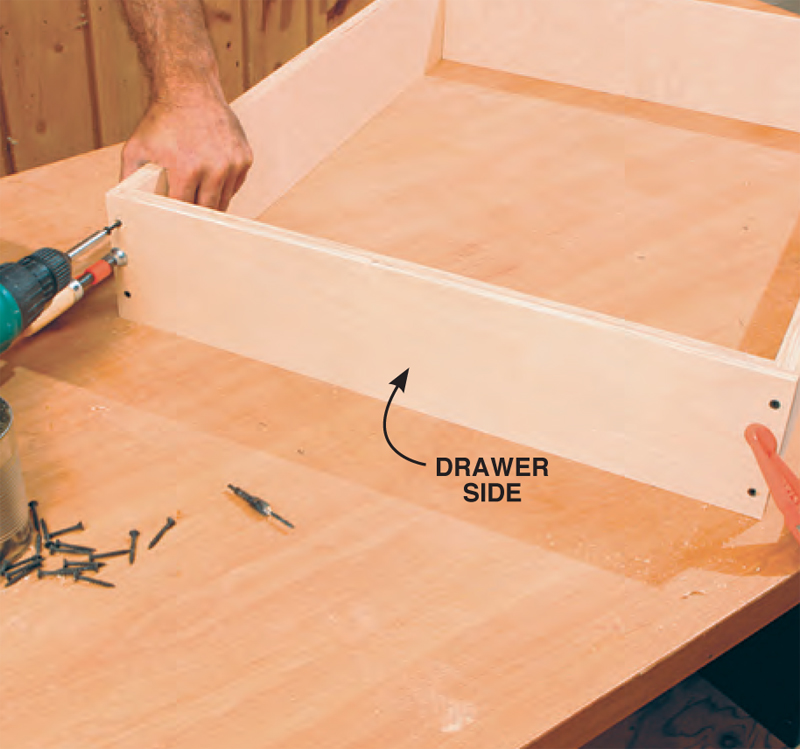
11. Screw and glue together the drawer boxes.
Then, screw on the drawer bottom to square the drawer.
|
|

|
|
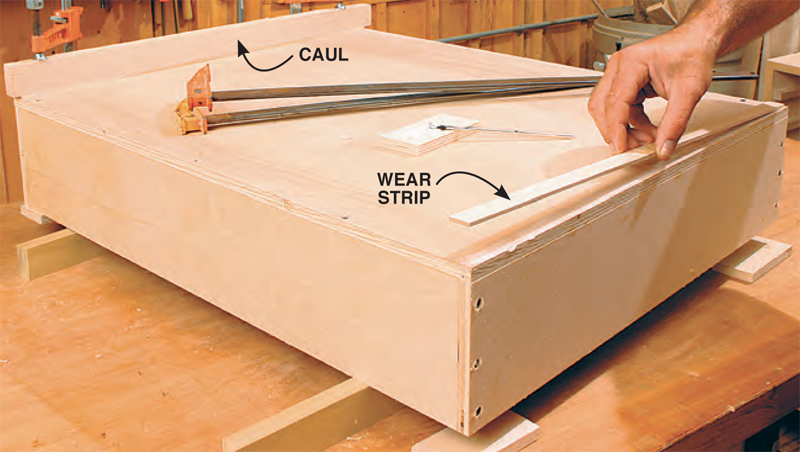
12. Glue birch wear strips to the bottom of each drawer. Use a caul
to distribute clamping pressure.
|
|

|
|
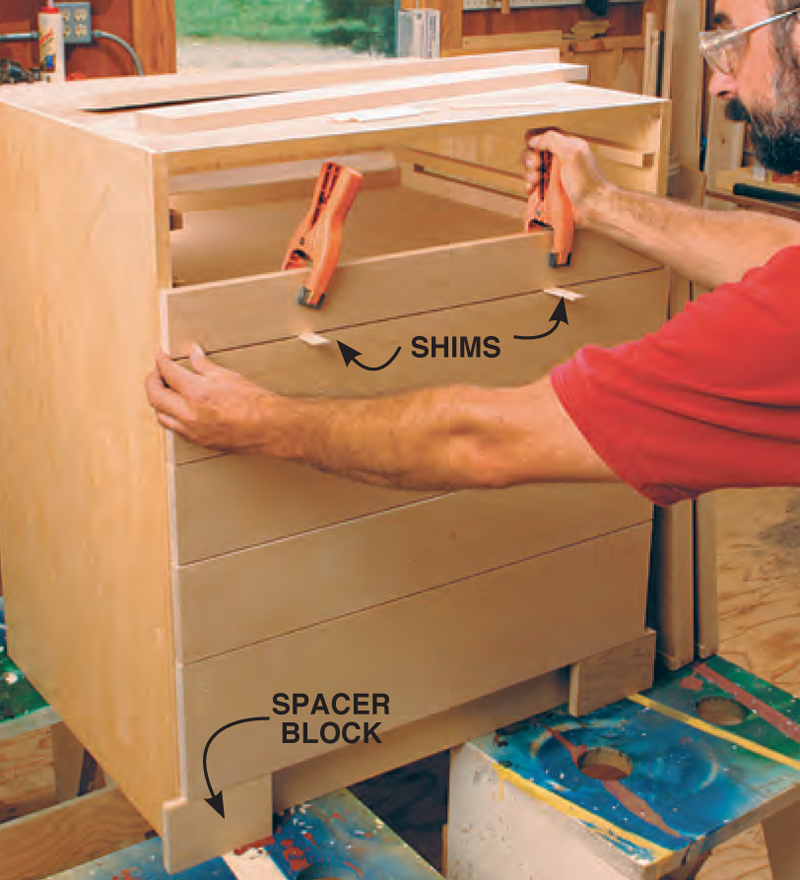
13. Attach the drawer
fronts, using a shim
to set the gaps between
them. Start at the bottom,
and use a pair of spacer
blocks to set the front so it
overlaps the bottom shelf
by 3/8 in. Work from the
bottom up, keeping the
bottom edges of the drawer
fronts approximately flush
with the drawer bottoms.
Screw them on as you go.
|
|

|
|
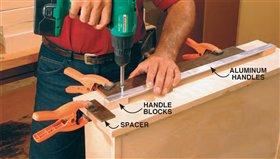
14. Screw the handles to the front of the drawers. Spacers
make sure the handles go on straight and level.
|
|
|
|
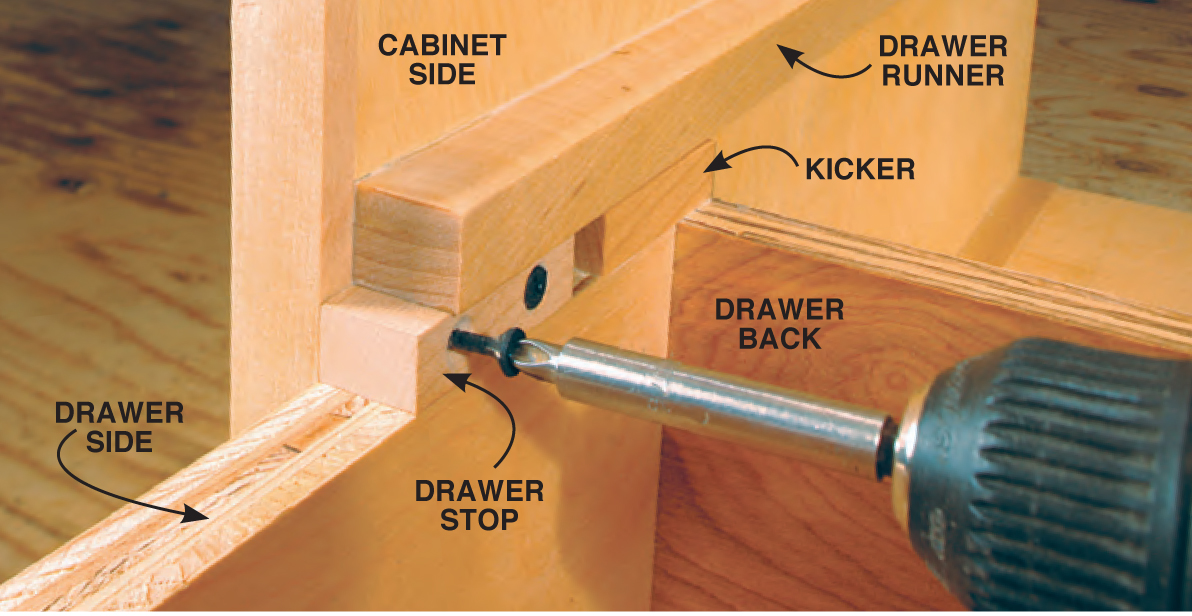
15. Screw drawer stops into each opening so you won’t drop your
drawers. The kickers hit the stops before the drawer can be pulled all the
way out. Don’t use glue because you may want to remove the drawer some day.
|
|

|
|
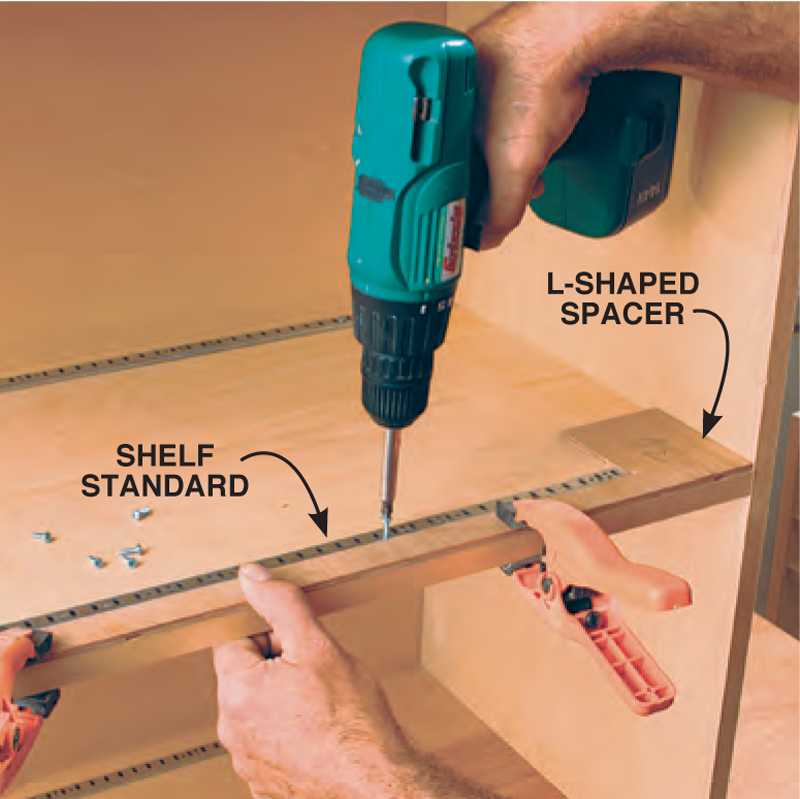
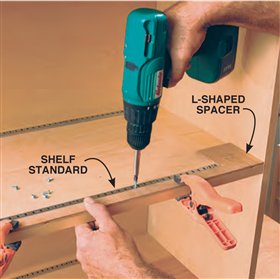
16. Fasten shelf standards into the
upper case. Use an L-shaped spacer
to make sure the standards are uniformly set
front to back and top to bottom.
|
|
|
Product Recommendations
Here are some supplies and tools we find essential in our everyday work around the shop. We may receive a commission from sales referred by our links; however, we have carefully selected these products for their usefulness and quality.