


We may receive a commission when you use our affiliate links. However, this does not impact our recommendations.
Make see-through doors in 6 easy steps.
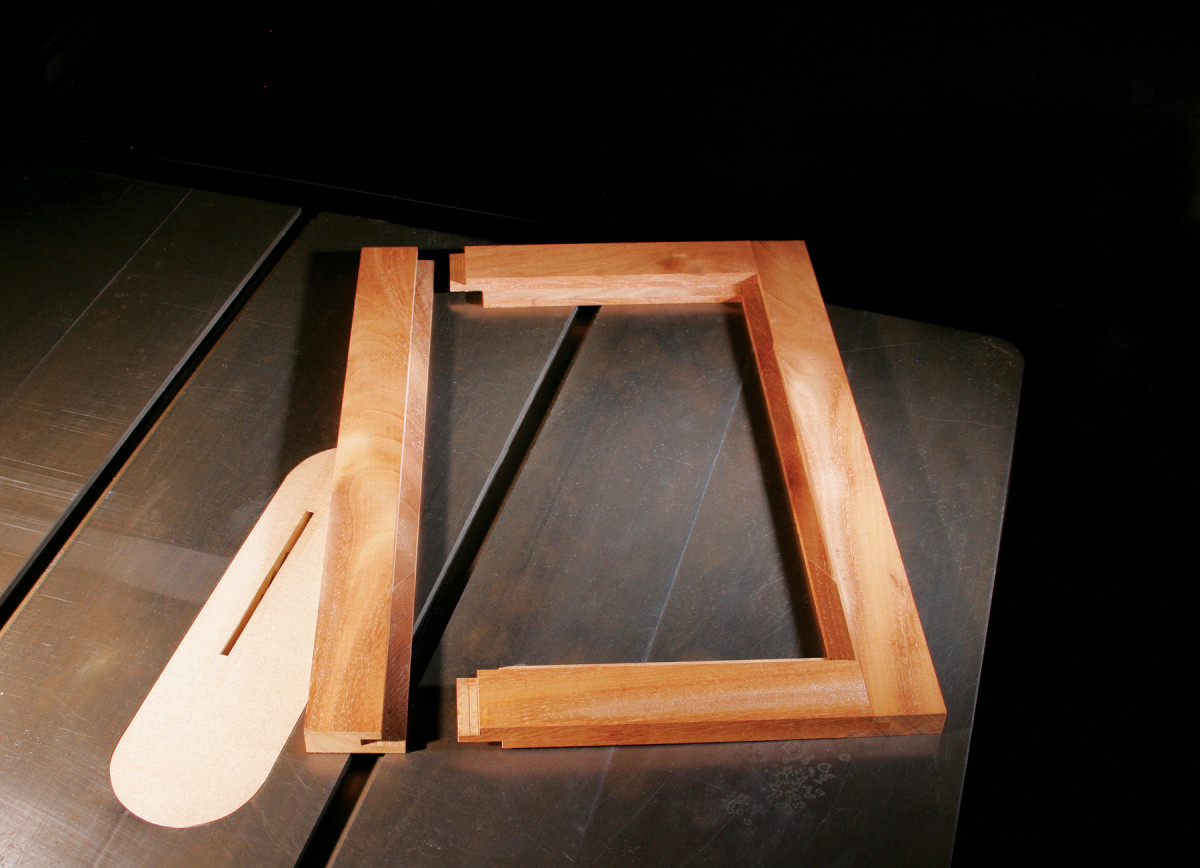
Here’s a nifty way to make frame-and-panel door frames with built-in rabbets for glass. The offset shoulders on the stiles and rails make the joinery look complicated, but it’s actually just a clever variation on ordinary tongue-and-groove joinery. If you plan to make a kitchen-full of doors, this is the way to go. It’s much faster than routing rabbets in all the assembled frames, and then squaring all the corners.
Mill stock to 3/4″ and cut the parts to width and length. Be sure to add 2″ to the length of the rails to allow for their 1″ tenons.
The stiles and rails shown here are all 2-1/4″ wide, but this method will work for stiles and rails of different widths, too. Consider increasing the mortise depths and tenon lengths for larger, heavier door frames. Include extra parts for making and adjusting your setups.
Cut grooves and mortises
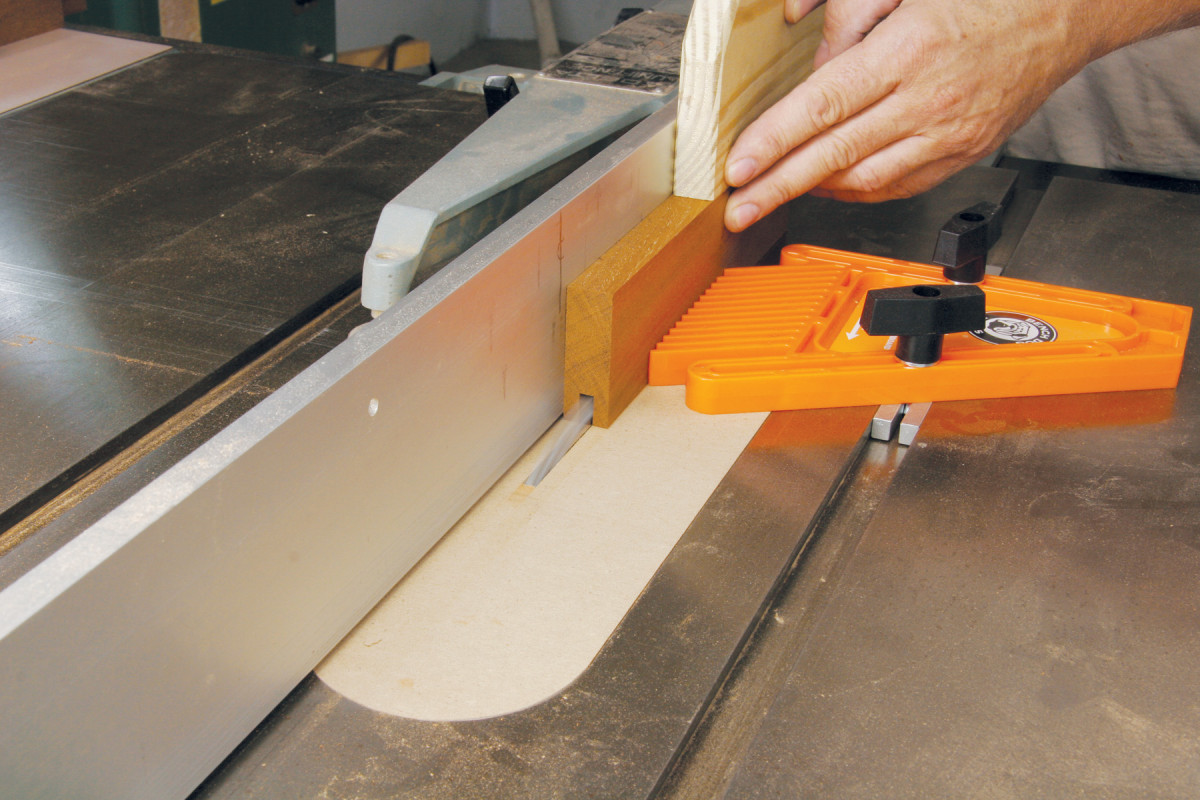
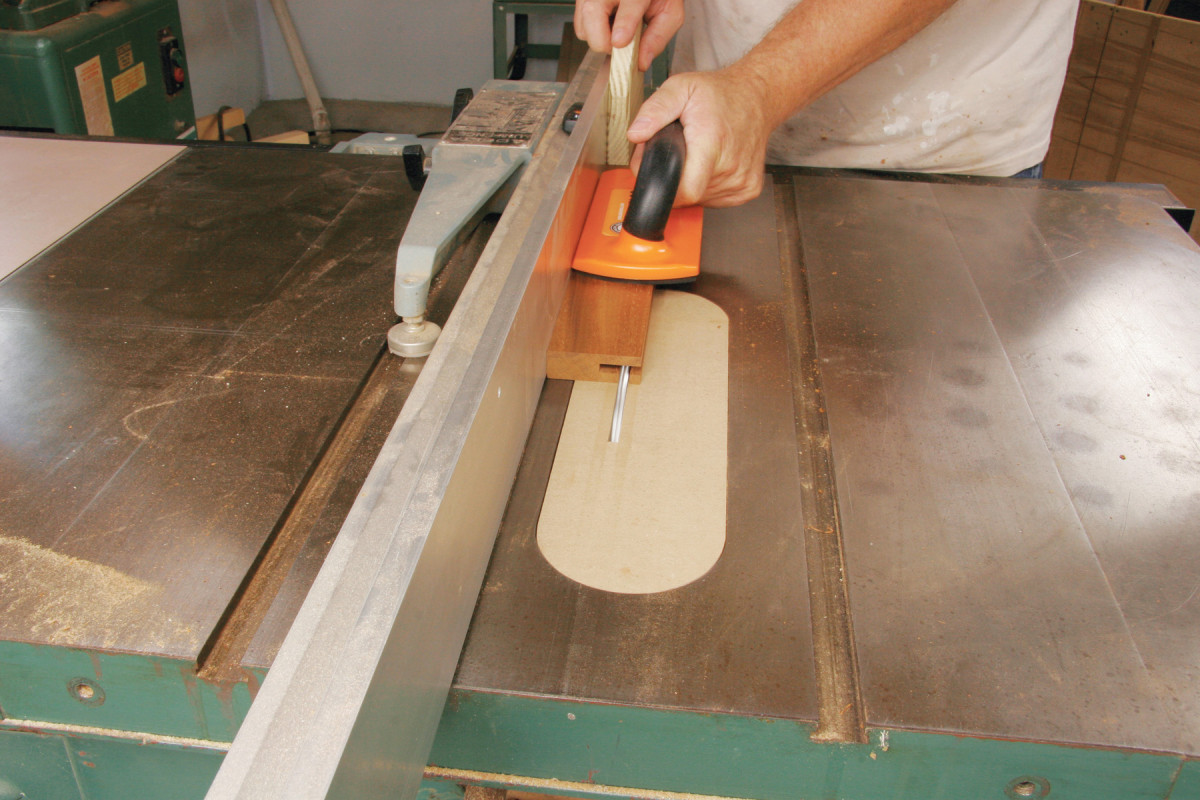
1. Cut a centered groove in one edge of all the stiles and rails, using a dado set.
Install a 1/4″ wide dado set in the tablesaw and position the fence to exactly center the groove in the frame stock. Make one pass on each face of a test piece and then check the groove. If the second pass widens the groove or leaves fresh saw marks on one shoulder, the groove isn’t exactly centered.
2. Raise the blade and cut a deeper stopped groove in both ends of both stiles. These stopped grooves are the mortises.
Once you’ve dialed in the setup, raise the blade to 1/2″ and cut a groove in all the stiles and rails (Photo 1). Then raise the blade to 1″ and make stopped cuts on both ends of each stile to create the mortises (Photo 2). As the groove is perfectly centered, the blade simply deepens it. To position the stop block for these cuts, mark a vertical line on the saw’s fence at the center of the blade’s arc.
2B.
Then mark the width of a rail’s inside face (measure from the outside edge to the rabbet) on the top edge of a test stile. Carefully cut a groove in the test stile, stopping when the two lines meet. Shut off the saw—hold the stile in position until the blade stops spinning. Then butt the stop block against the end of the stile and clamp it.
To cut each mortise, hold the stile against the fence and advance it into the blade until it meets the stop block. Turn off the saw and let the blade stop. Then remove the stile and flip it end-for-end to cut the other mortise.
Cut rabbets and tenons
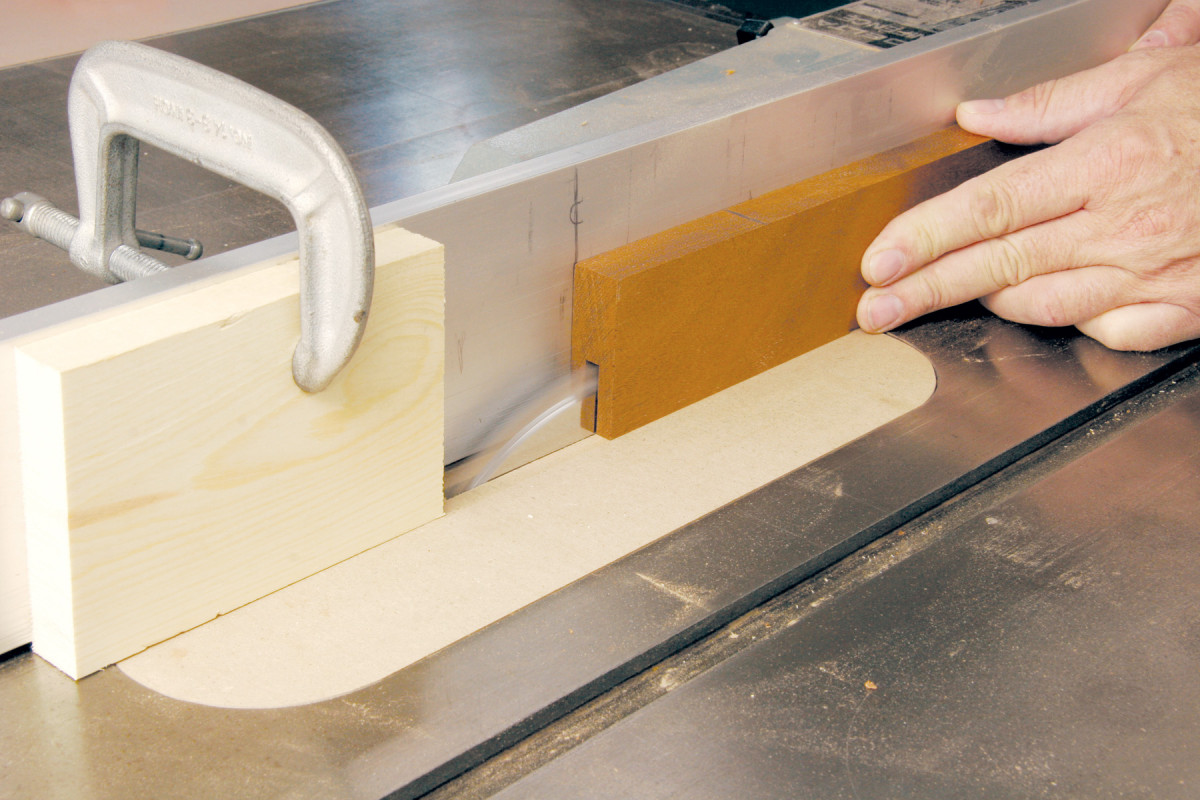
3. Cut a rabbet on the inside face of all four pieces. Don’t bother to change blades—just use the dado set and set the fence accordingly. This rabbet will house the glass panel.
Lower the dado set to 1/2″, set the fence and cut 1/2″ wide x 1/2″ deep rabbets for the glass on the back faces of all the stiles and rails (Photo 3). As you’re using the dado set rather than a regular blade, cut a rabbet on a test piece first, to make sure the rabbet’s width is correct.
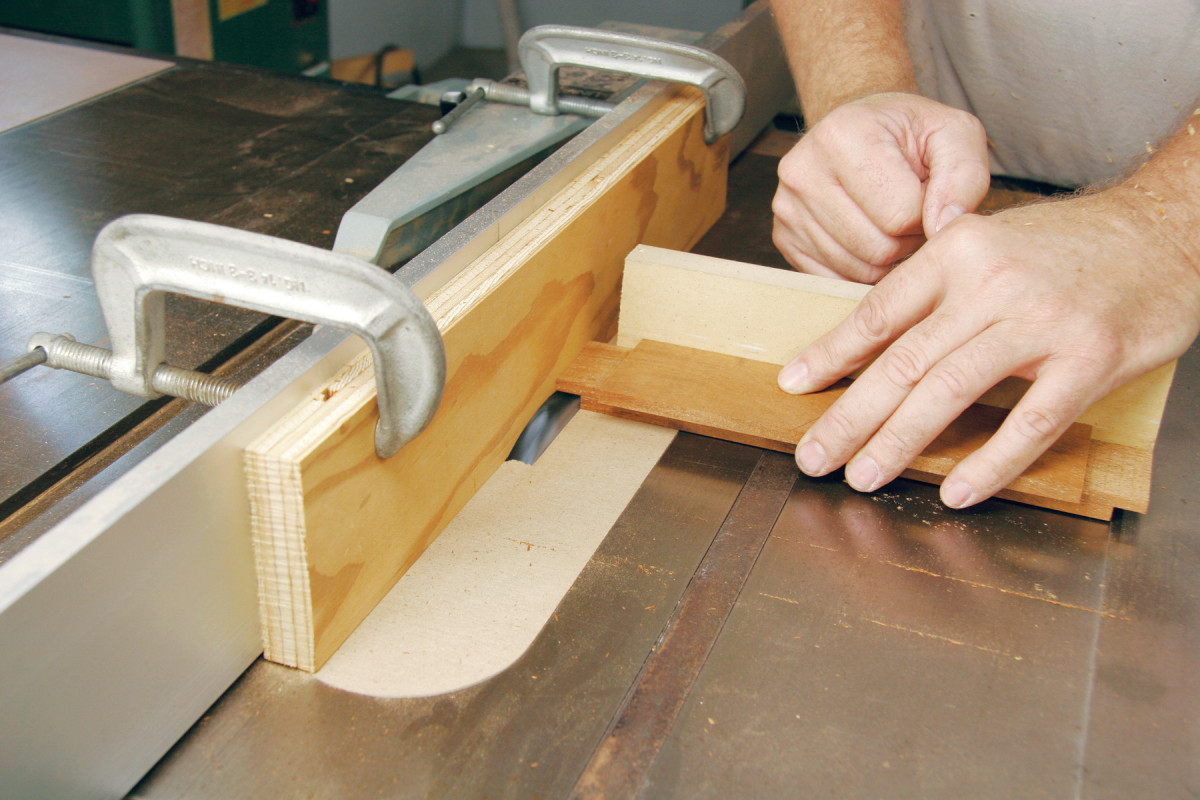
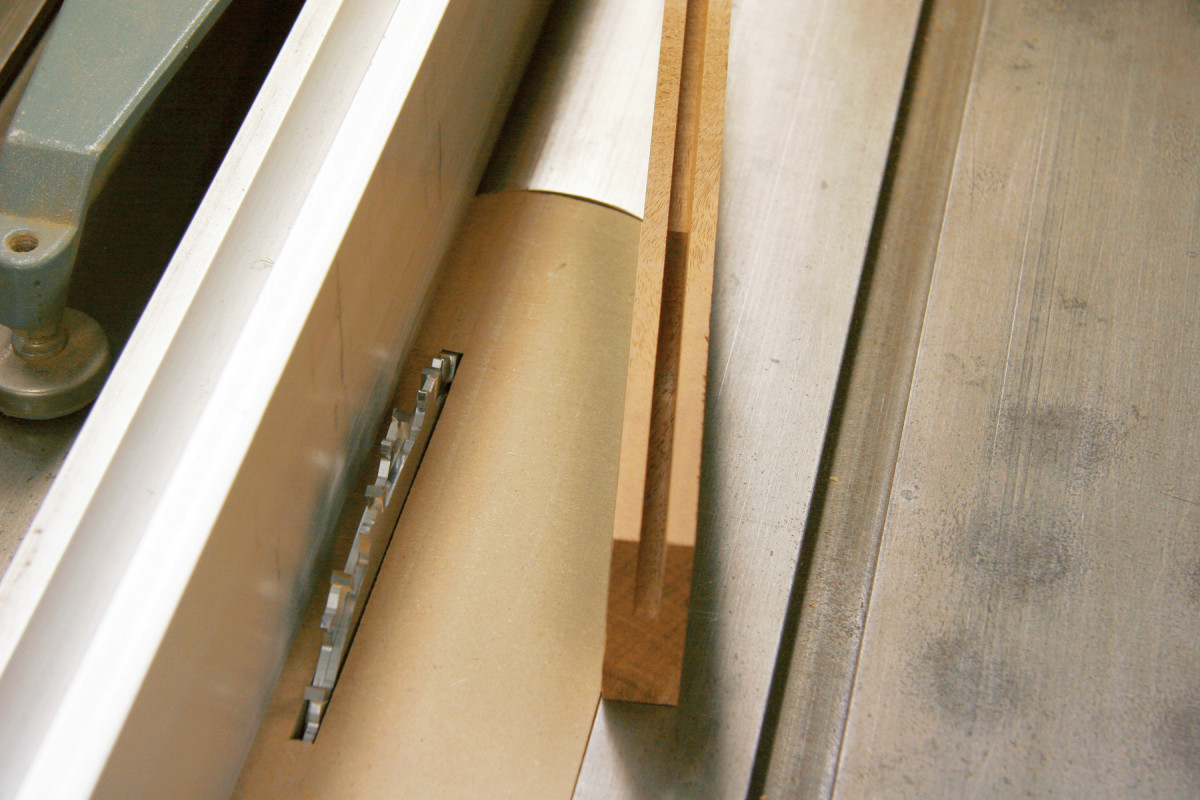
4. Cut tenons with offset shoulders on the rails. The tenon’ s length on the outside face matches the depth of the mortise in the stile. Its length on the inside face matches the width of the rabbet.
Use a miter gauge to cut the tenon cheeks on the rails (Photo 4). Add cutters to widen the dado set to 13/16″ and install a sacrificial fence on your saw’s rip fence. Start by making test cuts to dial in the tenon thickness. Set the blade height to 1/4″ and make a pass on each face of a test rail to cut a tenon. Test-fit this tenon in one of the mortises. If it wobbles, the tenon is too loose; lower the blade and start over. If the tenon binds, it’s too tight; raise the blade a tiny bit and try again.
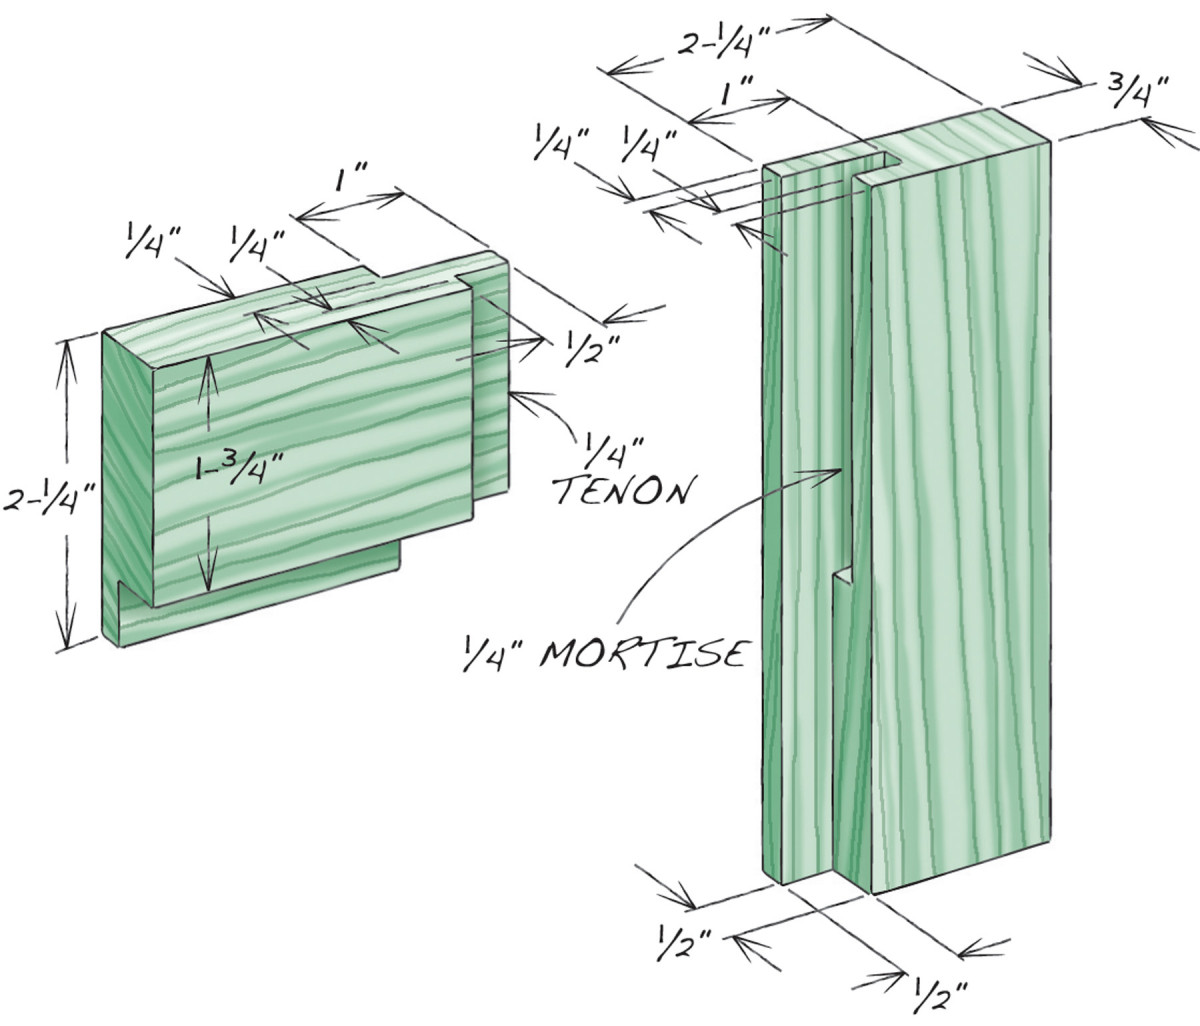
Fig. A) Glass Panel Joint
Once you’ve dialed in the tenon thickness, you can cut the cheeks and shoulders. The shoulders are offset, though, so you have to cut the tenons one side at a time. Mark the outside face on each rail and cut the cheeks and shoulders on those faces first. Set the sacrificial fence 1″ (the depth of the mortises) from the far edge of the blade. Make a test cut on a scrap piece. Then check the tenon’s length to make sure it matches the mortise. It’s OK for the tenon to be a tiny bit shorter than the mortise, but it can’t be longer. Adjust the fence, if necessary. Then cut the tenon cheeks and shoulders on the outside faces of both rails.
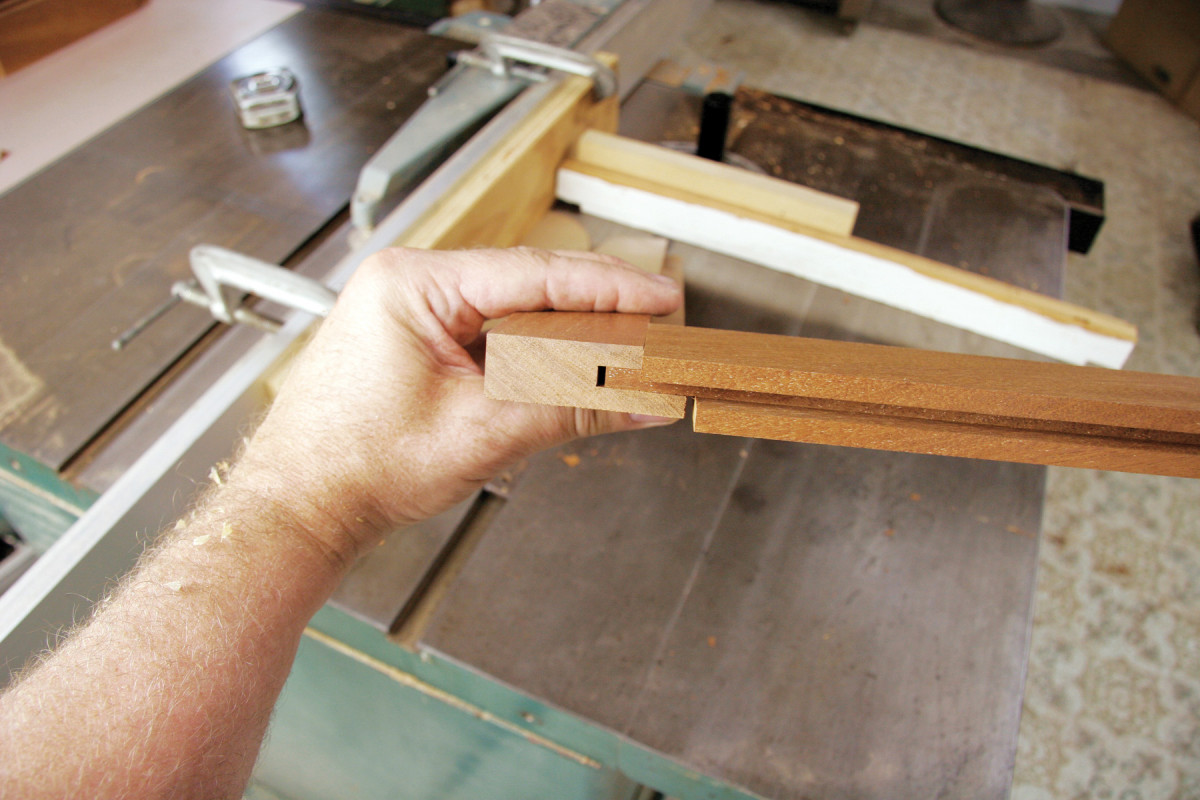
5. Test fit the joint. It’s best to cut the tenon shoulder on the inside face a little short at first. This allows you to to dial in a perfect fit by adjusting the fence and making a second pass.
To cut the cheeks and shoulders on the inside faces, just set the sacrificial fence 1/2″ from the far edge of the blade and repeat the process. It’s a good idea to give yourself some wiggle room when you cut these cheeks, so you can true the fit (Photo 5).
Install the glass
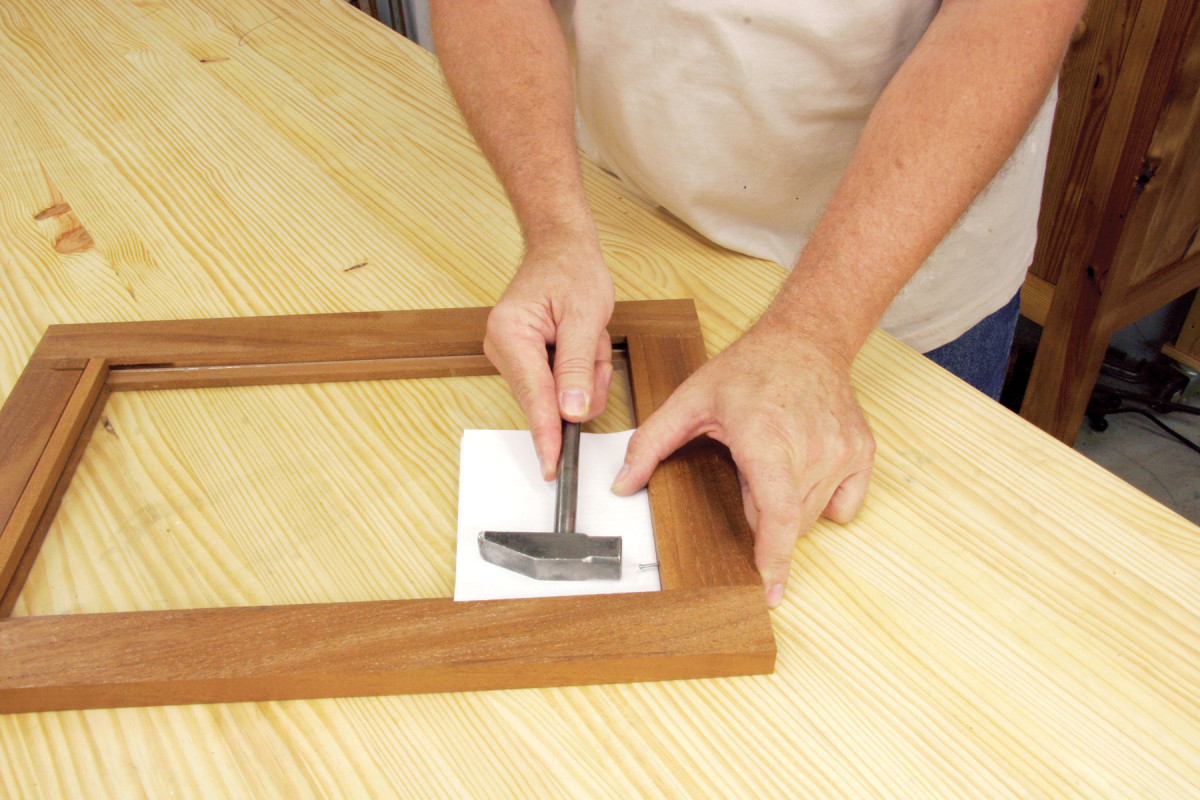
6. Secure the glass by nailing in wooden retainer strips with pre-drilled nail holes. Lay a hammer on the glass with a paper towel in between. Then just swivel the hammer to drive the nails.
Glue the stiles and rails together, cut mortises (or drill holes) for the hinges and knob and apply the finish. Then install the glass. Thin wooden strips that surround the glass and hide the rabbets look the best (Photo 6), but metal or plastic retainer clips will also do the job.
Here are some supplies and tools we find essential in our everyday work around the shop. We may receive a commission from sales referred by our links; however, we have carefully selected these products for their usefulness and quality.


