We may receive a commission when you use our affiliate links. However, this does not impact our recommendations.
 This outdoor kitchen keeps everything needed for an outdoor gathering close at hand.
Project #2210 • Skill Level: Intermediate • Time: 5 Days • Cost: $800
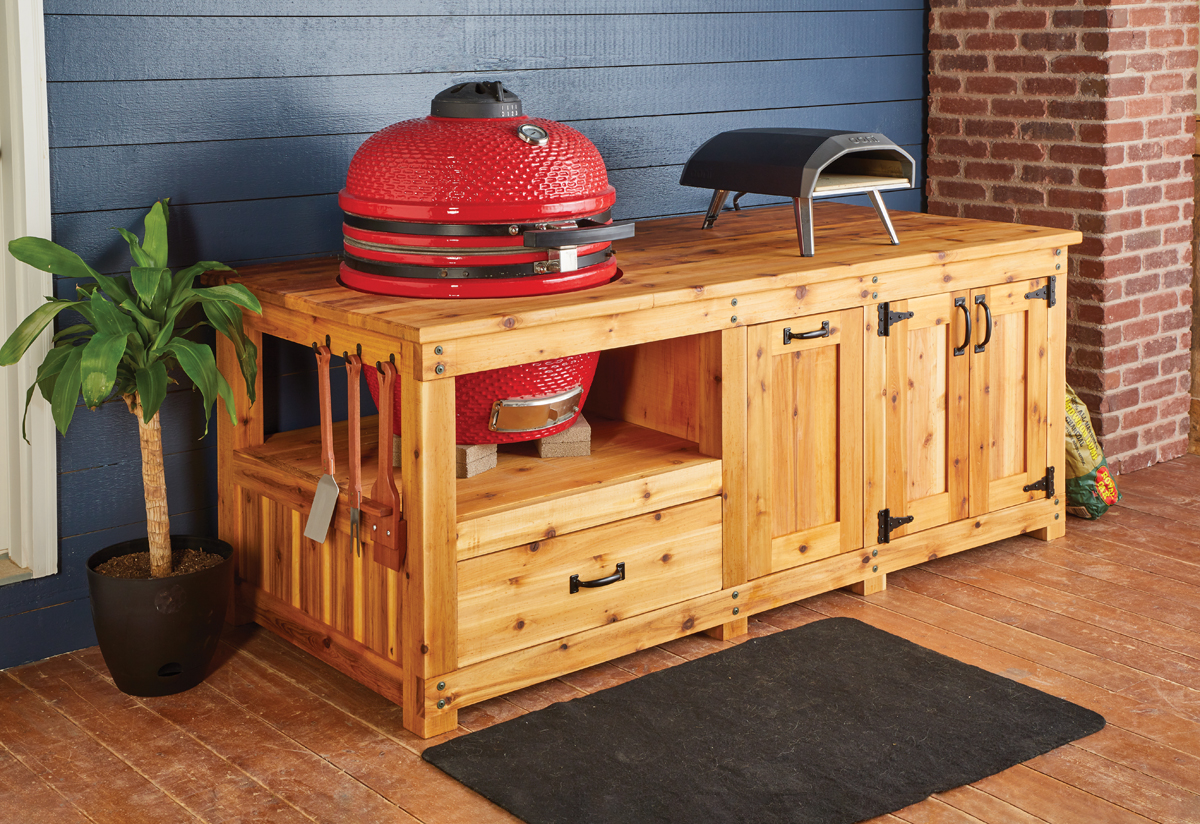
If you live in the Midwest, you’ll know that we’re a get-together type of people. I’m sure that’s a true statement across the US. And while the current situation has put a bit of a damper on this summertime tradition, I hope that things will eventually return to normal. So, in anticipation for the next summertime cookout, I wanted to build an outdoor kitchen to house my kamado-style grill and pizza oven. The results are seen here.
Now, I have to admit something. This outdoor kitchen actually started as a much smaller grill cart, with the intention of it being on wheels. Then, it evolved into a grill island. Finally, it graduated into a grill continent. As I started measuring and laying out everything, I quickly realized that the outdoor kitchen would be rather large, and not everyone would want an outdoor kitchen this large. So, that led to designing this piece to be fairly modular. Even though this kitchen ends up being nearly 7 feet long, it’s easy to trim it down and customize it to what you need — more on that in a bit.
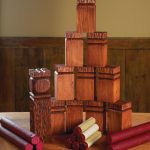
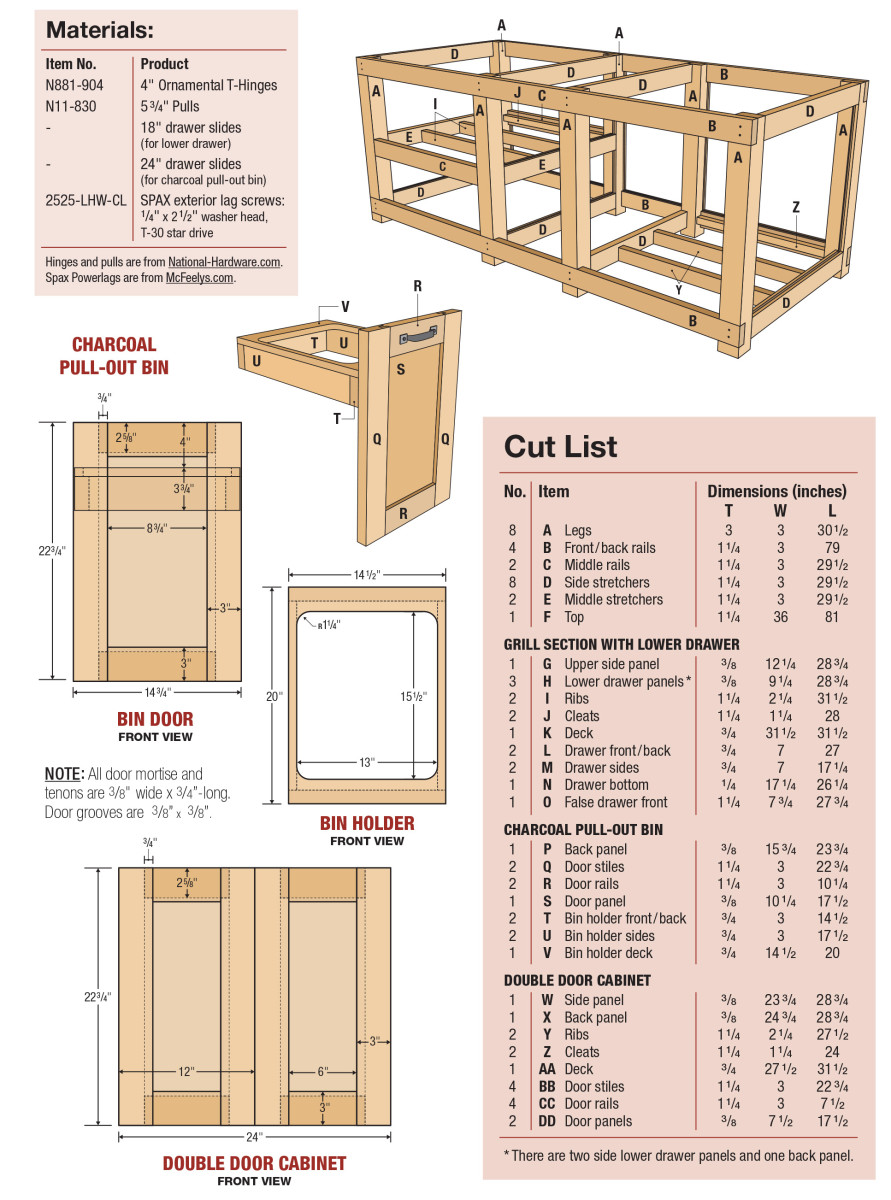
 Before we step into the shop and walk through the construction, the final thing I want to touch on is the material I’ve used. Originally, I planned on building this out of iroko to match my picnic table. However, working with the dense African hardwood comes with some challenges and would be a pretty pricey endeavor. Instead, I opted to build this from construction-grade cedar. A combination of 4x4s, 2x4s, 2x6s, and cedar fence pickets are readily available at nearly every big box store. However, any weather-resistant wood would work—iroko, teak, white oak, cedar, redwood, and cypress would all be great options. After finishing this kitchen, however, I think cedar was the right call for my application.
And finally, I want to note that this cart is designed for a kamado-style grill. These grills are ceramic and have great insulating properties. With the grill lit, the outside gets warm. You won’t burn yourself by brushing up against it, but it’s certainly not hot enough to burn the cart (it’s like touching a piece of metal that’s sitting out in the sun). This cart is not designed for a kettle-style grill, which is sheet metal and would get extremely hot during cooking. I also would not use my kamado grill at extremely high temperatures (800°+). That’s my disclaimer—make some great food but don’t light the kitchen on fire!
Start With the Legs
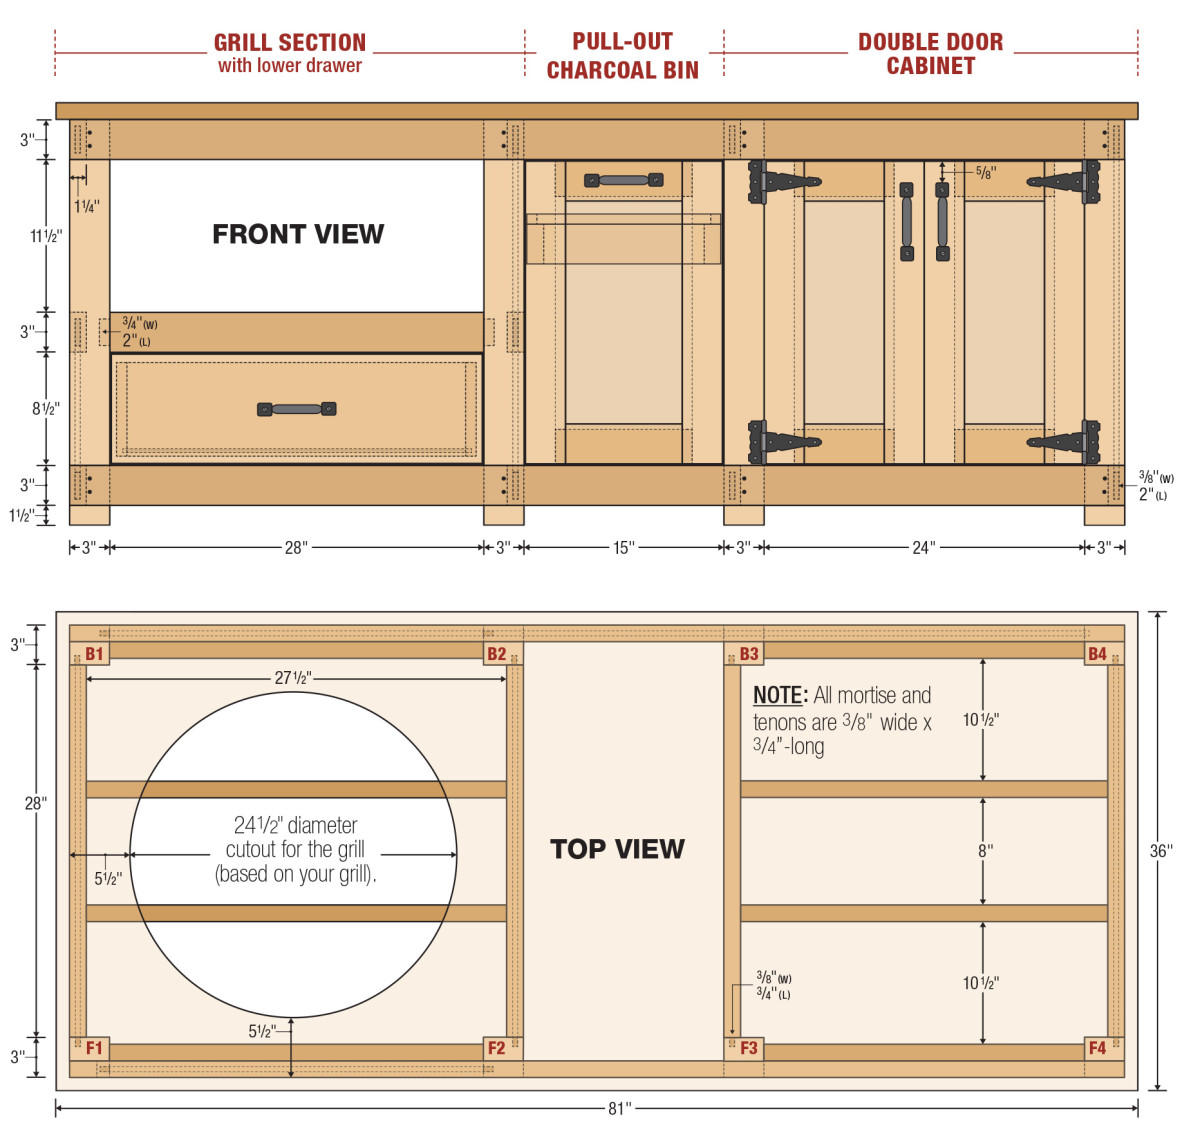
As you look at the main photo of the kitchen, you’ll notice that the outdoor kitchen is divided into three sections—the grill section with lower drawer, the charcoal bin pull-out, and the double door cabinet. The construction of each of these is identical: a pair of front and back legs connected by rails. Some sections, depending on where they are located, have more rails and others have panels in them. By adding or removing these leg sections, you can customize the size and layout of your kitchen.
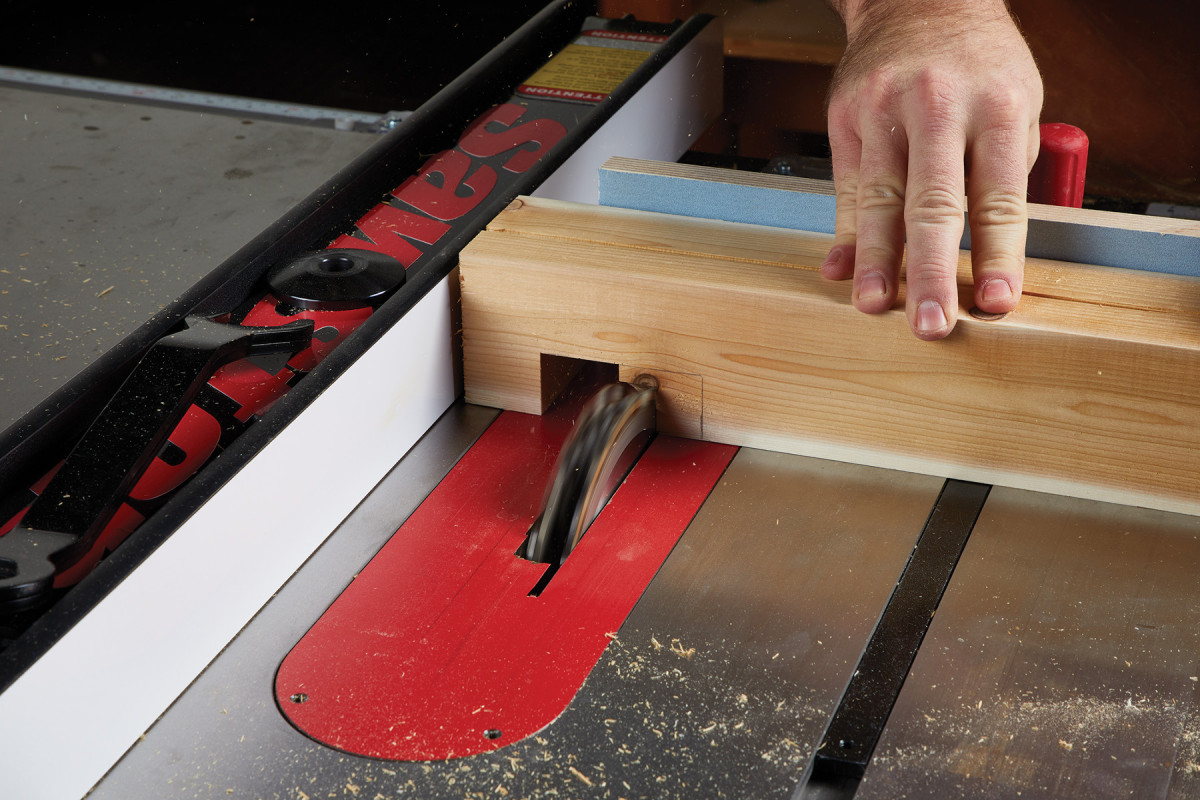
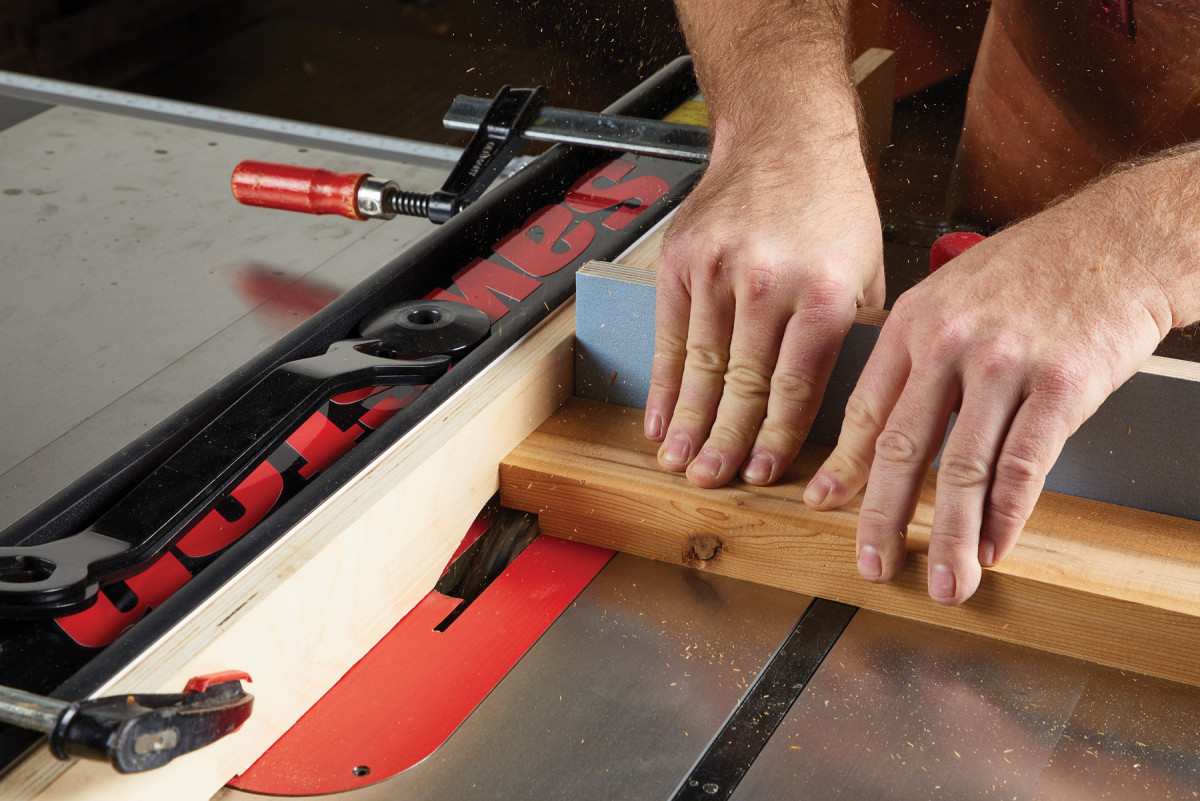
Use a test workpiece to dial in the size of the dado.
After verifying that the stretchers will fit in the test piece, use it as a setup to position the fence before notching all the legs.
The first thing we need to start with is the legs. I used some 4×4 stock and planed them down to clean them up. The series of legs are all connected by a top and bottom stretcher. To make a connection point for the stretcher, we’re going to cut some dadoes and notches in each of the legs. To do this, I loaded a blade up in the table saw. As you can see in first photo, I used the miter gauge with an auxiliary fence on the miter gauge to guide the workpiece during the cut. The auxiliary miter gauge fence is fresh, and this “zero-clearance” fence helps reduce tearout on the backside the workpiece.
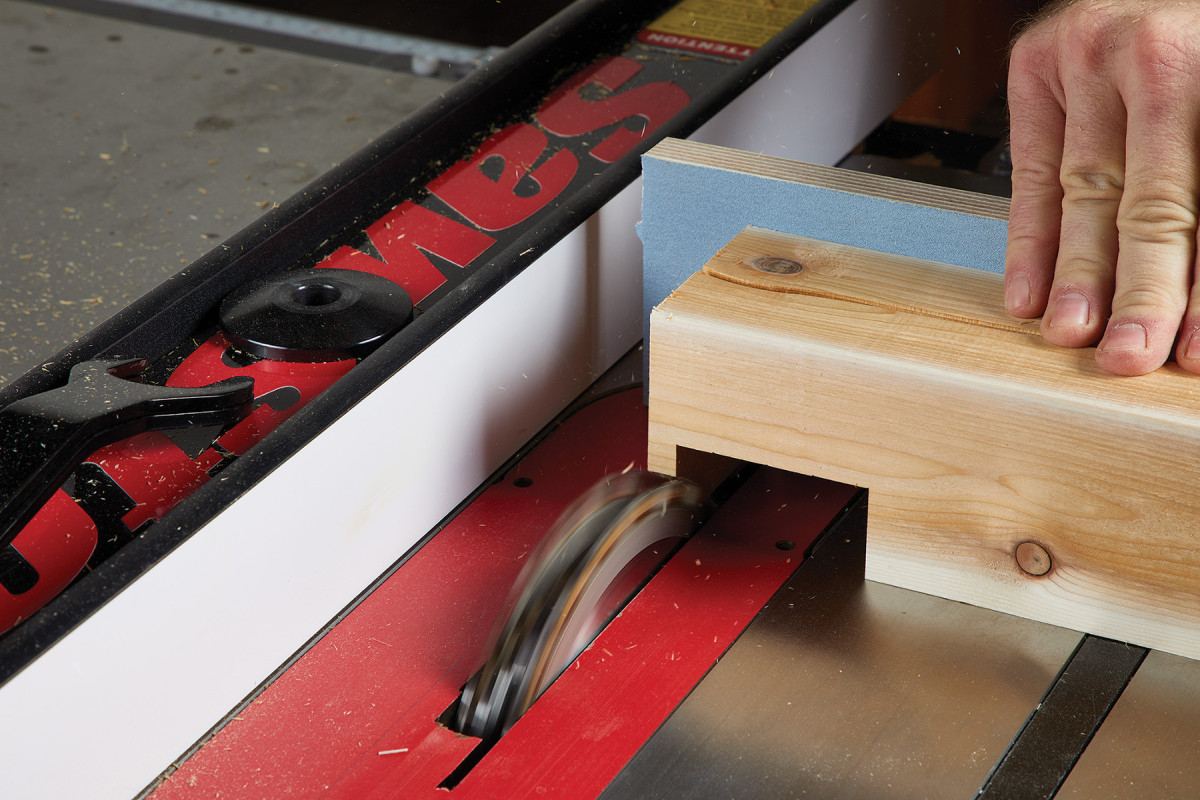
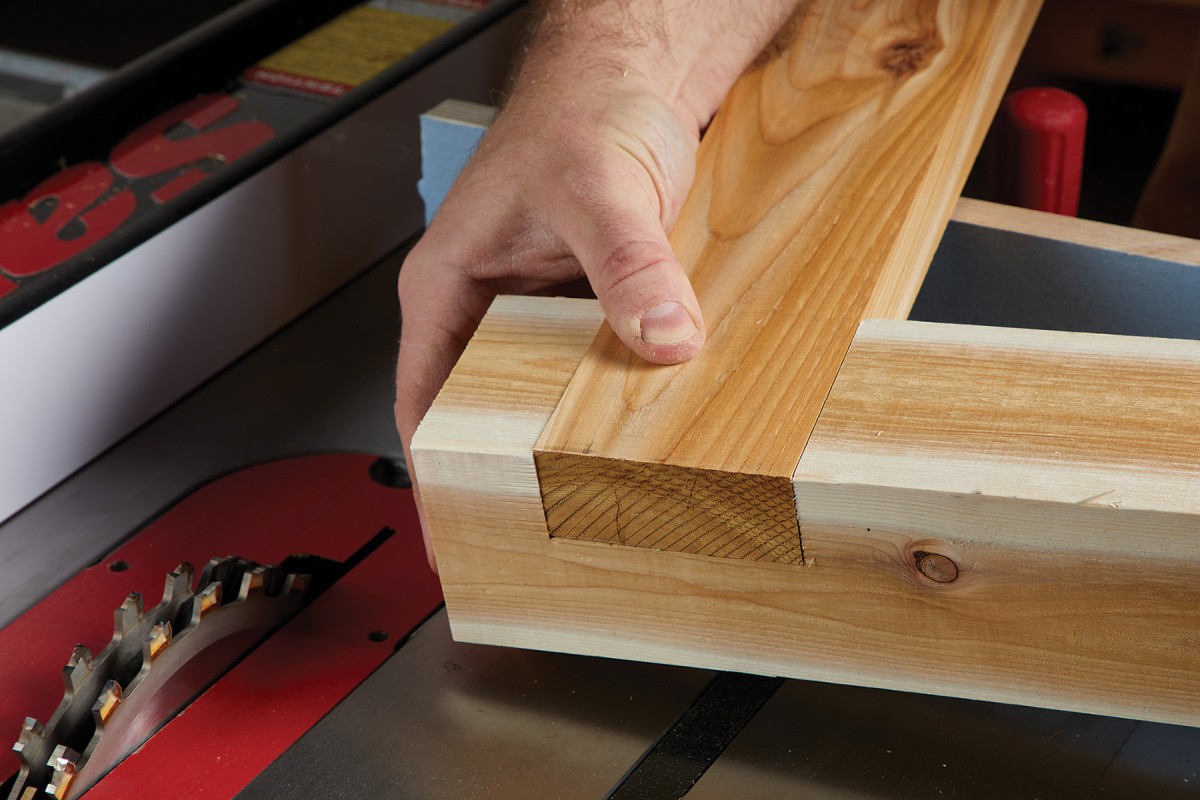
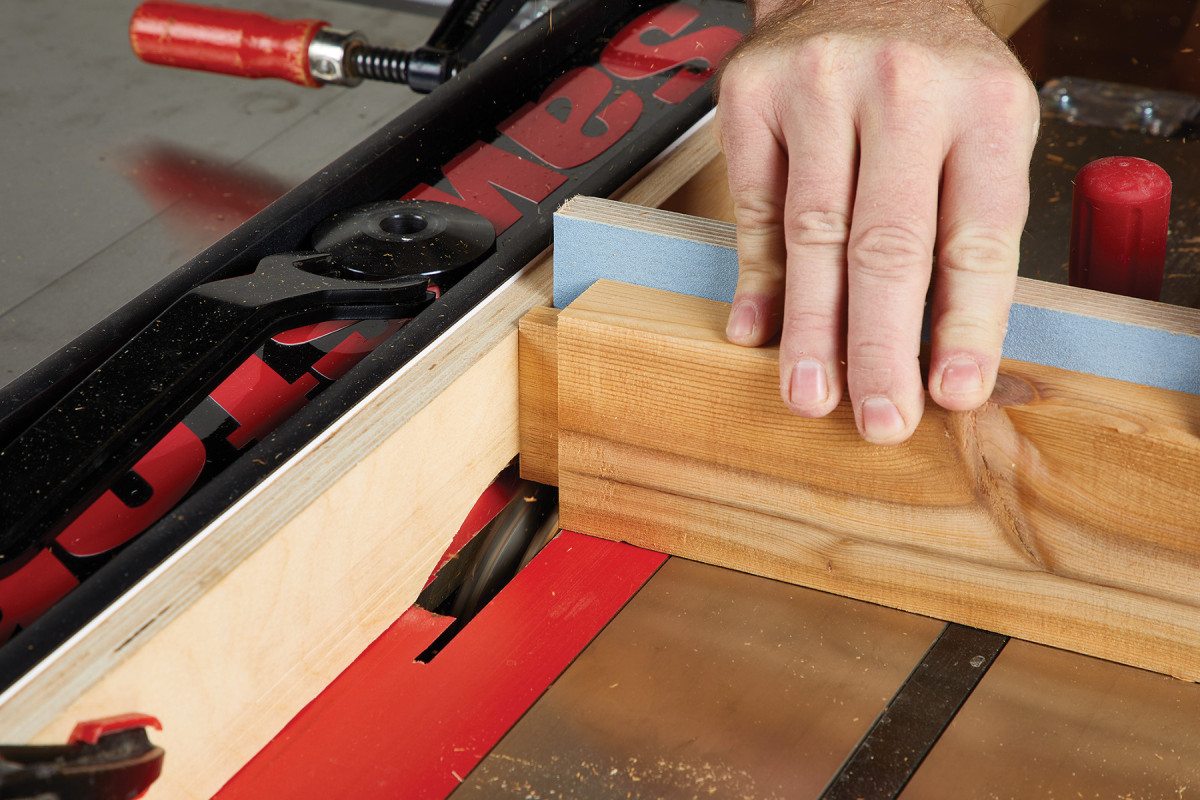
The top notch only requires one setup of the fence. Position the fence to locate the bottom of the notch and nibble away at the waste.
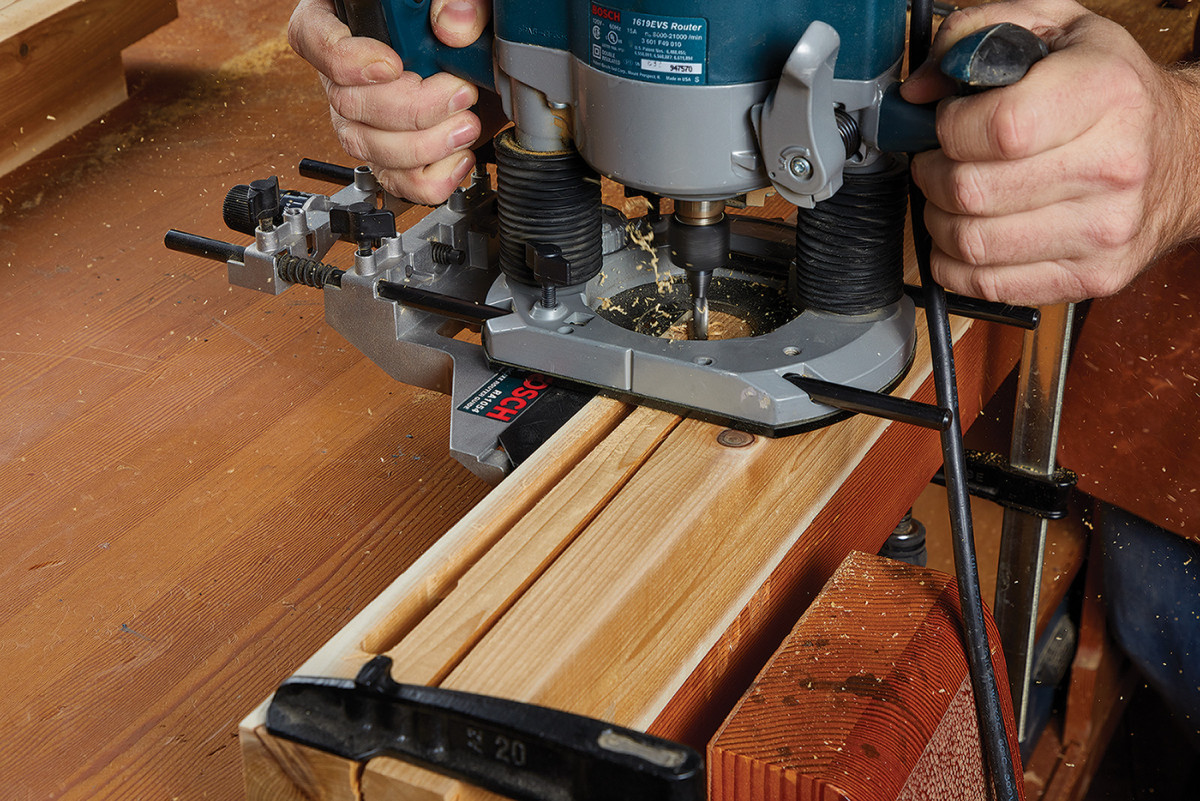
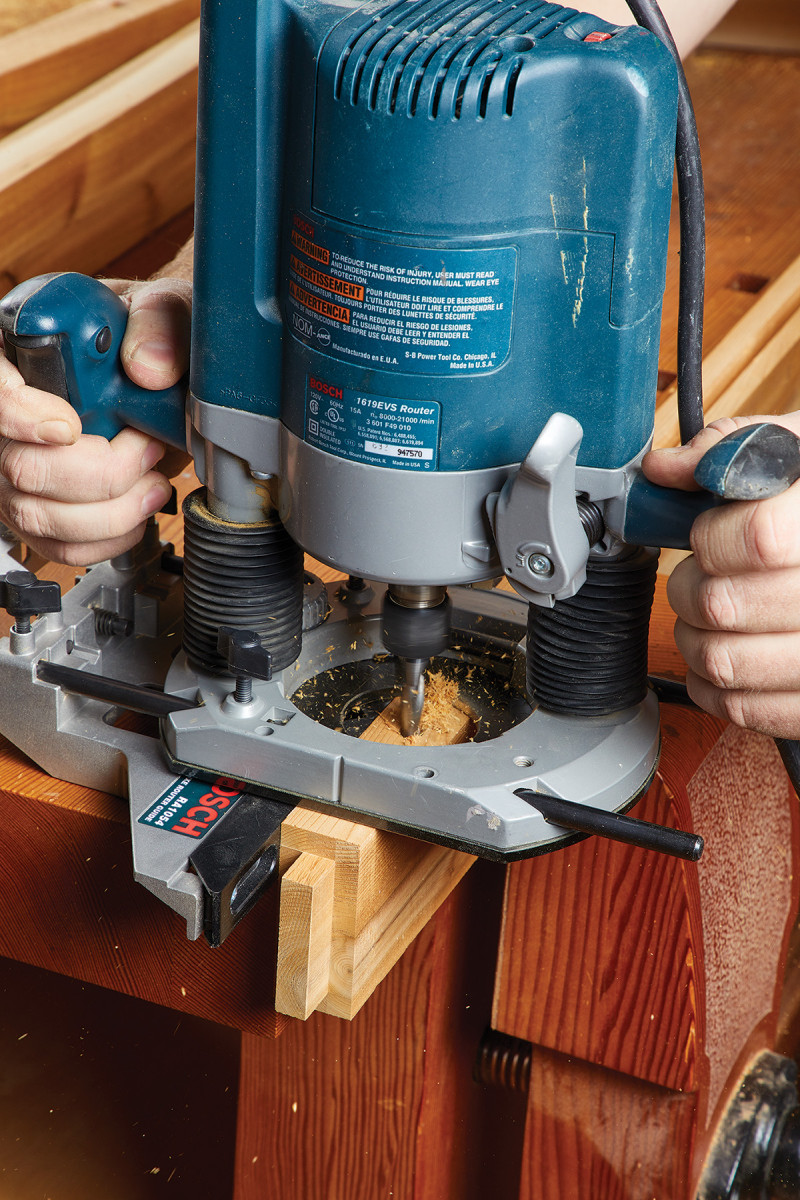
After creating the lower dado, I set the rip fence to position the end of the top notch and cut this in the top of each leg. With all the notches cut, I found it to be a good idea to stand them all up and pick the best-looking legs for the front of the kitchen. I labeled each leg with its position… “F1, F2, B1, B2” etc. Each front and back pair of legs is connected with rails. Tenons on the rails mate with mortises in the legs. Cutting the mortises is easily done with a plunge router and edge guide. The soft cedar allows you to make a full-depth mortise in one pass.
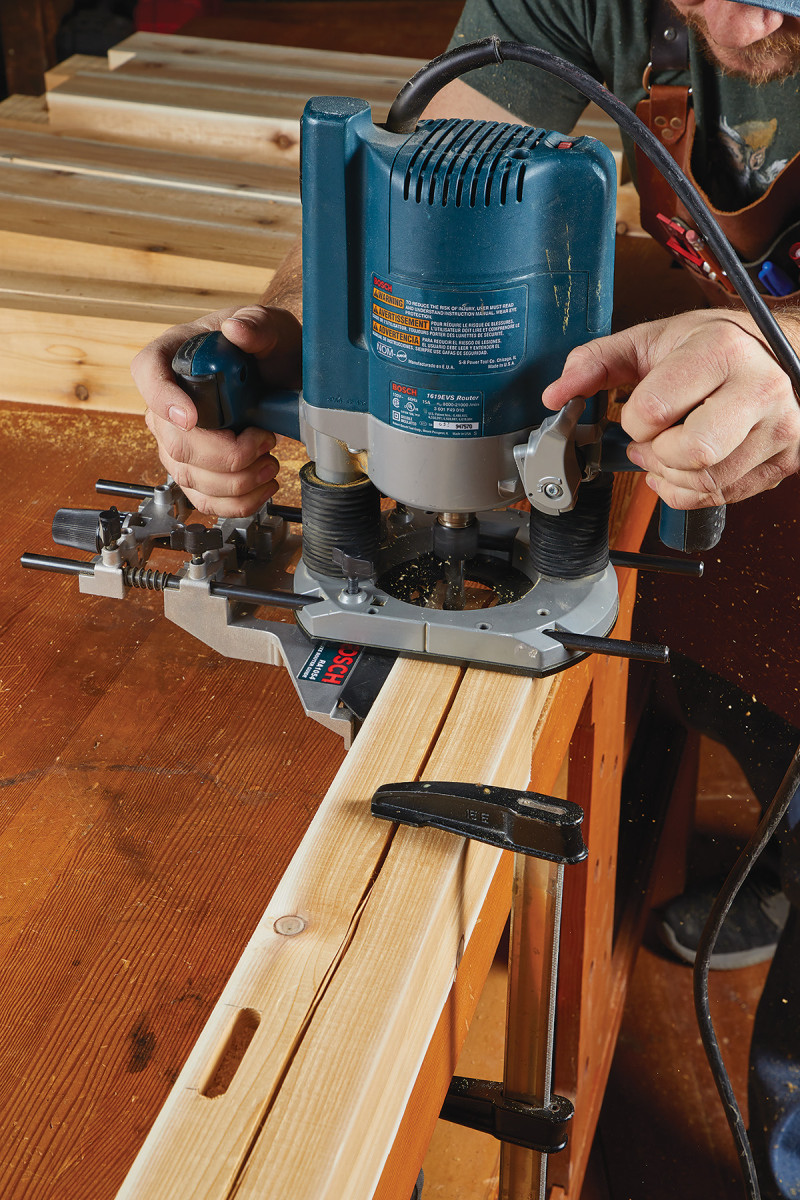
An edge guide and router makes creating mortises a breeze.
After planing down 2×4 material for the rails, it’s time to hit the table saw one more time. Here, you’ll use the dado blade to form the tenons on the end of the rails. With the tenons cut, round over the corners of the tenons to match the mortises. I just did this free-hand with a chisel and mallet.
Cut the face of each tenon first.
Flip the workpiece on edge and finish off the tenon.
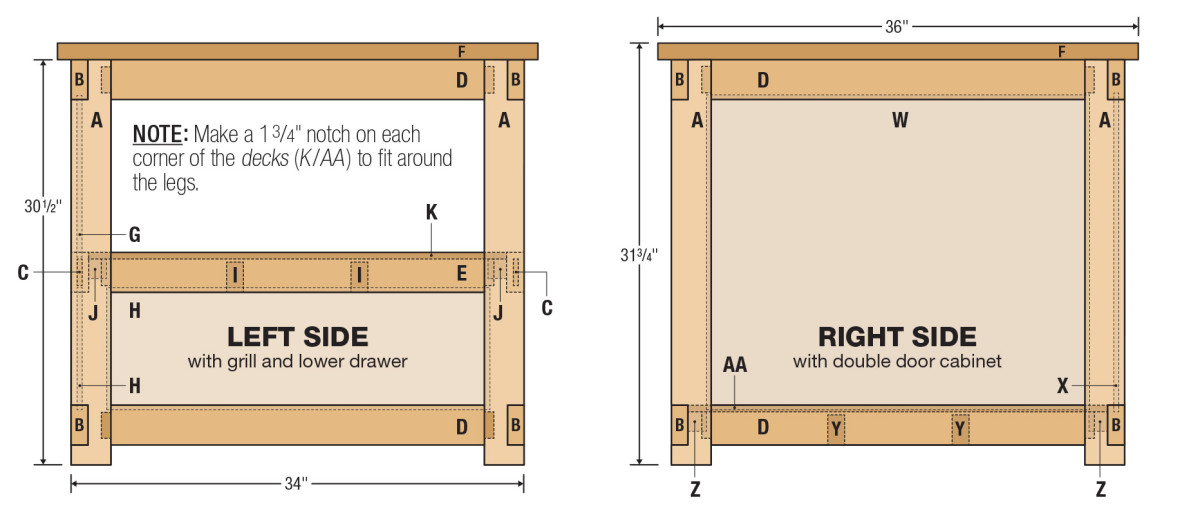
With the rails dry-fit to the legs, you can decide what’s getting panels and what isn’t. Both of my ends were going to have panels (the grill bay only has lower panels), and every bay back has panels. To create a groove for the panels, I used the router and edge guide again. This groove is routed on the inside of each rail (second photo below) and on the inside of the legs. The illustrations will show the locations of each groove, at least in my layout.
Rout the grooves for the panels in the legs. These grooves run from mortise to mortise.
Form the matching groove inside the rail. Make sure to always reference the edge guide off the outside face of the workpiece.
To create each panel, I used dog-eared fence pickets. These pickets come from the lumber yard at about 5/8“-thick and perfectly flat. That’s a joke. You’ll need to dig through the pile to find fairly flat, uncupped fence pickets. And, even after taking your time to flatten one face, plane them to rough thickness, joint an edge and glue them up, you’ll probably still find that they move. Not kidding, I had a few panels that, after two days in the shop, the 32-inch panel had shrunk by almost half an inch! Ah, the lovely world of commercial lumber. Just plan for your panels to start a little oversized and cut them down.
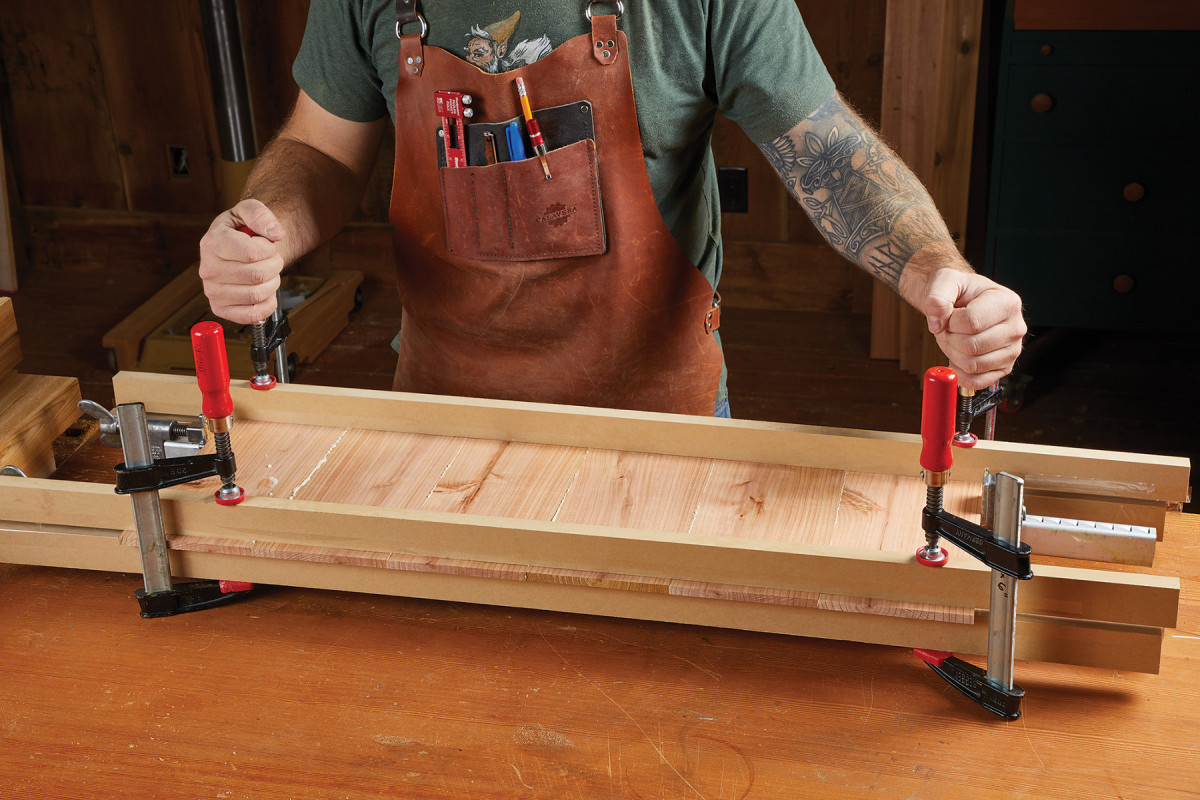
A couple of pairs of cauls wrapped in packing take help keep thin panels flat during glue up.
Glue Up Sections
With the legs all cut, mortises routed, tenons cut, and panels glued up, you’re almost ready to do some assembly. But first, let’s cut the panels down to size.
Unless you’re a glue-up wizard, the end of the panels are probably uneven and in need of trimming to square them up. These panels are fairly thin and floppy, so you’ll want to come up with a good way to cut them. A track saw, or circular saw would work. However, I happen to have access to a large edge sander. So, I struck a line, held the panel up to the edge sander, and squared up one end. Conventional? No. Did it work? You bet ya. Once you have a square edge, trim the panel to size.
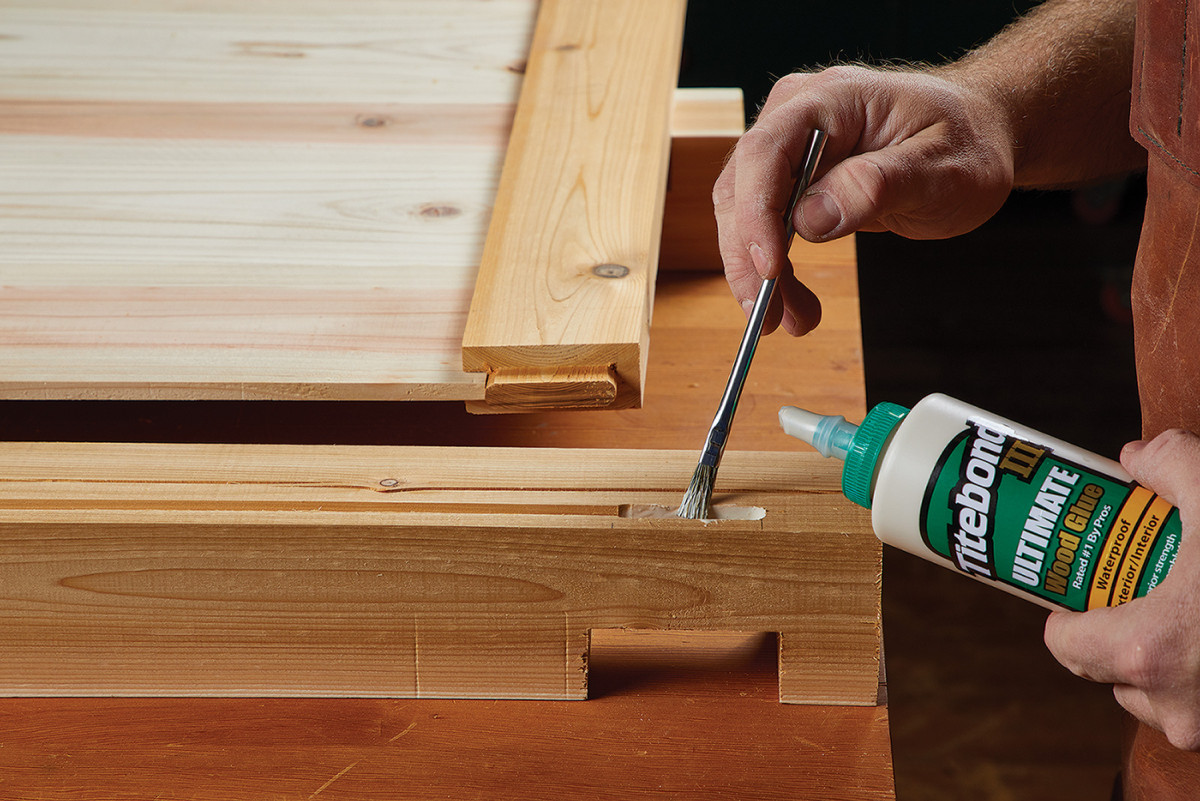
Use a water proof glue and spread plenty of glue inside of each mortise, but don’t worry about gluing the grooves.
Now, let’s get each pair of legs glued up. Because this is an outdoor project, pick a good waterproof glue. Epoxy works well, especially if your joinery is a little loose. I used Titebond III as it’s waterproof and has a pretty good open time.
Lay a leg on the bench and fill the mortise with glue. I use an acid brush to spread the glue around the mortise and brush any extra onto the tenon. Insert the upper and lower rails in place before sliding the panel into place. Cap it off with the other leg before applying clamps.
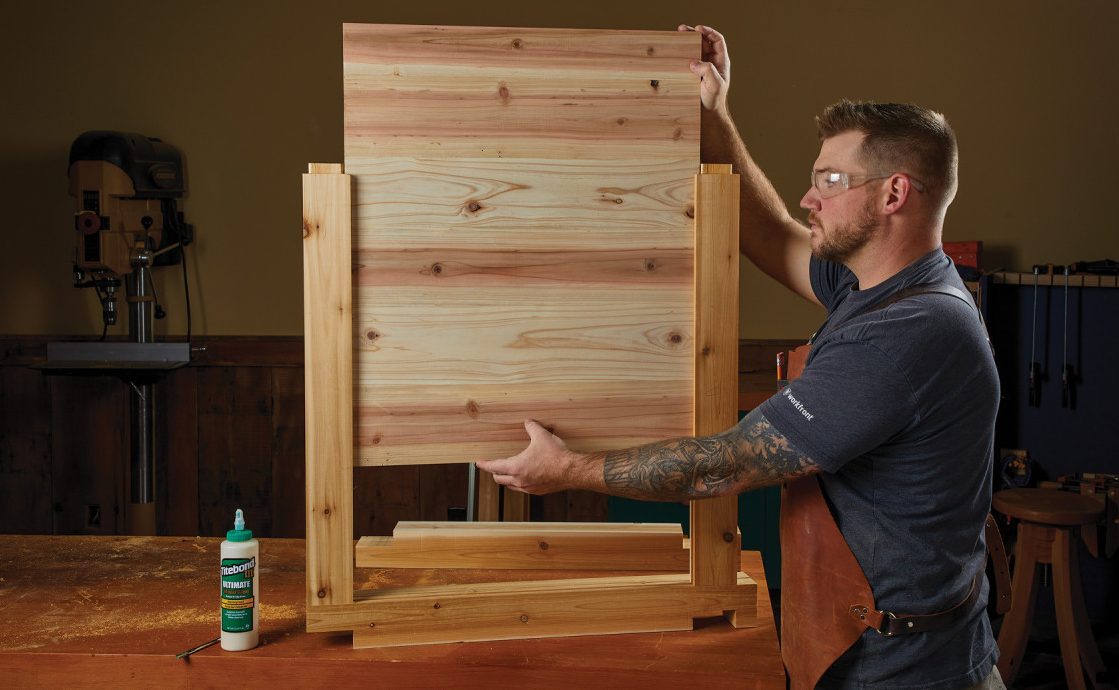
Slip the panels into place after fixing the rails into one of the legs.
As you can see in the photo above, the right-most pair of legs on my kitchen has one large, solid panel. This caps the end of the kitchen and is a clean look. For the left side, where the grill sits, there are actually three rails, as seen below. There is only one panel here, located between the middle and lower rail. This will be where the drawer unit is installed later. The open area to the front left and rear of the grill cubby will help provide adequate airflow to keep the outside of the grill cool,and allow airflow into the firebox. The right-hand side of the grill cubby (which are legs F2 and B2) is identical to this one, but with a panel between the middle and upper rails.
The grill cubby parts have middle rails that hold shorter panels.
With the four sections glued up in clamps and the glue drying, you can take care of the next pieces of the cart: the four long stretchers that connect each of the legs. There’s also a pair of front and back rails that define the top of the drawer opening, along with the back of the grill cubby. The long stretchers are pretty simple—the front pair are simply cut to size. The back ones, however, have grooves down the inside edge. These grooves, like on the legs, will be for the back panels. Instead of routing individual grooves for each panel, I went ahead and cut one continuous groove down the length of the panels. I simply stopped it a few inches short from each end, so you don’t see it on the ends of the kitchen.
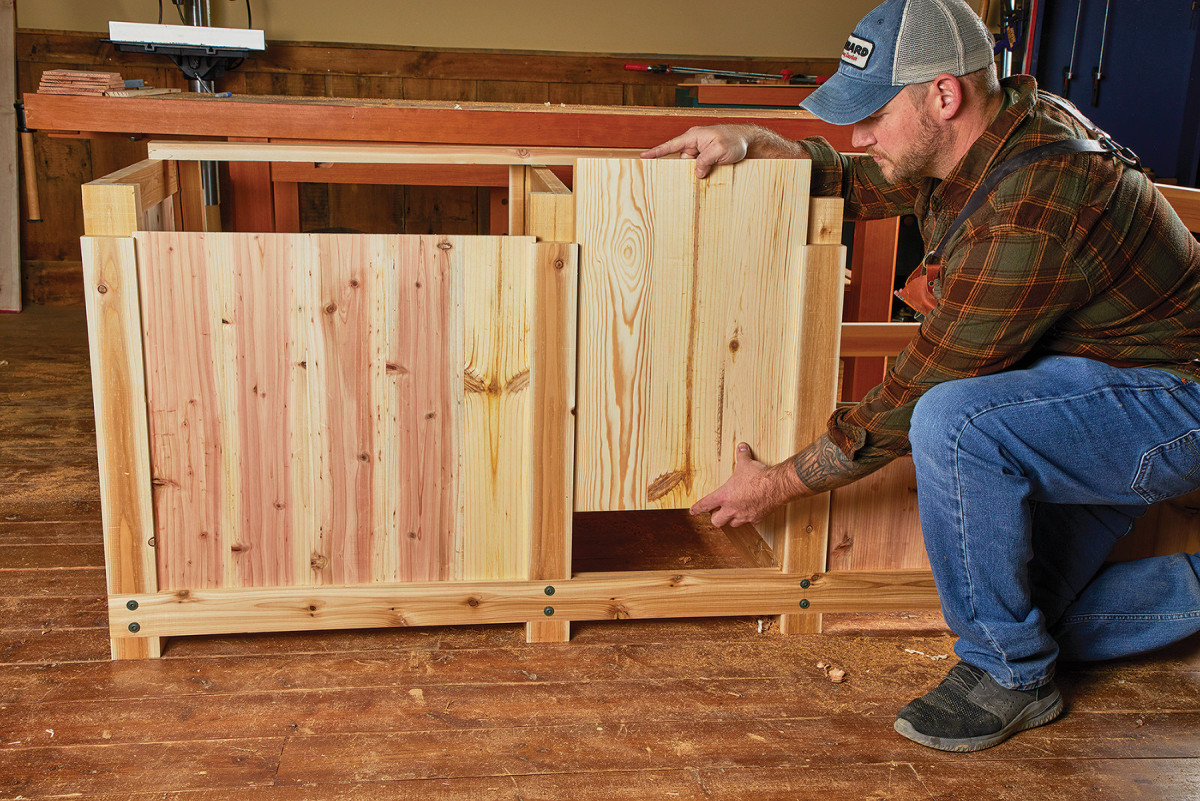
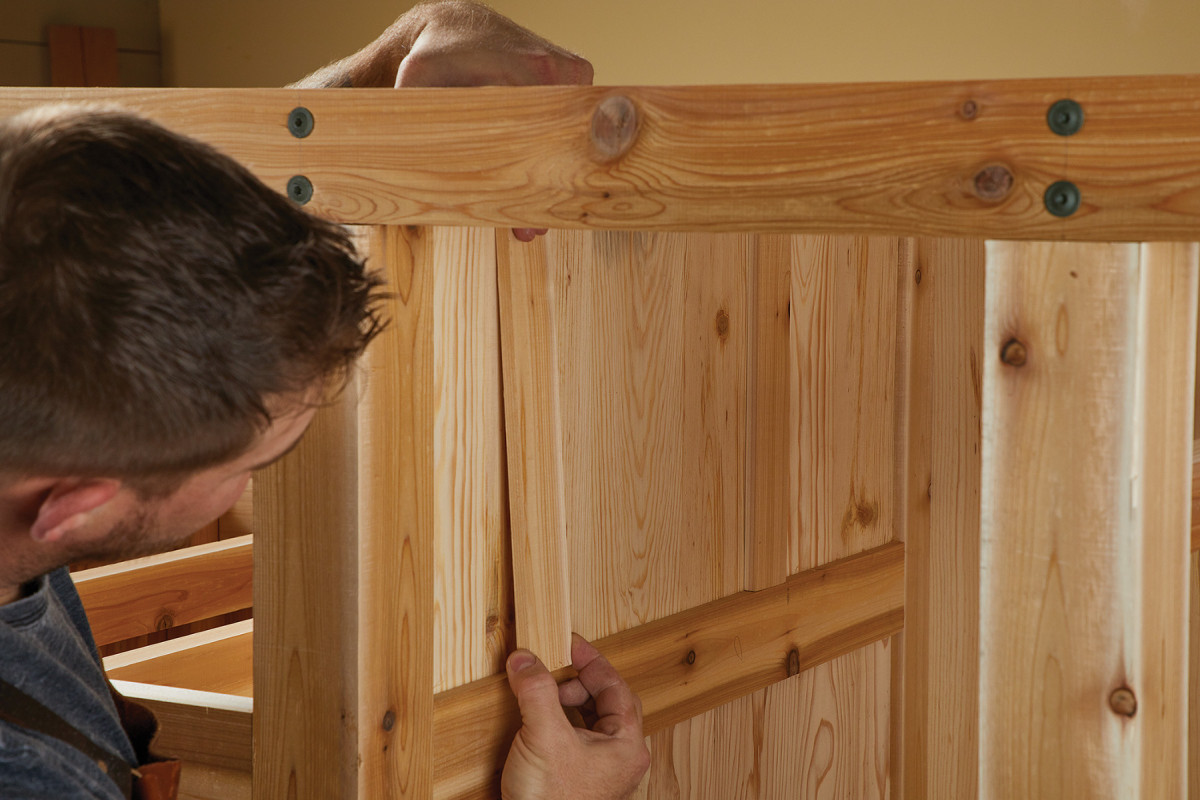
After attaching the back, lower stretcher, slip the back panels into place.
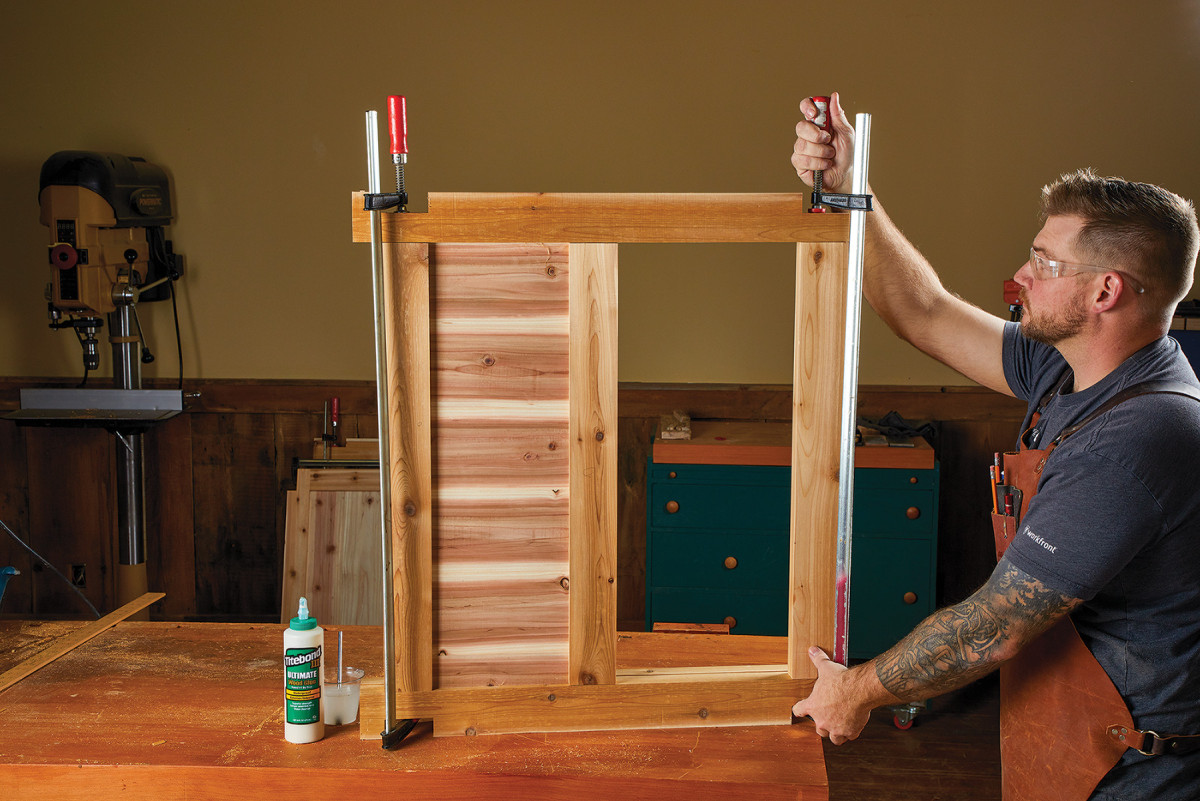
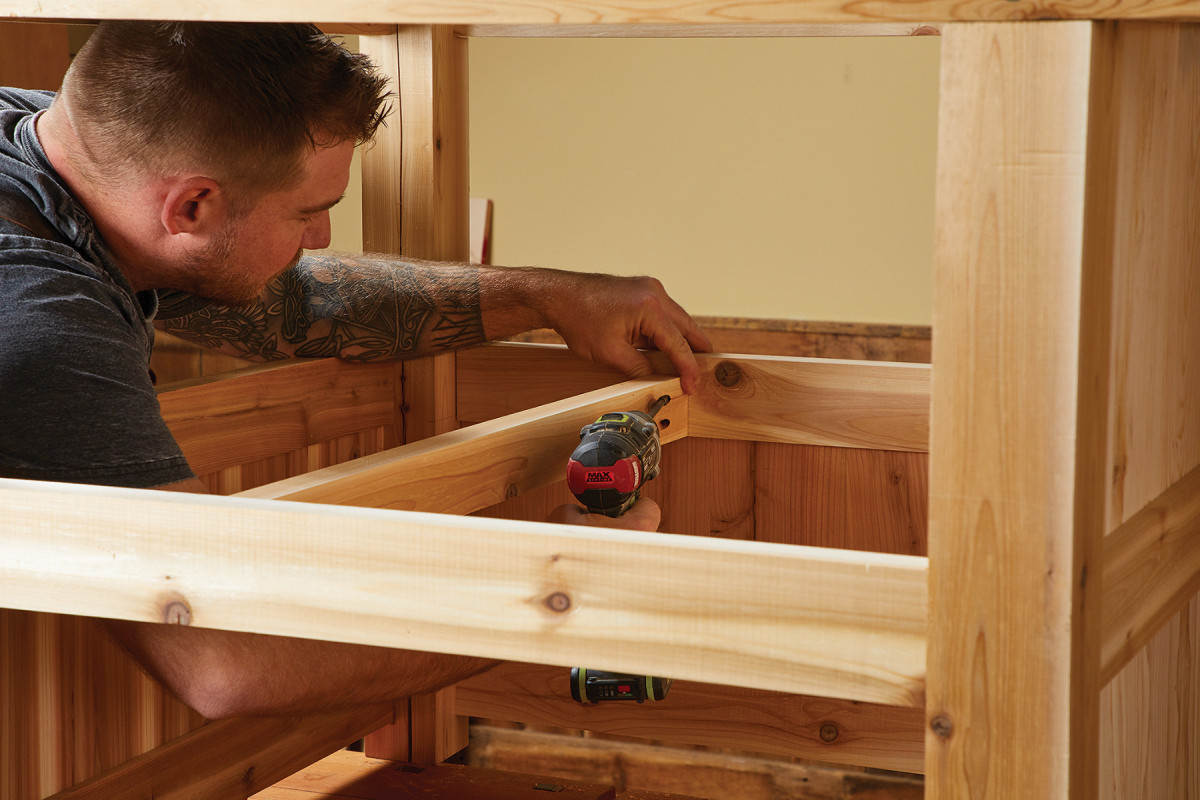
When the glue is dry on the leg assemblies (I leave my clamps on for about 2 hours, but overnight would be better), you can attach the lower back stretcher. I do this with Power-Lags from Spax. These lag screws often are able to be driven without pilot holes, but I pre-drill the end locations to make sure the stretchers don’t split. When attaching the lower back stretcher, start from the grill cubby side. The back and front middle rails need glued into the mortises at the same time as putting in the short, back panel and the back lower rail. It’s kind of a dance, but it’s doable. Once the rails are in and the stretcher is in place, drive the Powerlags through the stretcher into each leg. With the lower back rail in place, slip the back panels into the other cubbies. Then, you can add the top rear stretcher and attach it. Use clamps if you need to twist the legs into position before you drive the lags.
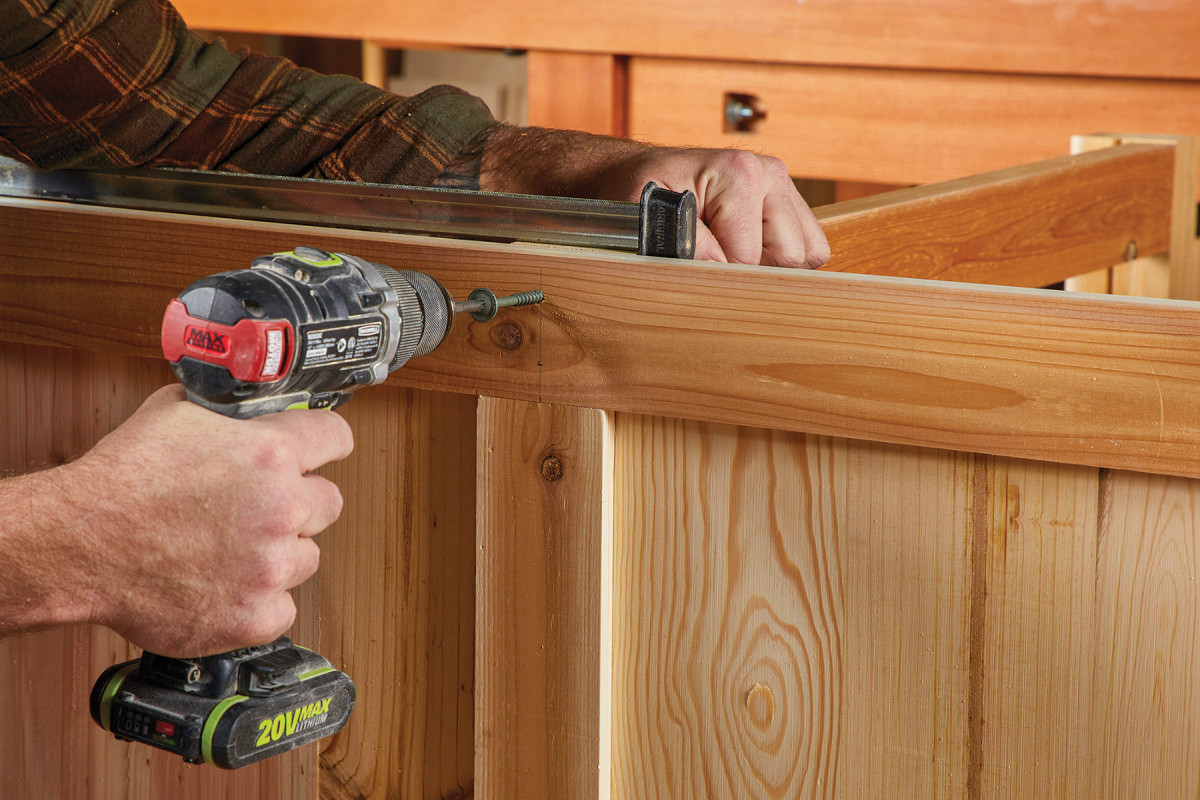
Cap the back panels by adding the top stretcher. The groove in the top stretcher sits over the panels.
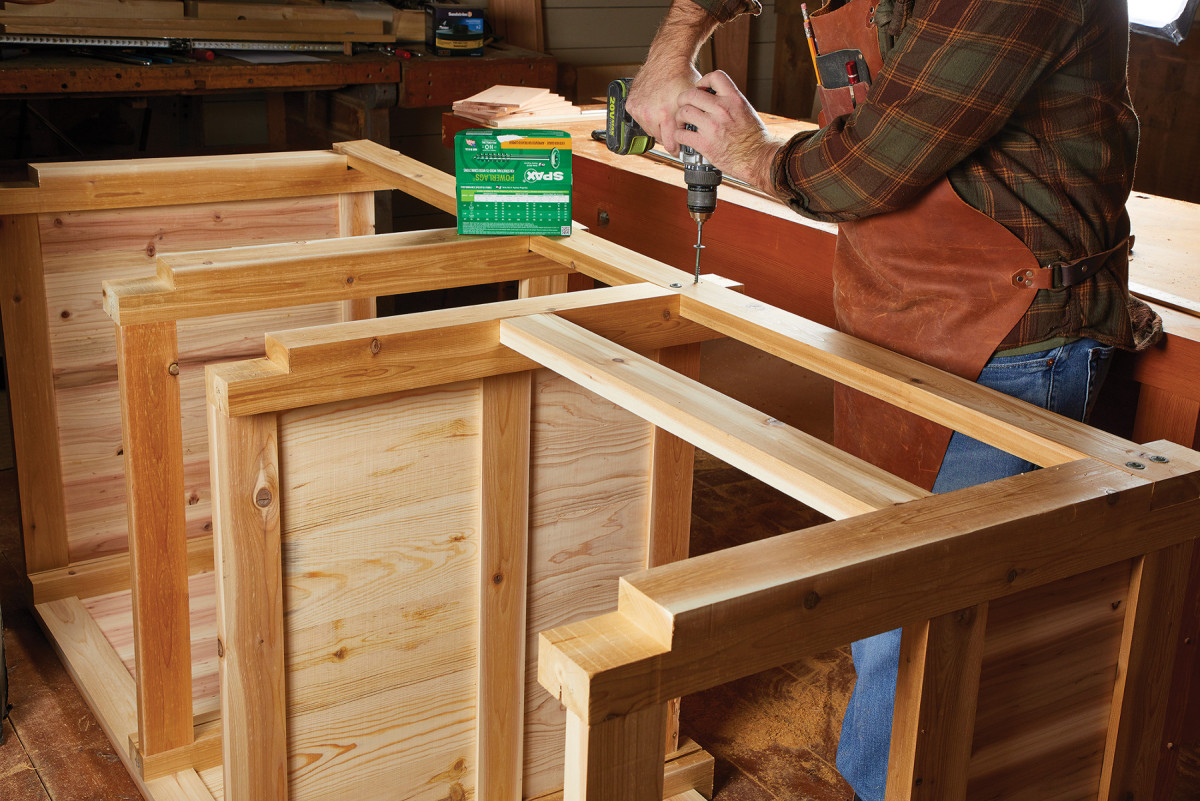
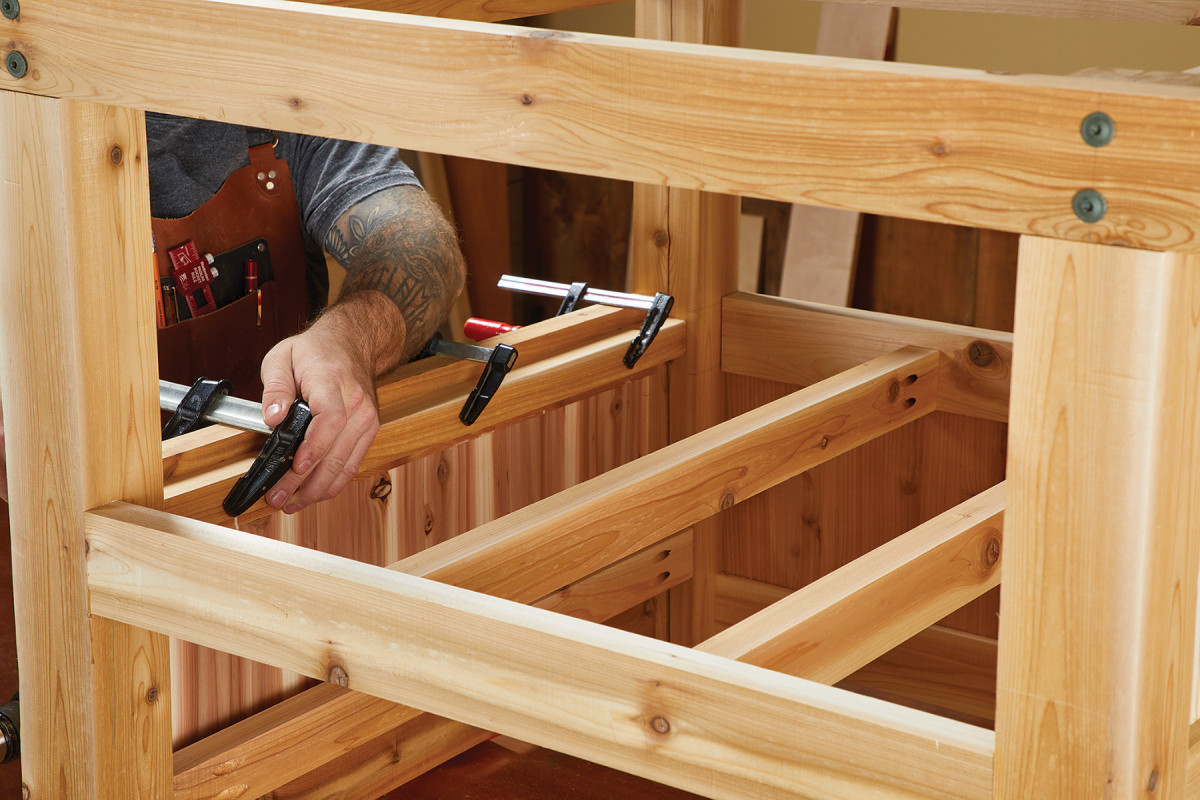
The front stretchers are simply located in the dadoes and notches and lagged in place.
Now, flip the kitchen onto its back. The front stretchers are simply a mirror of the back ones, but there are no parts to worry about slipping in place. Simply grab the stretchers, position them, and drive the lag screws. If you use the Powerlags, I would set your clutch on your drill, as the power lags will pull the heads deep into the cedar if you don’t. A few tests on your first power lag will allow you to drive the lag and snug it down while just barely squishing the cedar fibers. After attaching the stretchers, you can see how the kitchen looks below.
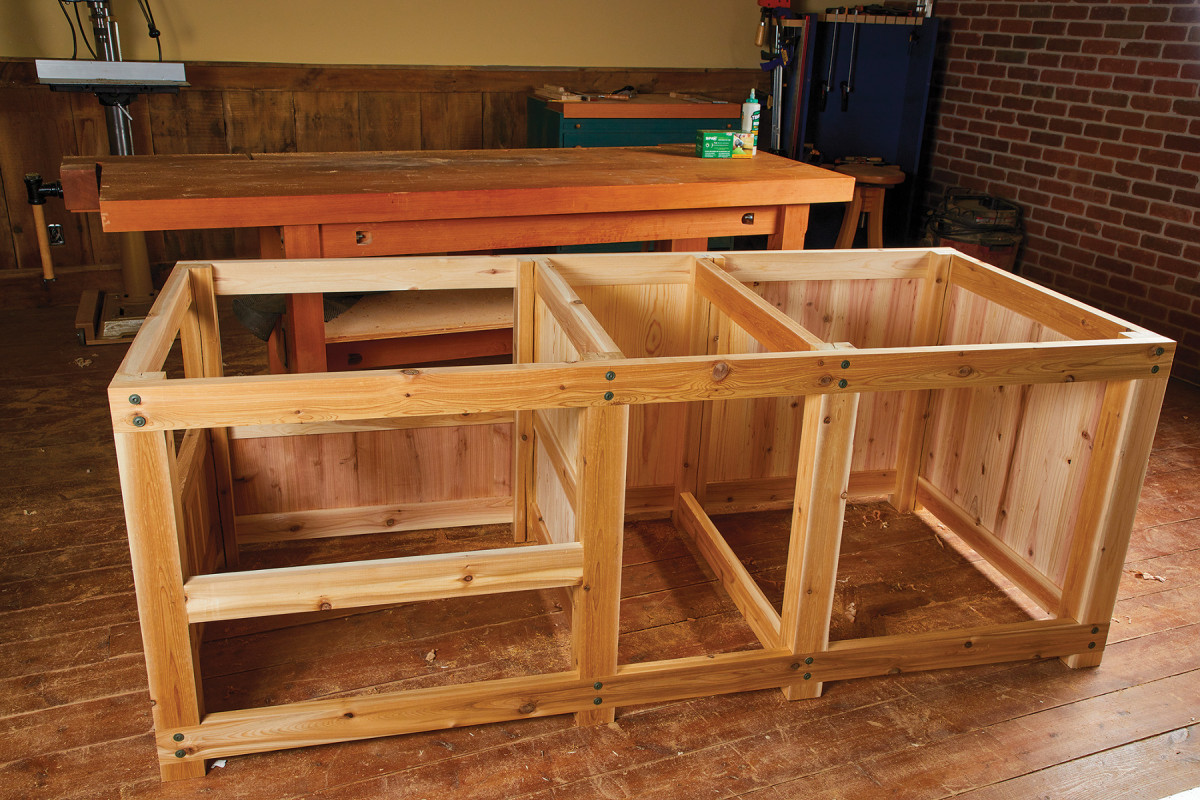
This view, without an internal structure, makes it easy to see how you could mix and match any of these cubbies.
Internal Structure
With the externals done, we can now add a little bit of internal structure to the kitchen. The biggest things to add, at least for this layout, are some cleats and ribs to the grill base, along with inside the double door cabinet (for the floor). There are a few other odds and ends to add, but up first are the ribs
and cleats.
Use pocket screws to attach the ribs to support the grill platform that we’ll add in a bit.
The ribs and cleats in the grill section run can run from front to back or side to side. The ribs are cut to fit between the rails. To attach them, I used pocket screws. Cleats are glued along the outside, unsupported sides. At this point, glue up the grill platform and cabinet bottom. These are simply panels, not unlike the ones you’ve already made. They’re a little thicker and the four corners get notched to fit around the legs. The notches can be cut with a handsaw or jig saw. Once you’re happy with how they fit, set them off to the side for now… you’ll want to get some finish on the cabinet before you drop them in place.
Cleats, along the left and right sides, will support the edges of the grill platform.
While you’re inside the cabinet, you’ll want to also add some drawer slide blocks. These will be for the shallow drawer that we’ll add later. You can pocket screw these in place, or glue them.
Thin spacers are attached to the panel and create a mounting surface for the slides.
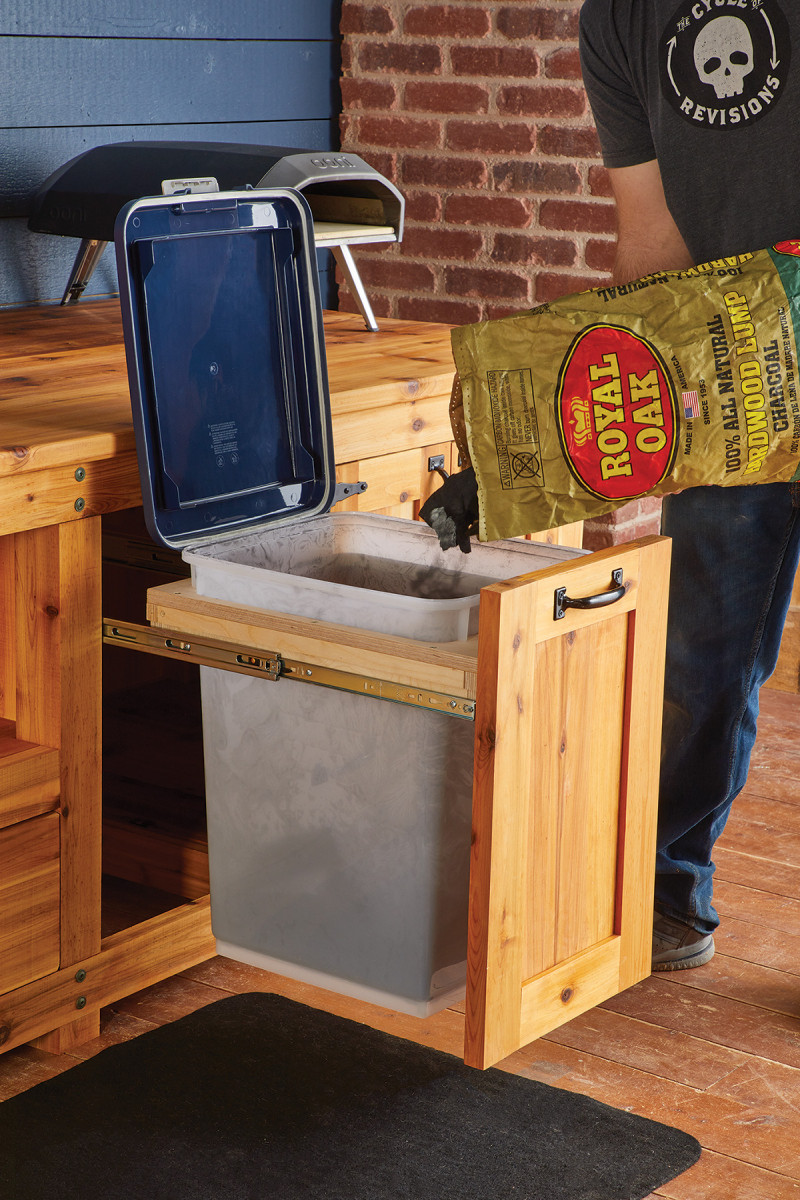
Moving to the middle cubby, I thought it would be great to have a place to store charcoal. I have a bad habit of leaving my bags of charcoal out and letting them get rained on. So, I figured a pull-out bin (think kitchen garbage can-style) would work well. I found a large “pet food container” on Amazon that seemed like it would fit, and it had the benefit of having a seal on it. This also requires a pair of drawer slides. So, I mounted one slide block with pocket screws between the third set of legs. For the left-hand side (along the inside of the grill cubby), I used some thin spacers to make the panel flush with the legs. I’ll glue these in later, when I figure out exactly where the slide mounting holes are going to be located.
Finally, let’s deal with the inside of the double doors. This section will receive a bottom, like the grill area. Ribs and cleats, exactly like before are the ticket. I’m leaving this as a large open cabinet for my purposes, but you could very easily add a shelf in here. Heck, after you add the top later you could cut an opening for a cooler. If you did that, you would want to add some bracing to hold the cooler. The choice is yours!
Inner workings
Now let’s shift to the guts of the kitchen where we have a few things to put together. First and foremost, there’s the “trashcan” holder for the charcoal container.

Pre-score the cut lines with a utility knife before cutting with a jigsaw. This yields a much cleaner result than the jigsaw blade alone.
Sizing this requires a little measuring of the container. After deciding the opening size, I defined the four corners with a large Forstner bit. Then, after marking cut lines that connect all of the holes, I used a jigsaw to cut the waste away. A sharp blade, slow going, and pre-scoring the cut are the keys to chipout free jigsaw cuts. After the opening was defined, I screwed on a frame of plywood under it to create a box. This “tray” will get a rabbet along each edge later for slide spacing. At this point, you can test the fit and set it aside.
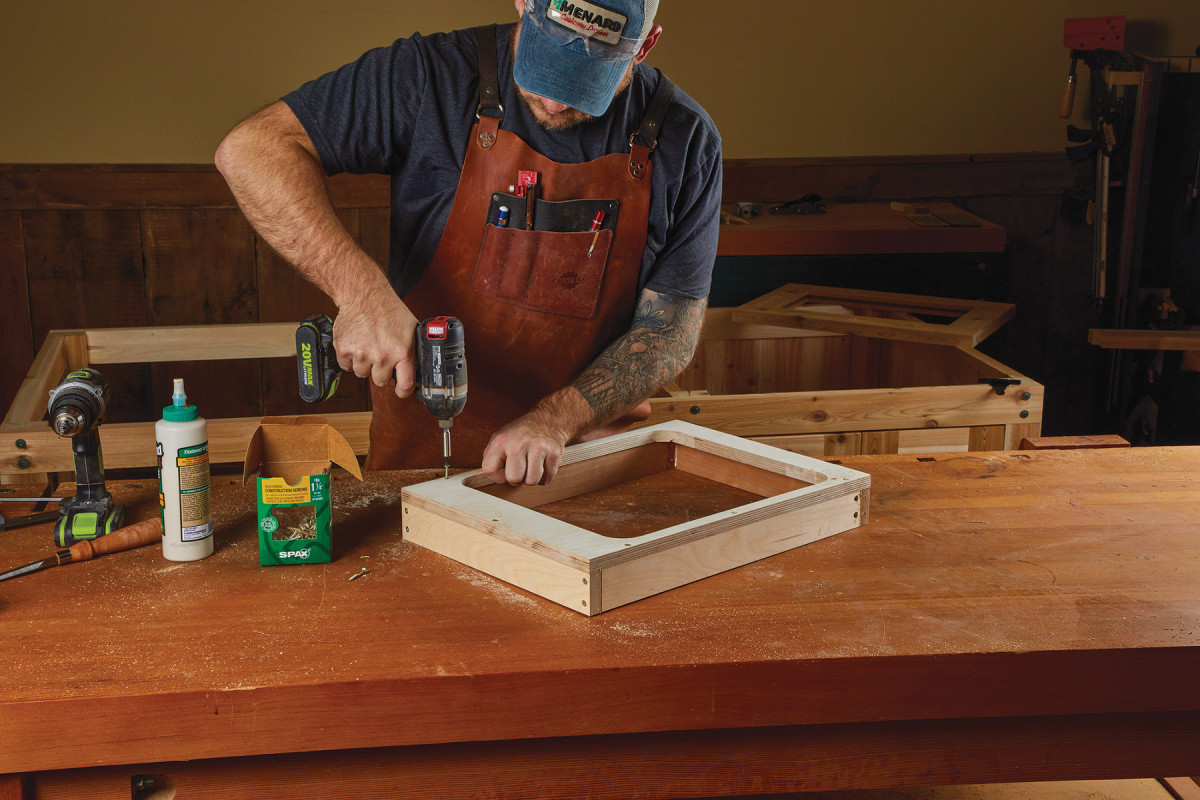
Attach plywood boxing under the charcoal holder. This will allow the front to be attached, and offer an attachment point for the drawer slides.
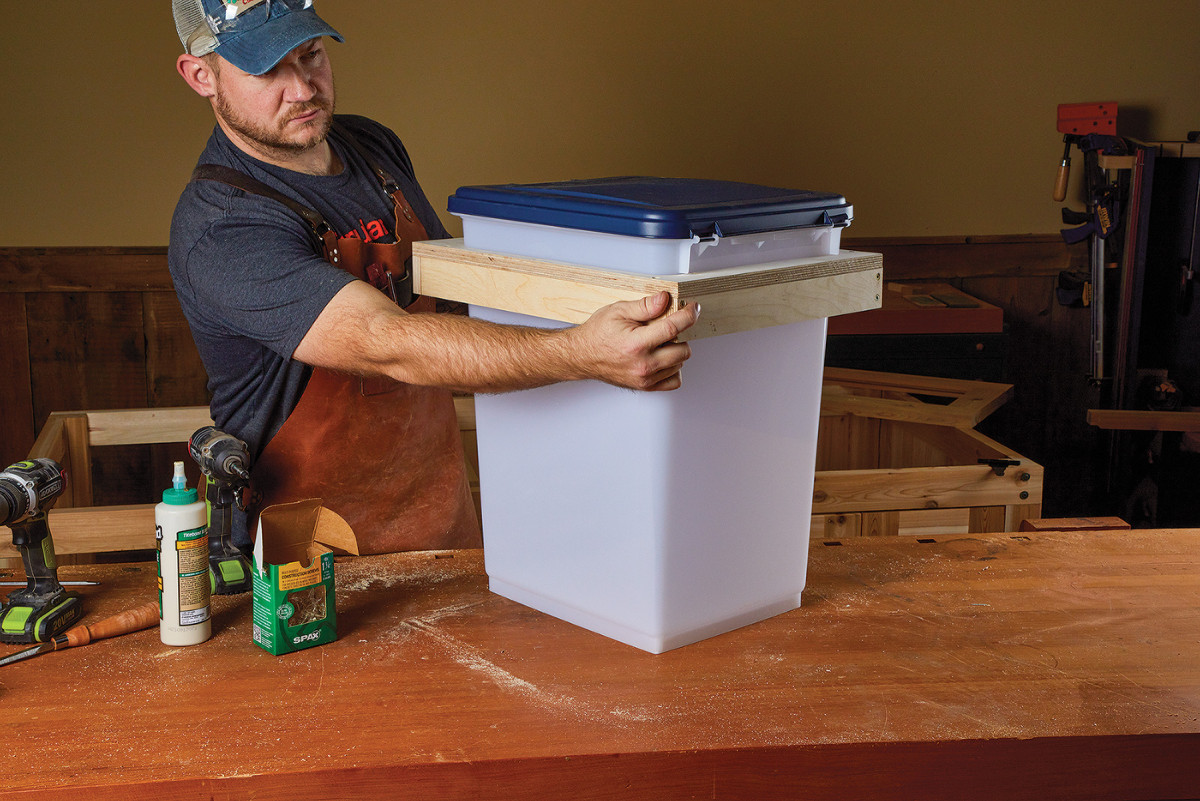
Test the fit, at this point you can measure for the drawer slide placement.
The drawer and doors are next. The drawer construction is about as simple as you can get. I created my drawer with rabbets and screws — no need to get fancy. If you want to view an article on a few different ways to build drawers, we have one right here. The false drawer front is simply solid cedar that I glued up.
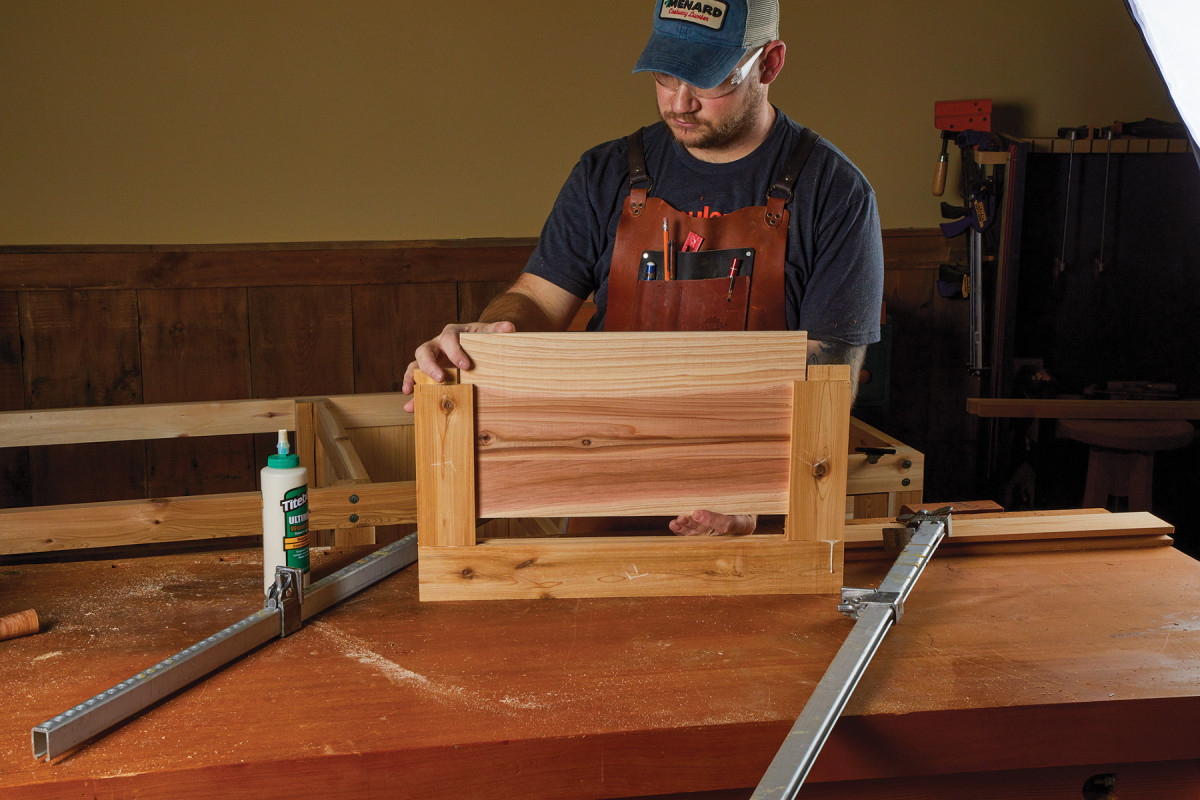
The double doors and charcoal door are simple frame and panel construction. Cut the tenons at the table saw and rout the grooves.
The charcoal pull-out and double doors share a standard construction—frame and panels. After making the rails from the leg assemblies, these should be simple. Simply cut tenons on the ends of the rails, and groove the inside of the rails and stiles with the router. Small panels get slipped into place in all three of the parts.
Wide Top
The top of the kitchen is made from 2×6 material. Take your time picking this out. If you need to, buy longer, 14 or 16ft material instead of 8ft. Often, the longer material is less picked over, and it’s usually cut from a better tree!
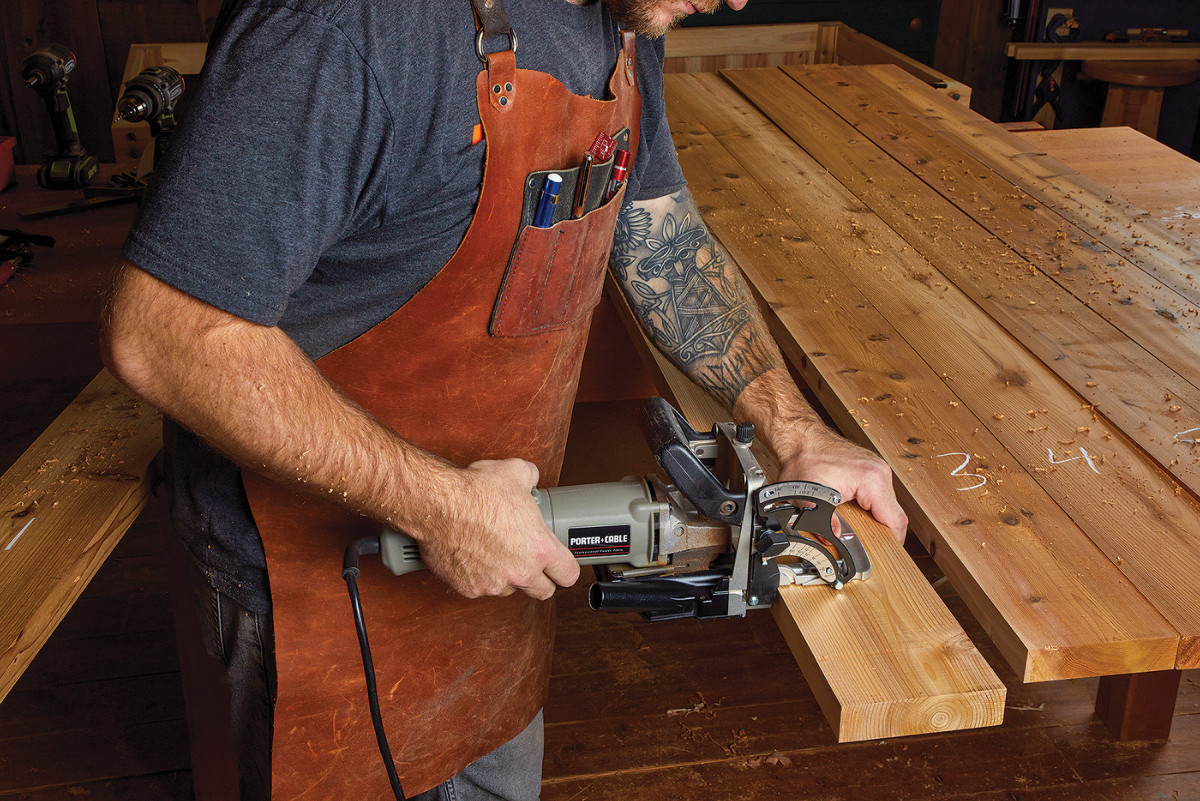
Four or five biscuits help align the boards while you’re applying clamps.
Because of the nature of the cedar, it wants to warp and move, even after surfacing it. So, after laying out the boards and marking their locations, I made marks for some biscuits. These will help in aligning the boards during glue-up … the biscuits themselves add no strength, but they do help keep the faces of the board aligned. A series of five biscuits seems to be enough for this length of top.
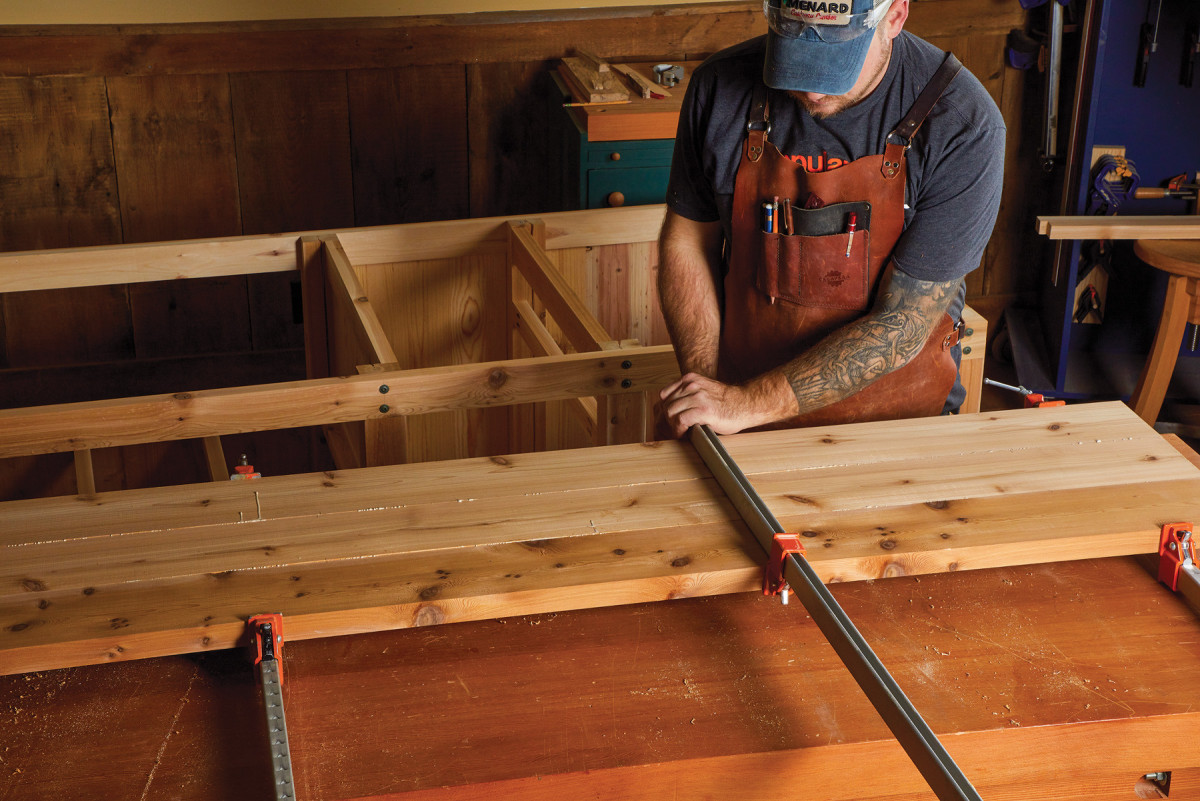
Glue up the top in sections. Three Boards with glue are much easier to manage than 8 or 9.
Another tip that helps with unruly timbers like this is to glue the top up in sections — preferably sections that will go through your planer. Three boards fit through my planer, so I glued the top up in a series of steps. After gluing three sections up, I brought them all together for the final width of the top.
After the glue dries, you can trim the top to the final size. A track saw makes this cut easy, but the easy-to-work cedar is easily cut with a panel saw as well. Now to tackle the surface. The biscuits do a fairly good job of keeping everything flush, but a little work with a jack plane is necessary to level the rest of the surface. If you don’t feel like getting a workout with a jack plane (and frolicking through in the shavings), a belt sander can be used very conservatively to level it out.
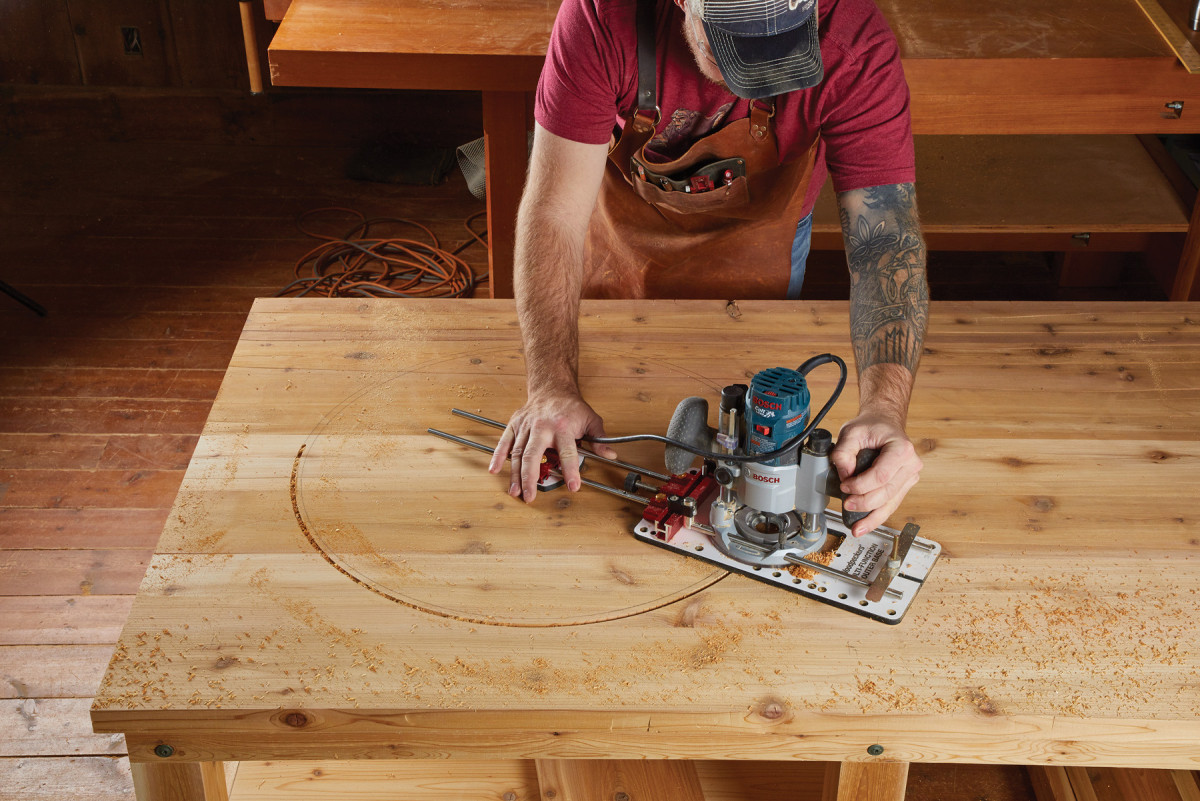
A router trammel pivots the router around a central point. Make the circle in a few passes, increasing the bit depth each pass. On the final pass, leave a few “tabs” to hold the waste in place until you can cut it free with a jigsaw.
To cut the circle where the grill will sit, you have a few options. First, you could use a jig saw. This leaves a fairly rough cut, but will work. A much better approach, in my opinion, is to use a router trammel. You can easily make one with a scrap of plywood or use a commercially made one. The photo above shows the Multi-Function Router Base from Woodpeckers (combined with my Colt router, it’s a mighty little package). When routing the circle, I made it in three passes. On the final pass, I left three little tabs to hold the waste in…I then snipped the tabs with a jigsaw.
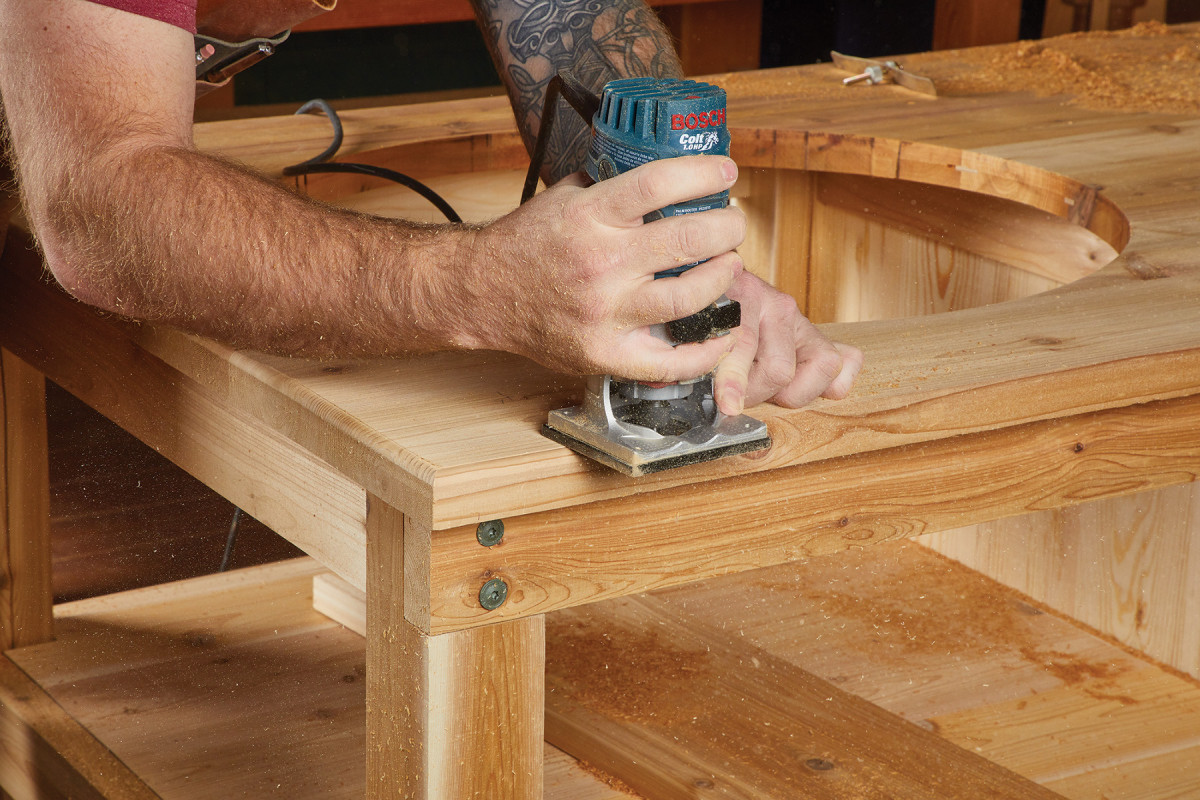
To soften the edge of the top, rout a roundover along all the edges. Start with the endgrain first, that way any chipout will be removed when you rout the side grain.
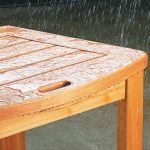
Finally, to soften all of the edges, I routed a roundover around the perimeter of the top, both top, and bottom edge. Attaching the top to the base is done with a series of figure-8 fasteners. These get recessed into the base rails with a Forstner bit, then screwed in place. Matching screws get driven into the underside of the top. This allows the top to expand and contract separate from the base. At this point, you can go ahead and apply a finish to the kitchen. The article on page 58 will give you a little more info on outdoor finishes. For this project, I used a new (to me) product by Nova. It’s an outdoor tung oil that you apply, let soak in, then wipe off. The tint I used on this was the “natural” flavor, and I like the color it gave it.
Assembly
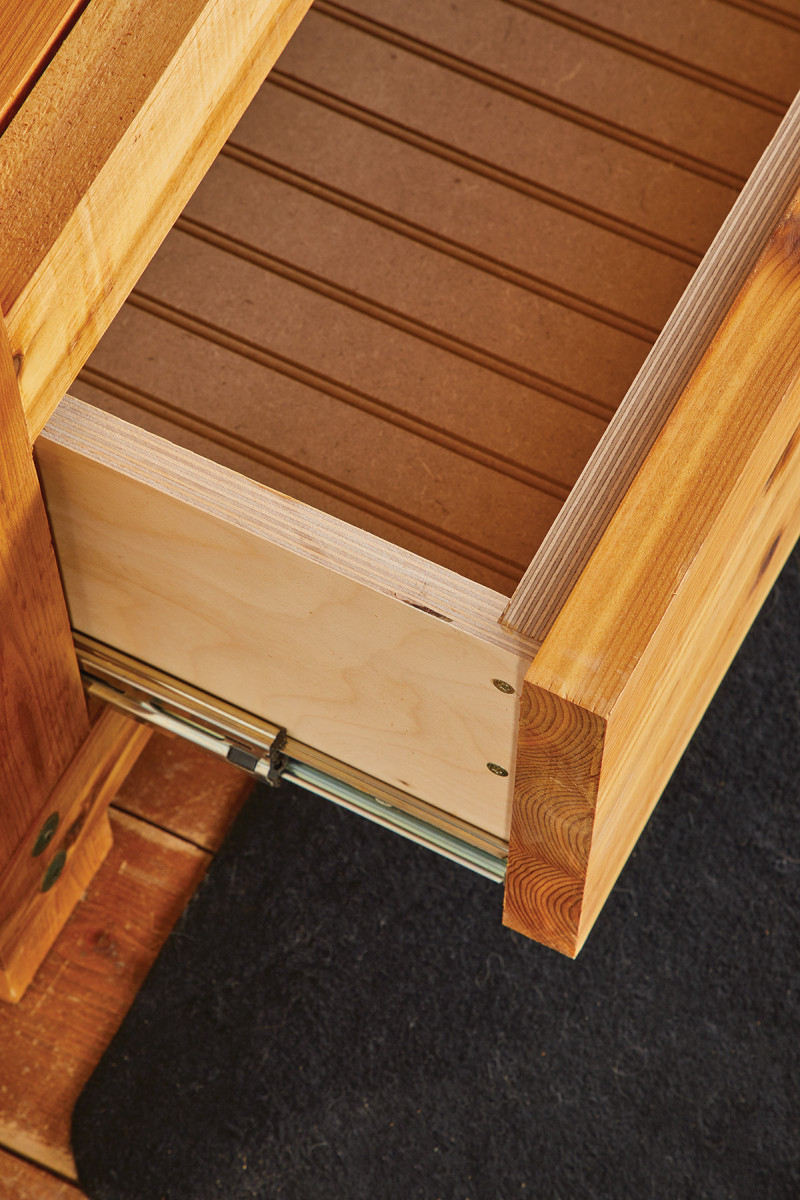
With finish applied and everything dry, it’s time to put this puppy together. Start by mounting the drawer slides inside the case. The drawer can get mounted to the slides using shims to space it out. To make sure the false front is centered, use a series of double-sided tape strips to stick the front in place. Shims help position the front, and after pushing firmly, you can open the drawer and permanently attach it with screws from the inside.
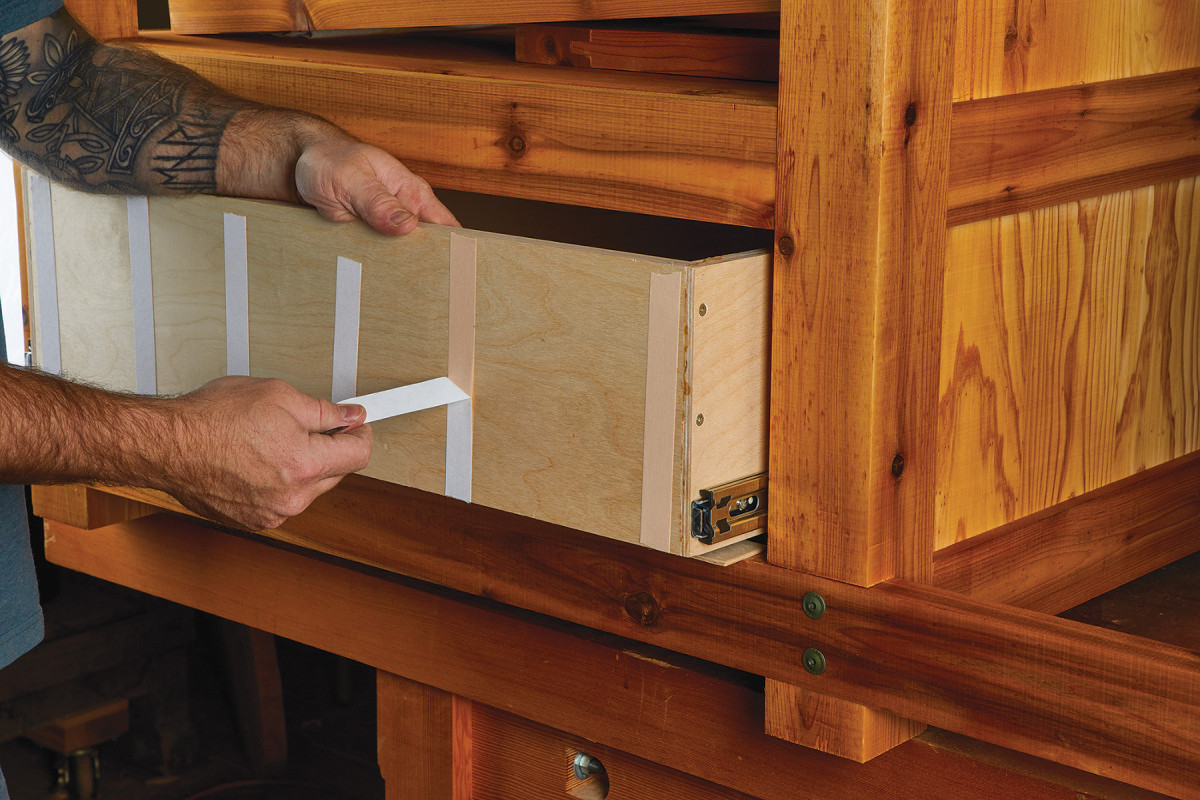
Double-sided tape is a great way to temporarily positions false fronts, allowing you to line them up for an even reveal.
The charcoal tray is mounted onto the slides like the drawer was. Here, you’ll need to rabbet the sides of the tray to fit between the slides. Insert the charcoal bin and make sure it operates as intended before mounting the door the same way as the false front—double-sided tape and screws from the inside.
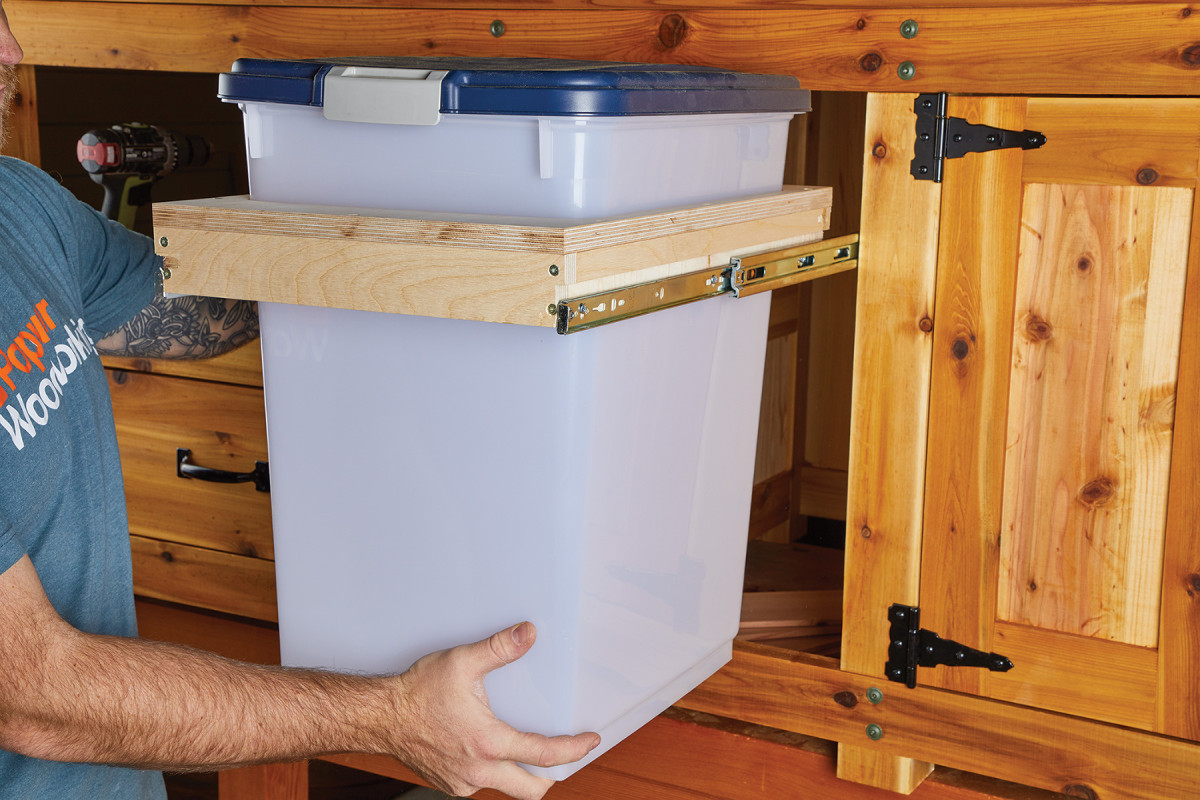
Slip the charcoal holder in place and check for functionality before attaching the door in place.
Mounting the double doors is a little more work. For these, I used a pair of surface mount hinges on each door. Mount the hinges to the cabinet first. I use an awl to locate the screw holes and start them (pilot holes usually aren’t necessary with cedar). Check the fit with both doors and shims. If any trimming is necessary, do that now. Then, you can mount the doors with screws. To keep the doors in place and act as stops, I used a pair of magnetic catches screwed to the bottom of the cabinet. The metal strike plates are installed inside each door.
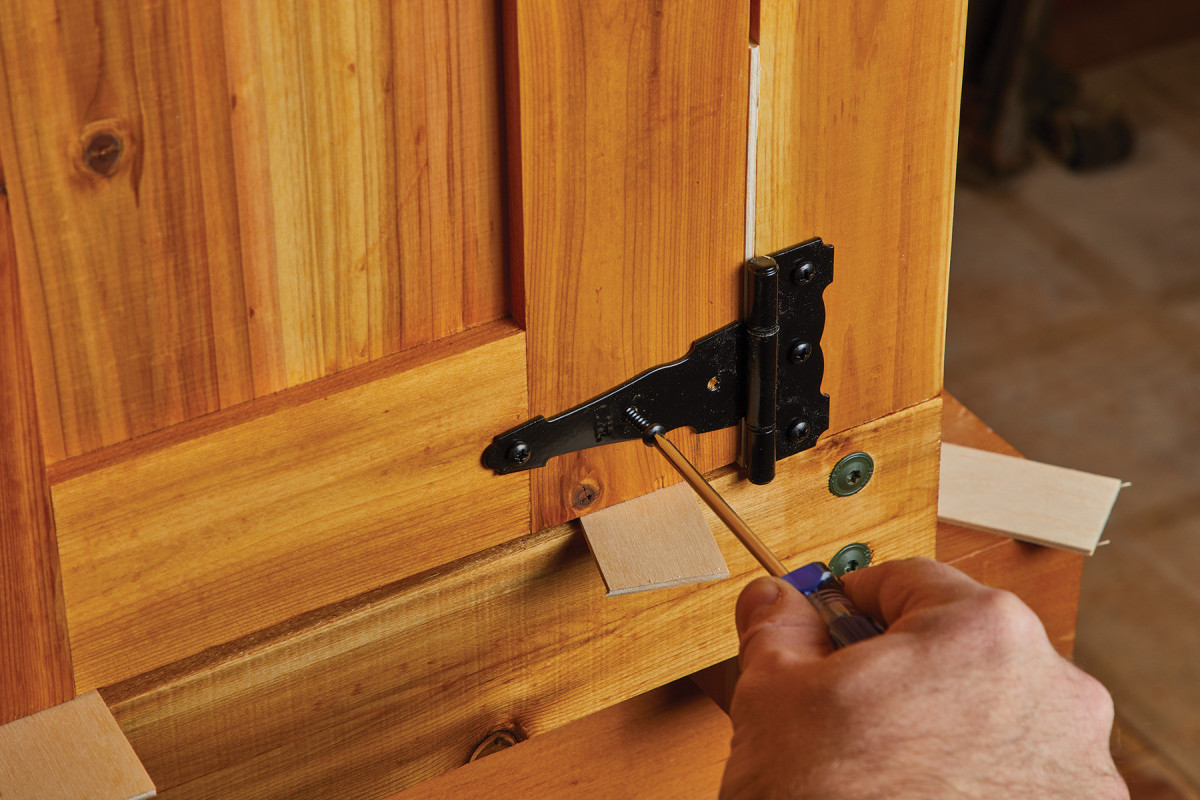
Surface mount hinges are an easy way to mount doors. Use thin scraps of plywood as spaces for an even reveal around all of the doors.
After moving your outdoor kitchen in place, you can drop your grill in. Most grills will probably require removing something from the outside. Mine involved removing the flip-up wings that came with it. If you look back at the main photo of this article, you’ll also notice that I have the grill sitting on top of a series of firebricks. This is to help promote airflow around the bottom of the grill and to also act as an insulator between the grill and the cedar bottom.
Overall, I think this outdoor kitchen will provide a great area to cook, gather, and entertain all summer long. If you think this project is something you could benefit from, I encourage you to take this design and customize it to suit your needs…then send me an invite for the first cookout!
Here are some supplies and tools we find essential in our everyday work around the shop. We may receive a commission from sales referred by our links; however, we have carefully selected these products for their usefulness and quality.