We may receive a commission when you use our affiliate links. However, this does not impact our recommendations.
 A student emailed me and asked: “How do I model the cut a core box router bit makes in SketchUp?” At first glance you might think the answer is the usual – model the shape of the bit and use the "Follow-me" tool. After further consideration it becomes clear that the answer is much more complicated. When router bits are used to make cuts inside a board – as opposed to around its edges – you have to consider the corners. Inside 90-degree corners will be square, while outside corners will have a radius.
Click on the picture at right to enlarge it and examine the corners. They are modeled as the router would cut them.
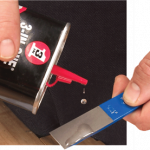
 Download the Router Bit.skp file and open it. In the scenes tabs along the top you will see seven "step" tabs which show the steps I took to model each board. Be sure to zoom in a lot to see the corner shapes. They are small – above each board and near its ends. The router bit I'm modeling is the CMT-814.627.11 core box router bit shown left. It has a 1/4” radius and is modeled as though the cutting depth is set to 1/4”.
The "Final Model" tab shows the finished model, while steps 1 through 7 show the steps used to model the cuts. But also notice that steps 1 through 7 have been scaled up a factor of 10 using the scale tool. So the boards are 240” x 60” instead of 24” x 6” and the bit has a 2.5” radius with a cutting depth of 2.5”. I scaled the boards to avoid a common problem with SketchUp – if a face is smaller than a certain size, the program will not model it properly, and will leave holes in the model. You can always correct this by first scaling up, modeling, and then scaling down the same factor. But you have to remember the scale factor for each operation you perform.
In this video I walk you through the seven major steps I used to model these cuts. The video is approximately 30 minutes long and focuses on the details of modeling a "race track" cut, but the same techniques are used to model other cuts such as serpentine.
Also, check out my latest DVDs on SketchUp 2014, now available in ShopWoodworking.com at a special price.
–Joe Zeh
Here are some supplies and tools we find essential in our everyday work around the shop. We may receive a commission from sales referred by our links; however, we have carefully selected these products for their usefulness and quality.