We may receive a commission when you use our affiliate links. However, this does not impact our recommendations.

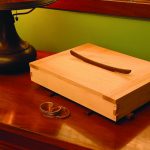
Built with love. The wild apple top was the starting point for this “memories box” I made for my wife. The rest of the box is of Swiss pear.
Wood is the starting point of inspiration for these boxes infused with the past.
In my mind, this article goes to the root of why we work wood. It is about the philosophy of creating things in wood and the approach more so than the technical application of skill. Back in 1993, I spent nine months studying a way of working under James Krenov at the College of the Redwoods in Fort Bragg, Calif. Yes, I learned technical things there, but more important is that Jim inspired us to think, to be sensitive in our choices and to do the very best we could in the execution.
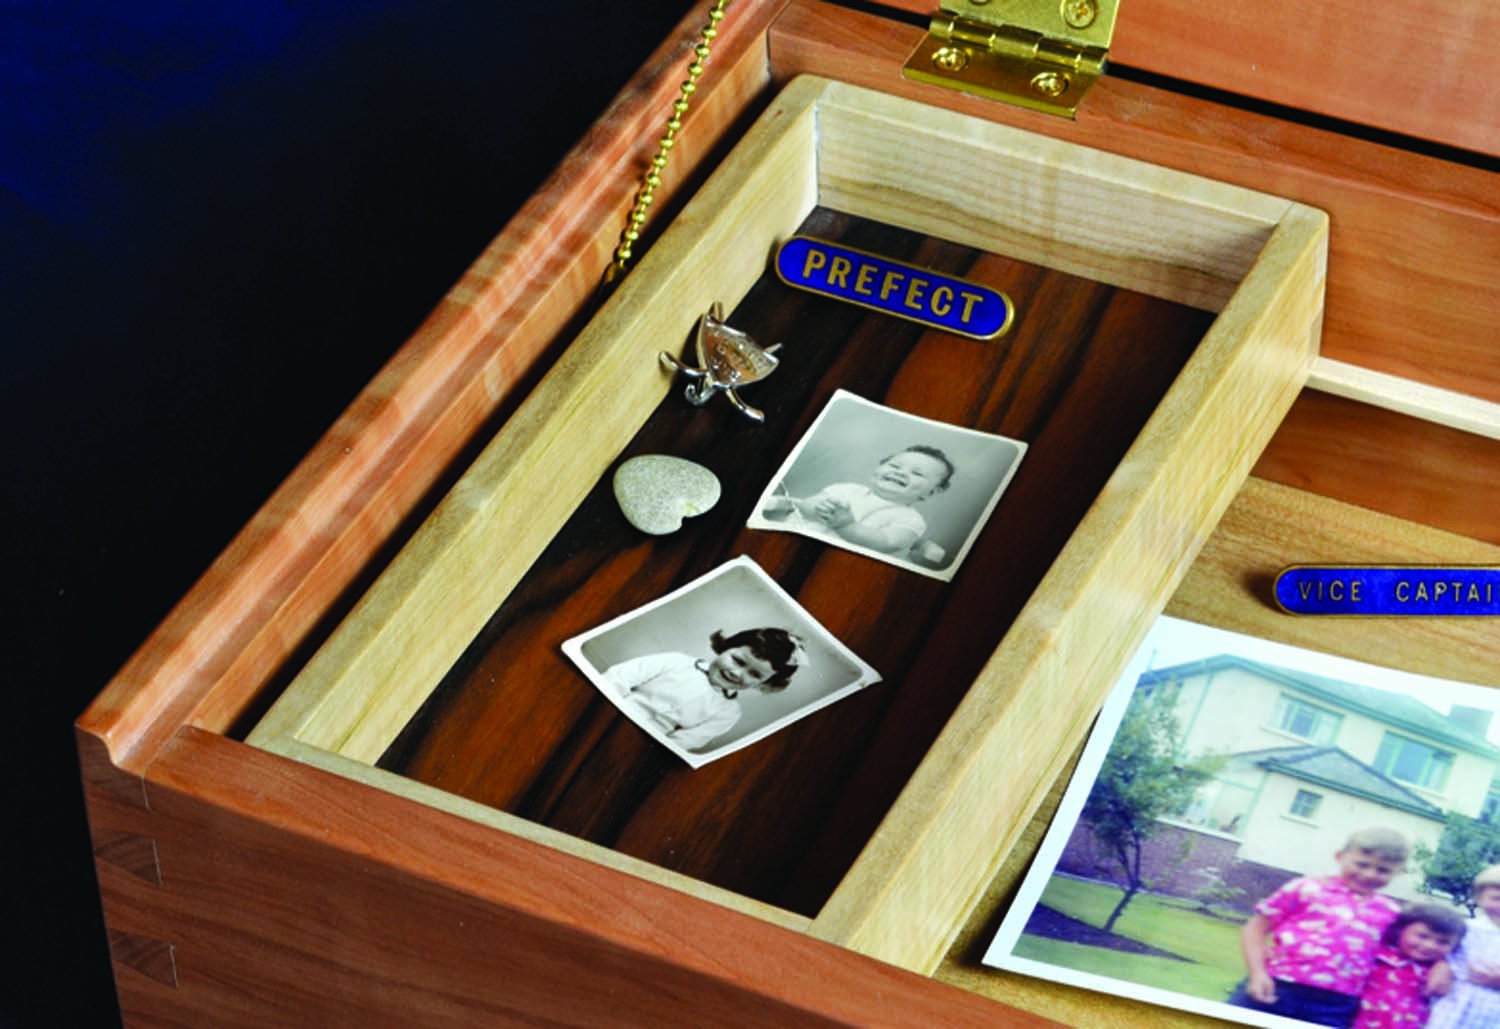
Surprise. Inside the larger box is the surprise of a smaller one.
If you have read Jim’s books, you will immediately grasp the fact that his way of working was significantly different from the rest. Jim was excited by the wood itself, and how he could gently massage the material to create a piece with a natural look, with a feeling. I once heard him say something along the lines of, “When you look at a piece of fine furniture, you are not just looking at the piece, but a significant portion of the maker’s life.”
This article is about applying and enjoying the principles I learned from Jim. It is about the making of three small boxes: why they were made, for whom they were made, and what considerations went into the materials, shapes, weights and feel of each piece. Jim liked fine work, a good honest joint, thoughtful use of grain and little tool marks left by the maker in the wood.
OLYMPUS DIGITAL CAMERA
I made these boxes for people I love. The first, made of Swiss pear, was built for my parents. It is a “memories box” – not that different from a jewelry box, except that there are fewer little pockets inside. The idea is to store bits of your life in these boxes: photos, ticket stubs, documents, awards, trinkets – just about anything that sparks your memory of special people, and special times. The second box, also in Swiss pear, was made for my girlfriend, now my wife. In the same way that I selected a favorite feminine wood for my mother, I also selected Swiss pear for my dear wife. I am currently making a third box, in this case of curly maple and ziricote.
Free Yourself in Your Work
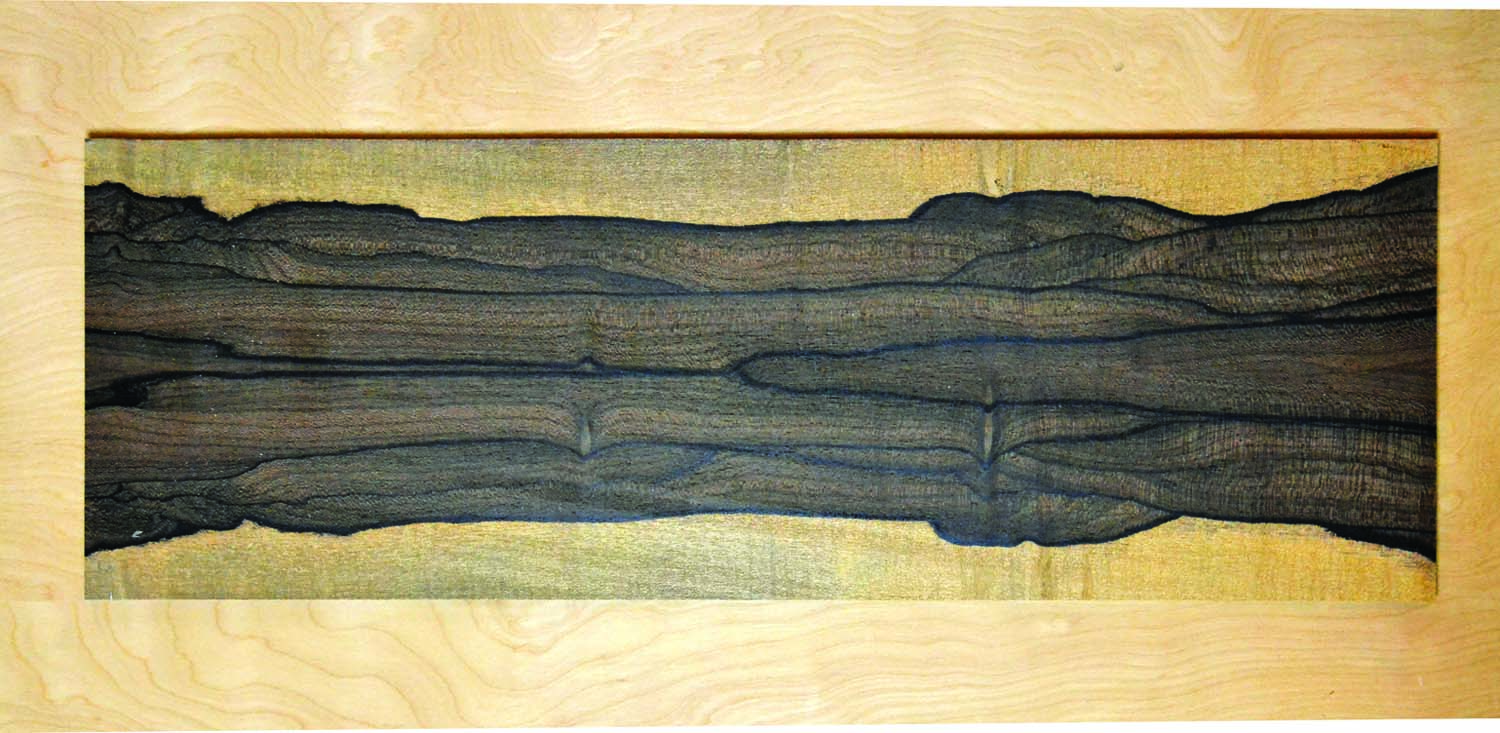
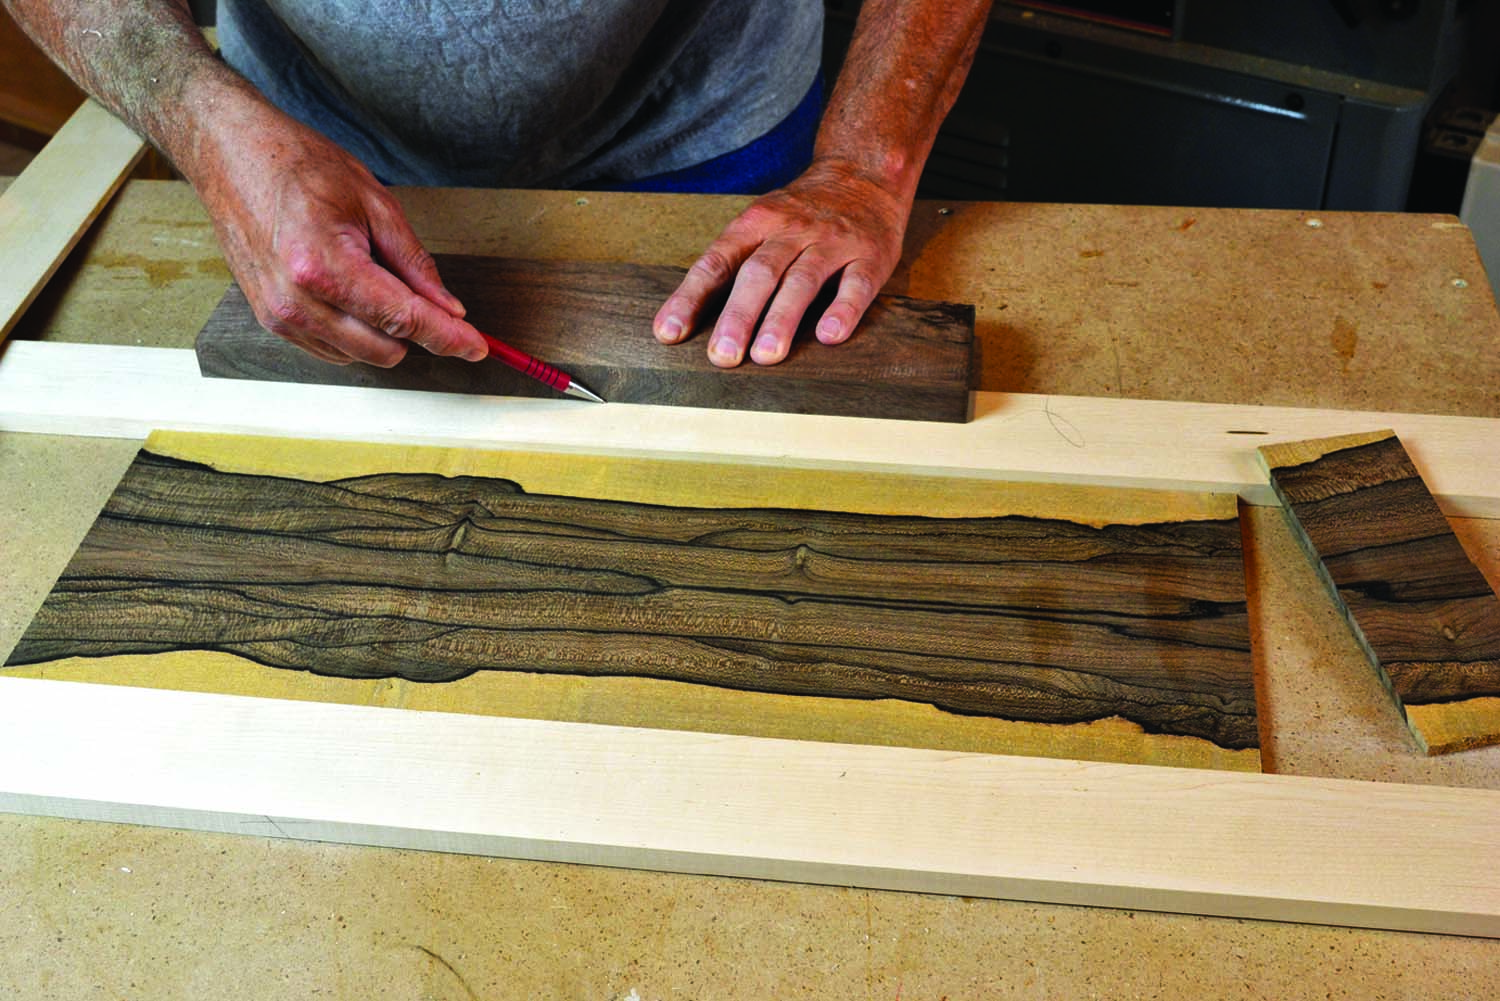
Scene. For the top panel of your box, choose wood that creates an inviting visual scene.
Jim taught us to focus on the visuals in the wood. In this case, when making a box, the most important visual is the top, or “face,” of the piece. This becomes the starting point – finding a piece of wood with an interesting message for the top panel of the box. If the panel is interesting, then the piece becomes alive and inviting. If the carcase of the box is smooth and calling out for your touch, then you move to a second level of tactile enjoyment.
In the case of the box made for my wife, the idea started with an interesting piece of wild apple wood. I knew that the graphics were strong, that the fine fruitwood would work well with my plane, and that the tight grain would take an exquisite finish. The panel looks like a country scene, with a horizon, and a setting sun in the west. Surrounding that image with a frame of Swiss pear made for an interesting beginning to a lovely box. When you open the box, you use an integrally carved handle, yet another Krenov influence, keeping a natural relationship to the piece.
Does it look right? Don’t be beholden to measurements. If the visual weight of the frame looks right, then it is right.
Yet another influence was the creation of a little surprise inside. When you open the box, you find another delicate box. This box is made of curly maple, and it sports the rich hues of caramel and licorice in the Macassar ebony bottom. In the bottom of the larger box, light curly maple is used to effectively give a sense of light from within. The rails on which the inner box is perched are hard maple, waxed so that the little box can slide along with ease. It is all about the little things.
Jim taught us how to create an entire piece, without getting caught up in measuring or numbers. Along with that concept, he spoke to the idea of “visual weight.” That is, how thick should a frame member be? How wide? How big should the box itself be? It is a very freeing way of working when you allow the process to be driven by discovery. The box should be about “this wide by this long,” he would say, waving his hands about. That concept would then get more focused by the size of the pattern of the top panel.
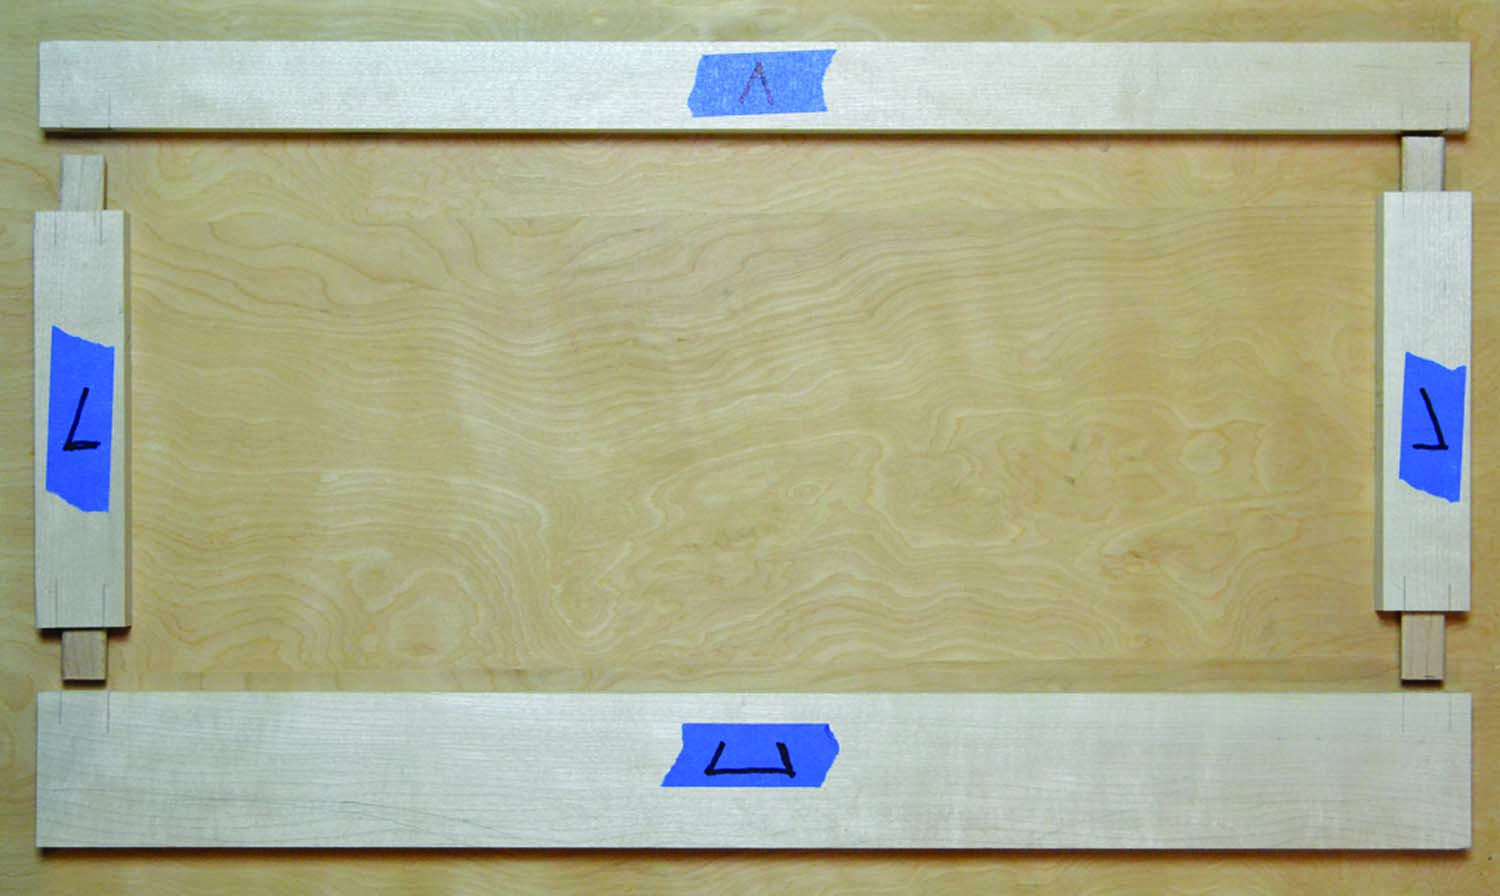
Stay oriented. Cabinetmaker’s marks help you instantly see which face is up, and keep your pieces oriented. Mark them on blue tape and you won’t mar your planed workpieces.
Once the top panel is sized, we then place the frame material around it, and mark the visual weight of the frame width on each piece. The frame members will all be milled at the same time, so the thickness of each is exactly the same, and “about this thick,” as Jim would say, as he looked at his thumb and forefinger. The point was this: The thickness of the frame had to be the right visual weight for the size of the box. Jim encouraged us to avoid round numbers such as 1⁄2” and 3⁄4“, because those numbers handcuff you, and the resulting design looks that way. I actually run the parts (plus one extra) through the planer all at the same time, and stop milling when the thickness looks right.
Keep Your Work Well-oriented
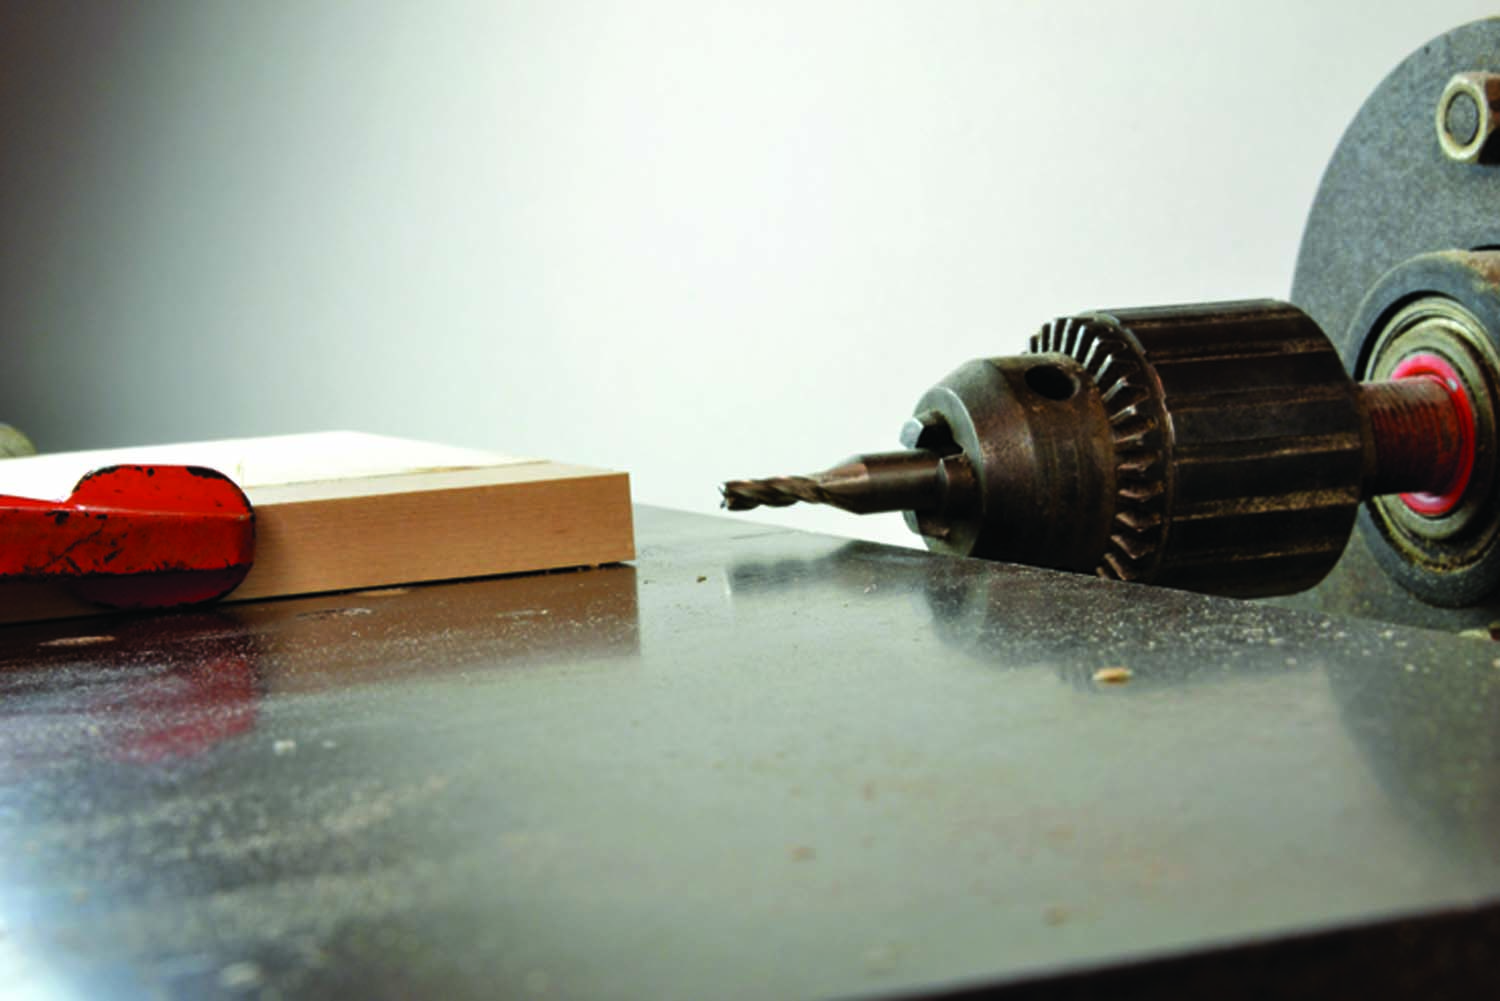
Floating tenons. A horizontal boring machine cuts the mortises for my floating tenons.
Cabinetmaker’s marks serve several purposes. We use a system based on a triangle. The bottom of the triangle is placed on the bottom of the frame, the stiles or sides of the frame get the sides of the triangle, and the top frame member gets the tip of the triangle.
This marking scheme allows us to keep the frame members oriented, and – this is very important – with the correct side up, when cutting joinery and grooving the frame to accept the panel.
When laying out the mortise positions, I simply estimate two things: how far I want to stay away from the outside of the frame, and how far I must stay away from the inside of the frame so that the panel groove does not cut into the floating tenon. I take a piece of wood and create a “story stick” from which I transfer the location of each mortise. Those cabinetmaker’s marks save me all the time from making errors: no numbers – simple and sensible!
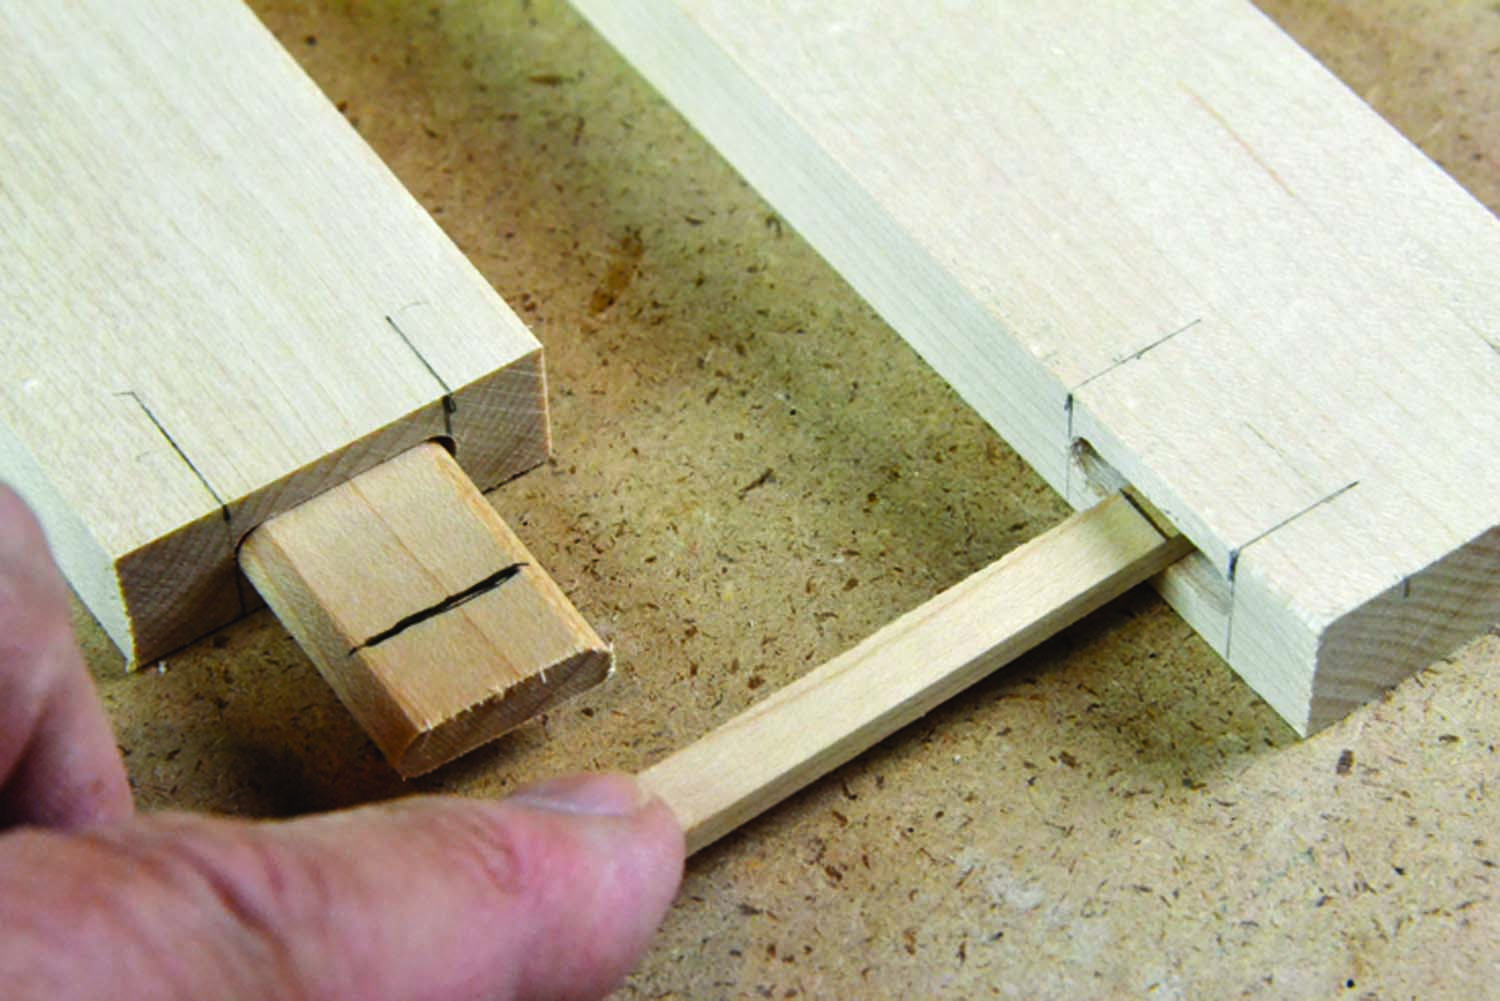
Story stick. Used to probe the depth of the mortise, the story stick is then used to transfer that measurement to the tenon. Cut the tenon a little shorter than the mortise depth.

When cutting the mortises, the first thing I look for are the cabinetmaker’s marks. I want to know that I always have the right side up. In this way, it does not matter whether or not the mortise is placed in the center of the wood, so setting the mortising machine is just as easy as eyeballing the middle of the frame thickness.
With the mortises cut, I then proceed to install floating tenons into either end of the stiles. I glue the tenons in place, leaving too much material protruding, in terms of length. When I dry-fit the tenons into the rails, it is simply a matter of gauging the depth of the mortise with a small story stick. I mark the depth of the mortise on the story stick, then transfer that depth to the tenon and cut the tenon a little short so that it will not bottom out.
Raise the Panel
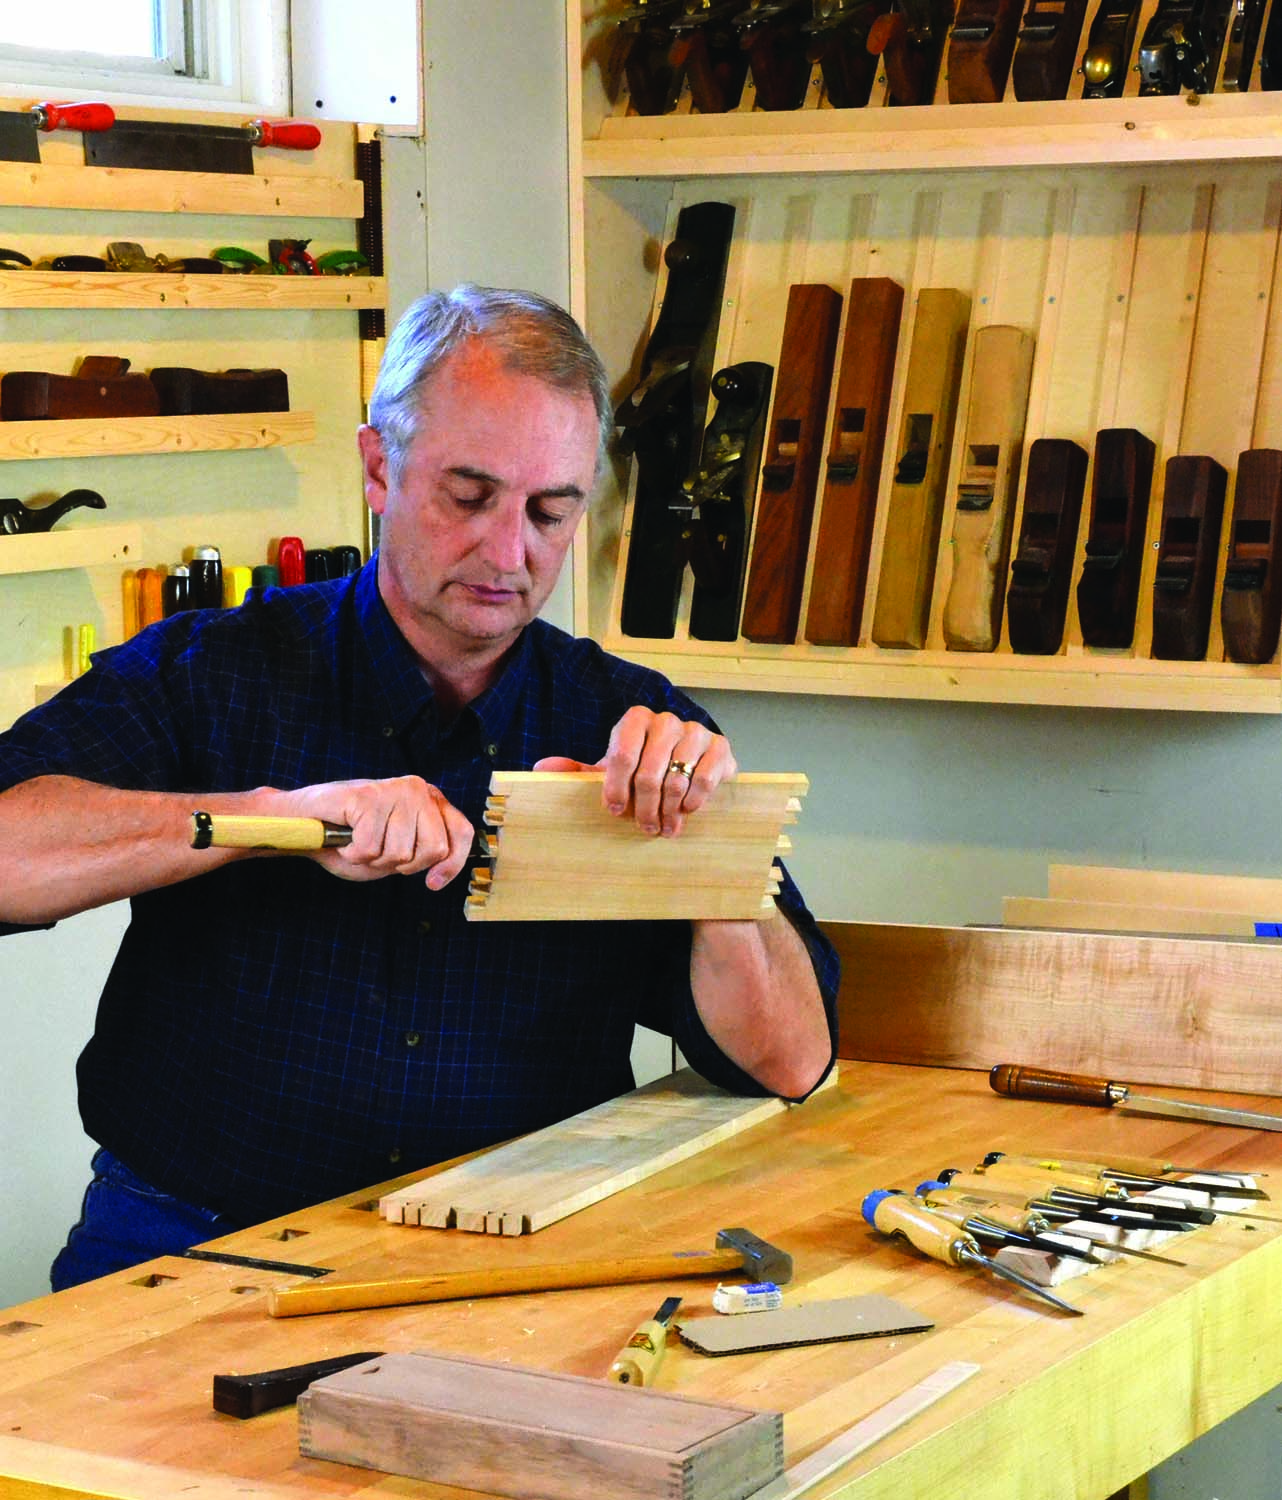
Pare. Tune your pins with a sharp chisel for the perfect shape before transferring the shape to your tail board.
The panel is raised. I do this with a modified straight router cutter, which has had its tips rounded slightly to make a wee rounded rabbet in the wood. To cut the panel to a tight fit in the frame, I again use two thin story sticks – material thinner than the groove, cut so that it just fits into the groove for length and width. With the ends of the story sticks cut to a point, you can slowly nibble off the points of the sticks with a chisel, until the stick just fits into the groove with a snug fit.
Use the short stick to set the band saw fence to a setting for the panel width, and the longer stick to set up the table saw to cut the panel length. Raise the panel with the router table, then take a few plane strokes off of the width of either side of the panel to allow for seasonal movement. I usually eyeball my estimate for movement of the panel, mark that with a finger gauged pencil line, then plane to the line. Still no numbers.
The panel is left just slightly too thick during raising so that, as the panel is handplaned, the thickness is planed on the backside to a nice fit with the groove. While you have the handplane out, it is time to plane the insides of the box sides before dovetailing.
Distinctive Dovetails
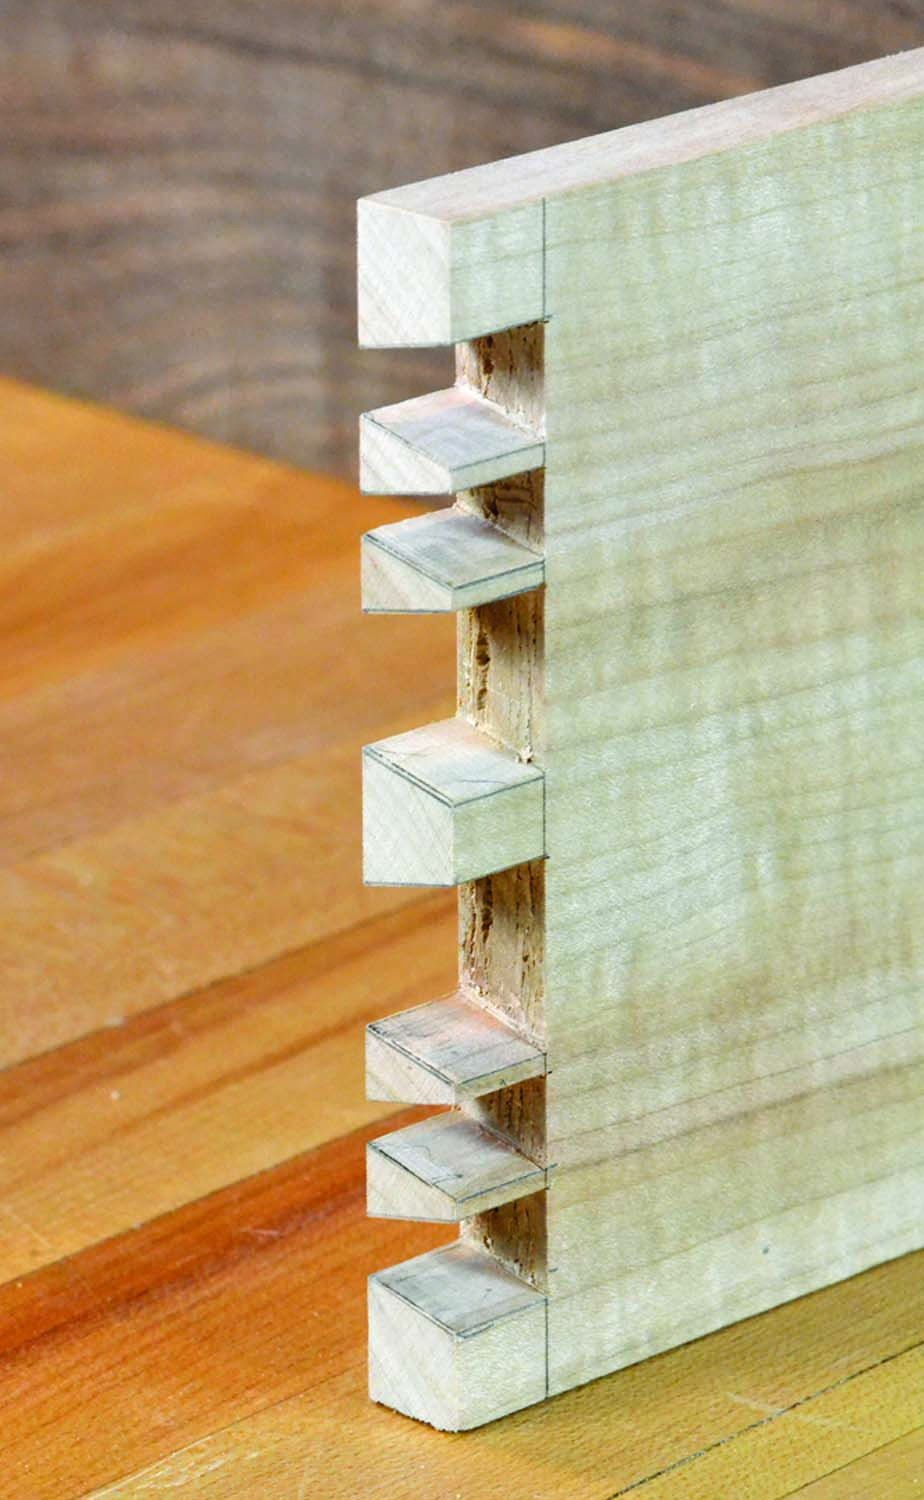
Distinct dovetails. Lay out an interesting dovetail pattern – one that can’t be cut with a router and jig – to instantly signal your box is handmade.
Make your dovetail pattern interesting, and something that cannot be replicated by router cutting. Jim always cut his pins first, tuned them with a sharp chisel for shape, and fit the tails to that.
Dovetails are cut to scribelines made with a marking gauge, and set so that the pins and tails will protrude just a bit, just enough to be cleaned up to a perfect finish when the outside of the box is handplaned.
Then, yes, I sand a bit with #400 paper. Jim would say to soften the edges until they feel good, but not so much that they feel like a marshmallow. Rounding over the edges starts with a plane and a file, and is then refined with a little bit of fine sandpaper, in that order.
An Inviting Finish
This sort of box is all about creating a delicate piece that calls out to be handled. In that vein, Jim taught us to use shellac polish to finish the piece. Again, even in the dilution of the flakes in the alcohol, it was “put about that much in the bottom of the jar, and about three to four times that much alcohol, and swirl it.”
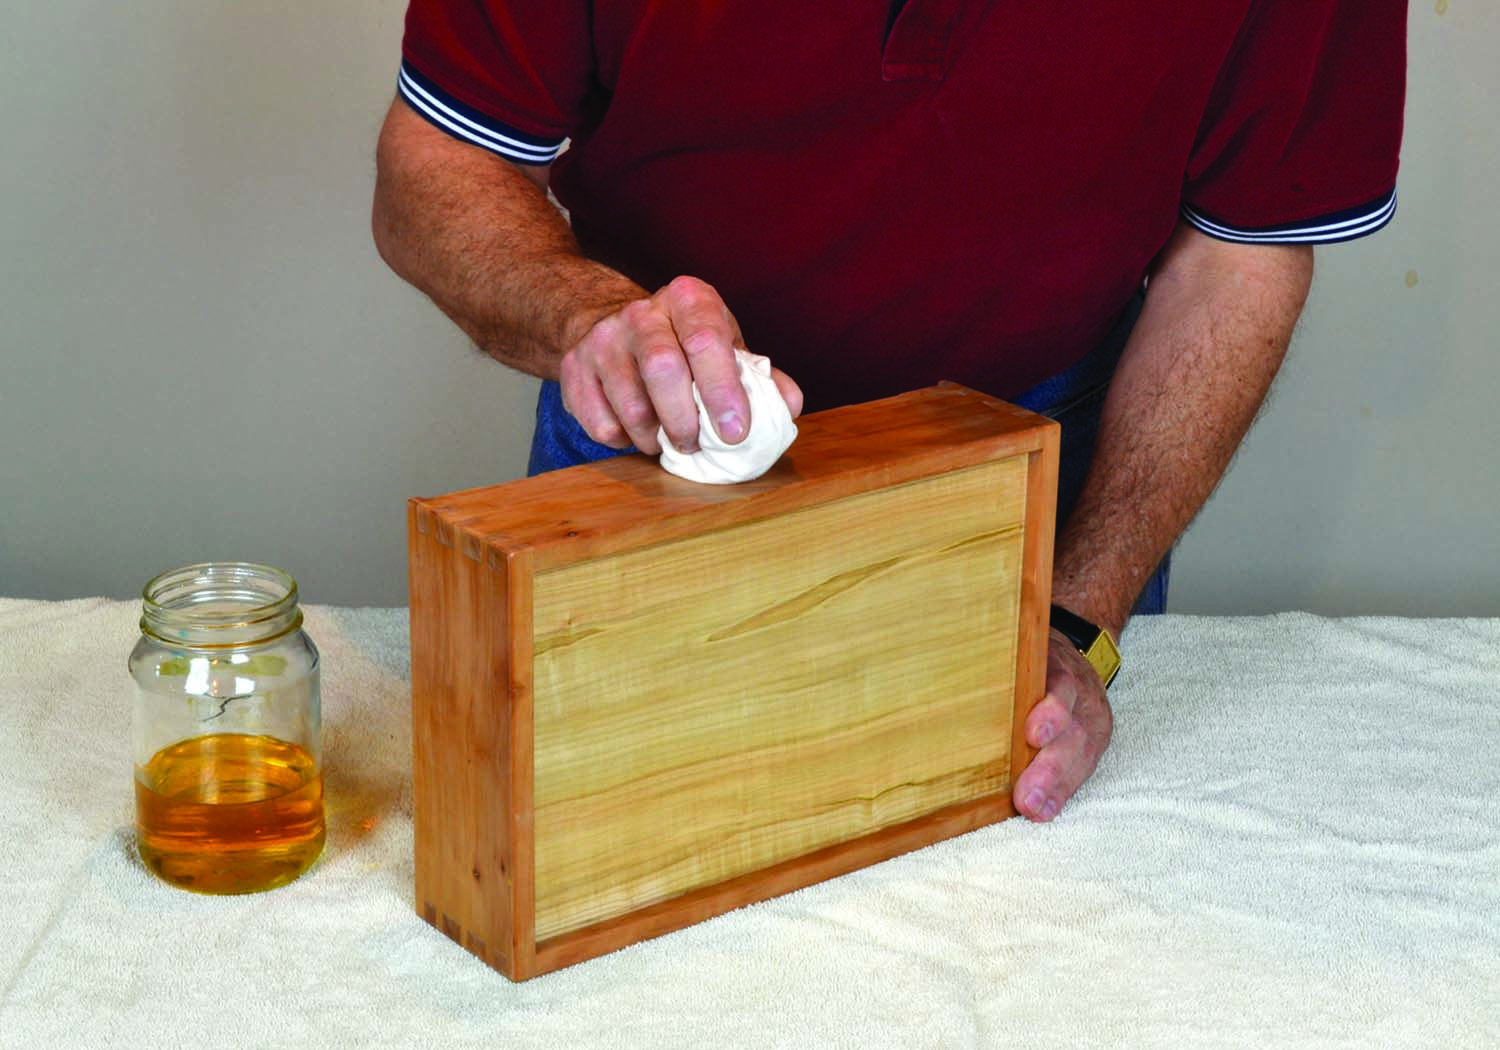
Shellac. Build up to eight coats of shellac, cutting back the finish between each coat with #0000 steel wool. The final step is to apply a fine cabinetmaker’s wax such as Clapham’s Wax, then cut back that finish with #0000 steel wool once again. The steel wool imparts a tiny scratch pattern in the finish to reduce shine. Buff the box with a soft cotton cloth – what we want is a beautiful soft sheen.
The shellac is applied using a padding technique, where the “pillow” of clean white cotton is kept moist, but not wet. Lay down layers of shellac, allowing each to dry in between. Drying time increases as the finish builds. Feel the surface with the back of your hand to see if it is dry – a cool surface is still drying. Cut the finish back with #0000 steel wool between coats, and proceed until you have a sheen but not a shine.
Achieve a pleasing sheen by cutting back the final coat of shellac (about eight coats on the outside), to avoid a shiny look. A fine cabinetmaker’s wax is the last part of the finish, which protects the shellac and improves the feel of the piece.
A Box for My Parents
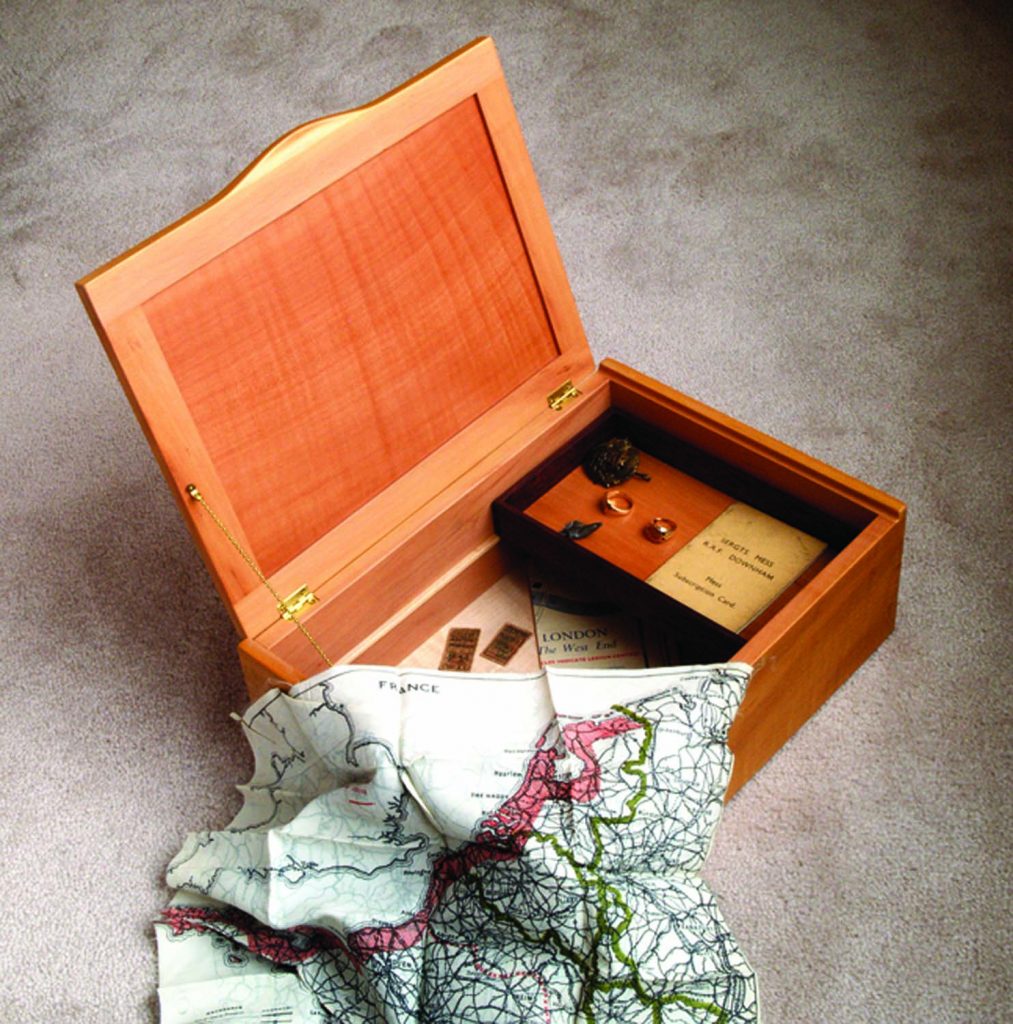
When I returned from California in 1994, I asked Mom what I could make for their home. She thought for a while, and finally said that she didn’t know, that their house was full. She was right. At that stage in their lives my folks had all they needed. So I decided to build them a memories box. Now that my folks are gone, I keep their precious things in it to remember them by.
In this image you see a box with a map hanging over the edge. It is printed on silk, and was sewn into the uniform my father wore while he was in World War II, flying in Lancaster bombers as a wireless air gunner for the Royal Canadian Air Force.
There are many things in this box, from my parents’ wedding invitation, to rings, to tickets my dad bought for a train in Montreal on the way home from Europe in 1945.
Make a memories box and give it to your loved ones. And Jim, I will carry your lessons with me forever. — TB
Now, About Those Memories …
We work wood because we enjoy the opportunity to work with such a beautiful material, and, with a sensitive hand and eye, we create a wonderful piece. As furniture makers, we may now continue to enjoy the work, as we present it to our loved ones. PWM
Ted is a long-time furniture maker and designer who lives and works in Ottawa, Ontario.
Further Reading: For another approach to a small, contemporary box, read Gary Rogowski’s “Jasmine Box.”
Here are some supplies and tools we find essential in our everyday work around the shop. We may receive a commission from sales referred by our links; however, we have carefully selected these products for their usefulness and quality.