We may receive a commission when you use our affiliate links. However, this does not impact our recommendations.
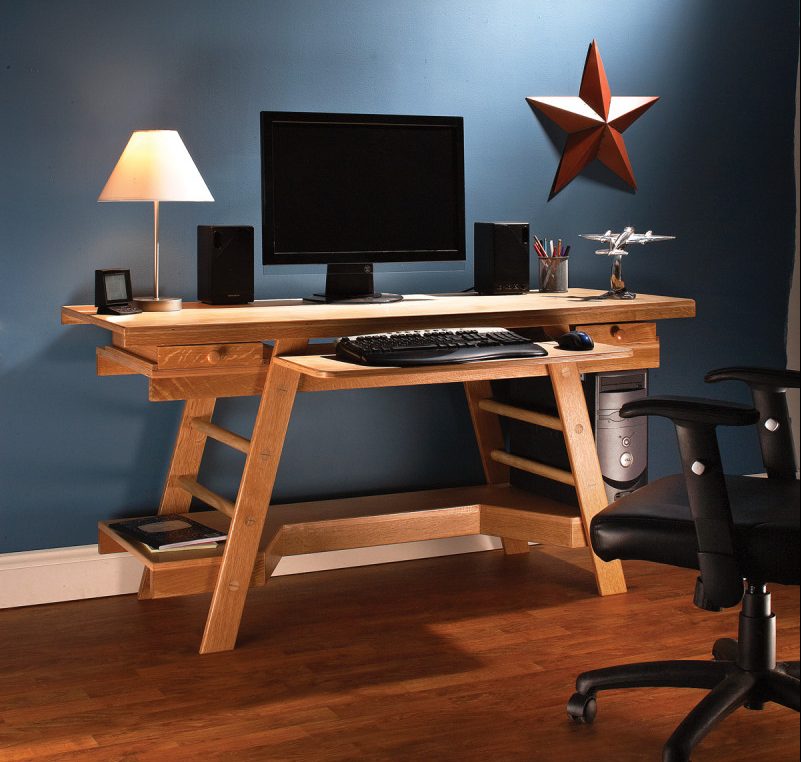
Easy to build, easy to move. This contemporary computer desk is built with simple joinery and is designed to be assembled or disassembled in minutes.
Ladders form the base of this knockdown desk — simple steps to a higher education in woodworking.
Editor’s Note: Hunter Lang was a high school senior when he completed this article for Popular Woodworking in 2009.
I’m in the midst of preparing for college, so I need a desk that is functional but also portable, so that I can easily move it into my dorm room when the time comes. The desk that I’ve had since I was nine years old is too small and about to fall apart. It wouldn’t be worth it to take it to school with me. So I decided to build a new one.
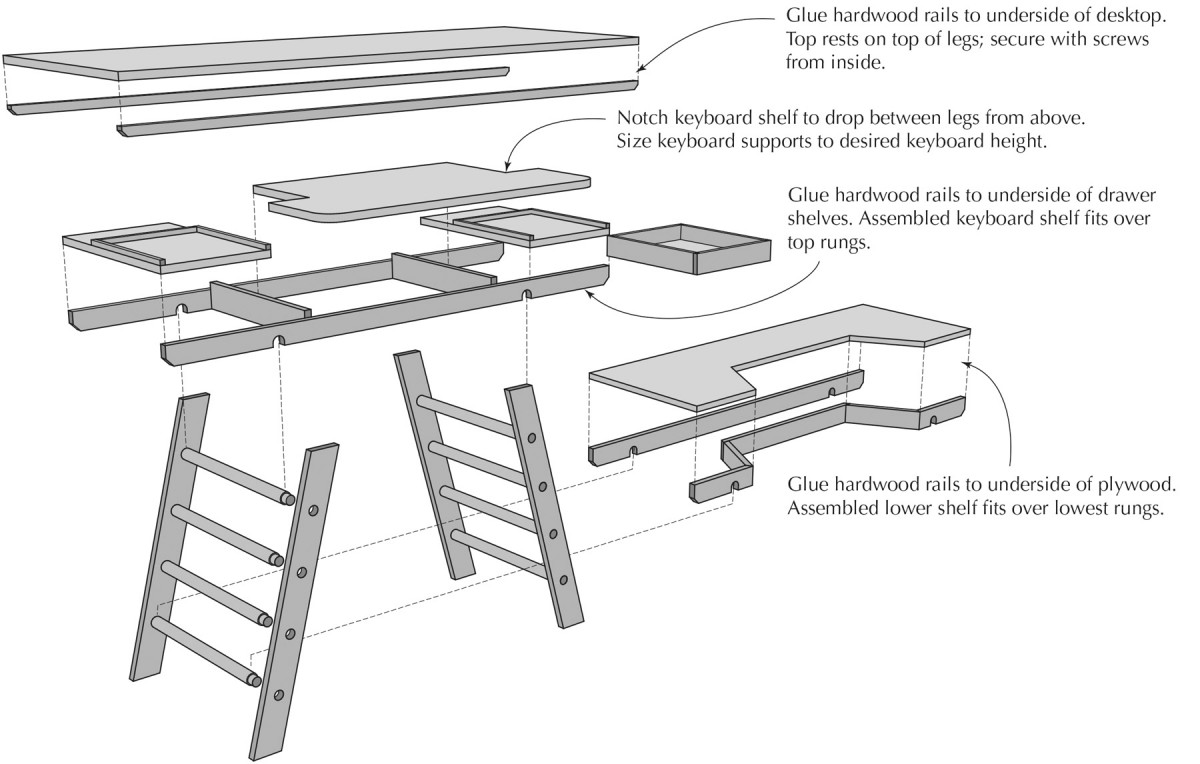
Exploded View
This new desk was designed with a large top to hold a computer monitor and still have enough space for book work. It was also designed to be easily taken apart and put back together. Slots in the rails of the shelves fit on top of the rungs of the ladders with a few screws for added stability. This design would be ideal for any college student, and meets my needs perfectly.
I began building the desk by cutting 1 1⁄4“-diameter poplar dowels to 20 1⁄4” to be used as connectors for the ladders. Then I made tenons on each end at the router table, with a 1⁄2“-diameter straight bit with 1⁄8” of the cutter exposed above the table. To keep each dowel centered over the cutter, I clamped blocks on each side of the bit and set the fence on the router table back from the front edge of the cutter by 7⁄8“.
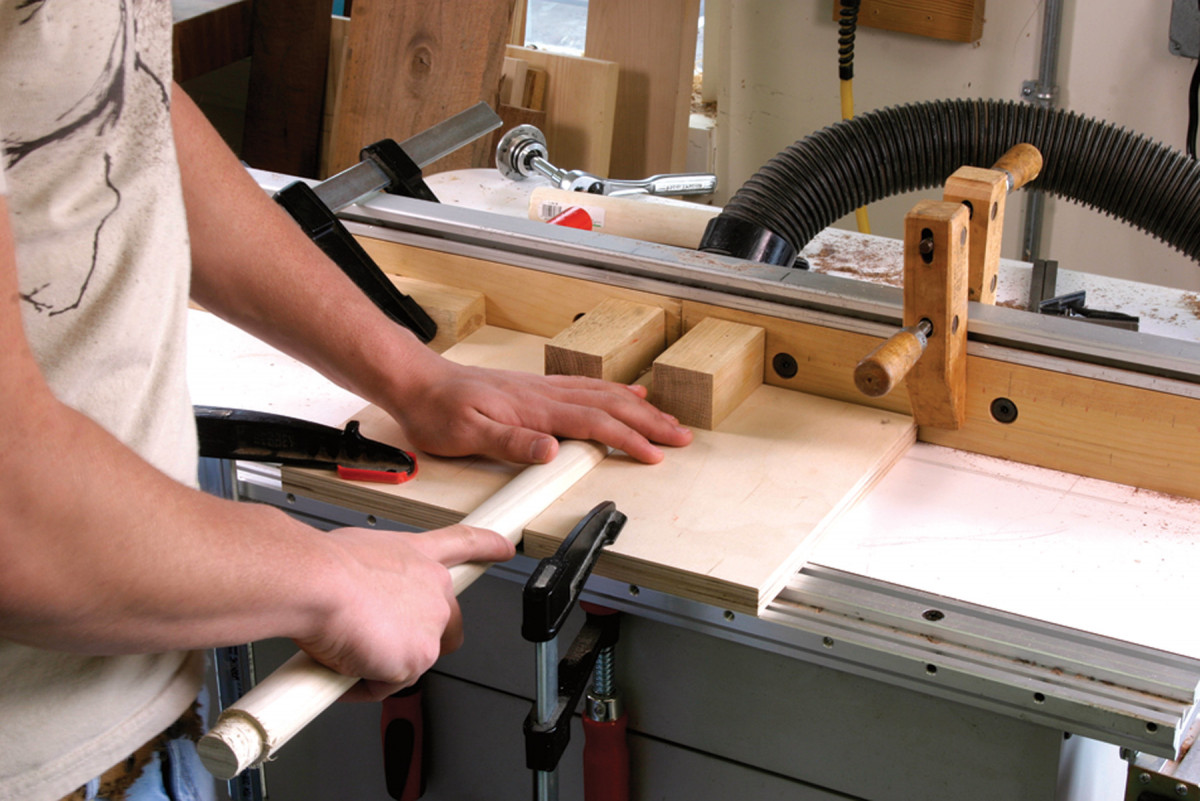
Take it for a spin. Tenons are formed on the ends of the rungs by rotating a dowel over the router bit.
I moved each dowel into the cutter and rotated it with my right hand as I held it down with my left. As the cuts were made I moved the dowel toward the fence until I had made a complete rotation with the end of the dowel against the fence. This gave me a tenon on the end with a 1″ diameter – that’s long enough to go through the legs of the ladders.
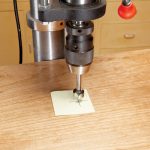
After preparing the tenons, I cut the angled leg pieces to length and laid out centers for holes according to the drawing on page 60. I grouped the legs in pairs and marked off the locations for the holes and the angles on the ends of the legs. Then I drilled the holes with a Forstner bit at the drill press, using the fence to center the holes in the legs.
Little Things Mean a Lot
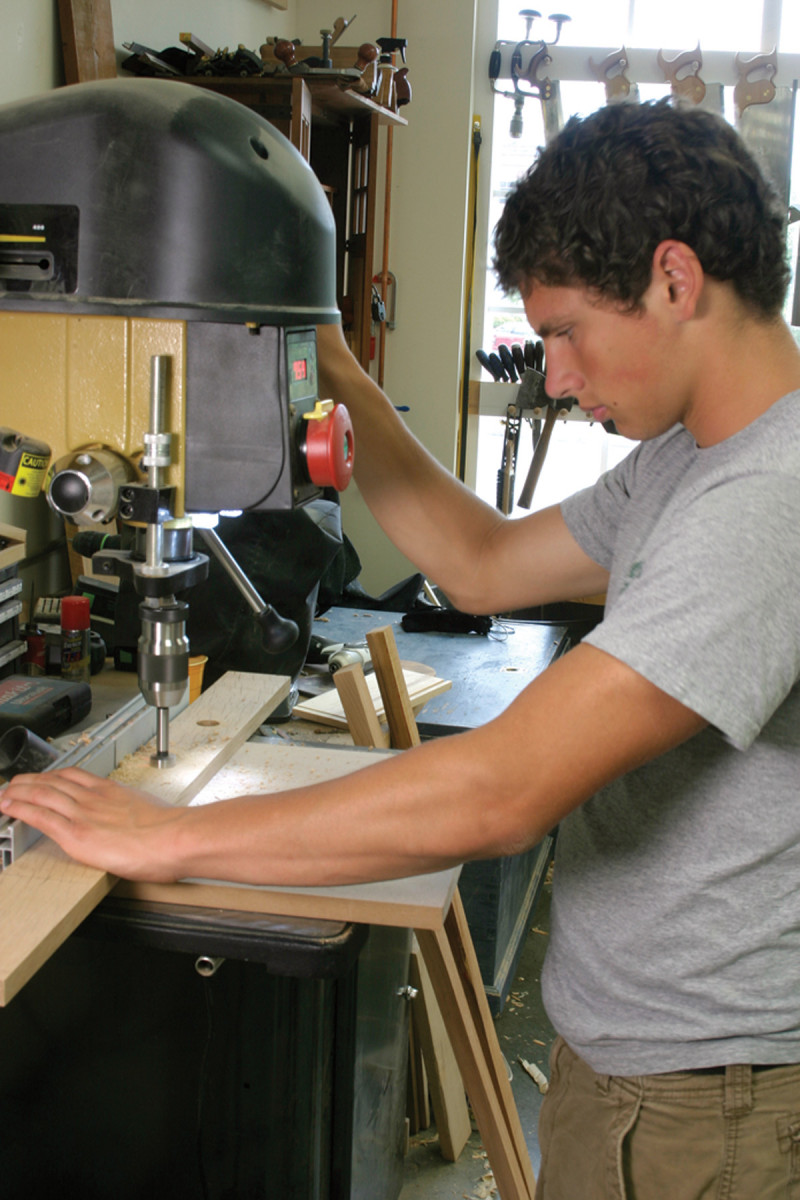
Holes in a row. Careful layout and setup of the holes in the legs makes for easy assembly and sturdy construction.
The next step was to make a kerf across the grain in each tenon with the band saw. I set the fence to keep them centered, and I stopped cutting just before reaching the shoulders of the tenons.
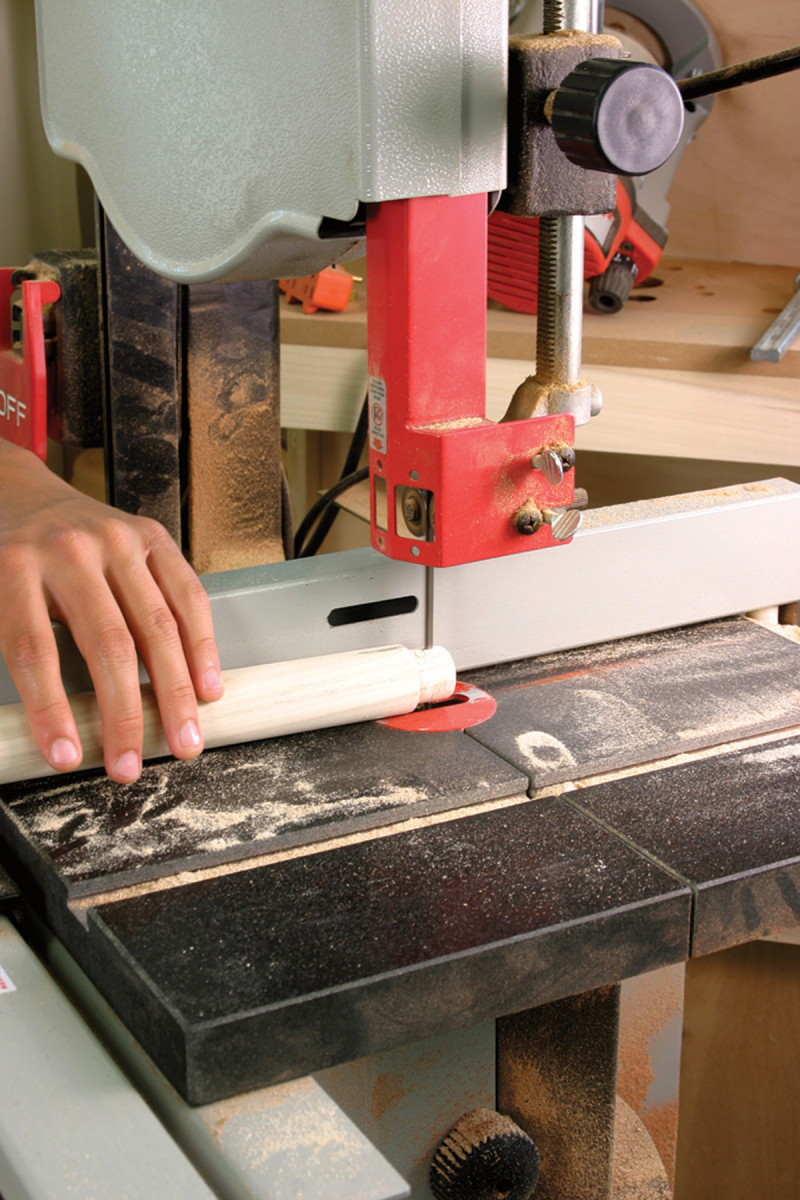
Across the grain. A band sawn kerf is cut in the center of each tenon.
Next, I made wedges to put into the tenon kerfs. These wedges strengthen the bond between the dowels and the legs after the joints are put together. To do this, I angled the miter gauge to 3˚ and sliced wedges from a wide, 1″-long cutoff of scrap. I flipped the piece after every cut to form the wedges. To keep the pieces of wood from falling through the insert in the band saw table, I put packing tape over it.
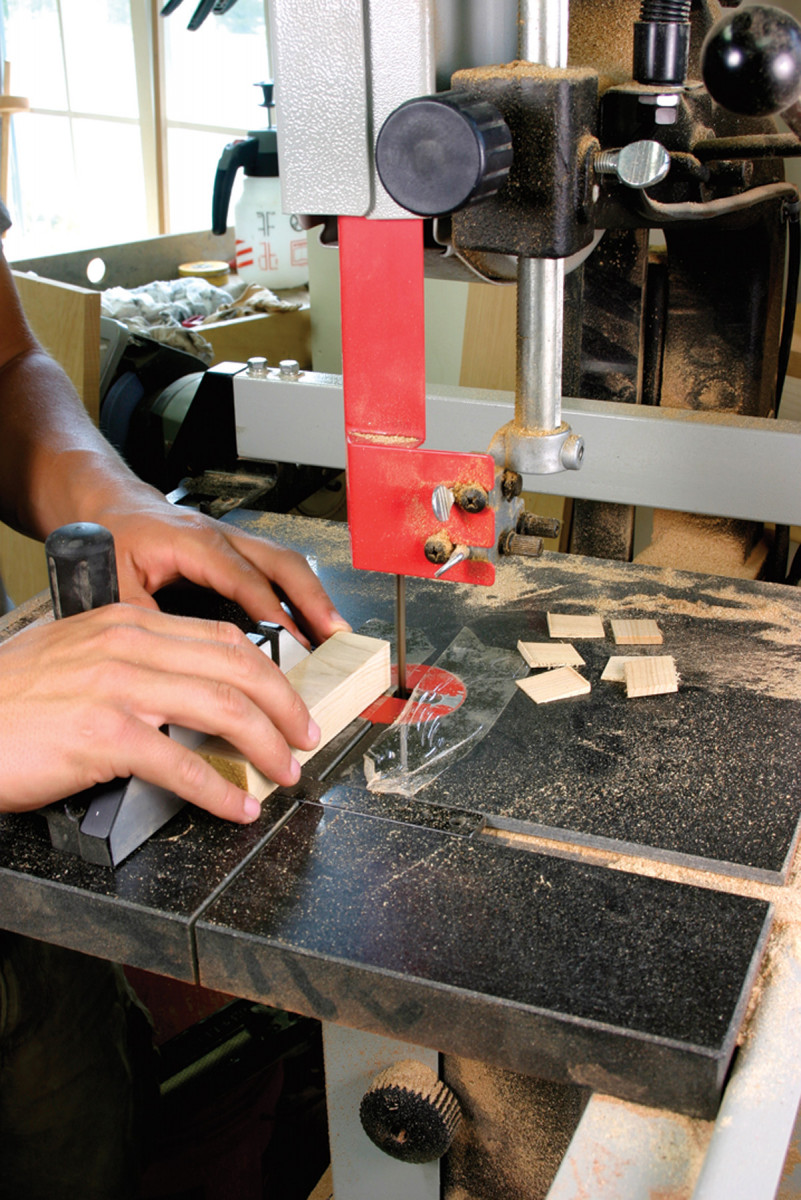
Flipping for wedges. The miter gauge is set at a slight angle, and the wedge stock is flipped over after each cut.
Now I was ready to put the tenons into the holes of the leg pieces. I started by brushing glue around the inside of the holes. Then I inserted the tenons and clamped the legs and rungs together. I put glue on the wedges and drove them into the slots in the tenons to hold the pieces together. I let the glue dry overnight then trimmed the protruding tenons and wedges with a flush-cut saw, and cleaned up the wedges with a block plane.
One Piece of Plywood

Keyboard & drawer shelf rail (top). Bottom shelf rail (middle). Leg (bottom).
With the leg units assembled, it was time to start building the shelves. All the plywood in the shelves came from one 5′ x 5′ piece of 3⁄4“-thick Baltic birch plywood. I ripped the plywood at the table saw. I made two rips at 181⁄2” for the bottom shelf and keyboard shelf, and I made the last rip at 22″ wide for the top shelf.
I cut the bottom shelf to 54″ long, cut the two end pieces for the drawer shelves to 115⁄16” long, and set the leftover pieces aside for the keyboard shelf. I laid out the notches in the solid-wood rails that support the shelves and drilled 1 1⁄4“-diameter holes at these locations, with the top edges centered in the width of rails.

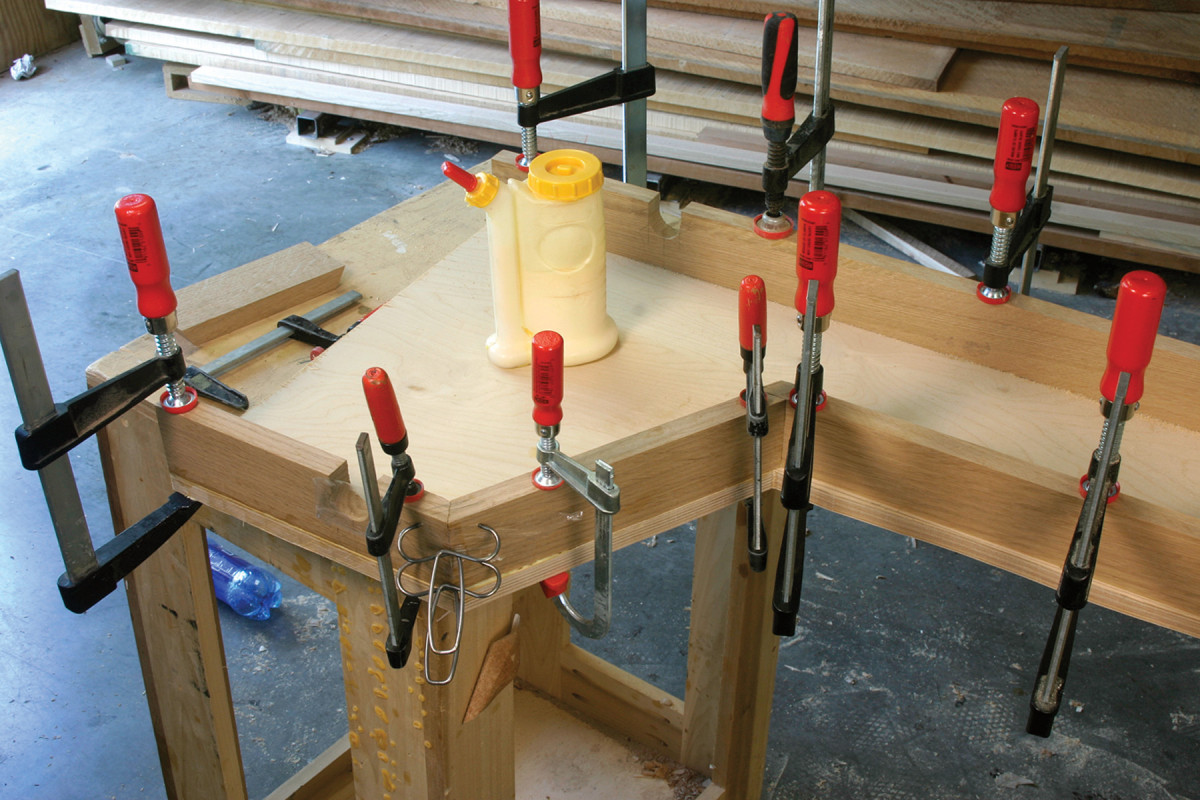
A reason to hide. I used liquid hide glue to allow more time to assemble the rungs and legs.
I used an adjustable square to draw lines tangent to the edges of the holes from the bottom edge of the rails. I used the band saw to cut from the edge of the rails to the holes to make notches, but you could easily use a jigsaw instead. Then I used a rasp to remove the saw marks at the notches and tested that they fit well enough to just slide over the rungs of the ladders.
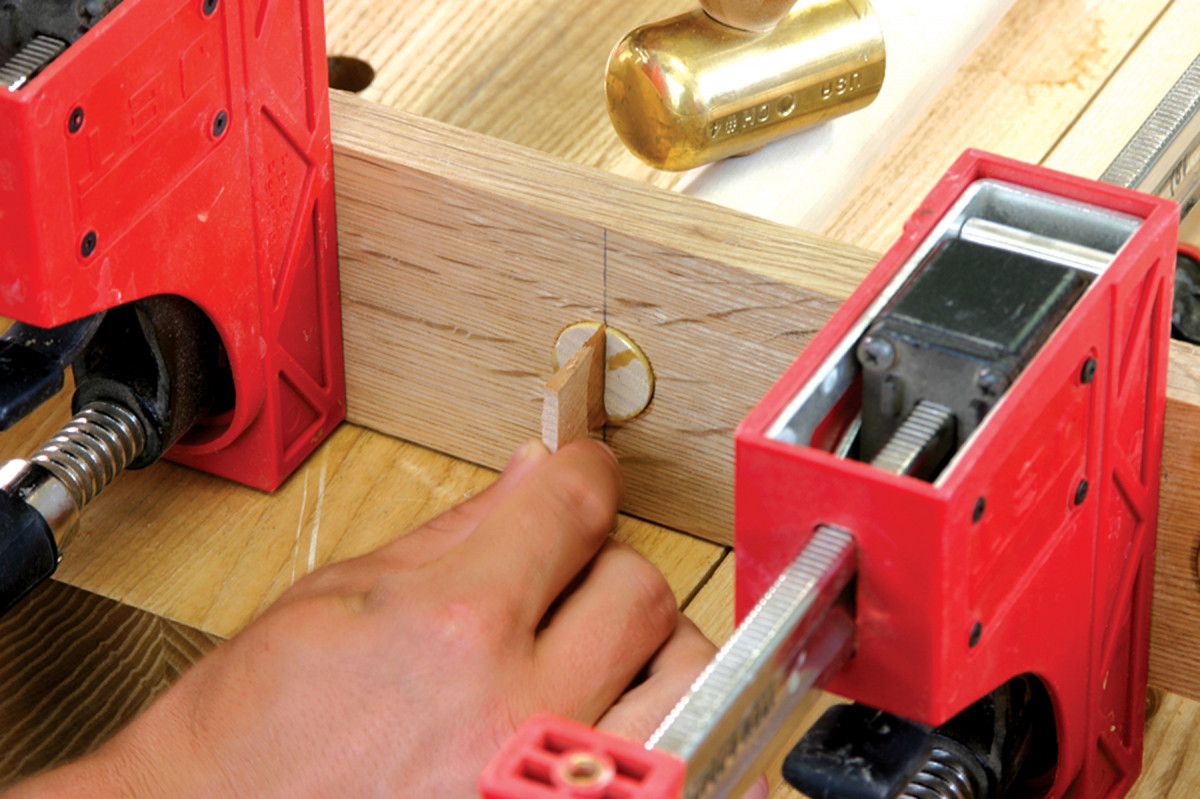
A short drive home. The wedges spread the ends of the tenons, making them tight in the mortises in the legs.
The angled cutout area in the lower shelf provides legroom. To make it, I set my bevel gauge to 15˚ for the angle and went back from the front 9″. With a jigsaw, I carefully cut outside the lines that I had marked. Then I cut the rails to match the bottom front and back edges of the shelf.
I mitered the ends of the rails at the front corner of the cutout in the bottom shelf. The last piece below the bottom shelf, the foot rail, is just butted against the ends of the angled pieces.
Starting at the Bottom
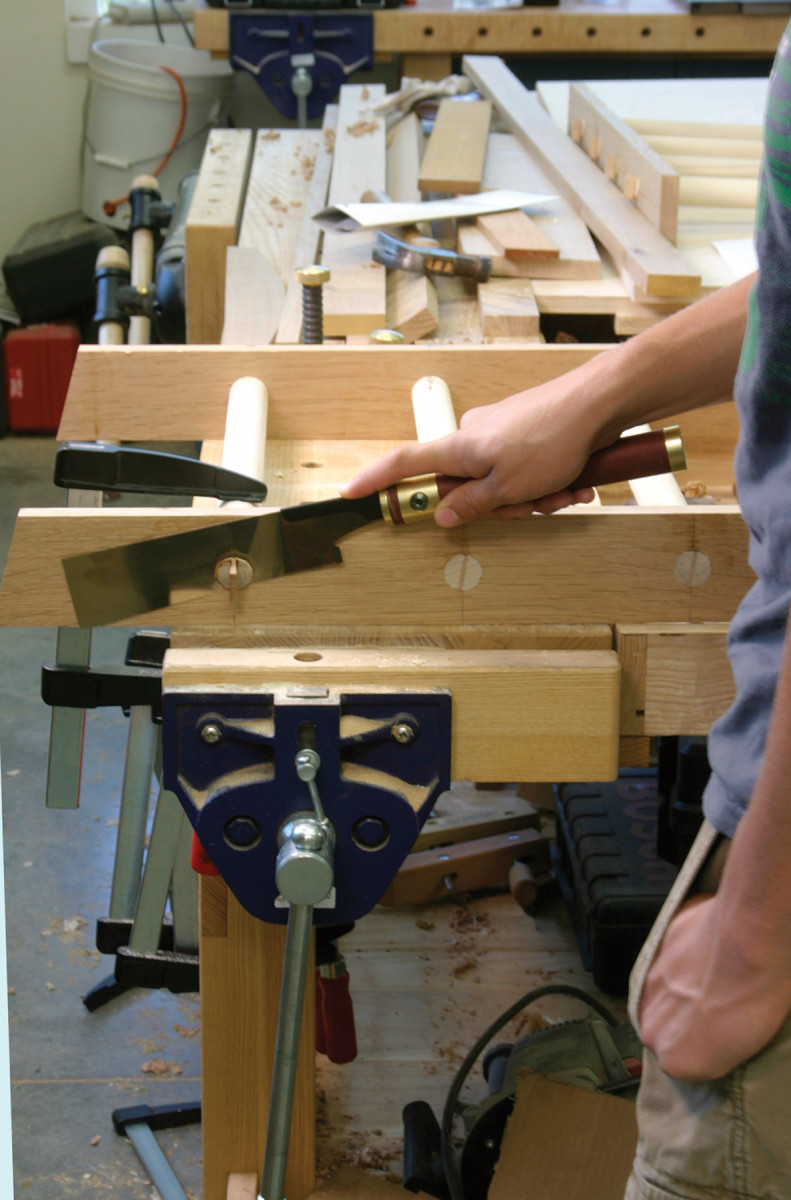
A little off the top. I made the tenons a little long, then trimmed them after assembly.
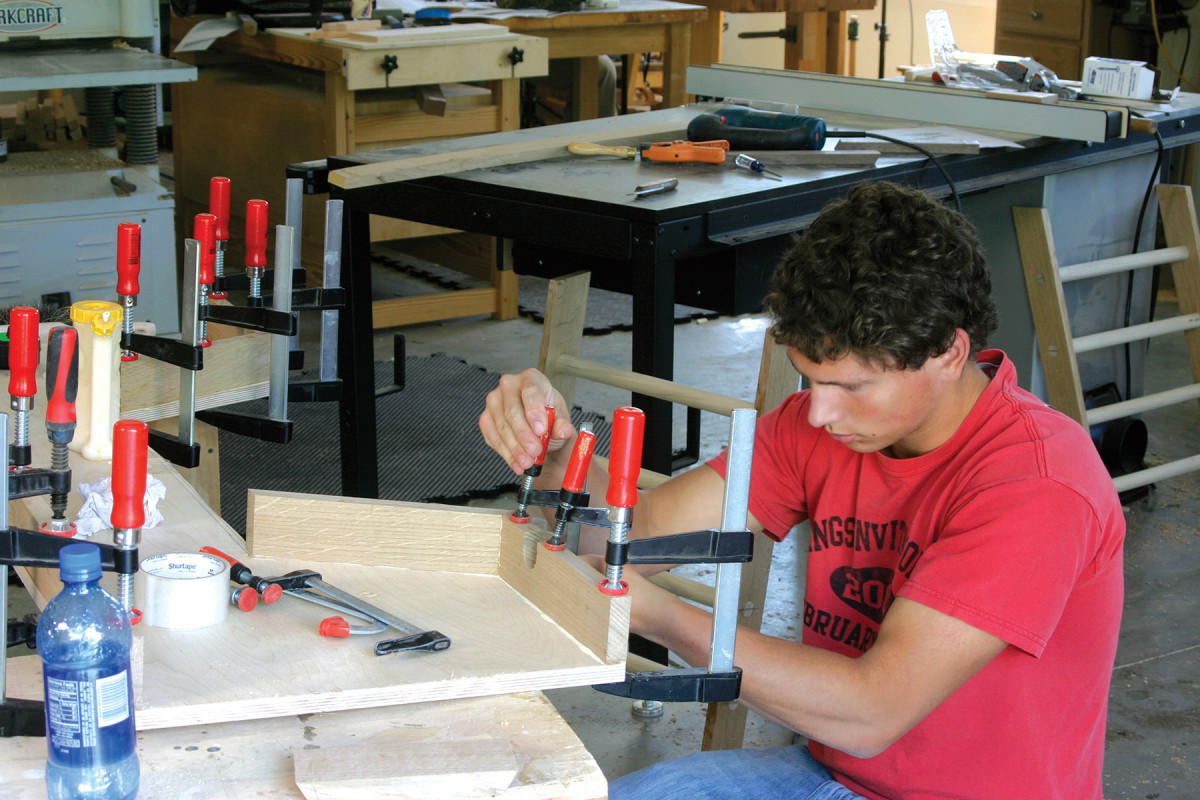
I started assembly with the bottom shelf, and worked my way upward. No fasteners were necessary. I just used glue, lots of clamps, and a strip of clear packing tape across the mitered corners. After the glue dried overnight, I used a trim router with a flush-cutting bit to trim the roughly cut plywood to the straight edge of the solid wood rails.
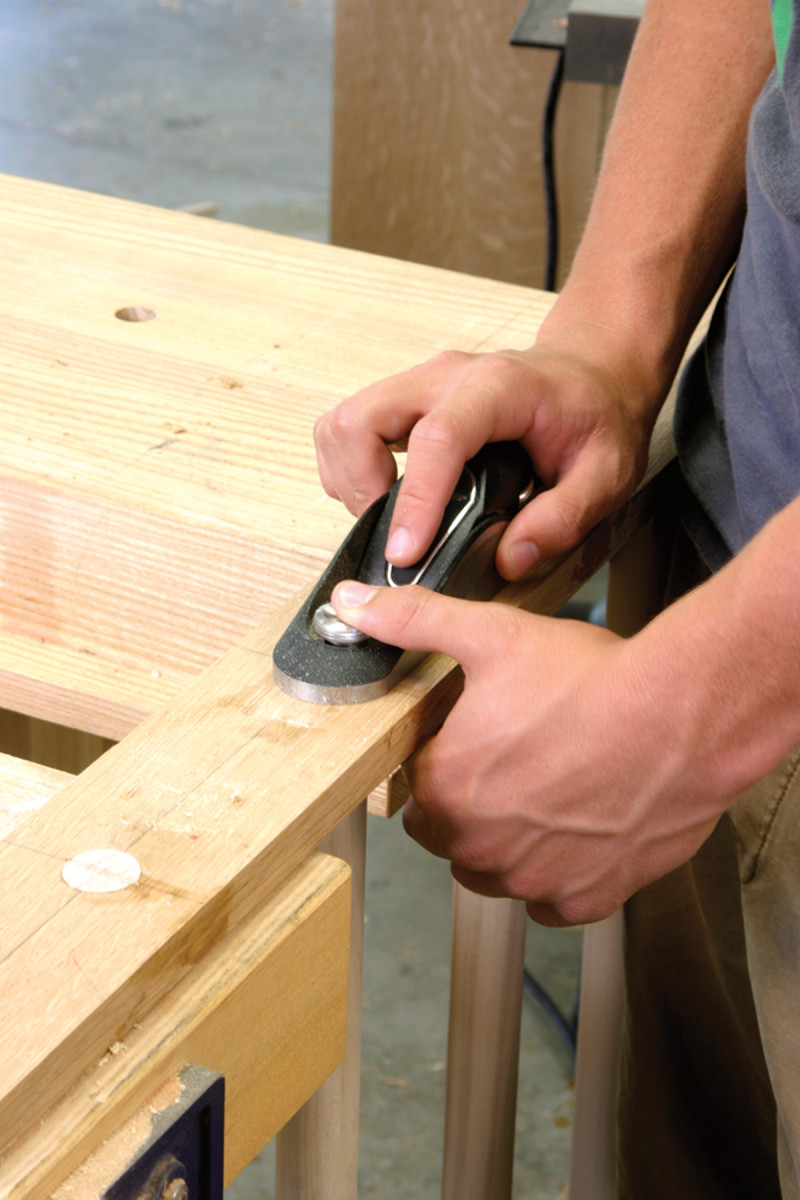
New block for the kid. A few passes with a block plane levels the ends of the tenons and wedges to the surface of the legs.
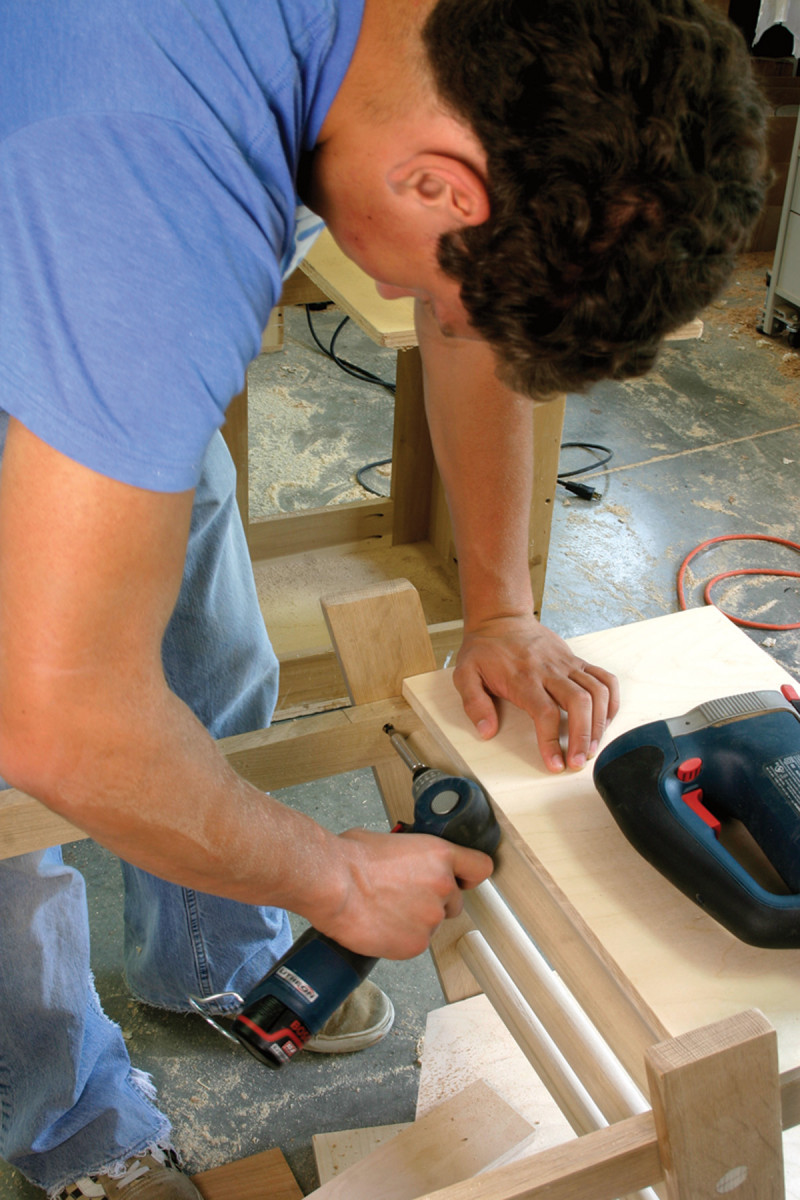
I put the shelves onto the ladders and clamped them into place. I then attached the shelves to the ladders with #8 x 11⁄4” screws from the inside of the rails into the legs of the ladder units. These screws don’t show when the desk is assembled, and they keep the shelves from pivoting on the rungs.
I wasn’t sure how tall the keyboard tray should be. My original design had the keyboard tray on top of the rails of the first shelf below the top. I thought that this made the tray too low, so I decided to make it a little taller. So I cut two solid pieces of wood 2 3⁄4” wide to support the keyboard tray, cut them to length, and attached them between the front and back rails of the top shelf with pocket screws. I didn’t use glue in case I decide to change the height later on.
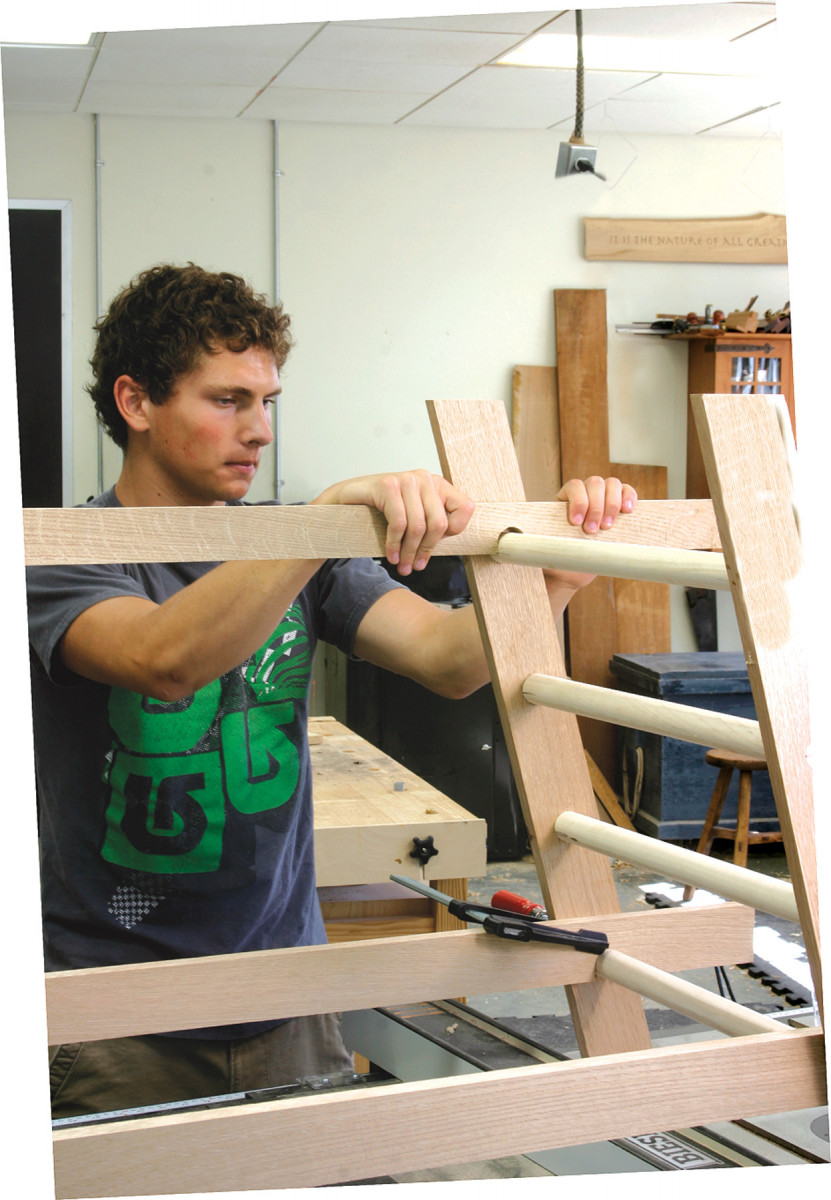
Notches are the key. The semi-circular openings in the bottom of the shelf rails line up all the parts and make assembly a snap.
You may also need to adjust the shelf heights to accommodate your computer case, if you want to put it on the bottom shelf. Check the clearance you will need before building. You can also leave the drawer off one side if you need the space. Replace the plywood shelf with solid wood rails between the two long rails, and that will give you a few more inches.
Glue is enough. The connection between the plywood and solid wood is long-grain to long-grain, so a glue-only joint will be solid.
I used a square to locate the notches on the keyboard tray, and made sure to leave clearance so I could drop the tray straight down between the ends of the ladders. These notches allow for easy disassembly; just pull the tray straight up to take the desk apart.
After I cut the notches in the keyboard tray with a jigsaw and smoothed the edges with a rasp, I screwed it down to the rails. The space behind the tray leaves room for wires and cables. The top was simple; two straight pieces of solid wood were glued beneath the front and back edges of the plywood. The top rests on the top of the legs, and is secured with a screw from the inside of each leg into the desk’s top supports.
Cutting Corners
Quick assembly. A few screws in concealed locations hold the pieces securely together.
I used the jigsaw to round off the sharp corners of the keyboard tray, then smoothed them with a rasp. Next, I used a 1⁄8” radius roundover bit in a trim router to ease the sharp edges on all the parts of the desk. Now it was time to sand everything. I used #120-grit with a random-orbit sander.
The drawers are simple boxes with rabbet-in-groove joints at the corners and a 1⁄4“-thick plywood bottom that slides into grooves in the drawer fronts and sides. To guide the drawers, I cut strips of solid wood 1⁄2” square. After the drawers were made, I set them on the shelf and nailed a strip on each side of the drawer to act as guides, plus one at the back of each as a stop.
After everything was assembled and sanded, I applied two coats of brushed-on satin water-based polyurethane. After the first coat, I sanded with #180-grit sandpaper to smooth out the finish.
Cutting corners. The angled cutout in the bottom shelf provides some legroom as well as out-of-the-way storage.
The building process wasn’t as difficult as I had expected. I had to work with many tools that I had never used before, but I took to the new challenges readily. The design of the desk is very functional, so all of the construction steps made sense.
After finishing the desk, I was very satisfied with my final product. I put hard work into building my desk, but it is going to meet all my needs for college. I have already taken it apart and put it back together a few times. It was a stress-free process each time, and I’m not apprehensive in the least bit about having to disassemble it and take it with me to college. I know that it will be a simple process, and it will probably be the easiest part of moving.
Knockdown Computer Desk Cut List
No. item dimensions (inches) material comments
T W L
❏ 8 Rungs 1 1⁄4 dia. 20 1⁄4 Poplar 18 1⁄2“ between tenons
❏ 4 Legs 13⁄16x 3 x 30 13⁄16 Oak
❏ 2 Desk top supports 13⁄16 x 7⁄8 x 60 Oak
❏ 2 Keyboard shelf rails 13⁄16 x 2 x 54 Oak
❏ 2 Keyboard tray rails 13⁄16 x 2 3⁄4 x 18 1⁄2 Oak
❏ 1 Bot. shelf back rail 13⁄16 x 2 1⁄2 x 54 Oak
❏ 2 Bot. shelf front rails 13⁄16 x 2 1⁄2 x 10 1⁄4 Oak
❏ 2 Bot. shelf angle rail 13⁄16 x 2 1⁄2 x 10 Oak
❏ 1 Bot. shelf foot rail 13⁄16 x 2 1⁄2 x 25 5⁄16 Oak
❏ 2 Drawer fronts 1⁄2 x 2 x 10 5⁄16 Oak
❏ 2 Drawer backs 1⁄2 x 1 1⁄2 x 91 3⁄16 Oak
❏ 4 Drawer sides 1⁄2 x 2 x 12 3⁄16 Oak
❏ 4 Drawer guides 1⁄2 x 1⁄2 x 12 11⁄16 Oak
❏ 2 Drawer stops 1⁄2 x 1⁄2 x 10 5⁄16 Oak
❏ 1 Desk top 3⁄4 x 20 1⁄8 x 60 Birch ply
❏ 1 Bottom shelf 3⁄4 x 18 1⁄2 x 54 Birch ply
❏ 2 Drawer shelves 3⁄4 x 18 1⁄2 x 11 5⁄16 Birch ply
❏ 1 Keyboard shelf 3⁄4 x 18 1⁄2 x 32 5⁄16 Birch ply
Click here to download the 3D Google SketchUp model of the Knockdown Computer Desk.
Here are some supplies and tools we find essential in our everyday work around the shop. We may receive a commission from sales referred by our links; however, we have carefully selected these products for their usefulness and quality.