We may receive a commission when you use our affiliate links. However, this does not impact our recommendations.
Make this router table in a couple of hours.
If you’re learning to use a router, it won’t be long before you realize that to get the most out of this tool, you’re going to need a router table. There are some joints and operations you just can’t do without one.
Our online router course with Colin Knecht will teach you all about routers and router tables, and it includes plans for a vise-mounted router table. If you can’t make the class, or you want a floor-standing table, here is how to build a router table with ¾” MDF or plywood in an hour or two.
You’ll want to start by making some 3-1/4” and 4” rips for the legs, frame and fence. Then make some 1-1/2” rips for the top build-up. Cut a piece for the top that’s 24” x 36.”

Step 1: Make the legs
Crosscut everything to length. Glue and screw the legs together, using one 3-1/4” piece and one 4” piece for each leg. Now glue and screw the frames together. Attach the legs to the two frames from the inside using more glue and 1-1/4” screws.
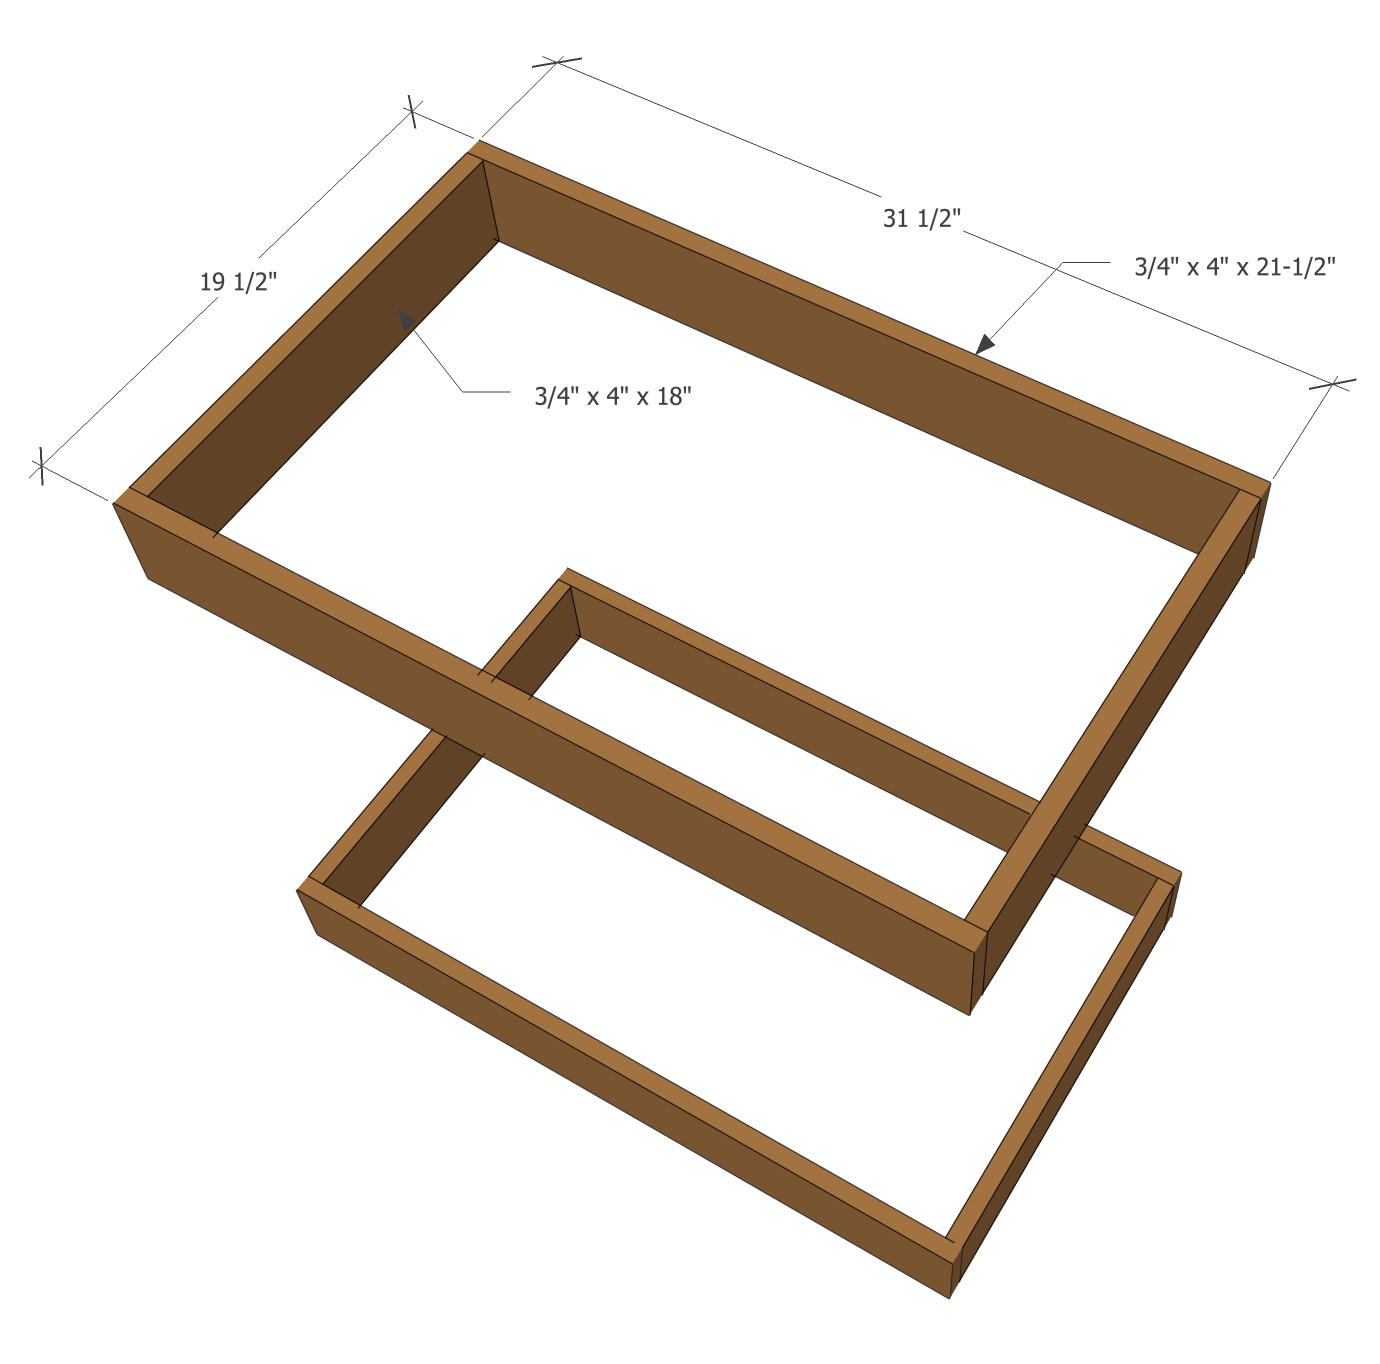
Step 2: Make two frames
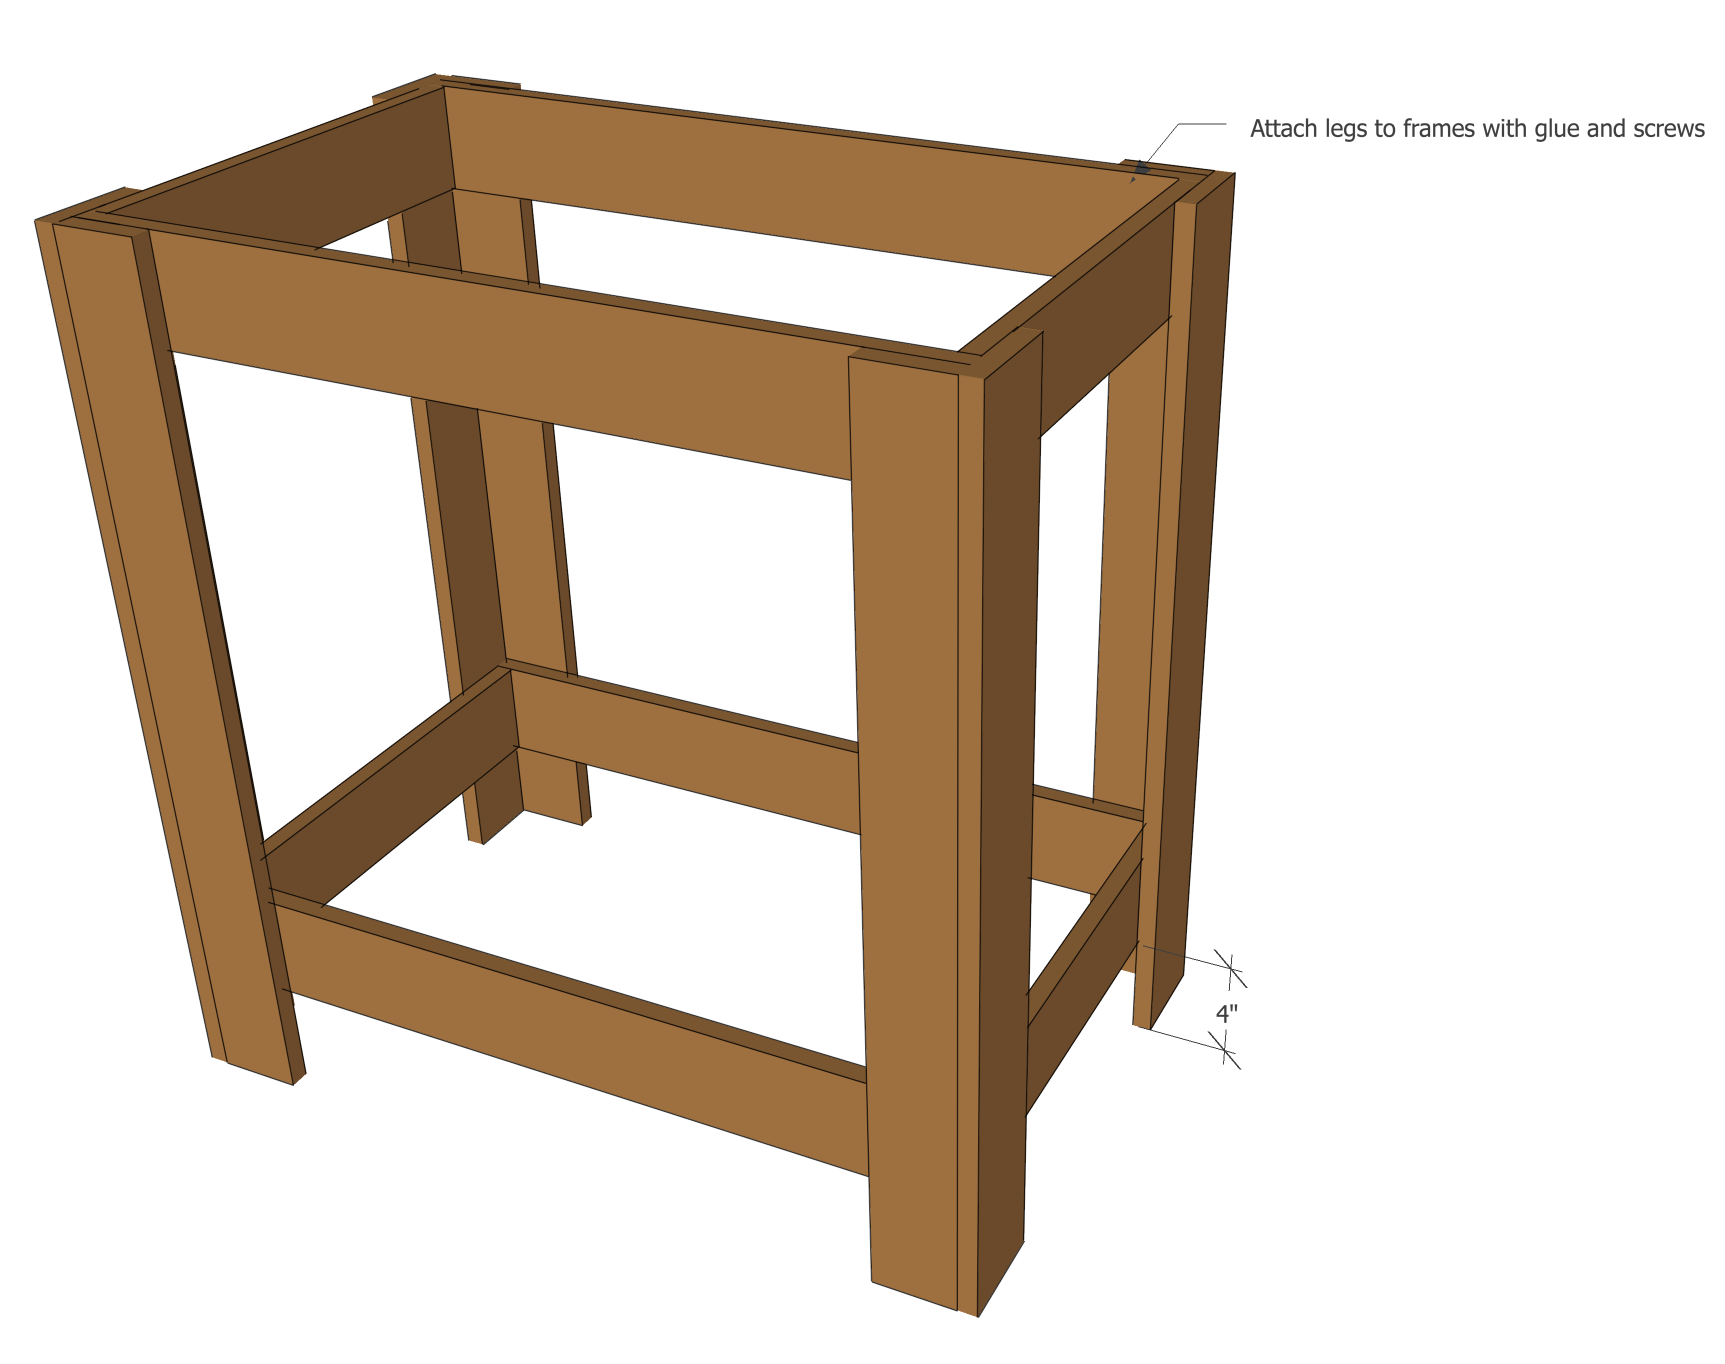
Step 3: Attach the legs to the frames you just built
Glue and screw the top build-up to the underside of the top, and set that onto the frame. You can attach the top to the frame with pocket screws or l-brackets.

Step 4: Add the build-up to the underside of the top
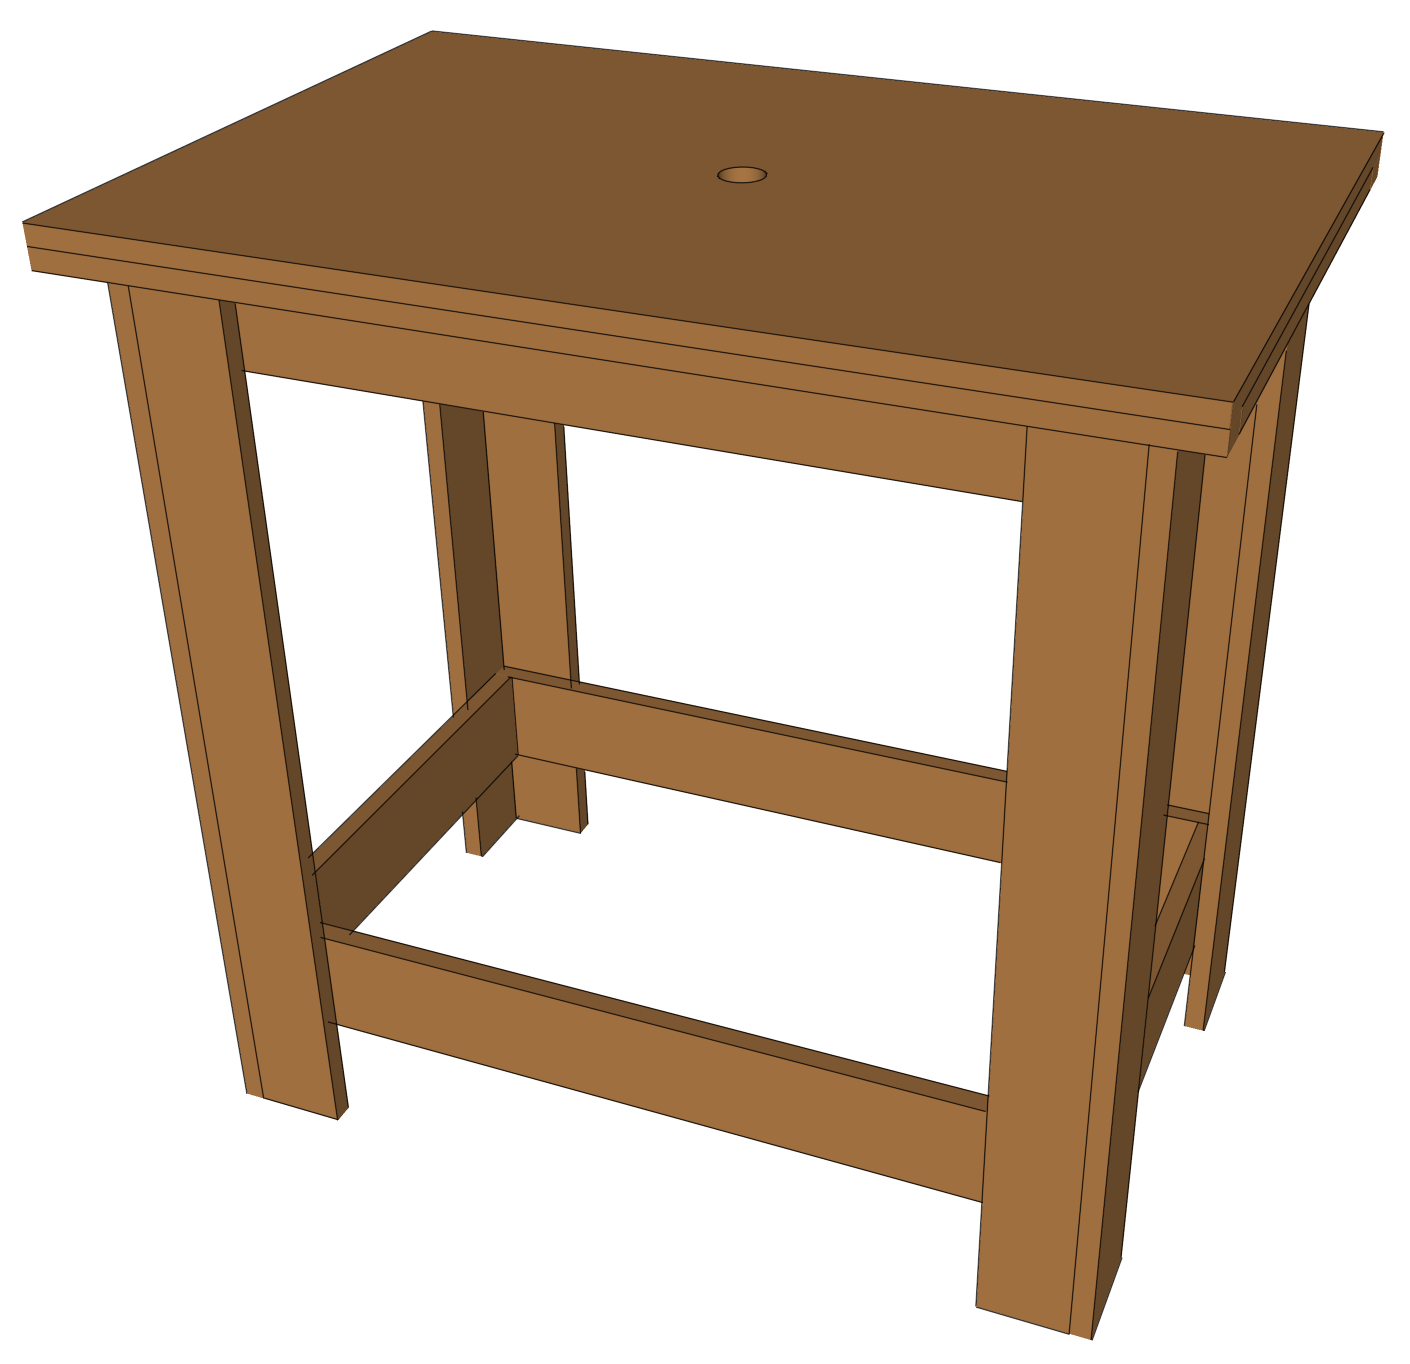
Step 5: Attach the top to the frame
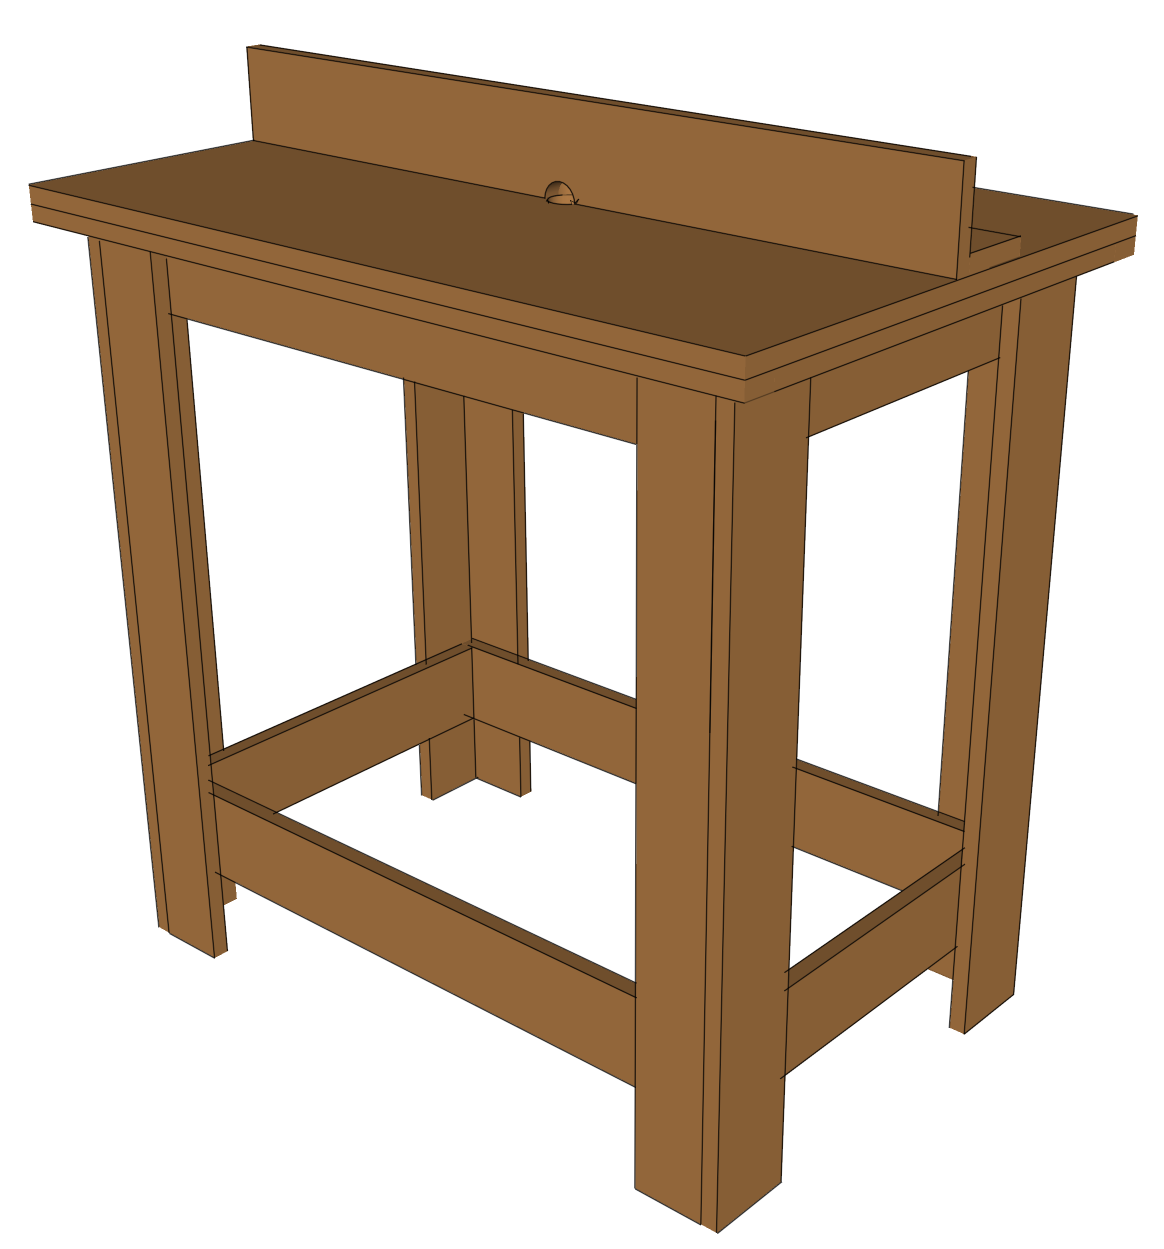
All that’s left is to cut a notch in the middle of each piece of the fence to make room for a router bit, and to attach the two pieces with glue and screws. Just clamp the fence when you want to use it. You could laminate the top and fence for a more finished look and less friction, but raw MDF or plywood will be just fine.
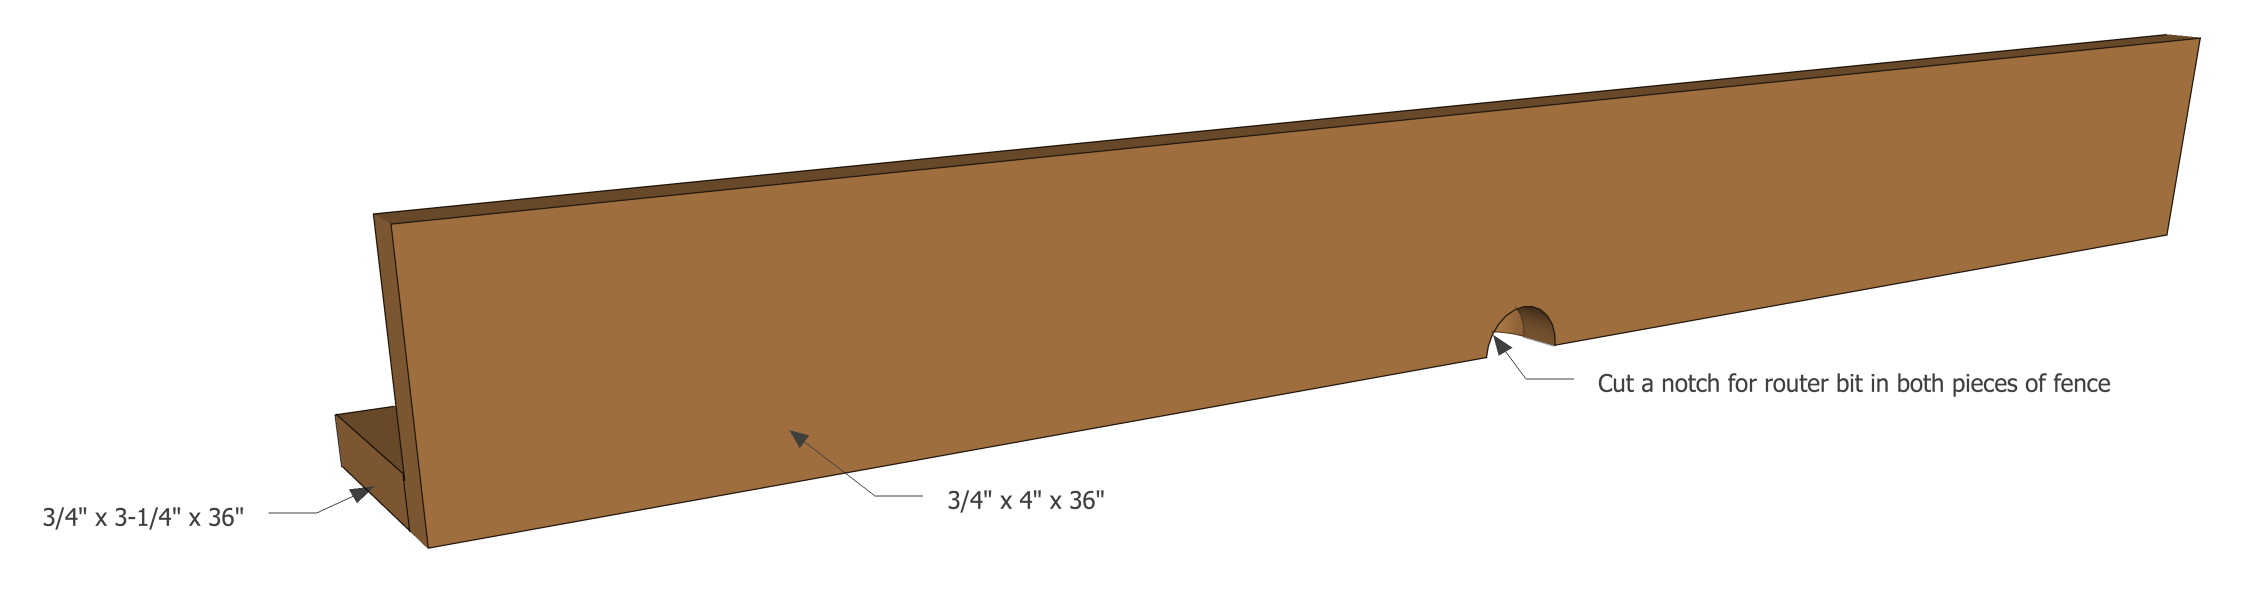
Step 6: Notch the two pieces for the fence and attach them
Here are some supplies and tools we find essential in our everyday work around the shop. We may receive a commission from sales referred by our links; however, we have carefully selected these products for their usefulness and quality.