We may receive a commission when you use our affiliate links. However, this does not impact our recommendations.
|
|
|
Tired of working on a sheet of plywood thrown over a pair of
sawhorses? Had it with rolling benches that wiggle and wobble? Hate
running around your shop whenever you need a tool? Boy, do we have the
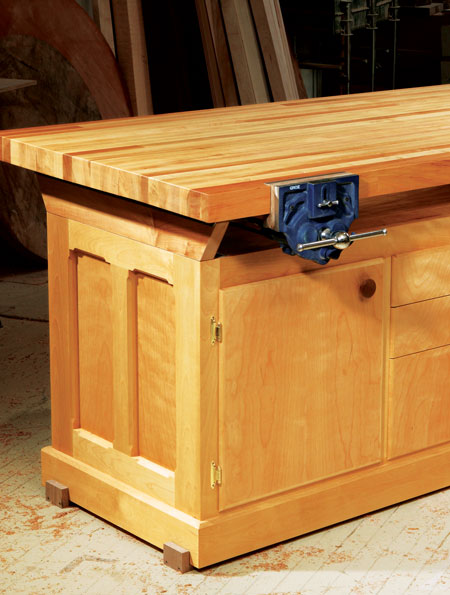
bench for you. Our dream bench starts with traditional workbench
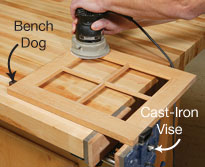
features like a thick top, a sturdy base, bench dogs and a pair of
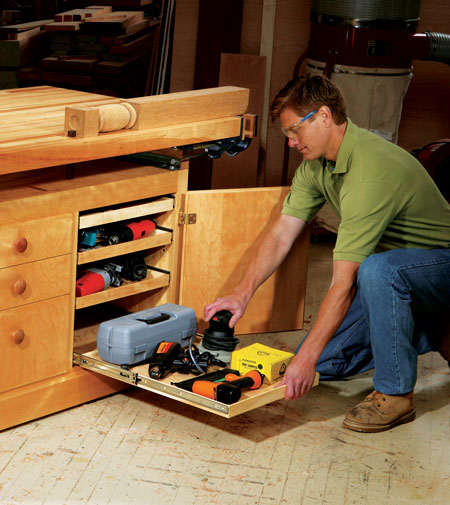
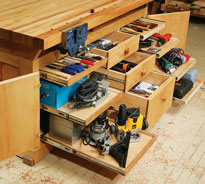
vises. Then we added tons of storage, an extra-wide top, and modern,
cast-iron vises. Last but not least, we devised a simple method to make
the bench mobile and still provide a rock-solid work platform. Our
bench is built to withstand generations of heavy use. Simple, stout
construction absorbs vibration and can handle any woodworking procedure
from chopping deep pocket mortises to routing an edge on a round
tabletop. The thick, butcher-block-style top is truly a joy to work on.
We'll show you how to surface this huge top without going insane trying
to level 24 separate strips of glued-up hardwood. Our top doesn't waste
wood—even the offcuts are used.
Benefits:
|
Tons of easy-access storage: |
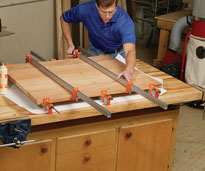
Extra-wide, heavy-duty top: |
|
You name it, this bench can clamp it down: |
It's rock-solid but mobile: |
|
PHOTO 1: |
PHOTO 2: |
|
PHOTO 3: |
PHOTO 4: |
Tools & Materials
If you go all out like we did you can expect to pay about $900 for
materials. If you can't swing that much dough all at once, don't worry;
you can build an equally functional version for about $450. How? Save
$220 right off the bat by substituting common 2x4s for the maple top.
We made several tops this way and they work great. Just be sure you dry
your 2x4s to around 8-percent moisture content before you build. You
can save $75 by skipping the expensive birch plywood and hardwood. Just
stick with construction lumber. The inexpensive bench may not look as
classy, but hey, it's still a great workbench. You could build
adjustable shelves inside the cabinets instead of drawers and pullout
trays. They're less convenient, but it'll save you another $110 in
drawer slides.The best thing is you can cut costs and still get a fully
functional bench right away, even if you go with the least expensive
options. When you've got the extra cash, you can always build the maple
top or add the full-extension hardware. To build the bench you'll need
a tablesaw, planer, belt or orbital sander, a router and a circular
saw. You'll also want a flush-trim bit and a dado blade for your
tablesaw.
|
PHOTO 5: |
PHOTO 6: |
Build the Cabinet
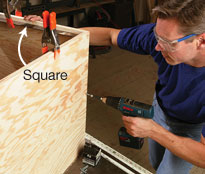
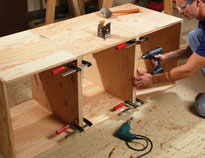
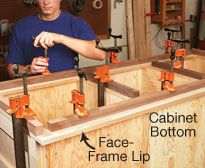
Cut the plywood parts for the three individual boxes (Parts D and E)
and assemble them (Photo 1). The three boxes are joined to form the
cabinet (Photo 2). Screw the two end pieces of birch plywood (H) to the
cabinet, placing the screws where the face frame will cover them (Fig. A).
Cut the plywood top (C) according to the actual measurements of your
assembled cabinet and attach with screws. Do the same for the back (B).
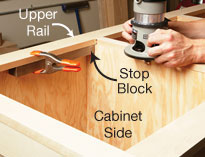
Cut and assemble the three face frames (parts U through AA). Use the
actual measurements of your cabinet to determine rail lengths. The face
frames are built slightly oversize to give you a little wiggle room
when gluing them to the carcase. The extra overhang will get trimmed
off later. Clamp and glue the side frames first. Tack the frames down
with a couple of brad nails so they don't scoot around under clamping
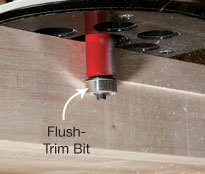
pressure. Use a flush-trim bit and a router to trim the side frames
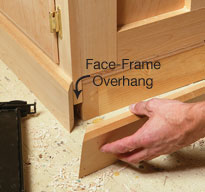
even with the plywood. Attach and trim the front face frame (Photos 3
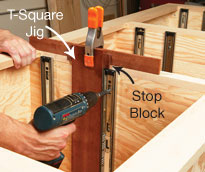
and 4). To mount the drawer and pull-out shelf slides, turn the cabinet
on its back and use a square to mark centerlines. Use a simple T-square
jig to align the slides so the screw holes are on the line (Photo 5).
|
PHOTO 7: |
PHOTO 8: |
|
PHOTO 9: |
PHOTO 10: |
The Top
This is the business end of your bench. You'll want to take extra care
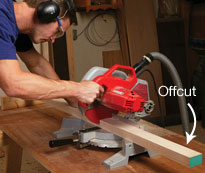
in each step to ensure a flat, solid top. Start by rough-cutting your
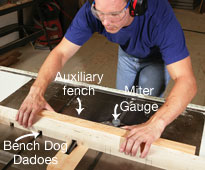
top stock (EE) to length (Photo 6). Cut 3/4 in. x 3/4-in. dadoes for
the bench dog (JJ) into the edge of one of the top pieces (Photo 7).
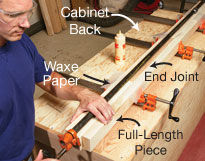
Before you start to glue up the top, make use of the offcuts. Just end
glue them in a line to create a full-length piece (Photo 8). I know
gluing end grain is a no-no, but all you want here is to hold the
pieces together long enough to build them into the top. Each segmented
piece will get properly edge-glued to other full-length pieces. The
result is a strong top that doesn't waste precious hardwood. Here's how
to assemble the butcher-block top without facing a sentence of hard
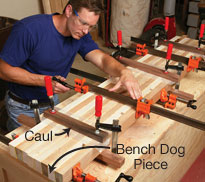
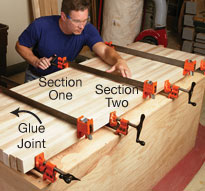
labor sanding. Glue up three 12-in. sections of the top on a flat
surface. We flipped the cabinet face down and used the back for our
glue-up (Photo 9). Each 12-in. section should start and end with a
full-length piece.
|
PHOTO 11: |
PHOTO 12: |
The segmented pieces can alternate with full-length pieces. Once the
glue is good and dry (overnight is best), remove the top section from
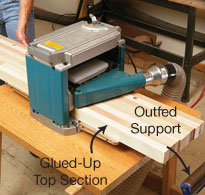
the clamps and scrape off any squeeze out. Now you're going to put your
portable planer to the test. Each section gets planed down to 2-1/2-in.
thickness (Photo 10). Take light cuts for the sake of your planer, and
to minimize tear-out. Try wetting the top's surface before the last
pass for the smoothest possible cut. Some minor tear-out is inevitable
with a big glue-up like this. Remember it's a workbench, not a museum
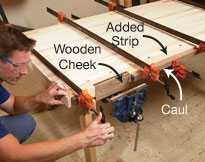
piece. Once all three sections are surfaced, you can glue them together
(Photo 11). Do one at a time. This allows you to concentrate on keeping
each joint perfectly level. Before you use any glue, dry clamp your
sections to make sure the clamps can draw the joint tight. Even a
slightly bowed section will be hard for clamps to pull straight. (See
Oops!, below, for a nifty fix.) Once all the sections are glued
together you'll need to trim the ends to final length. Mark the ends of
the top with a square. Continue the marks around the underside of the
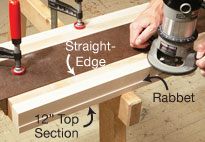
top as well. Set a circular saw for a 1-1/2-in.-deep cut and clamp a
straightedge to the top so the saw cuts on the line. Make the first
cut. Then flip over the top and set the straightedge for the second
cut. Complete the cut and smooth the ends with a power sander.
|
PHOTO 13: |
PHOTO 14: |
Build the Base
Build the base flush with the bottom of the cabinet. Pick the
straightest 2x4s you can find for the frame. If possible, we recommend
starting out with 2x6s that have been dried to about 8-percent moisture
content. Then joint and plane them to make straight and true 2x4s.
Assemble the 2×4 frame with screws. A plywood base top (A) is fastened
to the frame to finish the base.
If your bench is going to be stationary, go ahead and shim the base
level before adding the cabinet. If you want to make a mobile bench,
attach the six casters to the underside of the plywood base's top (Fig. A).
Leave just enough room for the casters to rotate freely inside the 2×4
frame. Six casters allow the bench to glide smoothly, even if your
floor is uneven. Add the base molding to finish the bench (Photo 13).
Doors, Drawers & Pull-Out Shelves
Start by cutting three door blanks (J). Add the 1/2-in.-birch edging on
all four edges. Put a 3/8-in. round-over all the way around the outside
edge of all three blanks. On the tablesaw or router table, cut a 3/8
in. x 3/8-in. rabbet on all four inside edges. Crosscut the drawer
fronts (K, L and M) out of one of the blanks and use the other two for
doors. Build and mount the drawers and pullout shelves according to (Fig. C)
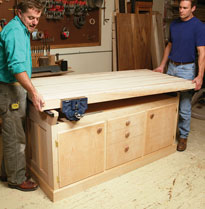
Now all that's left is to secure the top to the cabinet (Photo 14).
Accommodate the expansion and contraction of the solid-wood top by
elongating the two outside holes on the angle-iron cleats under the top
(Fig. A). A simple oil finish completes the job. There, now you've got all the support you'll ever need for your woodworking.
Download Plywood Cutting Diagram
Oops!
It's possible for the edges of the laminated top sections to end up
with a slight bow. With 12 in. of width, you're not likely to
straighten them out with clamp pressure. So what should you do?
A jointer is out of the question; the 12-in. section of top is just too
big and heavy, even for two people. We used a simple two-step process
with a router and a straightedge to joint our bowed top section.
|
Step 1: |
Step 2: |
Sources:
Home Center, Four sheets 3/4" AC fir plywood, $27 ea. ($108 total), One
sheet 3/4" birch plywood, $37, Three 8' 2x4s, $3.50 ea. ($10.50 total),
9 ft. 1-1/2" x 1-1/2" angle iron, $1.50 ea. ($14 total).
Wall Lumber Co., (800) 633-4062, 90 bd. ft. 8/4 soft maple, $3 ea. (total $270), 25 bd. ft. 3/4" birch, $3 (total $75).
Woodworker's Hardware, (800) 383-0130, Ten 24" full-extension drawer
slides with 1-in. overtravel, KV8405 B24 ANO, $11 ea. ($110 total) Two
3/8" inset, self-closing hinges, A07128 3, $1.50 ea. ($3 total), Six 3"
swivel-plate industrial casters, rubber, $10 ea. ($60 total)
Five 2" birch knobs, SBKR 200, 75¢ ea. ($3.75 total), 1/2" x 1-1/2"
straight cutter, CMT812.627.11, $17, 1/2" x 1-1/2" flush-trim bit,
CMT806.629.11, $21.
Highland Hardware, (800) 241-6748, 9" quick-release vise, 199152, $100,
7" quick-release vise, 199151, $70. Grand total: $899.25.
Here are some supplies and tools we find essential in our everyday work around the shop. We may receive a commission from sales referred by our links; however, we have carefully selected these products for their usefulness and quality.


