


We may receive a commission when you use our affiliate links. However, this does not impact our recommendations.
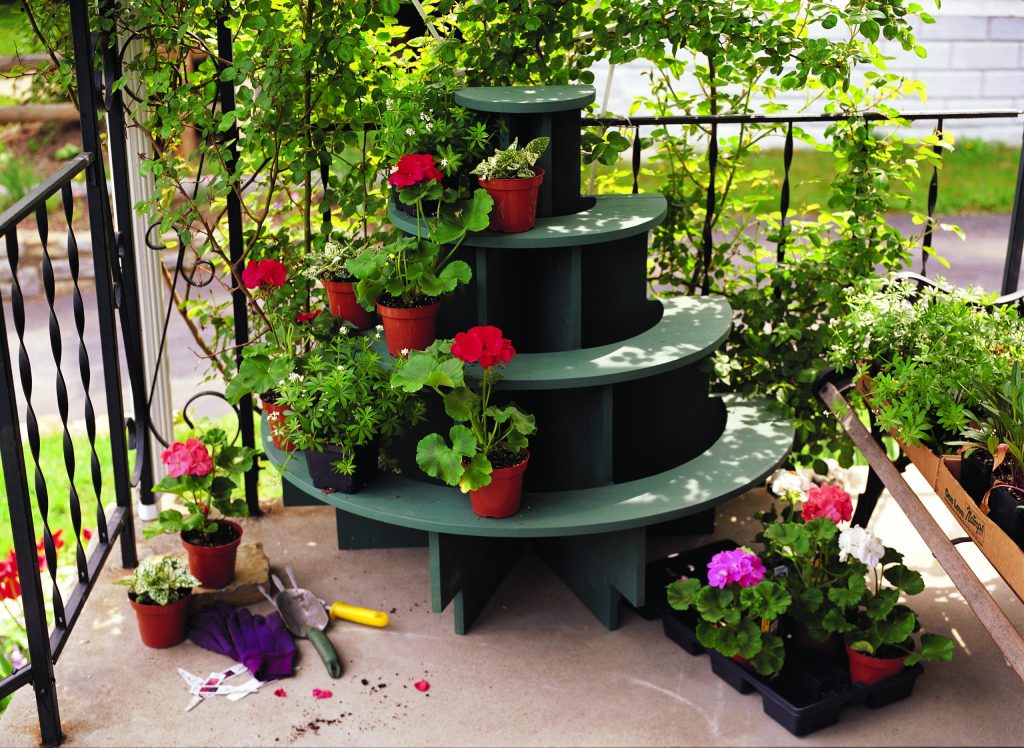
Less than one sheet of plywood and a long afternoon are all you need to build a functional and foldable floral display.
When you have a lot of plants to display, you are always looking for ways to show them off to their best advantage. Or maybe you just want to cover that hole where a gopher dug under the house. Either way this plant stand is a great way to make a few potted plants look like a huge display. And here’s a bonus feature: the whole thing folds up flat so you can hang it on a garage wall in the off-season. You can make it using about three-quarters of a sheet of 3/4″ CDX plywood, which is essential for outdoor use. The term CDX refers to the quality of the two face veneers and the glue between the plys. So CDX has a “C” and a “D” side (“A” being the best grade) with the “X” referring to the exterior-grade glue. The plys themselves are the same as in any other pine plywood. The shelves are designed to hold 6″ pots, but with care, larger pots are also okay.
Start with two four-foot square sheets of plywood, and begin construction by cutting out the back and supports from one sheet and the shelves from the other. Use the diagrams to lay out your cuts. To cut the shelves and supports from the ply, use a drill with a 3/16″ bit to drill two overlapping holes for the jigsaw blade. Drill clearance holes at the outside corners of the back and supports to start the saw blade. If you clamp the parts to a table, you can cut the shapes in short order. Once you get the back and supports cut, you’ll notice that the steps on the support are 3/4″ shorter than the back. This helps everything fold flat for storage.
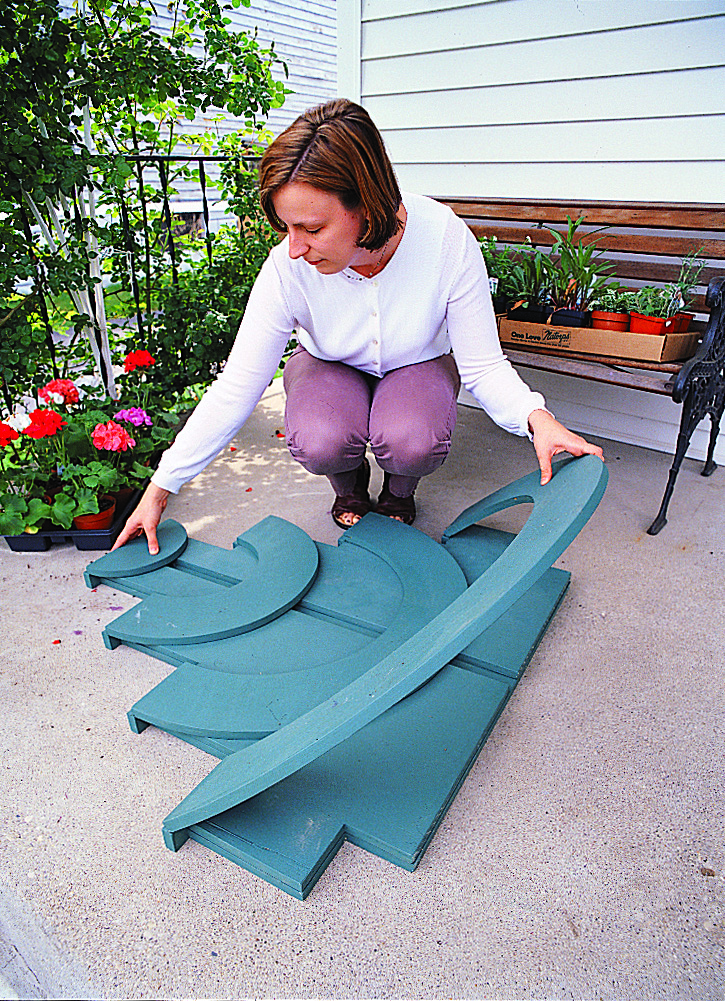
To set up the plant stand, lay it flat on its back and raise the shelves. Then fold the supports up.
The next step is to cut 3/4″ x 4″ notches in the tops of the steps, at the back, to receive the hinge mounting blocks for the shelves. Use screws and water resistant glue to attach the mounting blocks. When installed, the blocks stick out 1″ from the edge of the back and 3/4″ from the surface. These locations line up with the shelves and give an offset to clear the supports when everything is folded. Adjust the fit until the supports fit into the notches on the back, then mount the supports to the back. Take four butt hinges and place them where they will be mounted. Mark the locations with a pencil and then take the supports off the back. You need to rout a recess in the support and the back for the hinge. Otherwise, there won’t be enough clearance for the shelves to come down. Mount the hinges and check the fit of the supports to make sure they clear the mounting blocks. At this time, go ahead and paint the back/support assembly. This is easier now than when everything is assembled. Also fill any voids and knots with a waterproof filler. I used a two-part auto body filler. It sets up quickly and sands easily.
The last thing to do is cut and mount the shelves. Begin the layout with a set of trammel points, with a pencil on one end. From the center of the other plywood panel, lay out concentric semi-circles at 5″, 10″, 15″ and 20″. Now rip the panel at about 21″ to keep it manageable. Cut the shelves out using a jigsaw, taking it slow and stay on the line. When you’re done, you’ll have four concentric shelves ready for mounting. After filling the voids and knots, paint the shelves. Lay out and rout a recess on the bottom of the shelf ends to accept the hinge leaf, flush to the shelf. This also helps for the close tolerances when folding everything together. Go ahead and mount the shelves to the back. When you’re all done, lay the unit on its back and fold the shelves so they’re sticking straight up. Fold up the supports and tip the entire unit upright. Touch up any paint problems and you’re ready to lush up this display with the local flora. PW
Click here to download the cut layout for this article.

Here are some supplies and tools we find essential in our everyday work around the shop. We may receive a commission from sales referred by our links; however, we have carefully selected these products for their usefulness and quality.


Hi ,,,,,,,,,,,I am new to the site …….I would like the blueprints to this plant stand ,,,,,,, my pc does not do PDF files is there someone who could send them to me as a word document????
rnrland@comcast.net
THANKS!