We may receive a commission when you use our affiliate links. However, this does not impact our recommendations.
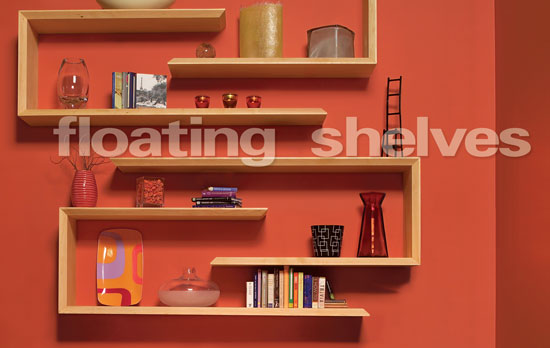
Floating Shelves
Torsion-box construction creates sag-proof shelves that "defy" gravity.
By Tim Johnson
|
Some time ago, an Ace Hardware ad in American Woodworker sparked a surprising number of inquiries from readers. They all wanted to know how to build the cool-looking shelves that appeared in the background. We liked the shelves, too. Their contemporary design and invisible mounting created a dramatic effect. The secret was torsion-box construction. A torsion box is a simple grid of slender ribs glued between thin plywood skins. It makes these shelves stiff and flat, yet incredibly light. This rigid architecture means torsion-box shelves won’t sag or twist, and they can be mounted without any external support. |
You may also like… |

|
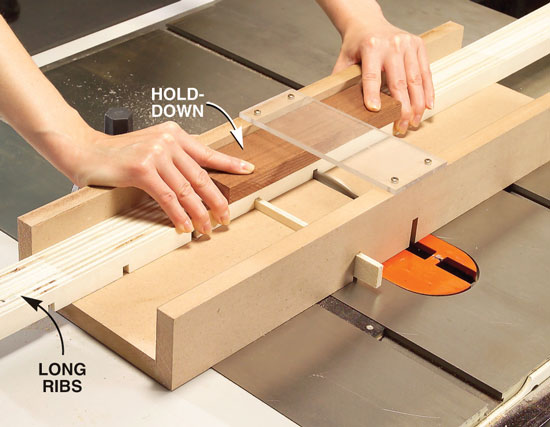
Cut notches in the ribs, using a shop-made indexing jig and a 1/4-in. dado set. The notches allow you to assemble the ribs into the grid sections that comprise the core of the torsion boxes. |
Click any image to view a larger version.
|
|
Cut short ribs from some of the long ribs. Use a template and an indexing piece to make sure you cut them consistently. |
|

|
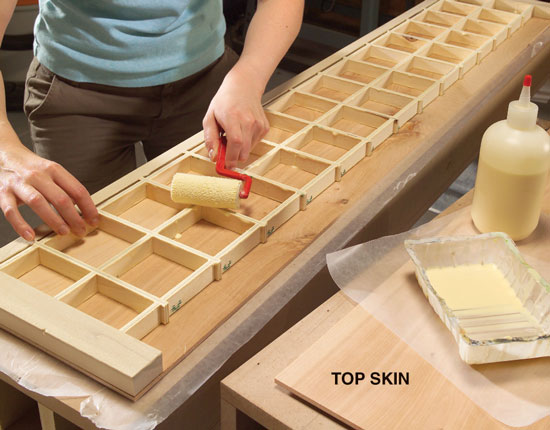
Glue the torsion boxes together by sandwiching the edging and the grid section between the plywood skins. This is a complex glue-up, so use glue that won’t dry too fast and a roller to spread it quickly and evenly. |
|
|
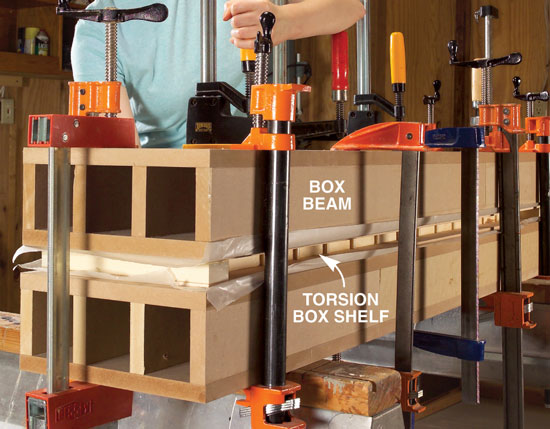
Clamp the torsion boxes between box beams. Box beams distribute clamping pressure evenly and guarantee your glued-up shelves will be flat. They’re well worth the effort to make. |
|
|
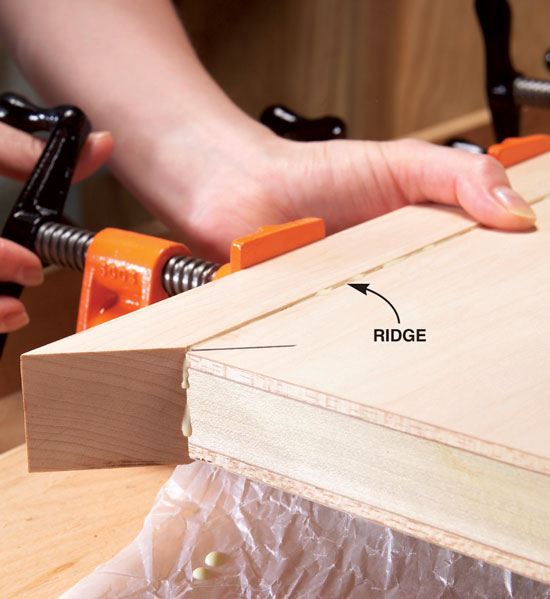
Glue on molding blanks that are slightly thicker than the shelves. Make sure you feel ridges on both sides of the blanks as you tighten each clamp, and again after all the clamps are tight. |
|
|
Rout the edges flush. Use a second shelf to support the router and a piece of scrap plywood as a spacer. |
|

|
Bevel the molding. It’s difficult to get good results when you cut thick, hard wood at an angle, so make two passes. First, make a slightly oversize rough cut. Adjust the fence and make a second light pass to clean the edge. |
|

|
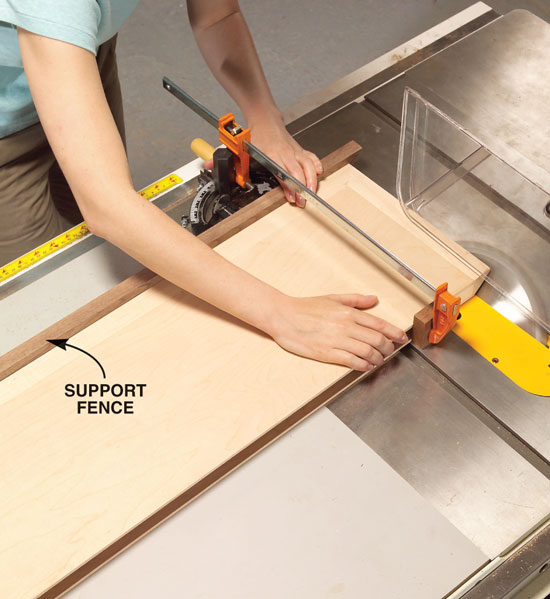
Bevel the end molding with your miter gauge and a long support fence. Rough-cut the bevel and then make a light final pass. Caution: If your shelf and miter gauge are unstable in the starting position because they hang off the front of the saw, use a sled to make this cut. |
|
|
Miter both ends of the upright and the inside ends of the shelves. Unlike the previous beveled cuts, these go all the way to the tip. |
|
|
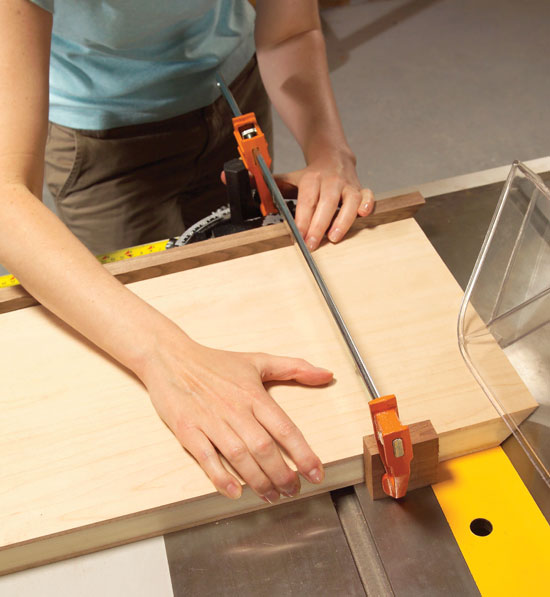
Cut biscuit slots. Biscuits align and strengthen the miter joints. |
|

|
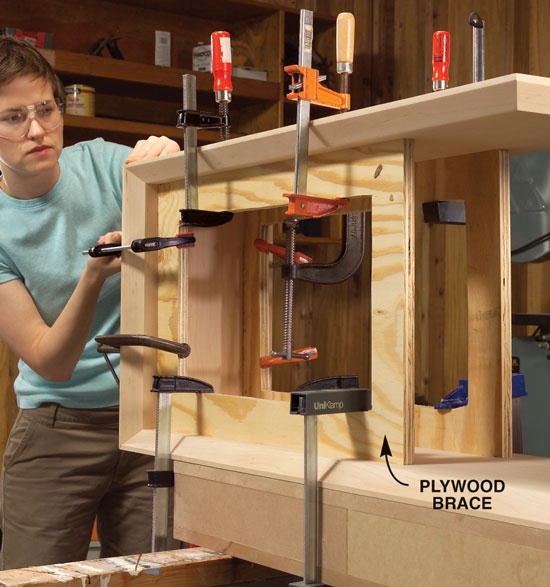
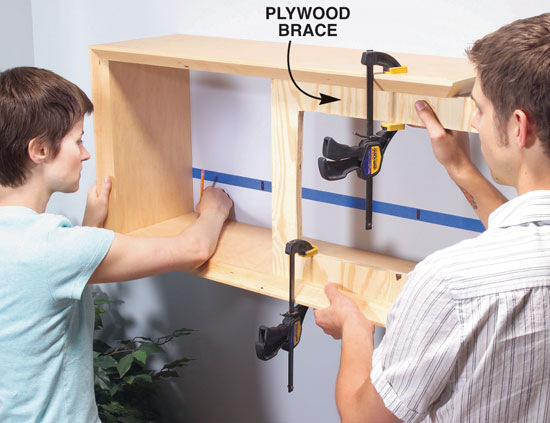
Clamp the three shelf components together without glue, so you can check the fit of the miter joints. Use plywood braces to support the upper shelf and hold everything square. |
|
|
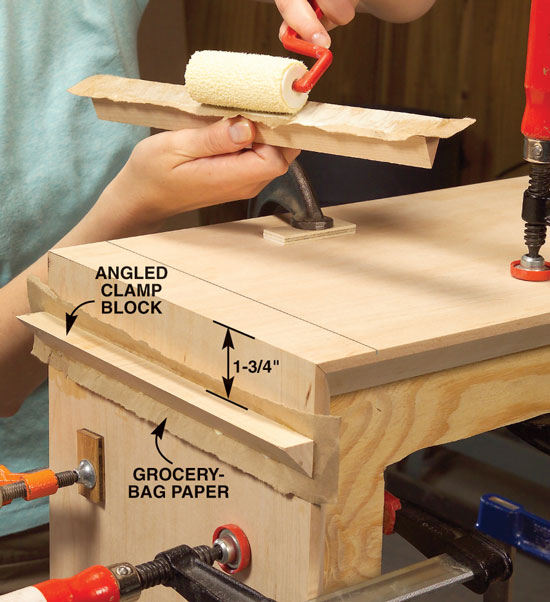
Glue temporary clamping blocks at the corners. They’ll allow you to clamp the miter joints effectively, without using long, heavy clamps. Pieces of heavy paper glued between the block and the shelf make the blocks removable. |
|
|
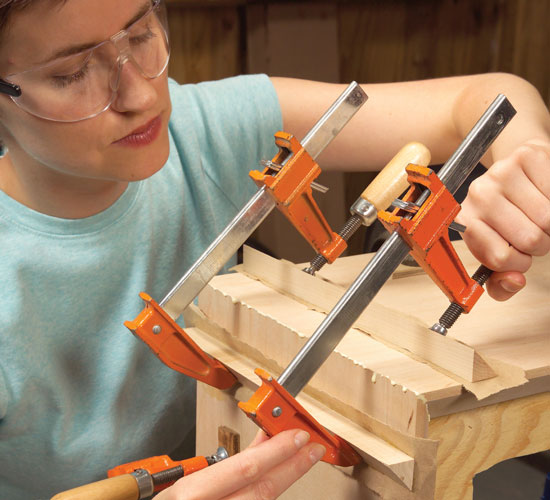
Clamp the miter joints to glue the C-unit together. After the glue dries, the clamping blocks knock off easily because of the paper, and the residue cleans off completely with water. |
|
|
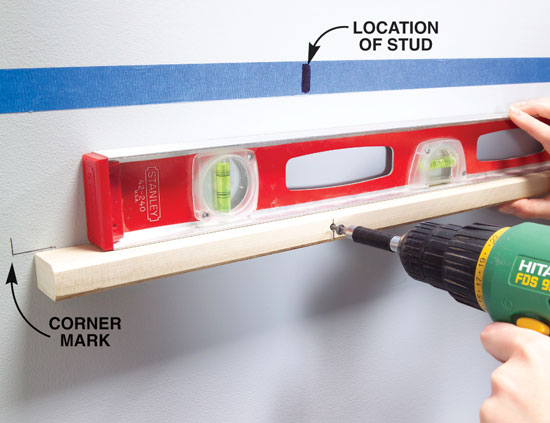
Position the C-unit on the wall and mark the inside corner. A piece of tape can be used to mark stud locations. Installation is easiest when both ledger boards anchor in two studs. |
|
|
Install the ledger board for the bottom shelf, using a level and your corner mark for reference. |
|
|
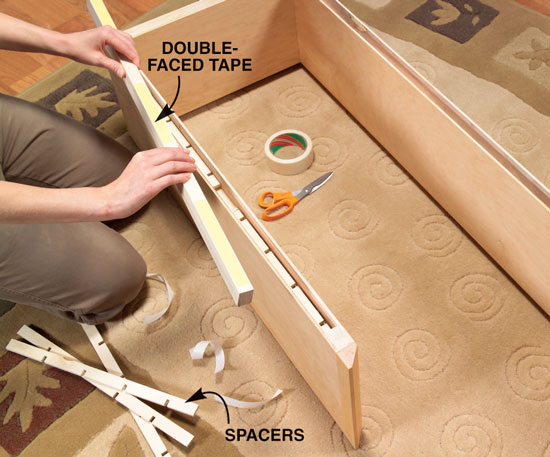
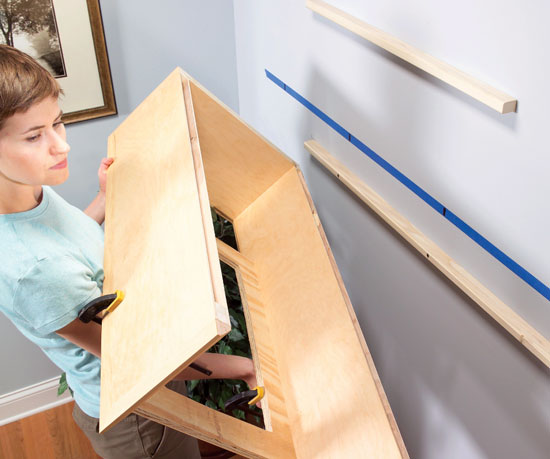
For a perfect fit, use the C-unit to locate the upper ledger board. Attach double-faced tape to the ledger and slide the ledger into its cavity, using spacers so it protrudes. Install the C-unit on the lower ledger and press the upper shelf against the wall. |
|
|
The upper ledger board remains when you remove the C-unit, thanks to the double-faced tape. Anchor this ledger to the studs. |
|
|
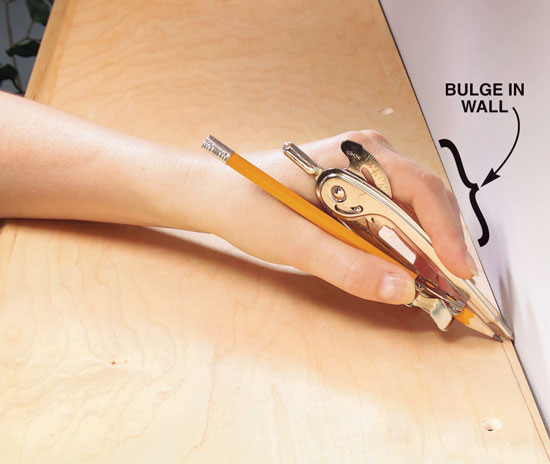
Scribe the shelves to remove gaps. First, transfer the wall’s uneven shape with a compass. Remove the shelf and sand the back edges to the lines. It’ll be easy because you’re sanding 1/4-in. plywood skins. Reinstall the shelves. Voilà! No gaps! |
|
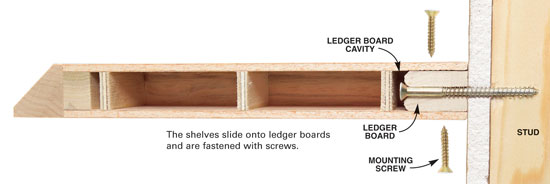
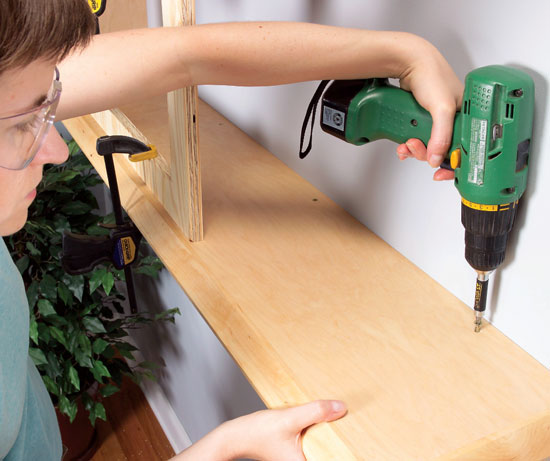
|
Fasten the shelves to the ledger boards with screws. This is strong enough for most applications and it makes the shelves removable. For maximum strength (to hold your anvil collection, for example) glue and screw the shelves to the ledger boards. This story originally appeared in American Woodworker November 2004, issue #111.
|
|

Here are some supplies and tools we find essential in our everyday work around the shop. We may receive a commission from sales referred by our links; however, we have carefully selected these products for their usefulness and quality.