


We may receive a commission when you use our affiliate links. However, this does not impact our recommendations.
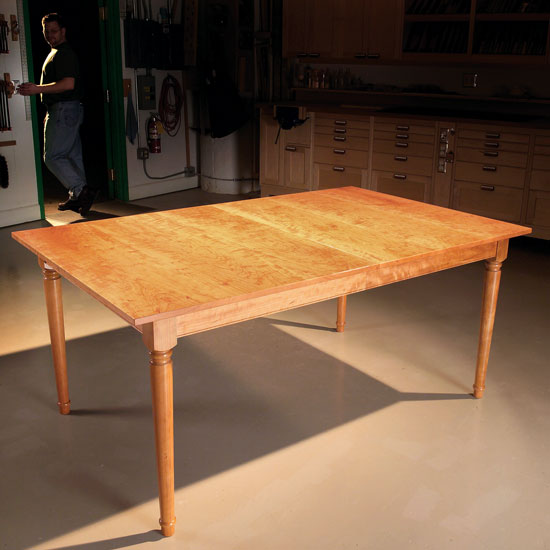
Extending Dining Table
Storing the leaves is a snap–they tuck away under the top.
By Joe Gohman
|
Have you ever seen wood glow? That’s what happened when I finished this table. I turned off the shop lights, walked out the door and took a glance back at my labor of love. That huge cherry surface radiated warm light like embers from a campfire. Wow! |
You may also like… |

|
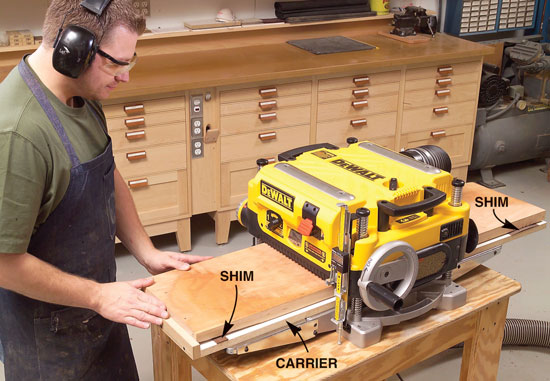
I used wide, roughsawn boards for my tabletop and flattened them with my planer. Place each board on a MDF or melamine carrier and stick shims under the board’s high spots. This prevents the board from rocking or bending as it’s planed. |
Click any image to view a larger version.
|
|
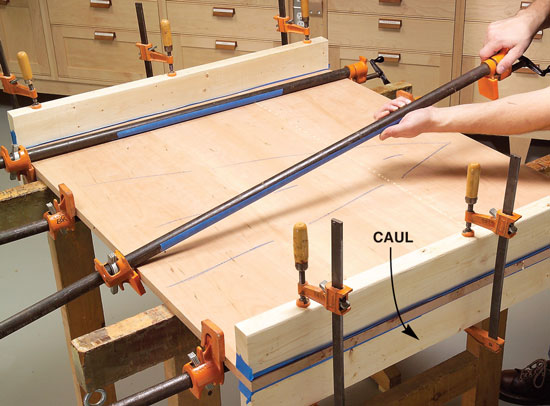
The table’s top is made in two pieces; the grain runs the short way. Each piece consists of three or more boards. Use biscuits and glue one joint at a time to make the joints as even as possible. Keep the top flat with cauls. Make the tops slightly oversize. |
|
|
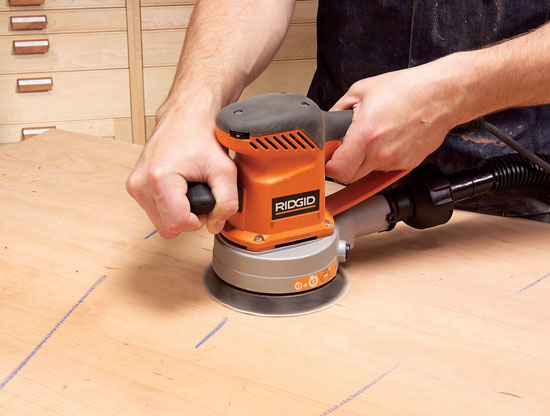
Sand the top’s glue joints until the pieces are flush. My favorite tool for this job is a 6-in. random-orbit sander. It removes material much faster and more evenly than a standard 5-in. machine can. |
|
|
Trim both tops to final size with a large template and a pattern bit (see inset photo). This ensures that the tops are exactly the same width and length. I left my router table’s insert plate attached to the router to help steady it. |
|

|
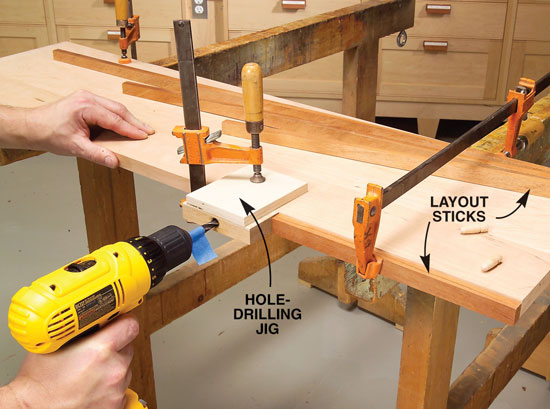
Drill holes in the leaves for alignment pins. These holes must be spaced exactly the same on each leaf and both tops. I used a shop-made jig and a series of layout sticks to position each hole. |
|
|
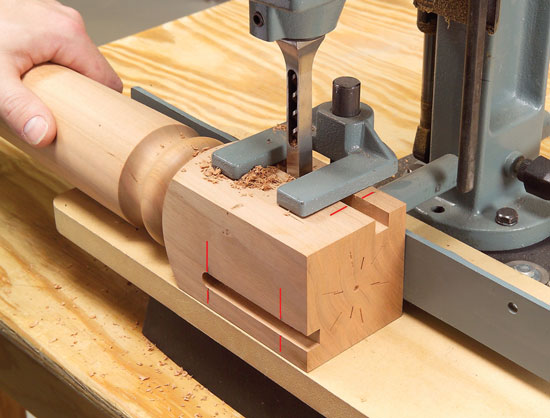
Rout a groove in the legs to start the mortises. This step is not strictly necessary, but it improves the joint’s accuracy. The groove’s purpose is to guide a mortising machine’s chisel. |
|

|
Cut the mortises using a hollow-chisel mortiser. The routed grooves automatically align the chisel, so you won’t get holes that are slightly offset in an irregular line. This method produces deep mortises with very straight, even sides. |
|
|
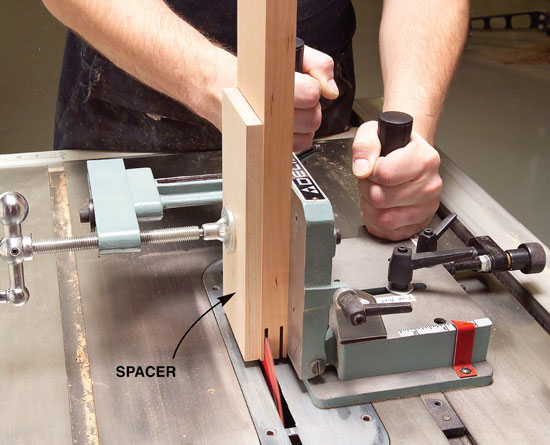
Saw tenons on the aprons. There are many ways to do this, but I like to use a tenoning jig. It cuts the tenon’s cheeks with only one setup. The spacer goes inside the apron for the first cut, outside for the second. |
|
|
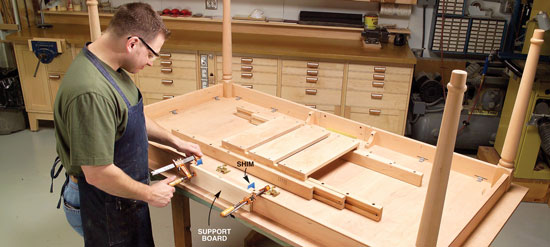
Install aprons on the leaves after the whole table is assembled. Clamp a support board to the table to ensure that the leaf apron is flush with the table aprons. Then fasten the apron to the leaf. |
|
|
This story originally appeared in American Woodworker March 2006, issue #120.
|
|

Here are some supplies and tools we find essential in our everyday work around the shop. We may receive a commission from sales referred by our links; however, we have carefully selected these products for their usefulness and quality.


