We may receive a commission when you use our affiliate links. However, this does not impact our recommendations.
Spline Jig
Make your ‘MegaSled’ into a shop workhorse.
Previously, we built the MegaSled – a table saw sled designed to accommodate a series of joinery jigs. The jigs and attachments I cover in this article are just the beginning – and with them, you can cut flawless finger joints, tenons, lap and bridle joints, and even splined miters. Once you see how they interact with the unique features of the Mega Sled itself, you may be inspired to create your own unique accessories.
Finger-joint Jig
Refer to the cutlist to cut out all the parts at the outset, or prepare your parts one jig at a time (I recommend using hardwood-veneered plywood from the home center). Whatever course you take, be sure to label each piece with its assigned letter. Cut each piece so that all corners and edges are square, and as you assemble them, check each part with a combination square to keep everything true. A pneumatic brad-nailer will reduce clamping time.
Tenon Jig
Most of the jigs are designed to attach to the T-track in the sled fence with T-bolts and wing nuts or star knobs. Wait to bore the holes for these bolts until each jig is completed. Then place the jig on the fence and mark the locations of the holes directly on the jig.
Micro-adjusters & Stops
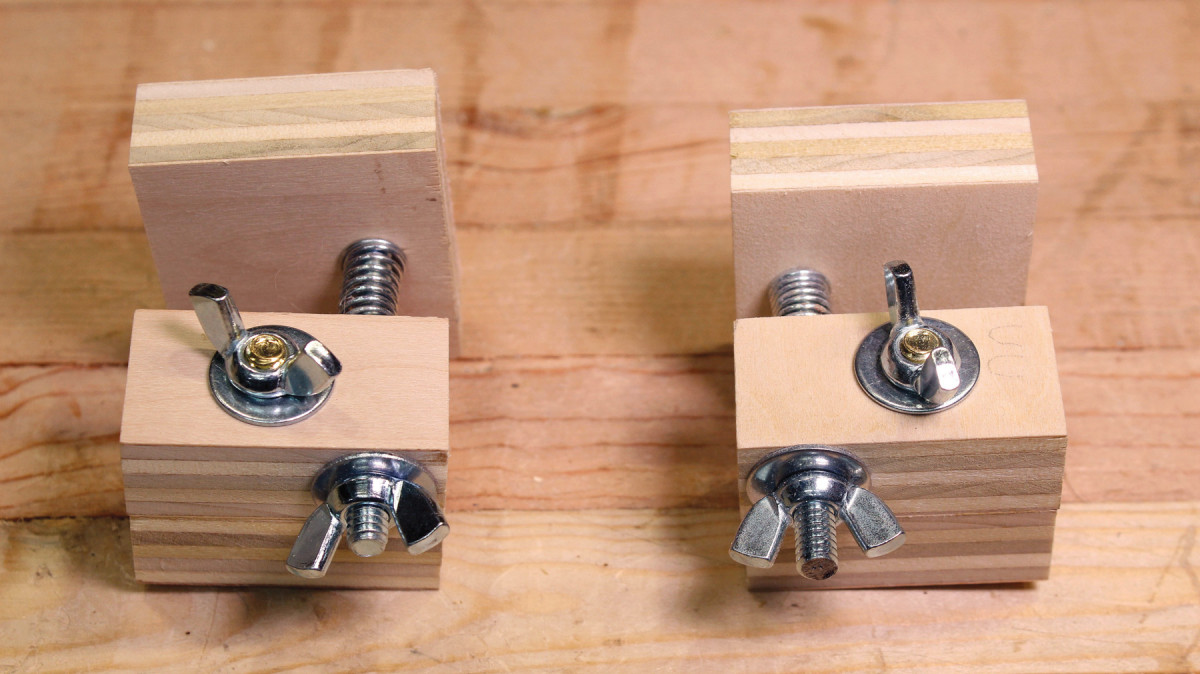
Micro-adjusters. A spring between the blocks is what makes these work.

One of the most useful features of this sled design is its ability to make accurate, repeatable crosscuts. A simple stop, made up of parts A and B in the diagram above, attaches to the T-track on the sled’s fence and fence extensions.
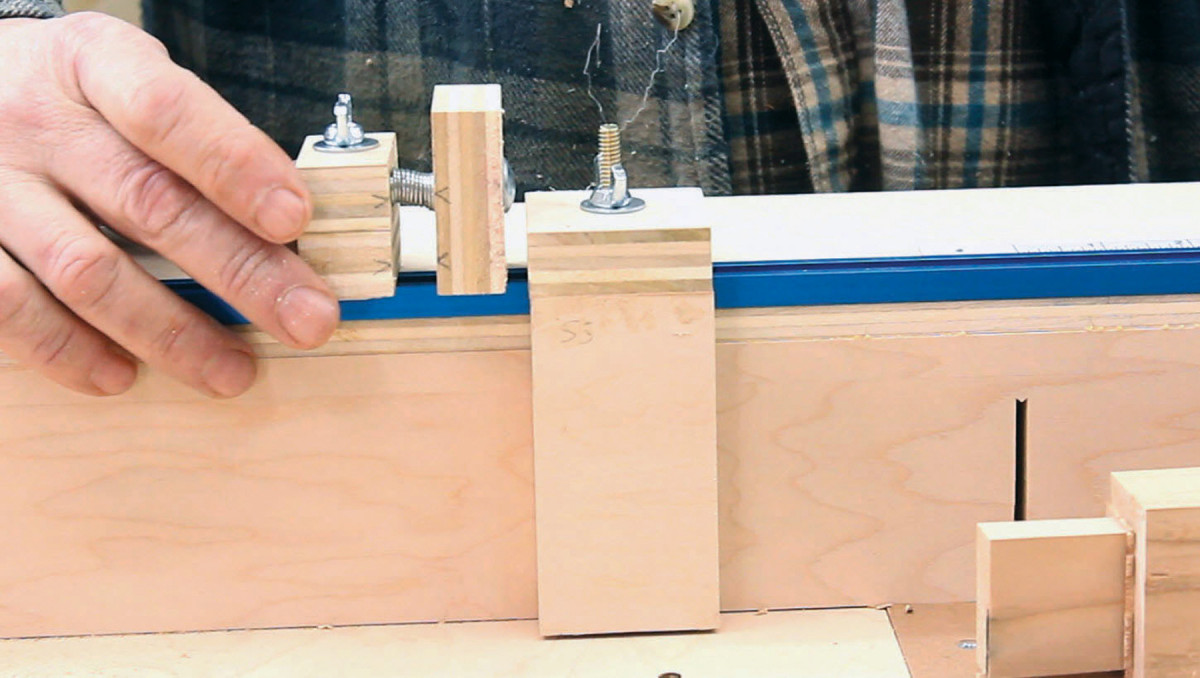
Stop. The micro-adjuster allows you to fine-tune the stop position on the T-track.
To fine-tune the stop’s position, I designed a pair of micro-adjusters. Refer to the diagrams to prepare their parts, paying careful attention to the position of the holes, all of which are 1⁄4” in diameter. Parts C and E should be glued together before the hole is bored through them. Slip a T-bolt through the hole and place a washer and wing nut on the end. Slide a carriage bolt through the holes in parts C and D, place a spring in between, then secure them with a wing nut and washer.
Miter Fences & Hold-downs

Miter fences. These are mirror images of each other – one for each side of the sled.
Table saw sleds are all about safety and accuracy, and these miter fences are designed to achieve both. They’re simple: a mirrored pair of 2″ x 18″ strips of plywood with a 5⁄16” slot cut 3⁄8” from the edge, stopping 2″ from one end and 4″ from the other. This slot, combined with T-bolts and wing nuts, secures the fences to the mating slots in the sled’s base panel while allowing for full adjustability.
Held down. The miter fences use the sled’s base slots. Hold-down clamps can be attached to the T-tracks.
A T-track is embedded in the opposite edge, making it possible to attach hold-down clamps to secure your workpieces during the cut, or to attach a homemade stop for repeated cuts. But these fences aren’t only for cutting miters – you may also use them to secure any small or oddly shaped workpiece to the sled for safe cutting. Simply attach a fence next to the workpiece and use its T-track clamping feature.
MegaSled Jigs Cut List
No. Item Dimensions (inches) Material Comments
t w l
Micro-adjuster, stops & miter fences
❏ 1 Stop cap 3⁄4 x 2 x 2 Plywood A
❏ 1 Stop body 3⁄4 x 2 x 3 5⁄16 Plywood B
❏ 2 Upper adjuster blocks 3⁄4 x 1 x 1 7⁄8 Plywood C
❏ 2 Main adjuster blocks 3⁄4 x 1 x 1 7⁄8 Plywood D
❏ 2 Lower adjuster blocks 3⁄4 x 1 x 1 7⁄8 Plywood E
❏ 2 Miter fences 3⁄4 x 2 x 18Plywood
Tenon jig
❏ 1 Fence bracket cap 3⁄4 x 6 x 2 1⁄4 Plywood F
❏ 1 Fence bracket face 3⁄4 x 3 7⁄8 x 10 3⁄4 Plywood G
❏ 2 Clamping blocks 3⁄4 x 2 x 10 1⁄4 Plywood H&I
❏ 1 Alignment strip 3⁄4 x 1 x 8 Plywood J
❏ 1 Main body panel 3⁄4 x 8 x 12 1⁄4 Plywood K
❏ 2 Panel support brackets 3⁄4 x 4 x 4 Plywood L1&L2
Finger-joint jig
❏ 2 Adjuster blocks 3⁄4 x 1 7⁄8 x 1 1⁄4 Plywood M1&M2
❏ 2 Fence caps 3⁄4 x 1 7⁄8 x 12 Plywood N1&N2
❏ 2 Face panels 3⁄4 x 3 7⁄8 x 12 Plywood O1&O2
❏ 2 Sacrificial face panels 1⁄4 x 3 7⁄8 x 12 MDF P1&P2
Spline-joint jig
❏ 1 Rear top panel 3⁄4 x 3 7⁄8 x 12 Plywood Q
❏ 1 Rear back panel 3⁄4 x 3 7⁄8 x 12 Plywood R
❏ 1 Rear bottom panel 3⁄4 x 51 1⁄16 x 12 Plywood S
❏ 1 Box platform 3⁄4 x 7 5⁄8 x 12 Plywood T
❏ 1 Box platform base 3⁄4 x 3 x 12 Plywood U
❏ 1 Fence base panel 3⁄4 x 3 x 6 7⁄8 Plywood V
❏ 1 Fence panel 3⁄4 x 3 x 6 7⁄8 Plywood W
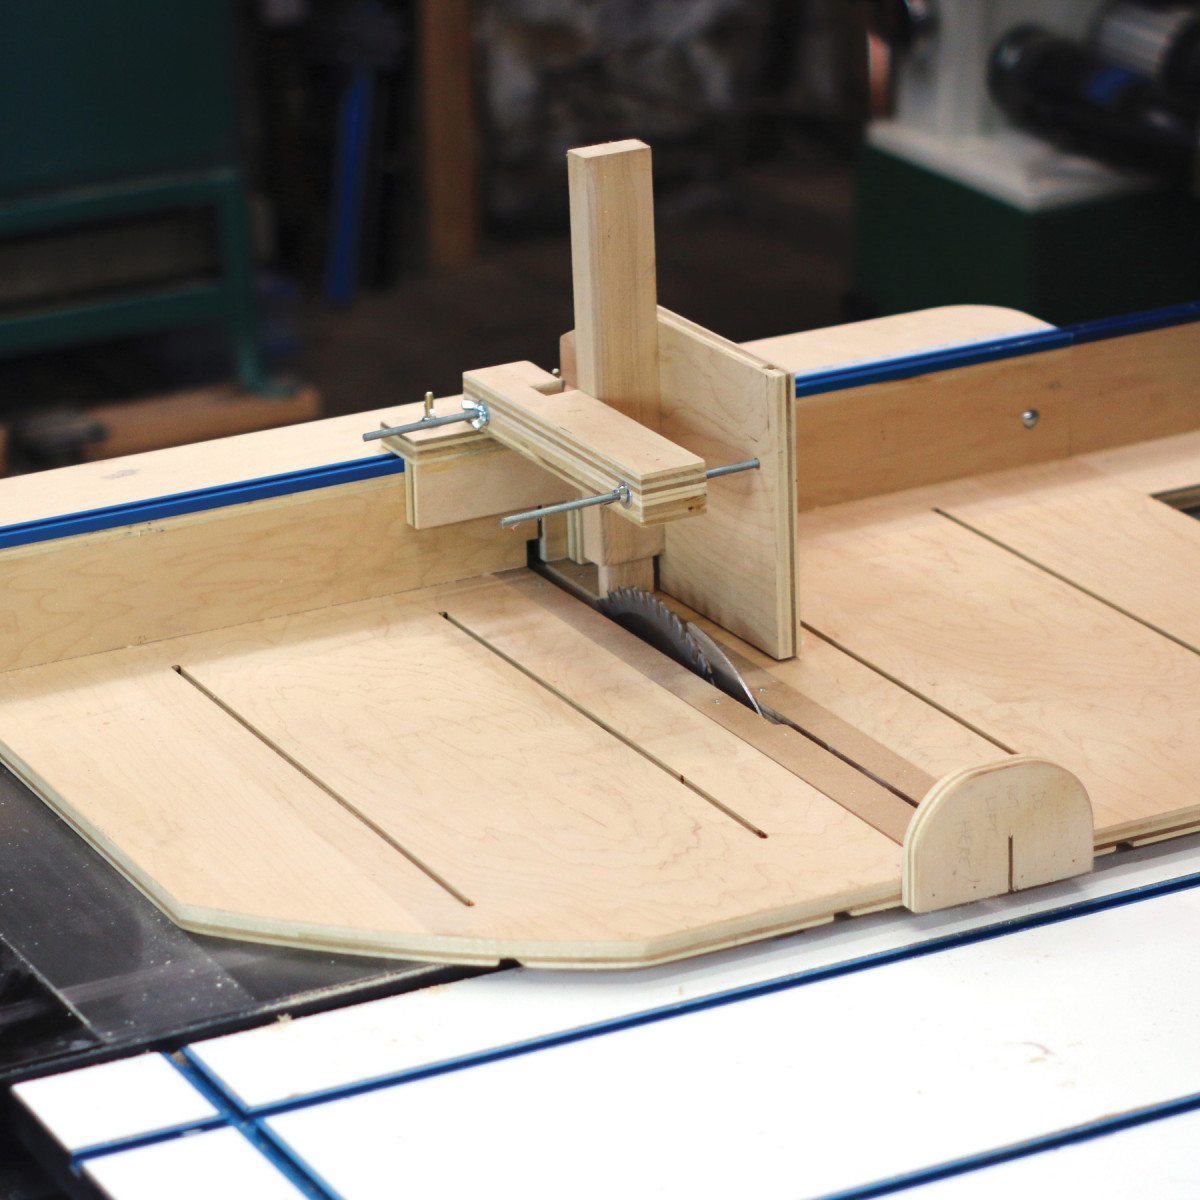
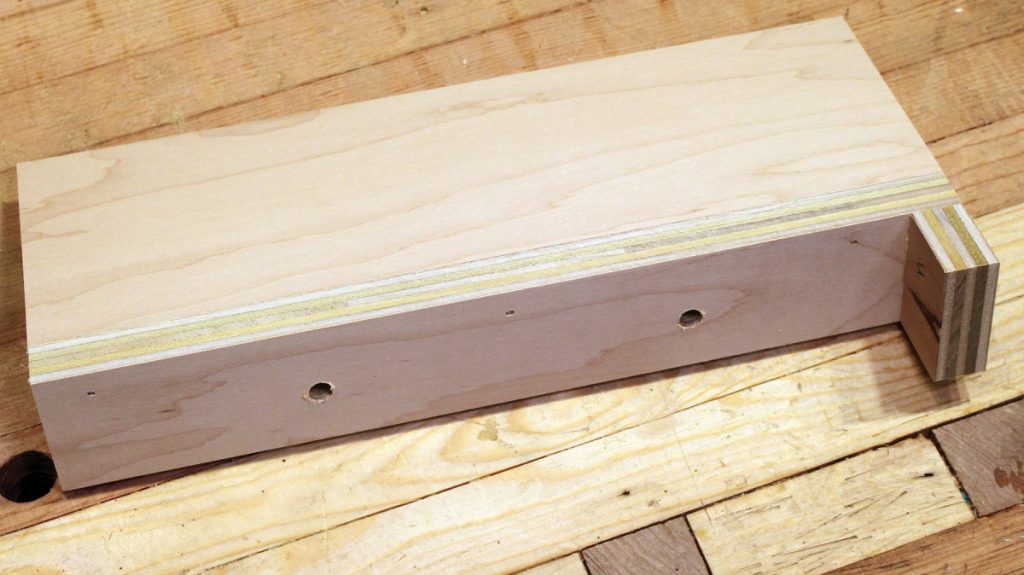
The Tenon Jig
 Tenons, lap joints and bridle joints are possible with this jig. To build it, prepare parts F-K by cutting the shapes and boring the holes laid out in the diagram. Parts H and I are glued together, and a pair of 3⁄8” holes are bored in the seam, 1″ from each end. Attach part G to part K, using the two triangular brackets (L1 and L2 in exploded diagram) to support and square up the assembly. Glue and brad nails will shorten clamping time throughout this project. Attach strip J to part K, just to the right of the missing corner; be sure it’s perpendicular to the top edge. Part F attaches to the top edge of G. Two pieces of 1⁄4” threaded rod should next be epoxied in the holes in the body of the jig.
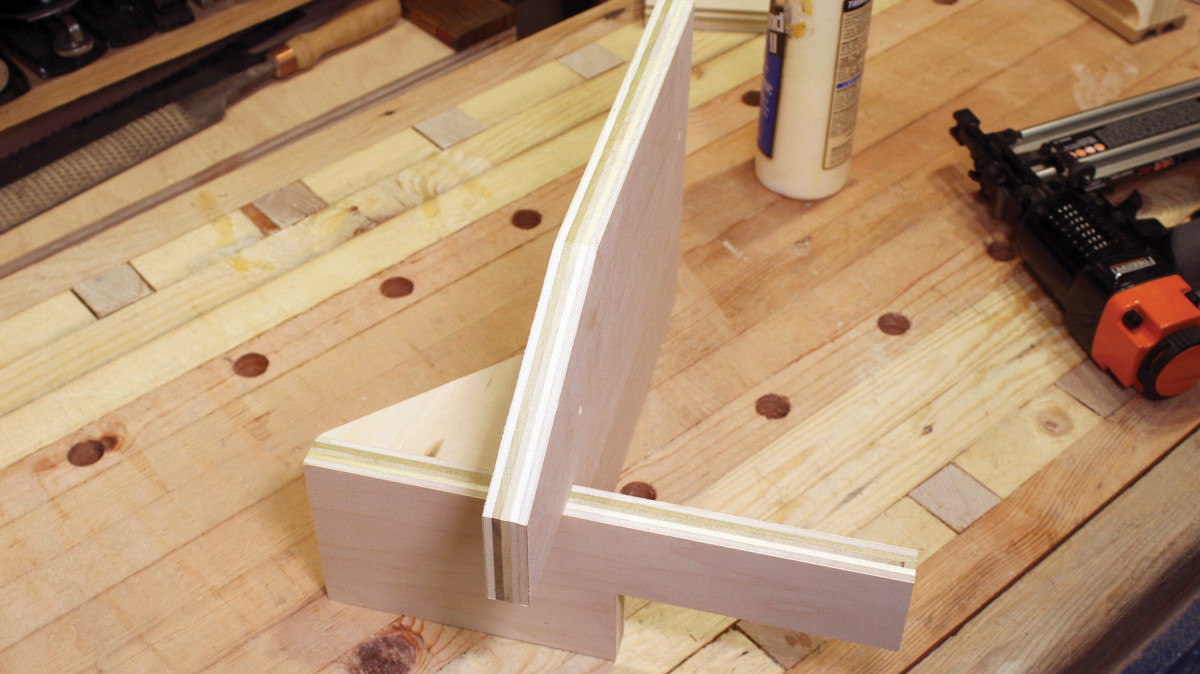
Assembly. Only one bracket (L1) can be seen in this view. The second (L2) is mounted beneath it.
This jig works much like any other table saw tenon jig. The workpiece is held perpendicular to the top of the saw, and secured in place with the clamping mechanism.
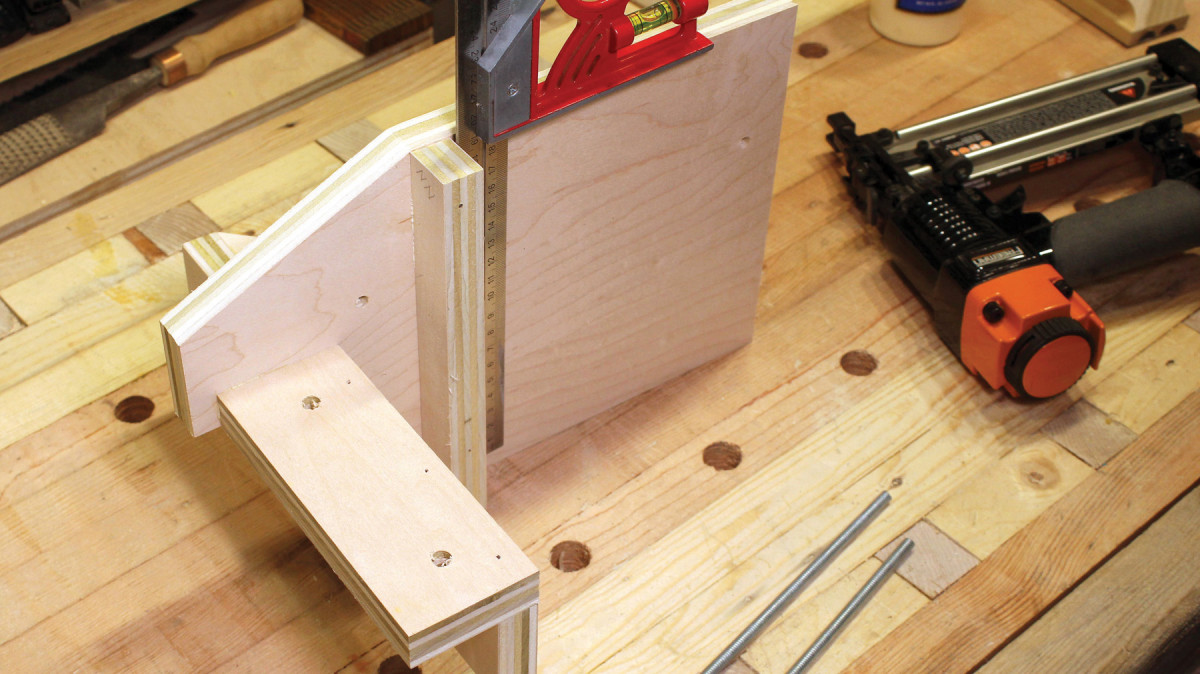
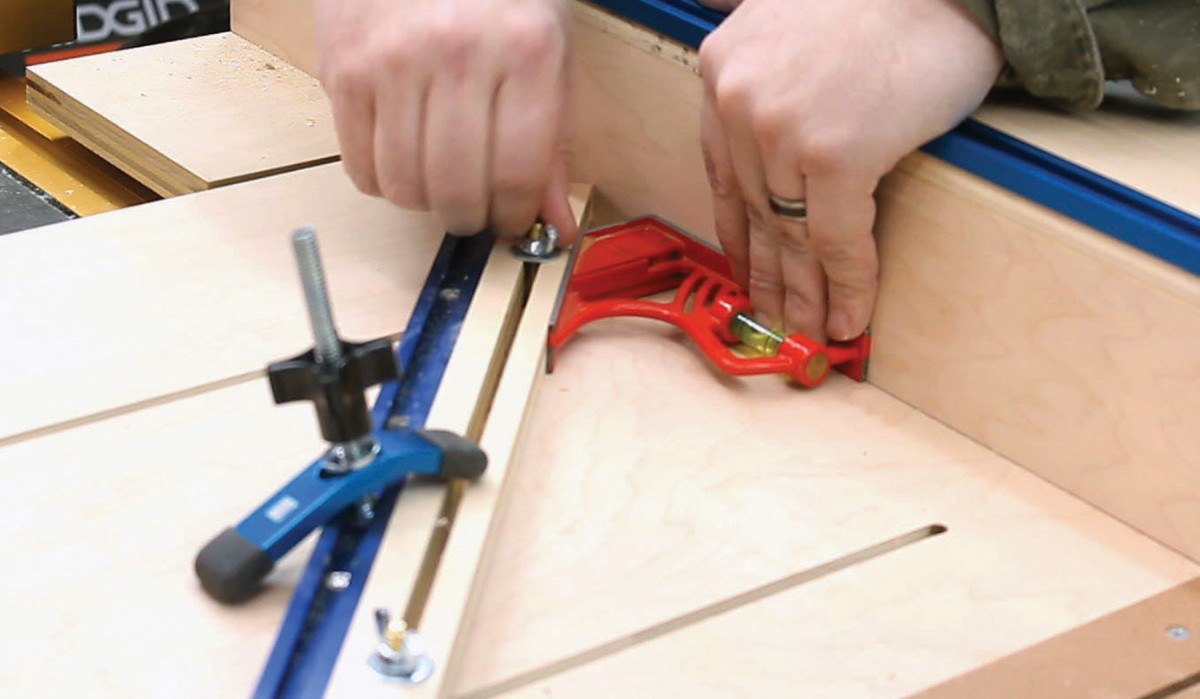
Square up. Check all parts for square as you work.
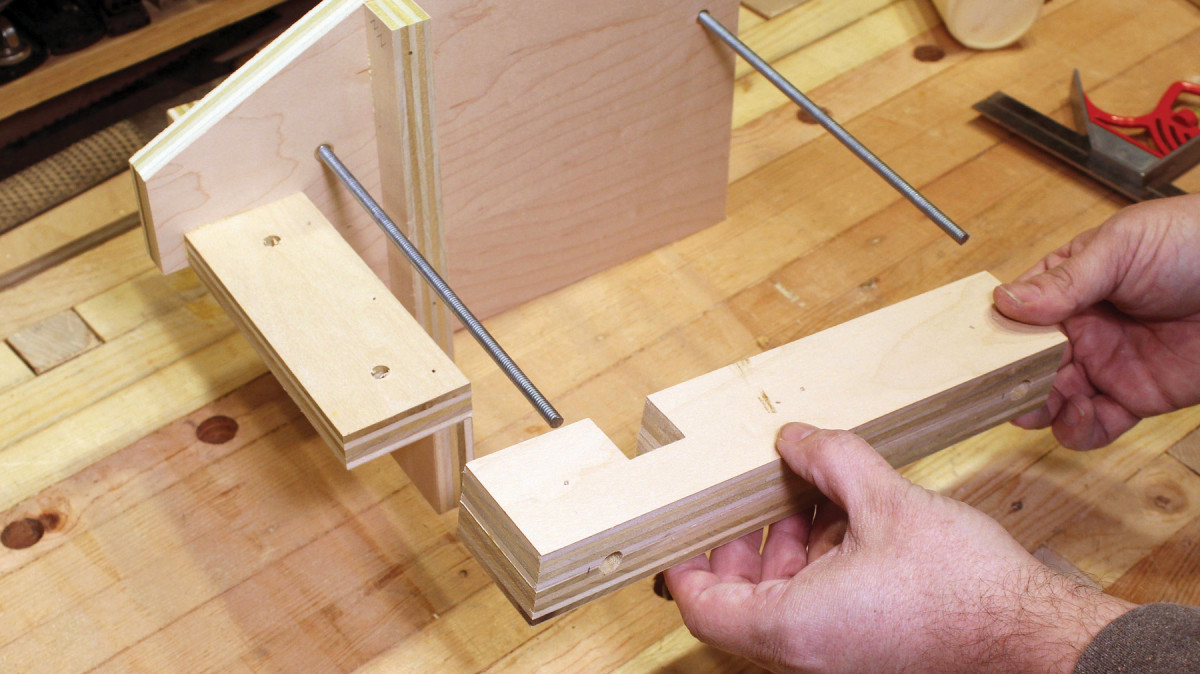
Attaching the fence. The fence slides onto the threaded rods. T-bolts through the vacant holes in part F will secure the jig to the sled.
What makes this tenon jig unique are two features: First, the sled’s base itself keeps the end of the workpiece from dragging across the top of the saw, and potentially shifting out of place during the cut. Second, the position of the jig may be fine-tuned by attaching one of the micro-adjusters next to it on the sled’s fence.
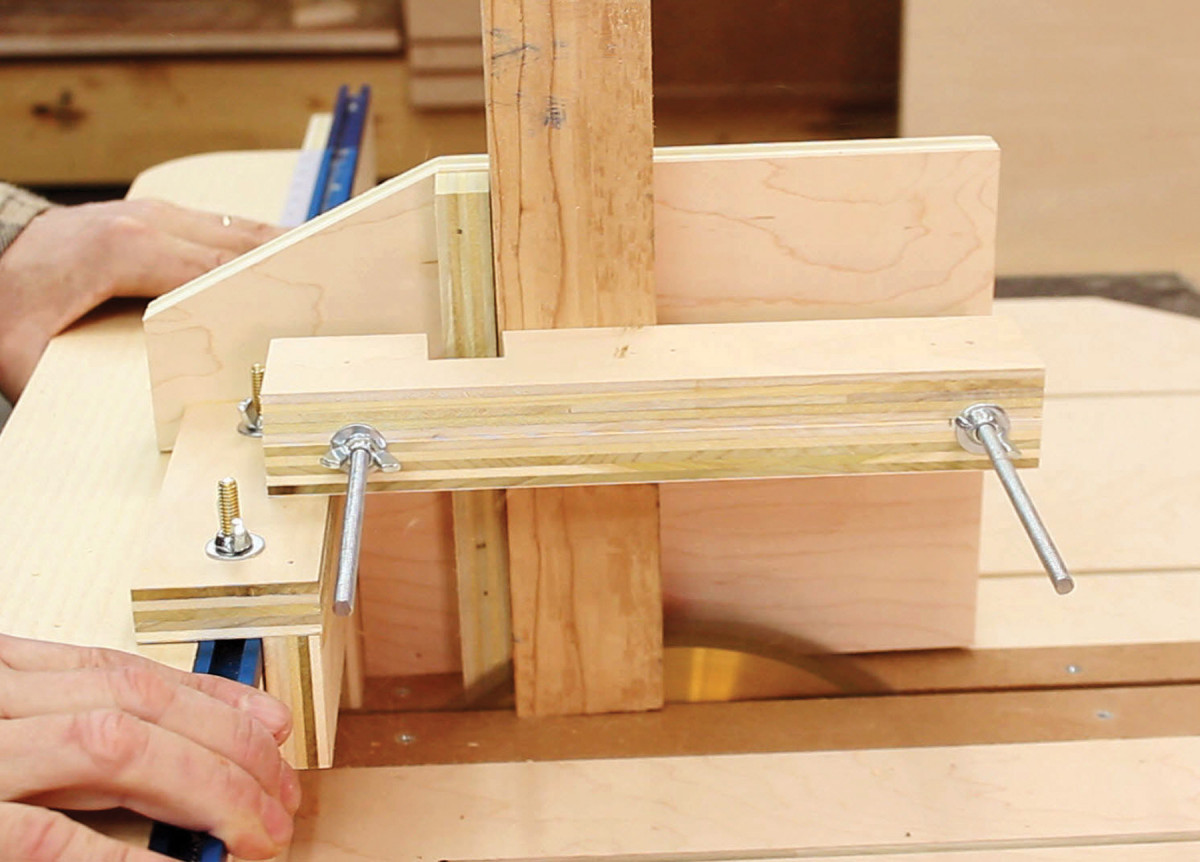
Tenon jig in use.
Cut the tenon’s cheeks with the jig, then the shoulders on the sled itself.
In using this jig, I typically cut my tenons a bit oversized, then use the adjuster to nudge the jig toward the saw blade, fine-tuning the tenon’s size with multiple light passes on opposite cheeks, until it perfectly fits my mortise.
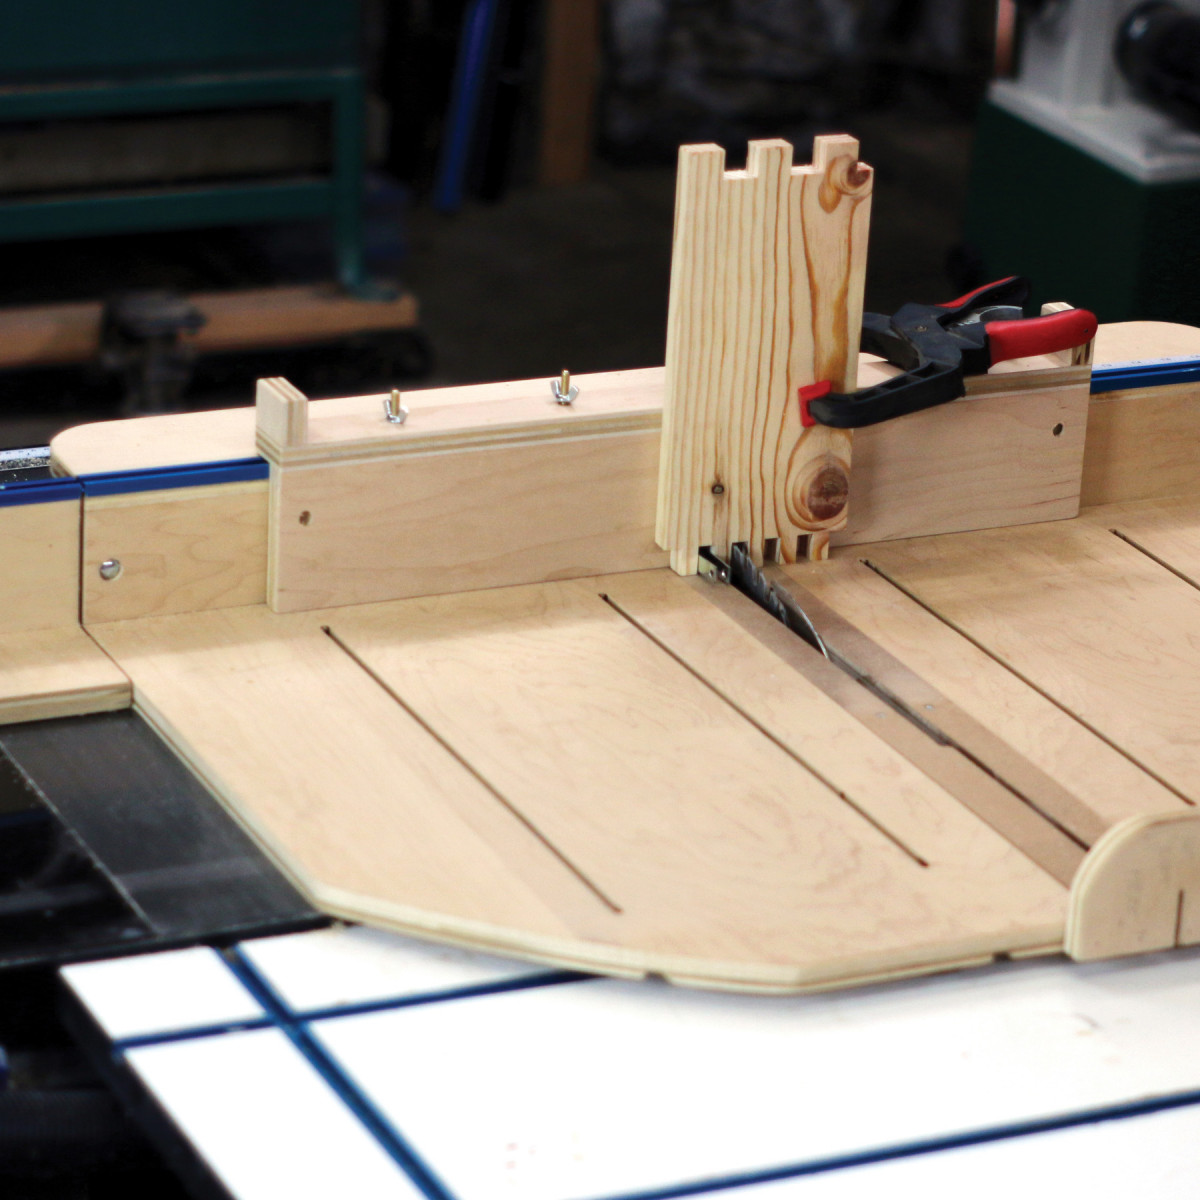
The Finger-joint Jig
 There are two assemblies to the finger-joint jig, and they are mirror images of each other. The small rectangles (M1 and M2) attach to the long, narrow parts (N1 and N2). Then these attach to the long edges of the large rectangles (O1 and O2). Next, attach a pair of steel angle brackets to the end of each assembly as shown in the illustration.
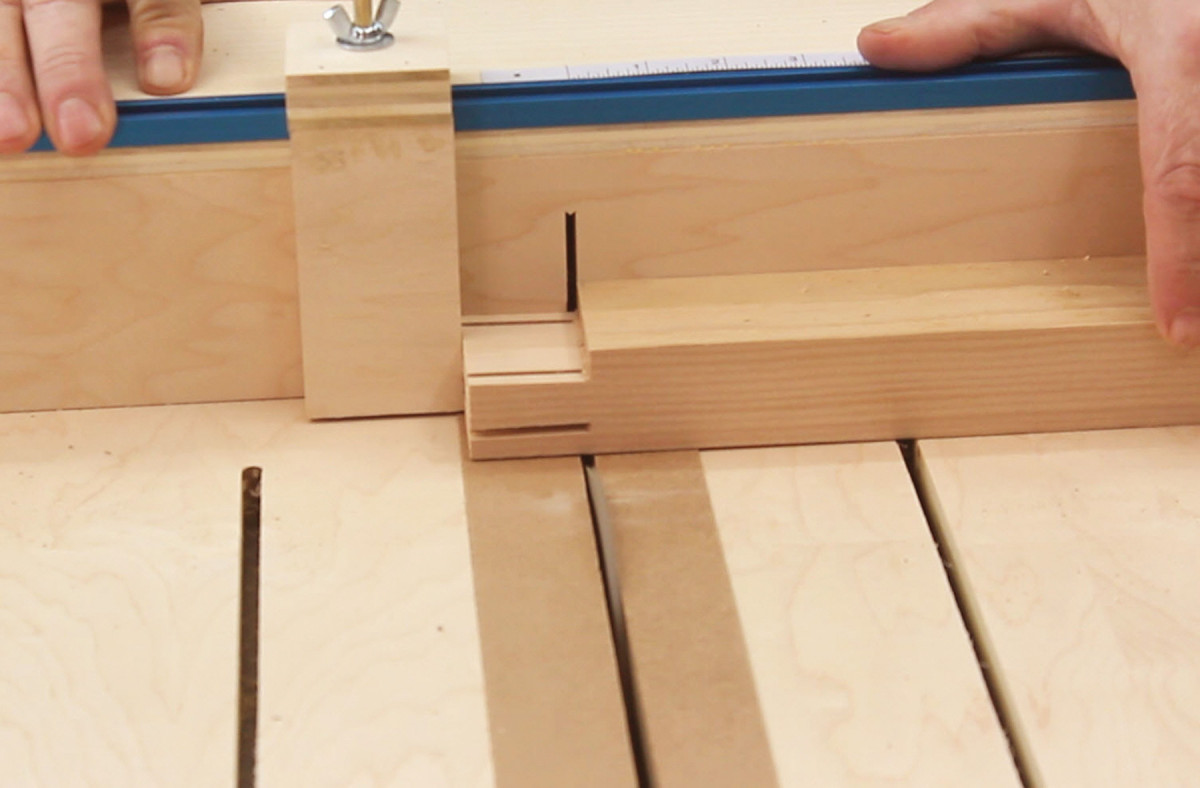
One side. Here’s one of the two finger-joint assemblies. The holes are for mounting it to the sled’s T-track with T-bolts and wing nuts.
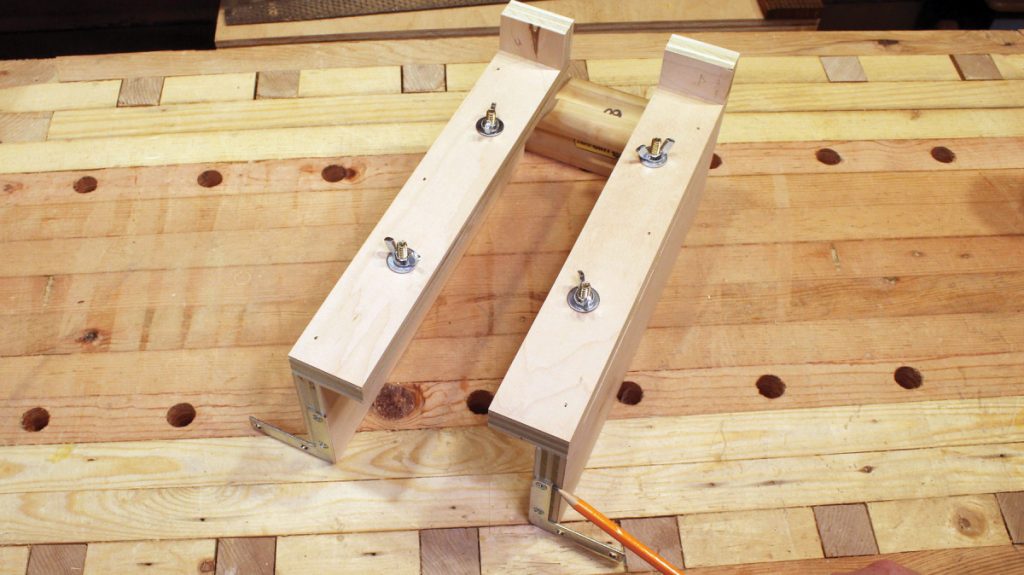
All together. The two assemblies for the finger-joint jig are mirror images. Note how the angle brackets are attached to the ends.
In the diagram, note the pair of 1⁄4“-thick pieces labeled P1 and P2. These are optional sacrificial faces. Because you’ll cut into the jig with your dado stack during use, you may wish to install these faces later. One covers the kerf in the jig, providing new, zero-clearance support for your next joint; the other serves as a spacer to keep both halves of the jig on the same plane.
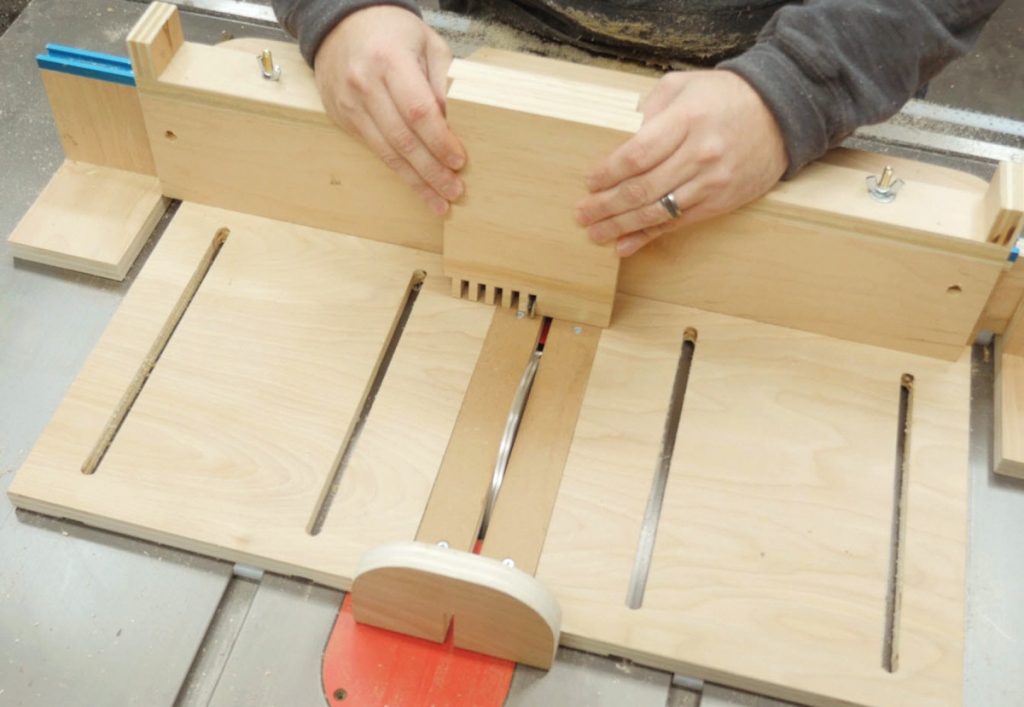
This jig works like many pin-based finger joint jigs, except that it is fully adjustable. Both halves attach to the sled’s fence with the fingers (the angle brackets) on the right side of your dado stack, facing one another. The steps required to set up and make the cuts are shown in the accompanying photos. You will be cutting both halves of the joint together, using a dado stack that’s equal to the thickness of the fingers you wish to cut.
It is not necessary to clamp the workpieces to the jig, but take care to hold them firmly against the base of the sled and the face of the jig during each cut. Also, keep an eye out for sawdust buildup along the base of the jig, blowing it away as needed.
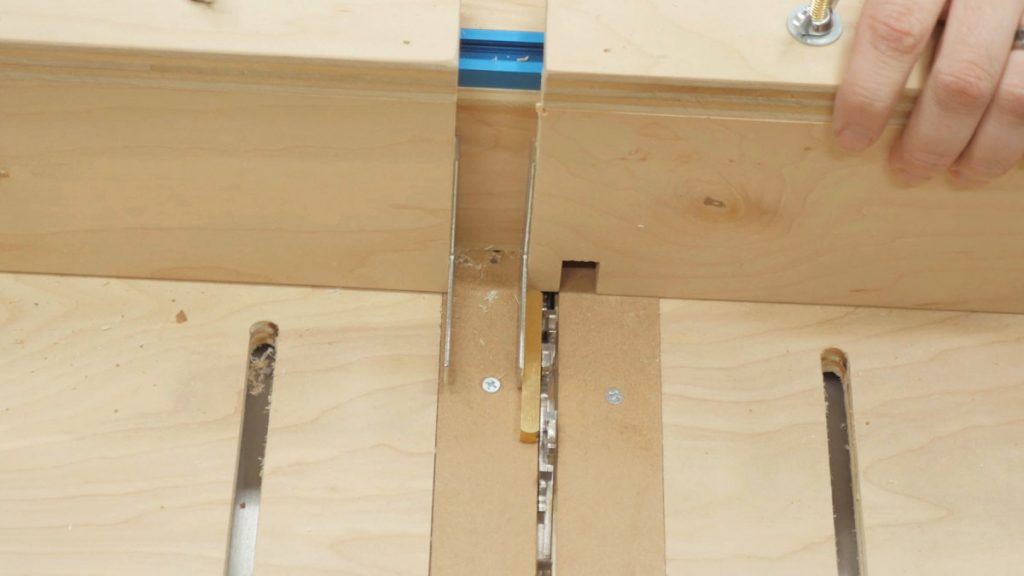
Step one. Use a spacer to set the distance between the teeth of the dado stack and the inner finger; lock that half of the jig to the sled’s fence.

Step two. Make a setup block by placing its end against the inner finger and making a cut.
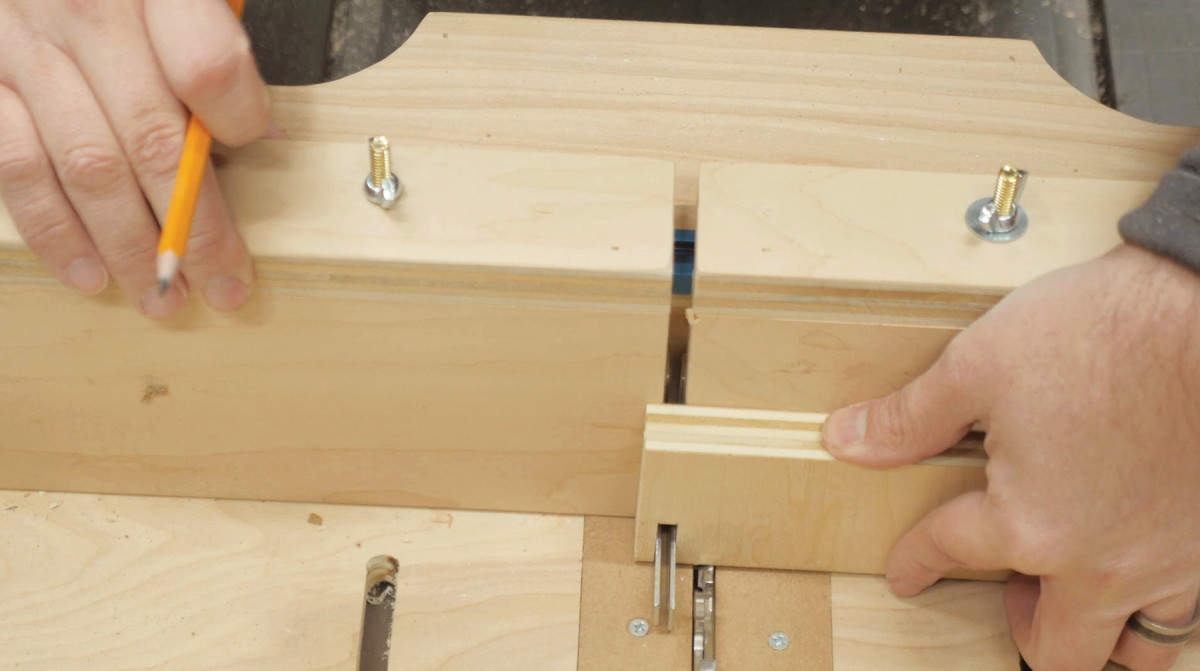
Step three. Use the setup block to set the outer finger’s distance from the inner finger.

Step four. Set the dado set slightly higher than your workpiece is thick.
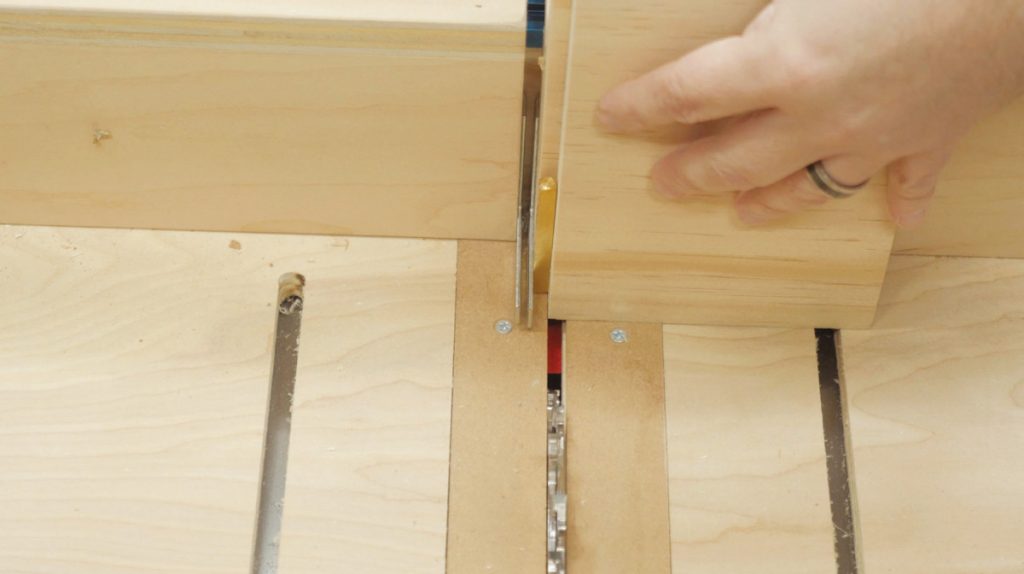
Step five. Place one workpiece against the inner finger, while offsetting the other by a finger’s width (a spacer is useful in this case).
Step six. As you make each cut, slip the newest kerf over the fingers, shifting the workpiece to your right and positioning them for the next cut.
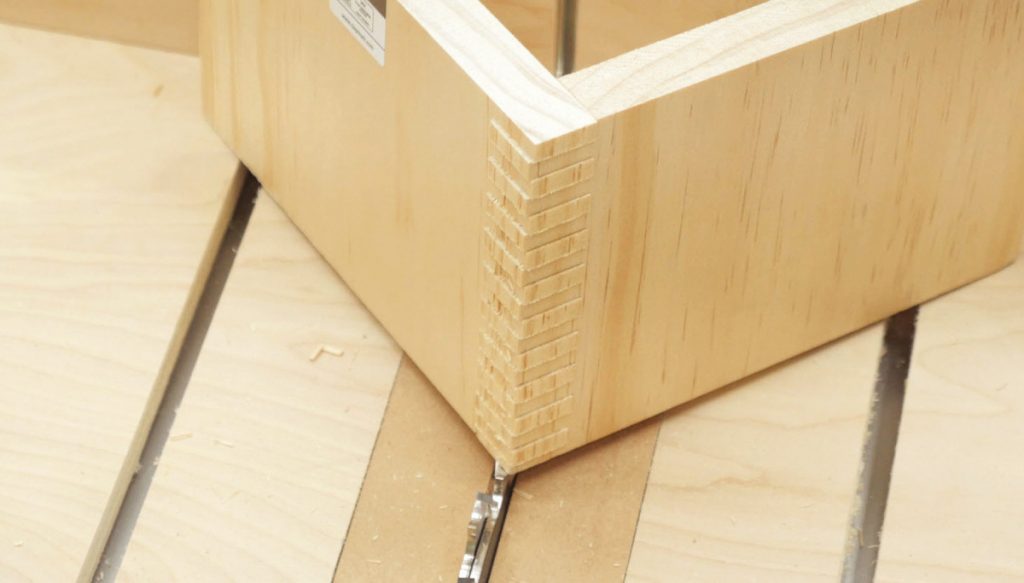
The right fit. If your fingers are too tight, add a shim to your dado set. Too loose? Remove a shim.
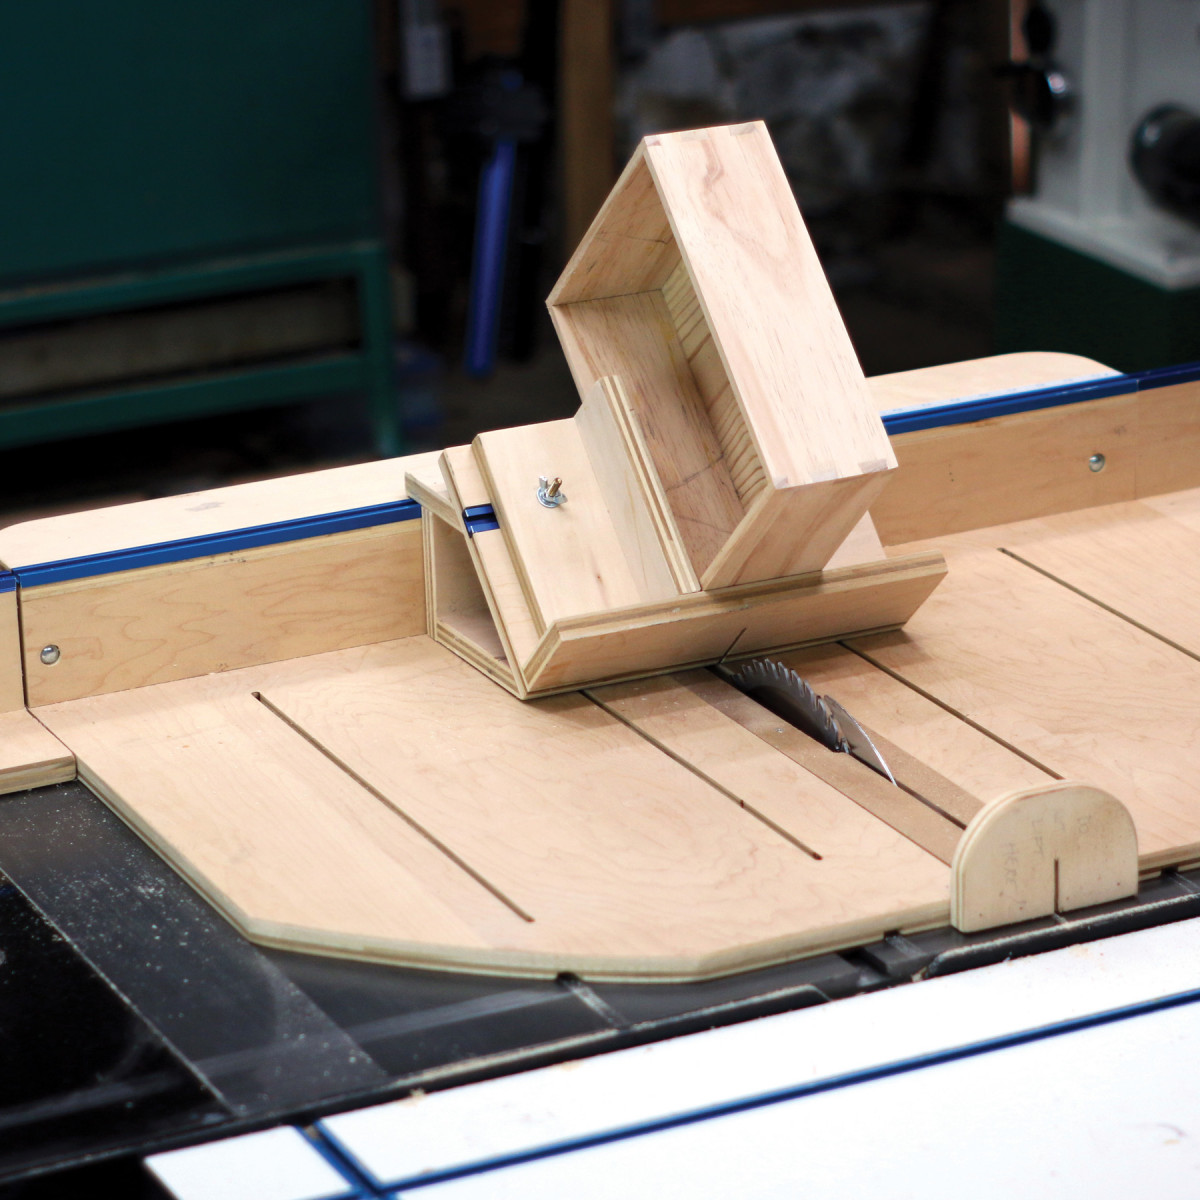
The Spline Jig
 Splines strengthen or accent mitered joints on boxes and frames. While cutting your parts to size according to the cutlist, add 45° bevels to the edges of parts Q and S. Part T requires a groove 2″ from a long edge, wide and deep enough to fit your T-track. In the photo abovw, you can see how the five major parts come together, with part T resting at a 45º angle. To construct the fence, attach part W to the edge of part V, place the assembly on the jig, mark the hole location through which the fence attached to T-track, and bore a 5⁄16” hole.
The spline jig should be placed against your sled’s fence, where you will bore holes through the portion that overlaps the T-track, and attach it as you did the other jigs. The first time you use the jig you will kerf through it. You might cut more than one kerf through repeated use, but it is wise to align a previously cut kerf with the saw’s blade to extend the life of the jig.
To position your work for cutting, slide the fence to the right or left across the jig and place the box against it. This way, you shift the position of the box, rather than the entire jig, when a joint requires more than one spline.
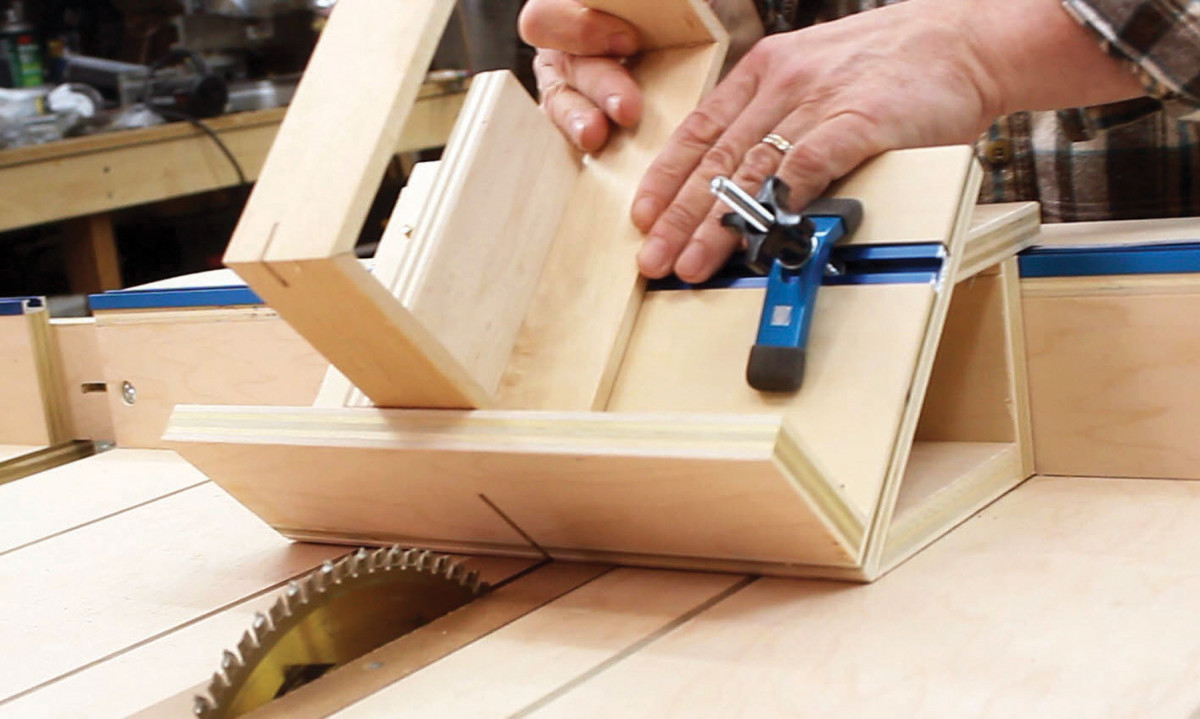
Keep it steady. The bottom edge of the fence assembly helps keeps it square as you slide it across the jig – so mount it as close to 45° as possible. Attach a hold-down clamp to the T-track to secure the work during the cut.
And that’s just the beginning of what the MegaSled can do – but with just these jigs and accessories, this crosscut sled is already a real workhorse in my shop. And I’m already thinking up new ways to use it!
Here are some supplies and tools we find essential in our everyday work around the shop. We may receive a commission from sales referred by our links; however, we have carefully selected these products for their usefulness and quality.