We may receive a commission when you use our affiliate links. However, this does not impact our recommendations.
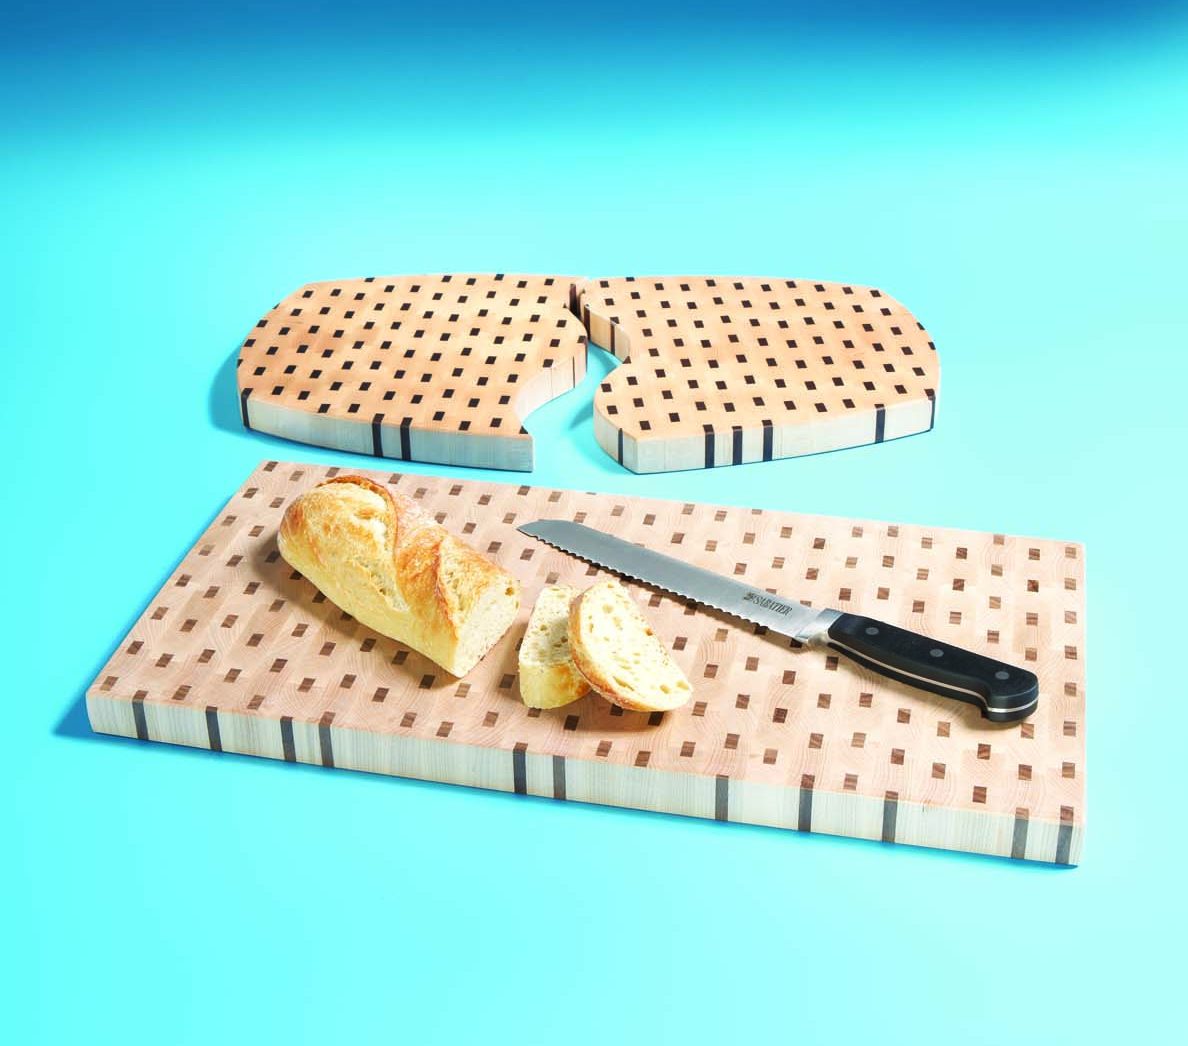
If you like giving gifts that actually get used, a cutting board is the perfect choice; I use one almost every day. But not only will this cutting board get regular use, it’ll get “ooh’s and aah’s” as well. Its contrasting splines give this cutting board visual interest and a clean, contemporary look. Stagger the joints during assembly, and the contrasting splines create a crisp, contemporary look.
I chose hard maple as the primary wood for this cutting board, and walnut for starkly contrasting splines. The end-grain maple cutting surface is rock-hard, and creates an interesting wavy pattern.
You’ll need enough of your maple to make 10 – 12 primary boards, 7/8″ Th x 1-1/2″ W. Rip them oversize first and let them rest for a few days. Once they’ve had a chance to finish drying (and twisting and bending) square them up and bring them to final dimension. Keep in mind that the final dimension of these boards isn’t critical. I cut all my stock into three foot lengths; that’s easy to handle, and results in enough material to make a cutting board that’s about 1-1/8″ x 10″ x 20″.
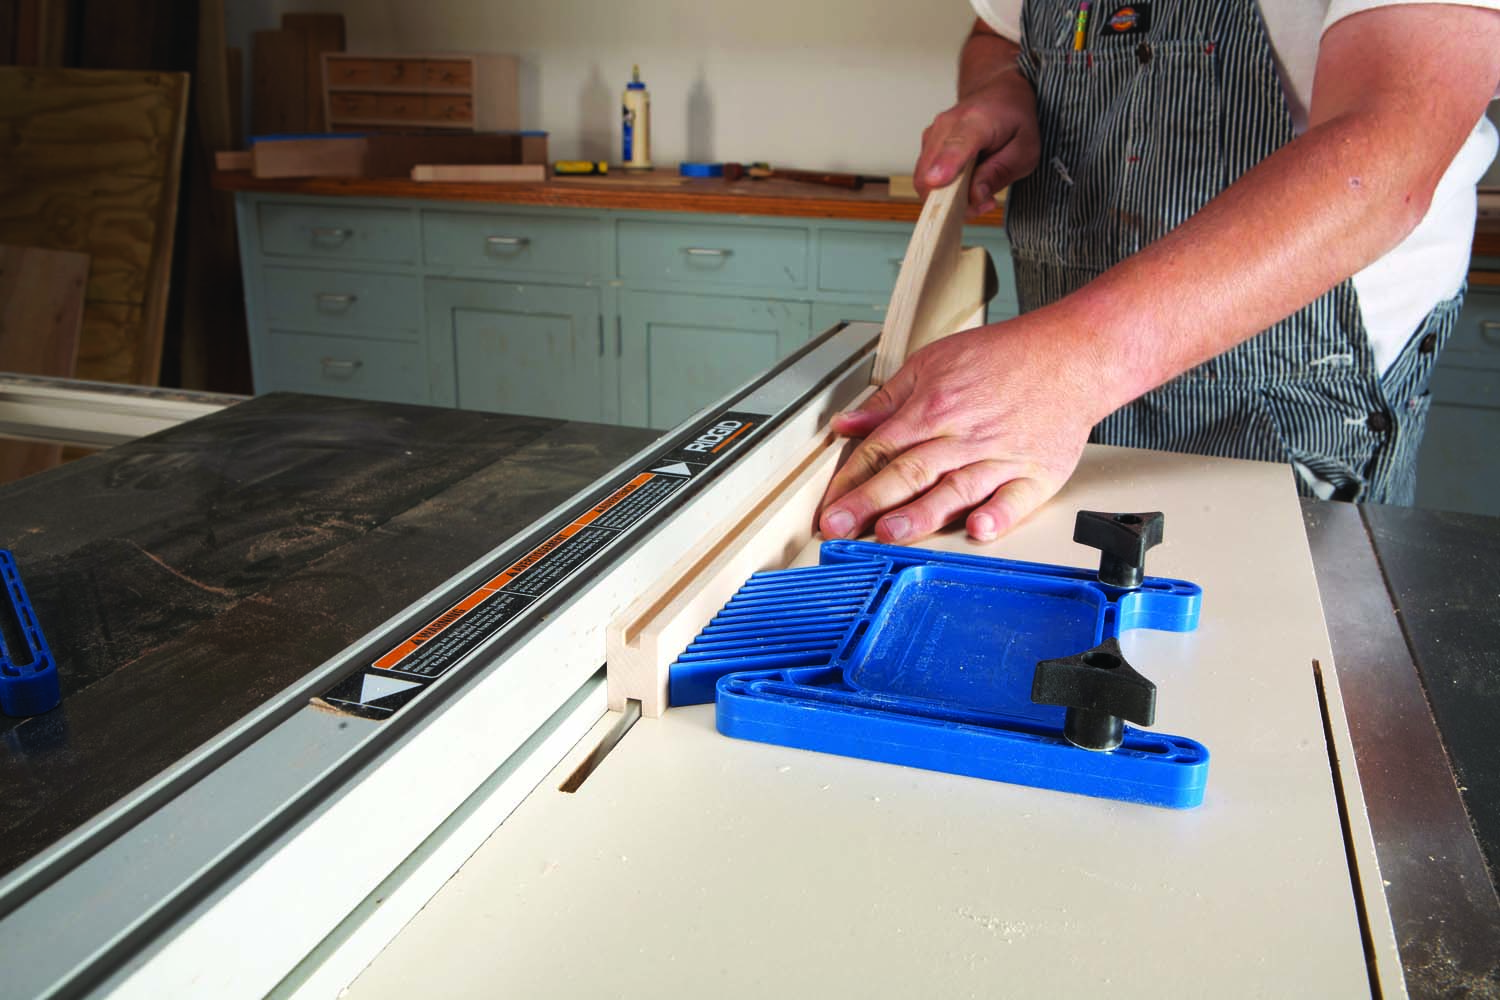
Photo 1. Cut centered grooves on both edges of all the primary boards except the two outer boards; groove only one edge of those.
Cut a 1/4″ x 1/4″ groove down the center of both edges of all of your maple boards (Photo 1) except for two; they’ll be the outer edges, and only get grooved on one edge. Before making the grooves, mark one face of each primary board. When you’re cutting the grooves, put the marked face against the fence. During the glue-up, make sure that all the marks face up (or down). That way, if the groove isn’t exactly centered, it won’t matter.
Tip: If your saw’s throatplate isn’t perfectly flush with your saw’s top, the grooves’ depth won’t be consistent. I bypassed the throatplate using a featherboard that locks into a miter slot, and a piece of 3/4″ Melamine.
Drill holes in the Melamine for the featherboard’s bolts. Make the holes oversize, so they don’t need to be perfectly placed. Lower your saw’s blade and tighten the featherboard’s knobs to hold everything in place. Start up your saw, and raise the blade to the correct height. Also, if you don’t have a zero clearance insert, the thin splines will slip down alongside the blade when you rip them. This setup remedies that, too.
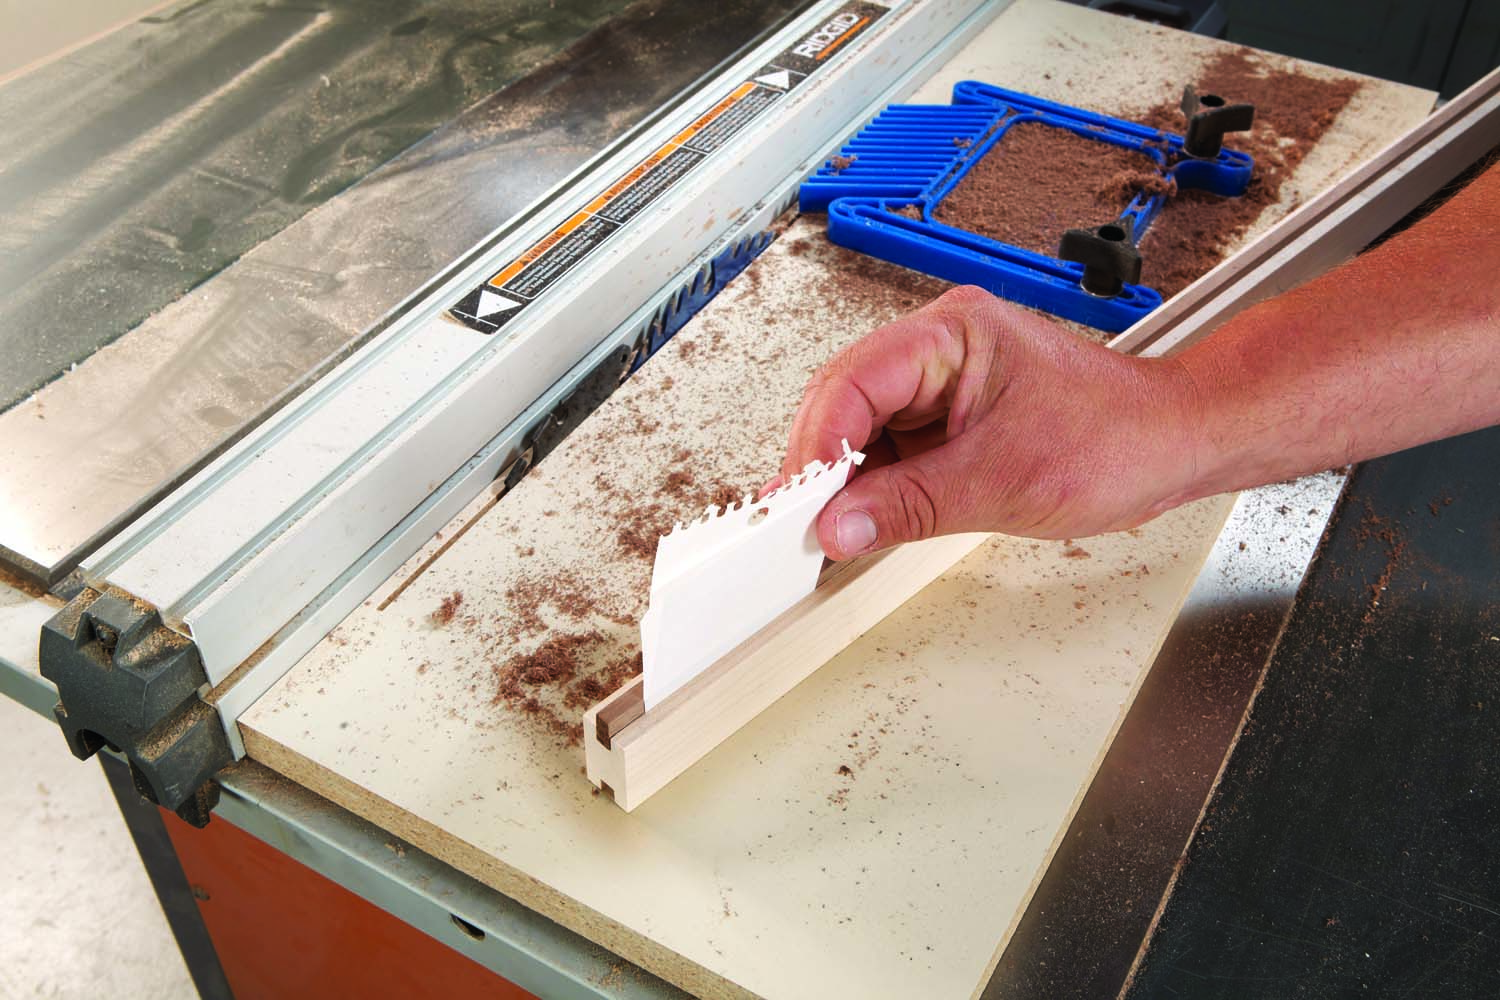
Photo 2. Test the splines’ thickness using a paper feeler gauge. The splines should fit snug along with two thicknesses of paper.
Plane your spline stock down to just over 1/2″ thick. Rip 5/16″ thick splines from this stock. Make a couple extras, just in case. Rip the splines to final thickness. The splines should fit snug with two thicknesses of paper – .006″ – in the groove (Photo 2). On my first attempt, I made the fit too snug, and the glue-up turned into a disaster.
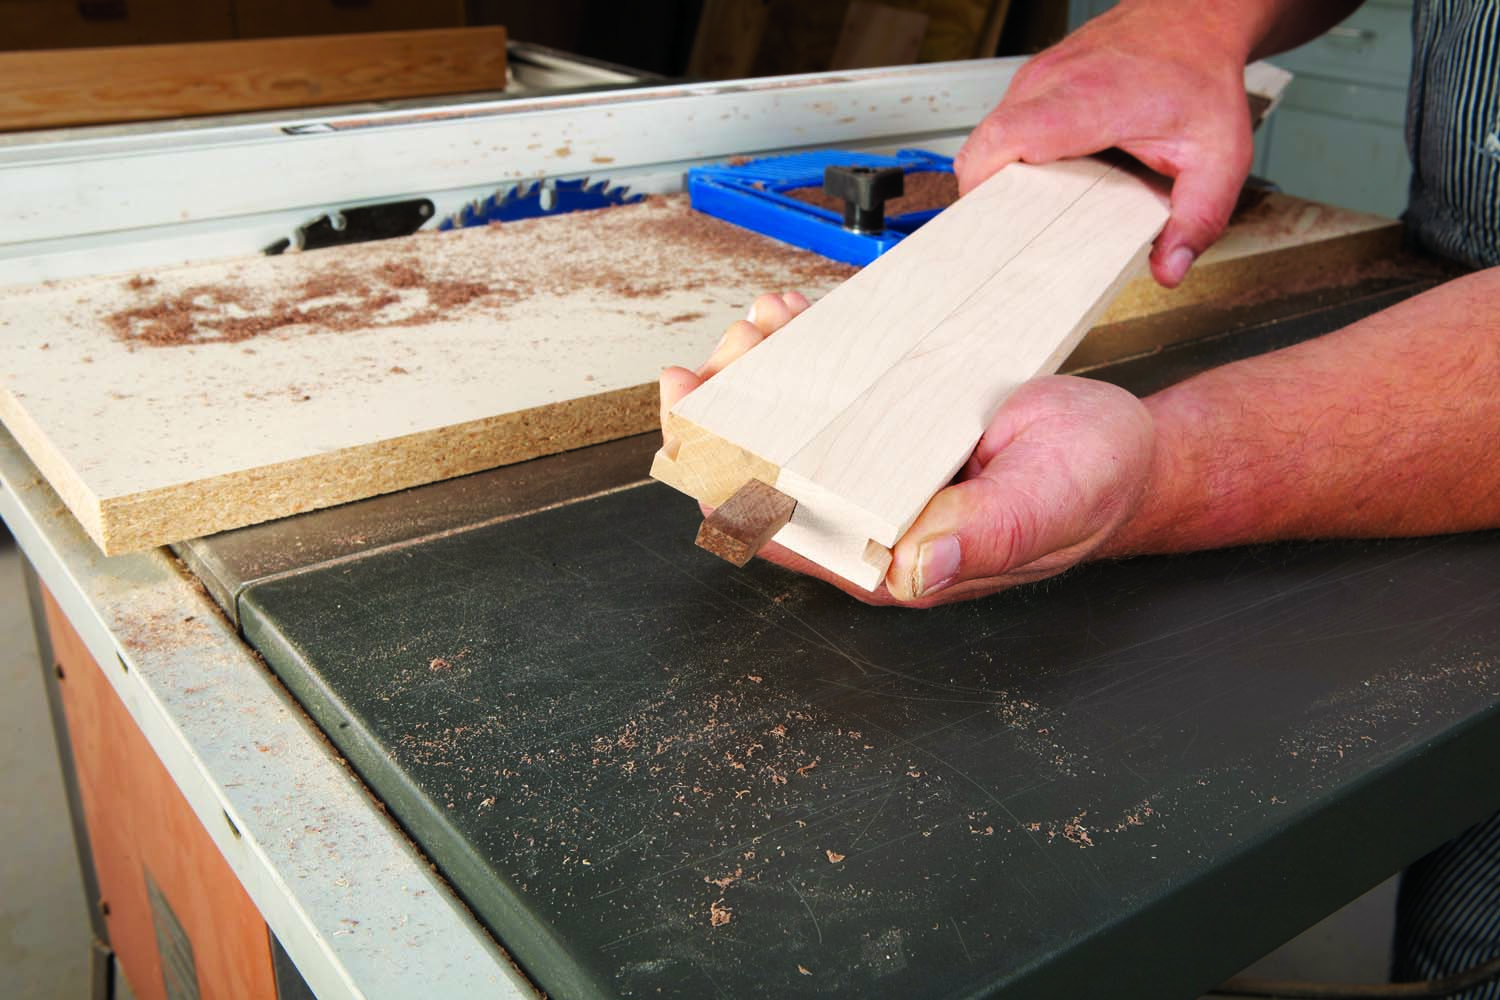
Photo 3. Check the splines’ width using two grooved boards. There should be no visible gap at the spline’s edges.
Next, rip the splines width so that when you assemble two grooved boards and one spline, there’s no visible gap at the spline’s edges (Photo 3).
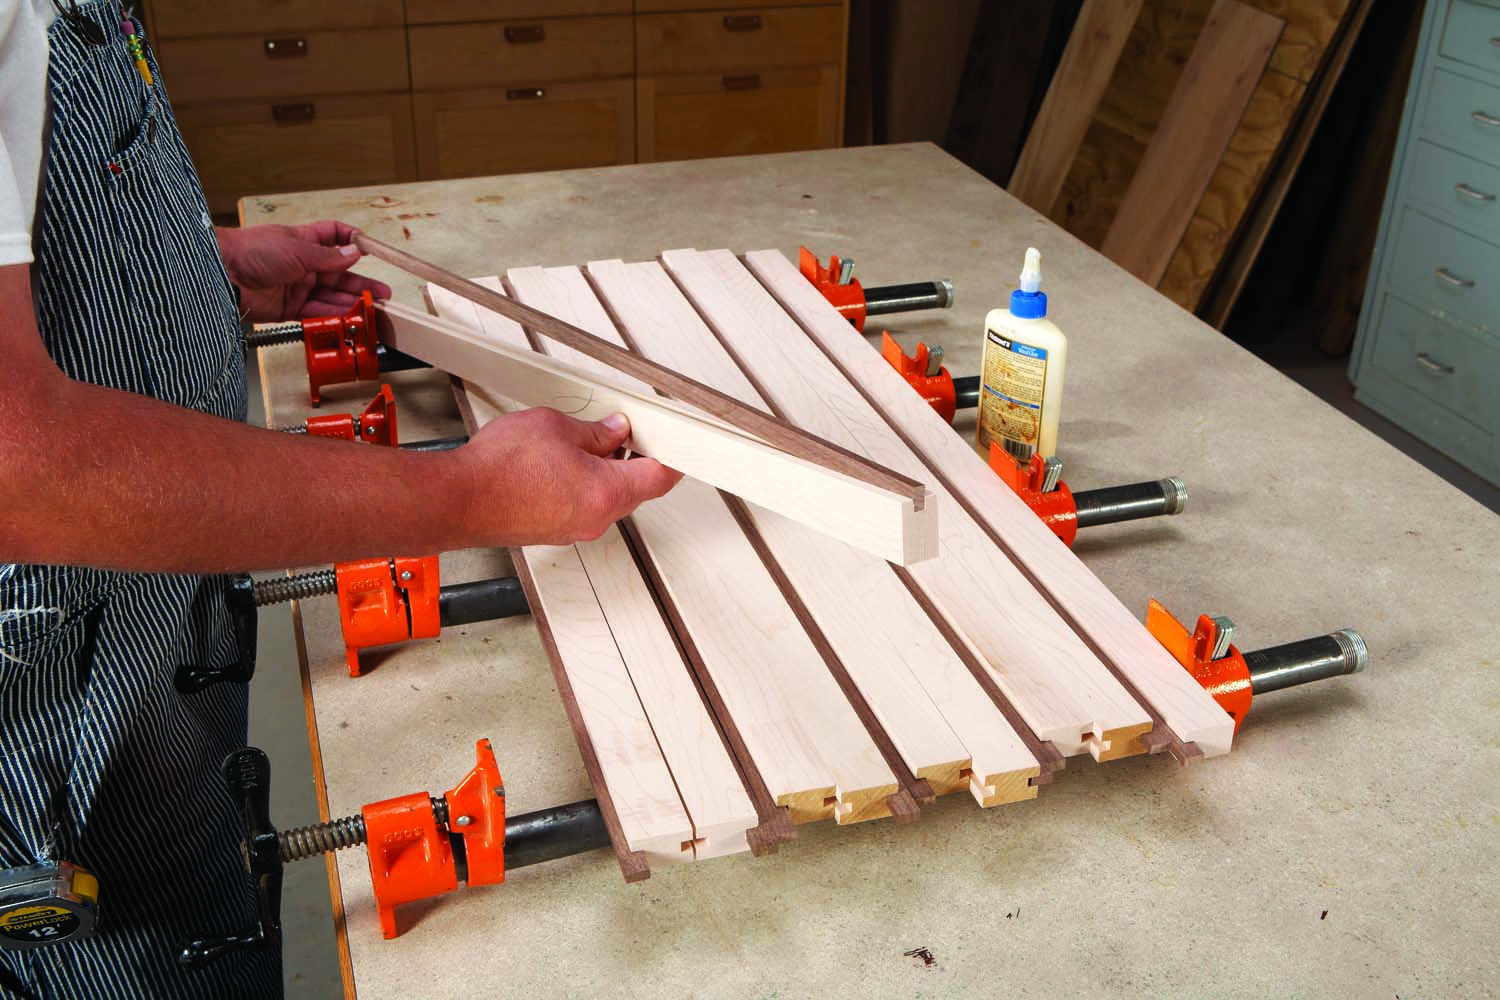
Photo 4. Glue each spline in only one grooved board. Clamp the boards with the splines facing each other to press them into the grooves.
A big glue-up like this is best done in stages. Start by gluing each spline into just one groove. Clamp the boards together with their splines facing each other, to press them all the way into the grooves (Photo 4). Use a flat-bladed screwdriver to clean out all the excess glue. If you need to wipe off any glue, use a rag that’s either dry or just slightly damp. Too much moisture could cause the splines to swell.

Photo 5. Glue up the whole assembly using cauls to keep it flat.
After the glue dries, it’s on to stage two. There are lots of parts and lots of glue-spreading, so you’ll need to move fast. Do a dry run first, without glue, to avoid any surprises. If all is well, glue and clamp the assembly and let it dry for at least a couple hours (Photo 5).
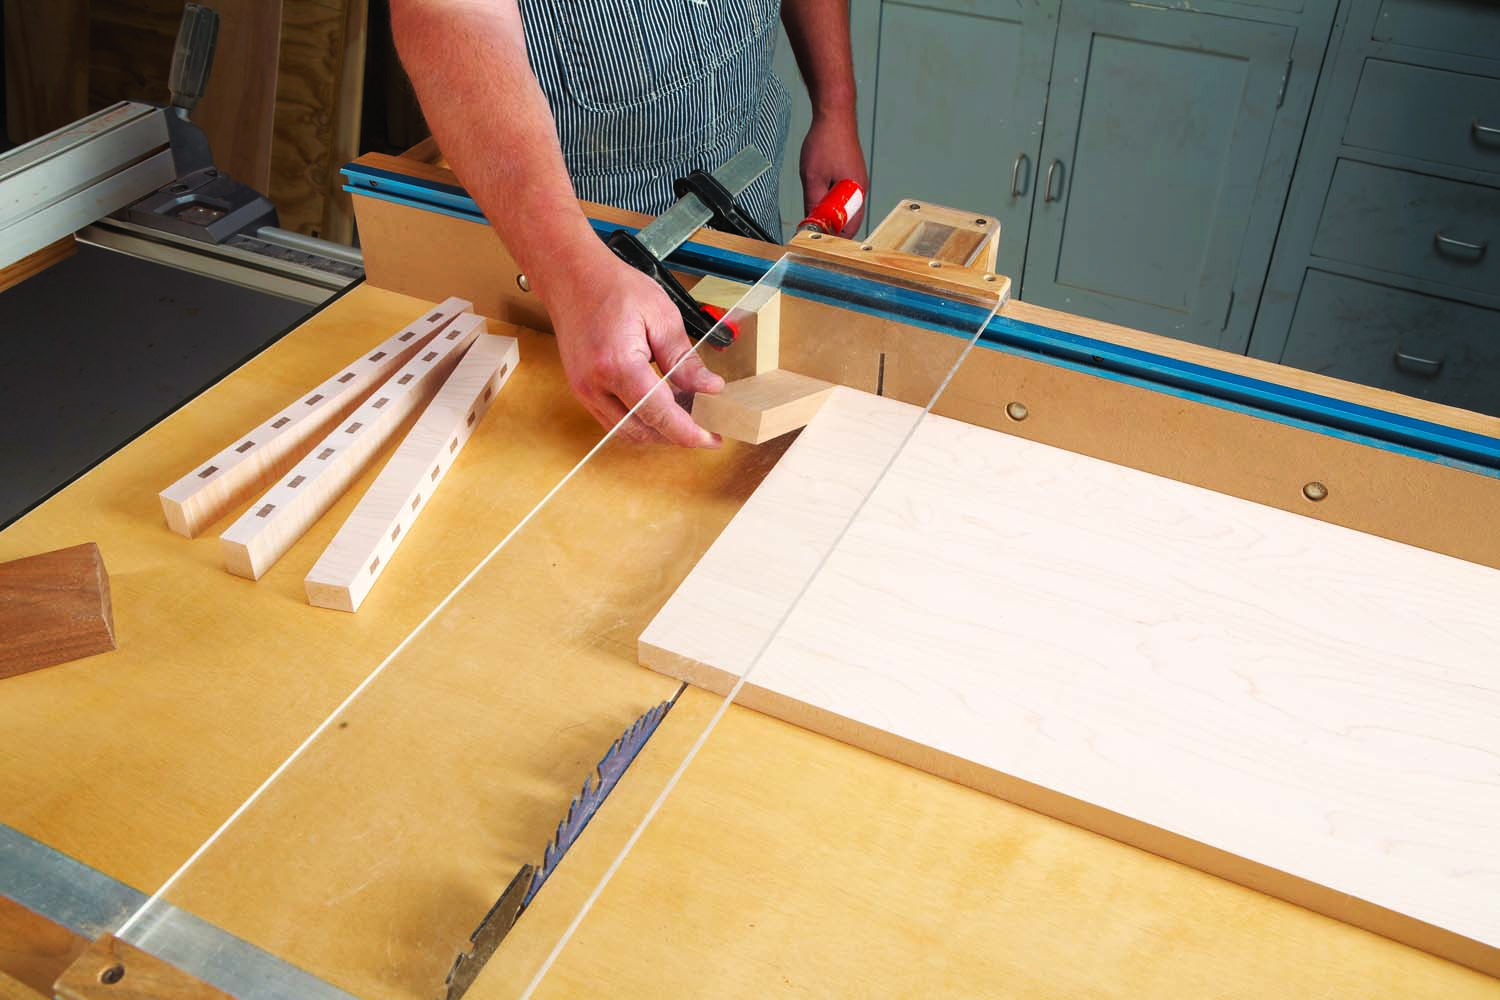
Photo 6. Cut the assembly into short-grain strips using a cross-cut sled.
Remove the assembly from the clamps, and plane it just enough to even all the surfaces. Using a crosscut sled on your tablesaw, trim one of the assembly’s ends square. Then, starting from the squared end, cut the whole assembly into 1-1/8″ wide strips. To do this safely, use a stop block clamped to your sled’s fence, and a spacer between the stop block and the glue-up. Set the spacer next to the stop block. Slide the assembly against the spacer, and then remove the spacer. While holding the assembly in place, make your cut (Photo 6). Crosscut the whole assembly into short-grain strips using this method.
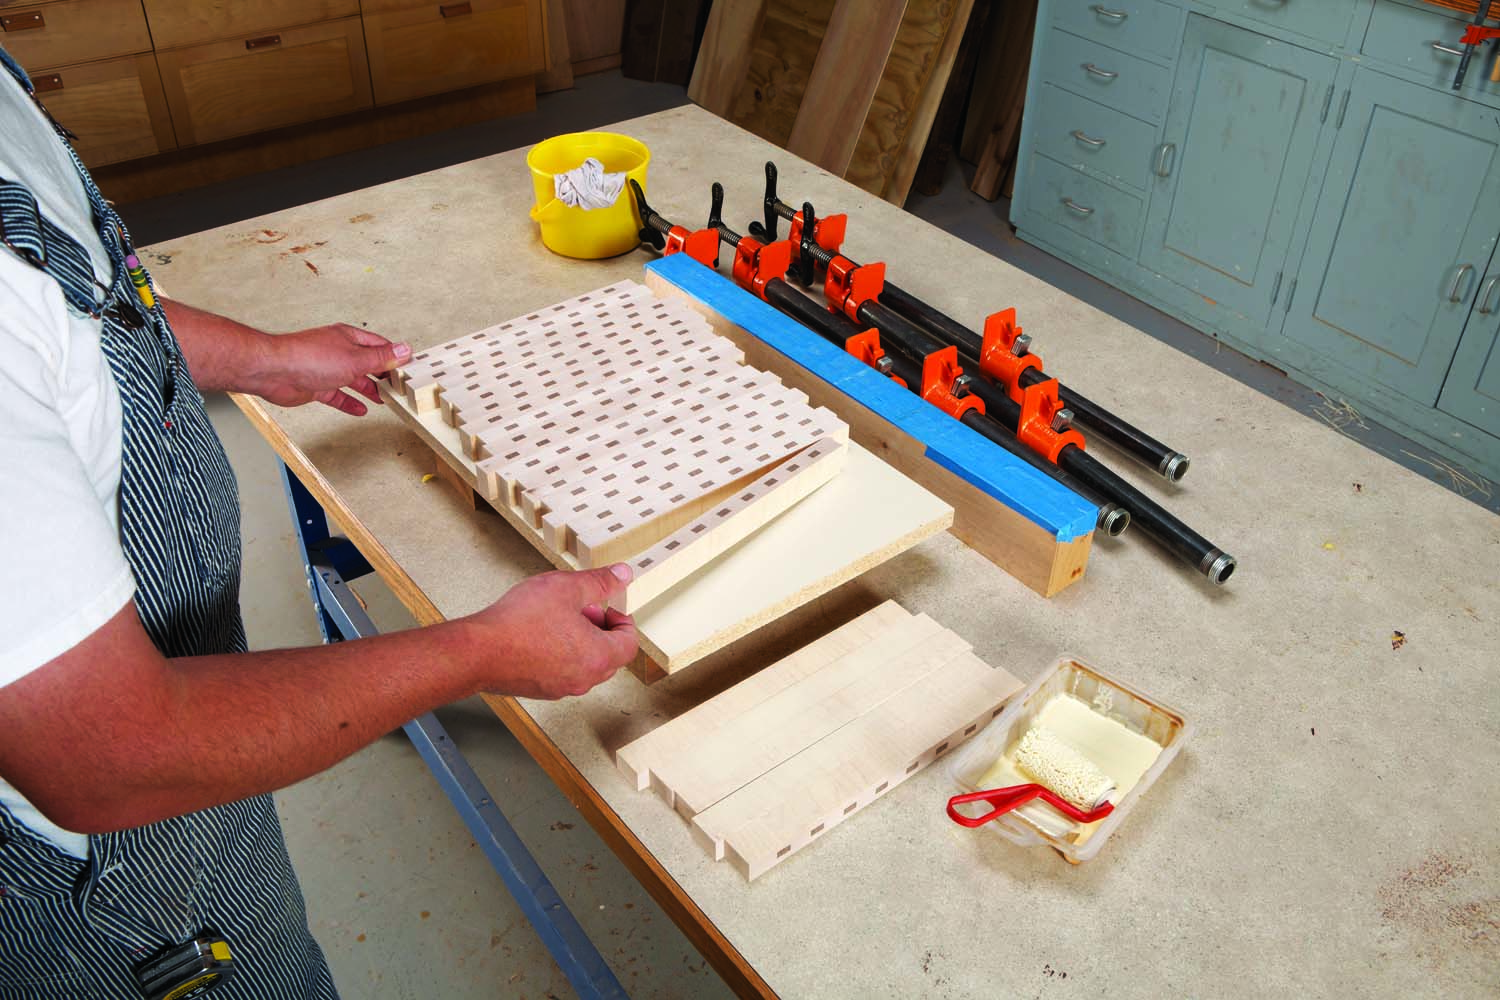
Photo 7. Glue the strips together on a sheet of melamine, using cauls to keep the cutting board flat.
For stage three, turn all the strips on edge, so the ends of the splines are showing. Set them on a sheet of melamine and arrange them however you like (Photo 7). I staggered my strips so there would be no noticeable pattern to the spline ends.
I use melamine for glue-ups like this, because it’s flat, and glue doesn’t stick to it. Again, have all your clamps and cauls ready to go, and glue up the cutting board. The more effort you put into getting it flat now, the less time you’ll spend sanding later. Let the cutting board dry for twenty four hours.
Remove the clamps, and scrape off any excess glue. Use your crosscut sled or circular saw with a guide to straighten the edges. Alternatively, you could bandsaw the cutting board into whatever shape you wish, or just leave the staggered ends.

Photo 8. Sand the cutting board with coarse sandpaper until the surfaces are perfectly smooth and even, then finish sand.
To flatten and even up the cutting board’s surface, start with the coarsest sandpaper you can get your hands (Photo 8). I started with 60-grit and finished with 180-grit. Round over or chamfer all the edges. If you have a drum sander, now’s the perfect time to put it to use.
I used two different finishing methods for my cutting boards. For the rectangular cutting board, I rubbed on paste wax using extra-fine steel wool, and then buffed it with a soft cloth after the wax started to feel tacky.
On the two-piece cutting board, I first melted beeswax in a double boiler. While the wax was hot, I poured it on the cutting board and spread it around with a credit card. After the wax hardened, I scraped off the excess with a credit card and then buffed it with a soft cloth.
The paste wax method emphasizes the maple’s end grain, while the beeswax method obscures the maple’s end grain a bit and emphasizes the walnut splines.
Here are some supplies and tools we find essential in our everyday work around the shop. We may receive a commission from sales referred by our links; however, we have carefully selected these products for their usefulness and quality.