We may receive a commission when you use our affiliate links. However, this does not impact our recommendations.
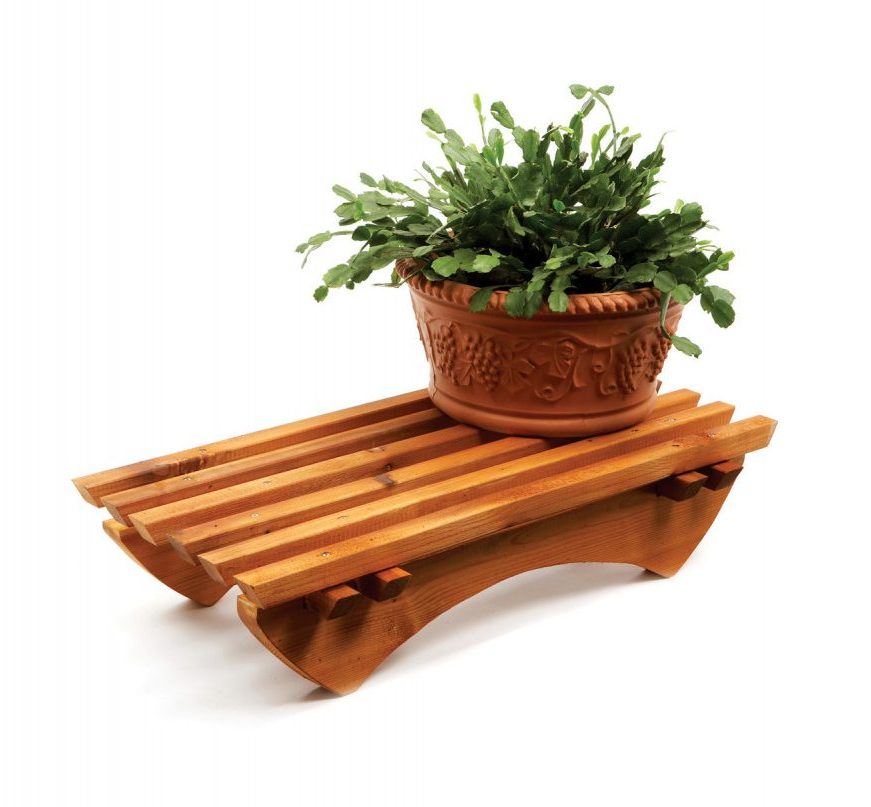
An Asian-inspired display stand for deck, patio or porch.
This stand was originally designed for bonsai plants—dwarf trees or shrubs—but it can be used to display any kind of potted plant. As a traditional bonsai stand, it’s designed to be attractive yet not distract from the beauty of the plant.
I built the stand from 2×2 and 2×6 cedar, but you could also use other rot-resistant woods such as cypress, white oak or walnut. Treated wood would work as well, but the stand would look better if it were stained. The dimensions of the stand are easy to modify for smaller or larger pots.
Looking for more patio ideas? Start here: Patio Design Ideas
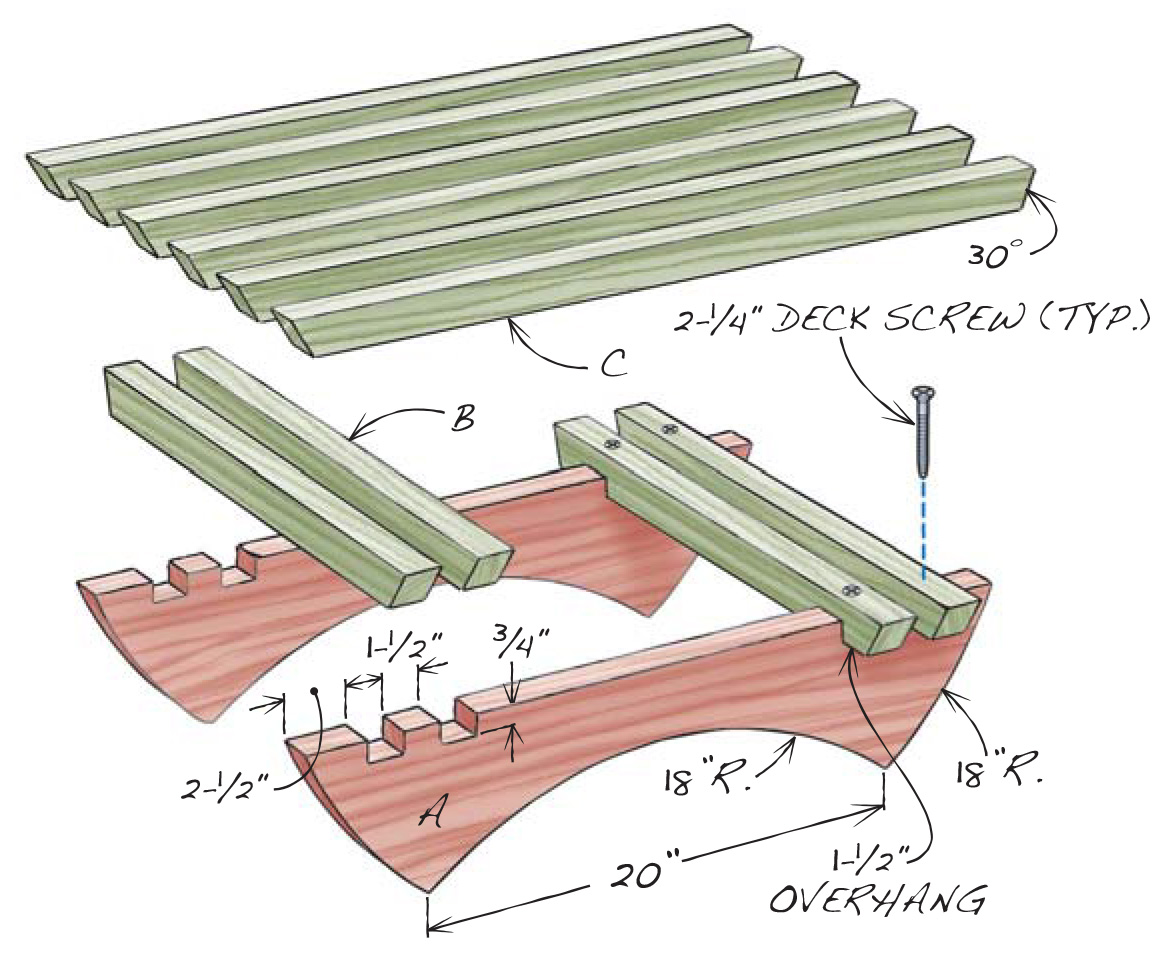
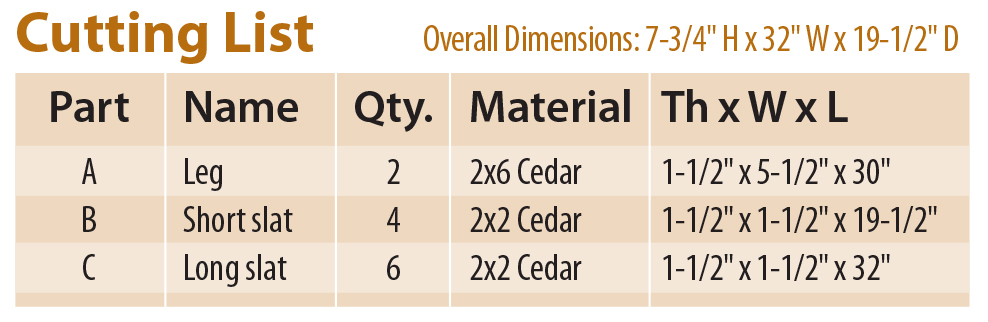
Cedar Plant Stand Cut List
Building Instructions
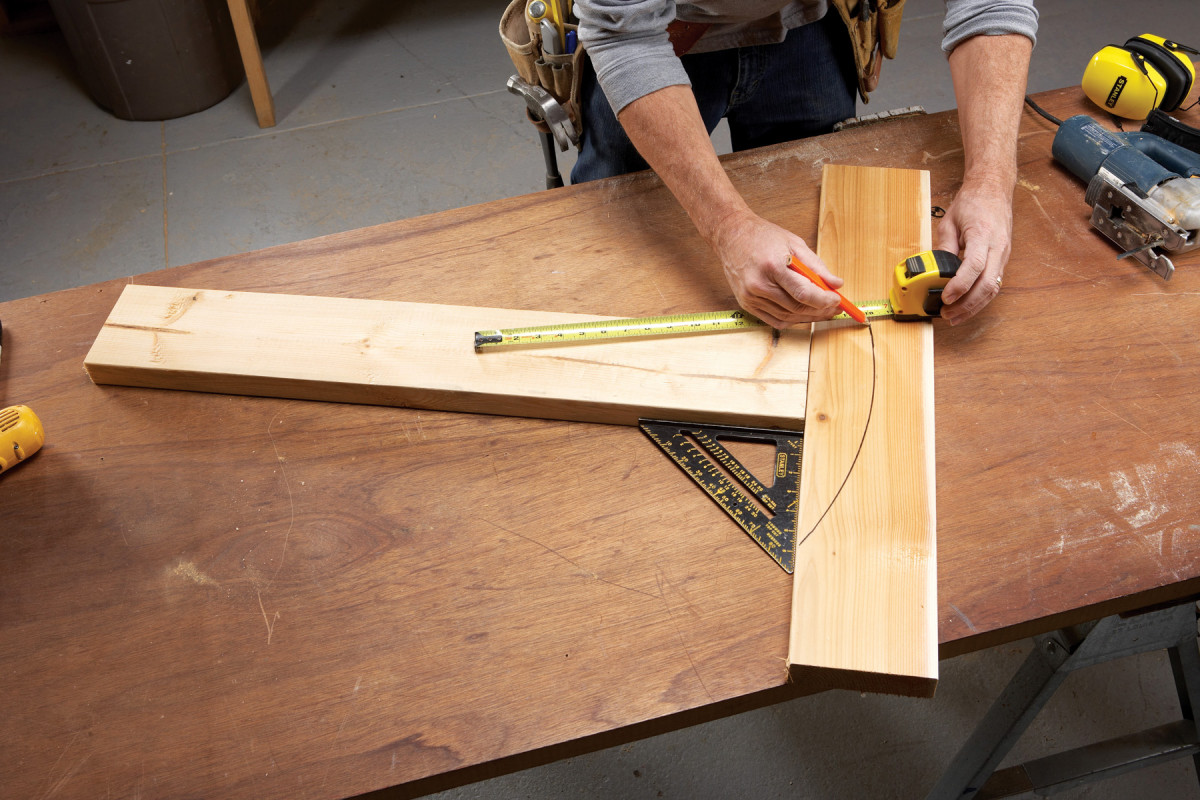
1. Draw the arc for the bottom of each leg using a tape measure or a trammel. Cut out the curve, then use the waste piece to draw curves on the ends of the leg.
To make the stand, cut the legs (A) to length, then draw the bottom arcs (Photo 1). Cut the arcs with a jigsaw or bandsaw, then use the cutoffs to draw curves on the ends of the legs. Smooth the curves with a belt sander.
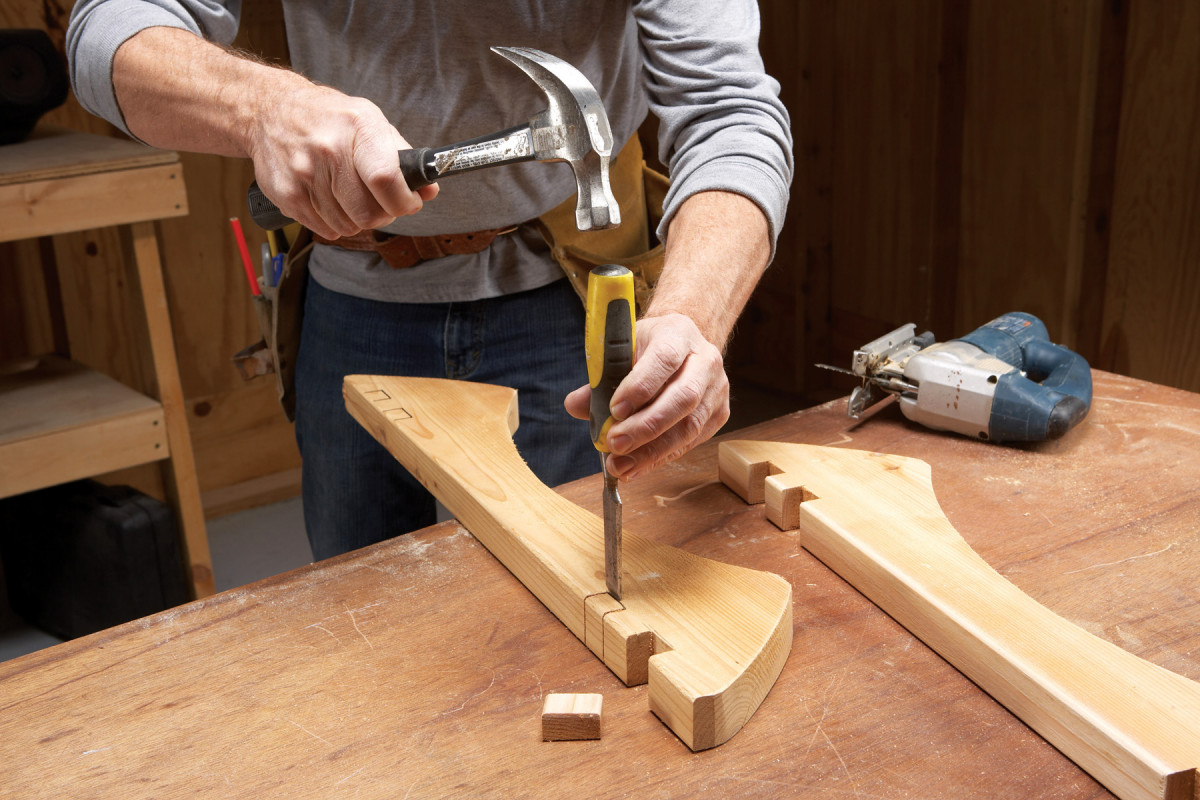
2. Notch the legs using a jigsaw and chisel.
Cut all of the slats (B and C) to length. Use scrap pieces of the slats to lay out the exact width of the notches in the legs. Cut the sides of the notches with a jigsaw, or on a bandsaw or tablesaw, then use a chisel to square off the bottoms of the notches (Photo 2). You’ll get better results by chopping a little bit off at a time rather than by removing the waste in one big chunk.
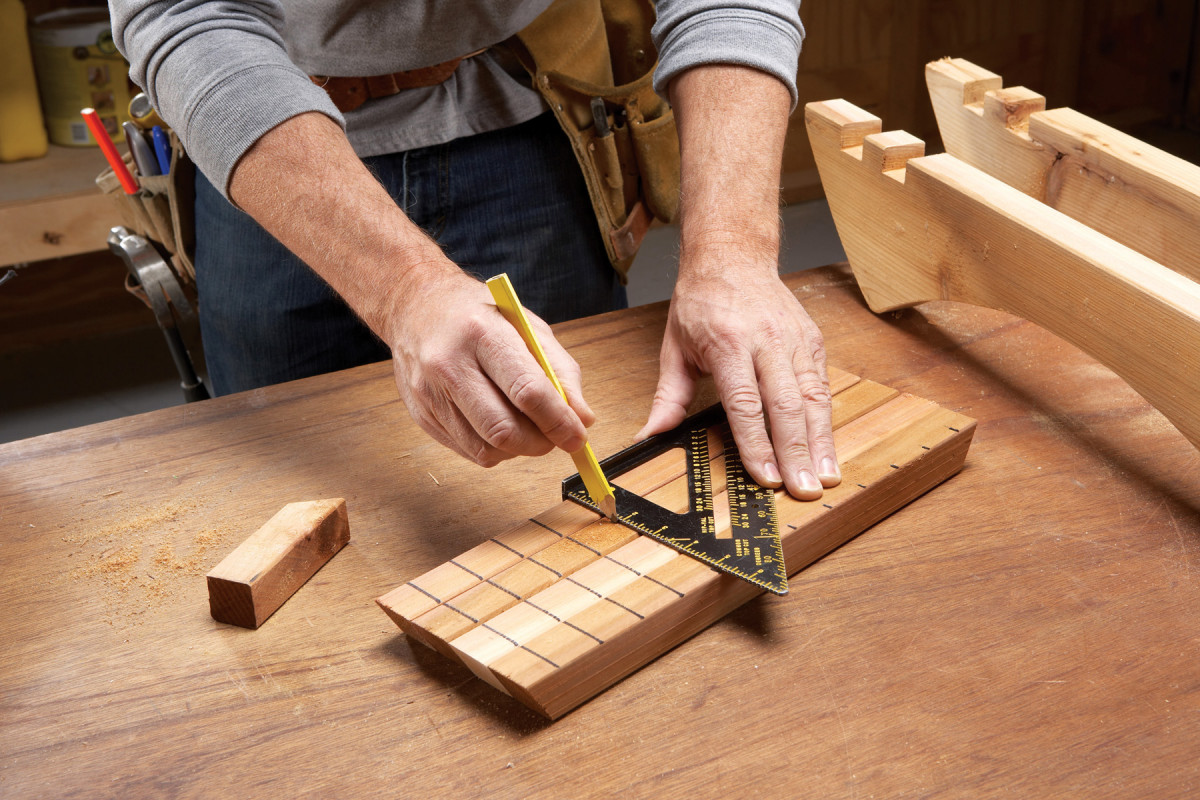
3. Cut the short slats to length, then draw layout marks at 1-1/2″ intervals. Fasten these pieces to the legs.
Cut the ends of all of the slats at an angle (see drawing). Place the four short slats side by side and draw lines across them at 1-1/2″ intervals (Photo 3).
If you’ll be finishing or staining the stand, do it now, before assembling the pieces. Left unfinished in the sun, cedar will turn a beautiful silvery gray.
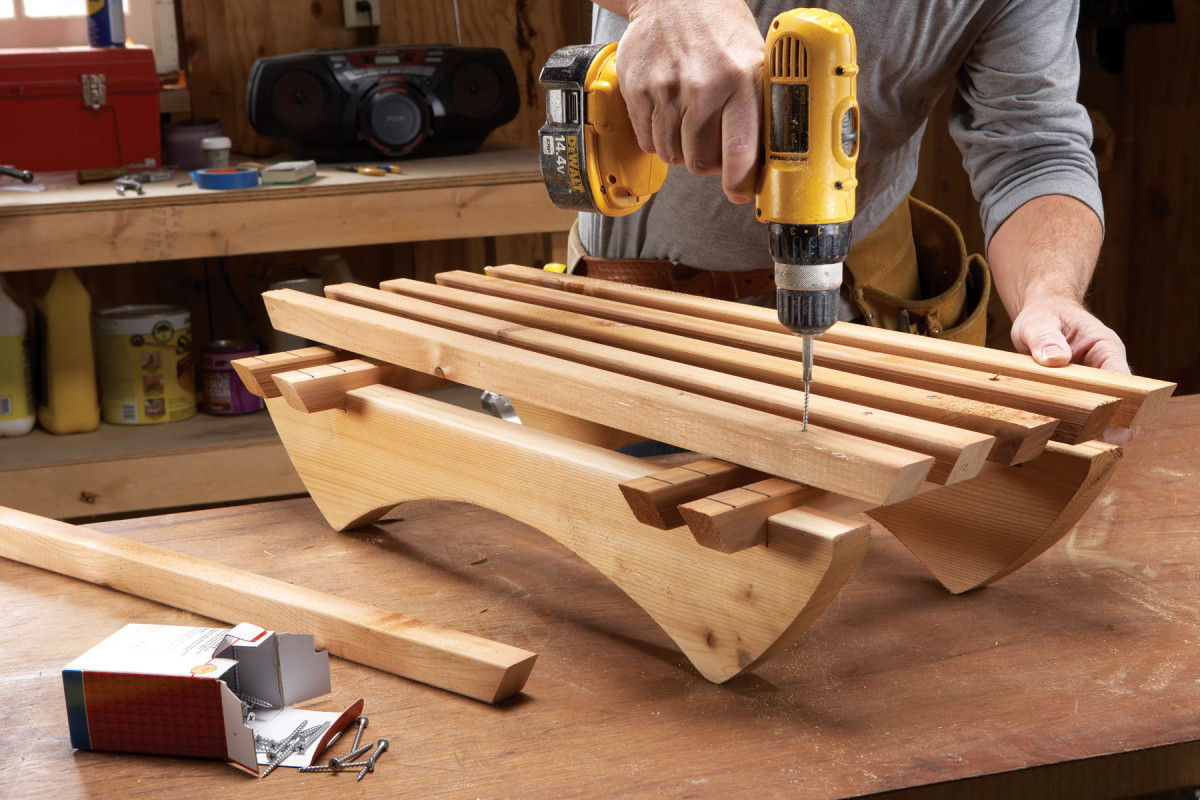
4. Align the long slats with the layout marks, then drill pilot holes and fasten the pieces in place.
Tap the short slats into the notches so they overhang the sides of the legs by 1-1/2″, drill pilot holes, and screw the slats to the legs using stainless steel screws or coated deck screws. Position the long slats on the layout marks and fasten them in place (Photo 4).
Here are some supplies and tools we find essential in our everyday work around the shop. We may receive a commission from sales referred by our links; however, we have carefully selected these products for their usefulness and quality.