


We may receive a commission when you use our affiliate links. However, this does not impact our recommendations.
See-Through Router Base
See where you're going on a dovetail jig.
By Dave Munkittrick
|
Why are so many router bases solid black? I hate peering through This new clear base is designed to accept Porter-Cable-style guide
Materials and toolsMake your base from 1/4-in.-thick acrylic or polycarbonate plastic. Acrylic is available at most hardware stores and home centers. Polycarbonate is more shatter-resistant, although it’s less stiff, harder to find and more expensive. Either plastic can be machined like any hardwood using standard woodworking equipment. Leave the protective film on to protect the plastic from scratches during machining. To make your clear base, you’ll need these items: a drill press, router table, bandsaw or jigsaw, flush-trim bit, 1-1/4-in. and 1-3/8-in. Forstner bits, a countersink bit, a centering bit for your router (see Source, below) and double-stick tape. You may need longer screws to fasten this new thicker base to your router.
Drill mounting holesUse the manufacturer-supplied base as a template for your clear base. Secure the original base to the plastic blank with double-stick tape. Cut and shape the blank on your bandsaw and router table (Photo 1). Keep the blank moving at about the speed of a clock’s second hand to prevent the plastic from melting. On the drill press, mark the centers for the mounting screws (Photo 2). Gently pry the original base off the blank using a putty knife. Select a twist bit just large enough to let the mounting screw shank easily pass through the hole. Drill the mounting holes all the way through the base (Photo 3). Friction from a spinning drill bit can easily melt plastic. When drilling plastic, use a quick, repetitive in-and-out action. Pause for a second between strokes to allow the bit and plastic to cool. Drill countersinks for flat-head screws (Photo 4). I use flat-head screws to mount a base, because the tapered heads automatically draw the base into the exact location each time it’s fastened. A countersink bit has the same profile as a flat-head screw. Don’t use a large twist bit to drill the countersinks; the profiles don’t match.
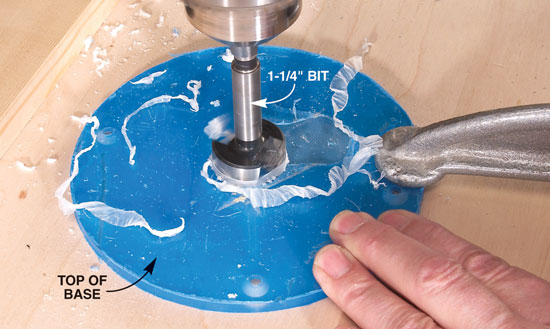
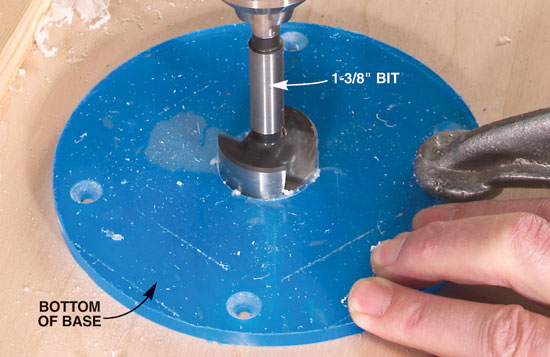
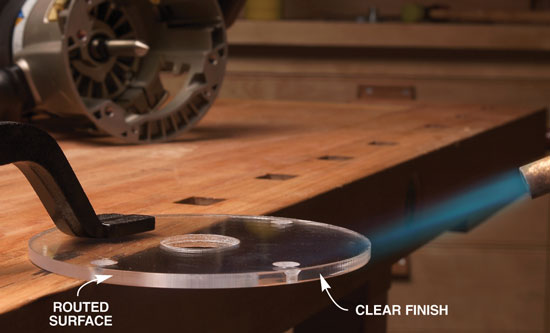
Drill center holesAfter the base has been shaped and the mounting screw holes completed, fasten the base to your router. Chuck a centering bit or a V-groove bit with a sharp point into your router. With the new base in place, gently lower it onto the router until it barely touches the plastic surface. Lock the router base assembly tightly to the router. Take a small hammer and lightly tap the plastic over the centering bit (Photo 5). Use the resulting mark to center the base under a 1-1/4-in. Forstner bit. Clamp the base to the drill press table. Check to make sure the bit is still in line with the mark. Drill the center hole through the base (Photo 6). Flip the base so the countersinks face up (Photo 7). Center the base on the table using the same Forstner bit that drilled the hole and clamp the base down to the drill press table. Change to a larger 1-3/8-in. Forstner bit. Now, before you get too excited about drilling from a smaller hole to a larger one, let me explain: Typically, you would drill a large counterbore first, followed by the smaller through hole. In this case, the mark from the centering bit is on the wrong side of the base for the large counterbore hole. I use Forstner bits because they are rim-guided. They can cut a larger hole over a smaller one without trouble. After all the machining is done, remove the protective film and use sandpaper to lightly round-over the bottom edge. You can clean up machine marks and scratches by carefully using a blowtorch (Photo 8). The result is a crystal-clear finish that’s not really necessary, but it sure looks good. SourceMLCS, mlcswoodworking.com, 800-533-9298, Universal centering alignment pin, #9054. |
Click any image to view a larger version.
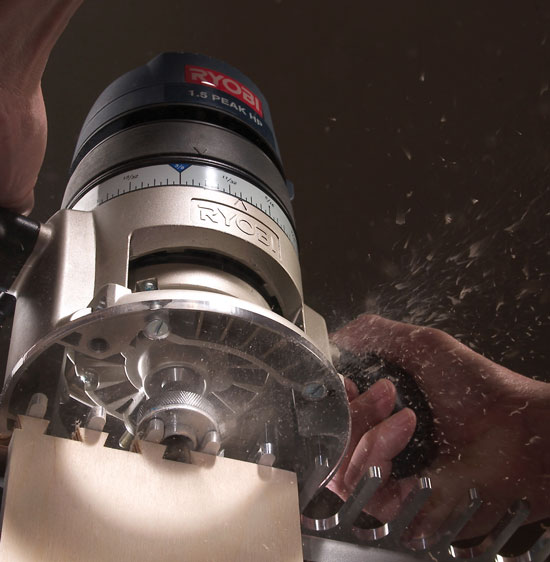
1. Shape a rough-cut clear plastic blank on the router table using a flush-trim bit. Secure the original base to the blank using double-stick tape.
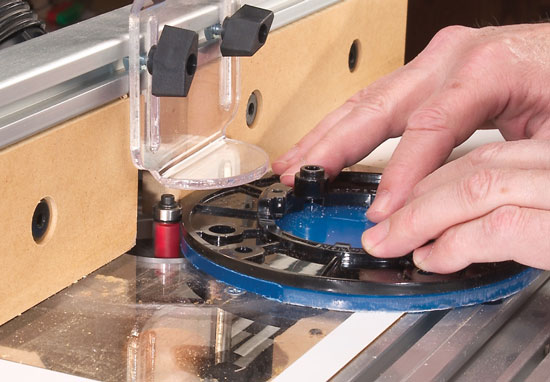
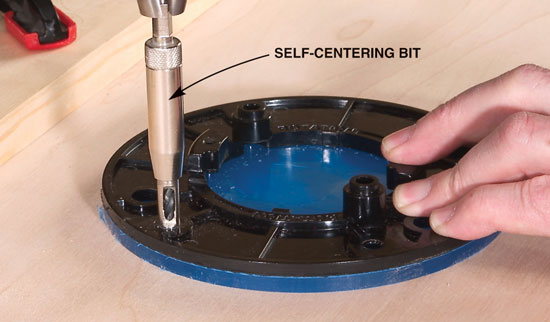
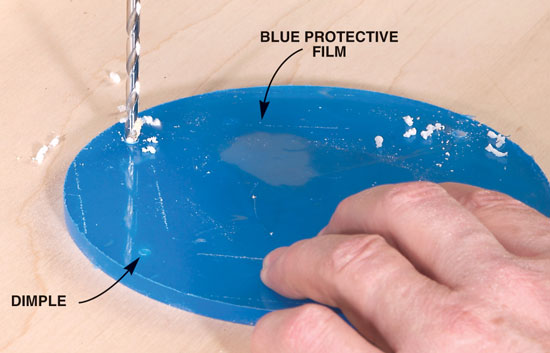
2. Mark the mounting screw locations using a self-centering bit mounted in a drill press. All you need is a slight dimple on the surface. Don’t drill all the way through the blank, because the centering bit is not the final diameter.
3. Drill the mounting screw holes using the dimple marks to center the bit. Center the dimpled hole under the bit with the power off. Secure the blank firmly with your hand, raise the bit, turn on the drill press and drill the hole.
4. Countersink the mounting screw holes. Center the bit by lowering it into the hole with the power off, as in Photo 4. Set the depth of cut so the screw heads will be sunk slightly below the base’s surface.
5. Locate the base’s center by putting a centering bit in your router, lowering the baseplate onto it and tapping the plastic with a hammer. The resulting mark will be dead center.
6. Drill out the center hole. Center the plate on the bit and clamp it down. Use an in-out feed action to keep the bit cool and the plastic from melting. You should get wispy curls of plastic, not molten mounds.
7. Flip the plate and drill the larger counterbore hole. Center the plate using the smaller bit and clamp. Change to the larger bit and drill.
8. A flame finish adds just the right touch. It turns the hazy, machined edges crystal clear. Just wave the flame from a blowtorch back and forth until you see the haze disappear. Be careful not to overheat the plastic or it will bubble. |


|
This story originally appeared in American Woodworker March 2006, issue #120.
|
|

Here are some supplies and tools we find essential in our everyday work around the shop. We may receive a commission from sales referred by our links; however, we have carefully selected these products for their usefulness and quality.


