


We may receive a commission when you use our affiliate links. However, this does not impact our recommendations.
Bent Wood Lamination Basics
10 tips for making strong, graceful curves that add a new dimension to your woodworking.
By Dave Munkittrick
Is your woodworking ready to break free of the box? Check out bent laminations. You’ll find a whole new world of possibilities to explore. Woodworkers use bent wood laminations for everything from chair rockers to drawer handles. Bent laminations do more than give your project a graceful look; when used as a structural element, such as a table leg, they are actually stronger than if the piece were cut from a single block of wood. That’s because the grain runs parallel with the shape; there is no weak short grain.
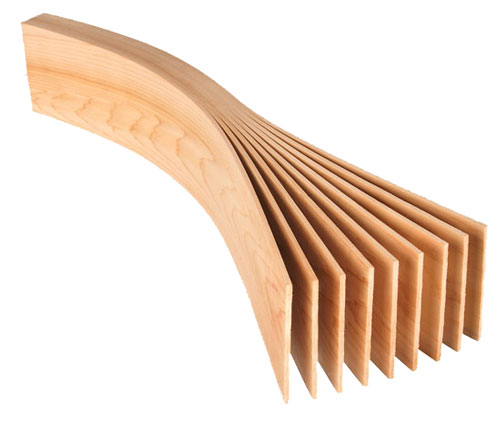
A bent lamination is simply a board sliced into thin, flexible plies and glued back together in a form to create the desired shape (see photo above).
Bent laminations don’t take a lot of specialized equipment. You probably already have all the tools you need: a bandsaw or tablesaw to cut the thin plies and a planer to take off saw marks and adjust each ply’s thickness. You will also need a bunch of small bar clamps, two-part urea-formaldehyde glue, a glue spreader and some sheet stock to make forms.
Here are 10 tips to get you started making your own bent laminations. Start small—try something like drawer pulls—and have fun. With a little practice, you’ll be ready to handle any curve.
Cut on the straight-grained edgeCut the plies through a straight-grained edge rather than the face-grain side. Because the cuts are made parallel to the grain, a straight-grained board can be sliced and put back together with little interruption to the grain lines. This helps keep the plies almost invisible. Mark your stock with a triangle so the board can be reassembled in the right order, in case you drop the stack of plies on the floor.
|
Click any image to view a larger version.
|

Use the right ply thicknessThe chart shows approximate maximum ply thicknesses. Hard or stiff wood, such as maple, may need to be cut thinner than soft woods, such as pine. |
|

Clean up saw marksMake a simple sled to plane the thin plies smooth. A 3/4-in. board with a thin backer glued to one end is all it takes to support the ply through the planer. Make light passes of about 1/64 in. to avoid chip-out. Planed surfaces keep the glue lines thin and almost invisible.
|
|

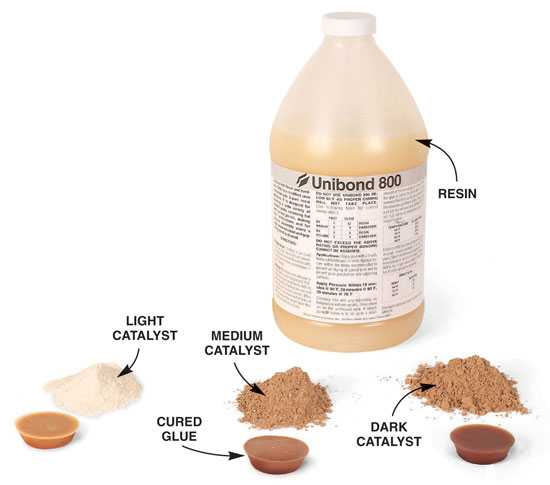
Use the right glueUse a two-part urea-formaldehyde glue for bent laminations. It sets hard but slowly. The hard set helps the lamination hold its shape. The long open time takes the frenzy out of glue-up. I recommend Unibond 800; it’s a urea-formaldehyde glue with three shades of powdered catalyst to better match the wood you’re using. It also cleans up easily with water. Epoxy is also a good choice for bent laminations, but it costs almost twice as much as urea-formaldehyde. Standard wood glue is not the best choice for bent laminations. Yellow glue sets soft and fast. It is also prone to glue creep, a phenomenon in which the cured glue creeps out of the laminations over time, resulting in unsightly, raised glue lines. |
|
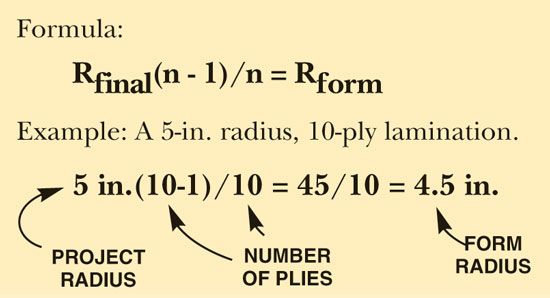
Compensate for spring-backYou can never predict exactly how much spring-back will occur. But you can compensate for spring-back in your form design with the formula at right. Rfinal is the radius you want for your bent lamination; (n) is the number of plies; Rform is the radius of your jig.
|
|
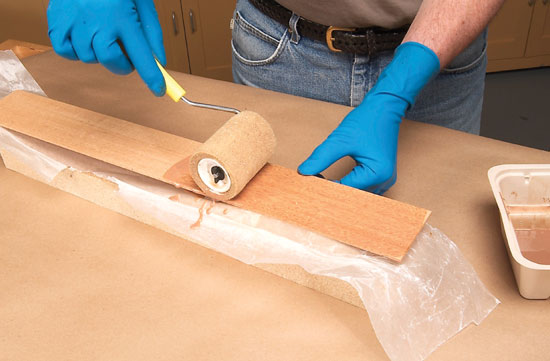
Foam Rollers Speed Glue-UpApply glue with a disposable roller. It’s the quickest, easiest way to get an even glue film on each ply. Lay the plies in the form and clamp. After the glue has set, you can remove the lamination from the form and machine or shape it as you would any piece of wood. Waxed paper protects the form from excess glue.
|
|
Cut out the middle of a two-part formMark a line parallel to the original layout line on the form blank. Set a compass to the total lamination thickness plus form liners. Cut out the marked slice on the bandsaw. The result will be a perfectly matched two-part form when the lamination and liners are added. Simply cutting the form in two causes a mismatch between the two halves.
|
|

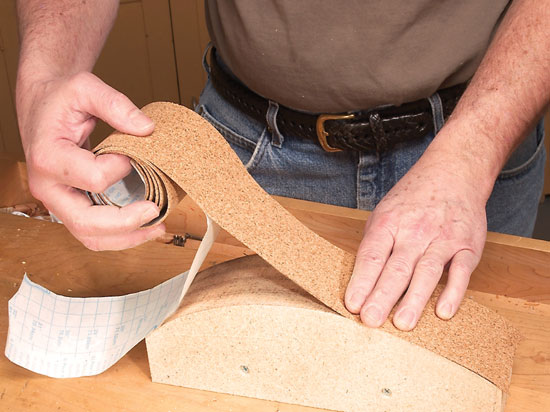
Line the form with corkApply a layer of self-stick cork liner (available at home centers, 12-in. x 4-ft. sheet, $6) to the form. This liner helps even out irregularities in the sawn form. Cork also creates a nonslip surface that aids in holding the lamination to the form as you apply clamping pressure. |
|
One-part forms handle sharp curvesUse a one-part form for curves in excess of 180 degrees or for complex shapes. A one-part form is easier to make than a two-part form, but it does require numerous clamps and that can make glue-up more challenging. Because pressure is applied only where the clamps are located, using a one-part form can result in some crushed wood fibers, an uneven surface and gaps in the glue lines. Most of these problems can be avoided by simply not overtightening the clamps. Use clamp blocks and plenty of clamps to help spread the clamp pressure evenly.
|
|

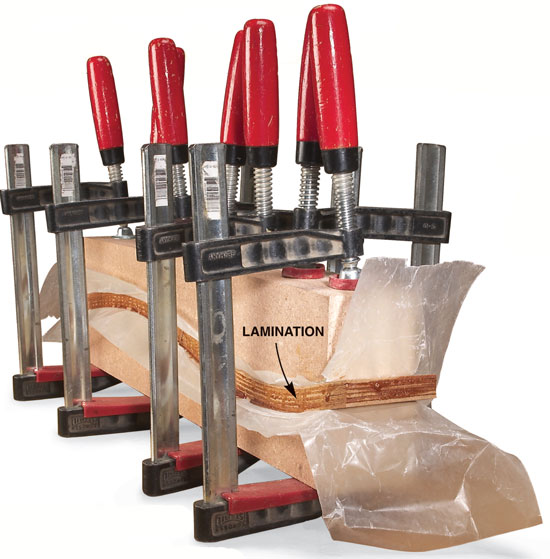
Two-part forms apply even pressureUse a two-part form whenever possible to clamp the plies together. Two-part forms are the best choice for gentle curves under 180 degrees. The two parts apply even clamping pressure along the lamination’s entire length. Using glued-up sheet stock is a quick, easy way to make a form blank. Waxed paper protects the form from glue squeeze-out. |
|
|
This story originally appeared in American Woodworker May 2006, issue #121.
|
|
Here are some supplies and tools we find essential in our everyday work around the shop. We may receive a commission from sales referred by our links; however, we have carefully selected these products for their usefulness and quality.


