


We may receive a commission when you use our affiliate links. However, this does not impact our recommendations.
European Hinges
German engineering results in a clean look, simple and predictable installation and three-way adjustability.
By Jim Grandbois
Once I discovered the simplicity of hanging doors with European hinges, I was hooked.Unlike butt hinges,European hinges are totally adjustable and very easy to install. With the help of a simple drill press table and a marking jig, you can hang a door in just a few minutes. Sound good? Read on.
Background
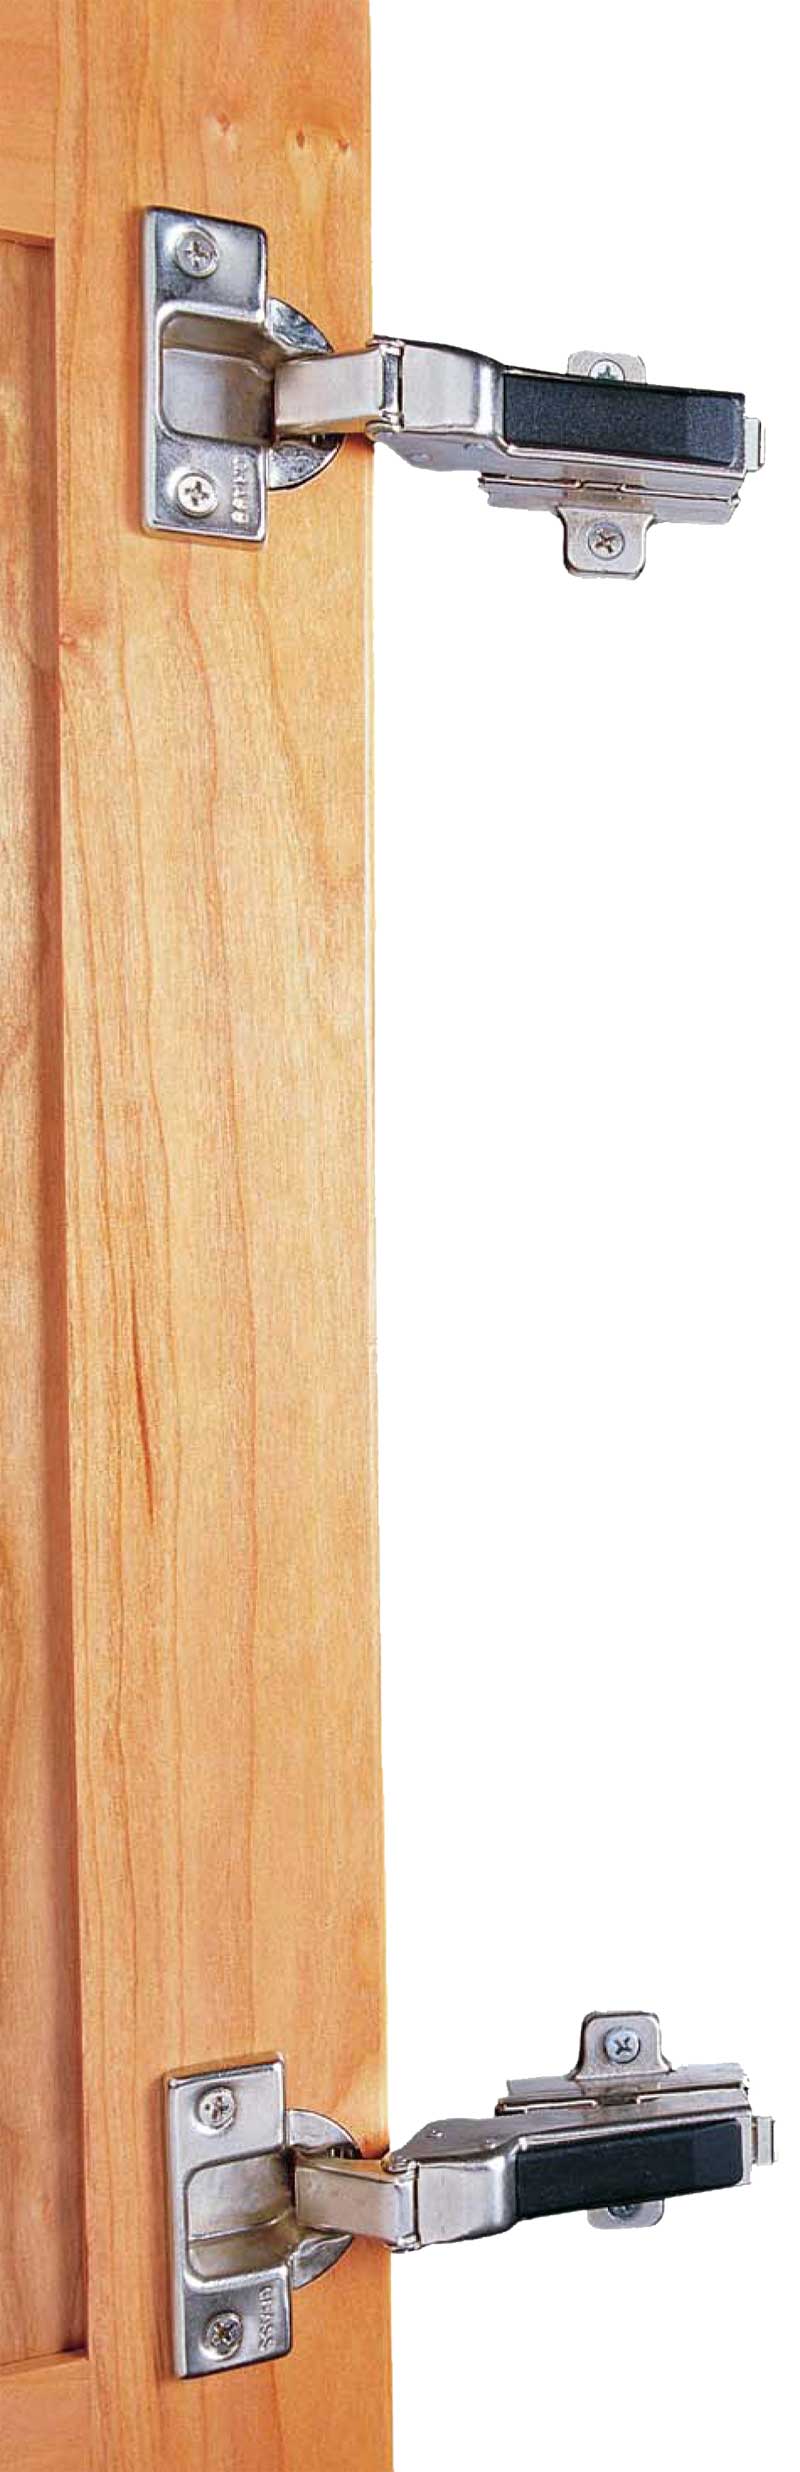
European hinges are part of a standardized construction system developed over 50 years ago in Germany. It radically changed cabinetmaking by streamlining production and reducing costs.The resulting European hinge is a beautifully engineered precision product (Fig.A).There’s a hinge for nearly every application. I’ve used Grass brand hinges for years with flawless results. Major brands such as Grass, Blum and Mepla make a great product that lasts for years. Expect to pay about $8 to $13 per pair.
Tools Required
Setting up for European hinges is very simple and quite inexpensive.You only need a drill press, a boring bit and a screwdriver. The drill press is a must for drilling a straight hole.While you could drill the holes by hand, it’s riskier. A drill press ensures success.
If you have a lot of doors to hang, I recommend a 35 mm carbide bit, a self-centering drill bit and a magnetic- tipped screw bit.A $25, 35 mm carbide bit keeps a sharper edge and outlasts steel bits, especially in tougher materials such as MDF. An $8, self-centering drill bit, such as a Vix bit, is great because it centers the screw hole and controls the drilling depth. In addition, the bit’s outer housing protects template holes from damage. A magnetic- tipped screw bit ($4 to $5) holds screws so well it’s the next best thing to an extra hand. Finally, consider spending $10 on a PoziDrive screwdriver for the adjusting screws. It delivers much better control than a standard Phillips screwdriver.
If you have only a few hinges to install, you can save some money. Use a 1-3/8-in. Forstner bit or a 35 mm, high-speed steel bit (costs less than half the carbide).A Phillips screwdriver is fine for installing a few screws and adjusting the hinges.
Installation
I always apply finish to the cabinet and doors before I install hinges.For an inset application (as shown in these photos), cut the doors leaving a 1/8-in. gap at the top,bottom, sides and at the center division between two doors.
Just follow Photos 1 through 8. With all the parts ready to go, installation of European hinges is as easy as eins, zwei, drei!
Fig. A: Parts of a European Hinge
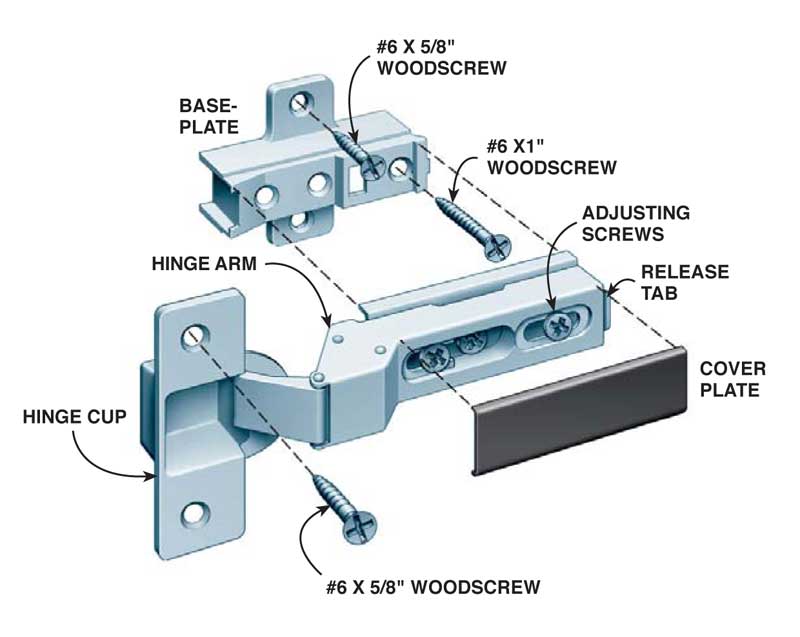
These sophisticated hinges allow complete adjustment of a door after installation. In addition, doors can be quickly released from the cabinet without removing a single screw! The hinges keep their settings when reattached—a wonderful feature.
Fig. B: Drill Press Table

This easily made jig saves time and helps you achieve consistent results.
Fig. C: Baseplate Template for Inset Doors
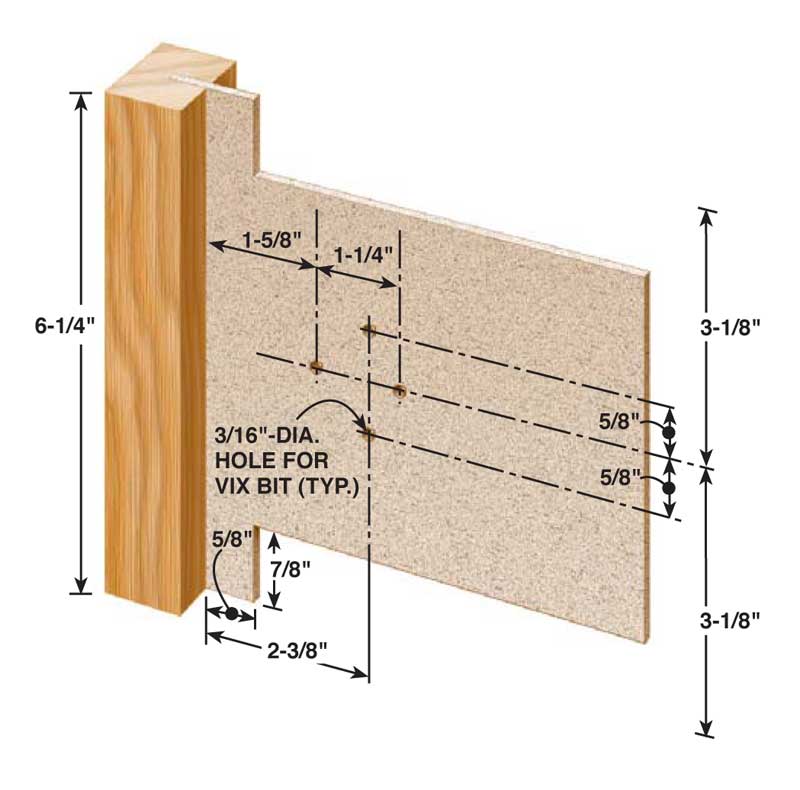
Instead of measuring and marking the cabinet for each door, make a template to locate the baseplate holes.This one is for inset doors. For overlay doors, the first hole would be about 3/4 in. from the front edge, with the other distances remaining the same.
This template is dimensioned for Grass hinges. However, each application and each brand can have a different drilling pattern, so be sure to read the specs for the hinge you are installing.
Click any image to view a larger version.
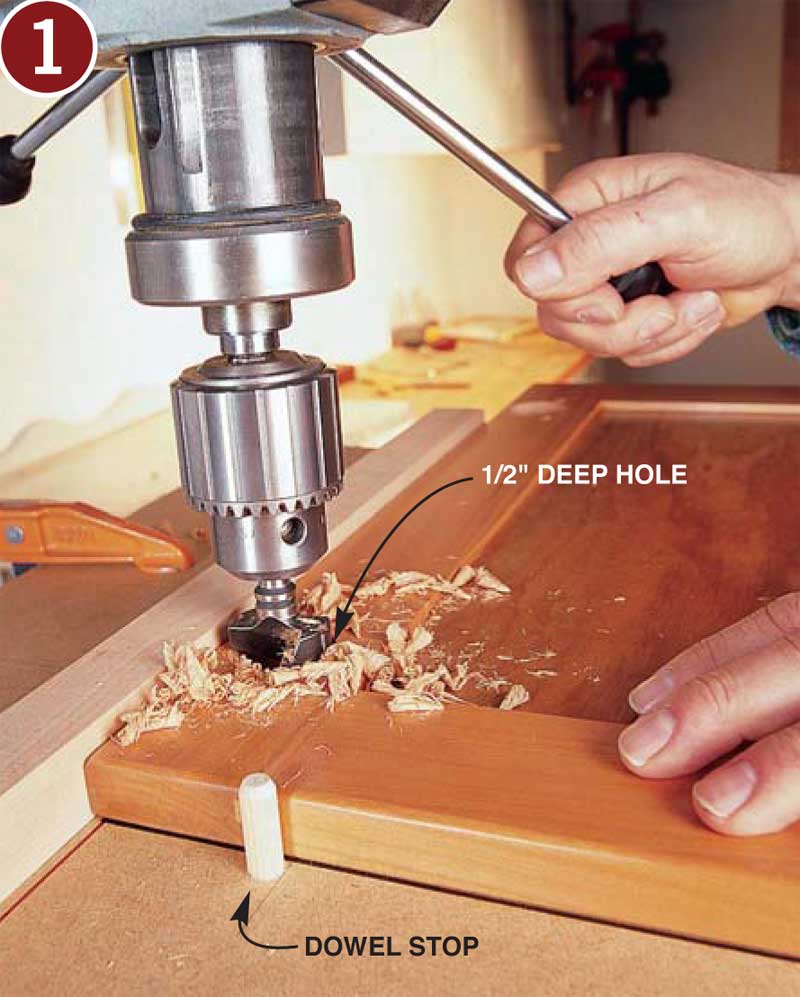
1. Drill a hole for the hinge cup. Clamp the drill press table in position (Fig. B). Hold the door against the fence, butt it up to the pin and drill the left hinge-cup hole. Pull out the dowel pin and insert it into the right hole of the jig.Then drill the right hinge-cup hole.

2. Screw the hinge to the door. First, insert the hinge and use a square to align the hinge’s arm perpendicular to the door. Drill pilot holes into the door using a 7/64-in.Vix bit. (A Vix bit automatically centers the pilot holes at a fixed depth, so you won’t accidentally drill through the door.) Install the screws.The soft pad under the door protects the finish.

3. Drill pilot holes for the baseplate. A simple template automatically locates all four holes (Fig. C).The Vix bit centers the hole,without damaging the template.

4. Fasten the baseplate to the cabinet. Install the baseplate with all four screws. A magnetic bit makes it easier to hang on to such a small screw!

5. Clip the door onto the baseplates. Attach the upper hinge first.This allows the door to hang so it’s easier to handle.

6. Engage the front of each hinge first. Then push on the back of the hinge arm until it clicks in place.
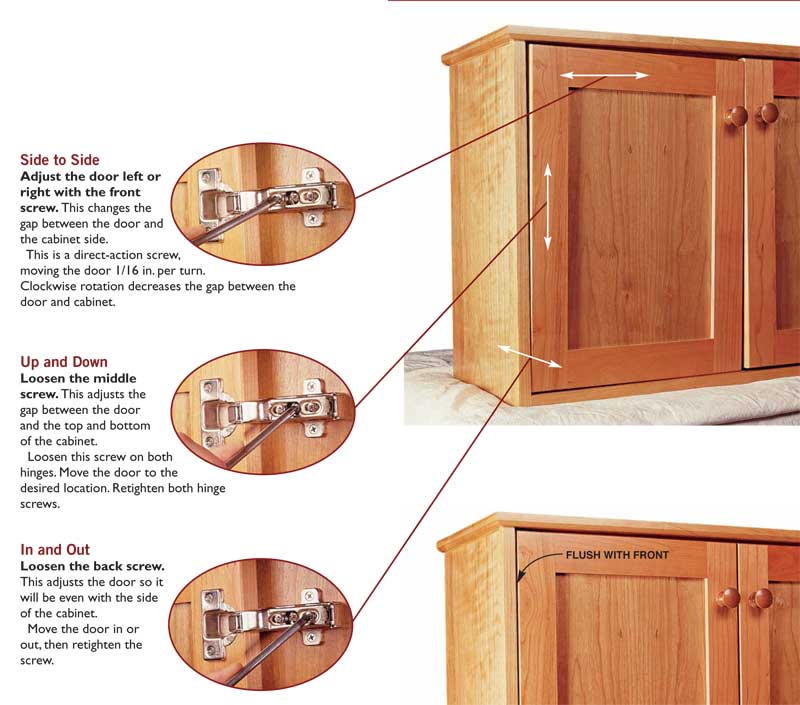
7. European hinges make on-site adjustments a snap. Uneven floors and walls can move doors out of line when cabinets are installed. Imagine trying to fix these misaligned doors if they had butt hinges!

8. Ganz getan (all done!).
Sources
Note: Product availability and prices are subject to change.
Constantine’s, 800-223-808, European hinges are available in 110-degree openings and 165-degree openings.The hinge used in this article is a 110-degree Grass 3704 clip-on hinge with a winged baseplate (Constantine’s Item # CH3700).
110-degree opening hinges:
CH3700, full overlay;
CH3701, half overlay;
CH3702 (Inset).
165-degree opening hinges:
CH3900, full overlay;
CH3901, half overlay;
CH3902 (Inset).
(All include hinge and baseplate.)
35 mm drill bits:
DB35, highspeed steel;
CDB35, carbide.
PoziDrive screwdriver:
CH9800.
Self-centering hinge bit:
VIX1, 7/64 in.
Other sources for European hinges and hardware:
McFeely’s, 800-443- 7937, Mepla brand.
Woodworker’s Hardware, 800-383-0130, Blum brand.
This story originally appeared in American Woodworker October 2000, issue #82.

Here are some supplies and tools we find essential in our everyday work around the shop. We may receive a commission from sales referred by our links; however, we have carefully selected these products for their usefulness and quality.


