


We may receive a commission when you use our affiliate links. However, this does not impact our recommendations.
 It’s hard to separate woodworking from history. Most of the skills we need and tools we use come from earlier times when everyday items that are now mostly plastic or cardboard were made of wood. It’s easy to look back and assume that a tool or process developed for a specialty in the 18th or 19th century makes sense today, or to make the assumption that what one branch of the craft preferred a century ago applies universally. History has a lot to teach us when we find a balance between the good parts of the past and the good parts of the present. We can make better stuff and enjoy the process more. It’s also easy to be fooled into working harder than we need to if we buy into romantic notions or marketing tricks.
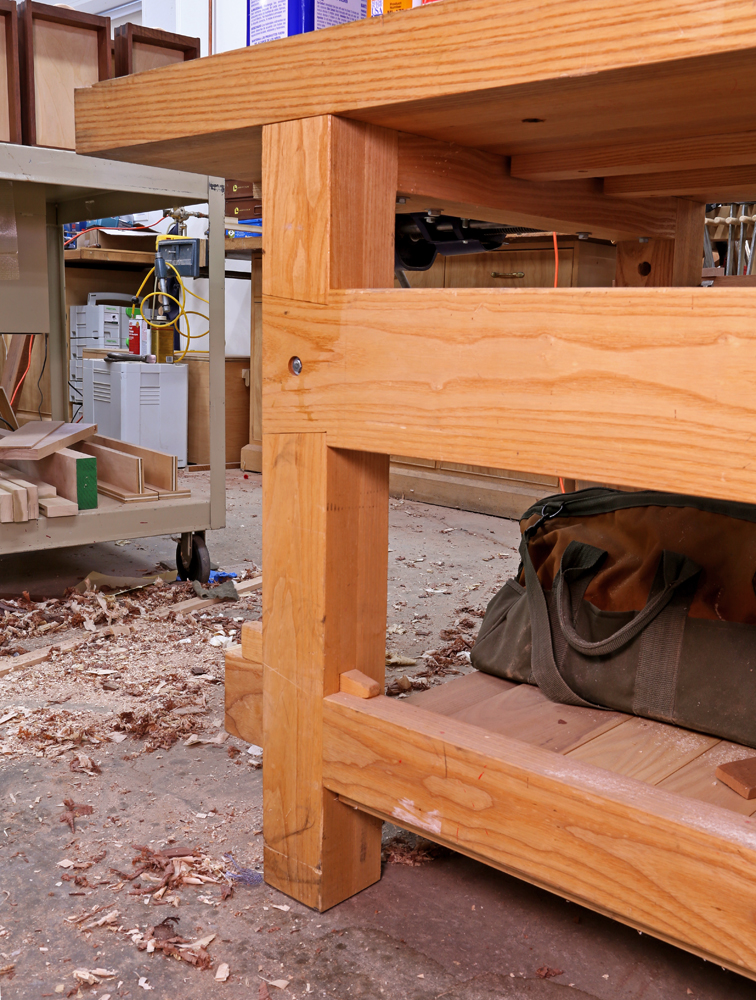
When I designed my workbench almost six years ago, I began by studying historical forms. I ended up adapting those forms to the way I work and the type of work I do. At the time, I had spent more than 30 years working on crummy benches, and I was out to make a bench that would last me for the next 30 years or more. I had two goals that seemed to be at odds with each other; I wanted a rock-solid surface and I wanted to be able to take the bench apart in case I had to move it. My bench has stayed together for the last five years or so, but you never know. I still get a lot of questions from readers about this bench and a good portion of those are about the connections between the long rails and the legs. I lifted the idea of the dovetail form from illustrations of old benches, and it reconciles the desire for stability and mobility.
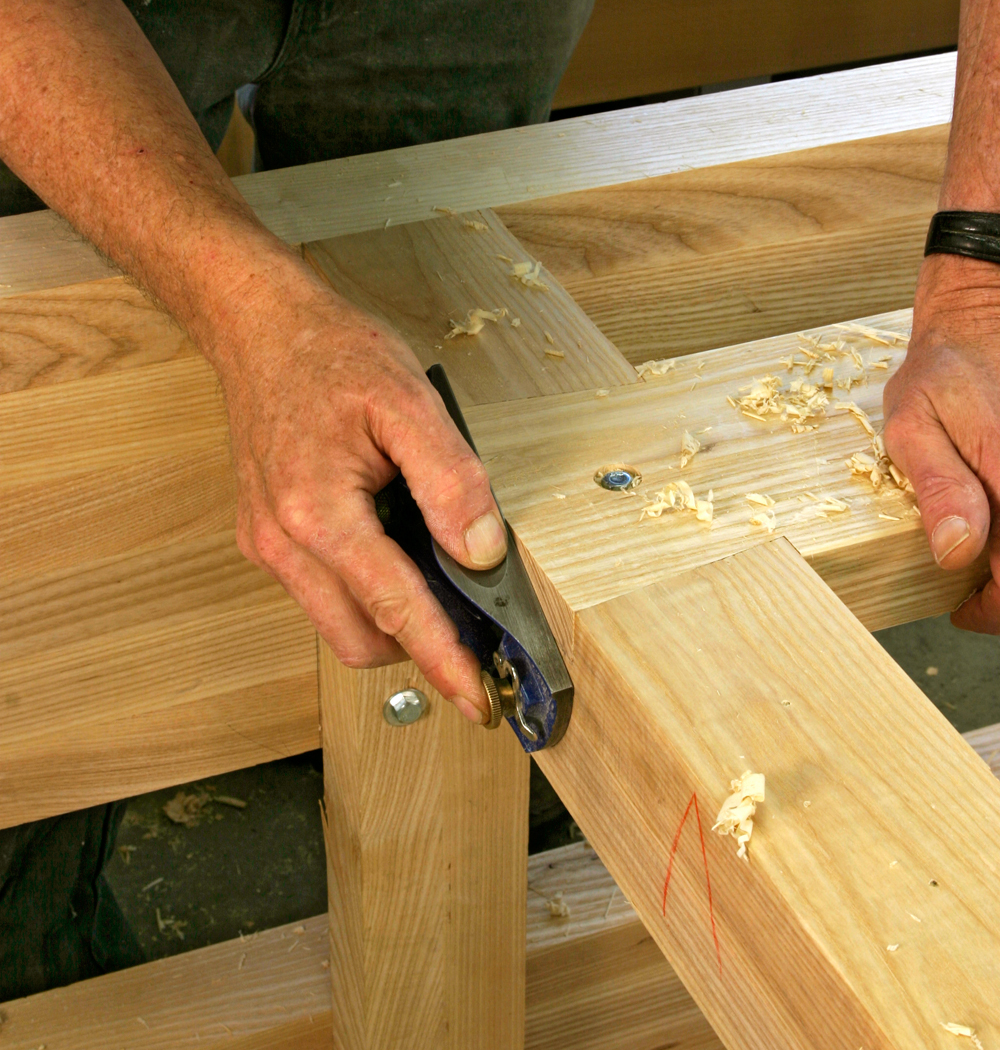 At the upper rail, a single lapped dovetail makes the connection. There isn’t a drop of glue in this joint, it’s all mechanical. In the middle of the tail is a lag screw that keeps the rail from falling out in the event of an earthquake. The rail is about 2″ thick and the lap takes about half that thickness. The leg is a lamination of two pieces of the same stuff, so the socket takes about one-fourth of the leg’s thickness.
For joinery to last, you need to be careful about how much material is removed. If you cut away most of a big honking leg to make a joint, you lose the structural value of the leg and may as well have used a skinnier one.
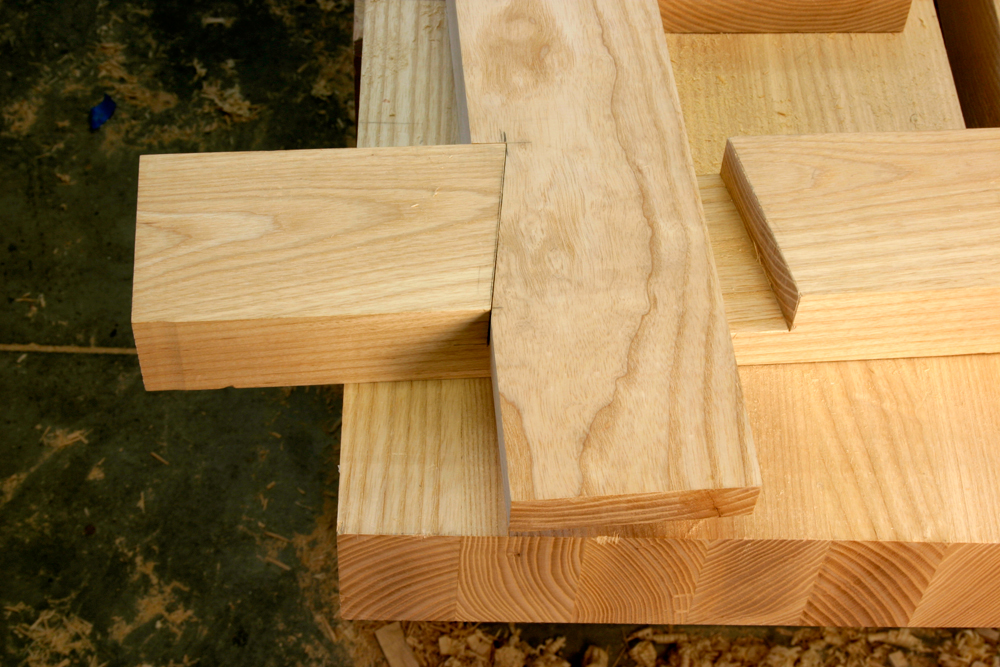 At right is the bottom rail joint as I was working on it. All of the joinery was cut before the legs were laminated. To put this one together in the finished bench, the rail is lifted so the end of the rail passes through the narrow end of the socket. That narrow end is about 1/4″ wider than the rail to make this easy. When the end of the rail is through the other end, it drops down to engage the joint and a wedge is tapped in from the outside.
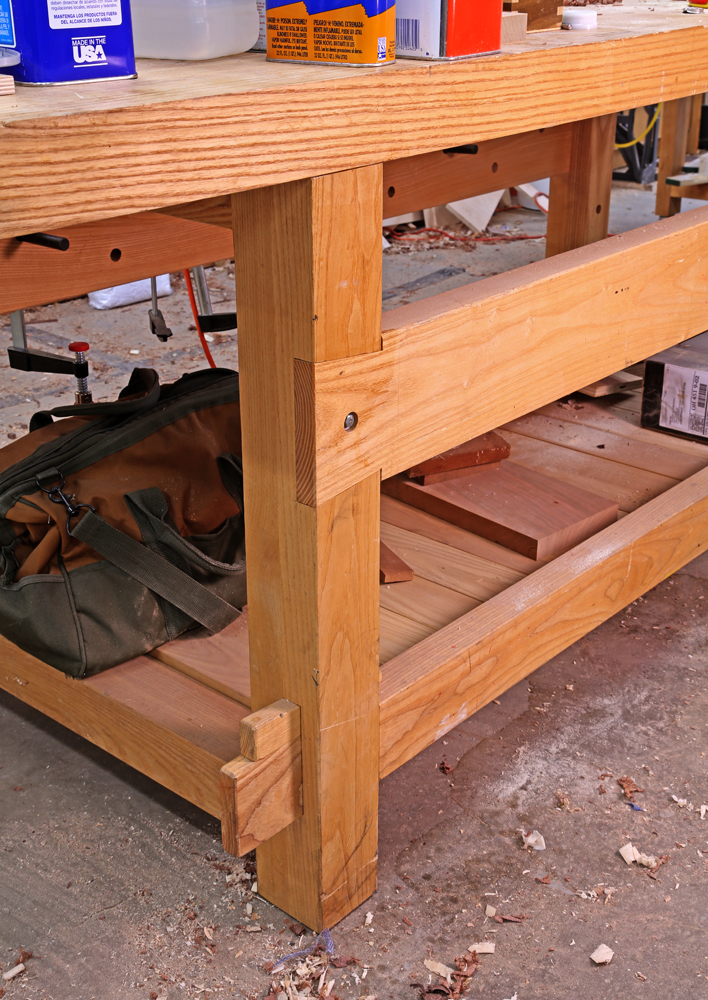 From the end you can see the wedge in place and how little of the leg is missing. In the event that something loosens up, a few taps on the wedges take care of it. The bench doesn’t loosen in use however, and that is the really cool thing about these joints. Most of the stress on a bench in use is in the long direction as in planing. When you push on a dovetail, the joint wedges tighter together and any wobbling stops.
If these were tenons and mortises, any force exerted in that direction tends to pull the joints apart. Yes you can drawbore the joints or bolt them together but there isn’t any wood in the joint itself to resist that force. Over time things start to wear and eventually you have a wobbly bench. The things you can do to a mortise and tenon to resist that might work, but the tradeoff is making the bench more difficult (or impossible) to take apart if you ever have to move the thing down to the basement or up the stairs.
The original article about this bench appeared in the October 2008 issue of Popular Woodworking Magazine. There are also several previous blog posts about this bench, including this one where we take it apart. There is also a video showing how hard we worked to create the cover photograph.
If you want to follow along on the entire build, head over to the store and pick up a copy of the “Build the 21st-Century Workbench” video.
Here are some supplies and tools we find essential in our everyday work around the shop. We may receive a commission from sales referred by our links; however, we have carefully selected these products for their usefulness and quality.


It hasn’t been a problem, but I don’t keep much on the bottom shelf. Mostly parts and extra material on the ends and back side and my bench hook and other jiggery on the front. I see it as an advantage as it limits the amount of junk I can put down there.
I built this bench when the article and plans first came out so I’ve had 5 years experience using it. Overall I’ve been very satisfied. However, if I could make one change it would be to eliminate the top rail (the half-lapped one) on the working side of the bench. By doing this you could easily modify the bench for a sliding deadman – a feature that I sorely miss. I have used my bench with this rail removed and have not had any decrease in the lateral stability – still no racking at all.