


We may receive a commission when you use our affiliate links. However, this does not impact our recommendations.
Simple joinery will keep this piece together for centuries.
Books, papers, lamps, candlesticks, spoons, Legos, clothing, electronics and more all end up on top of any flat surfaces in our house. As a joiner, I have made lots of carved boxes over the years. My family has between four and eight at any given time in our house; I haven’t seen the insides of some of them in years. That’s because of the stuff that gets piled on top of them.
So I decided to make myself a box with no tempting flat surface on its lid.
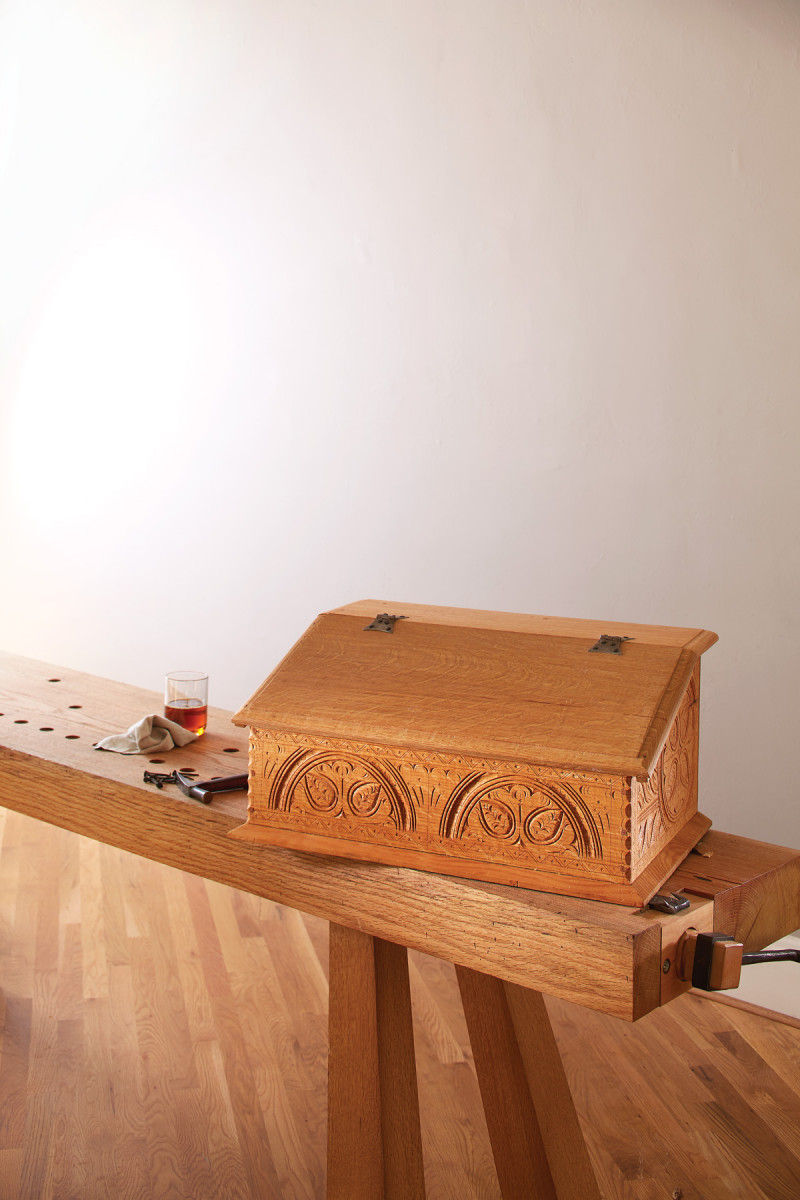
In the early 1990s, I studied a large group of 17th-century joiners’ work that was made in Braintree, Mass., and among this grouping was a piece perhaps known in the period as a “desk box.” But don’t think lap desk – this thing is so heavy and bulky that it would cut off your circulation if you placed it in your lap.
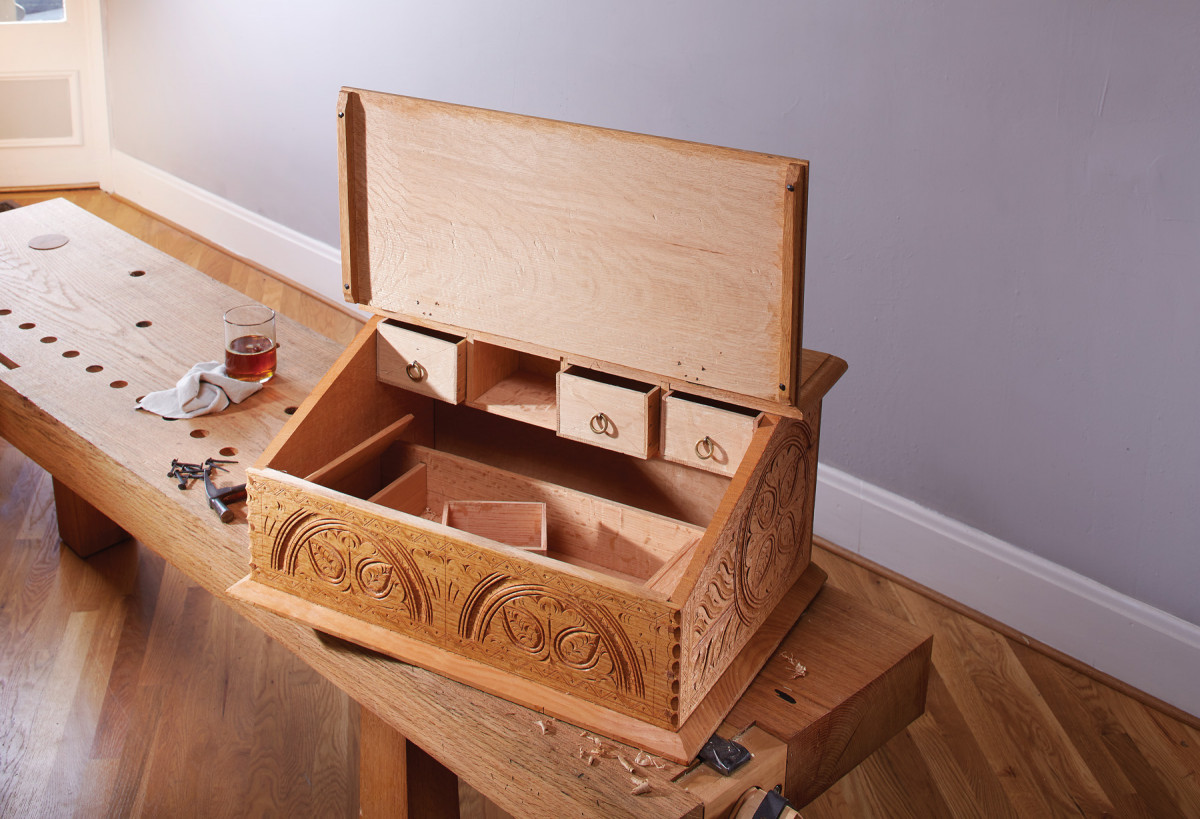
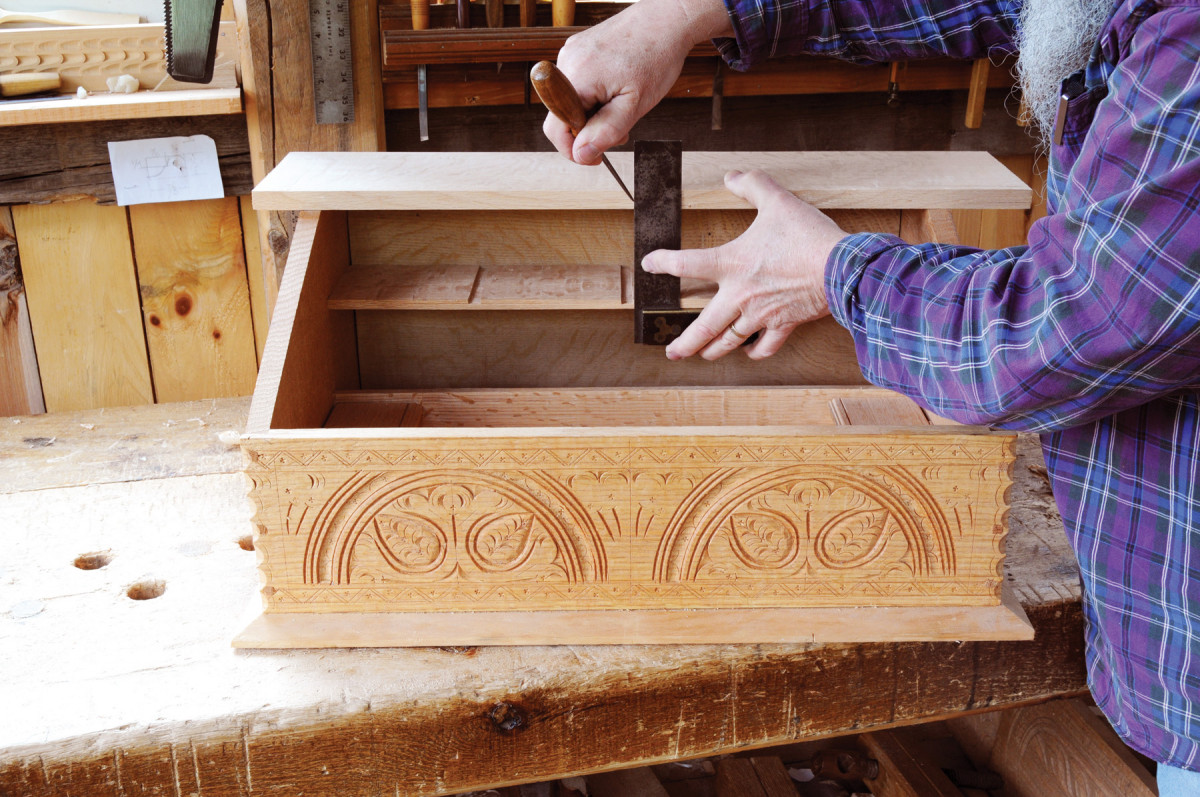
This oak and pine box is outfitted on the interior with a narrow open tray behind two tills, with four small drawers above. Between the tills is an open box area.
The joinery is simple; it’s rabbets at the corners that are fastened with glue and square wooden pins (or “trenails”). The bottom is nailed up to the carcase, and this captures the dividers that define the spaces inside. These are fitted into dados in the sides, front and rear. The hinges on the till lids are pintles.
Green Start
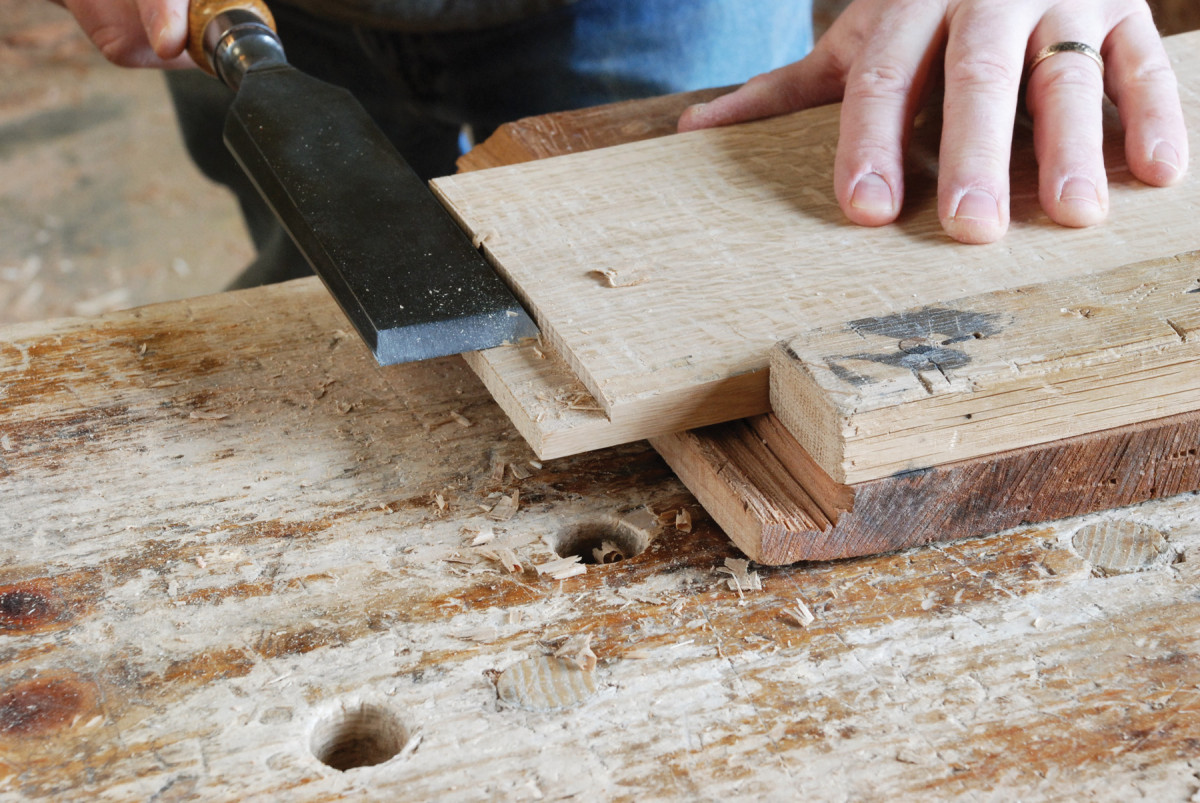
Weighty matters. The weight and mass of a large framing chisel help to keep it lying flat as I pare across the rabbet.
For me, the work starts with riving and planing all the stock from green oak. You can forgo the riving, hewing and planing and use sawn stock instead if you like. Quartersawn is best, but use what you have.
My desk features carved decoration based on the original; I do this work first, before cutting the joinery.
Leave scratches, not graphite. I use an awl and square for striking the layout lines. I abhor pencils in furniture work, but a pencil line sure is easier to see – it’s just harder to remove afterward. The boxes I’ve studied show layout lines remaining after all these years.
Begin by shaping the sides. The shape of these boards determines the slant of your lid, as well as the height and depth of your box. Mine is about 11″ tall overall, slanting down to about 51⁄2” at the front. All this happens over a depth front-to-back of about 14 1⁄2” to 15″. There’s a narrow flat area at the back of the box. This is where the hinges fasten the slant lid to the box.
Carcase Work
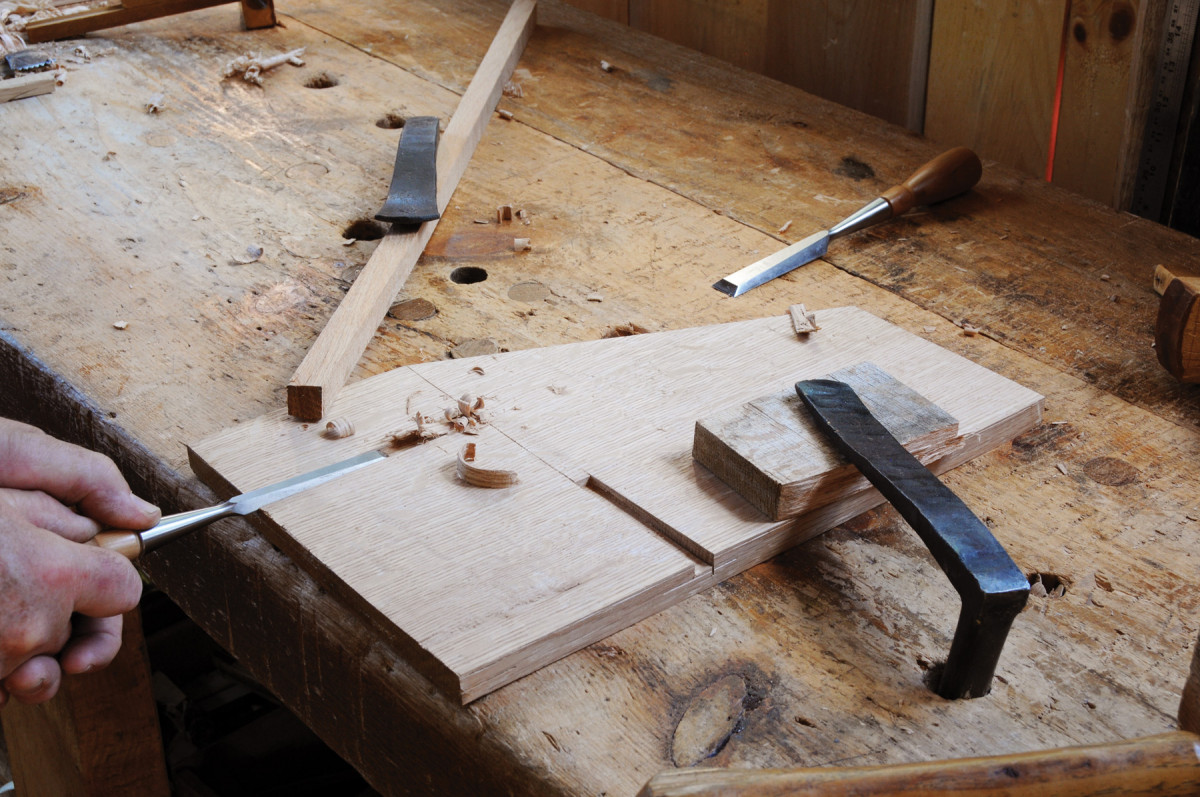
Saw then chisel. You can use a saw only to start the notches. After I’ve gone as far as I can with the saw, I get out the chisel and mallet to chop the end. Then, I use a paring chisel to take it to finished depth as shown.
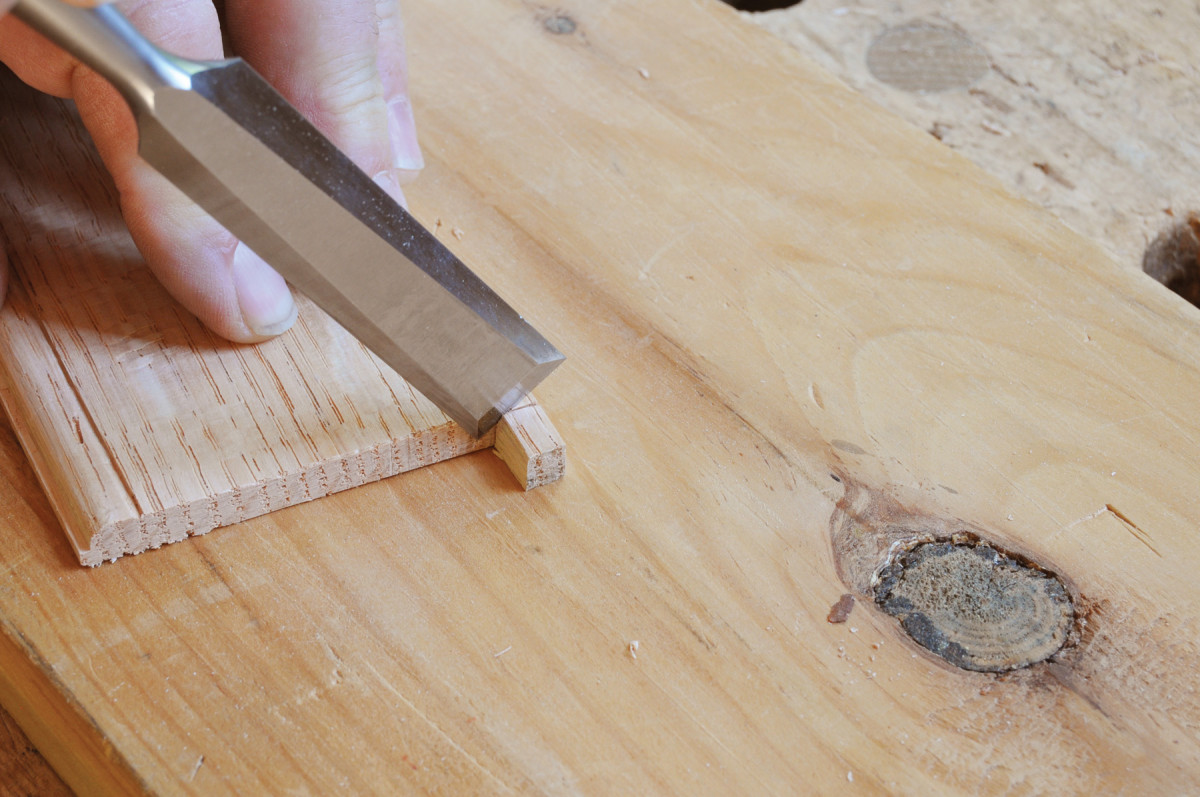
Once the carving is done, I cut the rabbets on the ends of the front and back boards. I lay the front board face down on the bench, then stand each end board in place to scribe its thickness on the front board’s inside face. I use a marking gauge to determine the rabbet’s depth, set to about half the thickness of the board. Then I saw the shoulder down to that depth line.
Because my stock is perfectly clear, straight grain, I split the next part of the rabbet joint. Saw the cheeks if you’re using sawn stock. Once I’ve cut both rabbets, I set winding sticks across them to check that these joints are in the same plane.
Editor’s note: Peter works without measured drawings; the illustrations shown in the article should be viewed only as rough guides for this sort of work.
 Many period boxes are nailed at the corners; this box uses square wooden pins and glue to secure these joints.
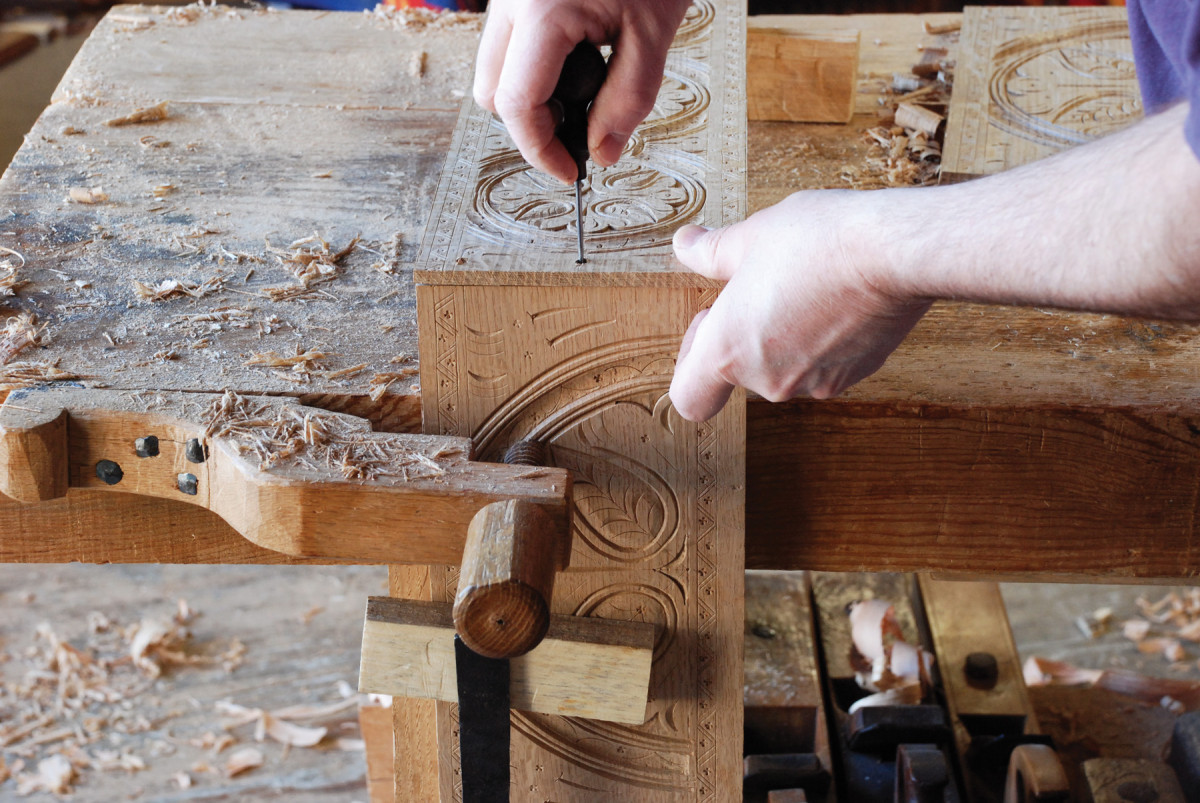
I bore the holes for these pins while I’m working on the rabbets – three holes in each, about 1⁄4” in diameter. Bore from inside the rabbet, which allows you to easily eyeball their location. Keep the holes away from the edges and try to center them in the rabbet’s width. I bore them separately in the front and back, then line these boards up one at a time against the end grain of the side. From there, I scribe where the holes fall on the side’s end grain, remove the front (or back) and bore the end grain. You could clamp the whole carcase together and bore the test-fitted joint, too.
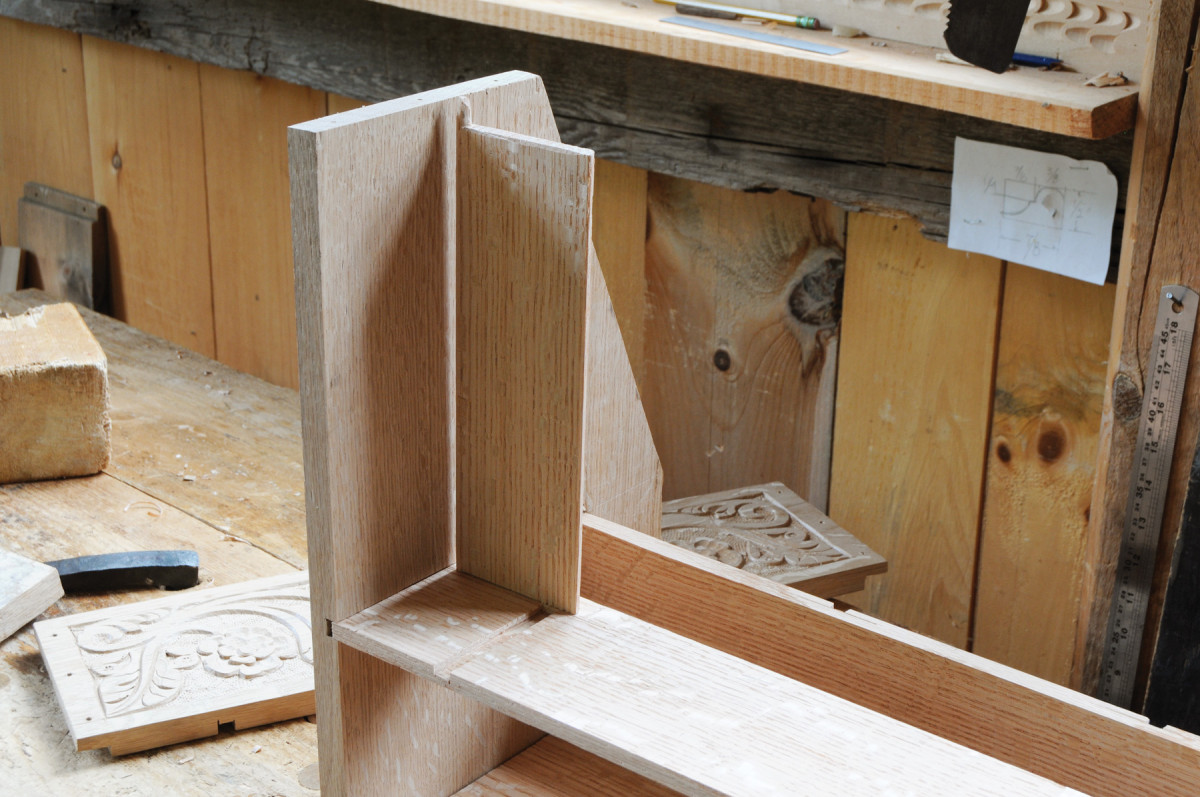
Dividers, Tills & Pintles
Pintle shoulder. Form a shoulder for shaping the pintle hinge round by pressing a chisel into the corner of the square pintle.
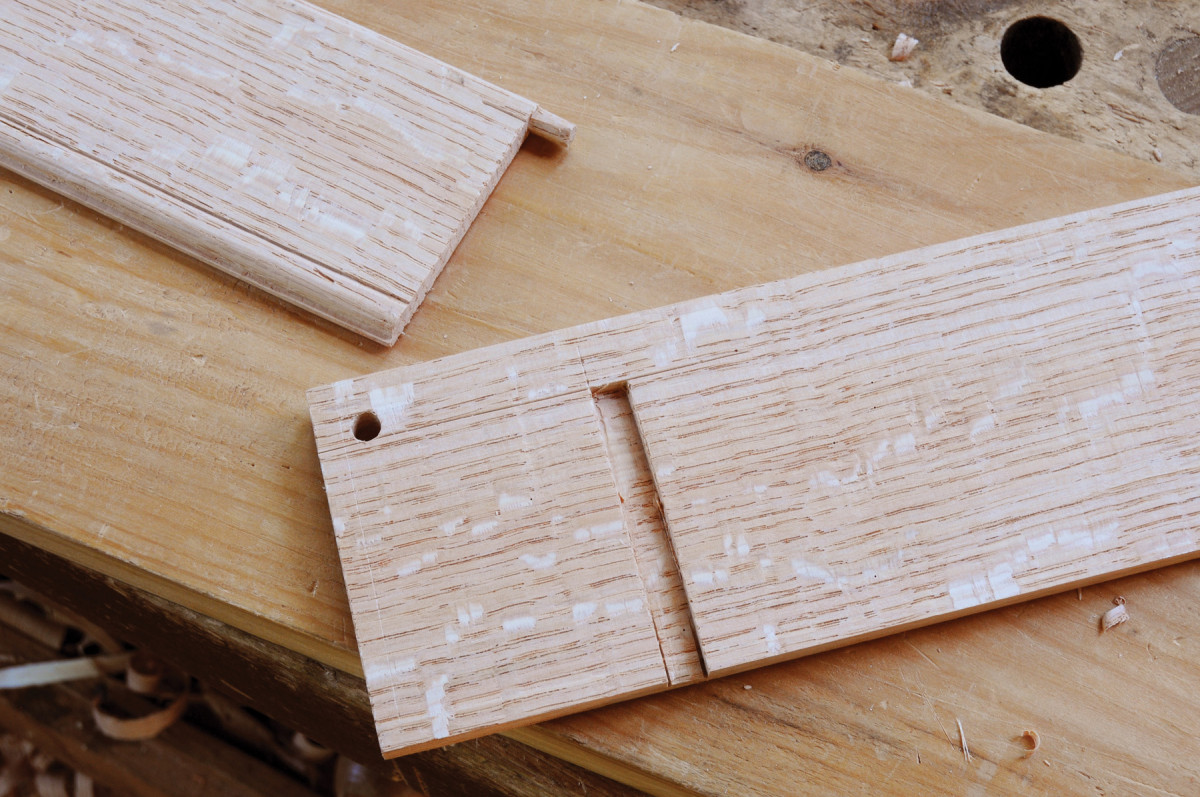
After those holes are bored, lay out the dados for the back of the tills and the shelf under the drawers. These cuts are done on the inside faces of the side boards. I lay a square from the bottom edge of the box side, and scribe a line up to the point where the flat top begins its slant toward the front.
This one scribed line becomes the back of the dado for the tills’ backboard and the front edge of the drawers’ shelf. I make these dividers from stock planed to about 3⁄8“, so for the tills’ back, I come forward by that amount to scribe the line that marks the front of this notch. The height of this notch in my box is about 3 1⁄2“.
Pintle & till locations. Here’s one end of the till backboard, showing the notch for the till side and the round mortise bored for the till lid’s pintle hinge.
Locating the height of drawers’ shelf can be worked out a few ways. One thing to consider is that if it reaches too low, there’s little room to get your hand in under it to reach the rear tray behind the tills. If it’s too high, the drawers will be pretty shallow.
Here, use the marking gauge from the top flat edge of the box’s sides. Once these notches are laid out I use a backsaw and chisels to chop them.
Backtracking saviour. Forgetting to bore this hole before rabbeting means you must clamp some stock in the rabbet so the bit doesn’t slip down in there. It’s clumsy but manageable.
I tend to go back and forth, through many test-assemblies in making something like this box. Next, I test-fit the whole carcase together so I can determine the length of the drawers’ shelf, and the backboard to the tills. I usually use a folding rule to measure these inside figures, from the bottom of one notch across the box’s width to the bottom of the corresponding notch on the other end. Another way is to use two narrow sticks, each longer than half the box’s width. Shove a stick into each notch, and pinch them together where they overlap. Then tilt them out of the box, without losing that pinched grip. This is the length you need to cut your boards. It should be the same for both the tills’ back and the drawers’ shelf, or very close to the same.
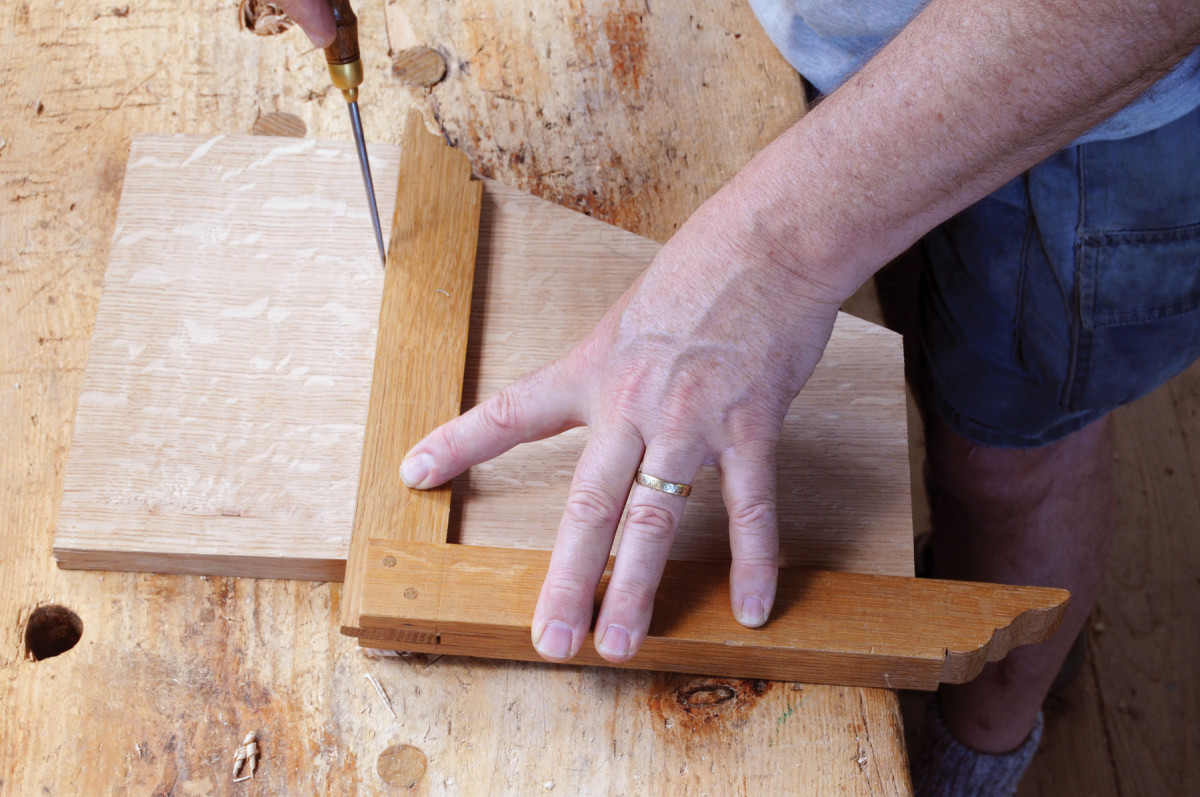
Pin locations. Here I’m working on a standard box (no slanted lid), but the method is the same for marking the bored holes for the square wooden pins.
Plane this stock to 3⁄8” thick, then work it to finished width to match the notch. Finally, trim it to length, then try to knock the carcase together with these pieces in place.
My notch-cutting and planing always leaves room for adjustment; a final trim on the ends usually gets these things so they will fit, and the box’s joints will close. Once I’m satisfied that everything fits as it should, I scribe a line across the tills’ back, right where the board fits into the carcase. This will help locate the holes for the till lids’ pintle hinges.
Shave while driving. I love when I’ve sized the pins just right; the corners of the pin are shaved as I drive it into the joint. That’s a perfect fit.
Both of these boards need some work. The shelf has notches for the drawer dividers; the till back gets notches for two till sides, and holes for the pintle hinges. It doesn’t matter which one you do first. The drawer dividers are a bit thinner than the shelf and till back, 5⁄16” this time. I laid out the dividers so the drawers were close to equal sizes. Mine has three dividers and four drawers, based on the format of the original. These notches are cut all the way across this board, so they’re easy to saw and chisel.
Same sequence. In this version of a desk box, I’m nailing the joints – but the sequence of assembly is the same. The shelf for the drawers must be in place before nailing or pinning the rear joints.
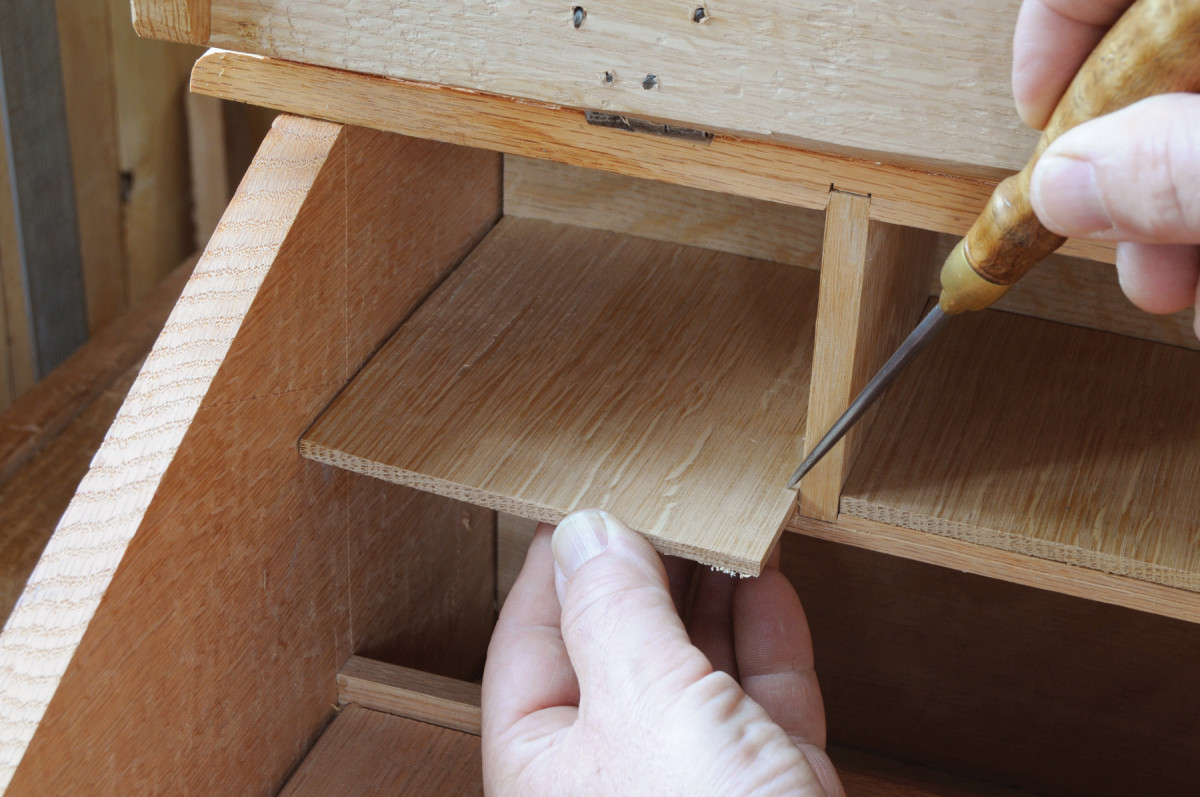
On the till backboard, mark out the pintle hole and the notches for the tills’ sides. The pintle hole needs to be dropped down from the top edge, so there’s wood above the hole. My oak till lids are 5⁄16” thick, so I come down that much again before the hole. I scribe a line 5⁄8” down from the top edge. This line marks the top of the till sides’ notch, and the bottom of the pintle hole. The till lids overhang the till sides, so you can slip your finger under the lid and lift it up. Thus the till lid’s width determines the placement of the notch for the sides.
To lay out the till sides’ notch, use the till lid width from the scribe line on the tills’ back, minus about 1⁄4” for the overhang. That’s the outer edge of the notch. I make it about 5⁄16” wide. It’s a stopped notch like the first ones, so that means more saw and chisel work. There are related notches in the box front’s inside face for the other end of the tills’ sides. You can locate these any number of ways; I find the simplest is to lay the tills back and the box front with their bottom edges butted together, and scribe the marks from the back to the front.
Check the direction. As you slide the till backboard in place, make sure the notches for the till sides are facing in the right direction.
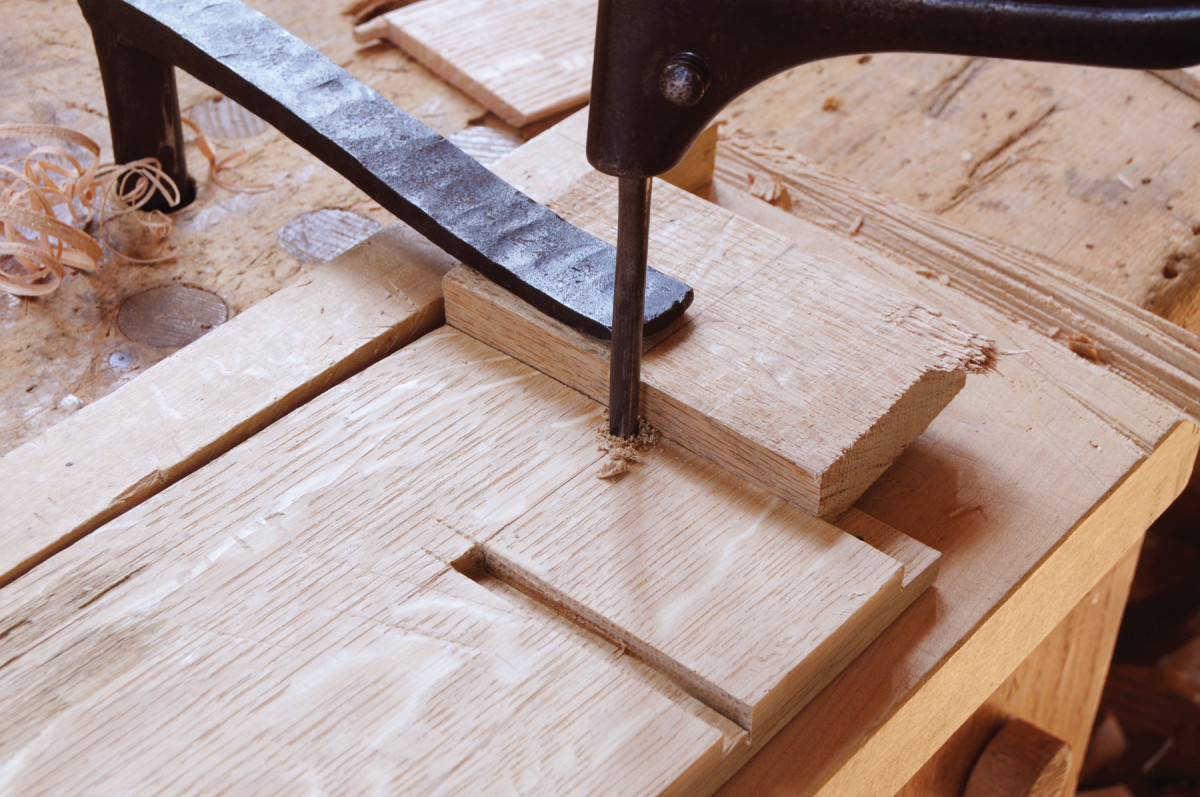
Bore the mortise for the pintles right against the box sides. Because I’ve already cut the rabbet, the bit will wander into the joint, making a mess of things. To resist the bit’s tendency to wander, I clamp a piece of scrap in the rabbet. This is only an issue on the box front, not on the tills’ backboard. The mortise in the back can go all the way through; that depth in the front is only about 3⁄8“.
Another test-fit gets the length of the till sides and the lids. Planing and fitting the sides is easy; get the length and cut the piece to fit. They can slip up from below quite easily. The till lids need an extension at each end – the pintle or hinge.
After scraping a moulded edge on the till lids with a scratch stock, I mark the length of the lid with enough excess at each end. I mark the pintles’ width using a marking gauge, aiming for about 3⁄8“, then saw this out, leaving square extensions at each end. Then, using a chisel, round the pintle by chamfering it bit by bit.
Put a lid on it. Drop the till lids into place before installing the box front. I never trust that they are interchangeable, so I keep track of right and left.
I press the chisel into the wood to make a hint of a shoulder, then pare toward this cut. It’s good to have a test hole to try your progress as you go. Aim for an easy fit; this lid wants to swing open freely. I also chamfer the whole length of the till lids’ hinge edges. Rounding this over, top and bottom, helps it swing open.
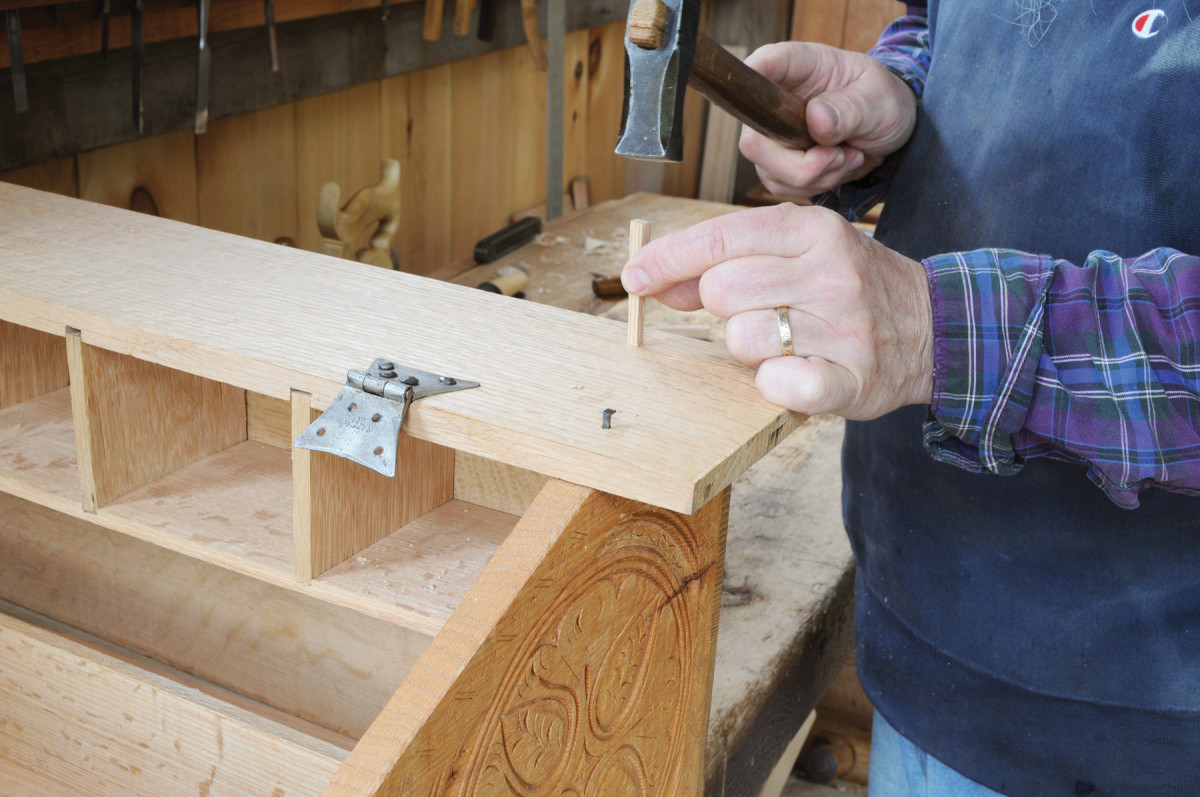
I mark the pin holes on the sides’ end grain by testing the joint, then marking the location on the end grain. Mark each joint, then bore the holes. I use square, untapered wooden pins to secure this glue joint. Most period boxes are nailed at the corners, in which case the glue is not necessary.
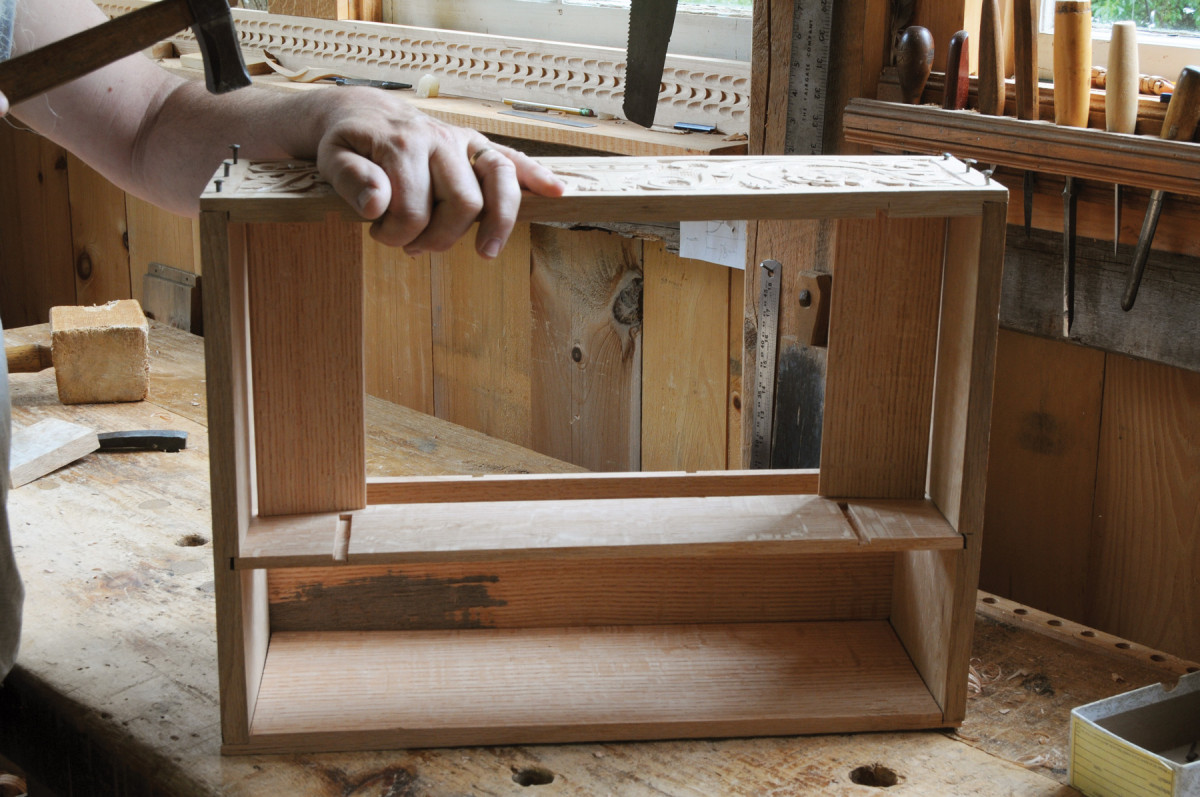
Payoff. All the test-fitting now pays off – there should be no excitement during final assembly.
The pins are shaved from dry, riven stock. It’s worth taking the time to test this joint if you’ve not pegged this sort of thing before; you don’t want any surprises once you’ve spread the glue. And the last thing you want to do is split the box parts during assembly.
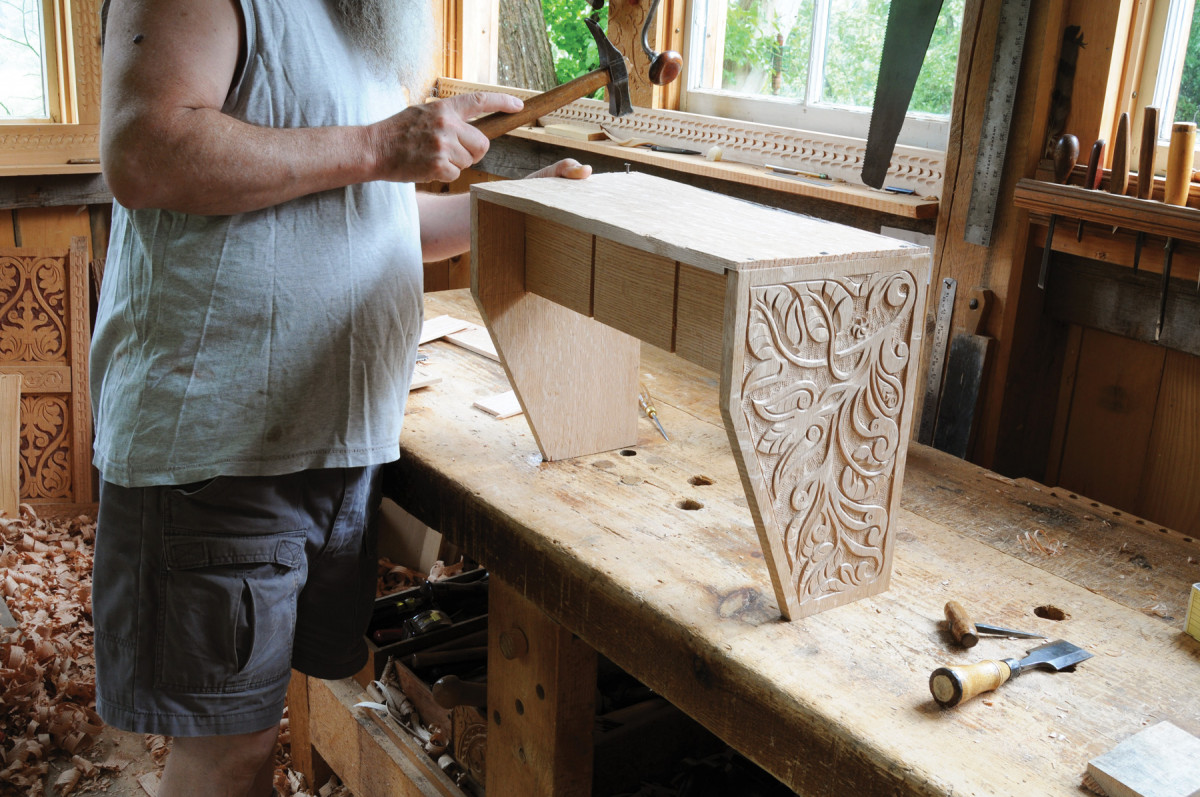
I glue and peg the back and sides together, with the drawers’ shelf fitted in place first. Glue the rabbets and the end grain, then drive the pegs. Then trim them flush.
Lay this sub-assembly on its back and slide the till backboard up in its notches. Slip the till lids in place (the till sides can go in afterward) then drop the box front onto the till lids and the box sides. Glue and peg as you did before.
When everything is pegged and trimmed, check that the box is square.
The till sides slide in from below, and the bottom will keep them in place. So make them slide in easily, but tight enough to not rattle around.
Add the Bottom
Hole-y. Be sure to bore pilot holes for the nails that attach the bottom to the carcase; otherwise one or both of the parts could split.
I make the bottom from a single white pine board. Plane it to about 5⁄8” to 3⁄4” thick, leaving it longer and wider than necessary.
Once it’s ready, set the box on the board, lining up the rear edge of the bottom flush with the back of the box. Then mark the position of the box on this face, with an overhang of about 3⁄4” side to side and at the front. I tend to scribe both the inside and outside of the box’s “footprint” so I can readily see where the nails go to fasten the bottom to the box.
Remove the box, lay out this overhang from the box’s outer perimeter, then cut the board to size.
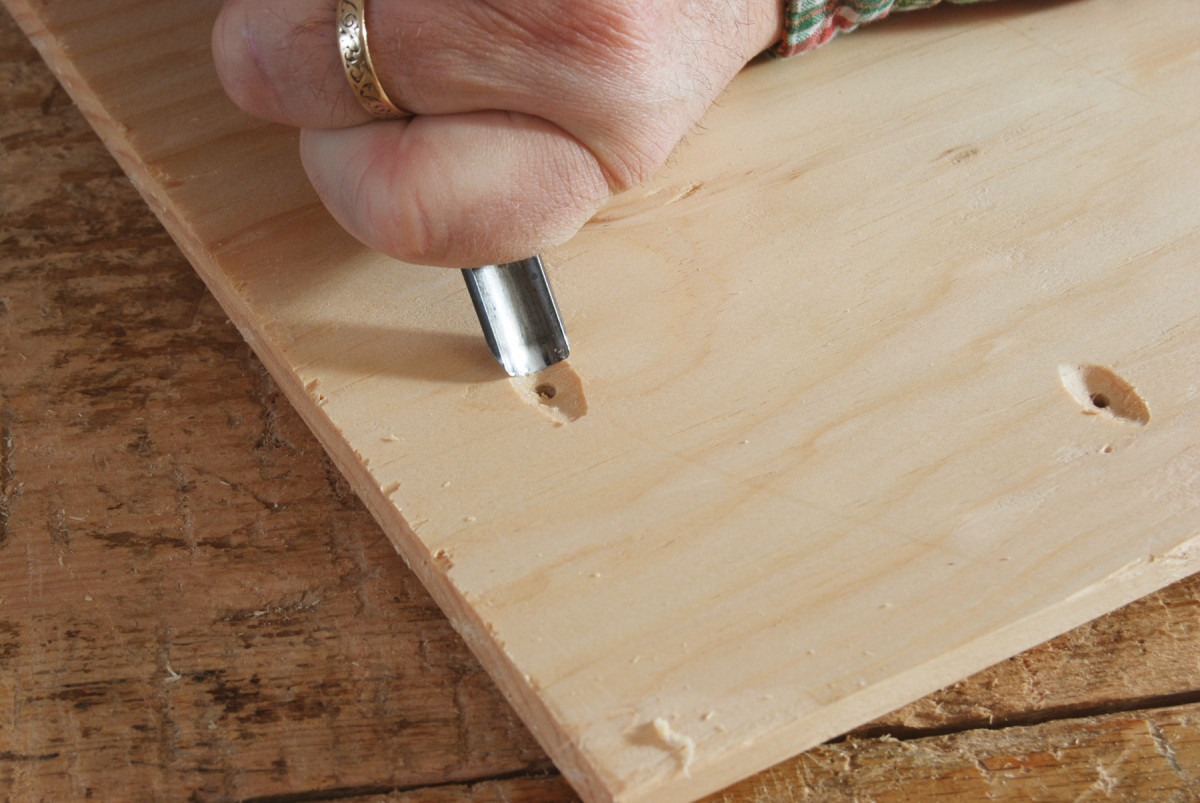
Scoop. Use a gouge to cut countersinks for the nail heads on the underside of the box bottom.
Plane a chamfer on the ends and front, from the box’s edge to just about the edges of the bottom. Then bore pilot holes for the nails that will fasten the bottom in place. I use two nails in the short ends, three in the front and back. Replace the box in position on the bottom and, with a fine awl, prick marks into the box’s bottom edge for these nails. Bore a smaller pilot hole partway into the oak box parts. Then use a gouge to cut a small countersink on the underside of the bottom for the nail heads.
Put everything in position, then nail the bottom to the box. Make sure the till sides are in place, and that the overhang is on the front, not the back!
Top & Lid
Transfer marks. After assembling the carcase, transfer the locations for the drawer dividers to the flat top of the box.
Now turn to the piece I call the top – the flat section that is fixed to the top edges of the box sides and back. The lid is the slanted piece that is hinged to the top. Size the top so there’s an overhang on the back edge and the ends. For the first step, it’s even better to have it extra long. I either clamp or temporarily peg it in place to scribe the placement of the notches for the drawers’ dividers.
Only temporary. A nail temporarily holds the top in place as I drive the wooden pins to secure it.
Line the top up so its front edge is in the same plane as the front edge of the drawers’ shelf. While you have this board in place, bore the holes for square wooden pins that will secure it in place. Then use a square and awl to transfer the notches in the shelf to the top. Mark the finished length, too, allowing for about a 7⁄8” overhang on each side. Remove the board and cut these notches with a saw and chisels. You can cut a thumbnail moulding on the short ends, too.
Before pegging this top in place, attach the dovetail hinges. It’s easier to clinch the nails on the underside when it’s a loose board.
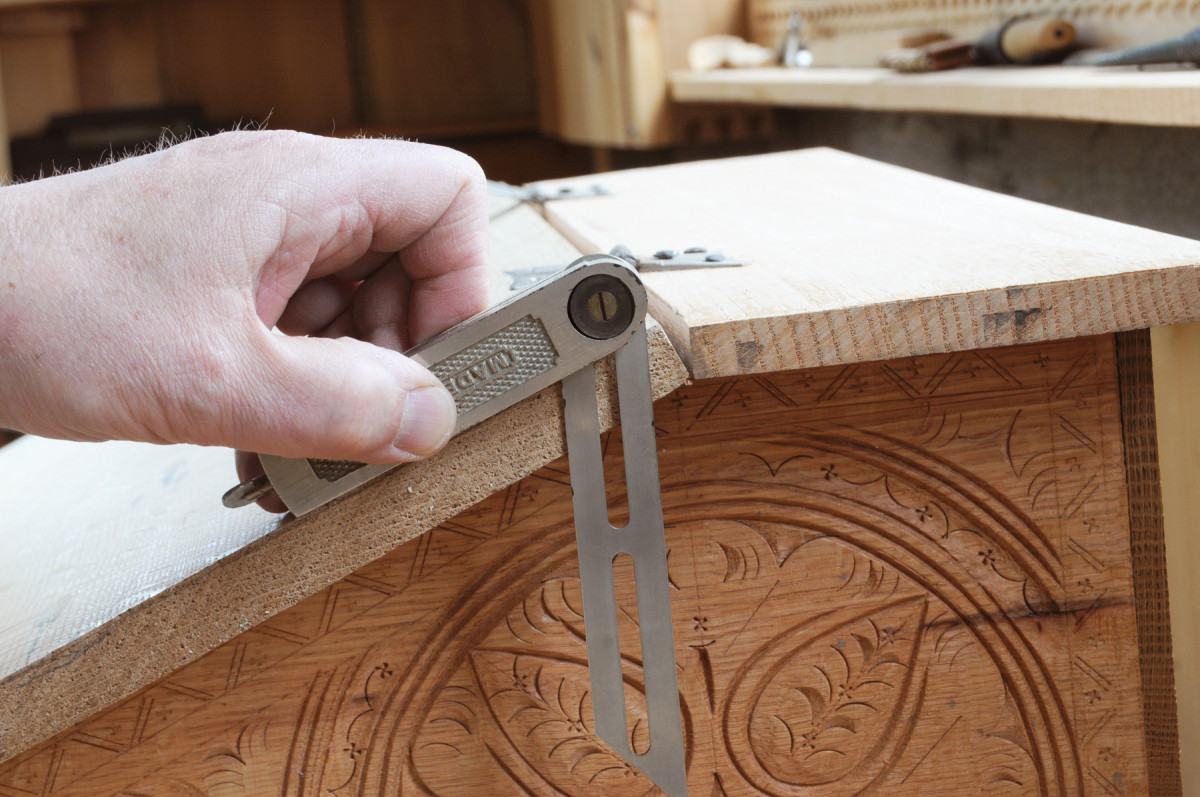
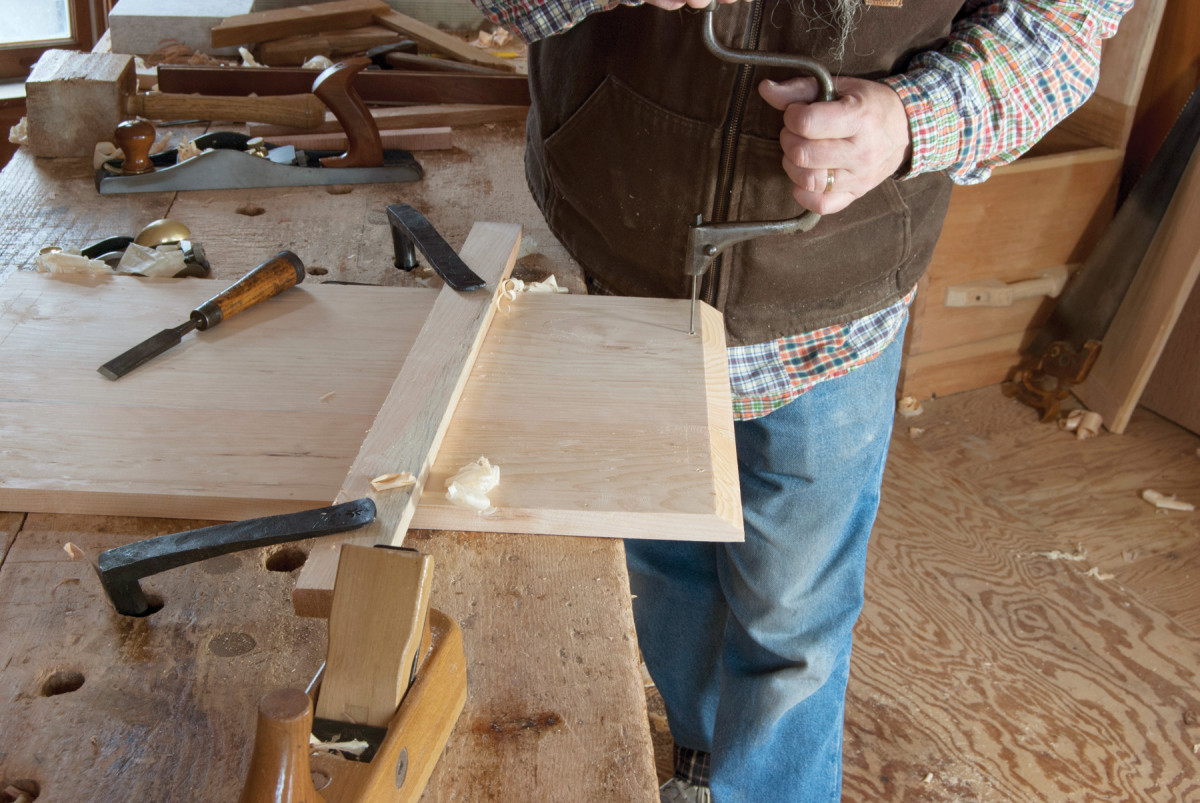
In my sights. I sometimes use an adjustable bevel gauge to sight the angle I need to plane onto the lid’s edge. Sometimes I eyeball it.
The hinges shown here were made by blacksmith Mark Atchison. You can buy manufactured dovetail hinges, but I encourage you to get to know your local blacksmith.
Chop a slight recess for the thicker part of the hinge’s leaf, making sure to align the barrel or pin of the hinge along the arris of the top board. Then bore pilot holes and drive and clinch the nails through the hinges.
I usually clinch the nails by placing one of my steel bench dogs under the place I’m nailing. When things go right, the nail bends as it exits and hits the bench dog. Or you can drive the nails through, turn the piece over, and back up the head of the nail and hammer the tips back into the oak.
Peg the top in place with square un-tapered pins, much like you did the rabbet joints. Two pins in each short end, three in the long edge.
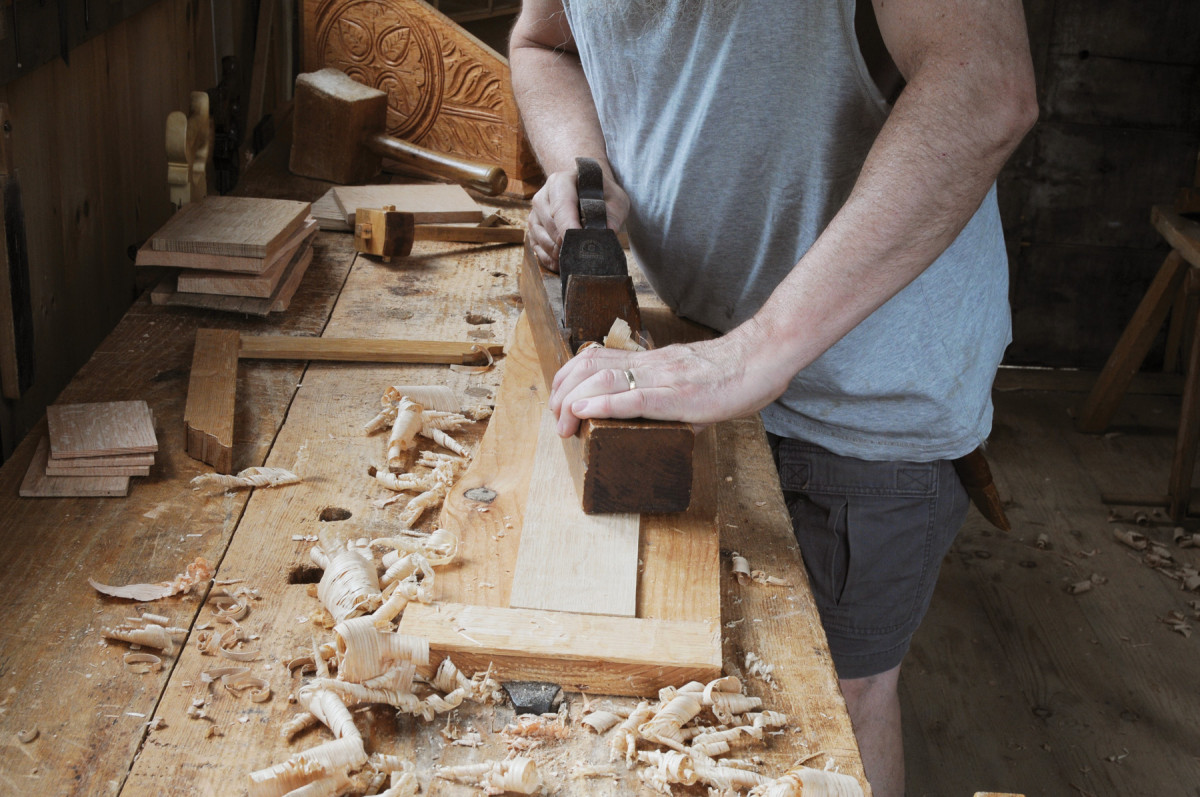
Flat helps. Planing thin stock is in some ways the most challenging part of this project. It helps to have dead-flat radial stock.
The lid is a wide oak board, beveled on one edge to meet the top at an angle. I start with the board wider than I need, and work the bevel first. Then I trim it to length and width, leaving an overhang on the ends and front edge. You can figure the angle with an adjustable bevel or just wing it.
I cut a thumbnail moulding on the ends to match the top board, and nail cleats to the lid’s underside to help stiffen it and keep it flat. The nails securing these come from below and are clinched on the top of the lid.
Place the box lid in place and scribe the location of the hinges. Cut a recess just like before and bore pilot holes for the nails. Driving these nails and clinching them is tricky business, because now there’s a large bulky box in the way. Patience.
Fit & Make the Drawers
Size to fit. Fit each drawer bottom into its opening first. Here, I’m scribing the length.
All that’s left now are the drawers. I based mine on some from a cabinet made in the 1680s. These drawers are made from very thin stock, maybe 3⁄16“, and are nailed together with headless wire brads. The bottoms are nailed up to the bottom edges of the drawer.
Planing the thin stock can be a challenge; I made a planing board for just this purpose. It’s a long piece of pine with a thin oak slat glued across it. The slat serves as a planing stop for the oak stock. I jam the whole thing against the planing stop on my bench, then carefully work the thin oak boards.
Hair-raising woodworking! These thin parts are easily split. I have a scrap of oak under the drawer front to keep from breaking it to pieces as I clinch the wire tails that fasten the pull.
The drawers’ sequence is: bottom, sides, front and back. The bottom board fills the drawer opening, so I scribe its width and length according to the opening. Then I cut this, fit it in place and make the sides to sit on top of the bottom, and slip into the openings. Everything is scribed, not measured. It might be (probably is) that each drawer is a different size. They are quite close, but my work is never exact.
Once I’ve cut the sides to size, the fronts and backs, which are the same height, are scribed and cut to fit between the sides.
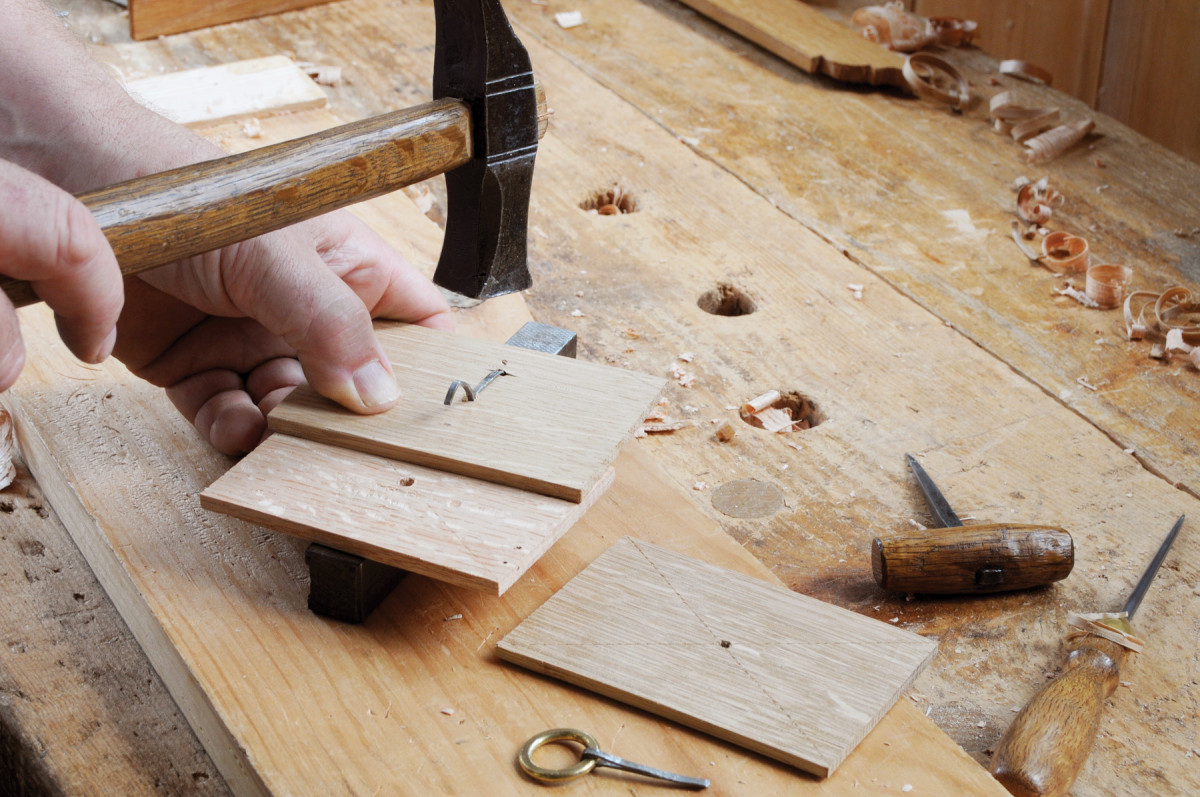
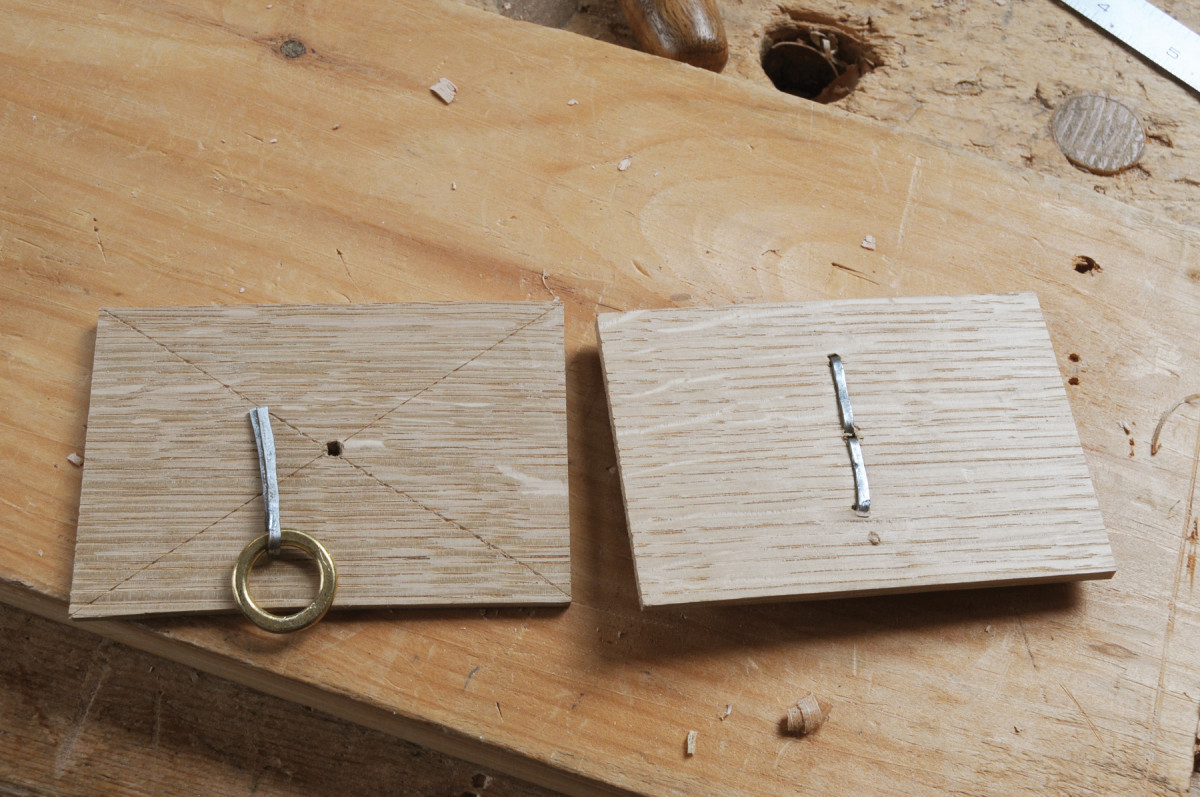
Then come the drawer pulls. Install these before assembling the drawers. I use brass curtain rings for the pulls, and they are held in place with wire wrapped around them and driven through the front, then clinched inside.
Nailed it. Clinch the wire brads down into the grain of the oak drawer parts. This is what I get for copying period work.
Scribe an “X” on each drawer front, or otherwise mark the centers. Bore holes for the wire. Fold the wire through the curtain ring and drive both tails through the hole. Then bend them over, and drive them into the oak.
I use thin wire brads to assemble these drawers. Bore a pilot hole using an eggbeater drill and a bit made by snipping the head off one of the wire brads. These pilot holes are way out near the edges of each board, and there is little tolerance for error. Drive the brads in, leaving about 1⁄4” standing proud. Snip the heads off, then bend them over and drive them into oak’s grain. Done.
The finish (on the outside only) is linseed oil thinned with turpentine. You could choose to paint the entire outside or use paint just to highlight your carvings.
Here are some supplies and tools we find essential in our everyday work around the shop. We may receive a commission from sales referred by our links; however, we have carefully selected these products for their usefulness and quality.


