We may receive a commission when you use our affiliate links. However, this does not impact our recommendations.
Work miracles on wood with oxalic acid.
Watering a potted plant can be disastrous if the plant lives on top of something made out of wood. We’ve all seen the white spots and black rings that can result when water seeps through the pot. And if you’ve ever tried to sand out these marks, you know it’s a tough job that can leave telltale depressions on the surface. Fortunately, in many cases, this type of damage can be almost magically undone by treating the wood’s surface with oxalic acid.
Oxalic acid removes the gray color from oxidized wood, without changing the wood’s natural color. That’s why it’s commonly used as the active ingredient in deck cleaners, and why restorers use it to remove gray or black water stains on furniture (see “Oxalic Acid Undoes Rust,” below). Oxalic acid is also used in some household cleaning products for removing hard water stains, and it has many industrial uses as well. Although it is found as a natural ingredient in some vegetables (spinach and rhubarb), oxalic acid is quite toxic if ingested in concentrated form.
Identify the stains
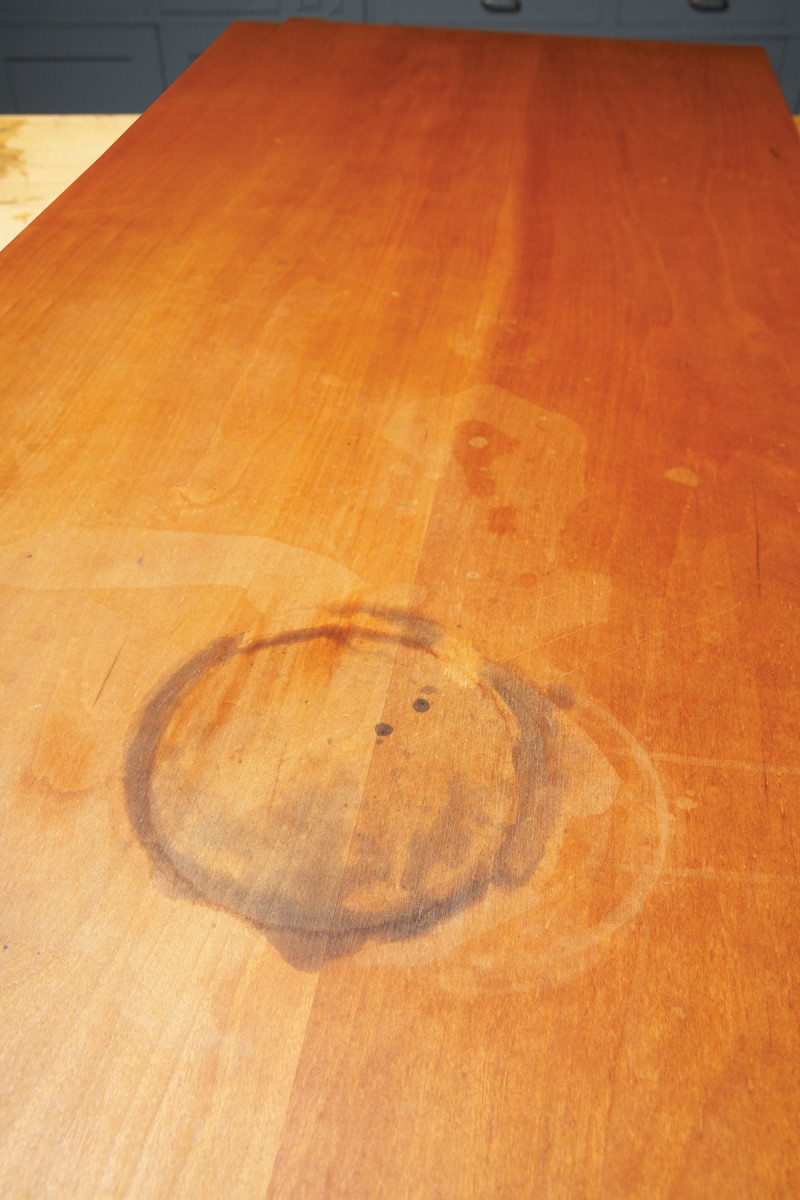
Every finish repair job is unique, of course, so the first step is to thoroughly examine the problem. The chest lid shown here has both whitish marks (also called blushing or bloom), and dark gray and black discolorations. White marks are usually in the finish; dark discolorations from water indicate more significant damage, because they’re down in the wood.
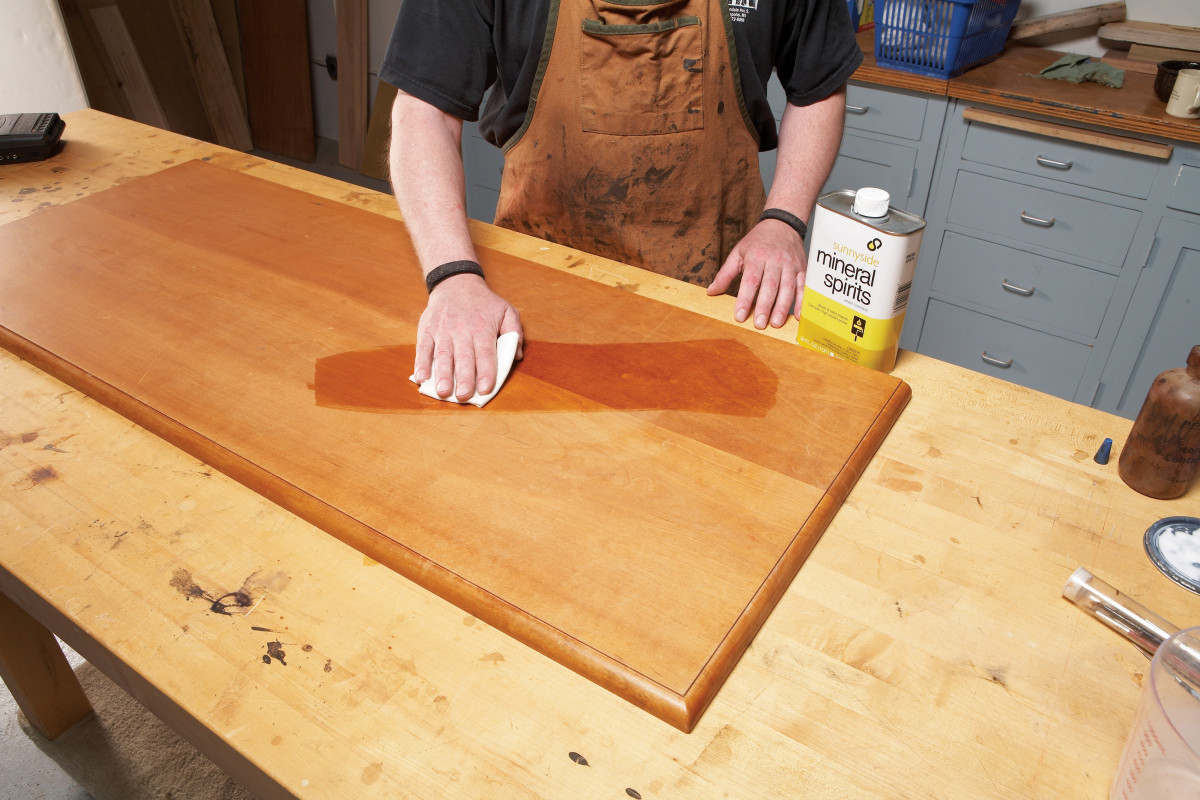
To help formulate a plan to repair this finish, I dampened the entire lid with mineral spirits [Amazon] (paint thinner). This testing method is useful anytime you want to look closely at either old dry finish or bare wood. The look of the paint thinner-dampened surface is similar to how it would look if shellac or a clear oil based finish were applied. In this case, dampening the surface makes the whitish marks temporarily disappear (they reappear when the mineral spirits evaporates). That means a coat or two of finish is all that’s needed to take care of the white marks. (This is a stroke of luck; if the white marks hadn’t disappeared, additional repair steps would be necessary to remove them, and that’s a topic for another story.)
Now I can focus on the black rings. The mineral spirits test shows that they get darker, and that makes them good candidates for treatment with oxalic acid. If the oxalic acid works, I won’t have to aggressively sand the entire lid. Not only would sanding remove the remaining intact finish (80%, in this case), it would also lighten the lid’s aged cherry color, so it would no longer match the rest of the chest that it belongs to.
Treat the stains
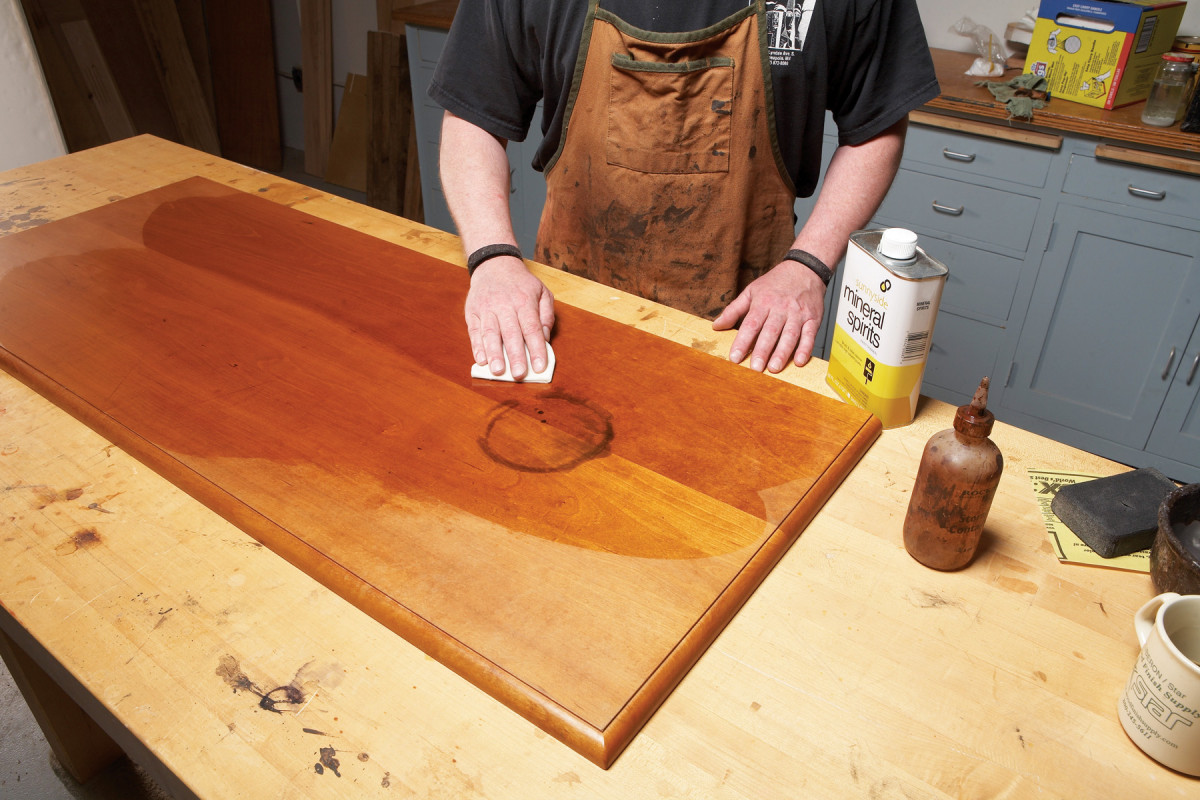
1. Start by thoroughly cleaning the surface. First, wipe it down with mineral spirits, to remove polish and other crud that’s greasy or waxy. Mineral spirits also shows what the damaged areas will look like with a clear finish applied.
Every step of this treatment should be done consistently to the entire surface, not just the damaged area. The procedure involves flooding the surface with water. Fortunately, the damage shown here is on solid wood—using this treatment on a veneered surface can be risky.
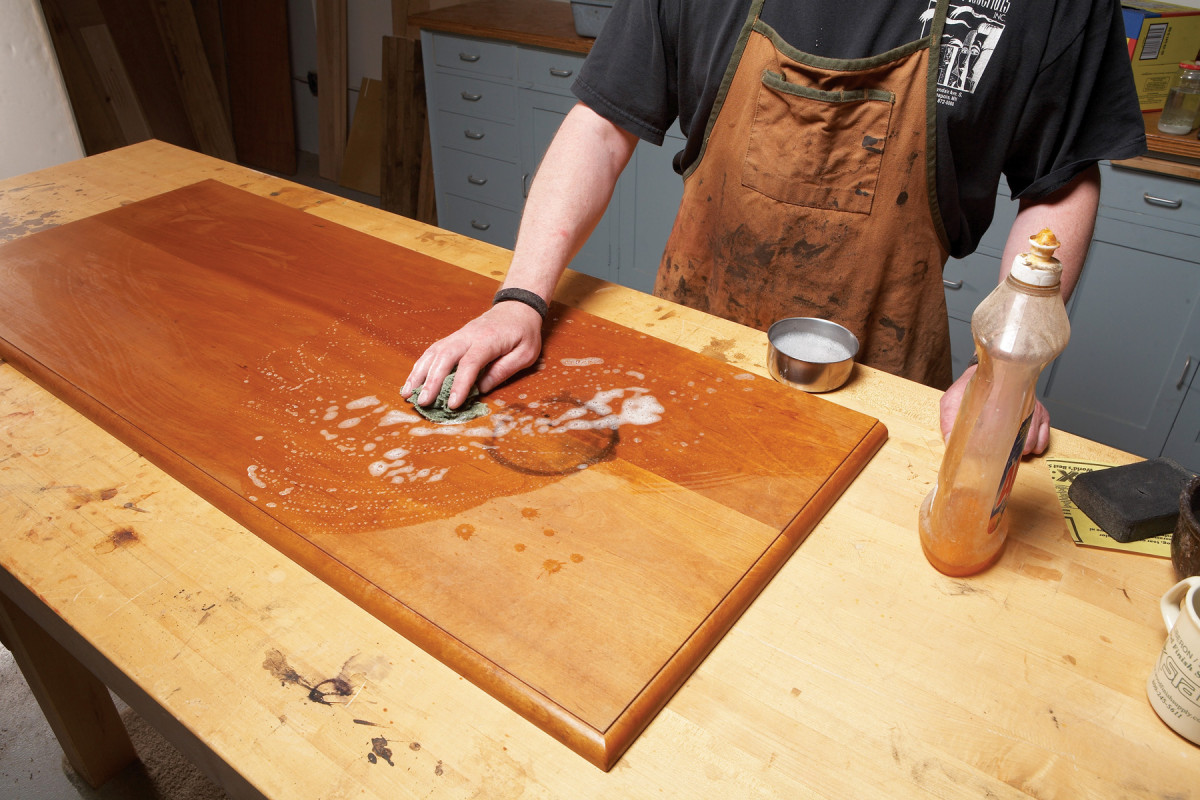
2. When the mineral spirits has evaporated, complete the cleaning process by wiping the surface with soap and water, using a soft cloth, to remove water-soluble residue. Allow the surface to dry completely.
The first step is a thorough cleaning, using two different cleaners. Mineral spirits removes greasy residue, such as old wax or polish (Photo 1). Mild dish soap and water removes any water-soluble crud (Photo 2). Neither of these processes will damage an intact finish.
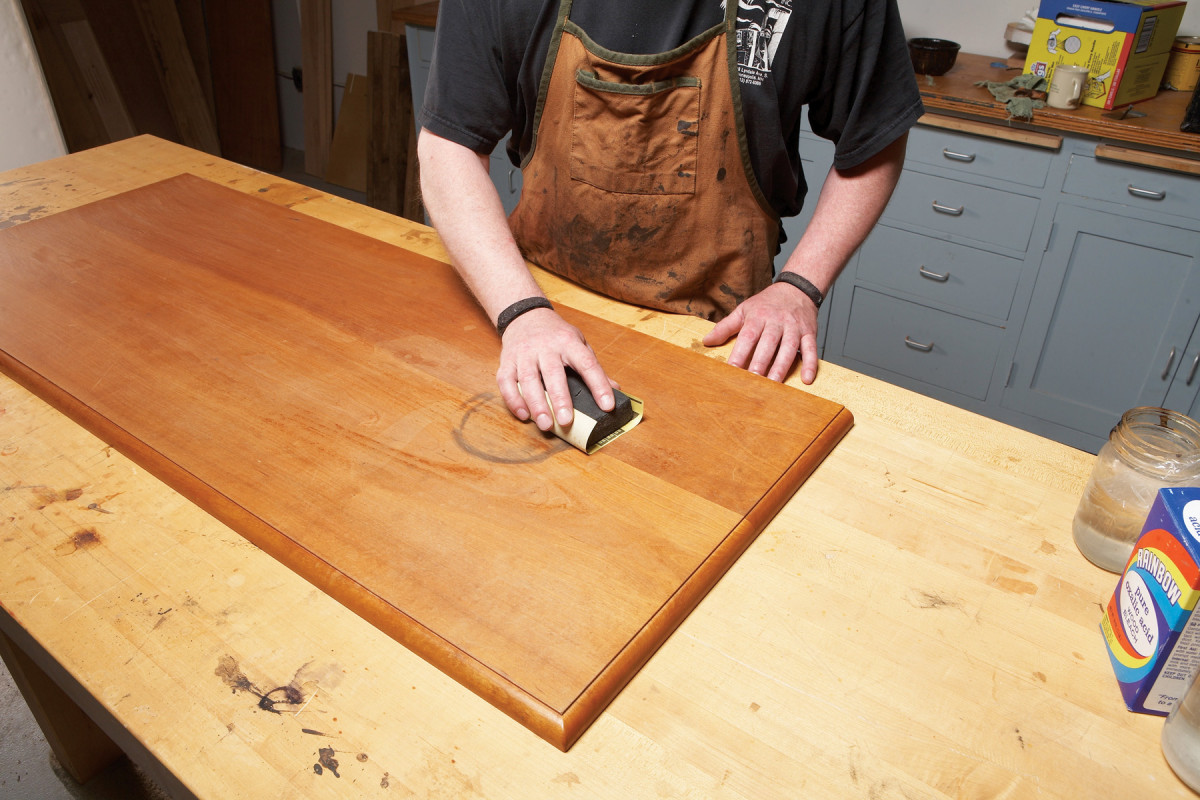
3. Sand lightly, using fine paper, a soft block and very little pressure. Although the goal is to remove the raised grain from the damaged area, it’s important to sand the entire surface to maintain consistency.
The grain is raised very slightly in the water-damaged area, so a little sanding with 400 grit paper is necessary (Photo 3). This step should take about one minute.
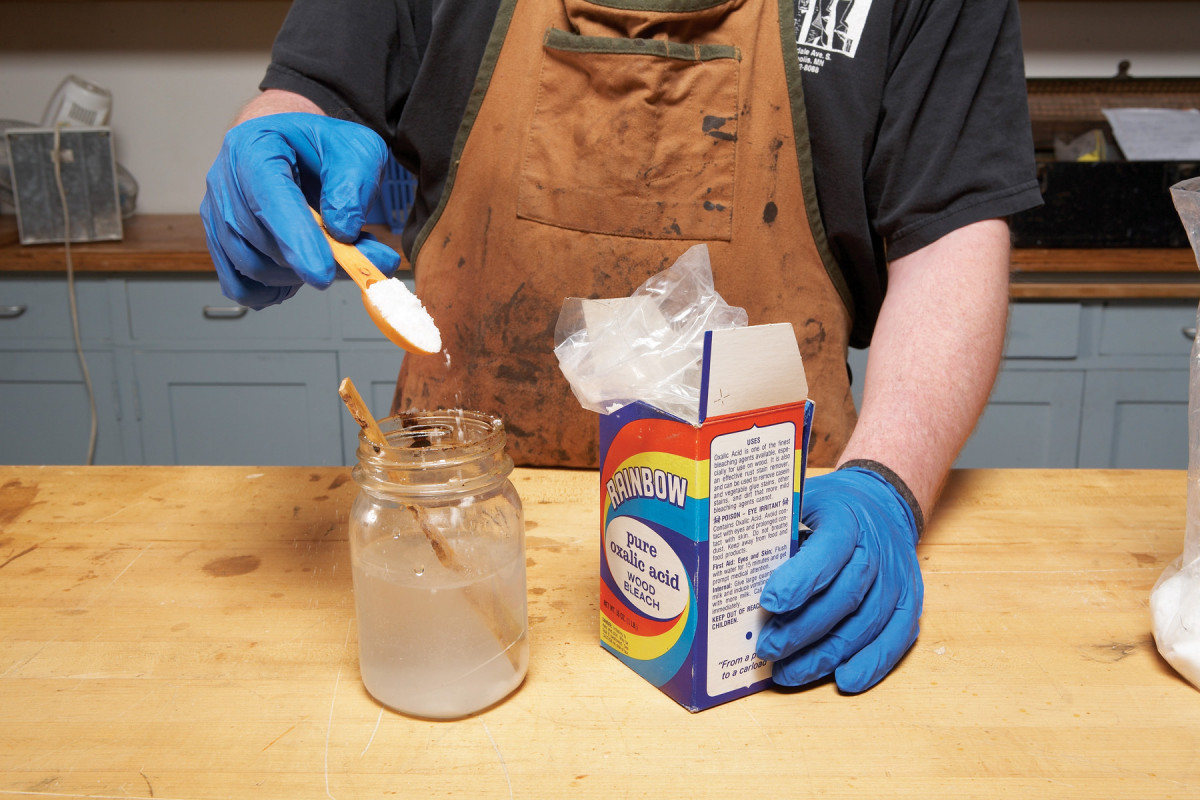
4. Mix a saturated solution of oxalic acid in a non-metal container. Add a spoonful at a time to the water and stir, until a layer of non-dissolved oxalic acid remains at the bottom.
Mix up a saturated solution of oxalic acid [Amazon] by adding the crystals to a jar of warm water with a plastic spoon (Photo 4). Do not use any metal containers or utensils—the acid could react with the metal. Add crystals a spoonful at a time and stir until no more will dissolve into the water. I always use a saturated solution, so that I have a maximum-strength problem solver.
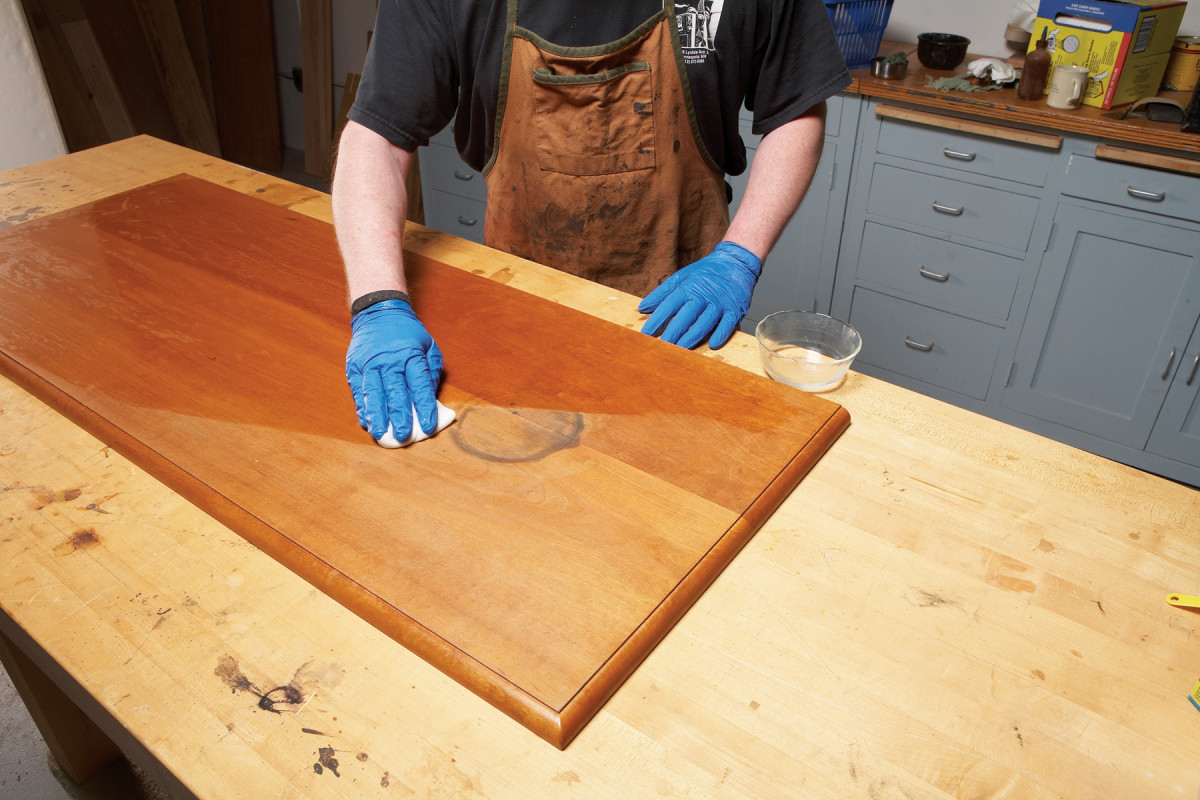
5. Wipe on the oxalic acid solution. Leave it on the surface for about five minutes to achieve the maximum effect. Then wipe off the excess and let the surface dry thoroughly. The effect can be almost instantaneous.
Wearing gloves and eye protection, use a rag or sponge to saturate the entire surface being treated, not just the dark spots (Photo 5). Keep the surface wet for about five minutes to allow for the maximum effect. Then wipe off the excess and let the surface dry completely. You may see the effect immediately as you apply the acid, or the spots may disappear gradually, as the acid dries. If a second application of acid is necessary, wait to apply it until the first application has thoroughly dried, or it won’t work. If two or three applications do not remove the stain completely, more acid is not likely to help. You’ll have to live with the remaining discoloration or resort to sanding to remove it. However, do not sand until you have thoroughly rinsed the surface—breathing dust that contains oxalic acid is extremely unpleasant and potentially hazardous.
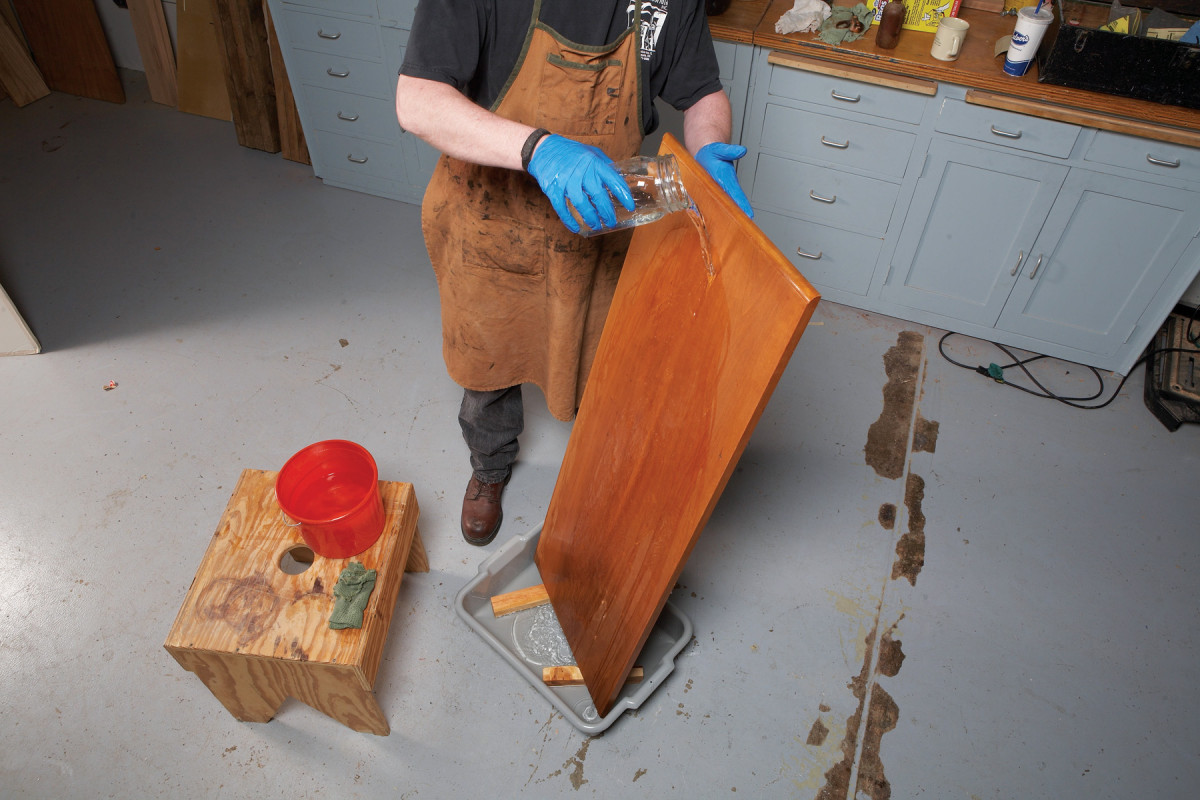
6. Flood the surface with water repeatedly, to remove any remaining oxalic acid crystals.
When you’ve completed the oxalic applications, it’s imperative to thoroughly rinse the treated surface with lots of clean water, to flush away any acid that remains on the wood (Photo 6). Flood the surface several times and dry it with a clean cloth or paper towel each time. Let the surface dry between each flooding.
Attempting to “neutralize” the acid that remains on the surface with a mild alkali such as baking soda, borax or ammonia is a cleansing option that is frequently mentioned as an alternative to rinsing. However, I have never seen any accurate formulas that would make this chemical balancing act a practical possibility. Besides, I know that thorough rinsing works.
Dampen the sur- face with mineral spirits to test the results. Here, the whitish blush areas virtually disappear and the black marks are 99.9% gone. The repair is complete; it’s time to rebuild the finish.
After the lid has thoroughly dried, don a respirator and lightly sand the entire surface with 400 grit paper, to cut back any grain raised by the oxalic treatments. Test the surface again with mineral spirits, to gauge the results (Photo 7). The test on this lid indicates that the surface is ready for finishing (Photo 8).

In this case, the finish is blonde shellac, the same finish as the original. Adding a waterproof finish over the shellac could help to prevent future damage. Moving the plant may be a better option.
Here are some supplies and tools we find essential in our everyday work around the shop. We may receive a commission from sales referred by our links; however, we have carefully selected these products for their usefulness and quality.