


We may receive a commission when you use our affiliate links. However, this does not impact our recommendations.
 The modern term “butcher block” probably originated from the large, heavy chopping blocks found in old-fashioned butcher shops, which consisted of thick square boards (such as 3″ x 3″ x 24″ hard maple), glued and bolted together and oriented with the end-grain as the chopping surface. Today the term describes just about any solid wood surface made by gluing together narrow boards, including cutting boards, countertops and tabletops.
Because these surfaces often appear where food is prepared and served, I’m frequently asked, “What’s the appropriate finish for a “butcher block”? My response is always based on the answer to one very important follow-up question. “Will it be used for cutting on?”
Safe for contact with food
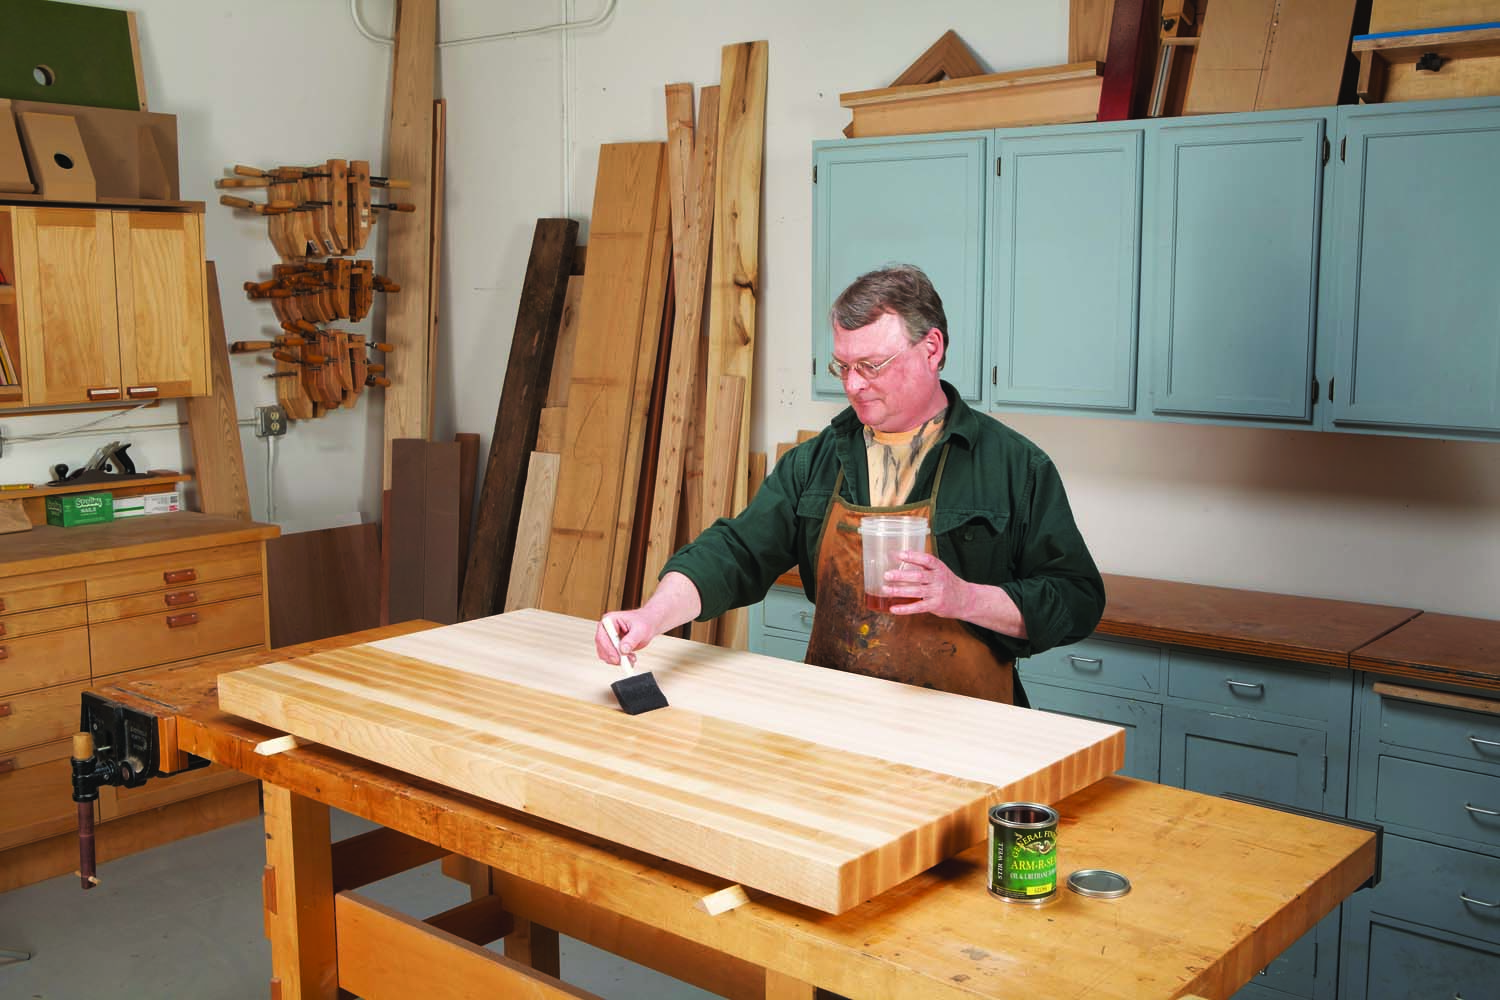
Photo 1. Any finish is safe to use on a butcher-block table or countertop that will not be used as a cutting surface.
If the surface won’t be cut on, the answer is simple: Any film-forming finish you would normally choose for durability and appearance will be just fine (Photo 1). The finish only needs to be safe for contact with food—meaning that no toxic chemicals from the fully-cured finish will get into food. While only a few wood-finishing products are labeled as “non-toxic when fully cured,” virtually all of them are generally considered to be so (Photo 2). In fact, the FDA does not restrict any modern wood finish from being used on tabletops or counters in homes or restaurants; basically, no U.S. government agency considers it to be an issue.
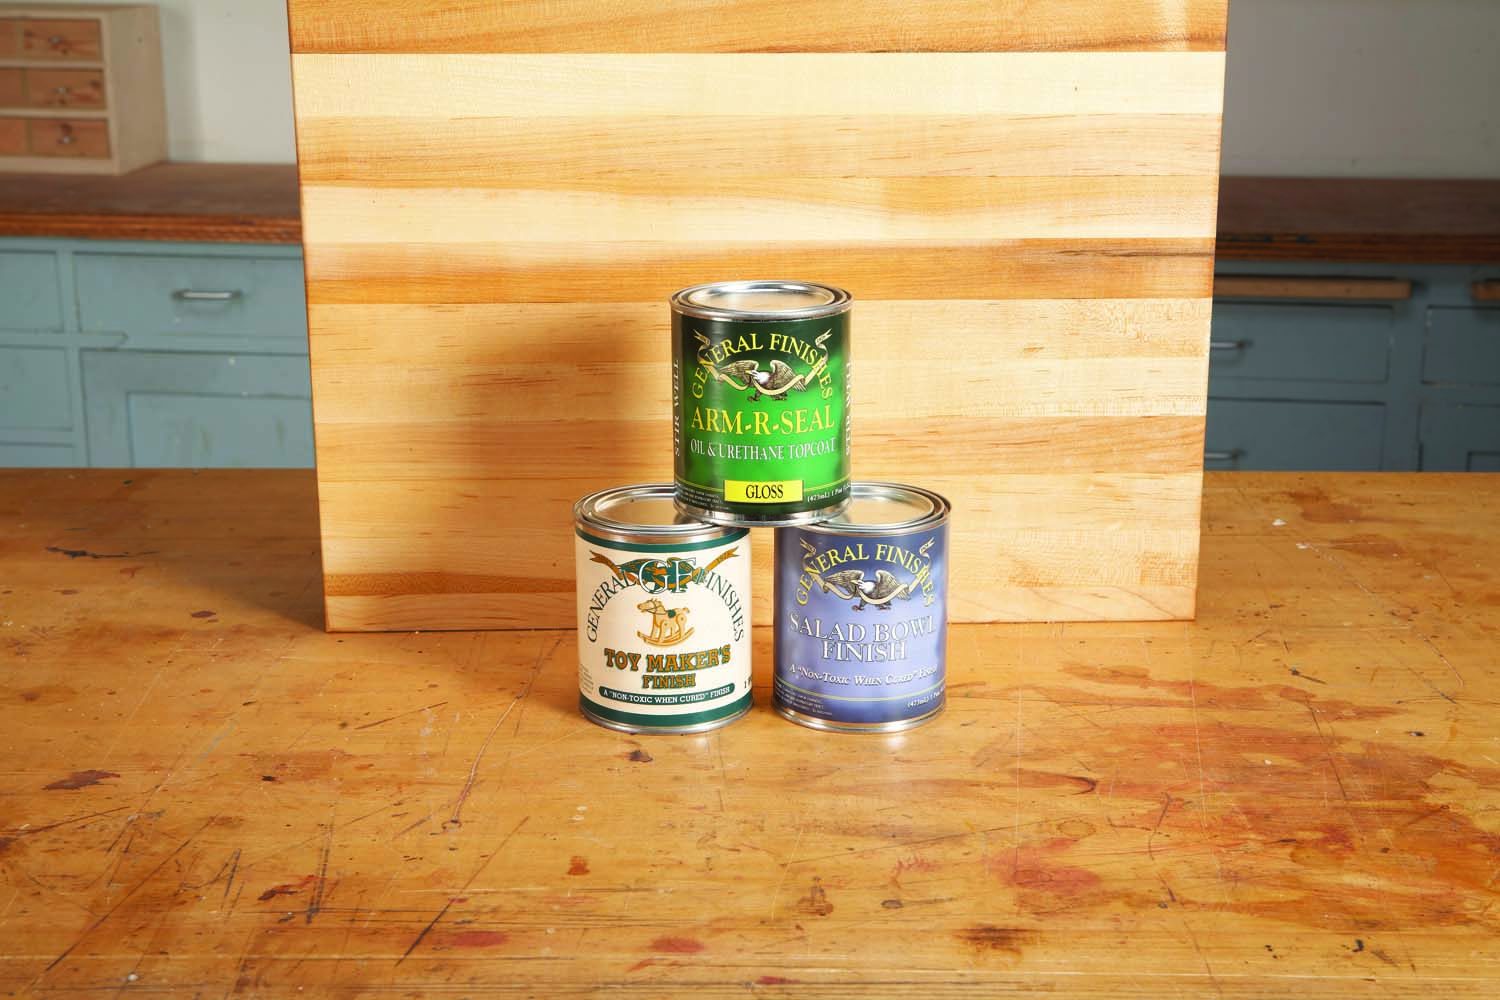
Photo 2. Labels can be confusing. Only the bottom two wood-finishing products are labeled “non-toxic when fully cured,” but the ingredients listed on the back of all three products are virtually the same.
The important thing to understand is that film-forming wood finishes are toxic as liquids, but non-toxic after the solvents evaporate and the finish has dried to a hard, fully-cured film on the wood’s surface. For example, furniture manufacturers typically finish tabletops and kitchen counters with lacquer and other fast-drying materials that are typically stinky and toxic. But once the solvents have evaporated and the off-gassing that occurs during the curing time has passed, the hardened finish is usually considered no more toxic than a plastic plate. So, unless you are concerned about eating food stored in or served on plastic, you don’t need to worry.
I knew I would never cut on the butcher-block counters that I made for my kitchen, because I always use cutting boards. So I finished the counters with oil-based polyurethane. I wanted a durable, waterproof and heat resistant finish that would require minimal maintenance. After ten years of daily use and washing, they still look great, and I’m still here—so I don’t believe they’ve poisoned me.
Cutting board finishes
If you plan to use your butcher block as a cutting board, you could conceivably ingest small amounts of the finish (and the wood) when you use it. So you may want your finishing material to contain only ingredients that you personally consider to be edible. This line of thinking probably rules out all synthetic, man-made film-building finishes and leaves the following options for you to choose from.
Option 1: Leave the wood bare.
This is my favorite treatment for edge-grain butcher-block cutting boards that I use frequently. It’s quick, easy and the only maintenance required is washing and drying.

Photo 3. No finish at all is my first choice for a frequently used cutting board. Just wash the board with soap and hot water after every use and allow it to thoroughly dry.
Although it will stain easily and is more likely to split or crack if allowed to soak up lots of water during cleaning, a wood cutting board doesn’t require any finish whatsoever to perform satisfactorily for many years. Just wash the board with soap and hot water after every use and allow it to thoroughly dry on all sides (Photo 3). I’ve been using a cutting board made of solid pine and another made of glued up maple strips for more than ten years. Both are slightly stained and show small end-grain cracks, but they’ll both survive many more years. A very interesting study done by the University of Wisconsin in 1993 documented that bacteria are much more likely to survive on a plastic cutting board than on wood.
Option 2: Apply an oil finish.
All things considered, oil finishes are my last choice for any cutting board because they dry too slowly or don’t dry at all—and also because they require too much maintenance.
Tung oil and “boiled” linseed oil (the most commonly used drying oils in wood finishing products) provide protection because they polymerize and “harden” in the wood. However, they are not made to be edible. Food-grade “pure” linseed oil (from flax seed) is available as a nutritional supplement. Unfortunately, this untreated linseed oil takes weeks to harden unless toxic metal driers are added, as is the case with “boiled” linseed oil. “Tried & True” brand linseed oil finishes (available at triedandtruewoodfinishes.com) stand out because they claim to contain no solvents or toxic metal driers. Instead, a heat-treatment process is said to be used to help speed the drying.
Walnut oil is often used because, like linseed and tung oil, it’s said to harden. My own experiments show that it takes weeks to dry. It may also contain allergens that even in small amounts could potentially trigger severe allergic reactions in the small portion of the population with tree-nut allergies.
Non-drying oils (vegetable oils and mineral oil) offer a very limited amount of protection because they don’t harden or cure. Constant maintenance is required because they wash off easily and must be reapplied frequently whenever the surface looks dry. Food-grade vegetable oils such as olive oil run the risk of turning rancid over time. However, washing the surface frequently with soap and hot water dramatically reduces the chance of this happening. Mineral oil is the most commonly used non-drying oil because it doesn’t turn rancid. And when purchased at a pharmacy as a laxative, it definitely qualifies as edible, even though in reality, it’s nothing more than highly refined petroleum. (Note: Mineral oil is sometimes marketed as a food-safe finish for butcher blocks at a much higher price than it commands at your local pharmacy).
Option 3: Blend oil and wax.
This is my favorite finish for pretty edge-grain cutting boards (and wood utensils) that I want to keep looking their best.
Mixing oil with wax (usually mineral oil and beeswax) makes an easy-to-use, edible product that seals the wood much more effectively than oil alone, and requires no drying time. Oil and wax blends are made by warming the oil to the melting temperature of the wax and then stirring in the wax. This melts the wax without adding any solvents and the oil and wax remain in solution even after the mixture cools. The right amount wax depends on the desired thickness of the mixture at room temperature. More oil makes the mix thinner and easier to apply (Photo 4). Just rub it in, let it soak and then buff. Because the wax in this finish seals the wood much more effectively than using oil alone, much less maintenance is required. Just reapply when the surface looks dry—a little dab will do. A mixture that contains more wax offers more protection but is harder to rub in.
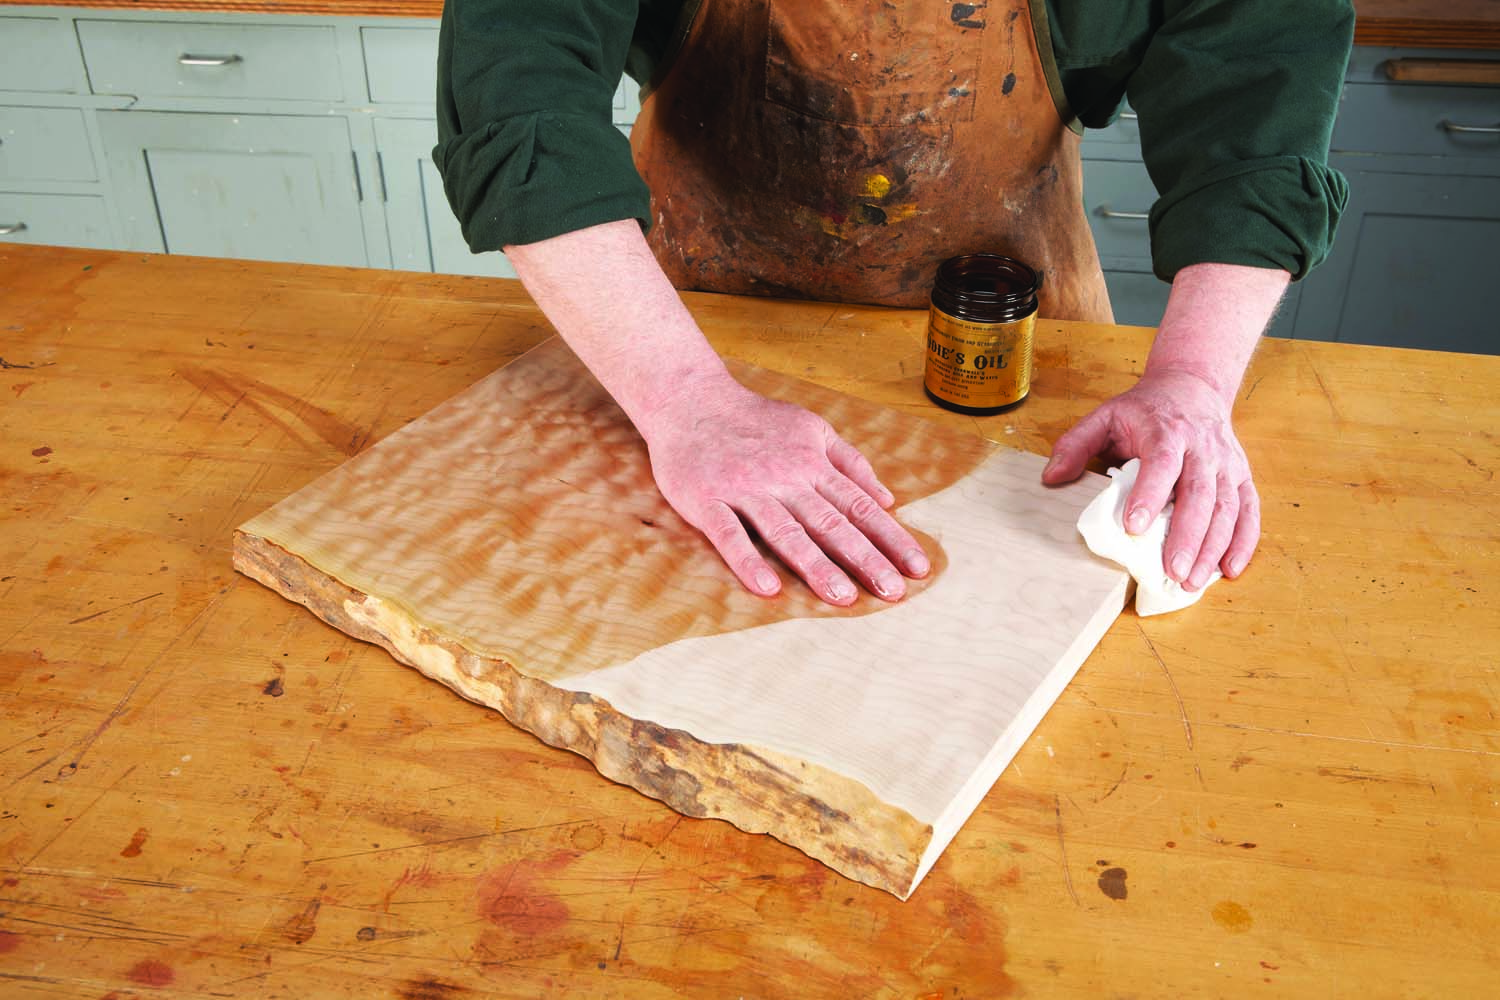
Photo 5. Mix your own non-toxic, edible oil and wax blend by melting one part grated beeswax in about four parts of mineral oil that’s been safely heated to approximately 150° F.
Odie’s Oil and Odie’s Wood Butter (available at odiesoil.com) are oil and wax blends that are labeled as food-safe and solvent-free. These two blends have different consistencies—the oil is thinner than the butter. You can also mix your own oil and wax blend (Photo 5). Use a crockpot set at “warm” to heat the mineral oil. For safety, do not use an open flame.
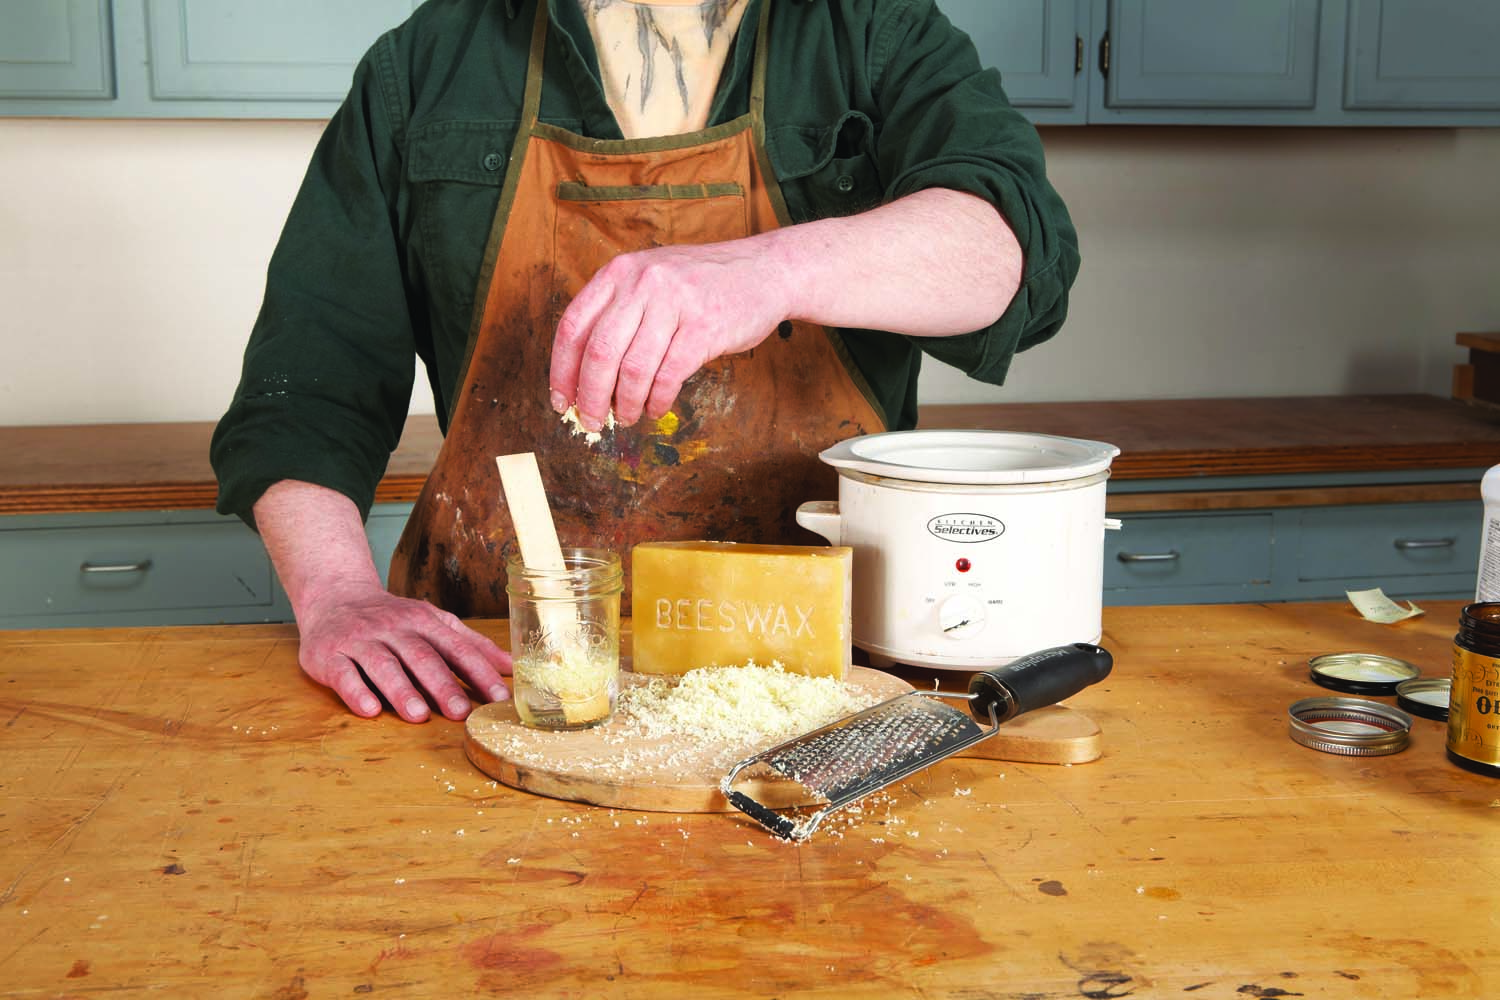
Photo 5. Mix your own non-toxic, edible oil and wax blend by melting one part grated beeswax in about four parts of mineral oil that’s been safely heated to approximately 150° F.
Option 4: Rub in pure molten wax.
Without a doubt, this is my favorite finish for end-grain cutting boards.
This method was used to seal the massive end-grain butcher blocks in old-time butcher shops. Solid wax was melted and poured onto the wood hot, so it would spread easily and wick into the end grain. After the wax had cooled, the excess was scraped off and then the surface was buffed.
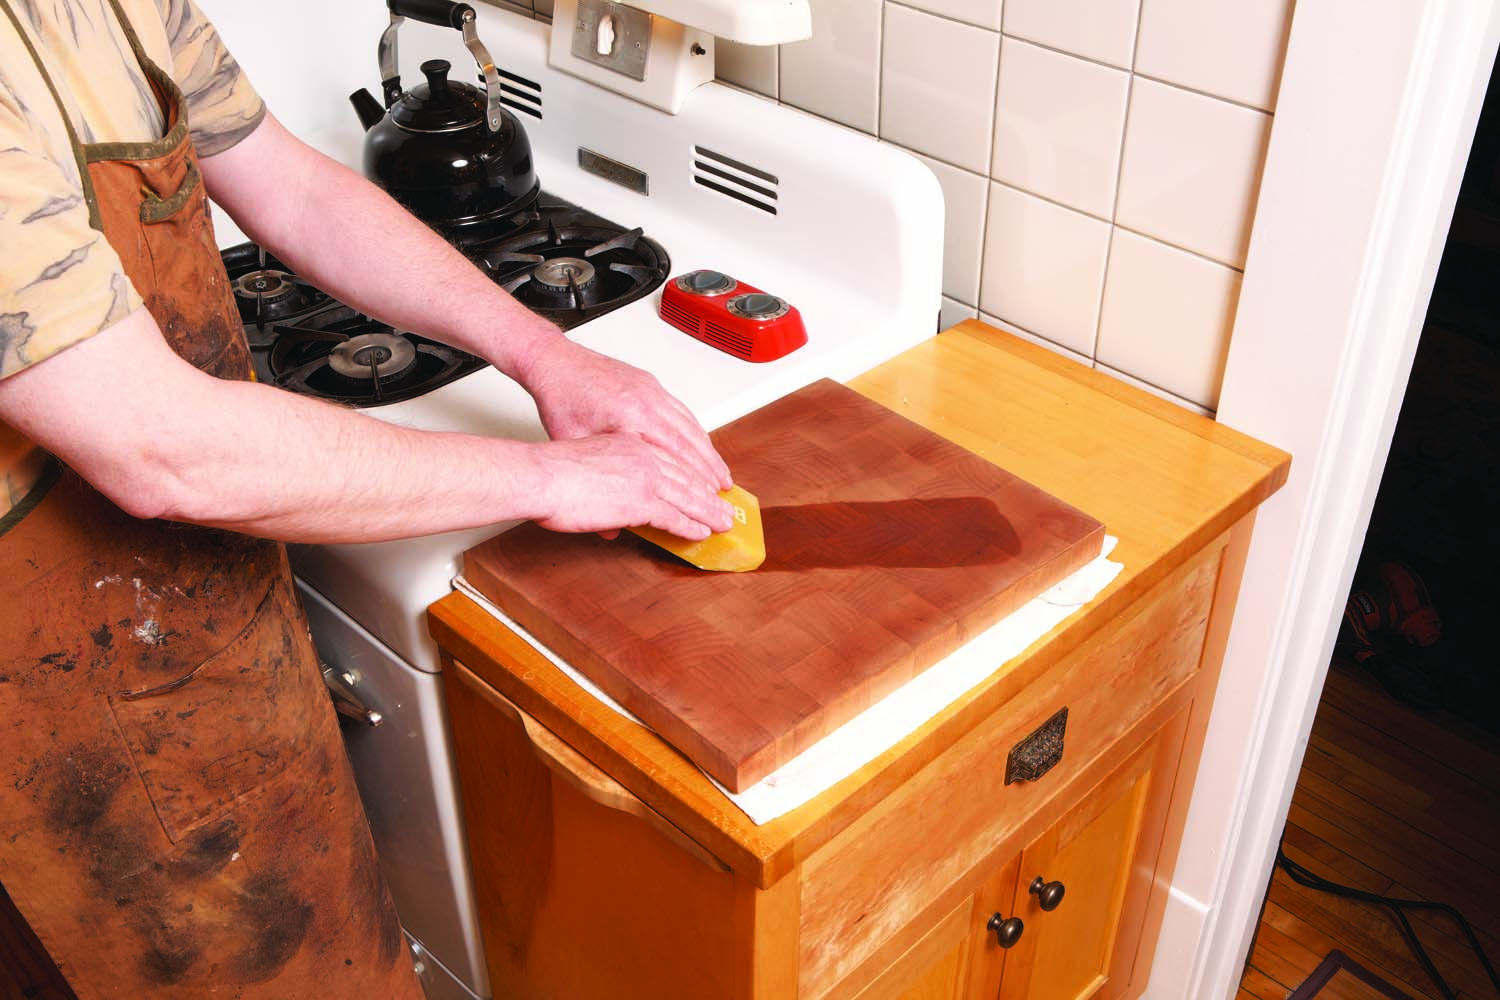
Photo 6. Molten beeswax is a superb food-safe finish for end-grain cutting boards. Rather than heating the wax, I heat the board and then use it to melt the wax. One application lasts for years.
For an end-grain cutting board that’s small enough, there’s an easier (and safer) way to apply this finish. Let the solid wax melt into the wood after heating the board in your oven (Photos 6 and 7). Buff the surface after the wax cools and it’s good to go.
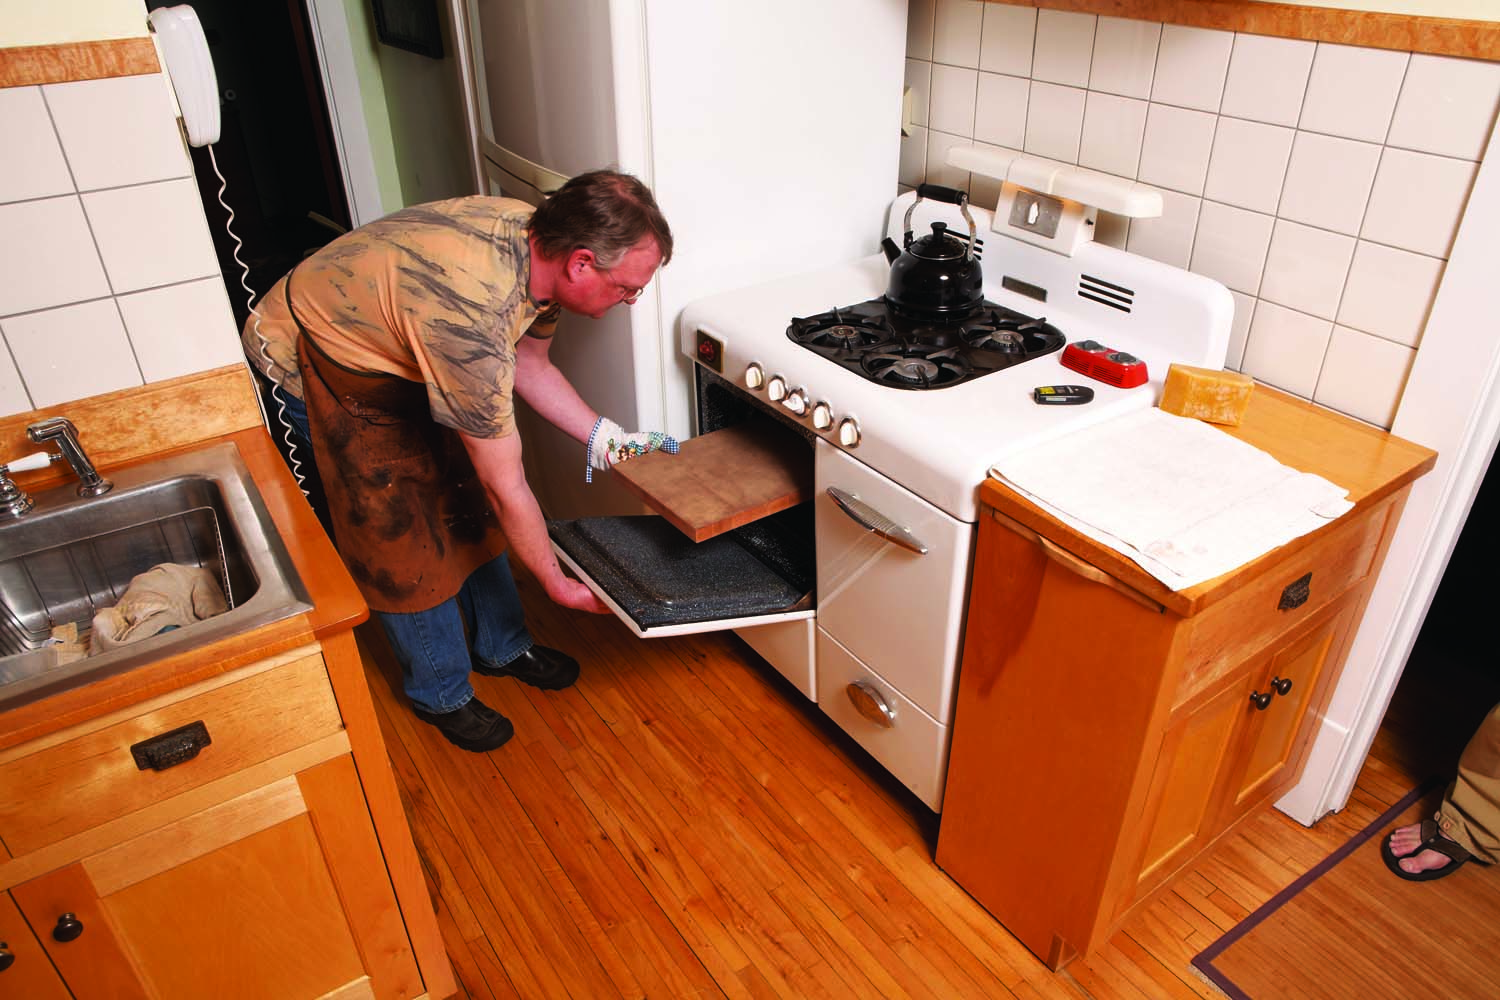
Photo 7. Bake an end-grain cutting board at 350° for 10 minutes to prepare it for waxing. This raises its temperature to about 175° so the wax melts into the grain upon contact.
This method uses no solvents, seals end-grain superbly and requires no drying time. I prefer to use beeswax (which I recently discovered is available from local beekeepers), but carnauba wax and paraffin will also work. In over 10 years of daily use, I haven’t needed to reapply molten wax to my end-grain cutting board. An occasional dab of oil and wax blend has kept it looking great with no solvents or drying time. My only regret is that this method is not nearly as effective or long lasting on edge-grain cutting boards.
What About Bowls and Utensils?

Although all modern finishes are food-safe, not all of them are considered edible, so deciding how to finish small wooden items that come in contact with food depends on personal preferences. Here are examples of decisions I’ve made. The old wood spoon has never been treated, except for washing with soap and hot water, because I don’t really care much about its appearance. The cherry spatula is finished with an edible oil and wax blend, which I maintain to keep it looking good. The figured maple bowl has one coat of linseed oil to enhance the grain and two coats of thin wipe-on polyurethane to make it waterproof.
Bio
Kevin Southwick is a wood-finishing specialist and furniture restorer/conservator in Minneapolis, Visit southwickfurnitureconservation.com to learn more.
Here are some supplies and tools we find essential in our everyday work around the shop. We may receive a commission from sales referred by our links; however, we have carefully selected these products for their usefulness and quality.


