


We may receive a commission when you use our affiliate links. However, this does not impact our recommendations.
Hey, welcome back. It’s me again, Daniel Fishkin. In my first post I introduced you to the musical instrument called the daxophone, and discussed the principles of building its tongues, which are the thing that makes sound in the instrument. The tongue is one of four parts which, when combined, constitute the instrument. The other parts of the daxophone are: the bow, the “dax”, and the soundbox. In my last post, I showed you the principles behind the soundbox, so you can amplify your daxophone. In this post, I will guide you through building a dax, which is the curved piece of wood that you use to change the notes of the daxophone.
Since the length of the daxophone tongue is fixed, changing its pitch is all about stopping various points along its length—just like pressing down a guitar string with a slide or your fingers. A guitar slide works for the daxophone, too, but it is not ideal. Its inventor Hans Reichel created the dax, a curved piece of wood, which is rocked along the tongue, instead of using a sliding object. The dax is a solution to a problem, which Reichel explains thusly: “This rocking-dax is integral to the whole thing, because it works to a large extent without mechanical friction. You can create the same effect using any other hard object (i.e. the handle of a knife), but then the scraping or tapping to and fro creates so much interference in the contact-microphone, that you get fed up with it after a short time.”
The exact proportions of the dax vary widely between persons and geographic regions. Reichel himself constantly tried new curvatures, lengths, widths, and weights.[2] So have I! With the smooth curve of the dax, you can rock into whatever note you’re looking for, if you know how to find it. What’s not so obvious about playing with the dax is that: it affects pitch not only by its left-to-right position, but also by its side-to-side angle. You can twist and wobble it in almost any direction over the tongue and it will yield different pitches.
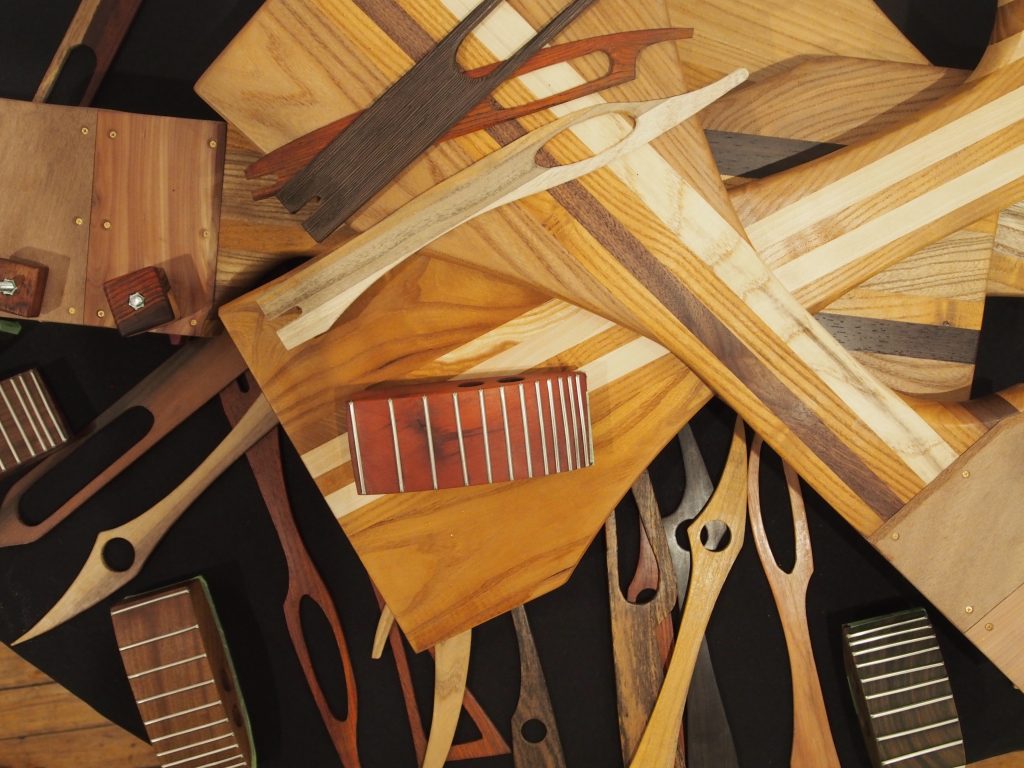
A gaggle of daxes waiting to be oiled, 2015
One side of the dax is often fretted, using ordinary guitar fretwire, which produces wonderful arpeggios and scales instead of sliding tones. The first question many people ask, upon seeing the frets on a dax, is, “What scale is it?” There’s no way to answer this question. Because of the variability of the tongues, and because you can move the dax left to right as you rock it, the frets fall on different notes every time. A daxophonist often relies upon the fretless side when playing pitched music with other instruments, but the fretted side will reward you with beautiful trumpet-like arpeggios more often than you’d expect.
Master daxophonist Kazuhisa Uchihashi explains the interaction of the bow and dax. Pay careful attention for the “yodel”.
Names can get confusing. People often ask me, why is that curved piece called the dax? Is the tongue the real daxophone, or is the whole thing, all four parts connected, the daxophone? To make matters more confusing, I tend to abbreviate the instrument as the “dax” (ie, starship dax or butt dax), when I’m really talking about the soundboard, not the curved wedge. I have no real answers to this glossological trivia (pun intended)—the one thing that matters to me is that you never, not even once, misspell daxophone with an “a” between the dax and the phone. Daxo, always! But regardless, there is a good question here, with a meaningful answer: Why should we call that wedge a “dax?”? I have said that the tongue is the soul of the daxophone, however, Reichel called his dax “the secret of the daxophone”. Why?
To unravel this mystery, we’ll briefly segue to another instrument inventor, the inimitable Bart Hopkin. Hopkin wrote the seminal tome Musical Instrument Design, which was formative for me and countless other instrument builders in the near web 2.0, pre-YouTube era of idea sharing. This book covers everything, taking nearly every acoustic instrumental concept and presenting plans and concepts starting from simple and ending up quite strange and unique. Hopkin is acutely interested in what makes instruments special. In this excerpt, he argues that it is not merely the instrument’s tonal character, but rather the way we touch, caress, breath into, wrestle with, or bring sound out of the instrument that gives the instrument its identity. Here’s a particular telling passage, from page 69 of Hopkin’s wonderful Musical Instrument Design:
“…The configuration of the pitch elements establishes what kinds of musical patterns will be characteristic to the instrument. Piano music sounds “pianistic,” and guitar music is “guitaristic,” in large part because of the nature of the physical interface between the player and the instrument. This may seem like an innocent enough observation, but the nature of the playing movements is a key to the character of the instrument as a thing of human musical expression. It is one of the essential elements in musical instrument design.
These ideas can be incorporated into the word gesture. Gesture has its physical aspect in the movements one makes to play an instrument. It has a musical aspect in the characteristic turns of phrase, the sorts of note clusters, or the rhythmic patterns that seem to fit the instrument most naturally. The two aspects are very much intertwined.”
Along these lines, I’d like to suggest the notion that perhaps it is the dax that makes the daxophone so unique and identifiable. The physics behind the daxophone’s tone is common to any acoustical cantilever—just try bowing a thumb piano and you’ll hear what I mean. But the dax gives the daxophone its gesture—the means whereby the notes and noises spill forth from the instrument. I know of no other instruments that utilize a similar rocking device for pitch. Strings do not work in at all the same way when used with a guitar slide. Reichel writes, “It also makes a difference whether you press the dax flat on the strip or just on its side-edge. The sound and pitch alter once more, enabling you to produce the very engaging yodel-effect.”
John Cage’s wonderful composition, Ryoanji played on the daxophone. Dig the daxophonic glissandi!
Of course, while it is charming and unique, the technique of the dax is also difficult to master—perhaps impossible. I’ve certainly gotten better after over a decade of playing…yet the daxophone remains recalcitrant—even feral. The notes are constantly in a different place, and you can’t really see with the exact precision of a string where the contact stoppage is. Sometimes, when I’m thinking more like an instrument inventor, I try to imagine daxophone variations that involve something other than the dax to change notes—a fretting mechanism like a typewriter, or wooden thimbles. I haven’t put much energy towards this, compared to my explorations in soundboard design. (Maybe you can come up with something different!) But when I’m thinking like a daxophonist, I realize the magic in Reichel’s invention. It is the secret. You must love it. If you’re hung up on precision, the dax may resist your efforts to intonate. But if you follow its curvy intentions, it will show you a world of beauty.
So, now I’ll show you how to make a dax.
How to make a Dax
Tracing the dax I made with Reichel in 2006.
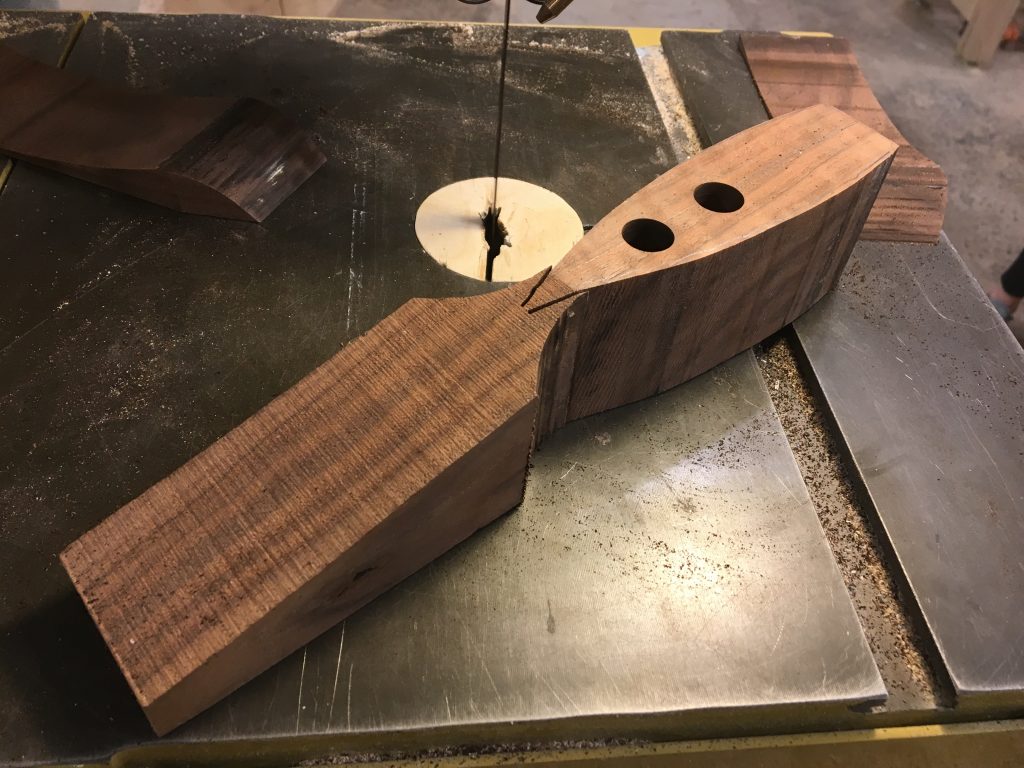
To make a dax, you’ll end up using mostly the bandsaw and belt sander. It’s not too hard—trace the shape, cut it out, and smooth down the surface. I’ll also demonstrate a little use of the CNC. While the curve of the dax is an easy shape, and the kerf of the bit is relatively wasteful, it was worth it for me to make very precise variations to the shape, to see what ends up feeling good in the hand.
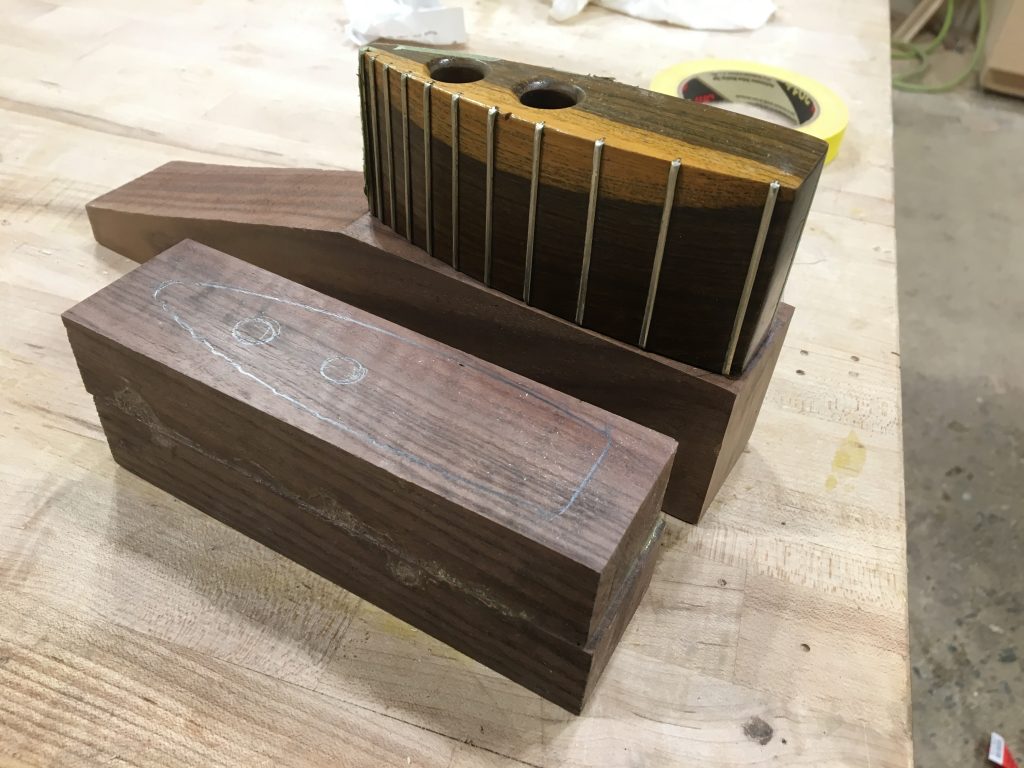
It definitely helps to leave a chunk of wood for your grip!
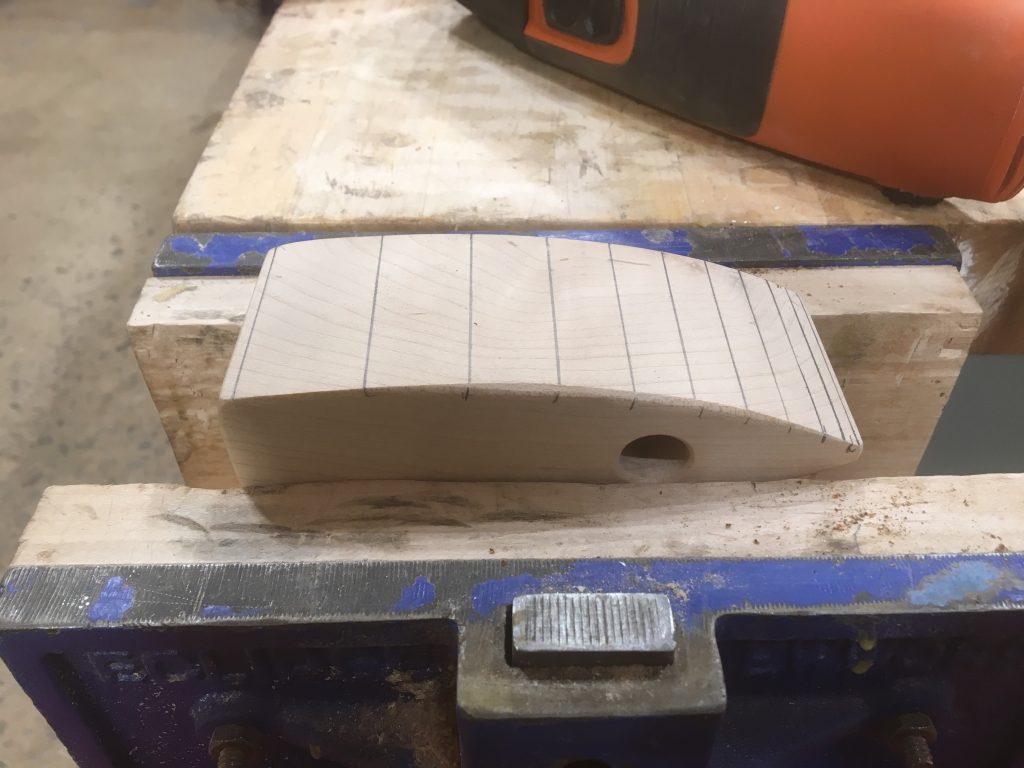
To make a dax, I trace the shape that I want on a block of wood, roughly 6” x 2” x 1”. In these pictures, I’m tracing the very dax I made with Hans Reichel in 2006. I often follow Reichel’s work as starting point and go my own way. Cut the curve above the line on the bandsaw, and then rock it carefully and continuously on the belt sander until you get down to your marked line. This is a very delicate procedure, and it’s easy to end up with flat spots in your curve, or to introduce a twist into the piece based on the biases of the way your hand wants to move.
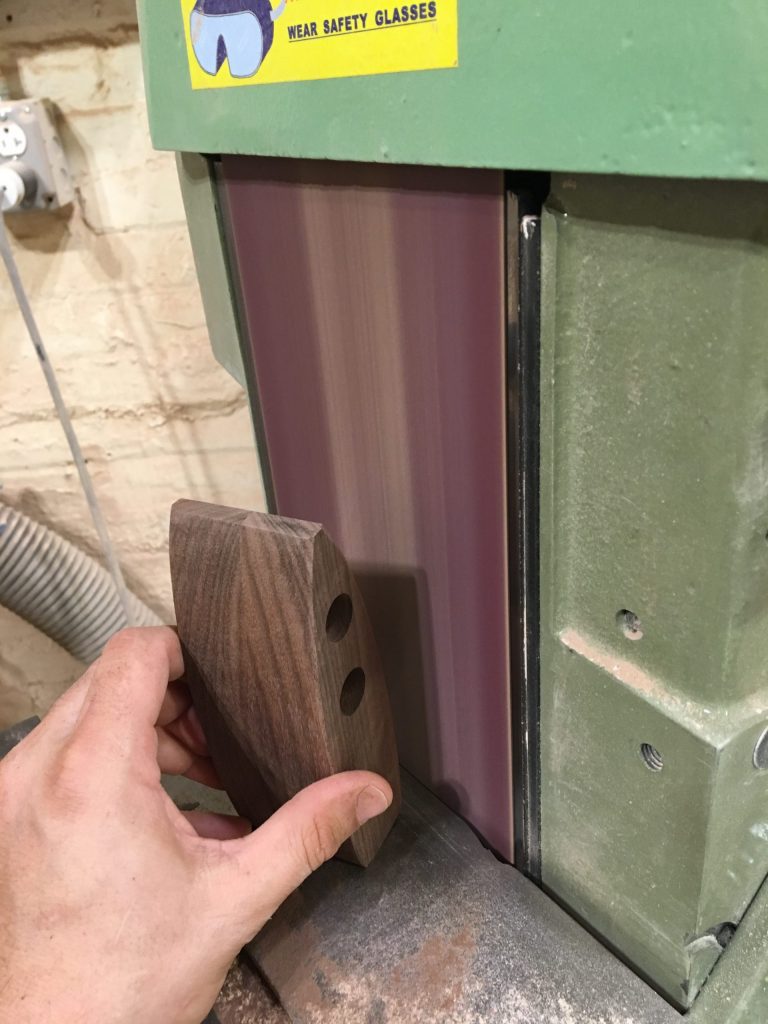
Smoothing carefully on the belt sander,
After you’ve smoothed out the rough kerf marks of the bandsaw, you should be left with a really nice dax—one that already feels right in your hand as a musical instrument. If not, you can very slowly take more material off, but slowly, so as not to introduce asymmetries. For someone with smaller hands, a narrower dax might be preferable. You can take the curved surfaces to a fine polish by repeating this process on a random orbital sander, up to 320 grit, or more if you’re obsessed.
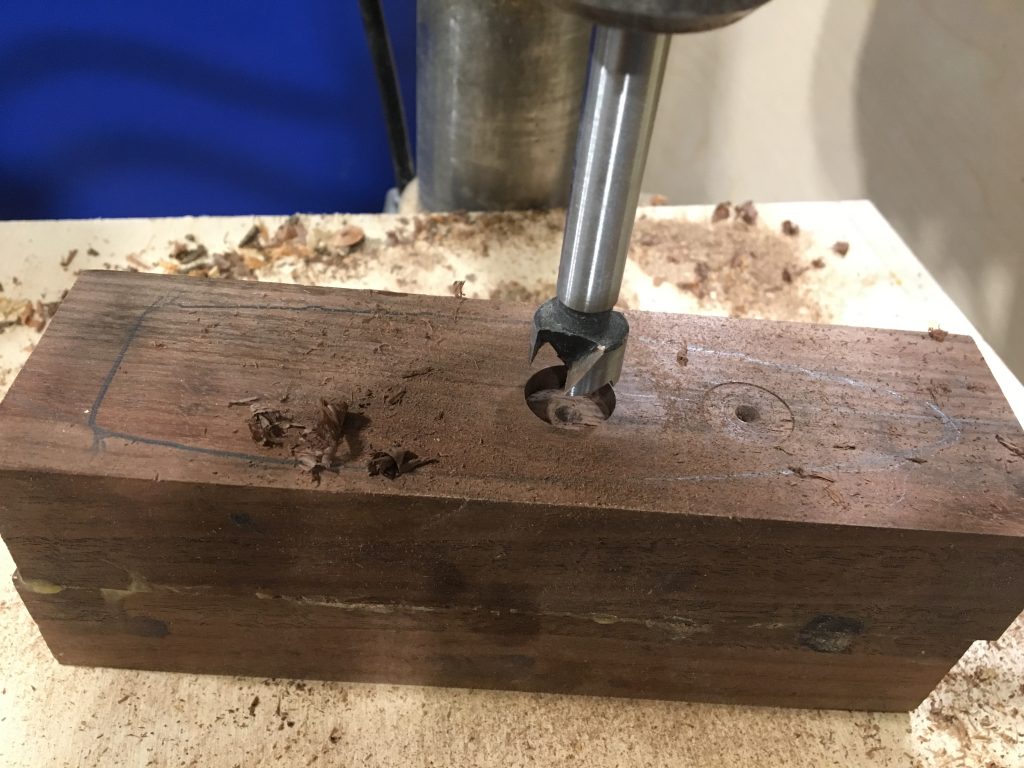
I know this is a little backwards, but it’s probably a good idea to drill the holes before you cut the block, so you can grip the piece in your vice more easily.
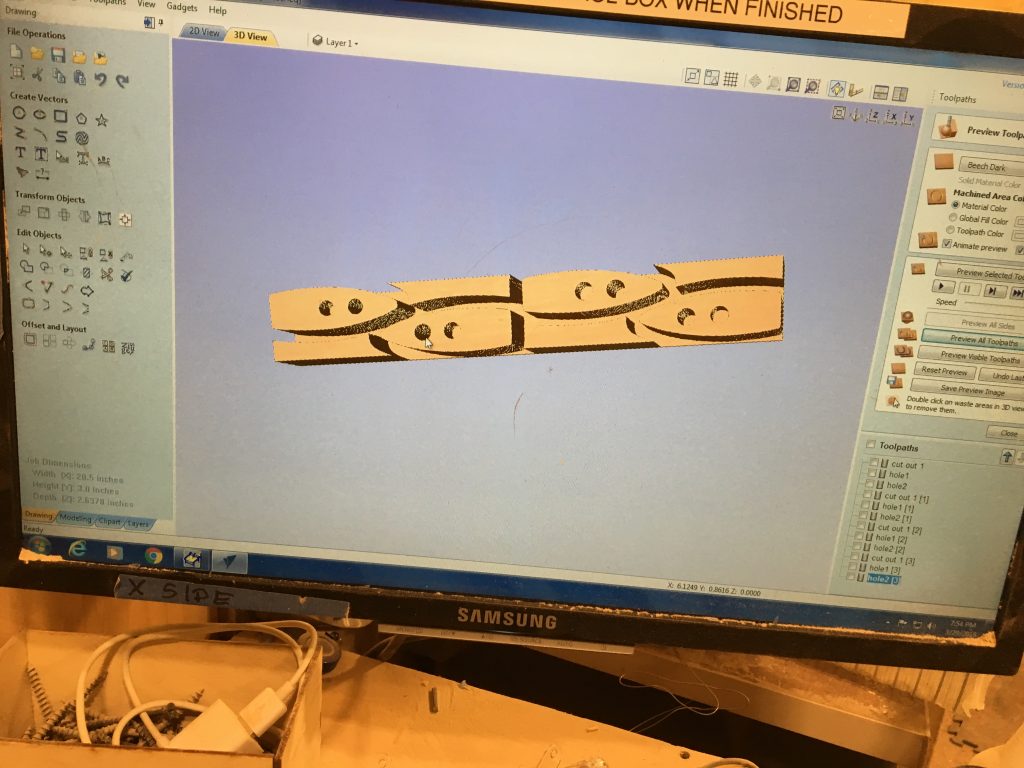
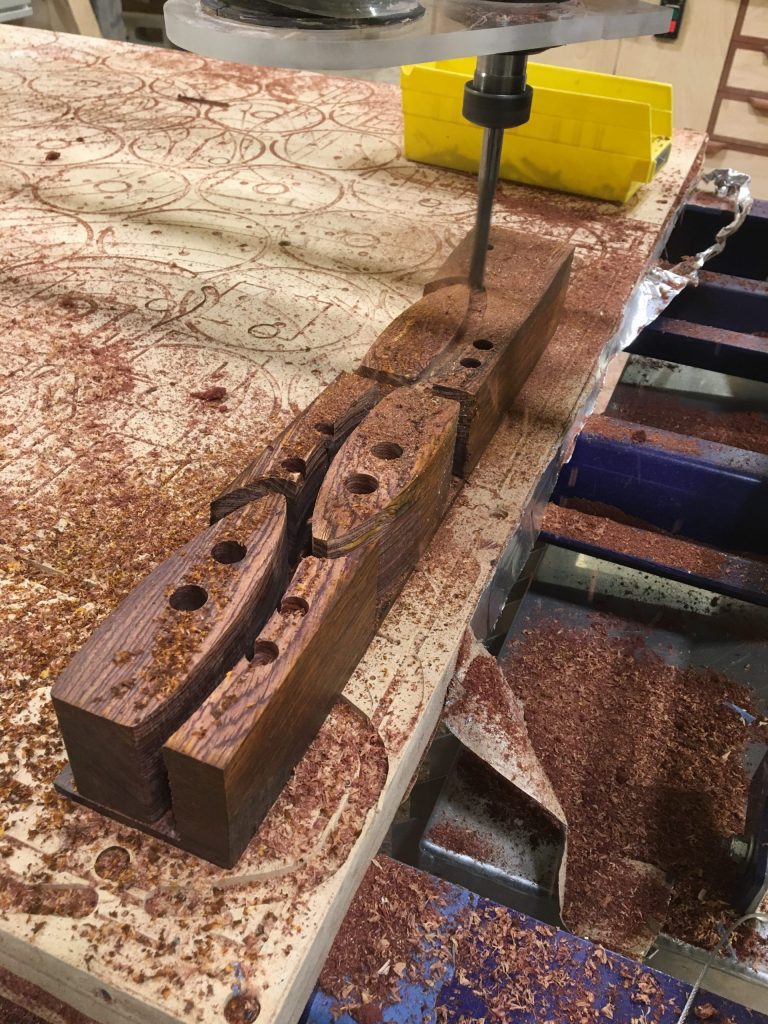
It isn’t pretty, and there’s a wide kerf—but this is a very precise way to do this operation. The dax may look somewhat basic or plain, but since every note hangs on this little block of wood, I don’t mind the sacrifice for precision. I measured out four daxes on this chunk of cocobolo, and I couldn’t have squeezed a fifth onto the chunk!
People ask all the time about the purpose of these holes. While it’s clear that they contribute to the ergonomics of the instrument, Reichel may have also been thinking as a designer when he introduced these. I have had the pleasure of examining a few of Reichel’s daxes over the years—sometimes, the holes go entirely through the block, and other times the holes only go a third of the way into the material. This is to reduce the loss of mass (Reichel believed that a heavy dax helps with intonation) and also to reflect the hand’s gripping tendency with respect to middle, index, and thumb. There are no rules. Try everything.
But whatever you do, when you drill holes, make sure to soften the edge of the cylinder. Reichel showed me this trick in 2006 and it makes the instrument so much more lovely to hold.
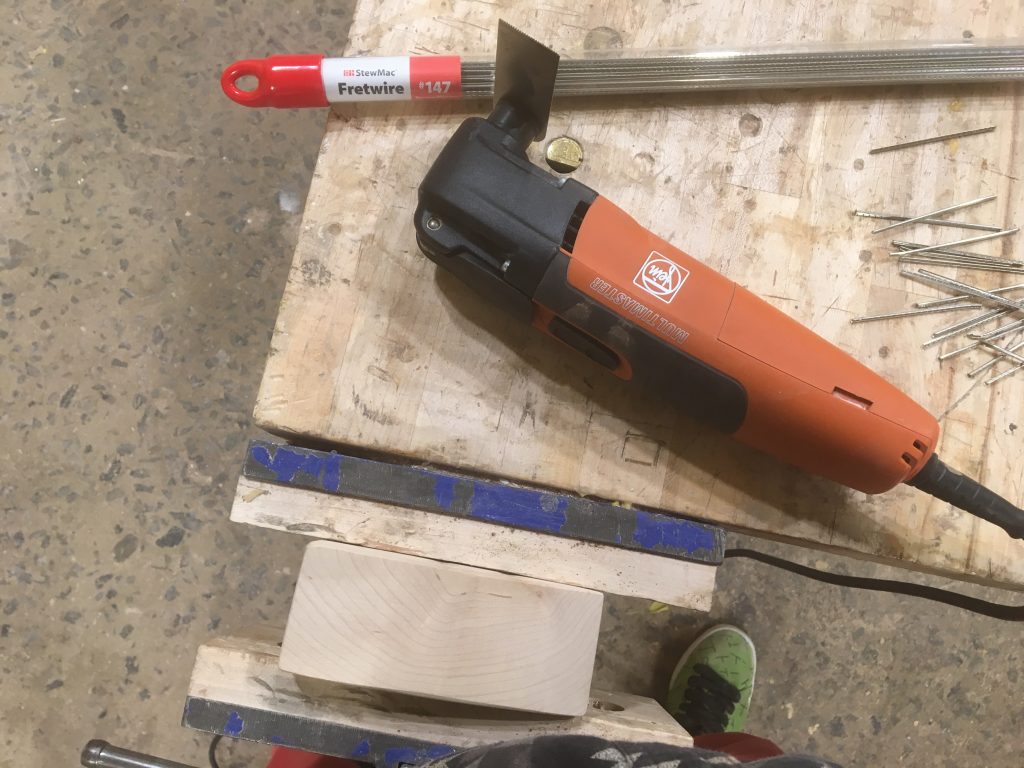
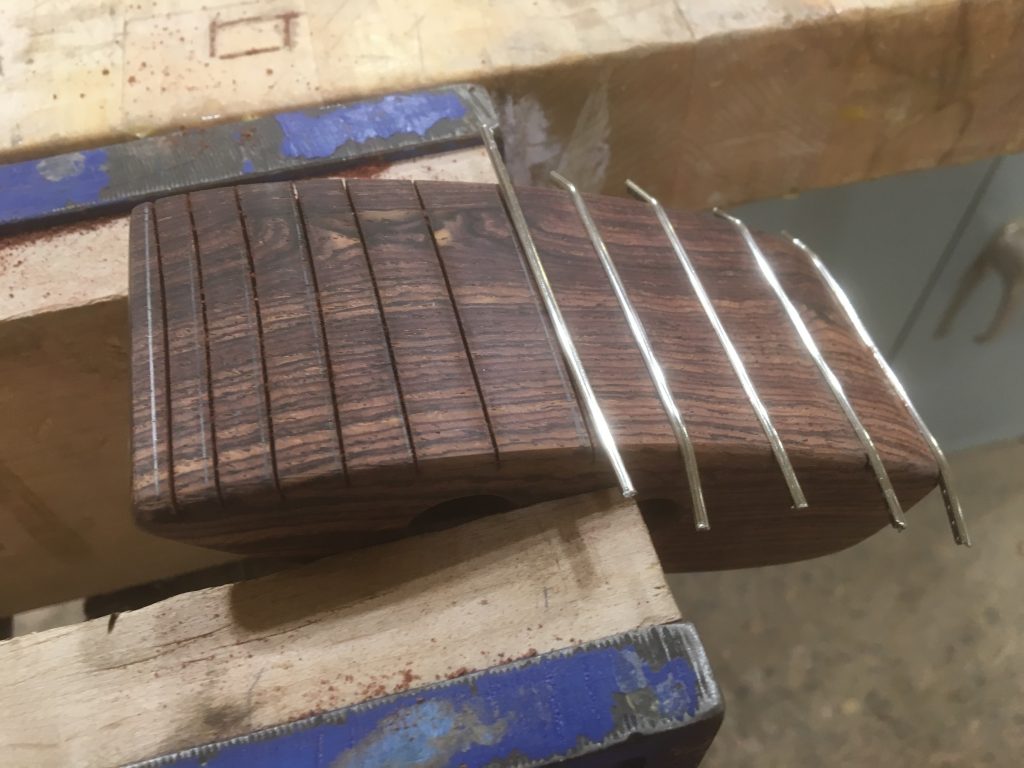
Fretting the dax with the help of an oscillating tool. Works nicely for people in a hurry.
Next, we’ll fret the dax. I trace on the markers for frets from the same strip of paper Hans printed out for me in 2006…but as I do this, I remember that the fret positions are arbitrary, as discussed above. So, I might nudge them up or down, or tack on an extra fret based on the length of the actual piece, for I am always trying new things in pursuit of the perfect dax. Once you have the marks, cut the frets. Most fret slots are cut on linear material—but the dax is curved, making this procedure a bit of a challenge. You can use a special fret-slotting saw. Or, if you’re like me, you might be staring at ten blocks of wood feeling a bit demoralized by the task ahead. I found that one of these Fein oscillating tools works really well for this procedure, and I have a saw-blade that happens to have the perfect kerf to match the fret-tangs of medium fretwire. The frets usually stay in without any sort of adhesive, but you can put a tiny droplet of superglue in the slot in case you cut the slot too wide.
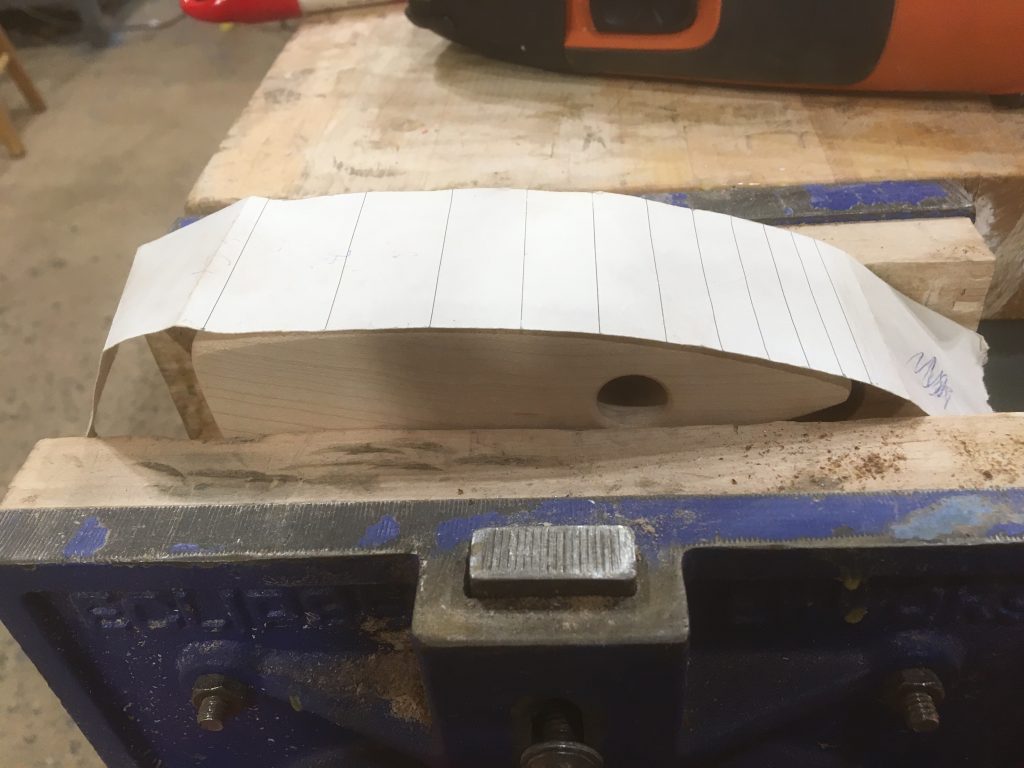
I’ve had this same piece of paper since 2006. Step 1.
Step 2.
Step 3 and four! Make sure you start the cut on an angle, or, no matter if you’re using a handheld saw or electric saw, disaster will strike.
Cut the frets long, pound them in, and then grind them down on a disc sander, and then flush with the belt sander. I’ll also sand down the fretted side on the dax slightly, to make sure the frets are at a uniform height. This might be a little too sensitive a task for the belt-sander—the orbital sander is better. At this stage, I’ll break the edges of every surface on the dax, putting a light chamfer or roundover on the curves by rocking the dax on edge on the belt sander or orbital sander. The fretwire will remain sharp, and I’ll fix this with a file or buff it. At this stage I begin to close my eyes and palpate the thing. Musicians have sensitive hands and I don’t want anything to feel awkward in the palm. If I feel something sharp or gnarly I try to file it smooth. Have you ever held an old guitar before, and noticed how lovingly soft and worn in the sides of the neck are?
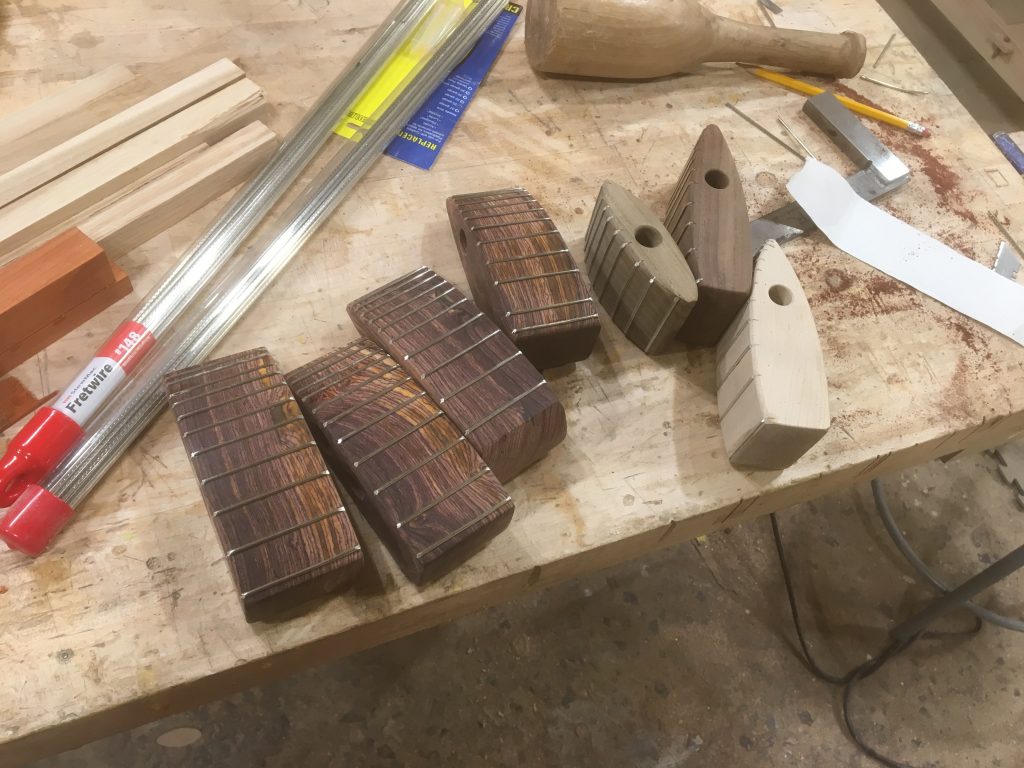
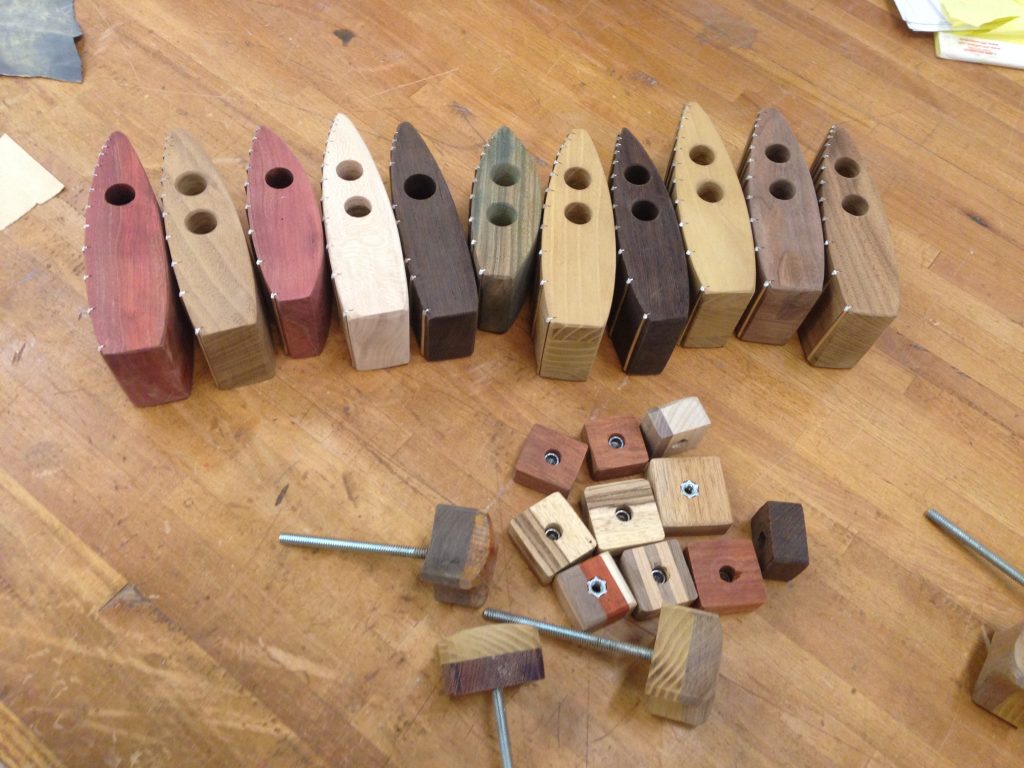
A new batch of daxes, from humble maple to rare cocobolo.
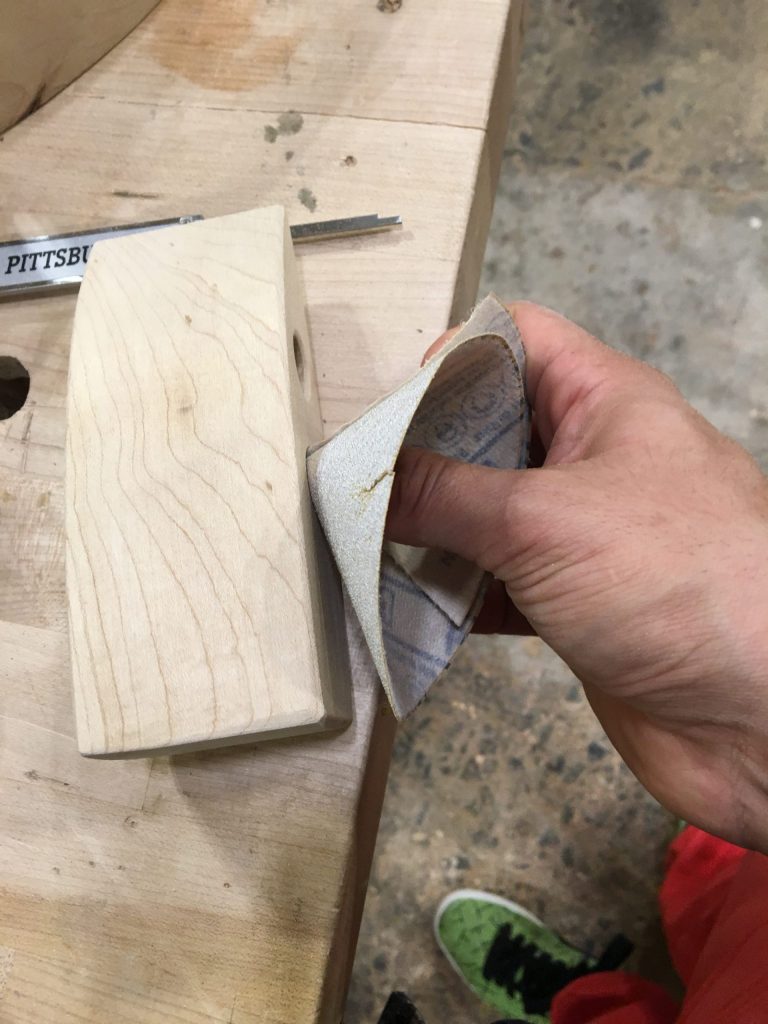
After the dax is finished (once more with PolyX oil, or whatever you please), it finds its humble denouement with the application of unseemly cardstock (in German, fotokarton) taped carefully to the smooth side of the dax. This covers up the beautiful job you did sanding, unfortunately. This misunderstood little detail does not look so graceful but helps mellow the tone quite a bit. I played for a few years without the cardstock but really noticed the improvement in sound quality when I returned to using it. It’s like putting a little bit of tape on a snare drum—the little dampening goes a long way.
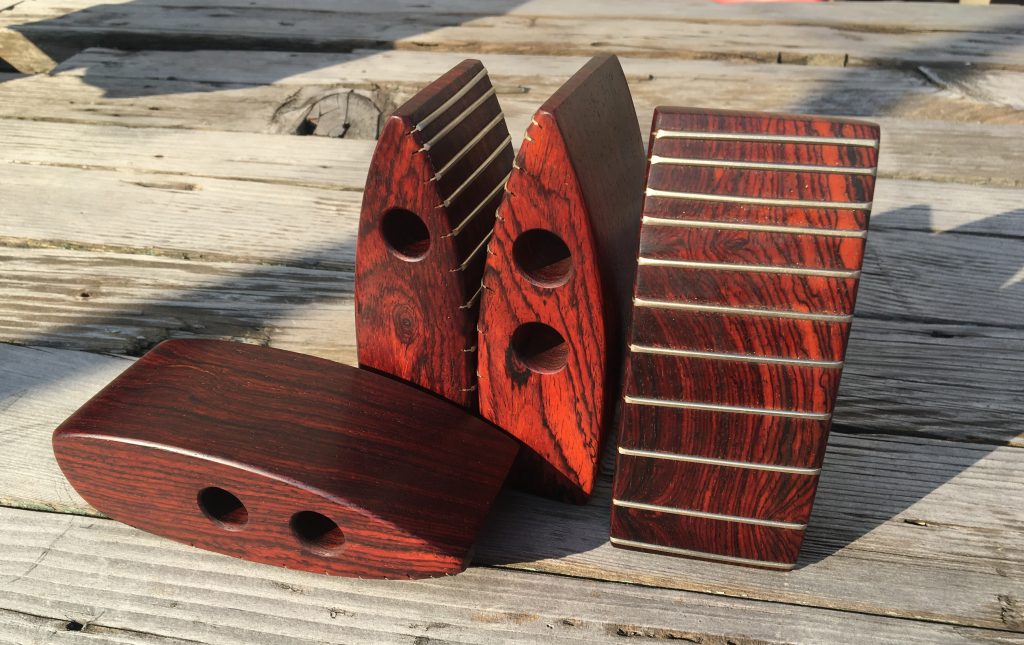
The cocobolo daxes, months after sanding and oiling, take on a rich color.
And, with that piece of lame cardboard, it’s done. That’s the end of our dax journey, which means that this series of articles about the daxophone is also at its end for the time being. Thank you so much for following along. Thanks again to The Center for Art in Wood, and to NextFab for the support and inspiration! Please get in touch if you have more questions.
Daniel is the type of composer that is more likely to reach for a soldering iron than a pencil. He has performed as a soloist on modular synthesizer with the American Symphony Orchestra, developed sound installations in abandoned concert halls, and played innumerable basement punk shows. To see more of his work, please check out his website here.
Here are some supplies and tools we find essential in our everyday work around the shop. We may receive a commission from sales referred by our links; however, we have carefully selected these products for their usefulness and quality.


