


We may receive a commission when you use our affiliate links. However, this does not impact our recommendations.
A paper mock-up can help you achieve a strong and decorative Houndstooth dovetail.
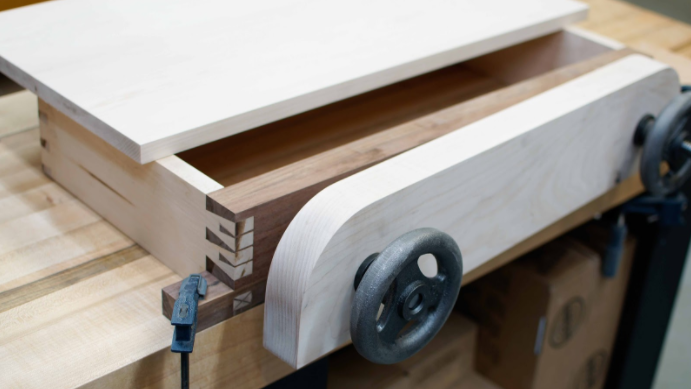
As an aerospace engineer I don’t often get the opportunity to sprinkle snippets of beauty into my day job – “I mean, isn’t a missile going super-sonic beautiful enough?” Definitely not when it comes to woodworking! I’m starting to realize that one of my weaknesses is my inability to interject design aspects into my woodworking while maintaining structural integrity. But truthfully, these two things don’t need to be separate and exclusive. Case and point, the Houndstooth dovetail has become a common joint used to strengthen the end cap on many traditional workbenches as well as adding a decorative element, especially when using contrasting woods (in my case, Hard Maple and Black Walnut). I decided to incorporate the Houndstooth dovetail into my Moxon vise mini bench. With limited experience in cutting dovetails, I knew I was in for a real treat.
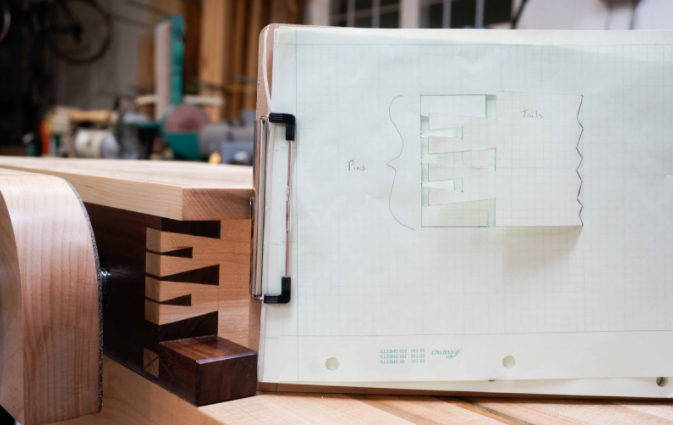
The Houndstooth dovetail consists of long pins and tails, and short truncated pins interleaved into the tails.
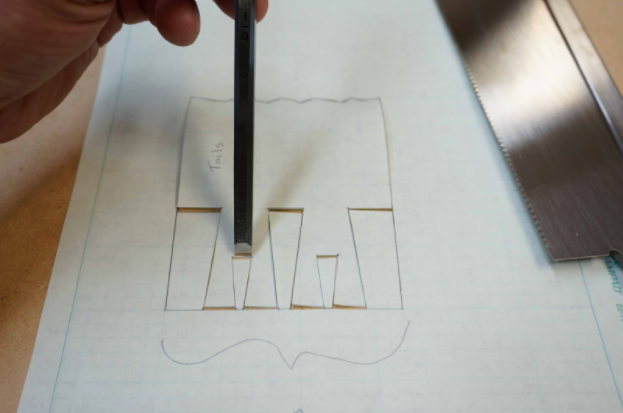
To attack this joint I called upon my strengths as an engineer and an academic. I broke out the engineering paper, compass dividers, straight edge ruler, and mechanical pencil. Going strictly off of an image on my tablet, I made a full scale drawing and proceeded to cut out the paper joint with a utility knife. This did two things: 1) gave me spatial awareness to ensure I had room to make the appropriate cuts with my hand saw and chisels, and 2) rehearsal before taking the saw to the wood.
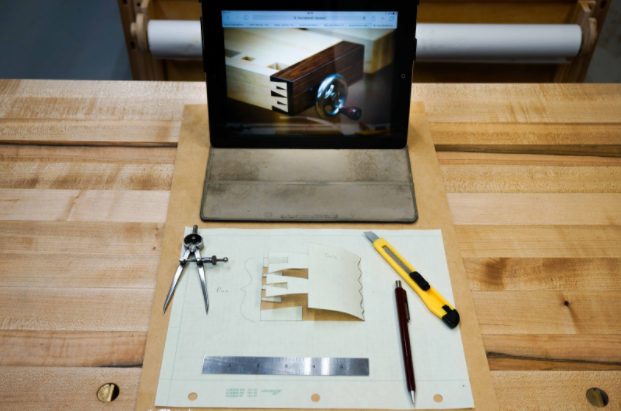
With dividers, a ruler, pencil, utility knife, and an image, I made a paper mock-up of the joint.
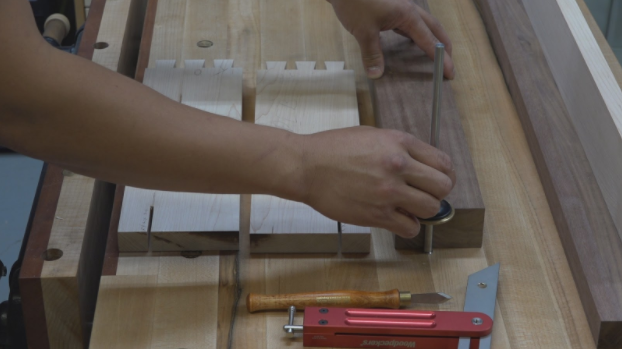
Making sure a ¼” chisel will clean out the pin sockets and the Japanese pull saw won’t cut into adjacent long pins.
Once I understood the spacing and process, I started the layout for my Moxon vice. The Houndstooth dovetails are located at the corners of the back jaw and bench sides, which means I was dealing with two different thicknesses. The baseline for the tails is defined by the thickness of the back jaw, while the baseline for the pins is defined by the thickness of the bench sides. I also had to define the depth of the short truncated pins, which I chose to be half the depth of the tails. Once I established the baselines with my marking wheel, I then used dividers, a double square and a marking knife to space out and mark the long and short pin sockets.
The depth of the tails is defined by the thickness of the pin board and vice versa. The short pins are defined by half the depth of the tails.
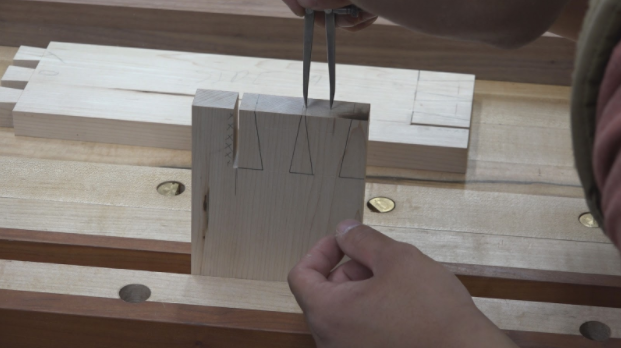
Dividers were used to evenly space out the short and long pins.
Outline of the tail and pin sockets to display the difference in depth between the short and long pins.
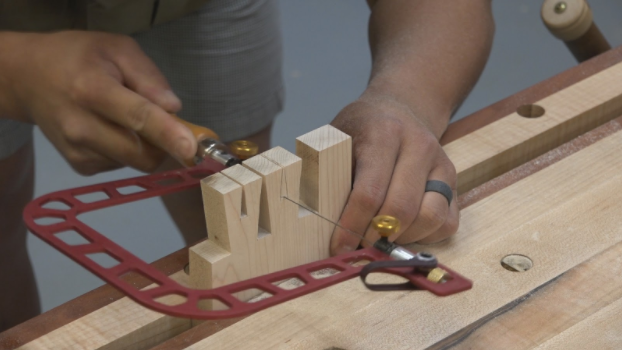
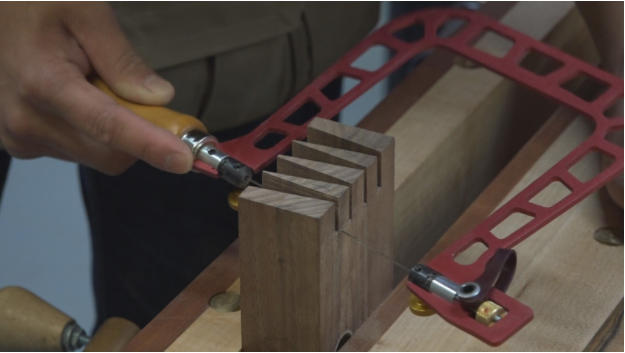
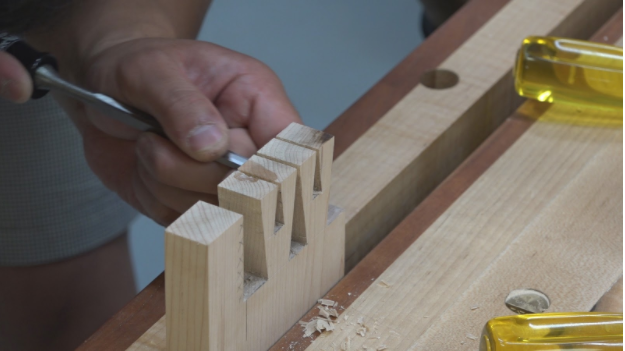
To cut the tails I needed all the help I could get, so I opted to use a magnetic dovetail guide (Katz-Moses Dovetail Guide) and a thin kerf Japanese pull saw (Dozuki “Z” saw). Using a dovetail guide is like sawing with training wheels – you’re able to get a clean, accurate, and straight cut as you’re developing your hand saw skills. I found that the Japanese pull saw has a thinner kerf than Western style pistol grip saws, and therefore tended to be more forgiving. One thing to be particularly careful of is clearly marking and cutting on the waste side of your layout lines. Once I make my cuts to the baseline I mark my waste and use a fret saw to remove the bulk of the waste material. Finally I use my smallest chisel (1/4”) to chop down to my baseline and larger chisels (3/8” and 1/2”) to trim the walls of the tails down to size.
A magnetic dovetail guide and Japanese pull saw are like training wheels. This helped me remain within the waste side of the layout lines.
A fret saw removes the bulk of the waste.
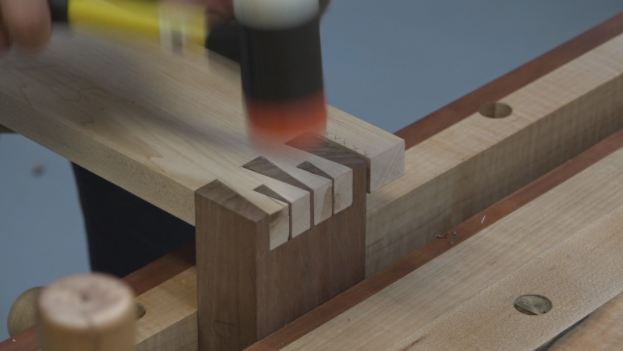
Chopping the pin sockets down to the baseline.
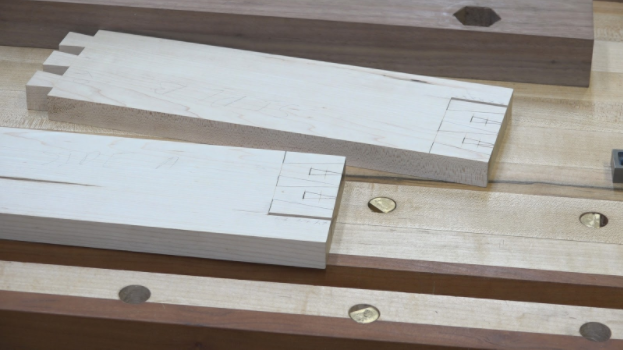
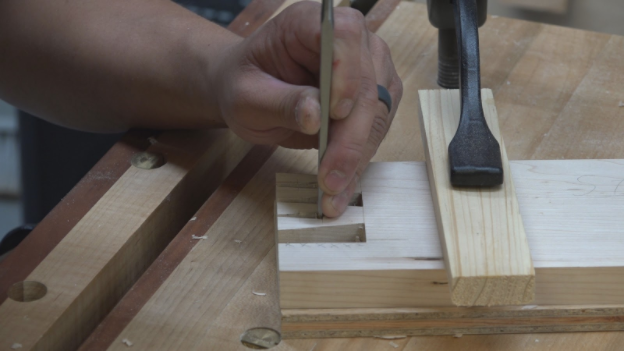
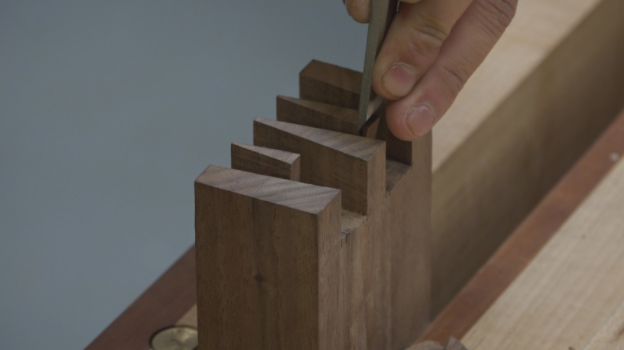
Now I’m ready to transfer my pin sockets onto my pin board with a marking knife. It’s difficult to mark right to the baseline of the short truncated pins, so it’s important that you layout the corresponding baseline with a marking wheel first. I used a shop-made dovetail alignment board to keep the tail board perpendicular to the pin board and the reference faces flush to each other. Again, I stress the importance of clearly marking and cutting on the waste side of your layout lines. Just like before, I used a magnetic dovetail guide and Japanese pull saw to help guide my cuts. I removed a majority of the waste for the long pins with the fret saw. To remove the waste for the short truncated pins, I skewed the fret saw making sure not to cut past the corresponding baselines. This severed the long grain wood fibers so that I could chop away the waste for the short pins. With my larger chisels I pared across the pins to avoid tapering them and risk showing gaps along the end grain of the tails.
Laying out the baseline for the short truncated pins with a marking wheel.
A dovetail alignment board helps keep the tail board perpendicular to the pin board and the reference faces flush to each other.
Skewing the fret saw to sever the long grain on the waste side of the short truncated pins.
Chopping down the waste to the baseline of the short truncated pins.
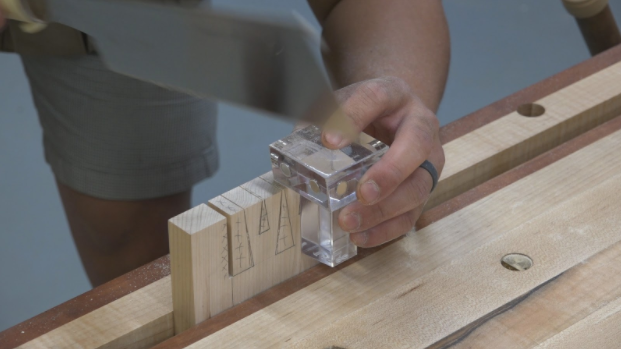
Undercutting tails and pins (not shown) to fully seat the joint.
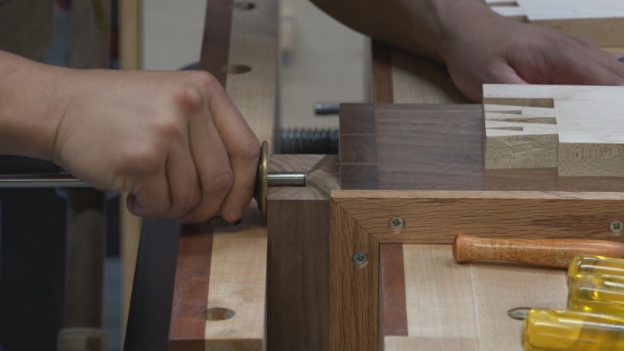
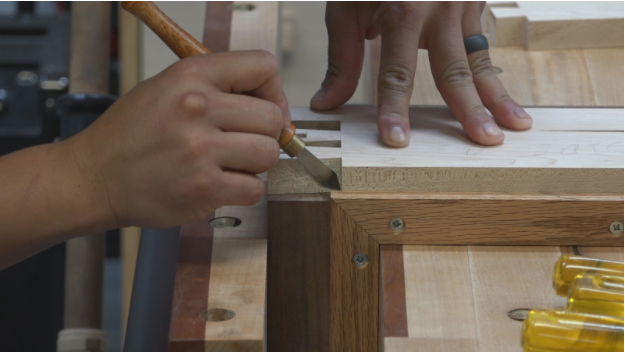
After a couple of iterations of paring and fitting, you should be able to get a snug joint.
After an initial test fit, I carefully pared away the pin walls as needed and undercut the pin and tail sockets so that the joint could fully seat. I made sure to take light paring cuts across the pins, especially around the short pins, which are more delicate than the long pins. After a couple of interactions of paring and fitting, I couldn’t believe it! As a novice dovetailer I was able to cut a beautiful pair of Houndstooth dovetails. I attribute this to designing and cutting the joint out on paper, first. Additionally, using a magnetic dovetail guide virtually eliminated the possibility of the saw blade wandering past my layout lines. This allowed me to focus on my sawing technique and body position.
This systematic approach could help demystify some of the more complex joinery techniques that have been on your wish list. Mock-ups are commonly used when designing and scaling furniture pieces and I thought it would be prudent for me to do the same on a micro-level.
Here are some supplies and tools we find essential in our everyday work around the shop. We may receive a commission from sales referred by our links; however, we have carefully selected these products for their usefulness and quality.


An idea joint. Thanks for sharing your meticulous process. Your clear explanation made it seem simple.