


We may receive a commission when you use our affiliate links. However, this does not impact our recommendations.
Nancy Hiller is a weekly contributor to the Shop Blog. Look for her articles every Monday morning and be sure to check out her book, Making Things Work.
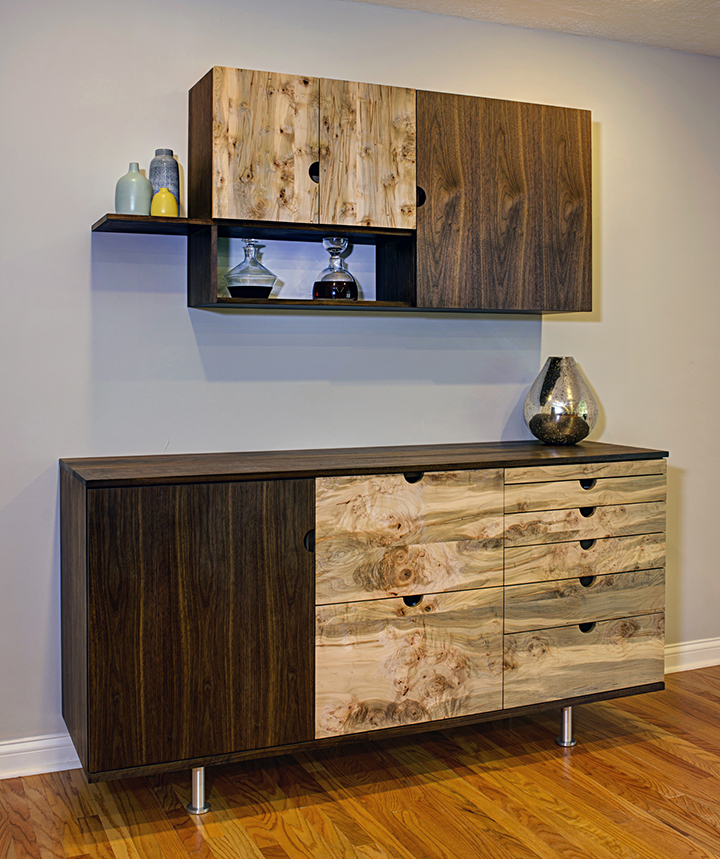
The drawers in this bar are fitted on Blum Tandem slides.
So you’ve decided to mount the drawers for your project on Blum Tandem slides. What do you need to know before you start cutting out drawer parts?
1. Choose your slide model and length
Note: The following instructions are for Blum Tandem 563 slides. The drawer width requirements are slightly different from those for model 569.
The slides come in 3″ increments, starting at 9″ and running up to 30″, but the most commonly used length is 21″, because it’s the size that works with standard 24″-deep base cabinets. Why not use a 24″ long slide? A standard 24″ deep cabinet won’t accommodate it. The slide lengths are nominal, not actual; they refer to the depth of the drawer you’ll build, not the length of the slide. The slides themselves are a little longer than their nominal size, to accommodate the adjustment features.
A few weeks ago, I shared how to install Blum Tandem Slides with two jigs in a blog post. Once you have the slides in place, here’s what comes next.
2. Decide the thickness of your drawer box parts
The thickness of your drawer parts will affect the length of the drawer’s front and back, so it’s a good idea to decide this element early on. My preferred thickness for most applications is 1/2″, because it looks finer than, say 5/8″ or 3/4″. That said, if you’re starting with 4/4 stock and are just going to be turning the unneeded thickness into chips, you may prefer to keep your parts thicker to save material and time. For this exercise, I’ll use 1/2″ as the thickness.
3. Determine the other dimensions of your drawer parts
Remember from my last post that if you’re using Blum Tandem slides, you’ll need to apply a face to the drawer front to conceal the spaces around the drawer box. The face can be inset, half- or full-overlay. In this post, I’ll stick to the drawer box, separate from the face.
You need to consider three primary dimensions in determining the size of your drawer: width, depth (front to back; in this case, the depth of the drawer corresponds to the length of the slide), and height.
A. Drawer depth from front to back (i.e., length of sides)
For this exercise, we’re going with a standard 21″ (nominal) drawer slide. Because I’m going to build the drawer with through dovetails, my sides will be the full (nominal) length of the drawer slide: 21″.
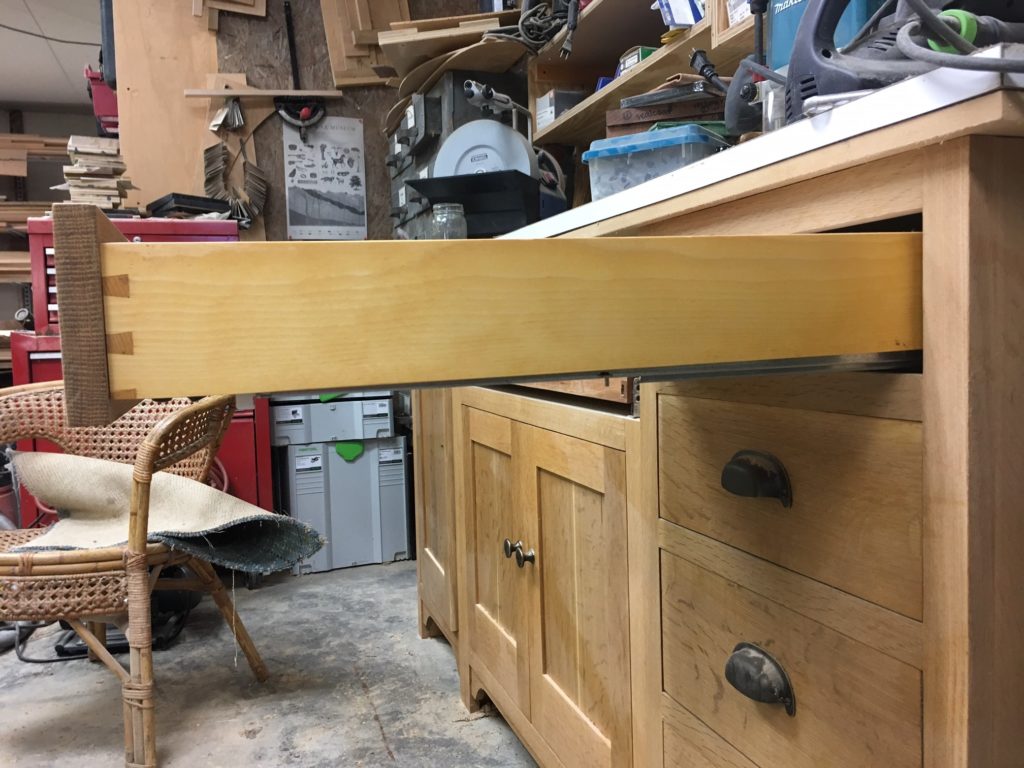
This drawer is made with through dovetails.
The same would apply if I were putting the drawer together with biscuits; the sides would need to come all the way to the front of the drawer box, with the front and back fitting between them, for maximum strength (i.e., to resist coming apart under the tension of being pulled forward).
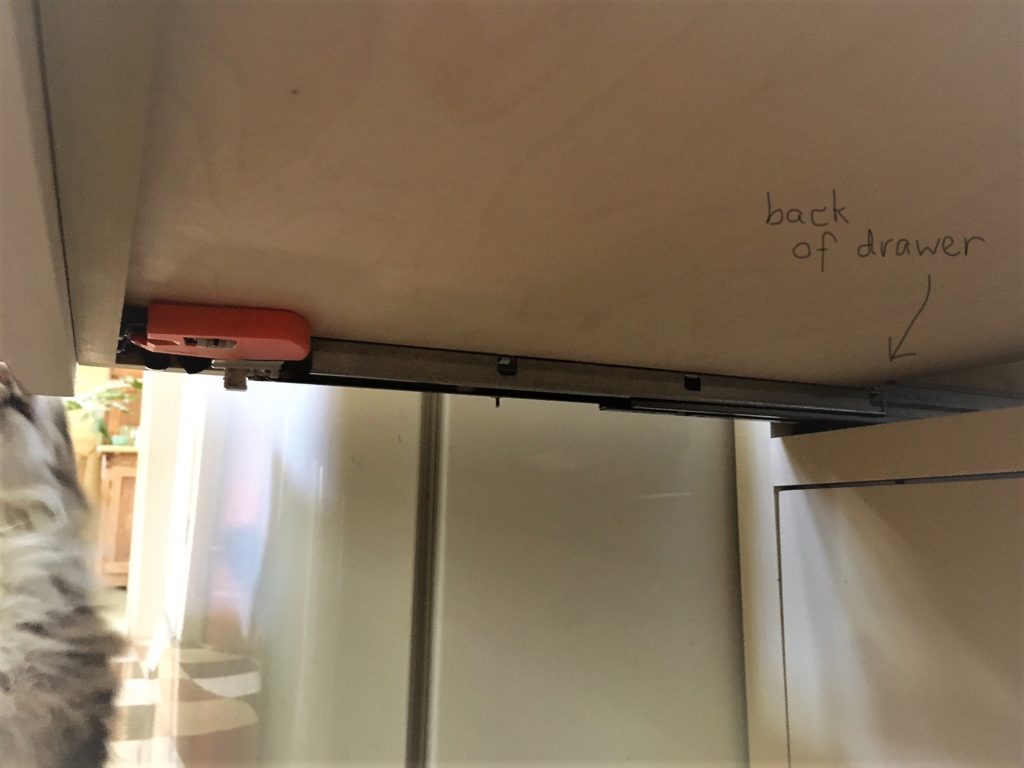
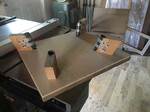
The crude arrow points to the back of the drawer, where the tilt adjustment mechanism fits into a hole in the drawer’s back.
If you plan to use blind dovetails such as those produced by many router jigs, you will need to subtract the amount of wood left at the front and back from the overall length of the slide to determine your drawer sides’ length.
B. Height
Because the runners are designed to sit between the drawer sides and are 1/2″ high, the height of your drawer will need to factor in this 1/2″ below the drawer bottom plus the thickness of the bottom, plus however much vertical clearance you need for the contents you plan to store in the drawer. Let’s say you’re building a drawer for a food processor, a blender, and a few other small kitchen appliances. The first question: Can you take the appliance apart to reduce the height you’ll require?
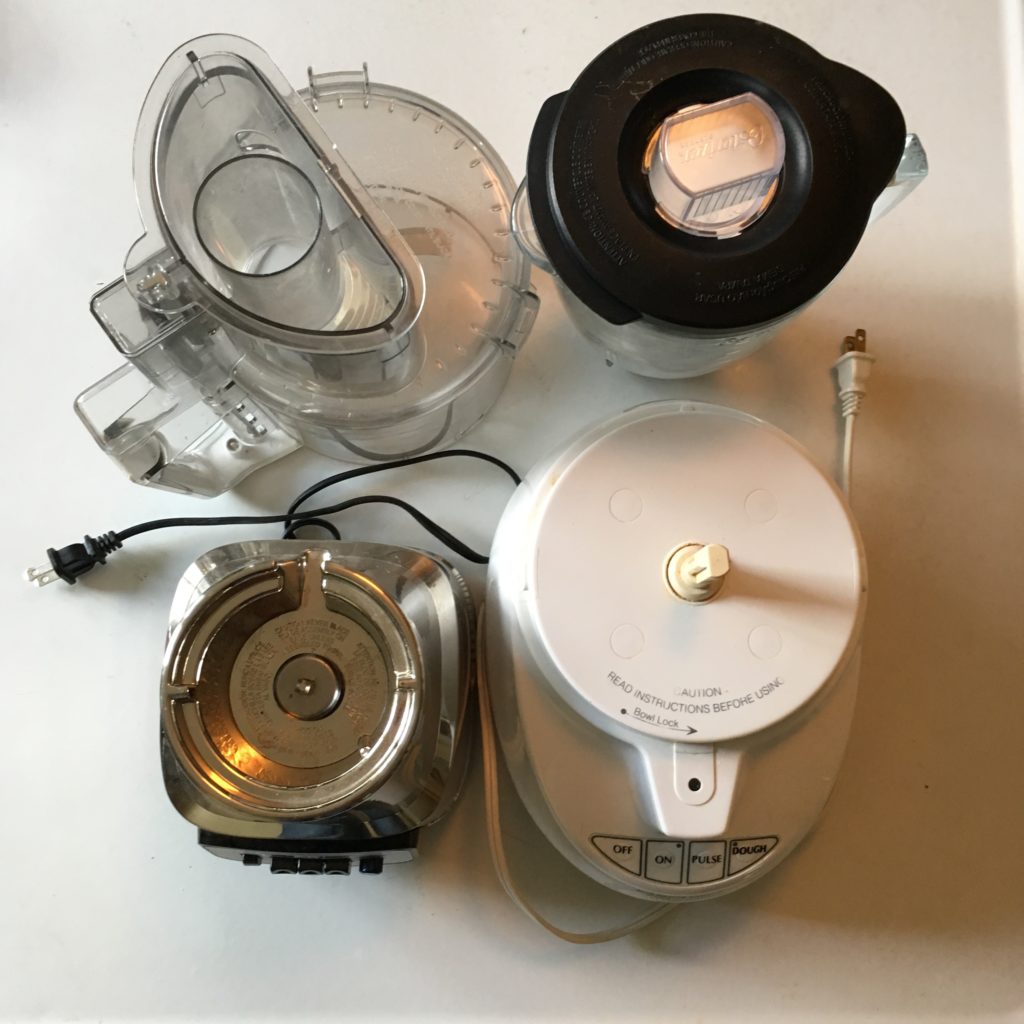
This food processor and blender only need 10″ in height for storage when the parts are disassembled.
Now add your net height requirement + drawer bottom thickness + 1/2″ required by the slides to get the net vertical dimension. *Note that the drawer sides don’t have to come up to the top of the contents. For many applications, it’s more convenient to have lower drawer sides, as they make moving bulky objects in and out of a drawer easier. For appliance drawers, I often make the sides, front, and back just high enough to keep the contents from sliding out — so, in this case, 4″. But the net vertical dimension is still determined by the height required by the contents.
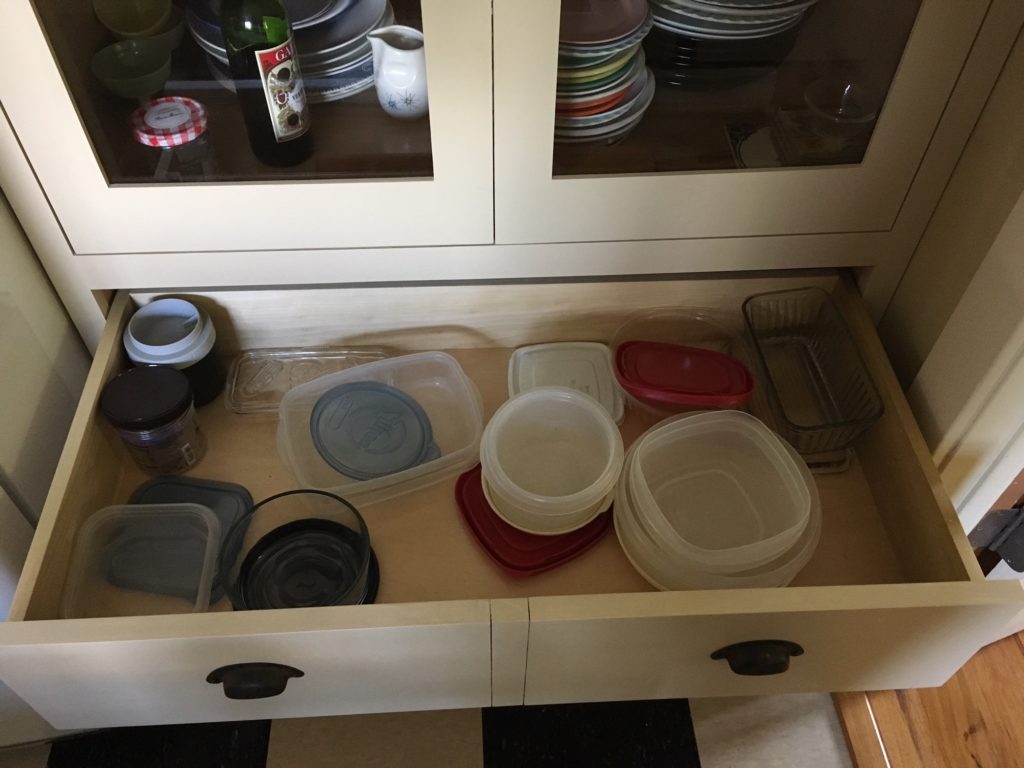
This large drawer for storage containers has relatively high sides, to keep the containers and their lids from falling over the edges. A similar drawer for large items such as appliances or pots and pans could be made with lower sides.
You’ll need at least 9/16″ below the drawer sides and 1/4″ above them, i.e. a total of 13/16″ in additional height, to determine your minimum vertical opening.
Let’s say I’m going to use a 1/2″ thick bottom for this drawer because these appliances and the others I’m going to store in it are relatively heavy. This means I need:
10″ + 1/2″ (drawer bottom thickness) + 1/2″ (slide requirement) = my net vertical dimension, i.e. 11″
Now I’ll add the 13/16″ of space for clearance below and above to yield the minimum vertical opening: 11 13/16″.
If I’m putting this drawer at the bottom of a three-drawer stack in a cabinet with a traditional face frame and drawer rails, this means the distance between the bottom cabinet rail (i.e., the top edge of the bottom face frame member) and the first drawer rail (i.e., the lower edge of the bottom-most drawer rail) must be at least 11-13/16″. Of course, I can make this distance larger if I have space and aesthetics demand it, but I cannot make it smaller.
You need to go through the calculations above to lay out the vertical components of your cabinet (unless you just want to space your drawers based on how the faces will look, rather than trying to plan for particular objects that need to be stored). Once you’ve done that, if you decide it would be most convenient for your drawer box to be just 4″ high (even though the space it will fit into will be at least 11-13/16″ high), go for it. That’s the dimension I’m going to use here.
So now we know that our sides will be 4″ x 21″.
C. Width
The width of your drawer box’s front and back will be determined by (a) the type of joinery you plan to use, (b) the thickness of your drawer parts, and (c) the width of the opening.
For example, if you’re making your drawer with biscuits, the front and back will fit between the sides. If you’re making your drawer with dovetails, the front and back will run the full width of the drawer.
The width of the opening is the width between the cabinet sides, or, if you’re using a face frame, between the face frame stiles. *Note: If your face frame stiles protrude into the carcase, you will either need to shim out the sides by the amount of that protrusion so that the drawer slides will sit flush with the inside edge of the face frame (as in my last post) or you will need to use a rear mounting bracket.
Yes, this is the same image as the last one. Here I’m using it to show what’s meant by the “opening width” — i.e., the width between the face frame stiles. Because of the way Blum Tandem slides are engineered, there will be a little gap between the outside of the drawer (at left and right) and the edges of the face frame.
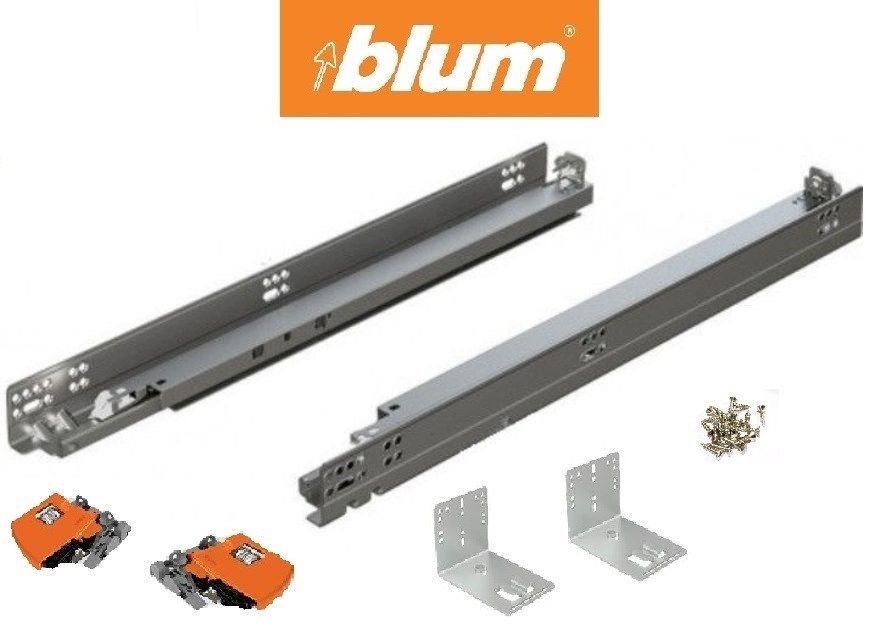
Rear mounting brackets (the L-shaped parts at bottom right) allow for installation in cabinets with face frame stiles that protrude into the carcass. In this case, the drawer slide is screwed to the cabinet at the front, then slotted into the rear mounting bracket which is screwed to the back of the cabinet.
What matters ultimately in determining the width of your drawer box is, to quote the Blum installation instructions:
“Inside drawer width must equal opening width minus 42 mm (1-21/32″) for TANDEM to align and function optimally.”
If you’re using biscuit joinery, this makes it easy to figure how long the front and back need to be, because the length of the front and back is precisely equal to the “inside drawer width.” Say your drawer opening (the opening between the face frame stiles) is 15″. Your “inside drawer width” will be
Drawer opening of 15″ – 1-21-32″ = 13-11/32″.
If you’re using dovetails, the calculation takes an additional step:
Drawer opening of 15″ – 1-21/32″ = the inside drawer width of 13-11/32″, as above. Now you need to add the length for the pins, which will be the same as your drawer sides’ thickness. So if the sides are 1/2″ thick, the whole calculation will be:
Drawer opening of 15″ – 1-21/32″ + (2 x 1/2″) = 14-11/32″. Because 21/32″ is just a hair over 5/8″, and because, as I mentioned above, I’m using drawer sides that are 1/2″ thick, I can take a shortcut and simply subtract 5/8″ from the opening width in calculating how long my drawer box front and back should be.
So here’s my finished cutting list, based on 1/2″ thick stock for a drawer box 4″ high made with through dovetails:
Sides: 2 @ 1/2″ x 4″ x 21″
Front and back: 2 @ 1/2″ x 4″ x 14-3/8″.
I will cut my parts to length and do the joinery with the back at the same width as the front, then rip it to fit over the drawer bottom after I’ve cut the grooves in the front and sides.
The Blum Media Center at blum.com has installation guides for all hardware. Look for “runners” then go to the Blum Tandem sections. https://www.blum.com/us/en/02/90/ Always make sure that you’re following the instructions for the specific model you are using.
Here are some supplies and tools we find essential in our everyday work around the shop. We may receive a commission from sales referred by our links; however, we have carefully selected these products for their usefulness and quality.


Hi Nancy,
I have a question: In your example above about drawer height, and I’ll use the 4″ side as an example, what is the interior height? Is or 4″ – 1/2″ (drawer bottom) – 9/16″(clearance on bottom)? And is 13/16″ clearance (9/16 below, 1/4 above) your numbers from experience or recommended by the manufacturer? ( I guess that was two questions.).
Thanks in advance.
Patrick
PS I really enjoy your posts.
PPS Note to Megan: Keep her happy. She’s great.
This is very useful information. Any suggestions on what to do if you are retro fitting (upgrading) to these slides and replacing drawers and faces but keeping the existing cabinet bases in place? I can kind of figure it out using the measurements and math above for retro fitting, just doing this in reverse. But, I was wondering if you had additional suggestions.