


We may receive a commission when you use our affiliate links. However, this does not impact our recommendations.
 I resist making jigs like I resist going to the dentist. So when I do break down and build a jig, it’s going to be something with a dial indicator and lasers. No, that’s a lie. It’s going to be something dirt simple but solves my difficulties completely.
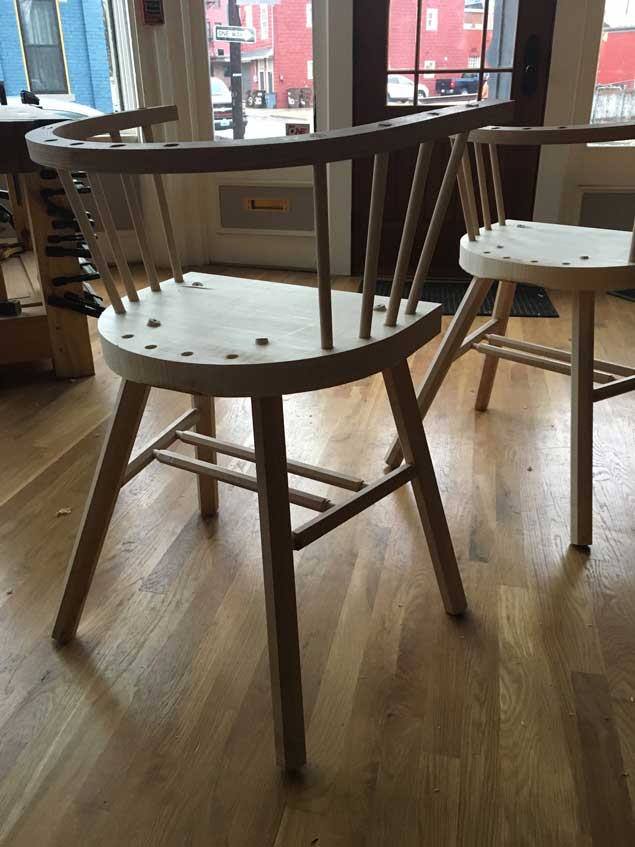
I build a lot of chairs with spindles that run between the seat and the armbow. The best way to drill the holes for the spindles is with the armbow clamped in place. The difficulty is to:
- Clamp the bow in place so it hovers over the seat in the correct position
- Hold the bow so it doesn’t move while drilling
- Make it so the jig doesn’t get in the way of drilling
- Make the jig so it is easy to clamp to the seat and remove.
I’ve worked with many chairmakers, I’ve read every book I can get my hands on and I’ve taken five or six classes from chairmakers who are much better than I. But I’ve never been happy with the jigs that hold the bow in place.
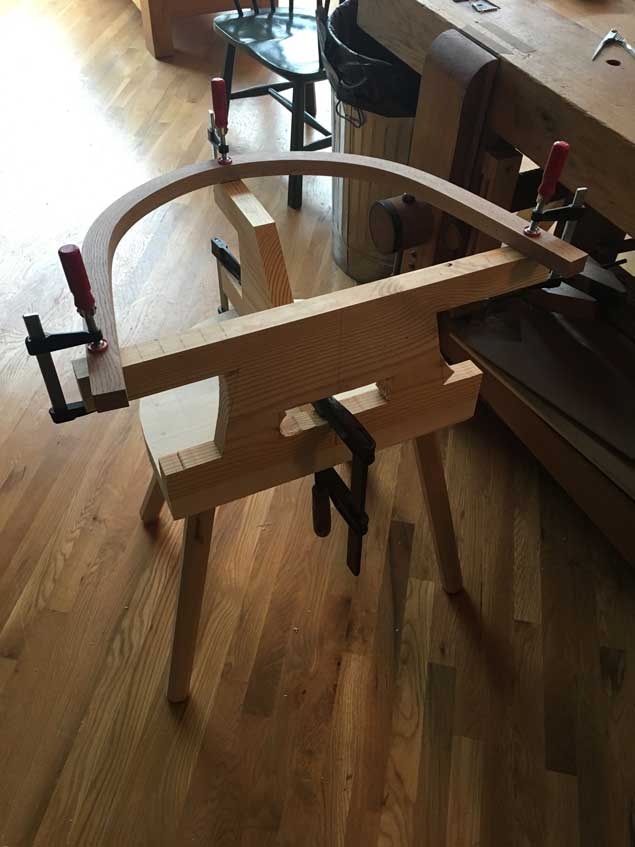 After a couple weeks of thinking, I designed this jig and built it in less than 10 minutes from construction materials. Here are the important points so you can make one yourself.
- The jig is in two parts. An upright at the front of the seat for that hands of the armbow that holds them 9-1/2” off the seat. A rear upright that fits between the two rearmost spindles that holes the armbow 9” off the seat.
- There is a hole in the front upright so you can clamp both uprights to the center of the seat with one clamp.
- Both uprights are marked in inches so that you can center the armbow over the seat and move it forward and back to get the correct pitch to the back of the chair.
- Lots of clamping positions to allow me to secure the jig to the seat.
- The thing is cheap, disposable and easy to make with a band saw.
I used the jig for two chairs last week and it worked flawlessly. The armbow was easy to position, easy to drill and didn’t move a bit. This jig is going into the permanent collection (instead of the firepit).
— Christopher Schwarz
Here are some supplies and tools we find essential in our everyday work around the shop. We may receive a commission from sales referred by our links; however, we have carefully selected these products for their usefulness and quality.


Hi Chris, do you use greenwood to make the back rest curve or steam kiln dried wood?
Thanks
I don’t know, to me, that jig seems to be more complicated than necessary.
If the chairs you are building are done in sets, then two hole jigs would make the job more efficient and faster.
Once you have the chair arm and seat drilled to your satisfaction, you can:
1. Flip them upside down and clamp them to a piece of ply wood.
2. Use their already drilled holes to place the holes at their proper spacing and angle.
{Not necessary but you could make the holes a bit larger for metal inserts for long lasting use.}
3. Cut out each form which is now a template of the part.
4. Add laminate or other stiff but bendable material around the edges to provide quick and easy alignment and to aid in keeping the parts in place.
To use:
1. Place the part in it’s jig.
2. Clamp the part.
3. Drill the holes out like you would with a pocket hole jig.
If you know someone with a foundry, you could make the jigs out of foam insulation and have the jigs cast in aluminum. But that wouldn’t be as much fun as making one yourself.
But then again, I don’t make chairs for a living or do a lot of woodworking, so what do I know.
More basically….how do you set the angle of the drill bit so that the hole you drill in the arm bow is at the correct angle such that the spindle will hit the exact spot on the seat?
Having never seen a chair being built, this is probably a stupid request, but could you show a picture of you (or anyone) using the setup to drill the holes? My guess would be that you drill both the rail and the seat holes at the same time through the rail, but that would be a very long drill bit. And pretty darn good aim.
??? “Inquiring minds want to know” (remember that rag?)
Would you carve the jig bottom for a chair with a carved pommel? Or use shims or pads? Seems like a good design that is very adaptable.