We may receive a commission when you use our affiliate links. However, this does not impact our recommendations.
Editor’s note – we found Gus’s project on https://www.reddit.com/r/woodworking and invited him to write an article on the build. Email David Lyell if you have a build you’d like to have considered for the Shop Blog.
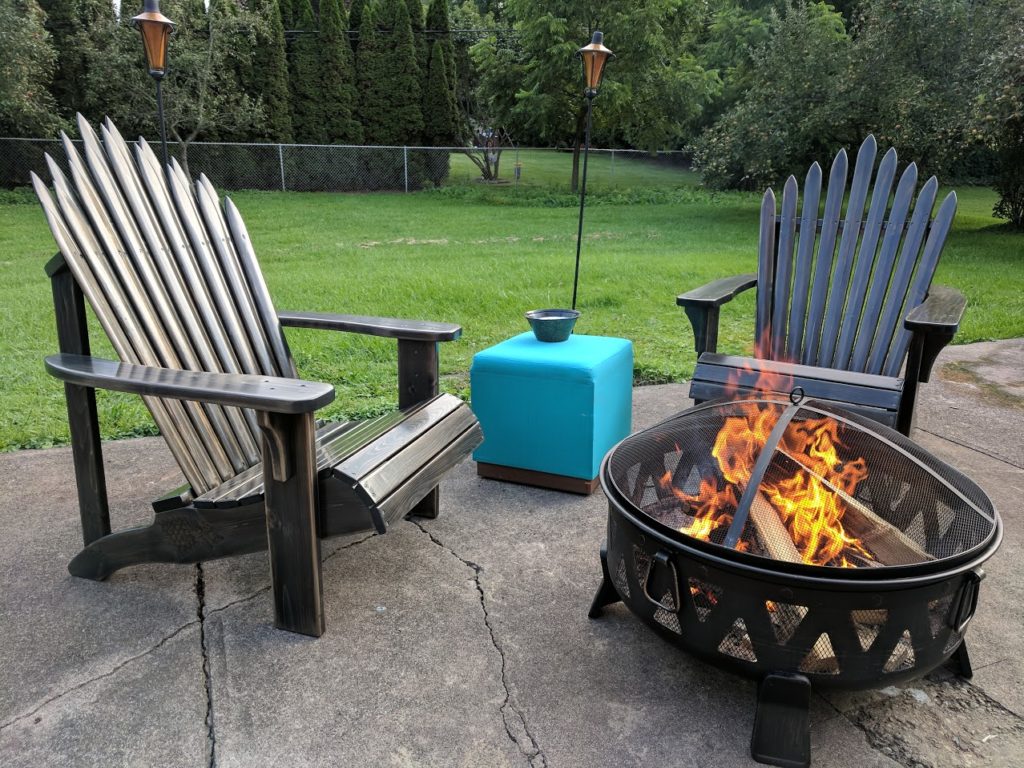
I made a set these Game of Thrones Adirondack chairs for our anniversary.
by Gus Bertrand
Unless you’ve been living on a deserted island, you probably know of a little television show called Game of Thrones. I haven’t seen it, but my wife says it’s pretty good. I don’t know. What I do know is that I needed to get her an anniversary gift and I was fresh out of ideas. Then it hit me. I have been wanting to build a set of nice Adirondack chairs, so I figured I would combine the Iron Throne from Game of Thrones with the classic Adirondack chair style and comfort. After searching the web for some design ideas, I quickly realized that I was on my own. I went into this build with a drive to make something unique. When the first chair turned out so fun and comfortable I decided to “up my game” and build a more detailed second one!
For the structure of the chair, I found basic Adirondack chair plans. The build I chose had the style I was looking for, was straightforward and fairly simple, allowing me more time to focus on the details. For this project, I decided to go with pine because it is lightweight and cost effective.
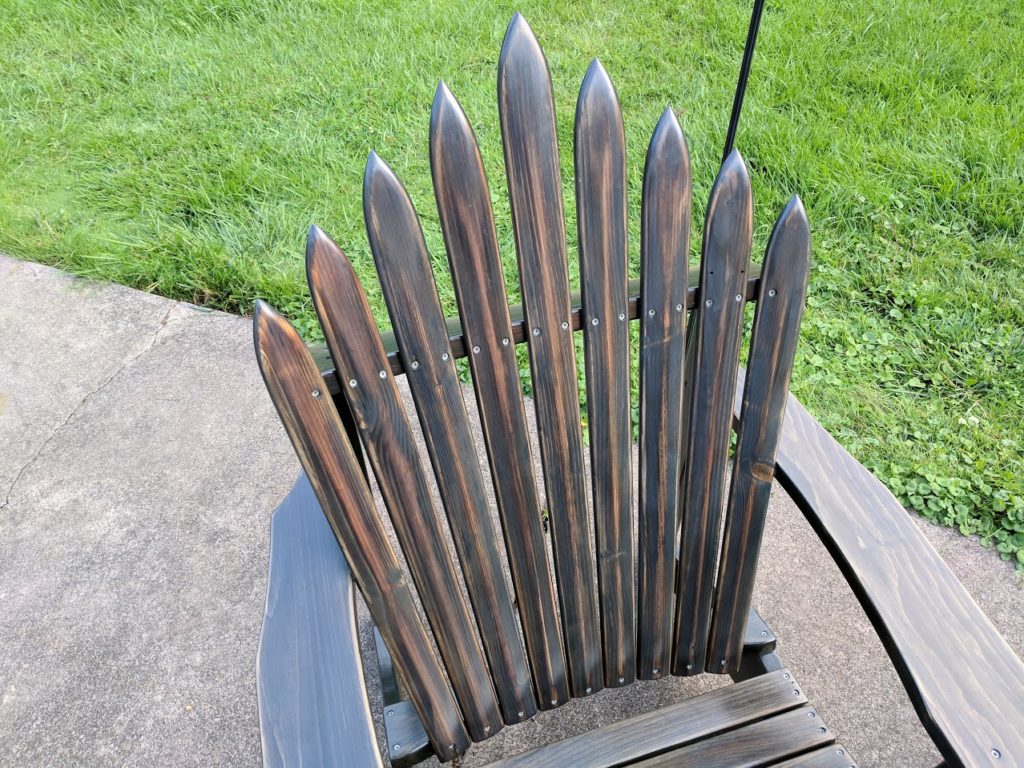
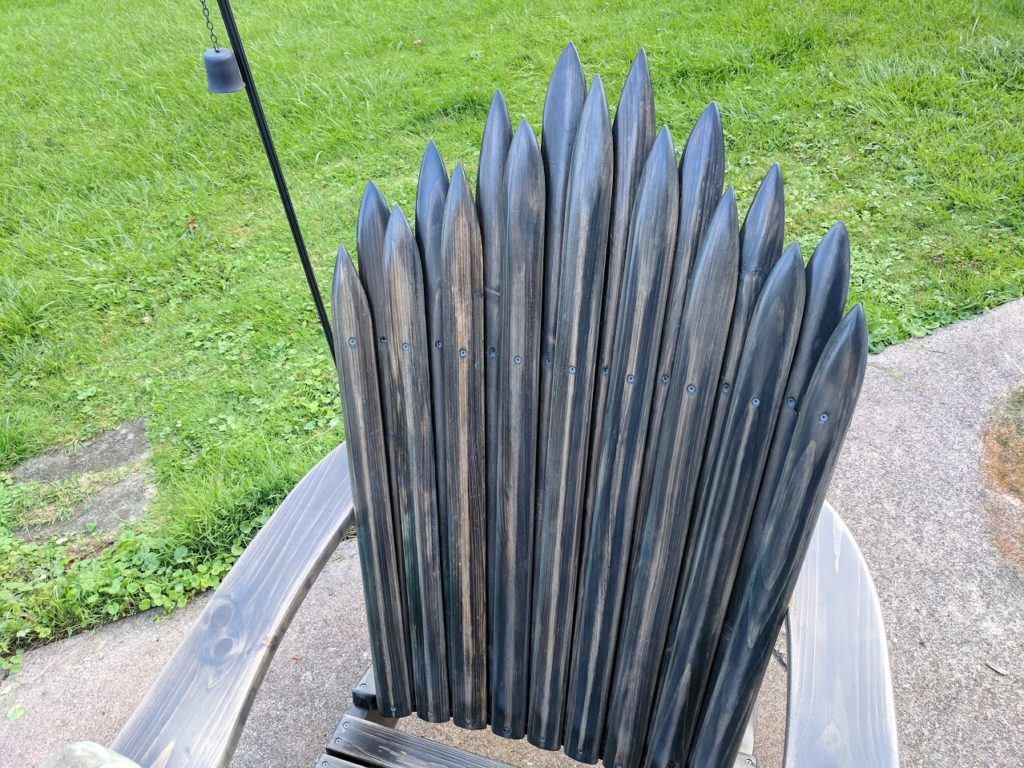
The narrower slats allowed me to fan the slats out at the top.
The first thing I focused on was redesigning the back to make it look like it was made of swords. I was going for a much simpler design than the “thousand swords forged by dragon fire” look that the show had. The original plans call for seven slats, 3-1/2″ wide. I reduced the width of the slats by 1” and fit nine slats across the seat back. This also allowed me to fan the slats out at the top.
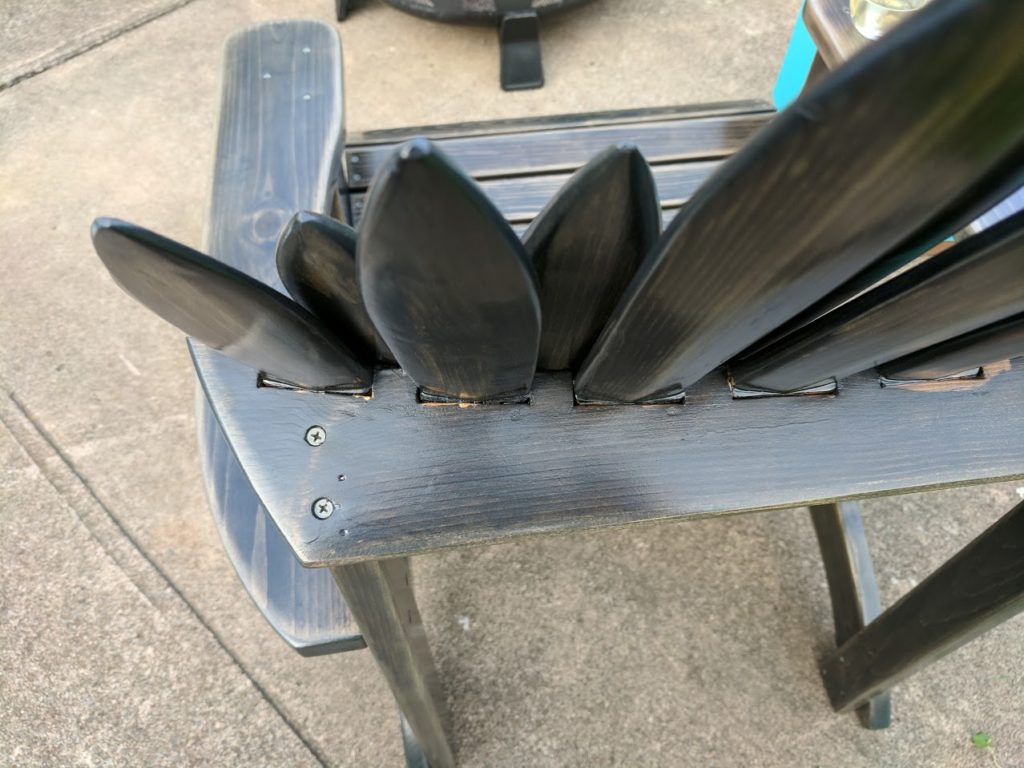
Here’s the back row of sword slats dadoed in the top rail.
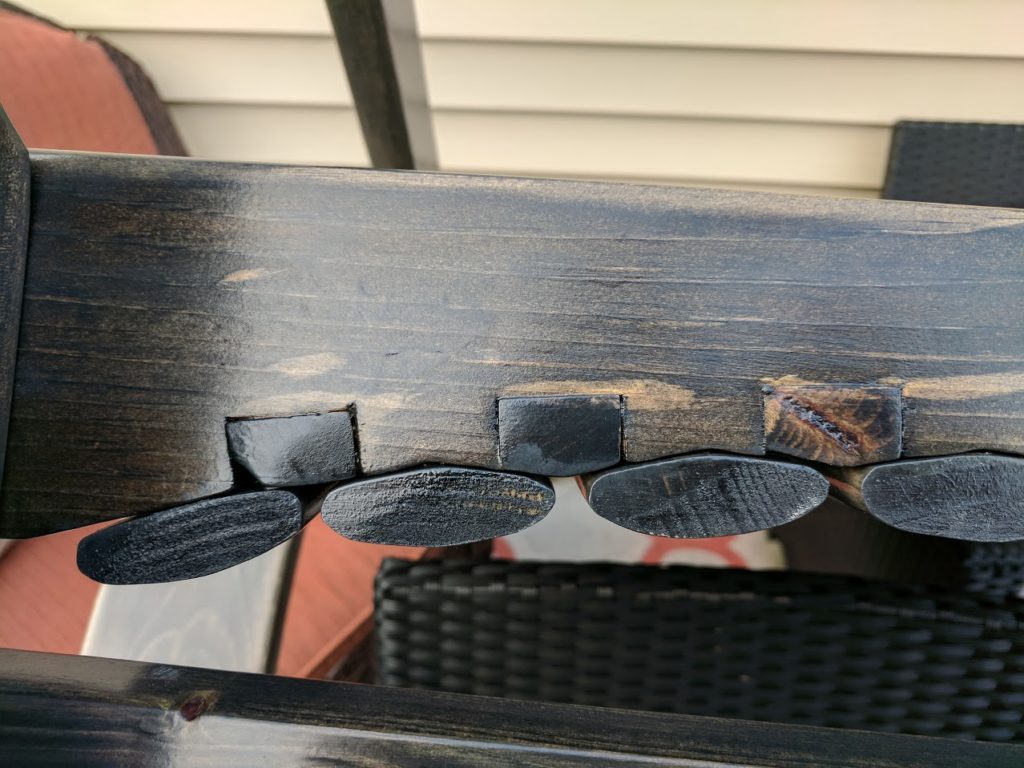
I dadoed the slats into the bottom rail so that they fit behind the first row of slats.
I roughed out the sword tips with a jigsaw and did the long-edge “sharpening” on a table saw set at 10°. This process leaves a lot of material to be removed – I used a block plane and slowly shaved them down to the classic sword shape. Here I went by eye and finalized the shape on a benchtop belt sander, then by hand.
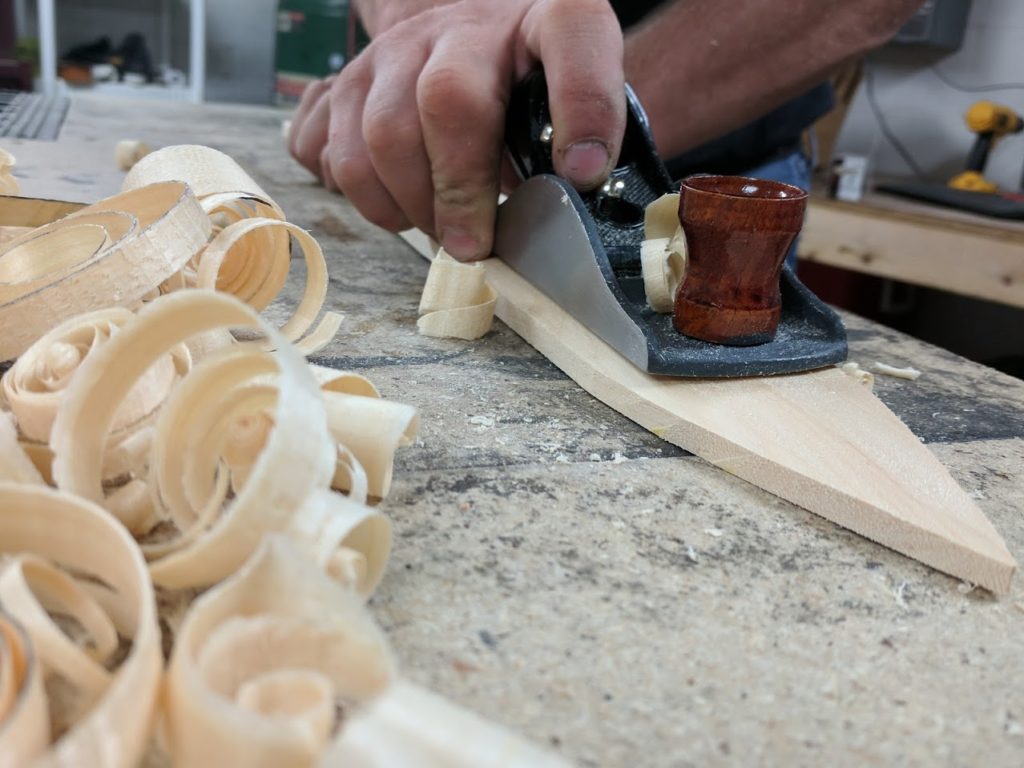
I refined the sword slat shape with a block plane.
On the second chair, I wanted to add depth to the seat back so I added a second row of swords. To do this without changing how comfortable the original chair is, I recessed the back swords into the top and bottom back rails.
I also decided to add a little flair to the second chair by wood burning into the side rails an emblem from the show, the dire wolf. Now, my freehand drawing skills are a bit lacking for sure, so I decided to use good ol’ carbon paper to help me transfer the image. I found a decent line art image online and resized it to the size I needed and printed it out. I then taped the image, with the carbon paper underneath, to the wood and traced the image with a pen using medium pressure so it copied nicely.

Once the image was transferred, I fired up the wood burner. Patience is the key with wood burning. Always test your speed and heat on a scrap piece of wood. For this project, I used the standard wedge tip and max heat to burn in the outline. After the outline comes the tedious part. The fur. For this I referenced many pictures of actual wolves to note the direction of the hairs on their noses and above the eyes, and for the shadows and color of the hairs. This part takes practice and patience on a scale that I for sure am not accustomed to. I did three practice wolves before committing the design to the chair side rail. Each one taking longer than the last. Each one looking better and more lifelike. The final designs took just more than three hours each, and were absolutely worth the time. When all the wood burning was completed and the swords shaped, the chair was assembled to triple check the fit of everything.

Now it’s time for the finish. For this, I disassembled everything. I stained each piece individually to ensure 100-percent coverage and nice crisp lines. I sanded all the pieces for a stained finish with #220-grit sandpaper. But before I stained, I thought there was one thing missing. You can’t make an Iron Throne without fire!

So I lit the parts on fire!

Well, not so much “on” fire, but I used a handheld propane torch to burn the wood. This basically sears the surface and really makes the grain pop and also adds some browns and reds that will show through the stains.
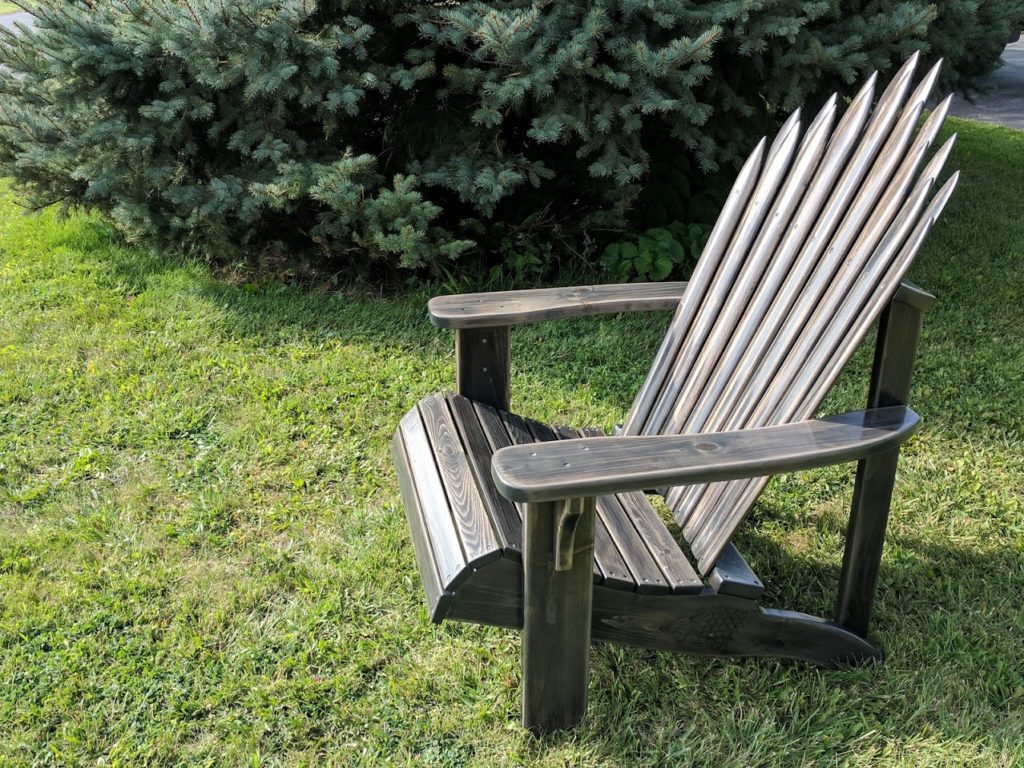
After my “Iron Thrones” had been forged with fire, I used an oil based ebony stain. Pine will soak up the color fast so I wiped it off after only 30-40 seconds. I gave the stain 24 hours to dry before starting with the palm sander. I wanted the chairs to have a weathered look, so I sanded any edge that looked like it should be worn down after 20 years of use down to bare wood again. This took a lot of work because it kept clogging the paper, but it was well worth it for that weathered look.
Now for the last coat of stain. I applied a classic gray stain over everything to give the final product a lighter, more metallic sheen. Since I only wanted a hint of gray, I wiped it on and immediately wiped it off.
Finally, I used was a semi-gloss polyurethane and applied 4 coats before assembling the chairs, sanding with #400-grit paper between coats. When they were all together I laid down the final coat to protect screw holes that may soak up water. I want these chairs to last as long as possible!

Once it was all said and done, this turned out to be an amazing project and anniversary gift; I am so proud of how everything turned out. I figured out a few new tricks for finishing wood and learned that building custom Adirondack chairs can be more than just sticking to the traditional designs. Designing new and quirky projects has always been a hobby of mine and I can’t wait to start working on the next one!
Gus is 36 years old and lives in a small town near Buffalo NY with his loving wife and fluffy cat. He is a journeyman millwright by trade and a hobby woodworker and Mr. fix-it by night.
Here are some supplies and tools we find essential in our everyday work around the shop. We may receive a commission from sales referred by our links; however, we have carefully selected these products for their usefulness and quality.