


We may receive a commission when you use our affiliate links. However, this does not impact our recommendations.
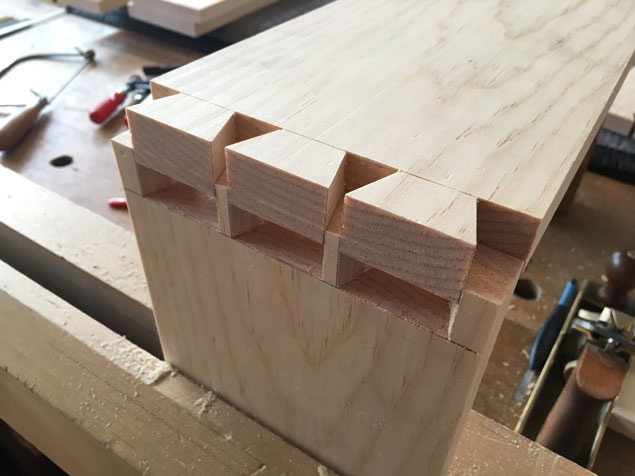
I don’t think I’ve cut a single dovetail for eight months – my work has been mostly chairs and casework that relied on other joints. So I’m a bit out of practice.
When this happens and I need to cut dovetails, I quickly default to the method I use to teach students to dovetail. This method helps build good habits when sawing and helps you fix any mistakes.
This method is used on the second part of the joint that you cut where dead-on accuracy matters. It works on either the pinboard and the tailboard. This trick has two principles:
- A saw will follow the path of least resistance. If you can lay in accurate kerfs on all the surfaces of your joint, the saw will follow them.
- To correct a mistake in sawing, you need lines on your work that guide you, showing where the saw kerf should have been. Paring your joint without guidelines is working blind and asking for trouble.
In the following example, I am using this method on the pinboard. (Apologies for the weird changes in color temperatures on the photos. My bench light has a really warm color.)
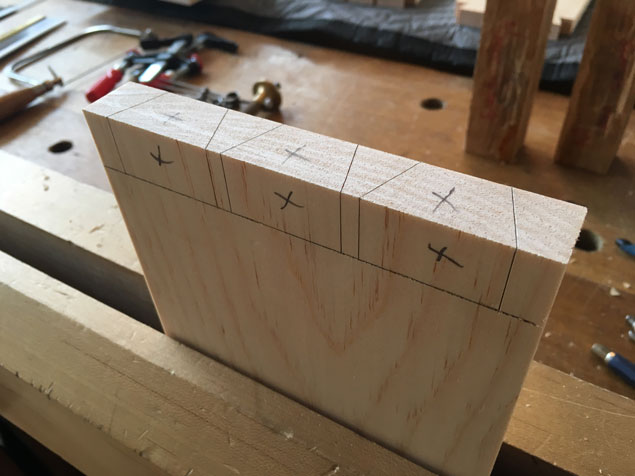
The layout on the front face of the pinboard in knife and pencil.
Lay Out the Joint
As always, I transfer the shape of the tailboard onto the end grain of the pinboard using a marking knife. Then I darken the knife lines with a fine mechanical pencil. Then use a knife and a square to mark the shape of the joint on the outside face of the joint and darken those lines.
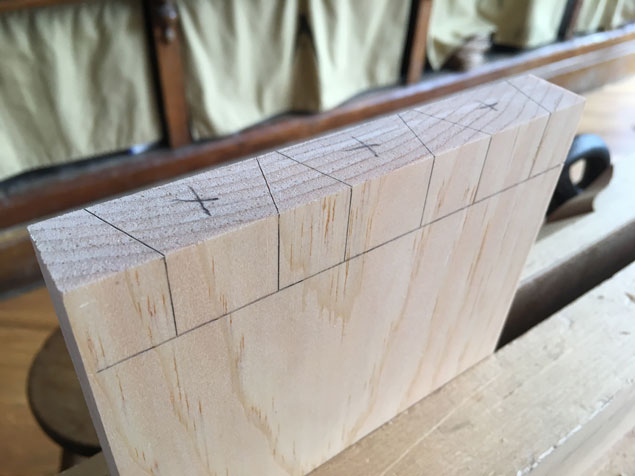
The layout on the inside face of the pinboard in pencil only.
Use a square and a pencil to do the same thing on the inside face of the joint. I skip the knife here because it’s the inside of the joint and won’t be seen.
It’s also a good idea to draw a pencil line in your baselines, as shown.
Saw the Joint
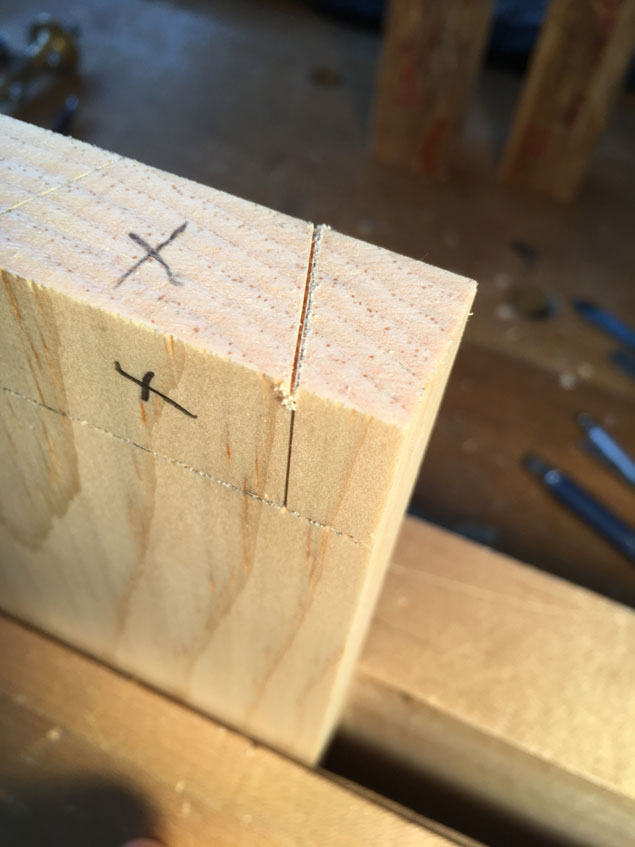
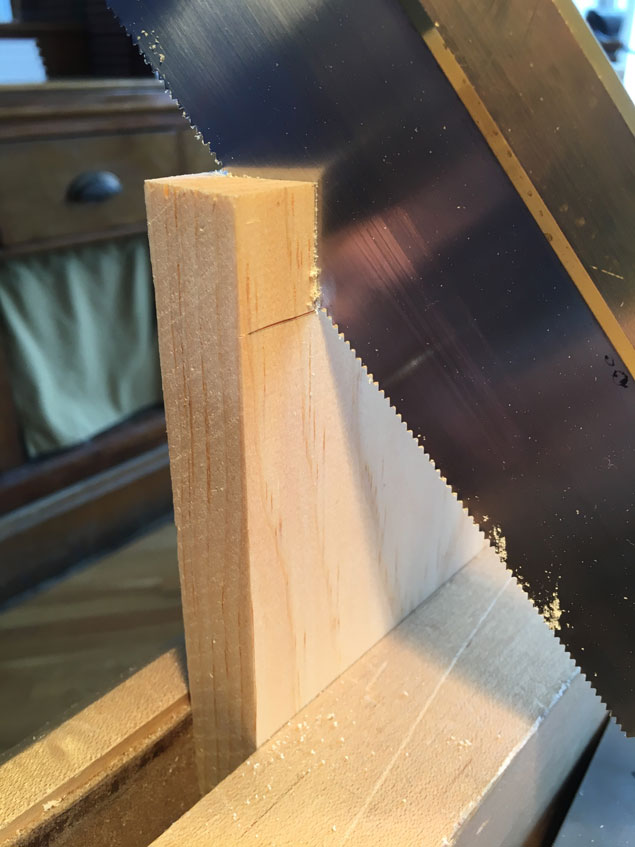
First lay in a shallow kerf on the end grain. I start sawing on the far corner and nibble back to the near corner. Get as close to your knife line as possible. The kerf on the end grain should be quite shallow – no more than 1/16”.

Now saw down the front face of the joint, following your knife line. Here’s how: Keep the saw in the kerf in the end grain. Drop the handle until the saw is nearly vertical as shown in the photo. Gently extend the kerf from the end grain to the baseline on the front face.
This method uses the saw’s plate to give you a straight line down the front face and is a really powerful trick for getting crisp dovetail shapes.
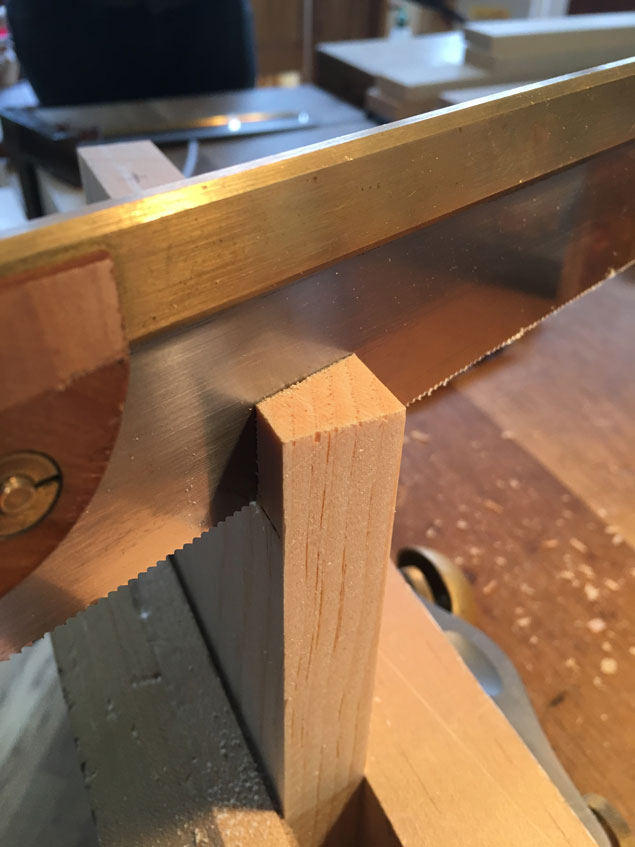
Raise the handle of the saw and kerf in the back of the joint, following your pencil lines.
After you hit the baseline, saw a shallow kerf down the inside face of the joint. You’ll have to raise the handle of the saw to near vertical to do this. After you hit the baseline on the inside face, take a breath and tilt the saw so its back is parallel to the floor.
At this point, you have a shallow kerf that connects your baselines and follows your knife lines. All you have to do is saw out the middle of the joint. The kerfs will guide you.
Finish the joint by sawing straight down.
If your sawing was wonky, you also have the knife and pencil lines that will guide you as you pare the joint to the correct shape.
This method adds a couple minutes to the sawing process on a pinboard, which can add up if time is critical and you have a lot of work to do. But it also increases your accuracy, which can save you time if you are having a sloppy day.
Give it a try before pooping on me in the comments section!
— Christopher Schwarz
Popularwoodworking.com is a participant in the Amazon Services LLC Associates Program, an affiliate advertising program designed to provide a means for sites to earn advertising fees by advertising and linking to Amazon.com and affiliated websites.
Here are some supplies and tools we find essential in our everyday work around the shop. We may receive a commission from sales referred by our links; however, we have carefully selected these products for their usefulness and quality.


Fortunately, you can avoid all of the mistakes of woodworkers who have ended up spending a lot more than they wanted to.
Click on the link below to get instant access:
http://scrnch.link/workshopguide
I’d be interested in seeing tips for layout. Like perhaps common setups for how to layout based upon thickness, length, degree.
I’ve sawn this way for a couple years now and really like it. Not sure ow or why but I think it became a habit after cutting 8 drawers with half-blind dovetails. I’ve asked this question before. I seem to have more control starting my cut on the near edge instead of the far edge. Just feels more comfortable. Anyone else do that? That is where you need to start the cut for half-blinds anyways.
Makes perfect sense to me, as a beginner myself. Do the show faces in the most controlled manner possible,