


We may receive a commission when you use our affiliate links. However, this does not impact our recommendations.
In the next few months, I’ve got a lot of furniture to make; Josselyn (my partner) and I just moved to Cincinnati from Maine. Last week, I built a new coffee table for our place. This week I’m building a new kitchen table, in between setting into my new job and figuring out where to buy lumber (and food, clothing, etc.).
Later this week I’ll post the full build of this project, here’s a post on what I did today. If you’re unfamiliar with the Staked Worktable from Christopher Schwarz’s “Anarchist Design Book,” the legs are mortised into battens, which are connected to the top with massive, 5″-wide sliding dovetails.
The dovetail slot is 5/8″ deep and 5-1/4″ wide. In his book, Chris shows a great way to put in the long joint by hand using a large tenon saw, a chisel and a router plane. My process is a bit different – I opted to go the power-tool route, though I took a few notes from Chris and incorporated some of the sensitivities of handwork to sweeten the fit and precision.
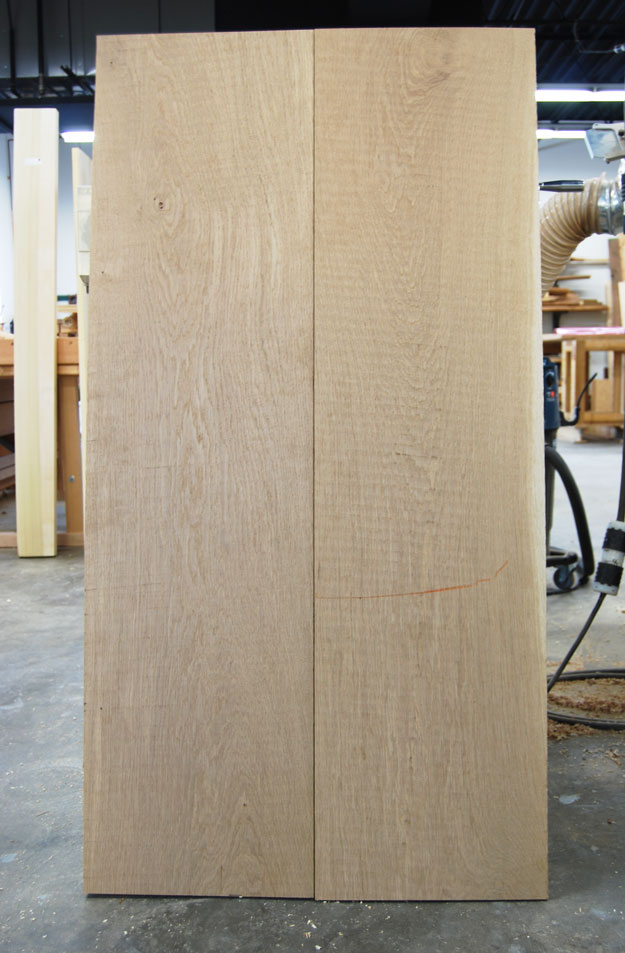
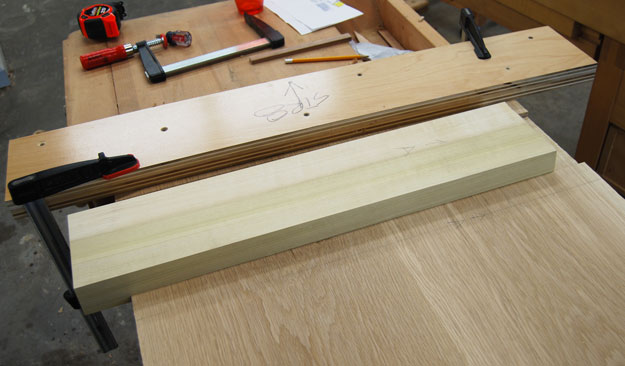
Here are the two 13-1/2″-wide white oak boards I’m using for the top of the staked worktable.
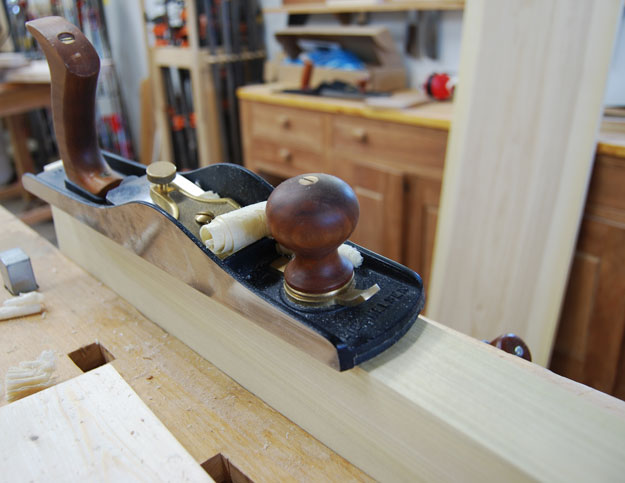
After getting the tabletop glued up, and before I cut the sliding dovetails, I had to surface the underside of the table to create a flat reference surface for the router work. I did this by hand for two reasons – I love to use handplanes and the shop’s planer isn’t wide enough. I used my two go-to handplanes, the Lie-Nielsen No. 62 bevel-up jack plane and my Krenov-style desert ironwood smoother. First, I took several traversing passes across the grain to flatten the board across its width. Then I took long passes down the length with the No. 62 and finished up with a smoothing pass with the smoother. That left me a flat, smooth surface off of which I could reference the sliding dovetails.

I used three processes to flatten the bottom of the tabletop. First, I traversed the face with a bevel-up jack plane. Then, I went down the length with the same plane, set finer. Lastly, I carefully dressed it with my smoother.
After that, it was time to lay out the dovetail slots. My battens are roughly 5-1/2″ wide, but this is just an estimate – in practice, the battens’ width will be dictated by the slots, so I’m going cut the slots, then fit the battens to them.
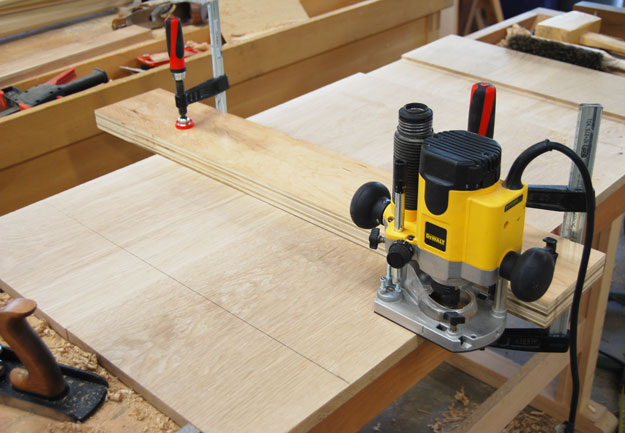
I used a beefy piece of plywood, jointed square and flat, as a fence for the router.
First, I drew the reference lines on which to set the router fence. There are 2″ between the router base’s flat side and the bit’s centerpoint, and I’m using a 1/2″ straight bit – so I drew two parallel lines 9″ apart, which left me with a roughly 5-1/2″ sliding dovetail. I made the fence with a beefy bit of plywood, jointed square and flat. The large fence ensures the top is truly flat – not cupped – when I rout the joinery, so the battens, when installed, will preserve this flatness.
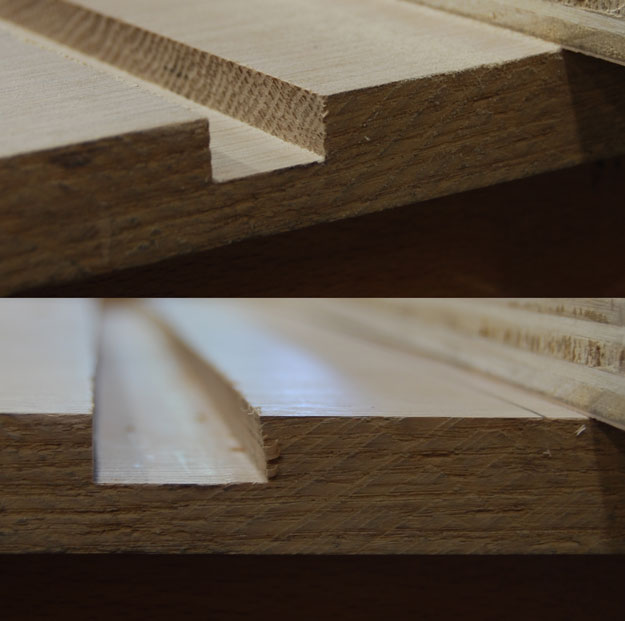
At top, is the slot routed with a straight bit. At bottom, the right-hand side of the slot shows how it looks after using the dovetail bit.
To begin the router work, I used a straight bit to rout the wall of one side of the slot, then followed up with a dovetail bit to cut the correct angle. Then, I moved to the other side of the slot and did the same. I made sure the bit was bottoming out at the same depth on both sides of the slot; it was a little trickier because I changed between the straight and dovetail bit a few times. I used the middle of the slot to check the depth, and test the setting to confirm the depth. This part of the slot isn’t seen in the final assembly and isn’t important for the joint’s strength, so this is a safe test area.
Also important to note: Routing across the grain can occasionally lead to blowout when the bit exits the work. I left my tabletop and battens long; I’m going to trim them to final width with a track saw after assembly. If you are working with a tabletop that is at its final width, consider scribing the depth and wall of the slot with a knife or marking gauge, and back up the bit.
Next came the fun (or messy and loud) part – wasting out the meat between the two walls. I did this with a wide straight bit and hogged it out freehand. Provided the router base is wide enough, this is pretty straightforward. I just made sure to have a solid footing for the base and tried not to be too aggressive. The 5/8″ depth needed here is a heavy load for freehand work, so I took this in two passes, and I set the plunge router’s depth stop to preserve the correct final depth. This could have been done the same way Chris does in his book, with a chisel and router plane (which I may prefer, as the mess and noise are significantly diminished), but I wanted to try it out with power tools.
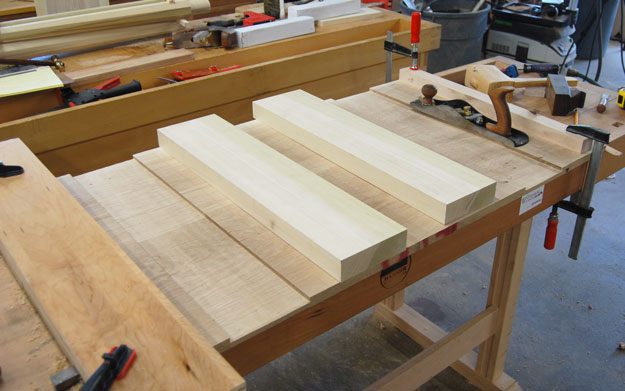
The slots are finished, so it’s time to fit the battens. Here they have been milled square and flat on all four sides, but I’ve not yet tapered them.
Next it was time to fit the battens. This could be done with a handplane, as Chris does in his book, but again, I wanted to show how to do it with power tools. After some jointer and planer work, I wound up with battens that were square, flat and close to the final width. Then I made a test piece from scrap to dial in the angle setting on the table saw.
I made a test piece that I carefully fit to the correct angle. I brought this to the table saw to set the blade.

I used the table saw to cut the dovetail profile on the batten.
Once I confirmed the correct setting on the table saw, I snuck up on the correct width. Here, the hand-tool woodworker in me took over: I got out the handplane because I couldn’t bring myself to cut to final dimensions with the table saw. First, even though I was very, very careful in routing the slots, there is a chance they aren’t perfectly parallel across the width. Accounting for a tiny error like that on the power tools – by using a shim or pieces of tape – is not my way (and would be tedious).
I used my jack plane to sneak up on the fit, and put a slight hollow in the middle of the batten side to make it easy to bring home.
So, I snuck up on the correct fit with a handplane, taking a single shaving’s worth out of the middle of both battens’ sides. I was shooting for the batten to go home easily, save the last few inches, where I will apply glue before I bring the joint home with a mallet. I got there pretty quickly, and establishing the correct bevel with the table saw made this even easier.
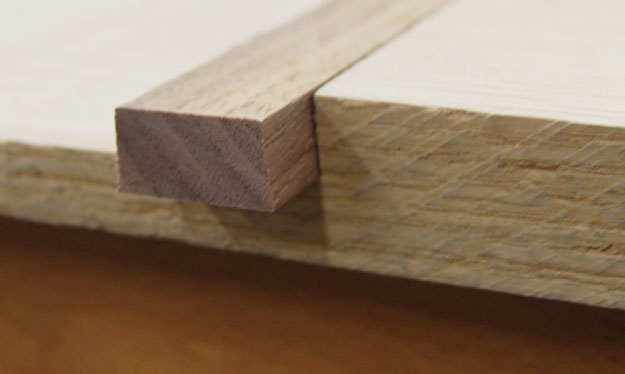
The batten is in almost all the way here, with just a portion of the dovetail slot still exposed. When I’m ready to glue up, I’ll apply glue to that small area and hit the batten home.
So the battens are fit; tomorrow I’ll install the legs, surface the top and finish up the piece. I’ll post the rest of the build once the piece is done, but parted out this section to share it on its own, because I think it’s nice to see an alternative way to execute the same joinery. In the end, I’m pretty firmly in the hybrid woodworking camp. I enjoy using hand tools, but there are more demanding or tedious tasks such as long rips, surfacing wide boards, repetitive drilling tasks or the like that I’ll happily do with power tools. After today’s experience, I can say that this is an accurate and handy way to execute this joint in your shop.
P.S. If you are particularly fond of routers, or are looking to get into them, we’ve got a few good resources that will get you there. We’ve got a great video called “Power Tool Essentials: The Router” on DVD or as a digital download. It’s a thorough survey of most of what you can do with these tools. If (like me) you’re looking for tricks and tips on how you might incorporate a router into your work, especially in some places where handwork might be tedious, check out “Router Tricks for the Period Woodworker” by Alf Sharp, who is not only an incredible talent but a great teacher, too.
Here are some supplies and tools we find essential in our everyday work around the shop. We may receive a commission from sales referred by our links; however, we have carefully selected these products for their usefulness and quality.


… Oh good; I’m not the only one who has thought that ironwood/ipe would make a good plane body.
Hey Brendan, why didn’t you use a tapered sliding dovetail? It’s a little easier as you don’t need to sneak up on the fit or relieve the middle to ease assembly. It will be interesting to see how you bore the holes for the legs. I would have bored the battens before assembly on a drill press for accuracy but there are many ways to bore them after assembly. Looking god so far.
As I followed your preparation of the dovetail slots and the battens, I was expecting you to drill the angled holes for the legs. My assumption was that this would be easier to get the angle correct when the battens were not yet mounted to the top. Your thoughts on doing this step earlier?