


We may receive a commission when you use our affiliate links. However, this does not impact our recommendations.
Best Wood Types for Finger Joints
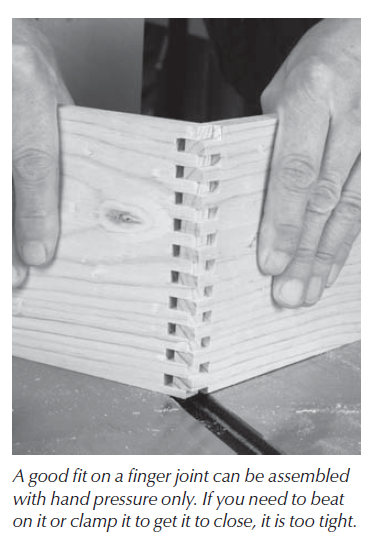
The type of wood used will make a difference in how forgiving the joint is to put together. Softer woods, such as pine or poplar, will compress when assembled. White oak and maple aren’t as cooperative, and may require more force to assemble, and more finesse to make the joint. This is a place where the science of the machinist and the art of the woodworker converge. The tolerances are close, but the joint should be made so that it can be assembled without resorting to clamps or hammer persuasion.
A “Sweet” Fit
 The location of the sweet spot for fitting will also vary with the width of the joint or the number of fingers. It’s a matter of compounding errors, and like compounding interest, a number that seems insignificant can grow large enough to defeat you.
Choose your Glue Method
The downside to the finger joint is that it takes some time to apply glue during assembly. Water-based glues will swell the fingers and that can keep the joint from going together. Or the glue can begin to dry on one end before you have finished spreading the glue.
One solution is to partially assemble the joint, and apply the glue with a brush. If it’s a large assembly, use a slow-setting glue such as liquid hide glue or polyurethane glue, and clamp the corners one at a time.
An alternative we found is to assemble and clamp the joint without glue. Thin CA glue is then applied along the outer intersections of the joint and allowed to wick into the joints. Set one side of the joint horizontally, apply the glue and wait about five minutes before turning the work and gluing the opposite side.
With this technique the glue won’t dry instantly, but if left for a few hours it will become as strong as a conventionally glued joint.
We tried this method with some other glues, including thin PVAs intended for fixing loose joints in chairs. The “Chair Doctor” produced a strong joint, but sealed the end grain enough that it showed when the joint was finished. The CA glue left no visible traces after the completed joint was trimmed with a block plane.
–Robert W. Lang
p.s. – Buy our new download on joinery, only $4.99, to learn how to cut finger joints on the table saw and with a router. You’ll also learn methods for five other joints.
Here are some supplies and tools we find essential in our everyday work around the shop. We may receive a commission from sales referred by our links; however, we have carefully selected these products for their usefulness and quality.


I use a glue comb aka Aztec sword to glue up those joints in a hurry 🙂
The real answer to perfect fitting box joints in any kind of wood is the I-BOX. You can adjust the fit of a joint from one that is very snug to one the slips together easily, and adjust to any type of wood in precise, easy-to-set, .001″ increments.
I see one tip on using CA glue. Where are the other 2 tips?