We may receive a commission when you use our affiliate links. However, this does not impact our recommendations.
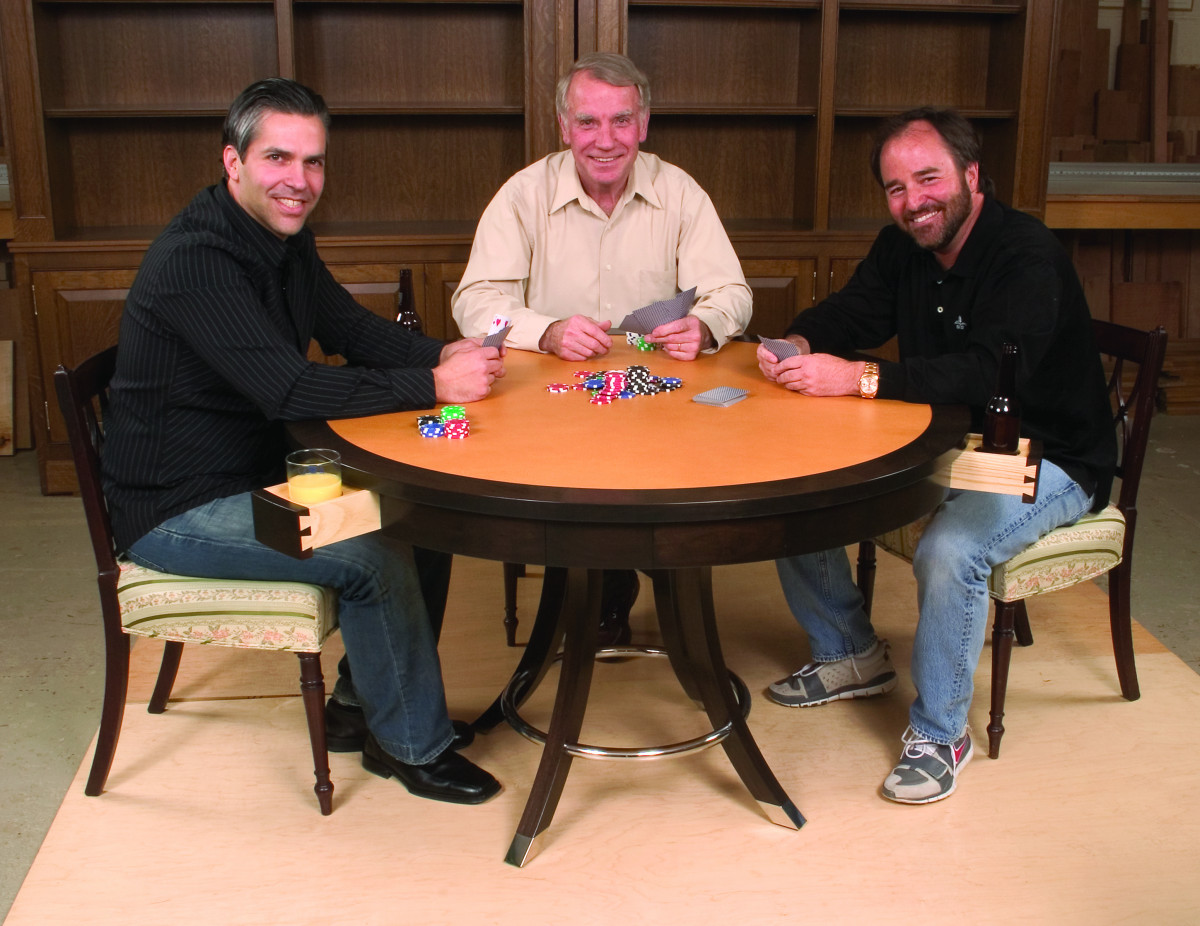
Architect, craftsman, client. This table design was a collaborative effort between architect Donato Maselli, cabinetmaker Frank Klausz and client Andrew Horowitz.
Architect, master craftsman and client design the ultimate gaming table.
Editor’s note: This article originally appeared in the October 2007 issue of Popular Woodworking
Émile-Jacques Ruhlmann was one of the finest designers of the Art Deco period. In the 1920s, he designed and produced many memorable pieces of furniture as well as other items for the interiors of the wealthy.
Many of his pieces combine dark wood, such as walnut, with metal. He is best known for inlaid cabinets and most of his designs incorporate elegant and subtle curves.
The Metropolitan Museum of Art had an exhibition of Ruhlmann’s work in the summer of 2004. I went to the show to see this magnificent work, and shortly afterward I received a call from architect Donato Maselli, whom I often work with.
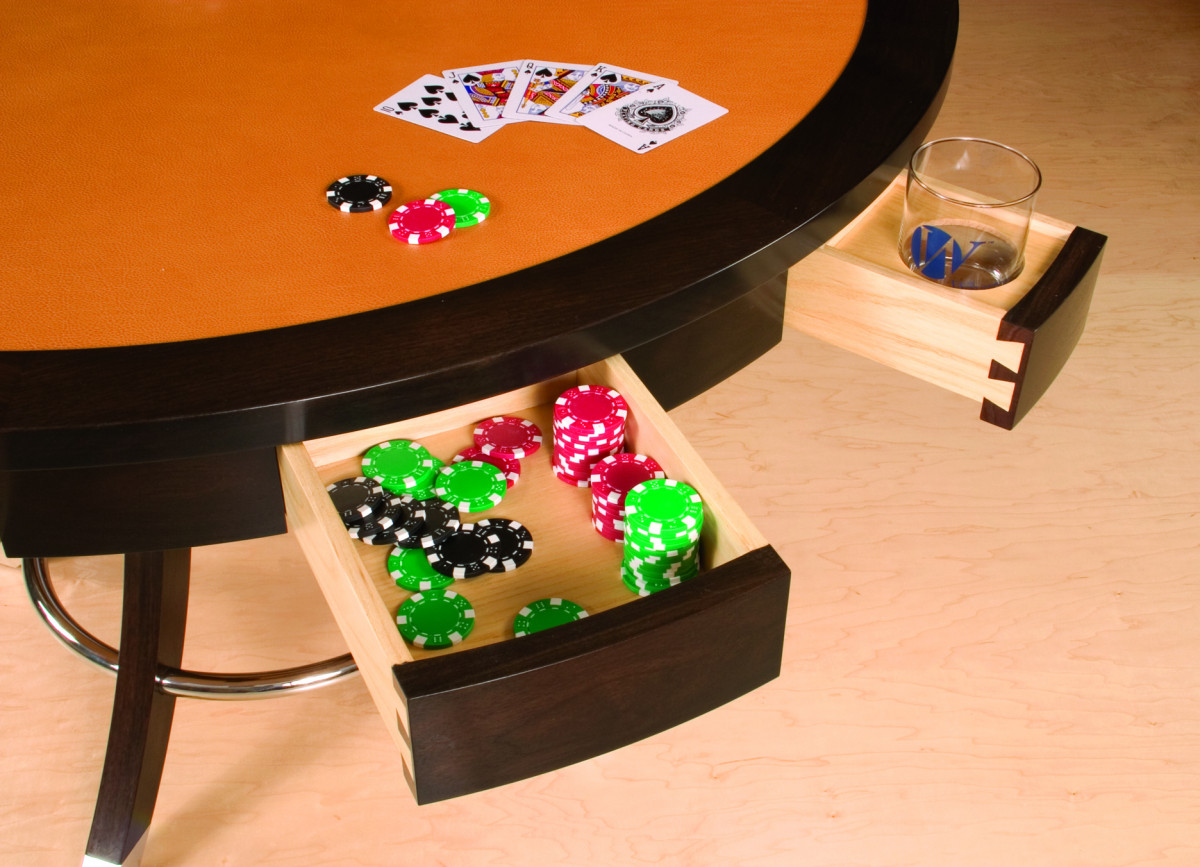
Leather, walnut and attention to detail. Drawers within the apron hold supplies and beverages.
He had visited the show with master craftsman Frank Pollaro. Pollaro is an expert on the work of Ruhlmann, and has made many faithul and intricate reproductions.
Donato asked to come by my shop with a client who was looking to have a poker table made in the Ruhlmann style. I have a Ruhlmann-style barstool in my showroom that has a steel ring piercing the legs. We all liked that detail, and wanted to incorporate it in the poker table. On the original Ruhlmann stool, the ring is attached to the legs with flanges. The pierced legs look cleaner than the original.
This made the table more difficult to build, but for cabinetmakers like us, the more complicated the idea, the more we like it. We get paid for doing the difficulties; that is our specialty. The three of us worked out the details, then the architect made some sketches and returned with finished drawings. After a few rounds of this, we settled on the final design. The table is 48″ in diameter with a leather top surrounded by a 23⁄4” band of walnut.
 A Dozen Drawers
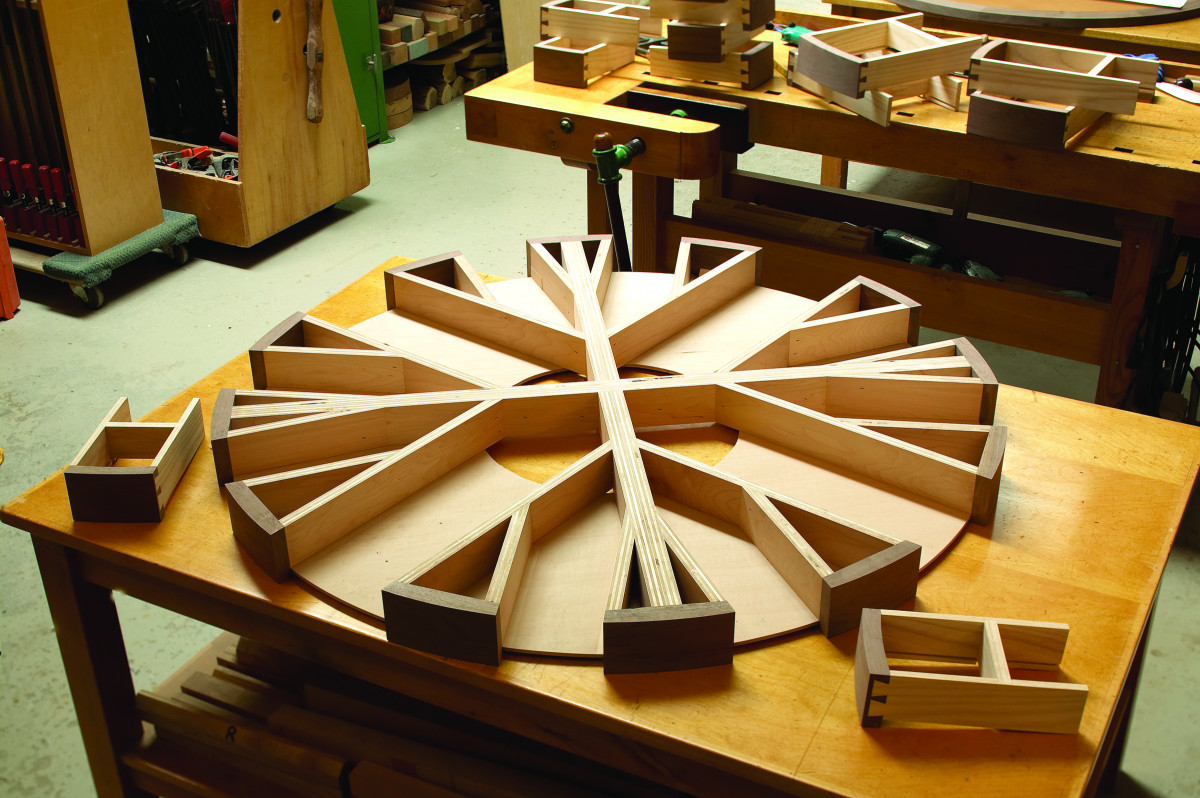
Stacking the deck. Plywood strips on a maple-veneered MDF base form the intricate structure of the tabletop.
Under the top is a walnut apron containing 12 drawers. At each of the four seats, there is a large center drawer for holding poker chips, a wallet, or other items. On each side of the center drawers, there is a smaller drawer for holding drinks. You could have a different drink on each side of you, but I don’t know if that’s a good idea when playing poker.
The structure of the tabletop starts with a piece of 3⁄8“-thick plywood that is maple veneer on an MDF core. On top of this are support pieces made from 3⁄4“-thick plywood that are glued and screwed to the disc from below. These stiffen the structure, define the drawer openings and provide support for the top.
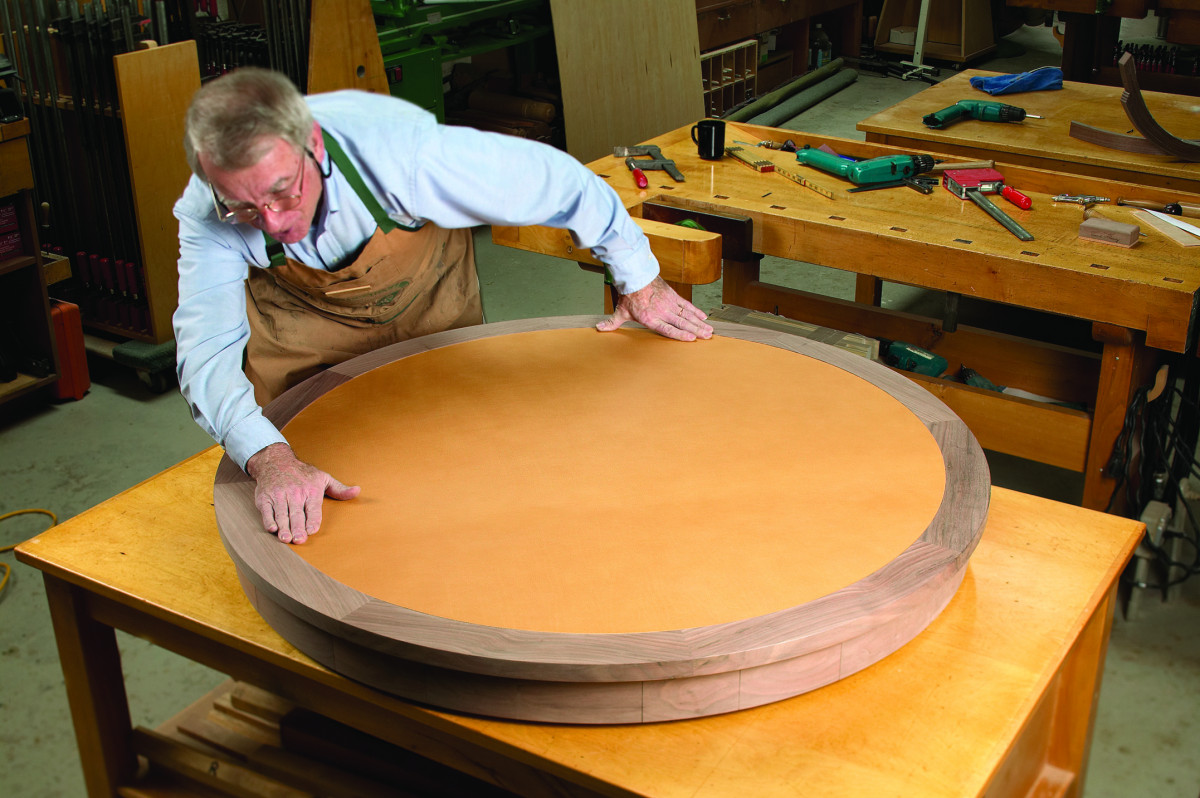
Dropping in a soft top. Leather glued to another disc of veneered MDF sits on top of the plywood structure and inside the solid walnut trim.
We usually make leather tops with a tooled edge, that is, the edge of the leather is tucked into a channel where it meets the wood. The client didn’t want that so I glued the leather to a piece of 1⁄4“-thick veneered MDF and trimmed the leather flush to the edge of the circle.
The drawers are made with extended sides so that they don’t tip when pulled out. The drawer fronts are curved on both the inside and outside faces. The fronts and sides connect with half-blind dovetails and the back fits between the sides with sliding dovetails.
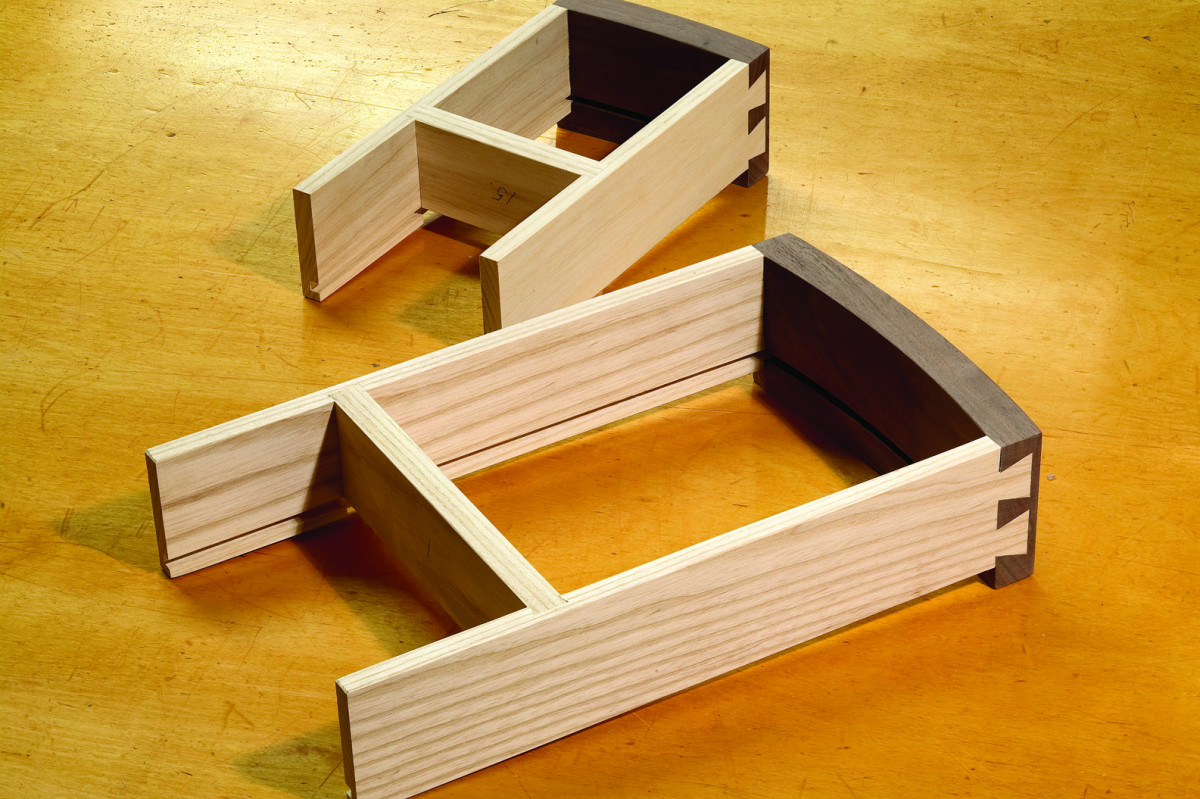
Curved fronts and extended sides. The long sides on the drawer boxes keep them from tipping when pulled out.
The drawer fronts and the apron trim in between were cut from big chunks of walnut and kept in sequence so the grain would match continuously end to end around the table.
The solid-walnut trim pieces in between the drawers are curved on the outside faces only. All of these curves were all cut on the band saw, cutting just outside the line.
Taking the Table for a Spin
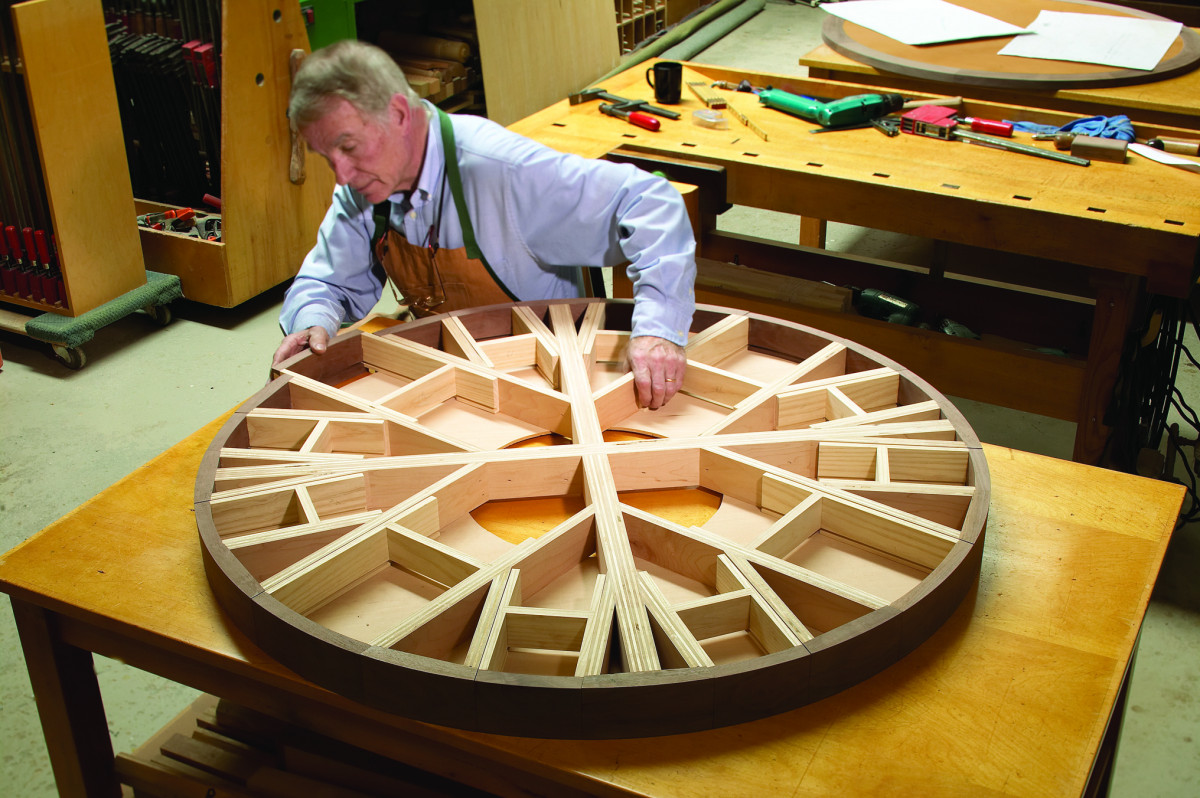
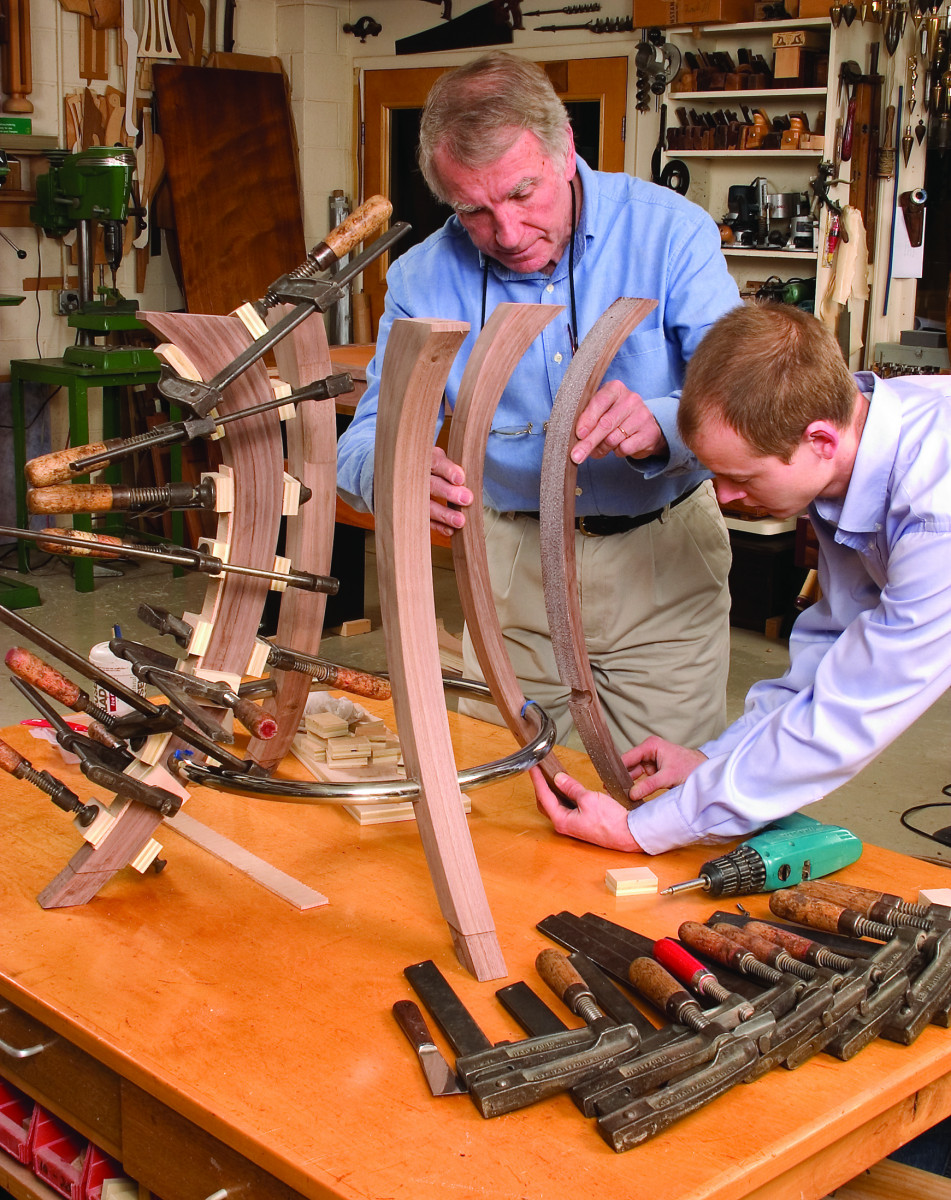
Solid-sawn aprons and trim. All of the solid-wood parts of the apron were band sawn and fit into place before final shaping.
After making all the drawers and attaching the trim, I wanted to bring all the parts of the apron into a perfect circle with all the faces lined up.
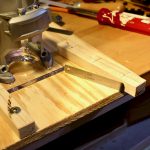
I made a trammel jig for my disc sander to smooth and shape the apron edge as well as the edge of the top itself. The jig was made so that when I changed the grit on the sander, I could move the piece in just a little bit. I sanded on the machine through #180 grit, leaving only a little hand sanding to do.
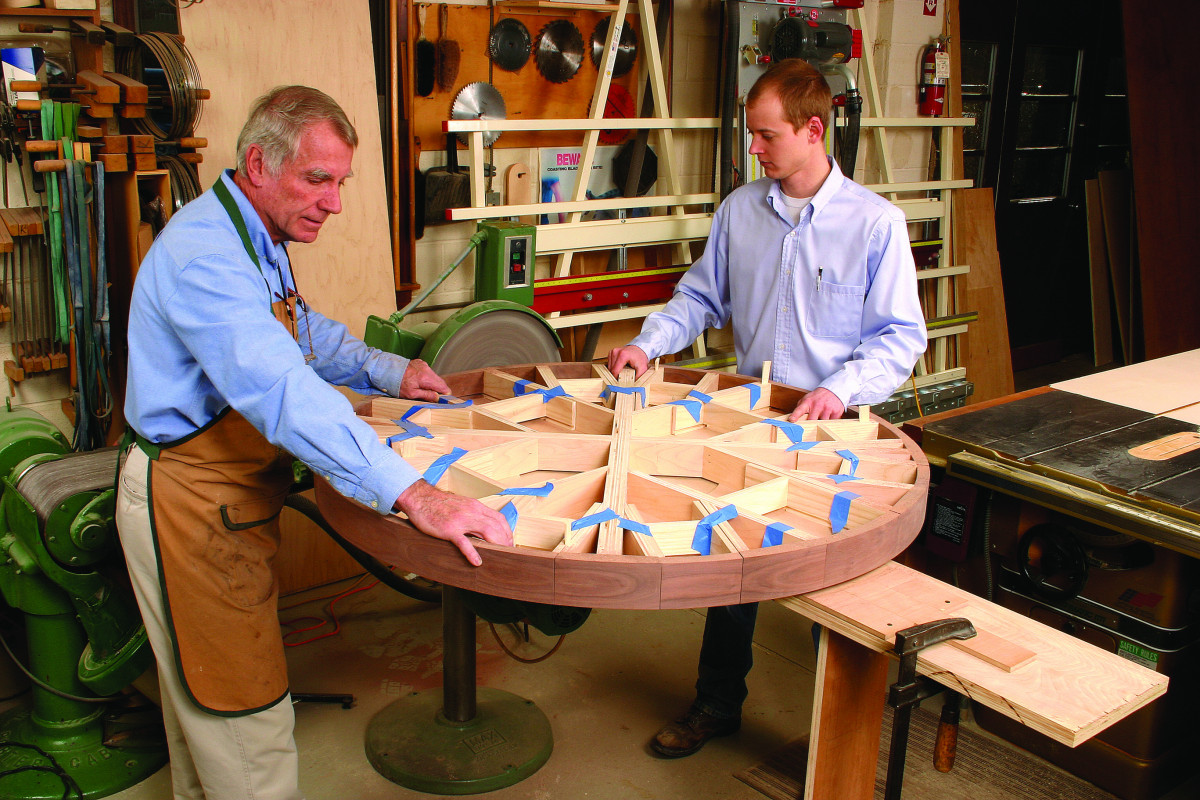
Round and round. Klausz and Douglas Bloom shape the drawer fronts and apron to a perfect circle with a trammel set up on the disc sander.
The walnut trim surrounding the leather top was sanded to shape the same way. After band sawing the eight curved pieces, and assembling them around a 3⁄4“-thick piece of veneered plywood, I then sanded them to a perfect circle. The leather top fits inside the walnut trim, supported by the thicker plywood below as well as the plywood ribs. With these parts for the top completed, I began to work on the curved legs.
Pierced Legs
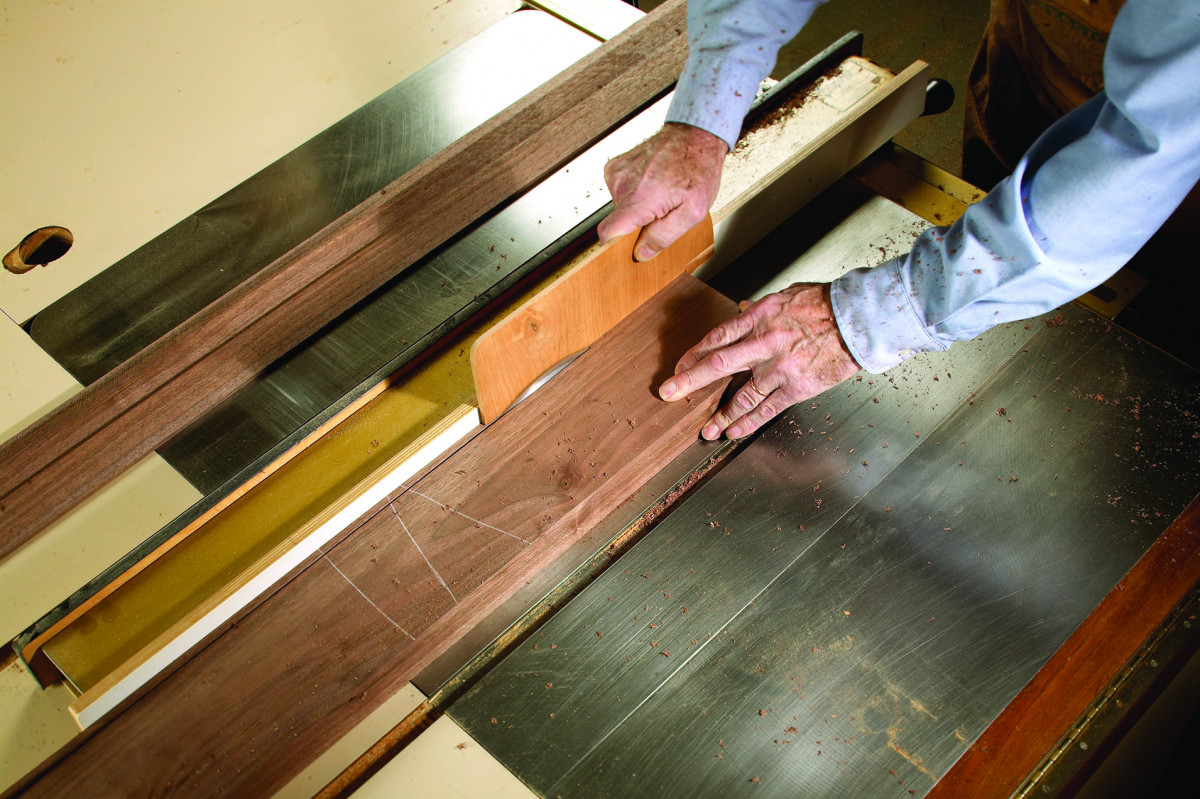
Many pieces form one curve. Stock for the bent legs is ripped into thin strips at the table saw.
The legs are bent laminations. Each leg is made from thin strips cut from a single board and kept in order. To keep the pieces in the original order, I marked each stack with a triangle, using a white pencil.
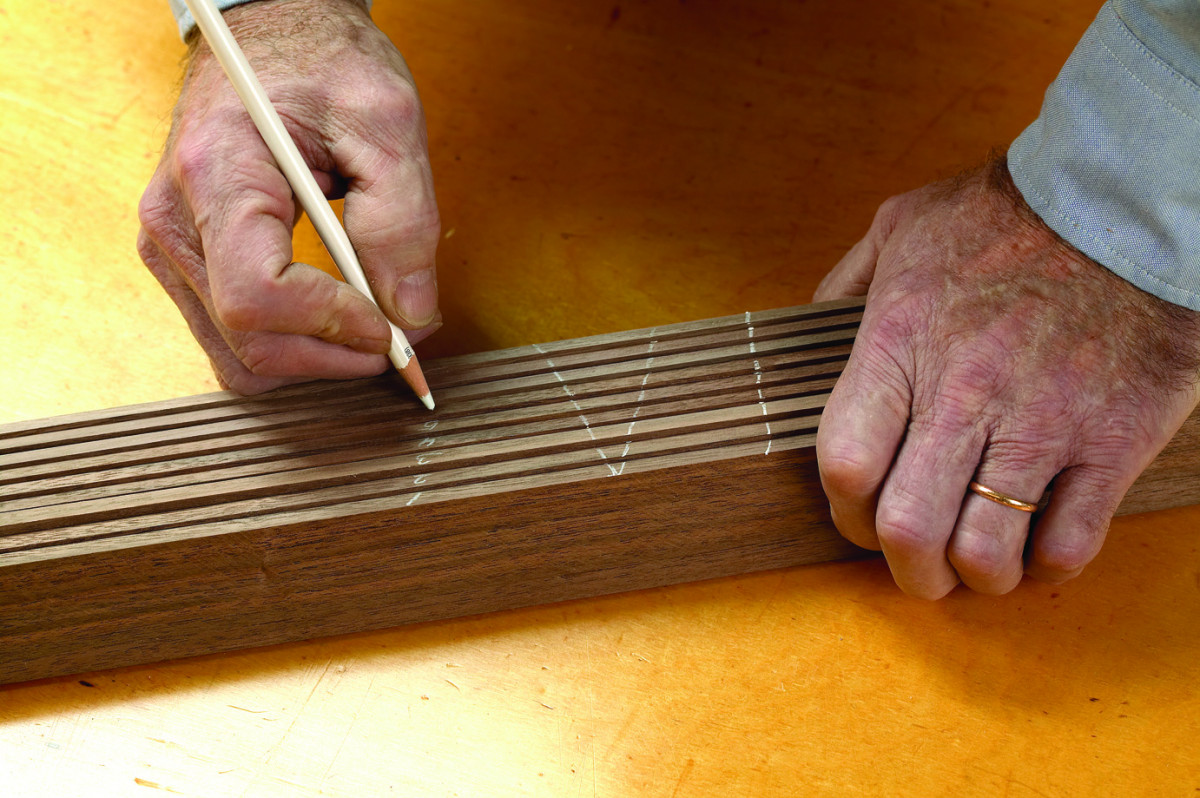
Preserving the grain. A triangle made with a white pencil helps keep the strips in order. When glued together they will look like a solid piece.
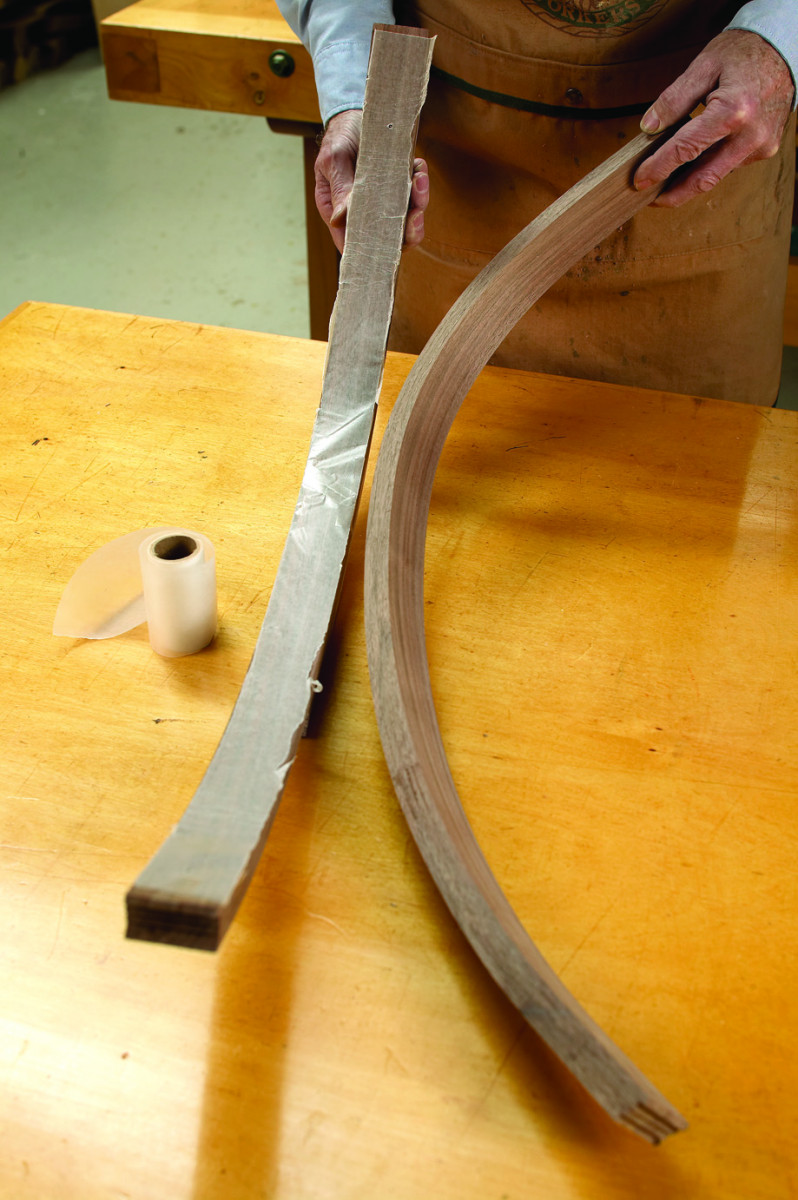
Normally one leg would be glued completely in the form, but I needed to do it differently to let the ring pass through the legs. I glued each leg in two halves, separating the halves with a piece of waxed paper.
Curves with a twist. The strips are glued to a plywood form. To allow the steel ring to pass through the legs, they are glued as two halves.
When the glue had dried, I clamped the halves together, and at the drill press, I made the holes for the ring. It was necessary to do a little carving to provide clearance for the ring inside each leg. A stainless steel foot completes the bottom of each leg, and I removed material before the final gluing to keep the face of the foot even with the face of the leg.
Avoiding a sticky situation. To keep glue out from between the two halves, a piece of waxed paper is inserted between them.
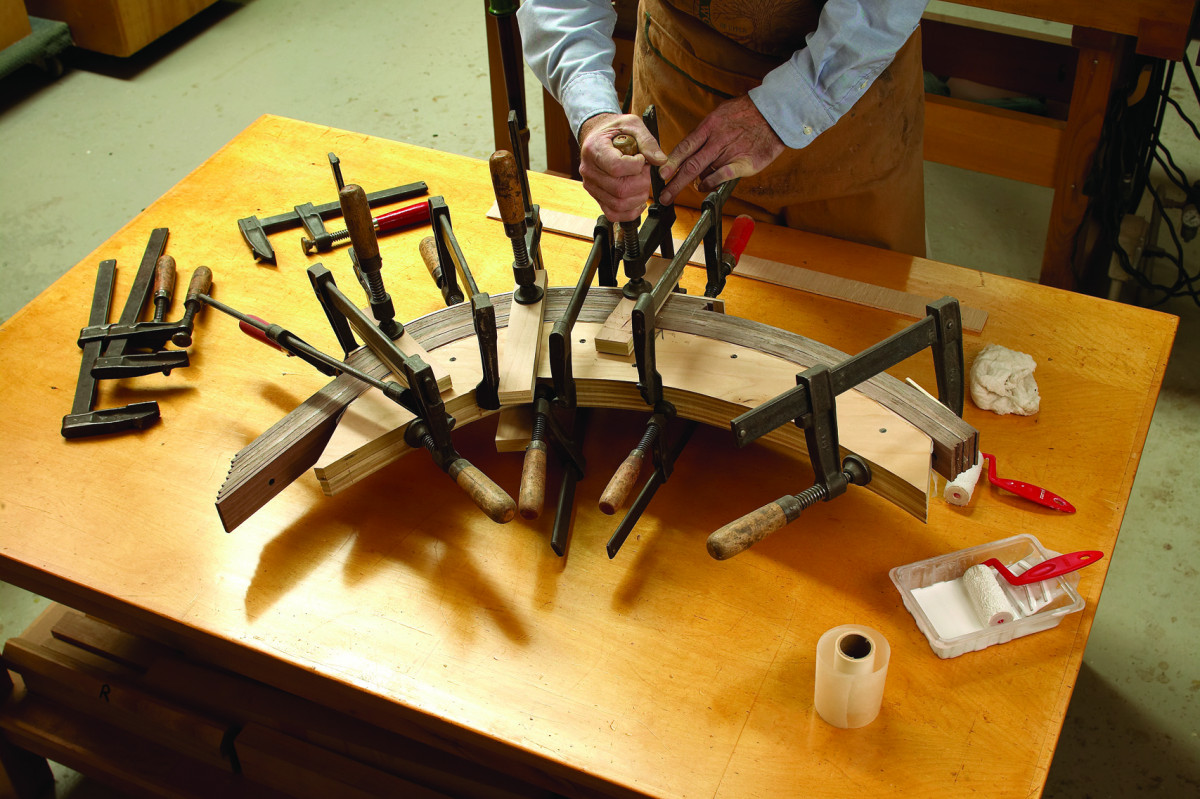
The final assembly of the legs was done by gluing the halves together around the ring. No form was needed, the half legs were stiff enough to hold their shape during the final glue up. As you can see in the photo above right, it took a lot of clamps – some to hold the two halves together and some to keep the edges aligned.
The Final Connection
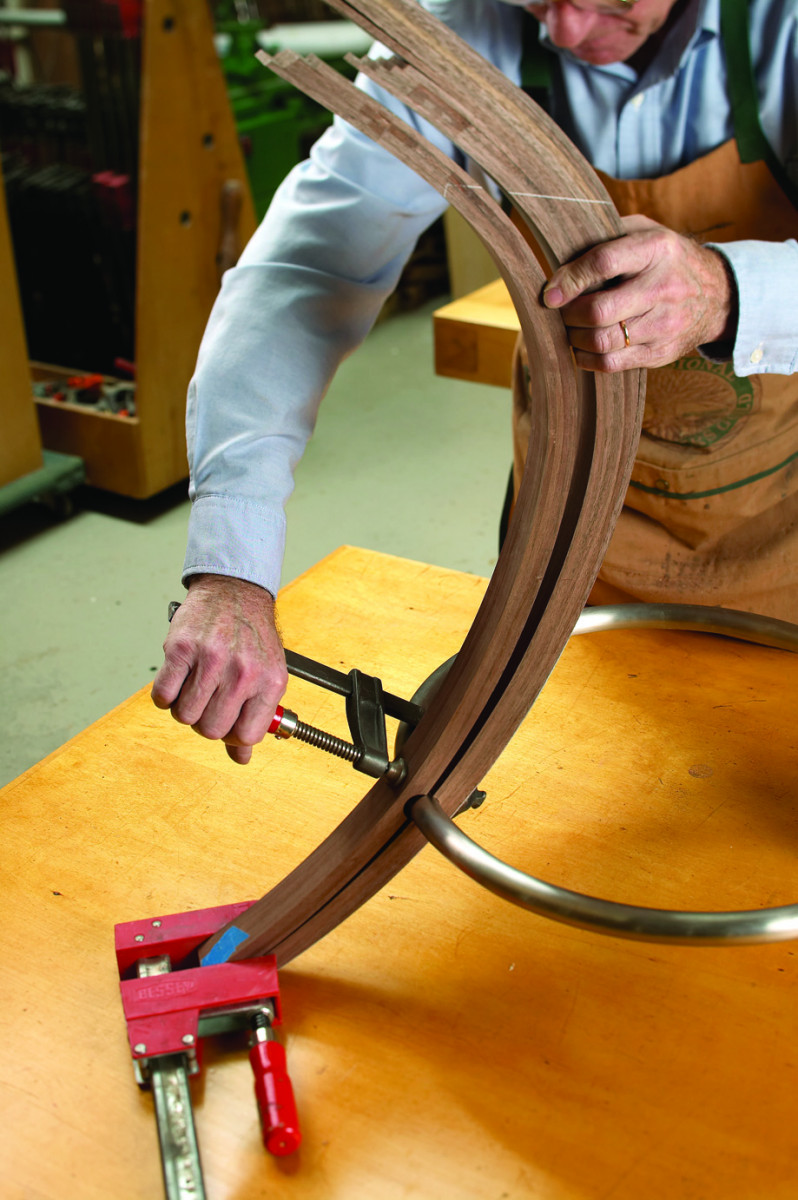
No hardware needed. The stainless steel rail pierces the finished legs. The two halves were clamped together to drill the holes.
The legs connect to the tabletop directly under doubled 3⁄4“-plywood ribs. A 5⁄8” dowel fits in a hole at the top of each leg, and in a hole in the bottom of the tabletop assembly. My original plan was to glue the legs to the top after it was delivered. It is much easier to move something like this in two pieces than it is to carry the entire table – especially when it comes time to go through a door or up the stairs.
No turning back. The two leg halves are permanently glued around the steel ring.
Instead of gluing, however, I attached the legs to the top with two screws at the top of each leg. This was very sturdy with this connection so I decided not to glue it after all. If the table ever needs to be moved, it will be much easier to remove the top.
Here are some supplies and tools we find essential in our everyday work around the shop. We may receive a commission from sales referred by our links; however, we have carefully selected these products for their usefulness and quality.