


We may receive a commission when you use our affiliate links. However, this does not impact our recommendations.

Yesterday and today, I was in the shop building and applying a couple coats of stain to the “I Can Do That” project for the December issue. The photo shoot is on Tuesday, the project still needs a topcoat, and gel stain takes 24 hours to fully dry. So I guess I know what I’m doing after lunch on Monday.
My other project on a tight deadline is the bench Chris and I have been working on. That one is taking a bit longer than the three hours the ICDT piece took to build (one of those hours was spent fighting with the *%#@ router collet , one of the many reasons I’m not fond of routers). The bench has to be completed in time move it , and a lot of other benches , to the Northern Kentucky Convention Center for Woodworking in America. That gives us 17 days…¦and Chris is out for another week.
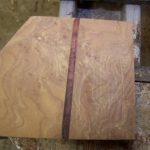
Thursday morning before Chris left for Germany, we cut the four mortises and dovetail sockets on the front and back pieces that will make up the four-board top (can you call a 5″-thick x 7′-long piece of wood a board?) of my new Roubo-esque bench. In Chris’s absence, I was tasked with marking out and cutting the male parts of the joints on the legs. Gulp.
Now I won’t say that I don’t know what I’m doing. After all, I just finished editing “The Workbench Design Book” (which, by the way, is on pre-order sale for 20 percent off until the day the book arrives in the warehouse , probably Sept. 22). And it’s been pointed out that we write about benches. A lot. So I edit writing about benches. A lot. I’m well-versed in theory. But there’s a difference between knowing what to do and actually doing it. While I’m comfortable making a mortise-and-tenon joint, I’m not practiced in doing so on workpieces I have to struggle to lift (not to mention a lot of you will be looking at this finished bench, so I want it to be perfect).
But, after I wiped off the second coat of stain today, I decided it was time to buck up and get started on the legs. Thankfully, the cutting gauge we used was untouched from Thursday (yes, I hid it), so I was able to mark out most of the joints with no worries. But I needed to work from the actual cuts to accurately mark the dovetail, and that meant setting the tails exactly in place atop the legs (this caused me almost as much frustration as the router collet). It was a long slog to get everything lined up without any help , and I’m sure it would have been funny to watch. It was easy to set the top almost in place, but getting it perfectly aligned, well, not so much. I had to pin the bench leg between my knees and use my legs to move it ever so slightly one way, then the other, then forward, then back, all the while making sure the bottom of the leg was firmly planted on the floor. Clearly, I’ve lost the soccer juggling skills I once had.
 I finally got everything aligned, made my pencil marks, repeated the frustration on the other front leg, then headed to the band saw. (At which point I realized I should have started with the back legs; mistakes there would be less obvious. Oh well.) I made a few test cuts in the waste area, just to get a feel for the monster 17″ band saw that I rarely use, and the cuts were straight, so I was feeling pretty good. I set the fence to make the cut at the back of the tenon…¦and the blade started to drift. I’d neglected to lock the fence on the one cut I’d made that actually mattered. Luckily, the cut drifted into the waste, so I was able to back out, reset the fence and make a good cut. At which point I decided I’d best go home and leave it for another day. So now I know what I’m doing before lunch tomorrow.
Here are some supplies and tools we find essential in our everyday work around the shop. We may receive a commission from sales referred by our links; however, we have carefully selected these products for their usefulness and quality.


I only have one leg, so I have to devise jigs and braces. I have several roller stands that I use regularly. There are many good tips in the postings above. The best one was was to sit down and take a deep breath and plan a way to do the next step in a safe manner. I have worked against dead lines all my life, but not in my shop. If you do not finish your work bench you can show it next time or next month. We all want you to keep your pretty fingers.
John Steiger
Books, tips, techniques, videos, and internet searches, often don’t have sufficient detailed "how to" information.
I keep step by step notes which get updated if I find a better method.
I put off trying raised panel doors until 2 weeks ago, when I saw a picture at one web site where he held the panel with a parallel bar clamp to do the freehand arched top. Fantastic idea that works. I added a few more details on using that method.
Solutions based on equipment at hand, seem to be left up to the individual – part of the learning curve I guess.
Must admit never had problems with router collets,but I won’t use reducers, only correctly sized collets.
If faced with the same conditions, I might have tried putting the beam over the edge of the workbench clamp a block to it to aligh the post (which will be sitting on top) and using a marking knife score your lines from the underside.
89.7 plays the Jayhawks – what’s not to love?!
I can’t believe you’re a fan of 89.7 WNKU. That station is terrible.
Two (no – three) things to remember about router collets are: 1) both the collet and the shaft it attaches to must be clean in the corners and recesses – gum and sawdust messes with them. 2) with some collets, if you put the shaft of the bit all the way to the bottom of the collet the the bit’s shaft end prevents the collet from tightening completely, even if tightened by gorilla hands on the wrenches. 3) ( I knew that there were three) a little known fact about collets is that they do wear out. If a collet and router shaft are clean, and the shaft of the bit is not sitting on the bottom of the collet and the bit slips anyway – the collet is worn out – time to replace it.
Mike Dyer
My money is on you kid.
Kick that thing’s butt!
Megan,
The trick is to leave the country right before a deadline so that everyone else can do it for you.
I wish more woodworking authors would spend time talking about the parts of the projects that gave them trouble. If I’m fighting with a *%#@ router collet, it is good to know that even people like Megan have to fight with *%#@ router collets. Sometimes it is me, and sometimes it is the tool. It is comforting to learn that sometimes the experts have the same difficulties. I’m sure a lot of articles could have a paragraph or two about the difficulties or mistakes that were made. We can learn a lot from it.
Ah! Showing off the skill of making errors that don’t matter. Wish I could do that! So Full Marks are in order.
Ha – one of my favorite "Star Wars" quotations (along with "These aren’t the droids you’re looking for").
Thanks for all the good suggestions…I should have posted _before_ I got started 😉
Work Smarter, not harder.
Megan,
Do or do not, there is no try.
Yoda
Megan,
Whether you think you CAN or CAN’T, you are right.
Greg B.
I’m not convinced that anything can be accomplished in the shop in just 3 hours. Best of luck to you Megan, be safe and don’t be hurried – or you’ll end up like me with a carbide blade in the hand.
Megan,
WRT bandsaw drift, that’s why I have a dyno tape note on my bandsaw to remind me to check the drift before I cut. This is especially true if one doesn’t use it freqently. Anyway, any faults on this piece you can attribute to the absence of Chris. It’s all his fault since he wasn’t around.
r/ Gordon
I made the dovetail tenon a couple of inches longer than the straight tenon. Then I could start the dovetail tenon in it’s slot, and have some stability while I marked out the rest of the joint. It’s looking really nice, though. I can’t wait to see it all together.
How about turning everything upside down? Flip the top piece so it’s top face is on the floor and stand the leg on it so it is sticking up in the air. It should be easier to align this way and you should be able to get to the surface you want to mark since the top is so thick.
When you are single-handing (working by yourself), it really helps to take a few moments to think about how you might make a simple jig to both reliably and repeatably hold the work and workpiece together while you mark or fit them together.
For example, it would help you fit the leg to the rail if you first clamp a short straight scrap to the rail exactly where you want the edge of the top of the leg to stop. If it doesn’t end up exactly where you want it, then tap it with a small hammer until it does. For smaller pieces, spring clamps are a real boon and often overlooked as a temporary alignment tool.
Continuing for this example, that leg would stay put when you let it go of it if you first clamp a large wooden clamp to the bottom to make a temporary foot for the leg. Now you can reach for that marking knife just out of reach without having the #%@! parts fall apart – again.
These kinds of simple things takes the frustration out of single-handing and puts the joy back into woodworking.
Wow! This bench looks even narrower than the Cherubo!
Yes, you can do it. Forget about the deadline and take it one step at a time.
The trick to moving big pieces like that into alignment is tapping. Leave the weight of the horizontal beam on the leg, and lightly tap the pieces as necessary with a lightweight hammer or mallet to gradually nudge them into position. It’s surprising how finely you can control the movement that way.
-Steve
Megan – Why didn’t you ask the person holding the camera to help you. 🙂
Jonathan
========================================