


We may receive a commission when you use our affiliate links. However, this does not impact our recommendations.
The “Woodworking Daily” 3-year magazine subscription contest has ended, and today a new contest begins. Since it’s finally spring, we thought of a good idea that has to do with spring cleaning.
What are your best tips for shop clean-up and organization? Tell us in the comments section! We’ll read all the comments on Monday and choose the best or most helpful. The winner receives our shop organization collection, the “Essential Woodshop Value Pack” – a $66 prize!
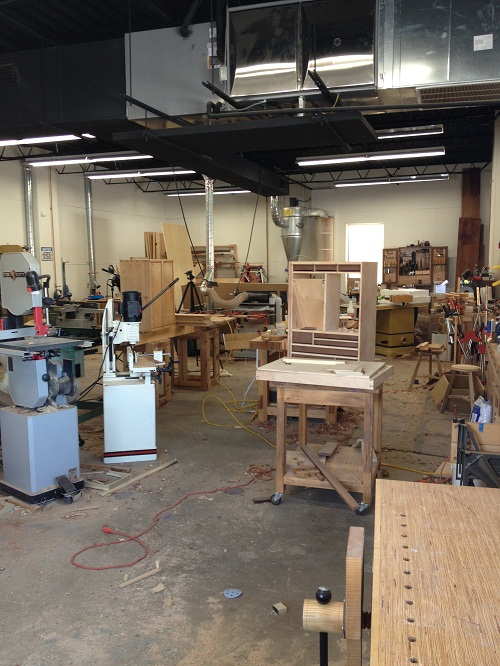 As you can see in the picture (left) of Popular Woodworking’s shop, clean-up and organization is a challenge for everyone. In fact, having a perfectly clean shop is probably a sign that you aren’t doing much woodworking! But there’s no doubt that a certain level of shop organization and cleanliness will help you to be more productive.
Here are a few tips from our blog authors:
Matt Vanderlist on storage ideas
Diagrams for a typical garage shop layout
Mike Siemsen on sweeping (funny)
Bill Rainford on customizing your tool chest
Megan Fitzpatrick on hand saws in her tool chest
I hope that gets your ideas flowing! The deadline for leaving a comment below is Monday, April 7th. So do a little sweeping and organizing this weekend and let us know what you come up with.
Oh, and please read the official contest rules here: http://www.popularwoodworking.com/current-contest-rules
–Dan Farnbach
UPDATE, 4/9/14: We’ve selected the winner for our contest, Kelly, who has shared this fabulous tip for keeping your shop organized!
Many thanks to everyone who entered with their amazingly good ideas. It was a very tough decision. Enjoy learning from each other, and keep adding your thoughts!
Maximize Vertical Wall Space & Eliminate Storage Carts
by community member Kelly
To fight cabin fever this winter and tackle shop clutter, I decided to maximize the vertical wall space above my workbench and eliminate numerous storage cabinets and shop carts accumulated over the years.
During a slow time at work in 2012 I built a 13-foot work bench for a new miter saw with 30-inch by 30-inch drawers of various depths. The new drawers did wonders for organizing my small tools, consumables, and pneumatic tools. It was not until this February that I got around to building upper cabinets to replace the slat board setup and an old storage cabinet.
My garage shop has 10-foot ceilings which I was not using to maximum advantage. I built 27-inch high by 10-inch deep cabinets for the most used items (glues, finishes, solvents, etc.) and installed them starting 12-inches above the workbench. Then I built 40-inch high by 18-inch deep cabinets to store less used items and installed them above the 10-inch deep cabinets. To minimize the dust accumulation, I added doors with acrylic panes so I could see the contents and avoid dust settling on everything. So far they are working great, not sure why I waited so long.
On the wall adjacent to my workbench where I stored my lumber I had two HTC lumber racks (4 uprights) installed 48-inch on centers which meant that any board less than 47-inches leaned against a wall somewhere or was piled on top of a cart or toolbox. I reconfigured my existing lumber racks and added two more lumber racks (4 uprights) and installed them 16-inch on center to store shorter boards and smaller plywood pieces. All the lumber racks were installed with the bottoms at 75-inches above the floor, which means using a ladder to access anything above the the bottom two rows. Below the lumber racks in a long line I installed 14-feet of Rockler clamp racks and 8-feet of 3-inch high metal peg boards. I used the metal peg boards to hang all my jigs and layout tools, which greatly reduced the cluttered around my machines.
I was able to eliminate four rolling carts and a huge 5-foot rolling aluminum toolbox from my shop. I now have plenty of floor space for work-in-progress without constantly moving cabinets. By eliminating all the clutter on the floor leaning against walls, I am able to keep the shop much cleaner too.
Here are some supplies and tools we find essential in our everyday work around the shop. We may receive a commission from sales referred by our links; however, we have carefully selected these products for their usefulness and quality.


I live in what we call a townhouse here in Johannesburg, South Africa. I know I wont get a prize, but here is my tip: I had to clear out my garage so that I could at least park my car in it, which meant moving everything out of the way and cluttering it yet again. In this process I found I had so much sand paper enough for a shop, LOTS of screws of all sizes, LOTS of just about everything. I decided since I am nearly 74 what I wont be using soon after not having used for so long, is get rid of it, like the sand paper, screws, tools, saws, my Shopsmith complete with the sanding belt, the planer, the bandsaw, my other tools and MAYBE build new cupboards or make better use of current ones rebuilt to store what I DO need and not what I MIGHT need and hopefully be able to find and use what I can and not what I wont. Wish me lots of luck in this endeavor!!!
When I go to the Hair Salon, they have this wheeled cart that has two bins, one on top, one underneath. I think that a wheeled “Project cart” would be a great idea. If you store the tools, bits, accessories that you may need for your project in one bin, and then use the other bins for scrap/garbage, I think it would make your job easier because you don’t have to go back and forth to a tool chest, cabinets, & garbage. You also can attach a dustpan and broom to the cart. Everything you need in one spot that is mobile to go with you around the room.
Simple…
Completely remodel your shop.
Get lots of help from Friends at your local woodworker’s club, not to mention your sister & brother-in-law.
Then tear out everything that was built-in, move all your tools, and rebuild new built-ins.
Photos:
https://www.facebook.com/stew.hagerty/media_set?set=a.280749962088259.1073741838.100004597721935&type=1
I’ve found that a few keys are: 1) if you don’t need it, don’t buy it; 2) a piece of wood less than 18″ long is firewood; 3) lots of cabinets with fitted doors; 4) a cyclone collector mounted on the outside of the shop with the ductwork broken into blast gated zones to maximize collection; 5) hang up some 20″ box fans from the ceiling and duct tape furnace filters to each one (you’d be surprised at how effective it is!) and change the filters every 4-5 weeks. And don’t forget to sweep up a lot. Make furniture if you have any time left over.
Open the overhead door, put on a respirator and turn on the leaf-blower.
It is simple… Don’t Make Junk, Don’t Buy Junk and Don’t Keep Junk.
One word: MOVE!! (or clean like you are going to!)
All woodworkers are pack rats, it is in our genes, I hoarded wood, tools and misc junk that I could not bear to part with until I had to move, and even though I now have a 1250 sq ft stand alone shop, every time I clean up I look at the pile and ask myself, “would I take this if I was moving? if not out it goes!
Believe me sometimes it HURTS but the lack of clutter is worth it.
I’m fortunate enough to have a stand alone shop that is heated and cooled so I don’t have a particular time when I do a complete cleaning. I find that I do a major cleaning when I purchase a new machine which usually means rearranging the entire shop so while everything is torn apart I give it a good overhaul. I do a fairly deep clean every time I finish a project. Then all of the tools and equipment are back in their respective homes and I have a fresh start.
Clean up as you go. Have a specific spot for each item so that when a tool isn’t there, you can call the person you loaned it to and nicely ask for it back.
I love spring, it gives me a chance to clean out and re-find lots of things I squirreled away. I recently did a reorganization of my shop where I went to a bin system. Now all of my shelves and several of my cabinets have categorized bins. Some of my categories are Layout Tools, Cutting & Sharpening Tools, Zip-lock bags, Electrical, Router accessories, Sanding, Adhesives & Touch Up, Bolts Tapcons and Large Fasteners, Drivers & Drill Bits, Tape, and several others.
I have larger bins with lids on my wall shelves and smaller open top basket type plastic bins on a narrow shelf just above my workbench but below my cabinets. In the cabinets I have medium sized open top bins that are filled with crystal light containers that hold smaller parts such as one for each size of drywall screw, tek screws, nails, and miscellaneous items. Each container is labeled with what is in it and what size such as 3″ drywall screws, or #12 x 3/4″ tek screws. The bin is then labelled with what the majority of the containers are such as Screws, Nails, or one is just Misc where all the odd-ball stuff is located.
The major advantage of this system is I get to spend more time actually woodworking instead of spending all my time searching for stuff. My categories are wide enough that most anything I add to the shop instantly has a home.
Hope this helps someone,
Tom
I have awesome shop lighting by installing 4′ x 8′ OSB sheeting with a aluminum foil, factory applied and facing down on my 9′ shop ceiling and then mounted four 4′ shop lights, facing up and mounted on bottom of Each, TWO 4′ x 4′ x 8′ frames made from 1/2″ aluminum square tubing.
I also do not trip on any more cords by installing three twist plug receptacles on each 8′ length on the outside frame housing.
It required me to put twist plugs on each tool, but I never have a disconnect any more.
Chuck and Glen have visited my shop and will agree on how great the light is spread around the shop.
Scrap lumber in my workshop is a nuisance. To get organized and cleaned up in my workshop would be keep or throw out scraps of lumber. A good article would be to help us decide on what might be useful to keep and what should be burned. Going right down to type of wood and size and what should be retained in regard to plywood. Then a good storage idea or two to best utilize area or space and make what is on hand easily assessable.
My goal for spring “cleaning” is to complete the projects I started. This would both free up the space taken up by the partial projects and give the satisfaction of completing the projects. I do not have a heated shop and we just finished a long unforgiving winter. I then want to complete the projects started by my father-in-law who passed away in 2004. My father-in-law had started several items with the intent of giving them to different family members. I would be proud to finish those projects and present them at the next family reunion. In 2013 I was lucky enough to be given a lot of his shop tools, wood, and unfinished projects. I feel the completion of the projects would give me a fresh start by getting the unfinished projects monkey off my back.
My secret is to ensure that my vacume system is turned on and that only 1 gate is open. Many times I forget to close a gate after using a tool such as chop saw or jointer. I lose a lot on vacumn when multiple gates are open.
Springtime cleaning will occasionally bring about the find of some long forgotten wood that is not only beautiful old pieces of straight grained wood but it is found to be grimy, greasy, and filled with dirt.
Not to worry. Just use this power-packed cleaner and some elbow grease and you will get that vintage lumber to shine.
3 parts sand
2 parts liquid hand soap
1 part lime
Mix these ingredients together in a clean container and proceed to scrub with a stiff bristled brush. Rinse with clear water and rub dry with a clean towel.
You now have some beautiful old wood that is ready for that project that has been waiting for some vintage wood to appear to get this dream finished.
When it becomes too much of a mess, clean and organize one area. However, you are not allowed to just pile the stuff in another area. Much easier said than done.
Living on a boat for a time did wonders for our organization skills. As we did on the boat, we made an inventory of tools, accessories and consumable supplies. We numbered each cabinet & locker and assigned our inventory to one or another numbered cabinet/drawer/locker/shelf (eg. D1C1 for Drawer#1 in Cabinet #1). The inventory list is placed in the “clean room.” This list can be consulted when looking for a tool or putting it away. After a bit, it is automatic. It helps that we have small cabinets or a tool box near each machine for supplies and tooling specific to that machine. The rule is to put the tools away at the end of the day. Dust collection catches a lot, but occasionally, we just open the garage door and turn on the leaf blower (remember to put the tools away first. The worst part of organization is managing the wood inventory, especially leftover sidecuts in an orderly fashion. Any tips are appreciated.
I have my shop split into two areas; powertools in the garage, and hand tools (plus a lathe) in the basement. As much as I strive to clean as I go, that just doesn’t happen 100%. My clean up strategy is simple; whenever I enter either space I put away 5 things. It can be any 5 things, 5 screwdrivers count. It isn’t much at a time such that it’s not really that bothersome. Usually it can be one quick trip out to a workbench, tablesaw, etc and back to the tool chest. However, since I pass through multiple times a day, bit by bit the clutter gets put away, so when it’s shop time I don’t have too much additional cleaning to do.
The key to getting ahead on the organizing front is to BALANCE time between production and building more shop organization. Make every 5th project a storage project (every 7th if you have been at this awhile…). Just as you don’t spend all your shop time sharpening your edge tools, since then you would never get any work done, you also don’t ignore dull edges; planned balance is the key.
Being disciplined about regularly building new storage will help you focus on what you most need, and ensure that you neither over- nor under-invest in building storage. You will also have time as you do “real” projects to think about and prioritize your next storage project (the one in five).
Spring Cleaning is best done by keeping
short accounts for all matters messy,
throughout all four seasons…
Keep the wood chips depth shallow.
Reorganize the tools before you start the next project.
Do repairs before the pile contains four.
Share your shop with your kids, grand kids, neighbors, guests…
thus keeping high motivation for all projects cleaning.
The longer you can make this list, the shorter the process becomes.
Generally clean up every couple days when I can’t find anything anymore or when done with each project. I have a very small shop that I am converting all the larger machinery to wheeled base to roll out of the way when not in use. Just bought a cyclone kit to add to my dust collector then to add some ducting instead of the 20 foot hose I am using now.
I along with four other retired law enforcement officers do volunteer work at our nonprofit little theater. We construct and dismantle sets for each play. We lessen our cleanup time by placing a twenty five gallon garbage can at the table saw and miter saw. When a cut off is made that is too short to reuse it immediately goes in the cut off barrel. If it is reusable it is placed on a three shelf rolling cart to easily take it to our storage area. We also use magnets on a long stick to pickup screws and nails. This saves time and keeps even older guys from having to bend over and pick up when we complete work each day.
I figure cleaning my shops is no different than cleaning the garage, or anywhere else. I have a wood shop and a machine shop next to each other, so things seem to get disorganized a lot quicker. I usually gather things that go to different places in piles, then take them there and put them away. It is always surprising to see how much stiff gets toted from one shop to another. I keep my stock on racks on the wall. Then when I just can’t get it cleaned, as the old saying says, you are the only one attached to your stuff. Have your spouse or friend come over and help you “sort”; then you can help him.
The best way to keep your shop clean is to do all your cutting and sanding in your buddy’s shop!
Your shop would be a breeze to clean with suck an open area and the layout of your machinery. Since you already have installed a central dust collection system half your work is already done for you. You should get the hoses and hand held swivel attachment wand suggested by Danny H from Rockler’s. With that the floor, benches, machinery and light’s and fixtures will be done in no time. You could even do the walls and girders if you get a long enough extension.
Now comes the tools. I’m sure they all had a place before they ended on the benches or where ever they have found their present home. Which leads me to the next contest. This contest should involve everyone that uses the shop, no exceptions. With all that wonderful wall space you have available around the shop, and since you need places to store all those hand tools,clamps, handheld power tools, plus whatever else it is you have that needs storage. You all get together and decide what cabinets must get built. Make a list, put the list in a wooden bowl and you each pick one out and have to build that needed cabinet for the shop. The cabinets must be of equal quality and build time. The prize will have to be selected by the group or maybe you can get one of the “SPONSORS” to donate a prize.
When everyone is done. You will have project’s for the magazine and all the subscriber’s.
That is how you get it clean and get more storage space.
I did hit the submit button too soon. the single most verticle storage that I use is like a poster rack at the store . I placed the swinging doors about 6 inches apart and try to store the tools on the doors by category so all out in the open and visable.
I do believe that any organization vertically is the way to go as mentioned in many responses. Keep all horizontal surfaces clear. (these areas do nothing but pile up until you reach the rafters and collect sawdust)
This might sound way to simple, but unlikely or impossible to do. ” Clean up at the end of every session and a concerted effort to put back all tools and fixtures at the end of the job. ” (which includes notes and special steps you took and what you would do to improve if you were to do it again or recommend to someone)
Now if anyone could help me practice what I preach, that would be great.
Keep every tool in the same place and return after every use so you know where to find it everytime.
Cleaning your shop would be easy with the wide open area and the layout of your machinery. You have central vac and getting the lengths of hose and the hand held swivel nozzle suggested by Danny H would take care of cleaning the entire floor and all the benches , plus machinery. After that getting all your tools organized should be another contest for everyone in the shop. With all the empty wall space available everyone should draw from a hat a different types of tool storage cabinets that are needed in the shop and each and everyone has to build that cabinet. Maybe the winner will be exempt from cleaning the shop for a whole month or whatever the group decides????? That way all your storage problems are solved and you now have projects for the magazine and all those who subscribe.
To clean up my shop, which is a two car garage I use a leaf blower. I usually only do this when I am ready to finish a project. I put on a dust mask and blow out the entire garage. I usually have to do this two or three times to get rid of all of the dust. I also pressure wash the garage door.
For organization, all of the large tools are mounted on wheeled bases, or can be mounted on sawhorses. Again my work shop is a two car garage in which is parked two cars. A place for every thing and everything in its place. I do ot buy a tool without first planning how to store it
Maximize Vertical Wall Space & Eliminate Storage Carts
To fight cabin fever this winter and tackle shop clutter, I decided to maximize the vertical wall space above my workbench and eliminate numerous storage cabinets and shop carts accumulated over the years.
During a slow time at work in 2012 I built a 13-foot work bench for a new miter saw with 30-inch by 30-inch drawers of various depths. The new drawers did wonders for organizing my small tools, consumables, and pneumatic tools. It was not until this February that I got around to building upper cabinets to replace the slat board setup and an old storage cabinet.
My garage shop has 10-foot ceilings which I was not using to maximum advantage. I built 27-inch high by 10-inch deep cabinets for the most used items (glues, finishes, solvents, etc.) and installed them starting 12-inches above the workbench. Then I built 40-inch high by 18-inch deep cabinets to store less used items and installed them above the 10-inch deep cabinets. To minimize the dust accumulation, I added doors with acrylic panes so I could see the contents and avoid dust settling on everything. So far they are working great, not sure why I waited so long.
On the wall adjacent to my workbench where I stored my lumber I had two HTC lumber racks (4 uprights) installed 48-inch on centers which meant that any board less than 47-inches leaned against a wall somewhere or was piled on top of a cart or toolbox. I reconfigured my existing lumber racks and added two more lumber racks (4 uprights) and installed them 16-inch on center to store shorter boards and smaller plywood pieces. All the lumber racks were installed with the bottoms at 75-inches above the floor, which means using a ladder to access anything above the the bottom two rows. Below the lumber racks in a long line I installed 14-feet of Rockler clamp racks and 8-feet of 3-inch high metal peg boards. I used the metal peg boards to hang all my jigs and layout tools, which greatly reduced the cluttered around my machines.
I was able to eliminate four rolling carts and a huge 5-foot rolling aluminum toolbox from my shop. I now have plenty of floor space for work-in-progress without constantly moving cabinets. By eliminating all the clutter on the floor leaning against walls, I am able to keep the shop much cleaner too.
I do not have the big shop I once had so now I am making use of about 700 square feet of basement space. I used to put all my cut offs in bins or boxes before, but that took up precious floor space. I kept looking at the unused area under the basement stair well and decided to frame it in and make shelving in that area. As a result I have graduated end load depth from about 2 feet all the way to eight feet for storing those cutoffs or odd boards. This did not become as valuable as I thought until I put data on the ends of each cutoff specifying length and species. Also it helps to keep like species in the same general area. or you can add vertical separators.
Best way to clean up your shop is stop saving all those little or medium sized pieces of wood. If you
cant make a project out of them in 1 hr or less. Use for firewood or give to someone that has a fireplace.
We ran our fireplace as much as possible(live in Florida) and I still have enough for next year. It has
made a big difference.
I have an unfinished basement. I use up scraps of wood from 1 to 2 inches wide by 18 inches long by screwing them perpendicular to the rafters. I then store my clamps and longer pieces of lumber between the rafters. Wood types can all have their own slot. All the clamps are in order by length and out of the way. This method also works for fishing rods.
As I have an extremely small shop, every inch of space is considered. As I also have a ton of stuff, the process is going on all the time. I think the biggest improvement that I made was to get rid all the metal “splayed foot” stands for my standing power tools such as the band saw and table saw. They take up a lot of excess floor space and are useless for storage. I built plywood cabinets on locking casters with shelving and doors for each tool. I now have tools all at the same working height (when appropriate) and can store all their accessories, plus a bunch of other stuff as well, right at the tool. I can also modify them as I wish and hang misc. items on the exterior. In some of them, I have placed small vacuums for dust collection.
Through trial and error I believe I found the best hose/wand system for vacuuming a whole shop equipped with a whole shop vacuum setup. The regular 4″ black corrugated hose many suppliers carry fitted with a swiveling 4″ head attachment from Rockler, used along with Rockler’s or Peachtree’s floor vac wand. I tried Rockler’s very flexible 4 ” hose to be heavy and difficult to use. I also attach the hose to the swivel nozzle with one of those easy wire spring clamps.
To properly spring clean, it is important to be neat and organized. It may take a few minutes extra but will save tons of time later.
We clean after ourselves after every project. We sweep, put all tools back in their place, make sure we use our shopvac to pick up all dust etc.
In the spring, we take out the smaller tools which are all kept in clear plastic boxes and after taking the tools out, we either wash out the boxes or just shop vac any dust etc.
We move all the larger tools, saws etc and shop vac, sweep etc. We ensure that the table saws are free of any wood fragments and with a damp cloth clean all the larger tools.
We then sort through any wood we have and keep only what we might use. This is stored on shelves in the garage, off the floor and neatly in piles on shelves.
Smaller items like drill bits are put in clear plastic jars and stored on the workbench.
The workbench is wiped down and vacuumed.
We also spray the garage with bug repellent to ensure any spiders etc will be gone.
All the doors and drawers of our work benches are cleaned out and dusted and wiped down.
Rakes, shovels etc are on hooks on the garage wall, off of the floor and cleared so no one can get hurt.
Being organized during the year keeps our spring cleaning at a minimum.
.
Cleanup and organization are two sides of the same coin and both are like dieting. Any diet will work if it’s one you will use, and if you are consistent with it. Consistency comes with training (habit). At first, organization and cleanup are hard to achieve, but once you establish the habits of being organized and clean, any system will work.
To properly spring clean, follow these steps:
1. Open all doors and windows
2. Put hearing and dust protection on
3. Fire up your leaf blower (if no leaf blower is available, the exhaust port of your shop vac will do)
4. Start in the farthest corner and work your way to the doors – blowing dust and dirt outside.
5. When complete, put he leaf blower away.
6. Go outside and pick up any tools and materials blown outside that you want to keep.
7. Shop is now clean enough.