


We may receive a commission when you use our affiliate links. However, this does not impact our recommendations.
I’m not sure if I can call it “progress” yet, but I have acquired access to a larger shop space. It is rather run-down, so there is some work to be done.
Sweeping was first. A close second was taking a look at the workbench. It was surrounded by a pile of locally harvested pine planks and a fair amount of debris. I decided to come back to it after reading a couple Christopher Schwarz articles for inspiration, and swapping out the blades on the thickness planer – in other words, the easy parts of the job.
Today I moved the pine planks out of the way and took a closer look at the workbench. I had some notes in hand from Chris’ “Kitchen Test” – a quick method for determining the usability of any workbench. Here’s the gist of it:
1. Dimension a piece of plywood to represent a kitchen cabinet door, roughly 3/4″ x 18″ x 24″. Also grab a kitchen drawer (or make one) that is about 4″ x 18″ x 18″ and a 48″-long piece of baseboard. The idea is that you should be able to easily work on all these pieces with your workbench.
2. Try working the faces, edges and ends of all three pieces. Can your workbench easily grip the kitchen components in every way? If not, it is time for some changes, or possibly a new bench.
Read the original “Kitchen Test” blog article here.
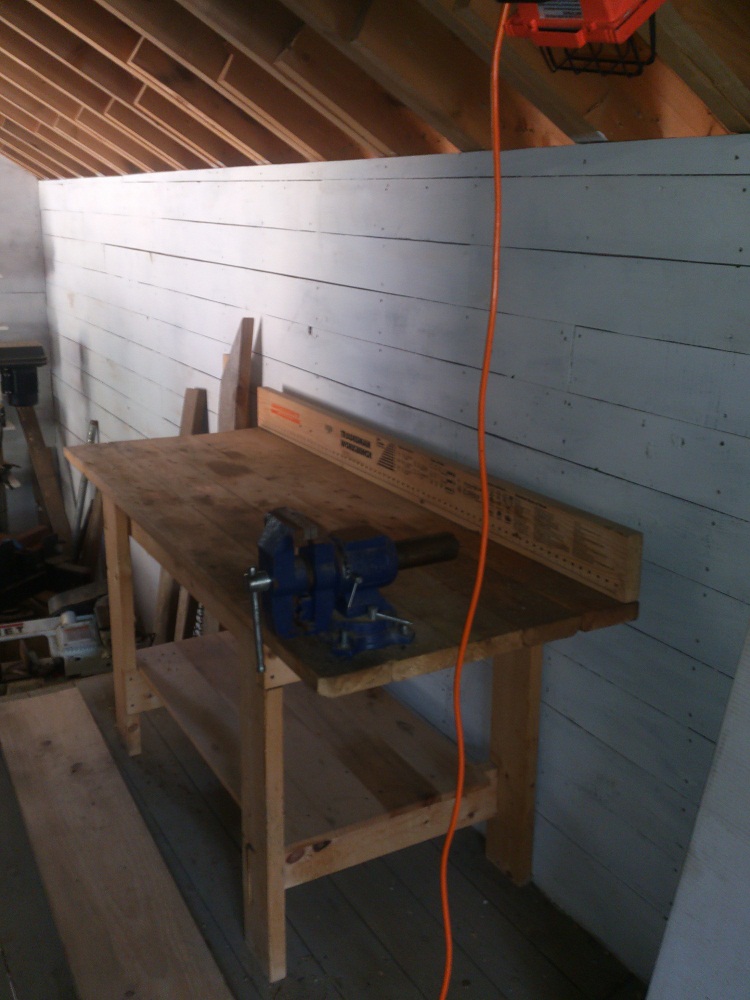
Um. Yeah.
In the end, I did not have to do much more than turn on the light and eyeball the workbench in question. It is pretty stable, but workholding is going to be a real chore.
What do you think – should I modify this bench, or should I build a new one?
If we’re talking a new build, I am tempted to try Chris’ latest, the “2-day Workbench” – now in store! But I am open to ideas.
–Dan Farnbach
Here are some supplies and tools we find essential in our everyday work around the shop. We may receive a commission from sales referred by our links; however, we have carefully selected these products for their usefulness and quality.


I thought I burned that bench when I built my new one. Turns out my wife tells me I gave to an old enemy!
My “new” bench is Roubo style except it has a twin screw vice on the end. The leg vise is on the left when standing at the twin screw vise end. This “giant clamp” is the most used tool in my shop. I can’t believe I ever made anything worthwhile without this bench. I would like to send you a picture but I guess I’m too tech ignorant . Do some research in available magazine articles, books and talk seriously with Chris. Your bench should be a reflection of the things you wish to make and how important it is to you to make them correctly.
GOOD LUCK !!!!!!!!!!!
Reading through all these comments, I am impressed as always with our community! High standards and a high degree of knowledge — just the kind of woodworkers we should all surround ourselves with. Please keep the ideas coming. If I’m learning something from them, there are many others learning as well.
First, congratulations on your new work space. This will be much better than working on projects in your living space.
Second, do make the investment of time, money, and effort to make a really flat and stable workbench somehow, or rebuild and upgrade this one before beginning any projects. Don’t “make do with” something “pretty stable” because you WILL get frustrated with it. That always seems to be when you have least time to stop and clear everything off to do something you know you should have done at the start. Same with jerry-rigging “improvements.” (Voice of experience.)
If you’re renting and concerned about moving your bench when you move out but don’t like the idea of bolted parts, make it less than 24 in wide so it’d fit through a door in an older building. Just do it… first real project in your new space.
Your bench really is the most important tool in your kit and literally the foundation for everything you create on it.
That is not a work bench, not even close. Start from scratch or you’ll hate yourself later.
Hey, Dan….
That bench looks awful familiar! I think I have one too, given to me by a friend of my sister’s. It screams “HoDe’s” ( Home Depot) to me. The back edge has Info printed on it, ruler, types of bolts & screws, nail types and sizes… etc. Mine right now is a catch all, but I intend to take it apart and rebuild with stronger legs for sure, and plane the top boards and add/glue a solid core door to the top, like a previous mention. That should make one hell of a good start to a strong bench. Wheels too, as it will be my main work/assembly bench in the middle of my small shop. “L” shaped shop 370sq.ft. Regards, Ted
First build a solid base – that’s the key….whether you use 2.x 4’s or oak or whatever. I like a plywood floor bottom between the legs…both for stability and for a good base for strorage – whether you add drawers or leave it open.
For the solid top I used a solid door (can’t beat that) and covered with bamboo flooring…maybe should have used oak for my oak base…but looks fine and remained flat – had very little plainging sanding to do (you could also glue two 4′ x 8′ plywood or particle board panels together for a solid top). I used 1 1/2 ” oak for front and back of the top.
I installed a quick-release front vise (thought long and hard about a leg vise) and designed a wagon/tail vise. I drilled 3/4 ‘” dogholes at 6″ intervals and with holddowns and the two vises, there’s nothing I can’t clamp anywhere.
I added a shelf and put in some pre-made drawers in one half with the other half open for storage. Also built a Moxan vise, and have mechanic vise attached to a plywood base that I can set on the workbend and hold down with holdfasts when needed – and same with the Moxan vise.
It was fun and inexpensive to build. I’ve got in on retractable rollers so I can use it up against a wall or roll it to the middle of my small workroom (single car garage…so I envy you with your large space. Also added a tooltray to the back, with my first attempt at hand cut dovetails…which was also fun, and turned out well enough that I’m not embarassed to show it off to visitors.
Have fun.
-Jed from Kansas City
Dan –
Food for Thought: Keep the bench and use it to build the undercarriage or base of a proper bench, then break it down and use the top as a laminate layer in a new top of 4″, perhaps between a couple of IKEA Countertops.
I’d consider editing the license plate of your truck out of the video. Other then that there is some serious potential in that space! Good luck
If it’s stable, keep this bench for sharpening, metalwork, and to help build your own woodworking bench. Two benches are better than one. I spent close to a year developing my version of the Milkman’s workbench with a knockdown base, and 18 months on my Walk-around main bench, designed for a small English garage. My recommendation is to build one faster than that so you can use it!
I think I might just double up on the legs and mount a somewhat larger new top right on the old one. Think of the clamping possibilities from an overhanging ledge.
Hey Dan,
What are you going to be doing with the bench? If you’re planning on a lot of woodworking, then build a woodworker workbench. Not the two day, think Roubo The workbench brings life to your projects, so you should have one that you can work. That is looks to be a “Puttering bench”
Have you looked at the Paulk bench? Easily built, strong and easily modifyable.
I’m with the others….build it!
Hello Dan
I agree with every one that you should build a new one. How ever, that bench there is still good. That is one of the first benches I ever had and I’m still using it for everyday stuff. The thing is though, even as a beginner I knew better to assemble it nice and square with glue and good screws then plane and sand the surface and finally apply a clear finish. Its been 10 years now and it still does the job.
Both! You know you want affirmation 😉
It’s time to think ambitious and build your best workbench ever.
Build!