


We may receive a commission when you use our affiliate links. However, this does not impact our recommendations.
 To initiate our fourth graders into woodworking, we offer them a branch and show them how to shape it into a mallet. The branch-mallet is a great project to introduce students of any age to woodworking. It familiarizes them to saws, chisels, gouges, rasps and sandpaper. And, once finished, they can use the tool on their future projects or just proudly take it home and place it on the mantel or a bookshelf. The mallet project doesn’t overwhelm young students with too many measurements, nor does it demand complicated layout or proficiency in knowing how to use a more sophisticated tools. It is, in fact, a very organic project that is based on the principle of subtraction. We provide them with a block of wood and show them how to successfully subtract from it until the mallet reveals itself. This is a fulfilling project for young students or beginner woodworkers, and for anyone who looks for a fun project that will not take too much time.
Here is how we do it.
Preparations and saw work
First, find a hardwood branch that is 4” or 5” in diameter. It would be easier to work with green wood, but any knot free brach will do. Most of the branches that we use were pruned tree limbs salvaged from the streets of Manhattan or branches that I picked up from our property or our neighbor’s spring tree trimming activity. Once you obtain a limb, cut it to 10” long.
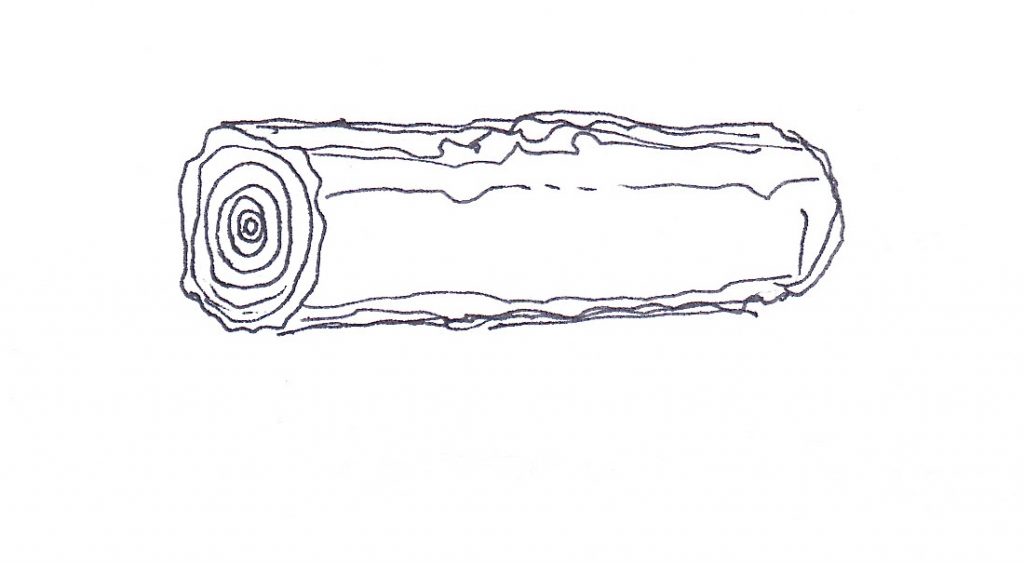
With masking tape or a pencil, draw a circumference line around the middle of the branch. This denotes the division between the head of the mallet and its handle. I also call this area the neck.
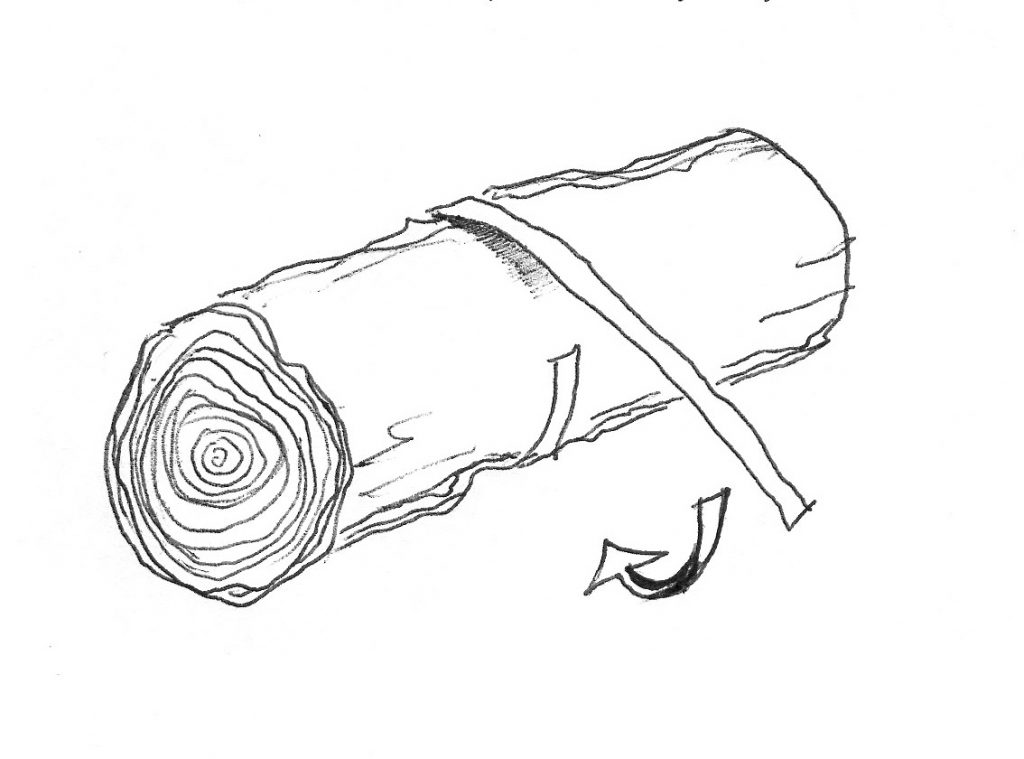
Decide which half of the branch should become the handle and place a compass or a round pre-made template on the center of the cross cut base. Draw a 1-3/4” circle. This is the maximum diameter of the handle.
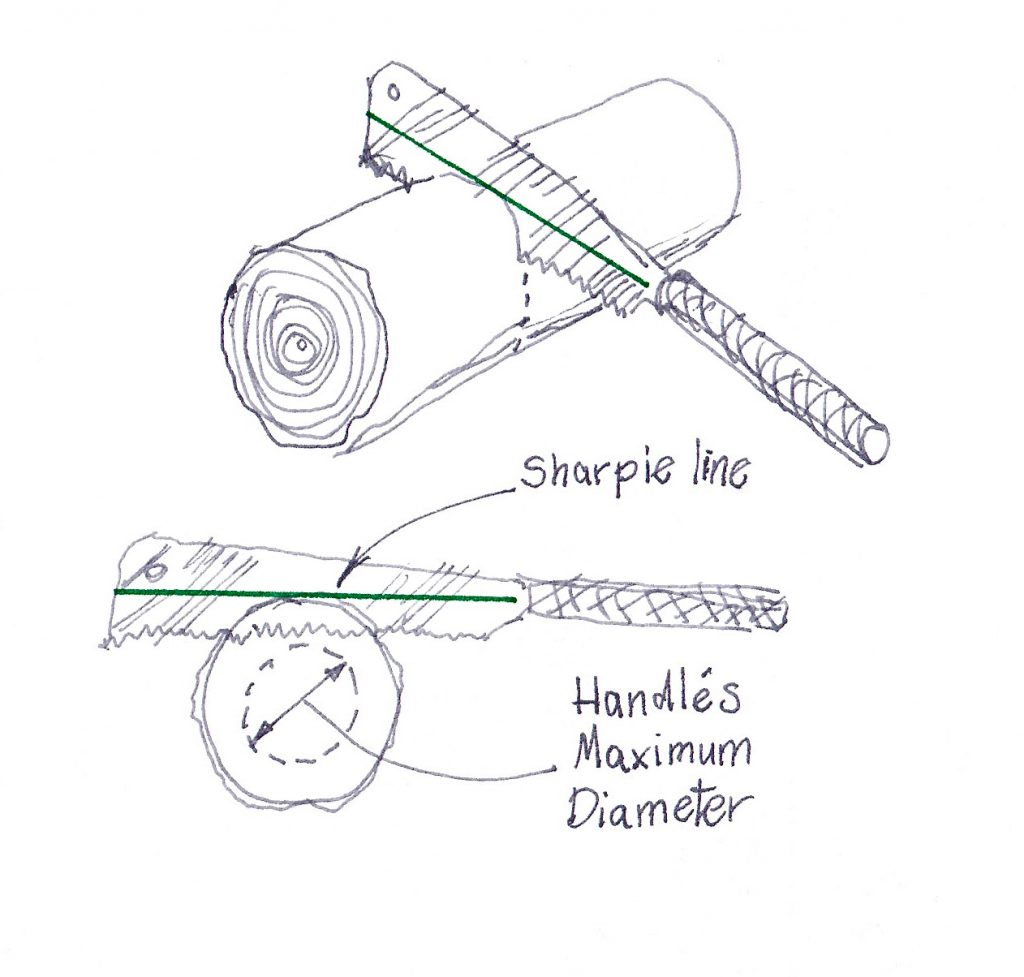
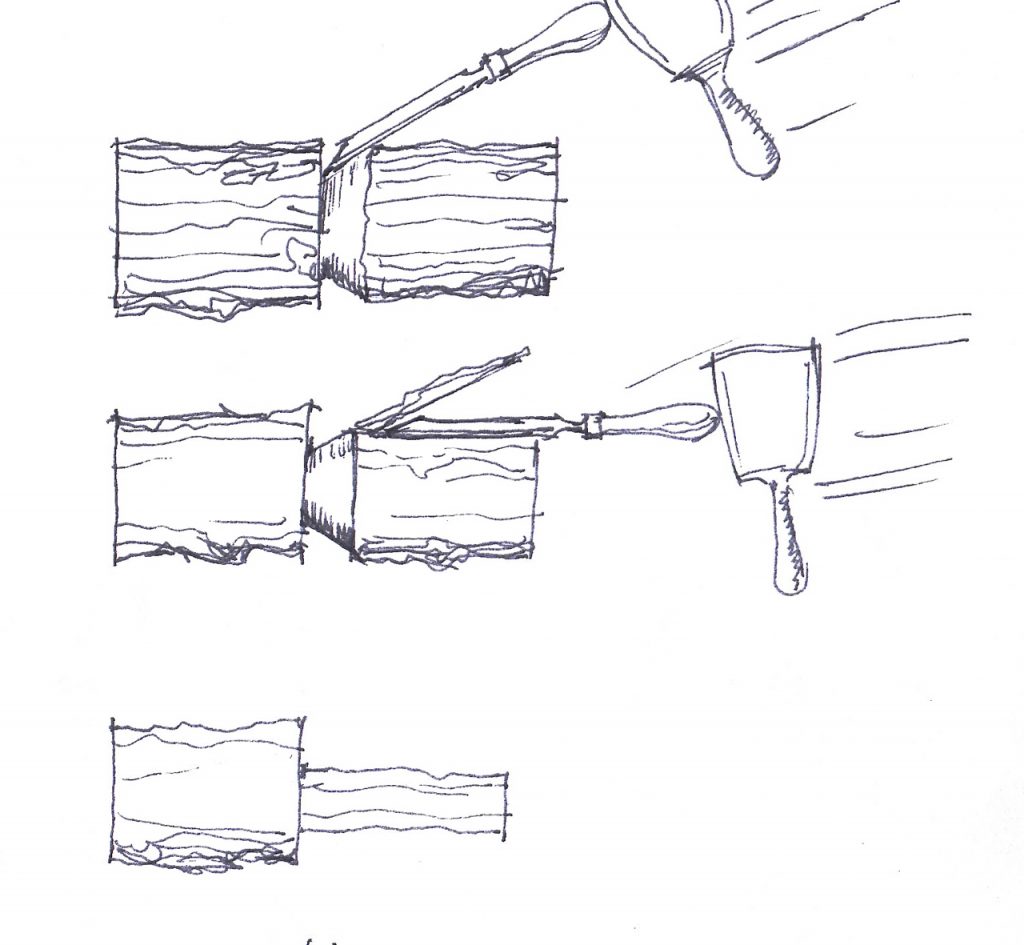
Place your saw on that base with the teeth tangential to the circle and mark the location of the branch’s circumference on the saw.
Align a ruler to intersect the mark and, with a sharpie (or any other marker), draw a line parallel to your saw teeth.
In order to indicate to the children when to stop sawing down the mallet’s neck we had to draw a limit or a destination line on the saw’s blade. We begin by drawing a circle equal to the diameter of the handle on the handle’s base. Then we place the saw’s teeth tangential to the circle (painted red). Now we draw the green line on the saw’s blade, which is parallel to the teeth and tangential to the bark.
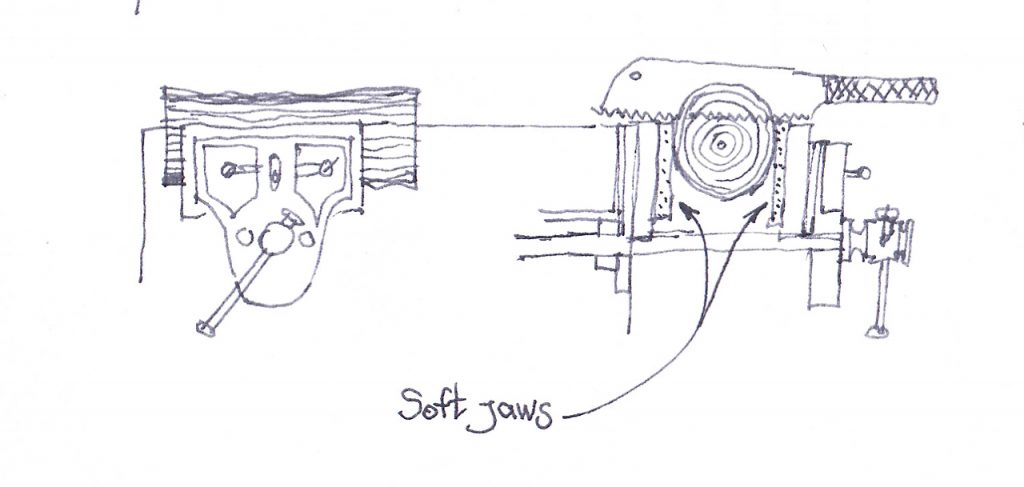
Now clamp the branch in your vise, tucked between two soft jaws and proud of the bench surface. Our soft jaws are made from a Homasote panel, but you can use cork or foam too. (Read more about it in my past blog.)
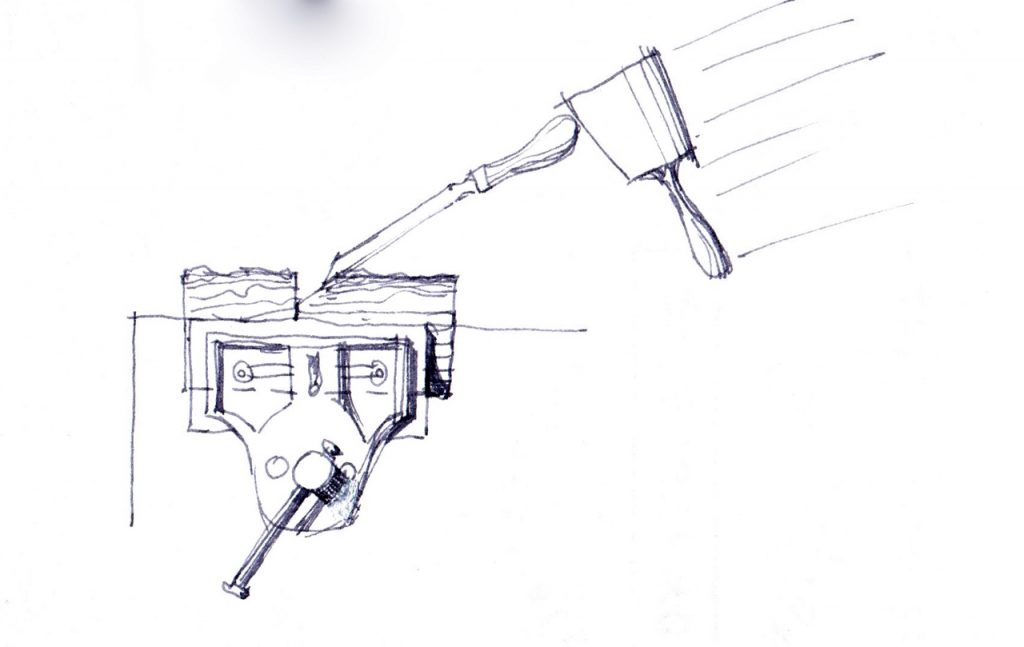
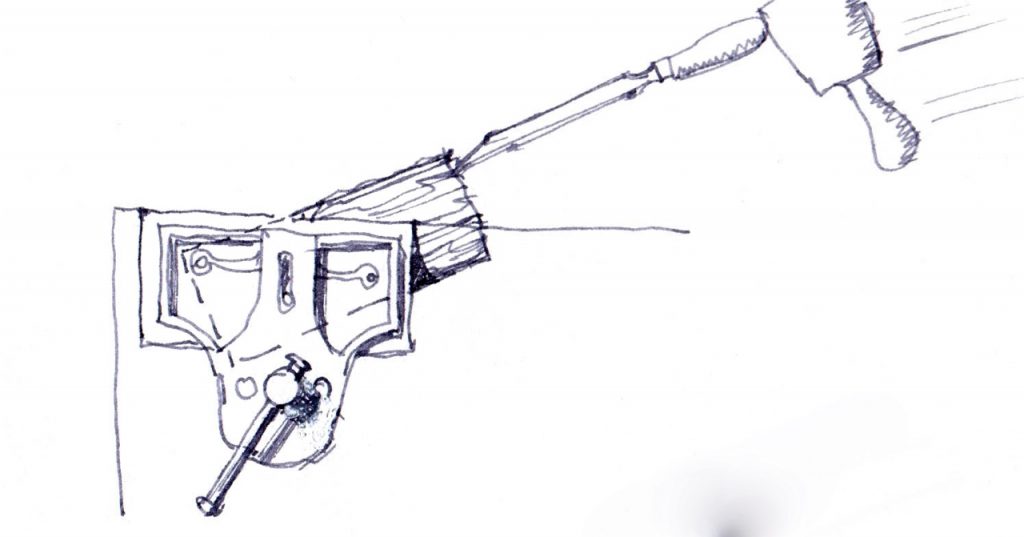
Saw down and around on the circumference line, using the saw’s sharpie line as an indication when you have reached the right depth and need to stop sawing. Roll the saw to the next segment on the circumference line and continue sawing until a uniform kerf all around the branch is completed.
Shaping the handle
We roughly shape the handle in two steps.
First we clear the neck as much as possible by gouging or chiseling at a 30 or 45 degree angle towards the bottom of the kerf line, from the handle’s side.
Then we gradually split and remove strands of long grain chips from the base of the handle towards the neck. We work around the future handle peeling away layer after layer of annual rings. Cleaving the grain comes with no complications when the branch’s grain matrix is homogenous and parallel. In this case I guide my students to use the bevel up approach. But if the grain is capricious (sometimes we work with eucalyptus and olive woods from California) or when we have to deal with branches with knots, I instruct the children to drive the chisel bevel down.
To cleave the branch we usually hold the branch in the vise at an angle, but if the child is not tall enough to work comfortably in this configuration we hold the brach parallel to the vise to help the young student drive the chisel closer to his or her chest height. This last stage of splitting the wood is the most joyful for my students. In contrast to the slow and laborious sawing and 45 degree slope gouging of the neck, the surprising ease and speed in which the grain can be cleaved generates a lot of joy and satisfaction.
Next time I will show how we continue the work and finish the mallet.
Here are some supplies and tools we find essential in our everyday work around the shop. We may receive a commission from sales referred by our links; however, we have carefully selected these products for their usefulness and quality.


For many years, I have made my own mallets from branches, dense wood (teak/mahogany), tree root with sap (some call it a maul), and laminated hardwood heads. These can be rugged dipped rubber coated, leather wrapped, or submerged in PEG, or simply left plain.
I turn them on a lathe (for the handled and cone shaped tools), and cut the heads on a bandsaw for various hammer-shaped mallets. I use the wooden mallets for delicate wood carving and chisel work requiring light strokes. I also collect and modify steel hammers (especially dental hammers) for repousse, chasing, and metal forming.
A simple 4X4 head on a 14 inch length of broom handle also works excellent for blacksmithing (flattening) when you don’t want to leave marks on your work. Might as well make several.
In this manner, there is no reason to invest allot of $$$ in specialty mallets, although I would not refuse a nice one as a gift. A hammer for every occasion! If they’re odd. I will collect them — e.g. cobblers shoe hammers/antique hammers.
Have you ever tried making a mallet like this out of mesquite wood? Since it is so hard, I am wondering if it would work very good as a mallet? It would be a pretty mallet if able to form it because of the wood grains in the mesquite wood.