We may receive a commission when you use our affiliate links. However, this does not impact our recommendations.
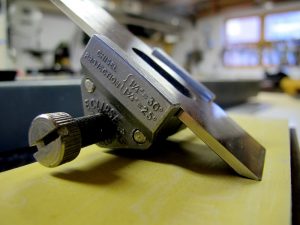
My favorite honing guide is the one you can find at almost any woodworking store. The guides are inexpensive and poorly made, but you can easily tune them up to make them work.
One of the major faults of these guides is that when you tighten a tool between the jaws, the jaws tilt up a bit and create a bump in the middle. This bump is a troublemaker. The iron can rock side to side on it, and this will spoil the best thing about the guide: its consistency from job to job.
Also, the jaws might come misaligned from the factory and one jaw will be higher than the other. The result: again, a bump in the middle.
For years I filed these bumps flat so that the jaws created a perfect bedding surface for the iron. It was a bit of a fussy process, I admit. But I wanted the iron to be well bedded, like on a frog.
That was stupid.
A couple years ago Deneb Puchalski at Lie-Nielsen showed me how he does it. Forget flat. Think hollow. So instead of trying to file the bed flat like a frog, just turn the bump into a slight concavity. Then the plane iron will rest only on the two long edges of the jaw. Fast. Brilliant.
(Deneb also makes some further modifications to his guides for accommodating shoulder plane irons and the like. Ask him for details.)
This morning I shot a one-minute video on how I file the bed hollow and what the results look like. Take a look if you like. (By the way, the music is Lucas Gonze’s “Frog in the Well,” from the FreeMusicArchive.org.)
— Christopher Schwarz
If you want to learn sharpening, the best way is to have someone show you. The next best way is to have a good book. I recommend Ron Hock’s “The Perfect Edge.” Ron has been an important voice in the woodworking community for reasonable and effective sharpening for many years. His book is also a good read.
Here are some supplies and tools we find essential in our everyday work around the shop. We may receive a commission from sales referred by our links; however, we have carefully selected these products for their usefulness and quality.


I have one of these little guys and will make the modifications – a great idea. Having said that, I also have one of the high end Veritas rigs mentioned in an earlier posting and I’m very happy my dissatisfaction with the little guy’s performance (which should now get better) caused me to pucker up and buy it. One great advantage is the angle setup jig that allows you to exactly duplicate the sharpening angle time after time thus greatly reducing the amount of work you need to do to keep your blades up once you get them sharp the first time. Also having the ability to add that little tip re-grind Micro-bevel is a nice feature.
Now we need a bit of wisdom on tuning up these little beauties for handling chisels. One way of course is NOT to use them for chisels but that is kind of a defeatist attitude! Or buy a Veritas rig or the like (but that is a bit defeatist also!)
Yes, I know they are supposed to handle chisels. But the gap provided for chisels is just not sized correctly to hold most chisels (even my Stanley contractor types). The profile of the gap is way too small to handle thick backs which all good chisels (?) have.
For myself, I now have (trumpets please!!) a new 8″ low speed grinder setup with a OneWay lathe chisel alignment rig and that, with an appropriate sled for the platform (along the line of the Veritas rig), will do the job for me. Still thinking on how to do that.
But I wander off the subject a bit – it would still be nice to have my little rig be able to do chisels also. So much to do and so little time!
Thanks for the blog, by the way. Always enjoy reading it.
Thanks Chris.
I have this same guide and tuned it up today.
I’m getting MUCH better results.
Thanks again.
Eric
Am I the only one that now has an annoying Black Eyed Peas song in my head? Thanks a lot, Chris!
Excellent tip. I’m going to do this today.
I’d also like to thank “tms” for the chalk tip!
Yup.Chalk your file. Old timer machinist tip. Keep a big piece of chalk near the file rack just for that purpose…
Might be worth noting that you should do this well away from your grinding station. Aluminum filings plus iron oxide (ie, rust) equals thermite. Add a spark from your grinder and you have an excellent way to burn down your workshop.
See this Wikipedia article for more info:
http://en.wikipedia.org/wiki/Thermite
Another one of those “DOH!” moments, when you
think “now why did’nt I think of that”.
Thanks for tip Chris, much appreciated. :0)
Deneb has a video on the Lie-Nielsen web site that expands on Chris’s performance.
http://www.youtube.com/user/lienielsentoolworks
Great tip, thanks for the information.
Richard
Hey Chris,
You might try chalk, to prevent the aluminum from clogging your file. Just rub the chalk on the file and fill the grooves. It does have to be re applied now and then.