We may receive a commission when you use our affiliate links. However, this does not impact our recommendations.
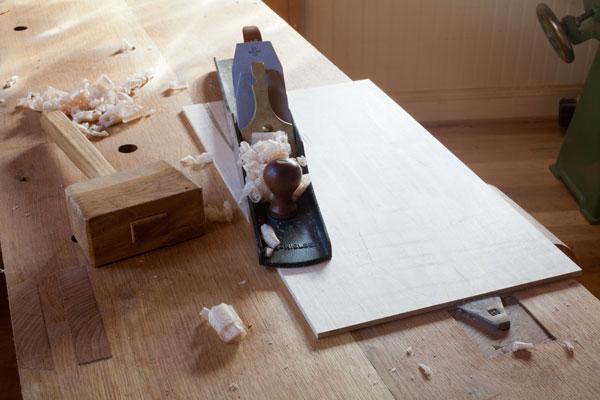
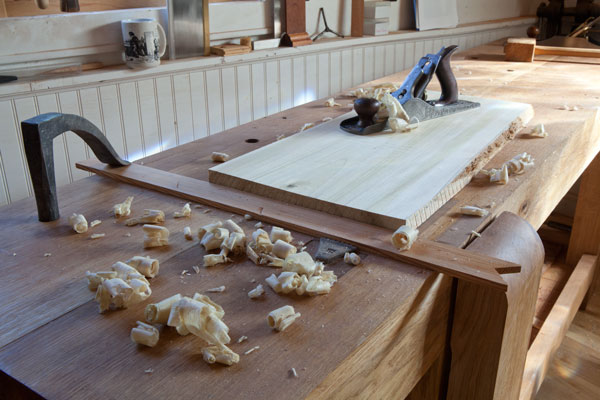
Because my workbench doesn’t have an end vise, I’ve become creative when it comes to planing my stock with only a simple planing stop, a holdfast and dogs.
Mine is a primitive arrangement compared to a beautiful European tail vise with its array of dog holes, but it works. And I rarely ever think: “If only I had a tail vise.” Of course, there are some tricks to using a metal planing stop successfully. Some of these are so basic that they are rarely discussed in old texts.
1. Sharpen those teeth. I keep the teeth of my planing stop filed sharp, like the teeth of a saw. This allows the stop to really bite into the work, holding it down to the bench and preventing it from rotating when you aren’t planing directly in line with the stop.
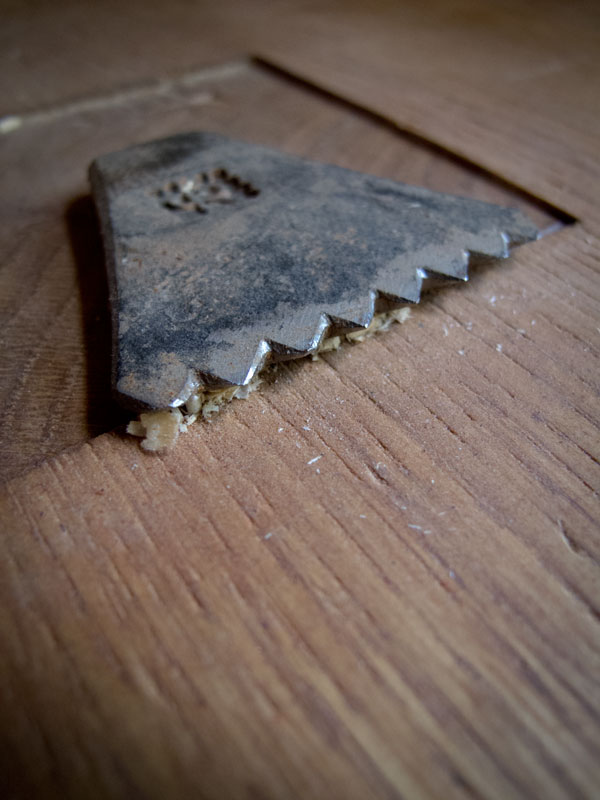
If you don’t believe that traditional craftsmen filed their teeth, check out this photo from Mark Firley of the blog The Furniture Record. This French stop has clearly been filed back over the years, as you can see by the recess that is cut into the bench to accommodate it. I also think it’s interesting how this stop is constructed. It looks like an L-shaped piece of iron or steel. One leg is attached to the wooden planing stop; the other leg is filed with teeth.
If you don’t have access to a blacksmith, this construction suggests how you could easily make a metal planing stop with an L-bracket and a triangular file.
Other shop-made planing stops I’ve seen have nails driven through the wooden stop with the points of the nails filed sharp.
Many people have said the sharp teeth are a hazard. I haven’t cut myself on one yet, but I give the toothy critter a wide berth and treat it like I have a sharp chisel sitting on the bench.
2. Mallet it from behind. When I plane stock that is wider than 6” or so, I find it helps to drive the work onto the planing stop with a mallet whack from the far end of the board.
Yes, this leaves marks in the end grain of your board, so you either have to plan for how you will remove the marks in a later operation or accept the marks as tool marks. I am in the acceptance phase.
3. Use geometry. When I plane a wide piece of stock, I sometimes have to shift the work toward me or away from me to prevent the piece from spiraling off the bench stop. I can minimize the number of times I have to adjust the work by skewing the plane slightly. This takes some practice, but it works.
If I have a lot of panels to plane, I will set up a wide planing stop that uses a holdfast, a thin wooden batten and a holdfast.
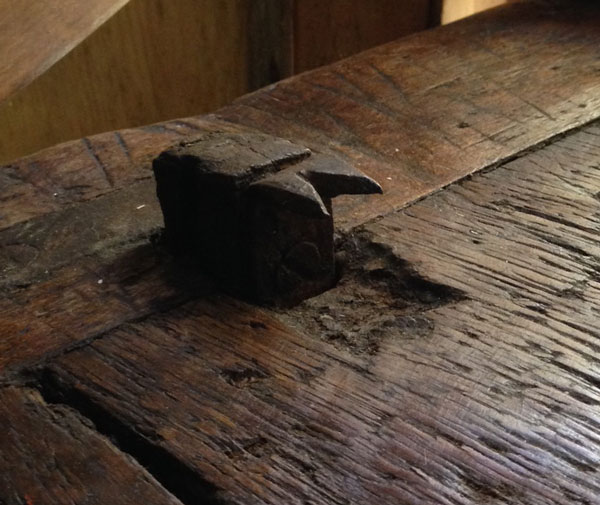
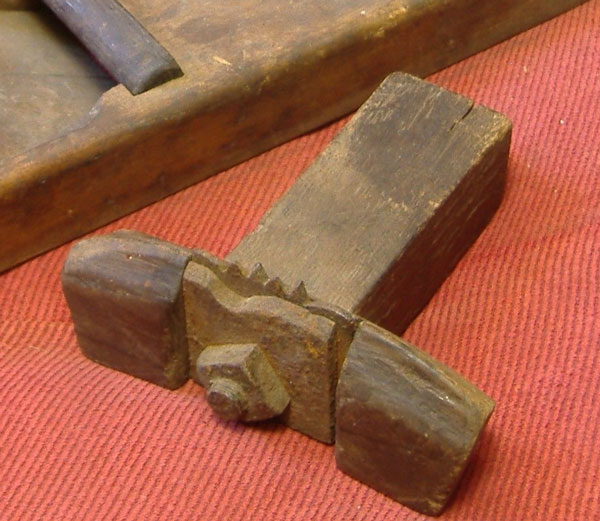
Another option, which I haven’t tested, is a planing stop with “wings.” See the above photo. This photo was passed to me from reader Trevor Anderson. My guess is that the “wings” will help prevent a wide piece from rotating. But there is only one way to find out for sure….
I know that most readers who practice handwork have an end vise, but the next time you need to do some planing somewhere you don’t have your bench (thick picnic table), a toothed metal planing stop might be an option to consider.
— Christopher Schwarz
If you’ve had trouble fixing up your old planes to do high-tolerance woodwork, you might want to check out my DVD “Super-tune a Handplane,” which walks you through a practical restoration and tuning process.
Here are some supplies and tools we find essential in our everyday work around the shop. We may receive a commission from sales referred by our links; however, we have carefully selected these products for their usefulness and quality.




I’ve collected over twenty something manufactured AND homemade bench stops over the years. My favs are the Millers Falls popups. They have a spring that pushes the head up to grab when you release the tension screw. A couple of the designs are monsters that weigh almost 5#. One comes up out of the bench at a 45 degree angle. I know, I know, it’s an odd thing to collect, but hey, it’s cheaper than collecting trophy wives. Don’t ask me how I know that.
Chris, I read somewhere, probably your blog, that the teeth should overhang the wooden block. I seems to me that this would prevent the user from ever getting the metal teeth below the surface of the bench. Does this ever create a problem?
Jennie here
I vote for Derek’s ” home made ” metal bench hook. See Make a Stool from a Tree p.18. You need a piece of Saw steel, bolt and nut and a piece of wood. If the wood gets loose, let a piece of bowed band iron into one sideof the block. I diasgee with Follansbee and Schwarz about safety. Please chisel a shallow, narrow gain in the bench under the teeth. When out of service retire the toothy critter down out of the way. Otherwise, a hand sweeping shavings off the bench is at serious risk. Also, If not retracted the metal bench hook will permanently usurp valuable bench surface.
Chris
I know the subject is metal planing stops, but not having an end vise on my bench I slotted a piece of wood and attached it to the end of my bench with hanger bolts. The bolts are long enough that I have no worries about pushing them out. I use air cleaner wing nuts to fasten the stop where I want it. They have a large bearing area and the wings are comfortable to turn. While not as elegant (nor perhaps historically correct) as the metal stops I’ve seen, I do have an adjustable bench stop the full width of my bench.
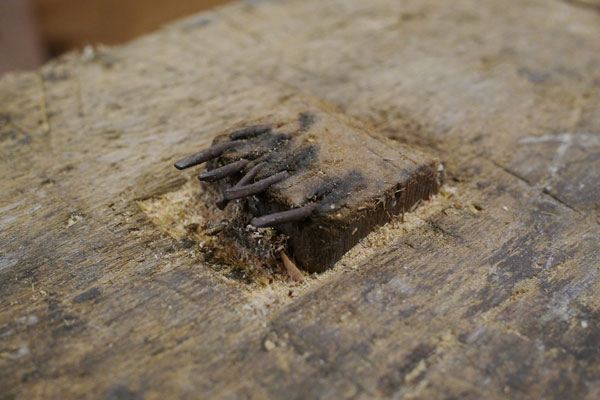
The “planing stop” in the last photo isn’t one. That is the post and cutter from a post-type cooper’s croze (albeit a rather worn one).
Roger Davis
Planing stop with wings: It’s hard to tell from the photo, but it looks as though the “wings” slope away from the toothed side, but lie flat against the benchtop.
If so, then perhaps it’s a double-sided planing stop? One side for gripping (but leaves marks); the other side just a simple wooden stop (and substantially wider).
–GG
Some people also use railroad spikes to make these toothed stops.
Chris, after first seeing the toothed planing stop on Roy’s show I got to wondering how I could make one without a handy dandy blacksmith to go to. My solution was to find a junk saw at a neighbor’s yard sale. It was one of those cheap home center hardened toothed cheapos. A few minutes with a cut off wheel and I had a toothed stop. Having dog holes to use I sandwiched the teeth in a kerf made in the end of a slat at a slight upward angle. It’s held together with epoxy and screws. Two dogs are glued in the slat to span two dog holes. The front dog has a hangar bolt in the bottom so I can tighten it down with a homemade wooden knob. This is quite rigid, works great and was really cheap to make. I do find I use it more often than the tail vise but I’ve also used it in conjunction with the tail vise for a supergrip.