


We may receive a commission when you use our affiliate links. However, this does not impact our recommendations.
Ebony plugs are essential to the Greene & Greene style. In fact, it would be almost inconceivable to design a Greene & Greene piece without them. They are simple to make, but woodworkers often struggle with the process. Over many years of building and teaching in the Greene & Greene style, I have developed a simple method that will consistently and efficiently produce ideal ebony plugs.
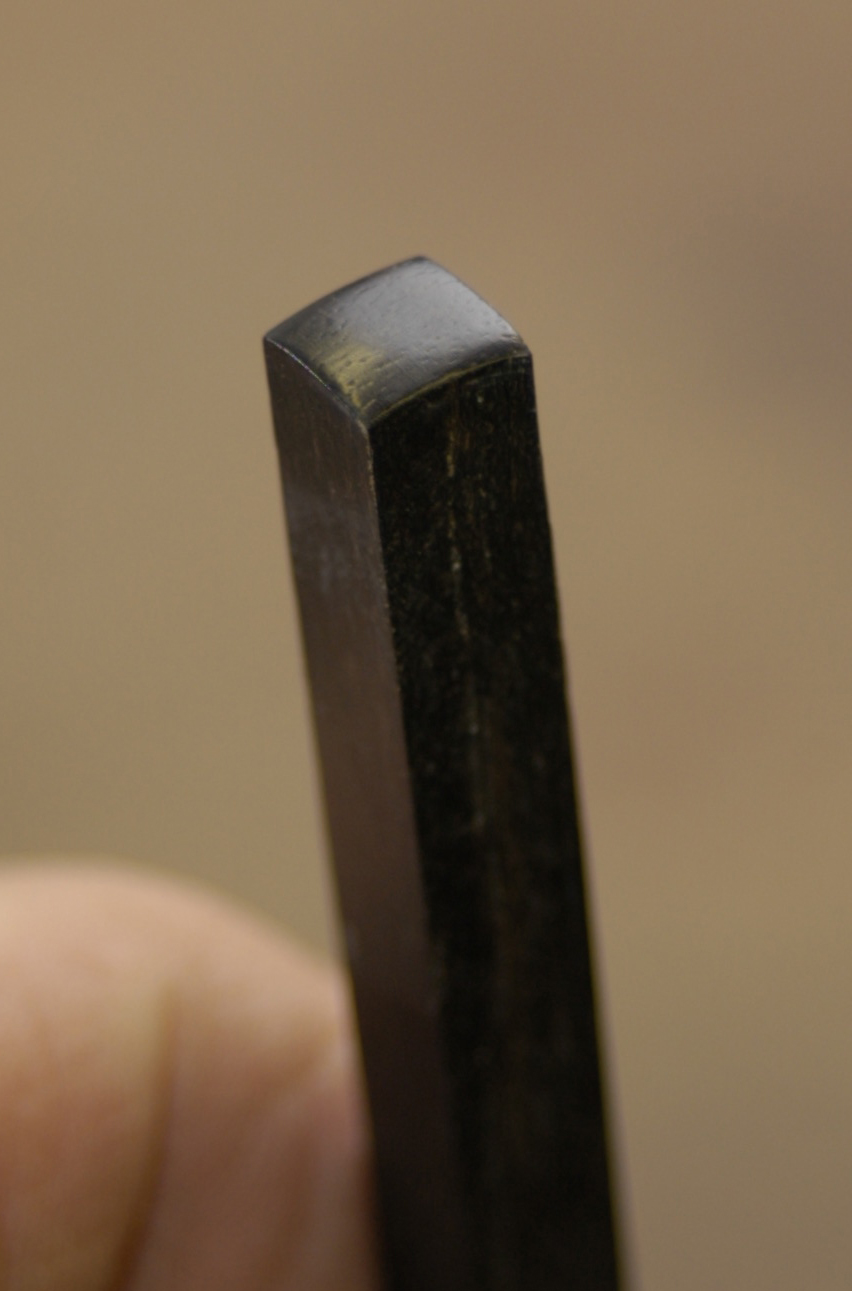
1. Start with a long rod of ebony that is cut a light 1/64” (about 10 thousandths) over the given plug size. The end of the rod should be square.
2. To form the pillow shape, use 220-grit sandpaper. (If the plugs are 3/8” or larger, start out with 150-grit.) Place the sandpaper over a soft surface such as a mouse pad or shelf liner.
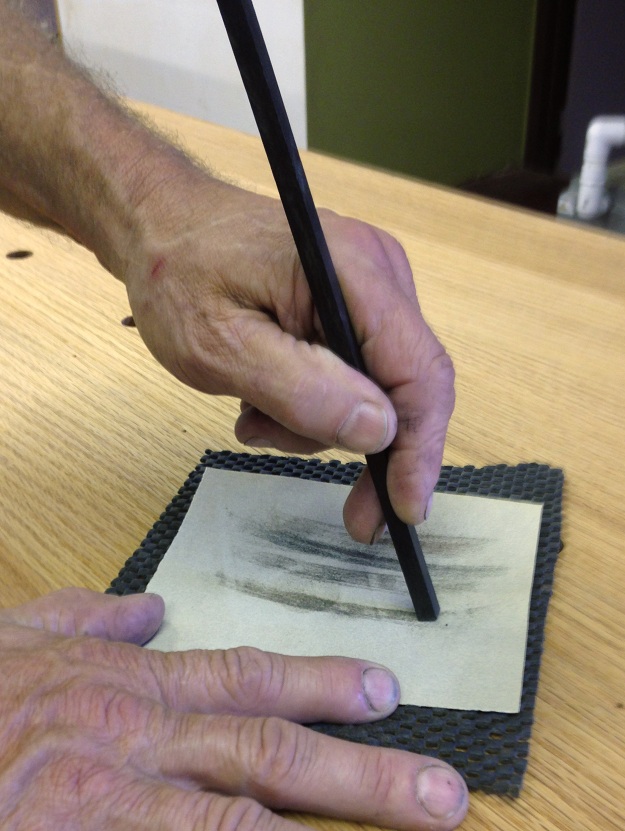 3. The next part is quite simple, but often where students go awry. Using a shallow pendulum motion with medium downward pressure, make 5 quick passes. Turn the rod 90 degrees and make five more passes.
4. Repeat this procedure with 320-grit, then with 600-grit. The pendulum motion is easy to master with a small amount of practice.
One of the common pitfalls is using too wide of a pendulum swing. This has the result of exaggerating the pillow shape or, in some cases, rounding over the edge. Another frequent mistake is to use a swirling motion as opposed to the pendulum motion. This draws the corners down and also exaggerates the pillow shape.
The original plugs were quite shallow and subtle. It is worthwhile to have a close look at an original ebony plug to gauge what our target is. The Greene & Greene virtual archives provides us with just such an opportunity. Click here for a close-up of a plug from the Fall Front Writing Desk in the Gamble House master bedroom.
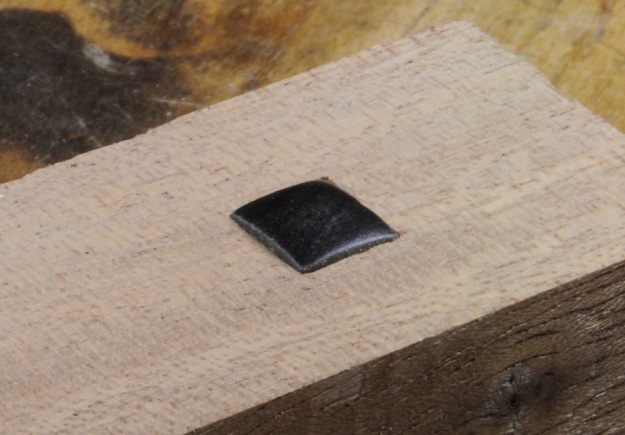
 The 600-grit should leave the face of the plug with a dull even finish (pictured at right). You can now polish the plug with white rouge on a buffing wheel. To finish off, cut the plug to about 1/4” long and back bevel the insertion end. It is ready to go!
If you are about to embark on a project that requires hundreds of ebony plugs you may want to refer to one of my two books for a disc sander jig that will speed the process up even more. Also, be sure to check out my latest DVD project with Popular Woodworking, “Build a Greene & Greene Rafter Tail Table.”
If you plan on working in the style of Greene & Greene it is essential to master making ebony plugs. My method is not the only one. But I hope it has been of help.
–Darrell Peart
Here are some supplies and tools we find essential in our everyday work around the shop. We may receive a commission from sales referred by our links; however, we have carefully selected these products for their usefulness and quality.


Perfect timing on this as I’m about to head out the the shop to make the 40 ebony pegs I need to complete a version of the (or plant stand). For recent projects I’ve been using a drill to spin the ebony to shape the end, but I have to finish off with the pendulum motion you describe or the ends come out too rounded and not shaped correctly.
After making over 70 of these for Darrell’s Greene&Greene blanket chest class, I can personally attest to his technique. BTW, don’t forget to do both ends of the stick, then cut them off. — Jim