


We may receive a commission when you use our affiliate links. However, this does not impact our recommendations.

Wiping varnish is the finish I recommend you use if you are finishing for the first time. Wiping varnish is a term I coined in 1990 to categorize a large number of very popular finishes that are sold individually under many different names but are actually all the same –oil-based alkyd or polyurethane varnish thinned about half with mineral spirits (paint thinner). Collecting them into a category removes the mystique manufacturers attempt to create and it makes the finish easier to understand. It also allows us to discuss uniform application procedures that apply to all brands.
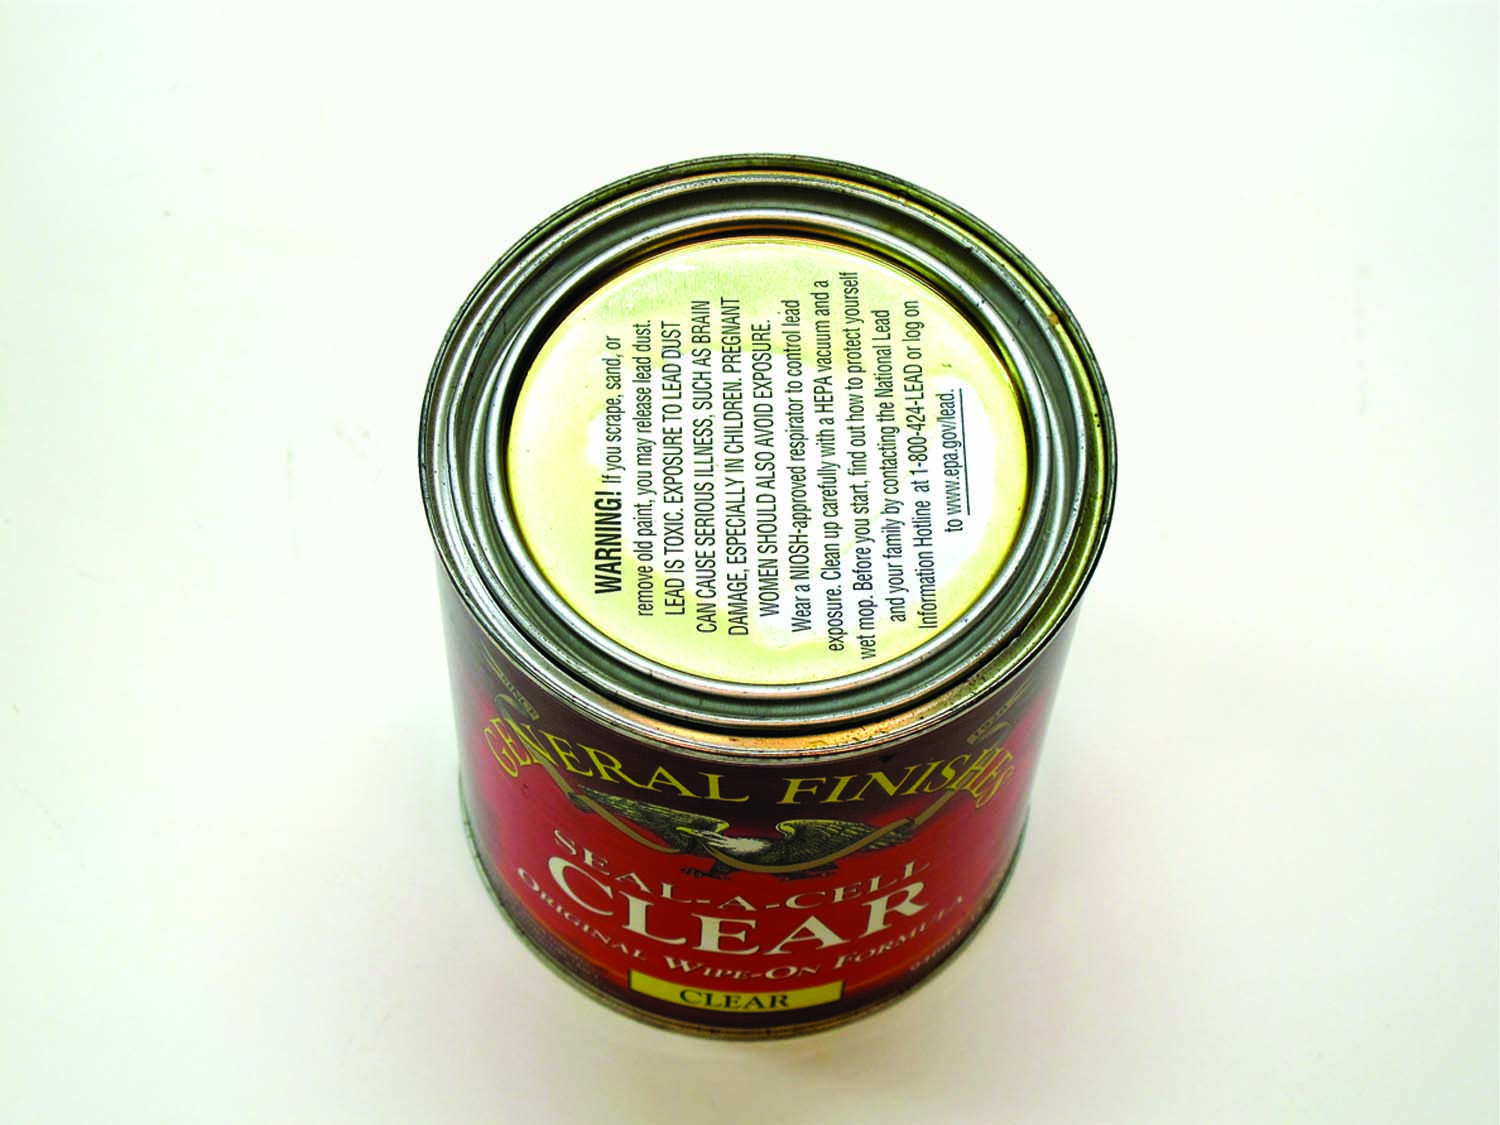
Identifying wiping varnish. Because of the uninformative naming, you need a method for identifying commercial wiping varnishes. Unfortunately, you can rarely do this from the label. You will need to put a puddle of the finish on the lid or other non-porous surface and see how it cures. If the product thins and cleans up with mineral spirits and isn’t labeled “varnish” or “polyurethane,” and it cures hard and smooth after several days in a warm room, it’s wiping varnish.
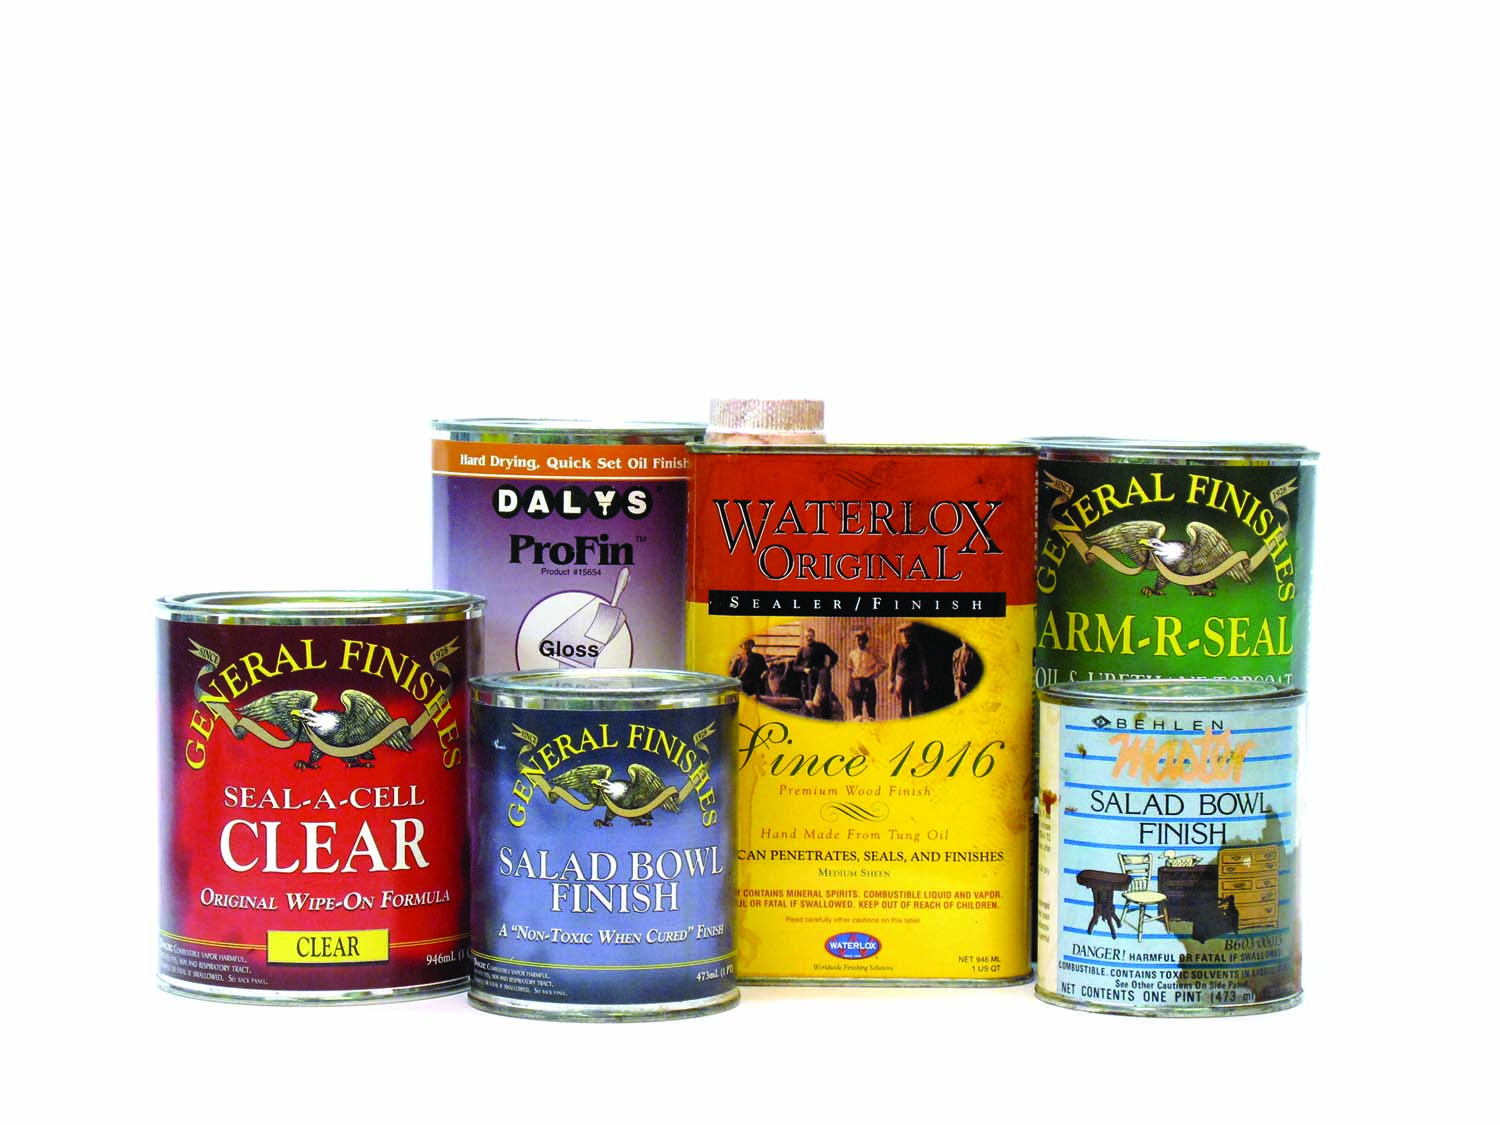
Notice from the pictures above that many of the brands of wiping varnish are labeled “tung oil,” “tung oil varnish” or “tung oil finish.” None of these are tung oil and few have any tung oil in them. Even in the rare cases when a little tung oil is added, it is insignificant and doesn’t justify the misleading naming. All of these products are simply oil-based alkyd or polyurethane varnish thinned about half with mineral spirits. (The wiping varnish Waterlox is a phenolic varnish.)
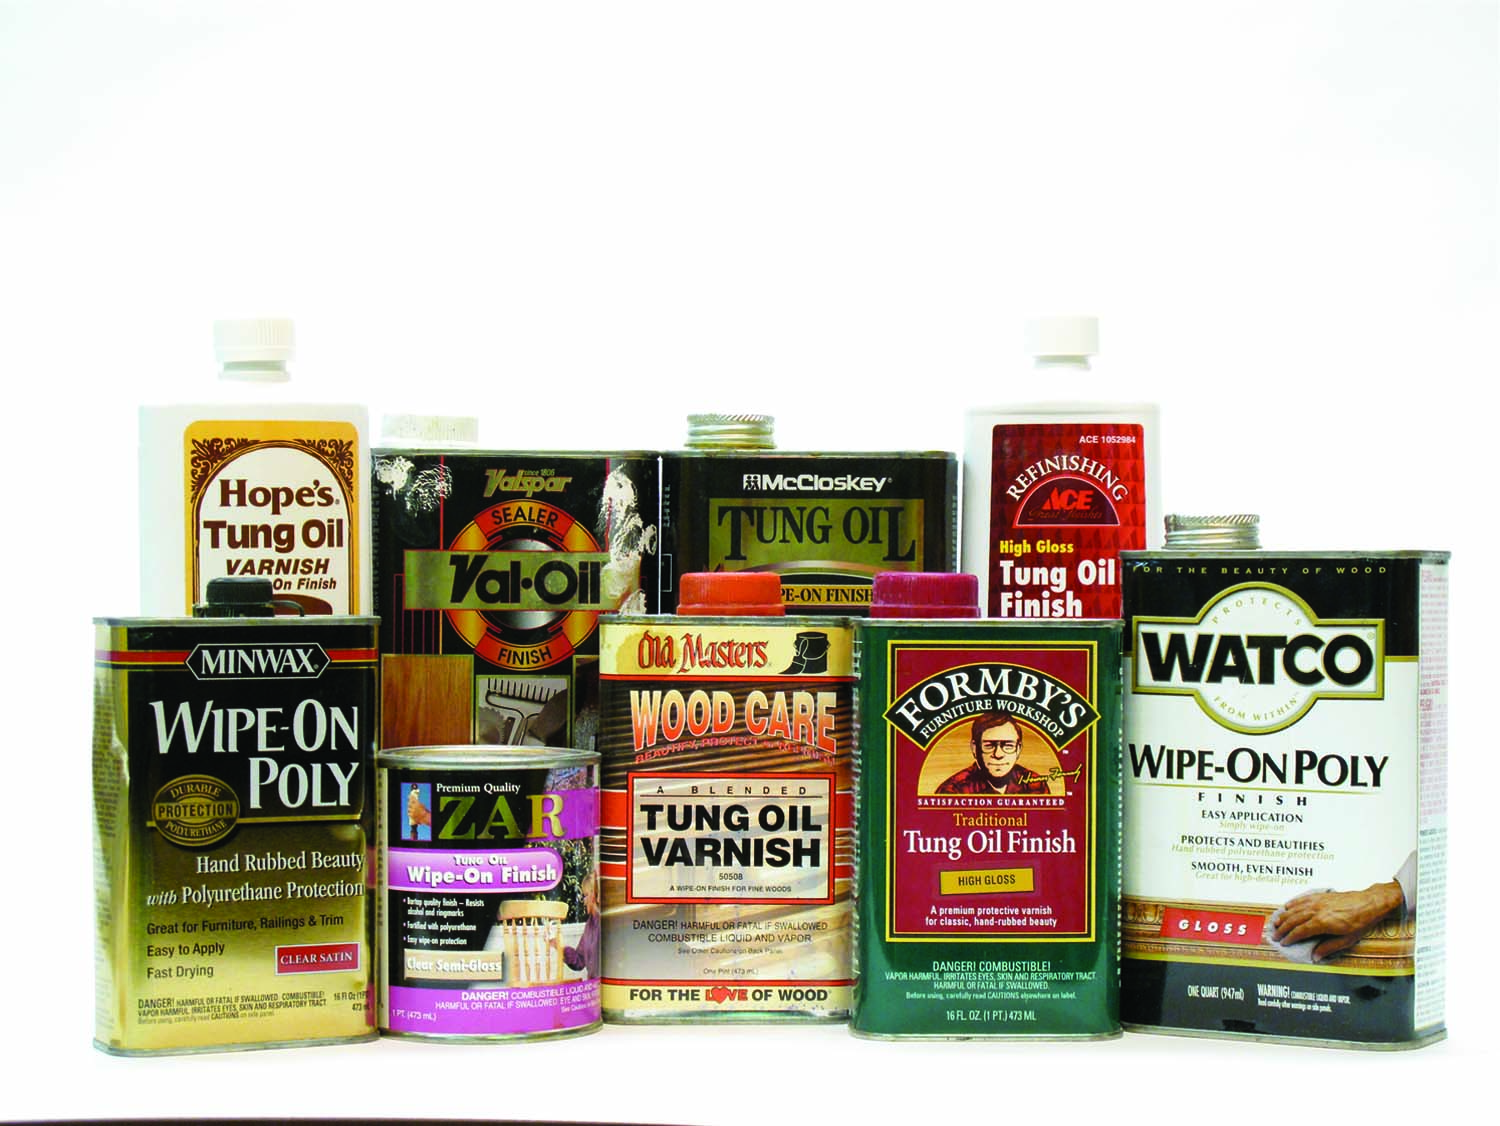
Commercial wiping varnishes. (above) These are typical commercial brands of wiping varnish sold in home centers and paint stores. (below) These are typical commercial brands of wiping varnish sold in woodworking stores and through catalogs.
 The difference between varnish and oil finishes is that varnish dries hard and can be built up on the wood for better moisture resistance. Oil (boiled linseed oil, 100-percent tung oil and blends of oil and varnish) dries soft so all the excess must be wiped off after each coat. No built-up moisture resistance can be achieved. This is a big difference!
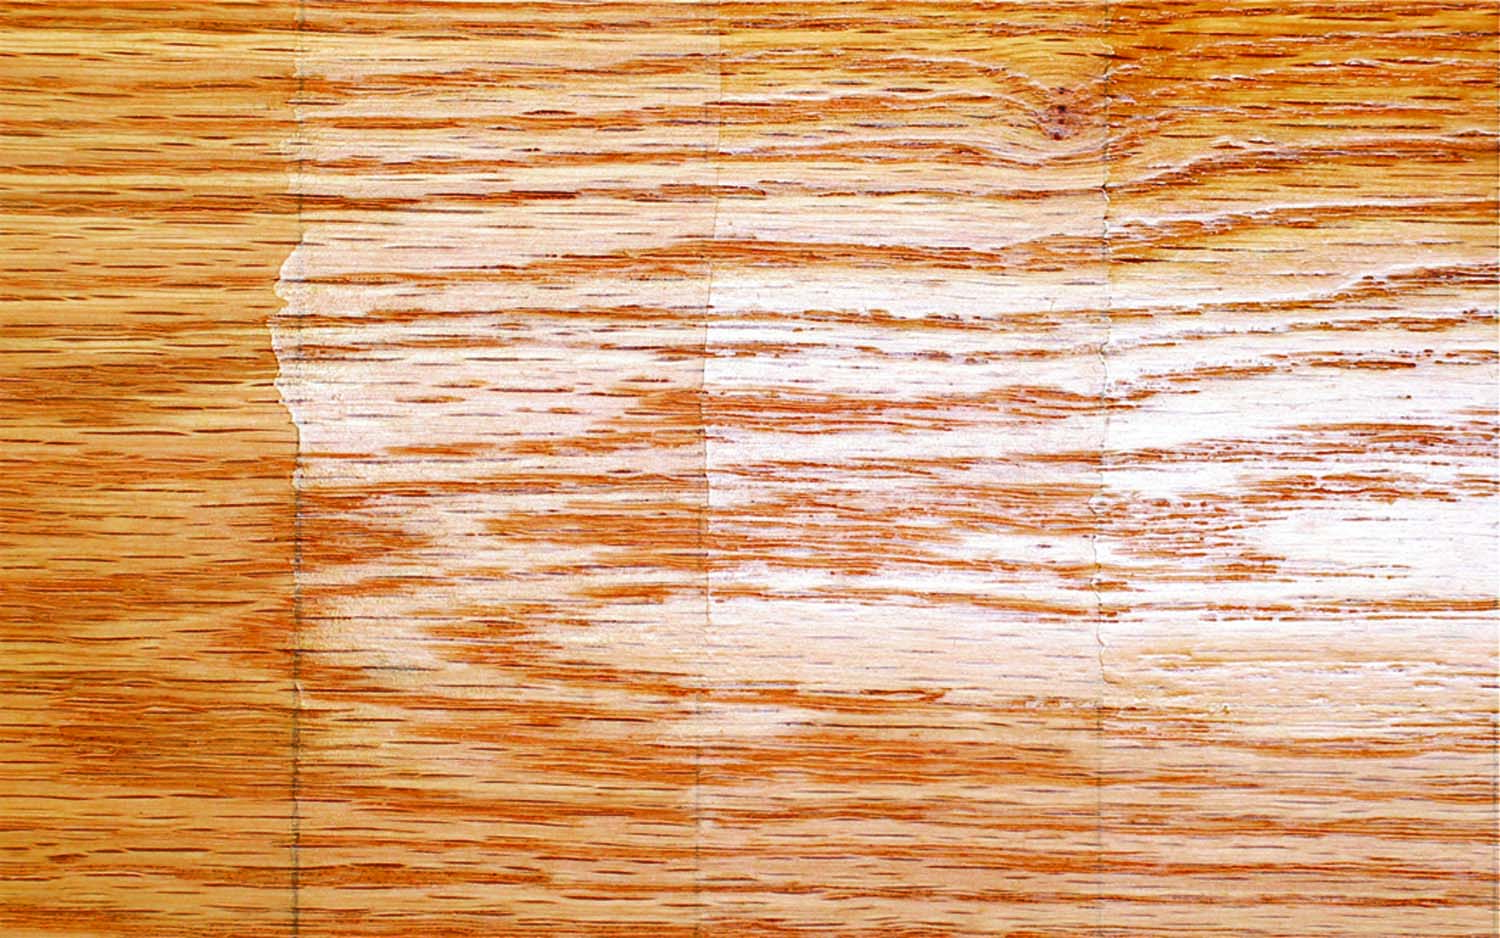
Thin mix. A thin mix of polyurethane and mineral spirits (paint thinner) builds very slowly.
Thick mix. A thick mix of polyurethane and mineral spirits builds much more rapidly and is still thin enough for easy application.
You can distinguish wiping varnish labeled “tung oil” from real tung oil by the following: Real tung oil is always labeled “100-percent tung oil,” so far as I know; no brands of real tung oil contain thinner (mineral spirits – usually called “petroleum distillates” or “aliphatic hydrocarbons” on the label); wiping varnish always contains thinner.
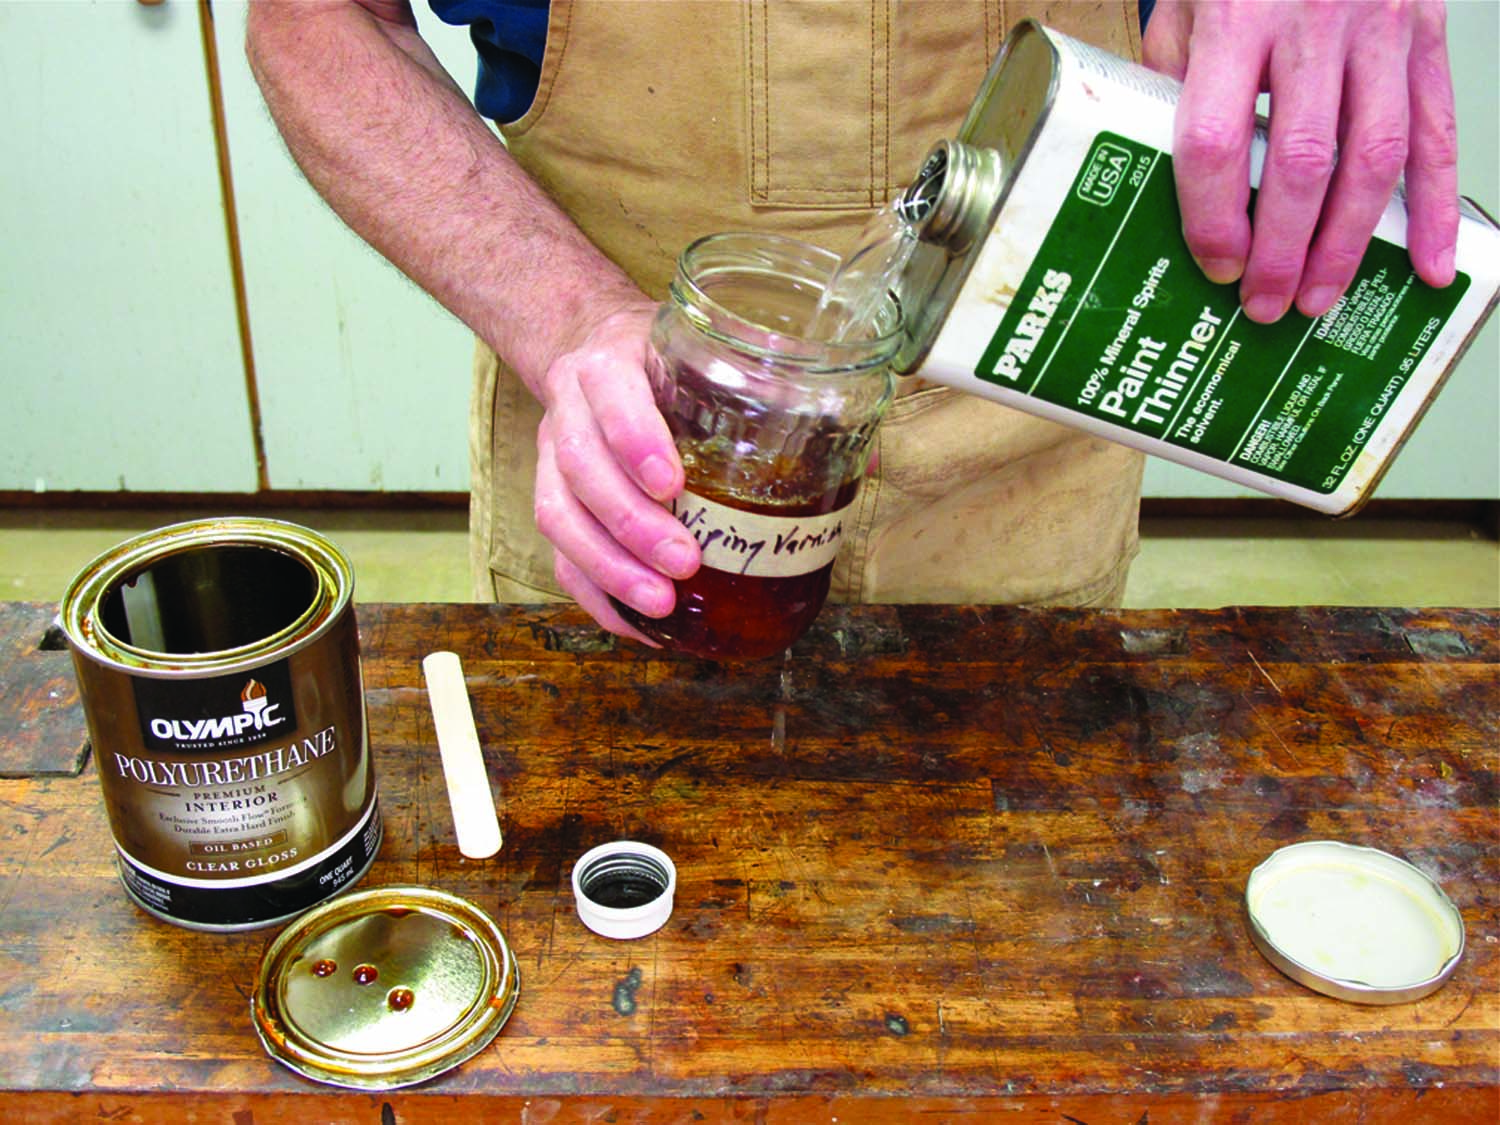
Make your own. To make your own wiping varnish for this exercise/project, pour approximately equal amounts of oil-based, gloss polyurethane and mineral spirits into a clean wide-mouth container.
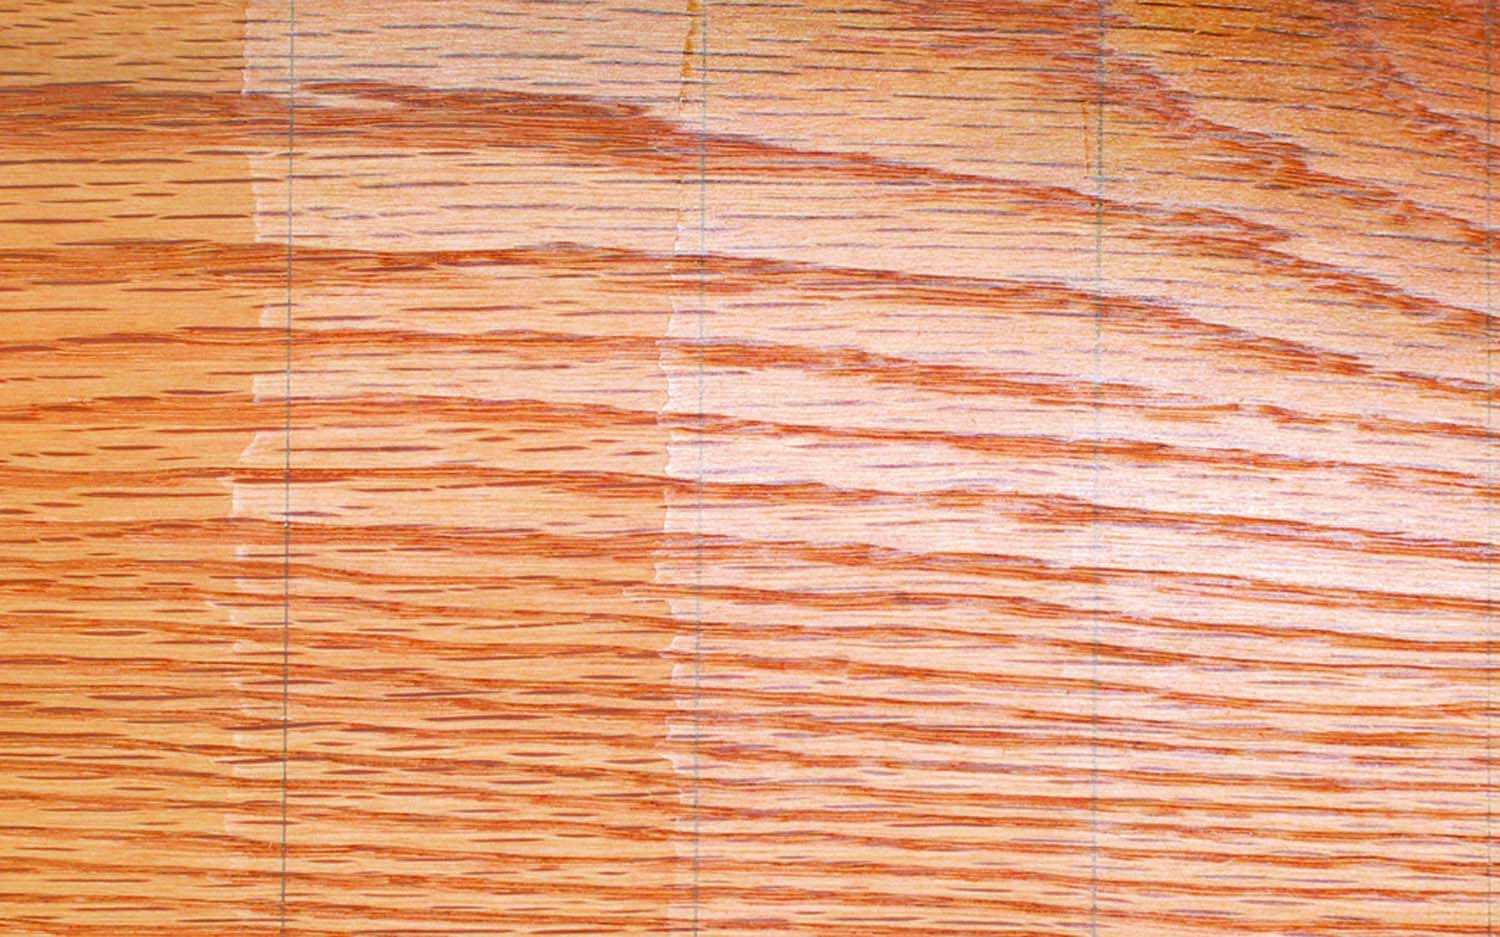
For this exercise on scrap wood you should make your own wiping varnish. You could use a commercial brand, but making your own gives you more control because you can add more or less thinner. You have much more control of the rate of build per coat if you make your own wiping varnish than if you buy a commercial brand. In the picture above left, panel sections are finished with one, two, three and four coats of polyurethane thinned with 75-percent mineral spirits – that is, a one-part polyurethane to three parts thinner.
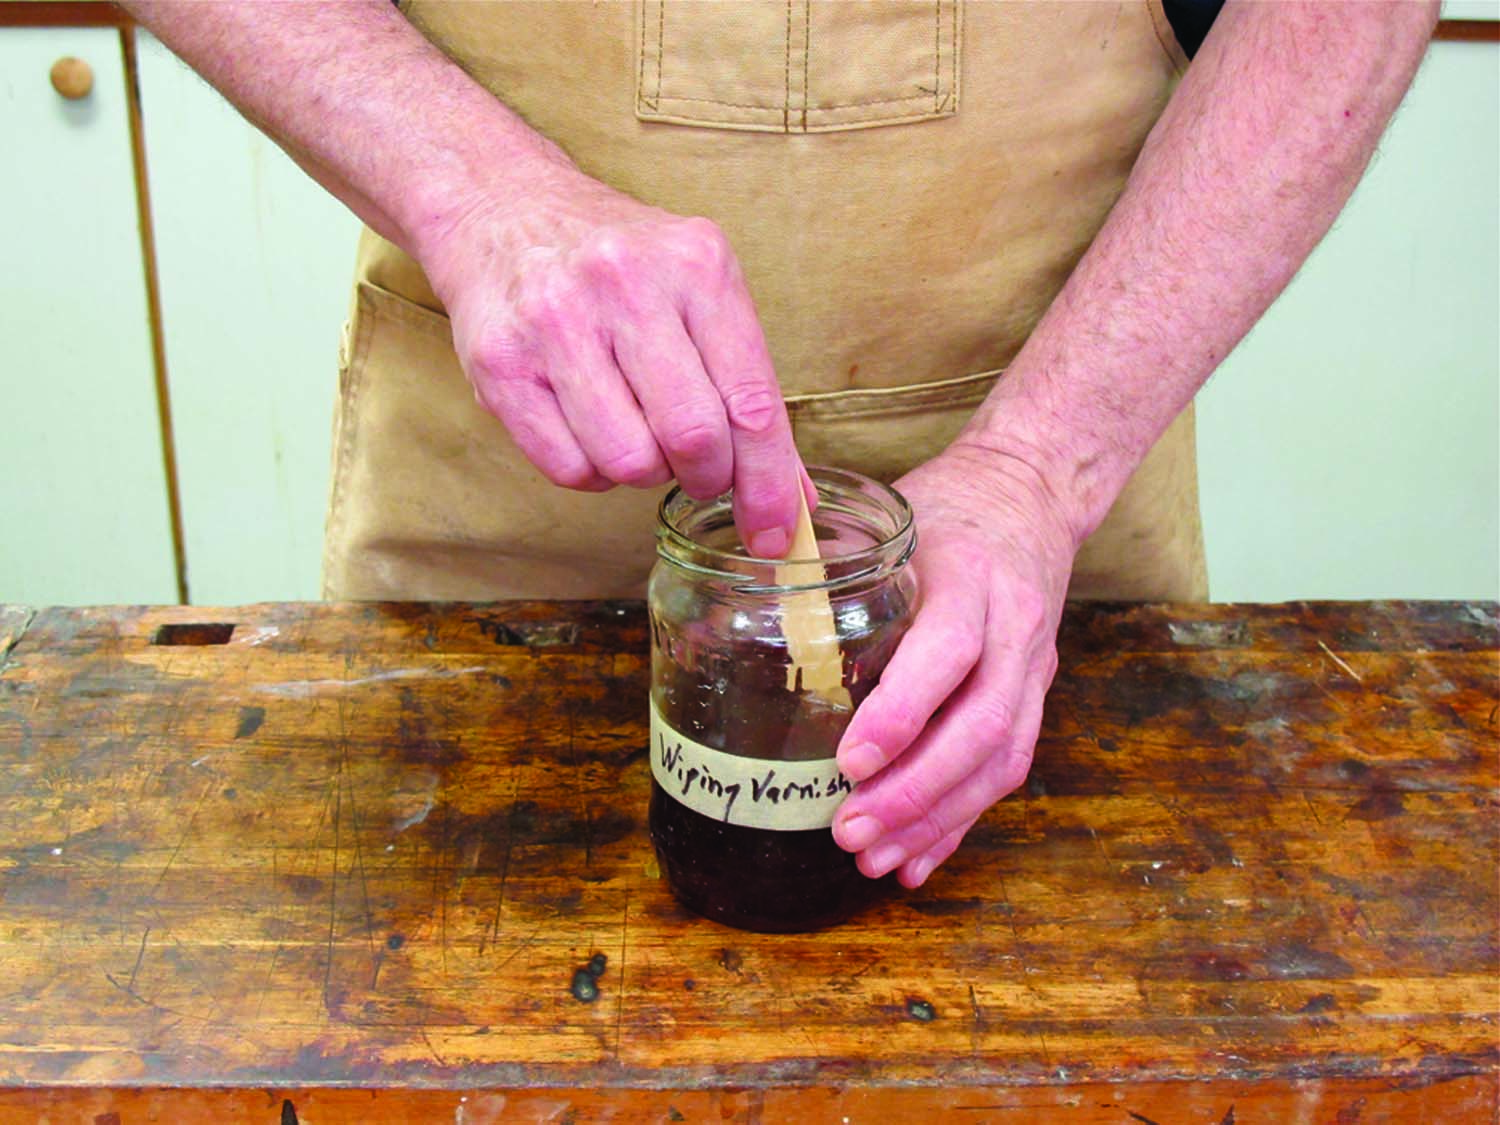
Be sure to stir. Stir the thinned polyurethane or the two parts will remain separated.
In the picture above right, the panel sections are finished with one, two, three and four coats of polyurethane thinned with 25-percent mineral spirits – that is, three parts polyurethane to one part thinner. In both cases, the finish was brushed and left. You can clearly see the faster build using the three-to-one mix. Though I’m going to use a half-and-half blend (similar to commercial brands) for this exercise, I recommend you try the three-to-one mix because it is still thin enough to be easy to apply, and it builds faster. You can always add more mineral spirits if the finish is tacking up too quickly.
What You Need for Applying Wiping Varnish
 A 16″ x 24″ or larger sheet of ½” or ¾” veneered plywood or MDF. Any hardwood veneer is OK. You can get this from your scraps, a wood supplier or from one of many cabinet shops (which often throw away pieces this size).
The following items are all available from a home center, paint store or woodworking store or catalog/web site.
- A pint or quart of gloss, oil-based polyurethane varnish.
- A pint or quart of mineral spirits.
- A clean plastic container, coffee can or wide-mouth jar with a lid. (Also likely available in your kitchen.)
- Latex or other type of protective gloves.
- Lint-free rags such as old, clean T-shirts, cheesecloth or paper rags (soft white paper towels in a box or roll marketed to painters).
- A good quality natural-bristle brush (best), or foam brush, or an inexpensive “chip” brush. A width of 2″ is easy to use on most projects.
- A sheet of #320- or #400-grit sandpaper.
- A small brown paper bag (from the supermarket).
Make Your Own
Instead of buying a poorly labeled wiping varnish and taking the risk that you get something else – for example, an oil/varnish blend – just make your own. All you have to do is thin any full-strength, oil-based varnish or polyurethane a quarter-to-a-half with mineral spirits.
Applying Wiping Varnish
 I’m going to show you three methods of applying wiping varnish: wipe off the excess; dry brush the excess; and leave the excess. You can use any of the methods for all the coats or alternate among them. I suggest you try both of the first two methods to see which you like best. You can use the third method on flat, horizontal surfaces.
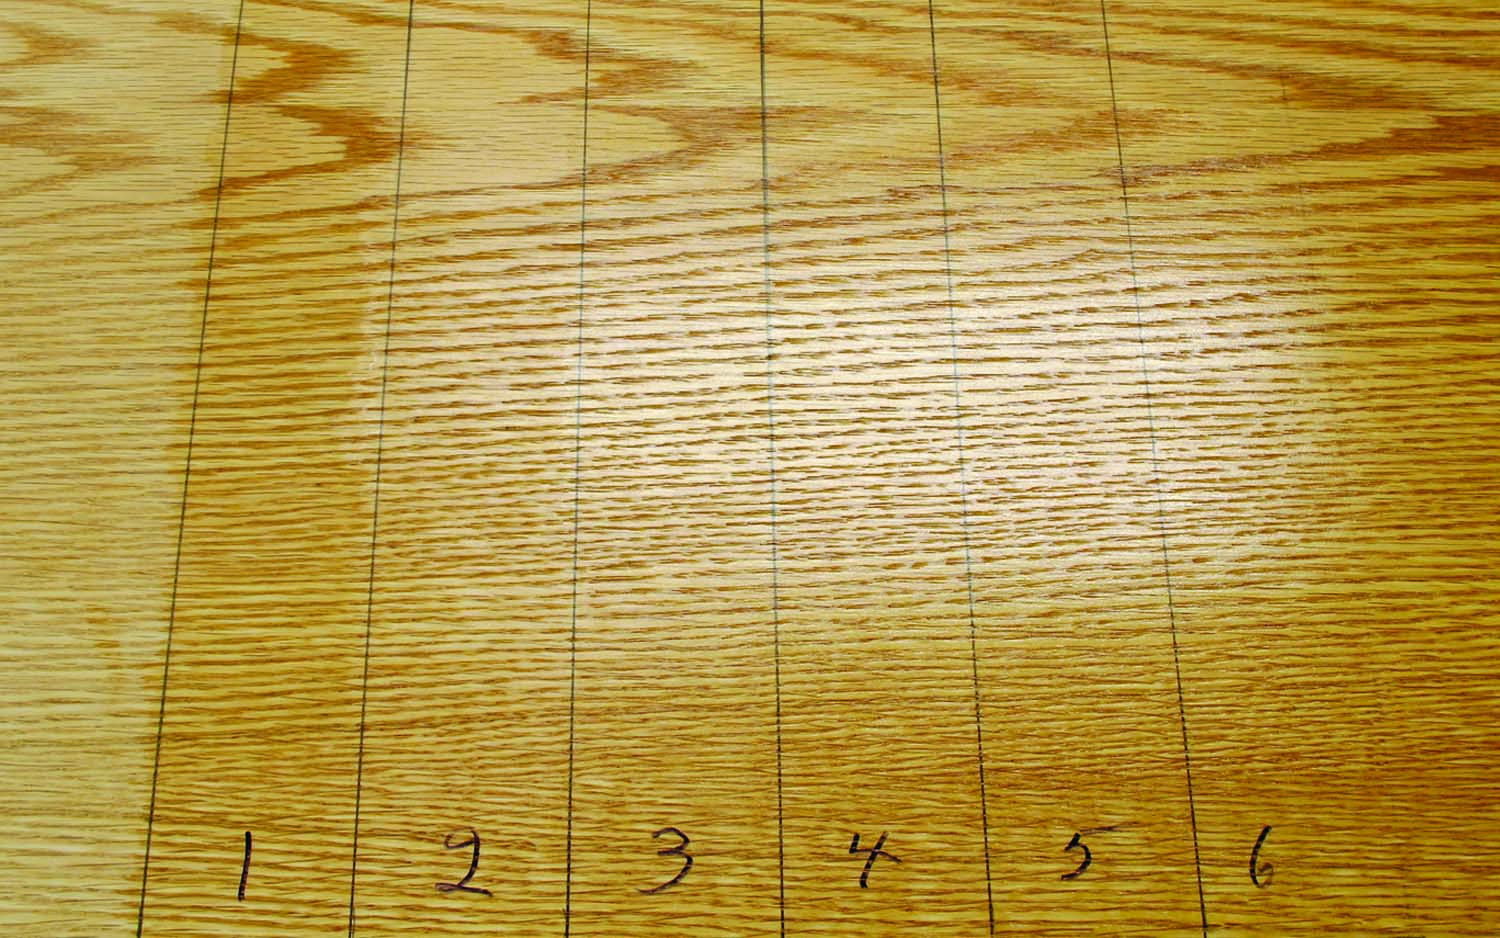
At left are pictures of one through six coats using each application method. In the upper picture I applied from one to six coats and wiped off the excess after each. In the middle picture I applied from one to six coats and dry-brushed the excess after each. In the lower picture I applied from one to six coats and left them to dry. You can see that wiping off produces the slowest build and leaving produces the fastest build.
‘Wipe Off Excess’ Method
Brush or wipe the wiping varnish onto the wood and wipe off the excess. This method produces the best results, meaning that there are no runs, no possibility of brush marks and almost no dust nibs. But the build is very slow, so it takes more coats than the other two methods to get the same look and protection against moisture.
First Coat. The first coat soaks into the wood and seals it when the finish dries. So, even though you intend to wipe off the excess, you should apply a wet coat to all areas and keep it wet for several minutes. Add more finish to areas that become dull due to the finish soaking in. You can use this wipe-off method of applying wiping varnish to “shine up” other finishes that have become dull (be sure the surface is clean) or to make a brushed varnish or polyurethane finish almost perfect after you have sanded out the brush marks.
Sand Smooth. The surface always feels rough after the first coat. A critical step for achieving a smooth final result is to sand this coat smooth after it dries.
More Coats. Keep applying coats (with six hours to overnight between each) until you’re happy with the look of the finish. The procedure for each additional coat is the same. First, you sand and clean the surface as just described. Then you brush or wipe on the wiping varnish and wipe off the excess before the finish dries.
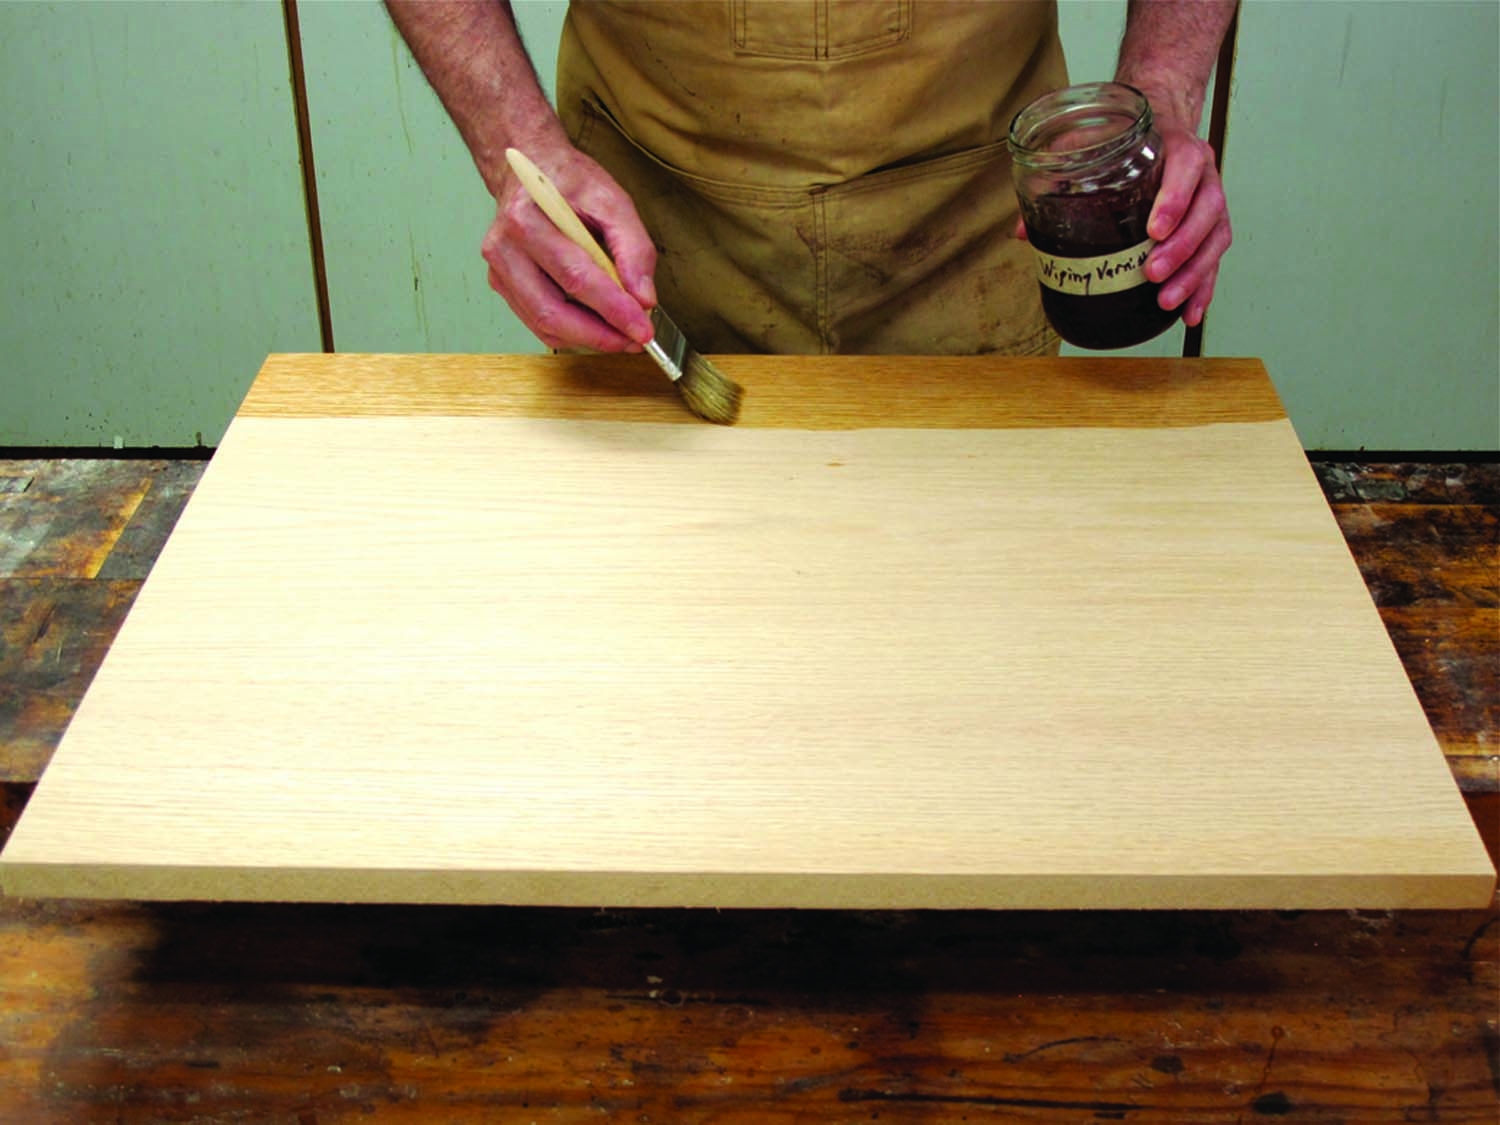
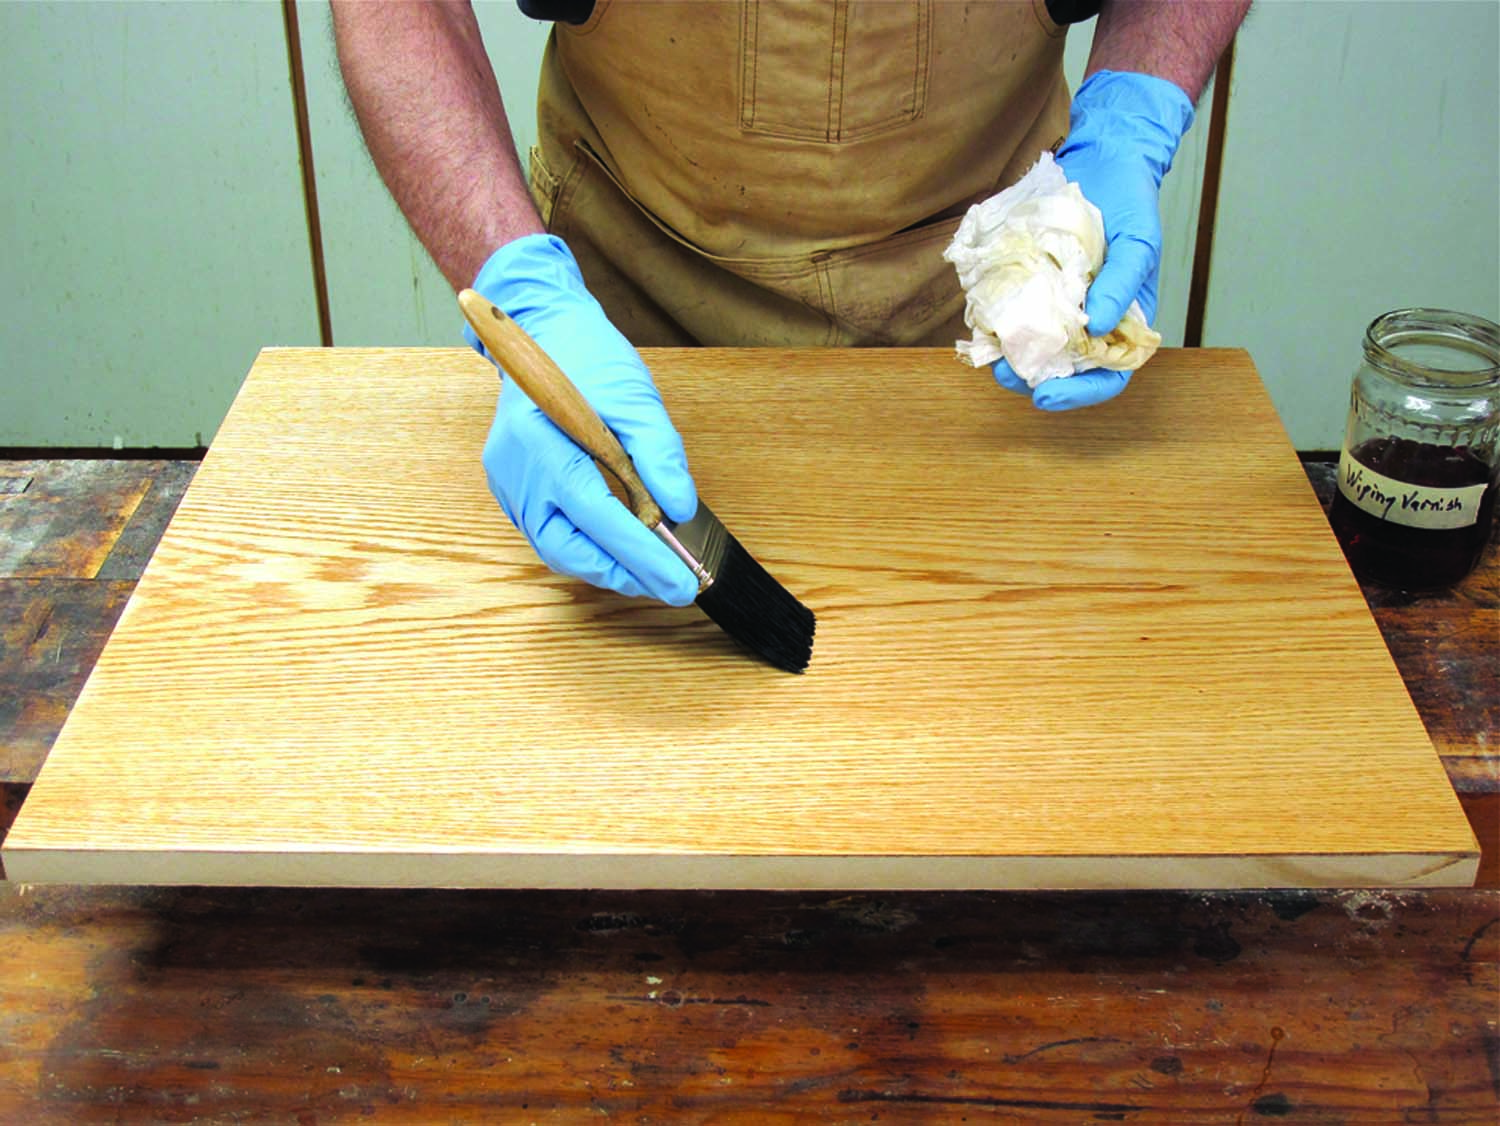
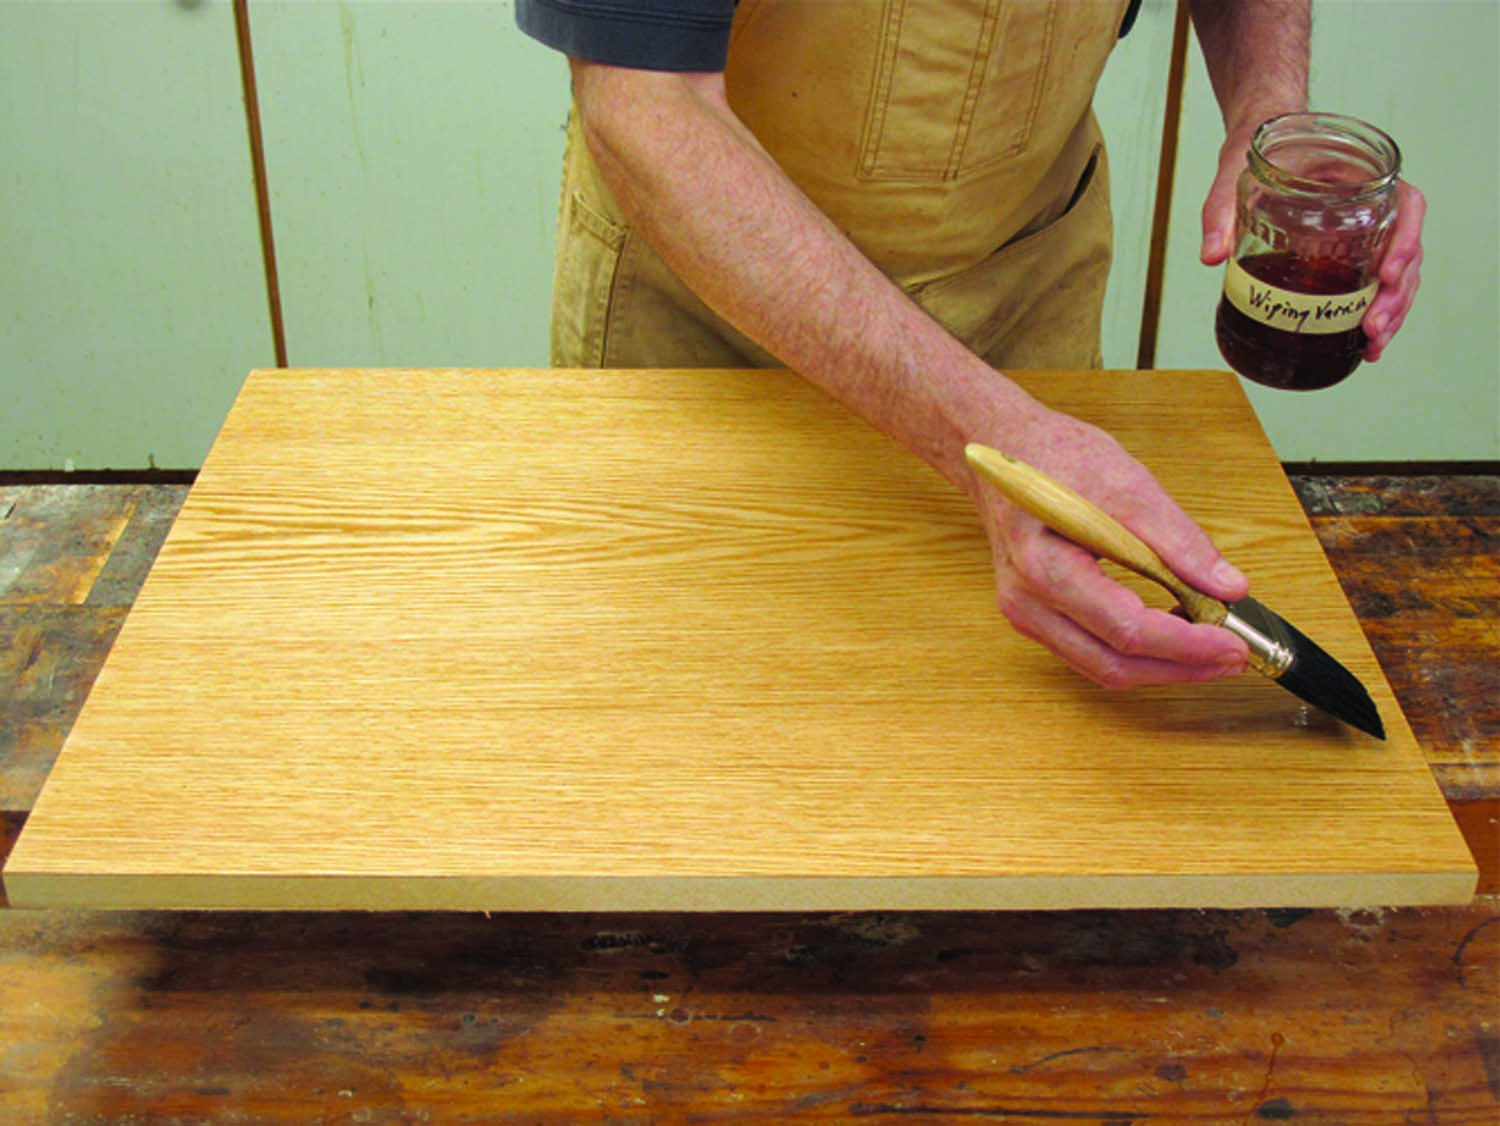
1. ‘Wipe off excess’ method. If you choose to brush the finish, the fast, efficient method on flat, horizontal surfaces is to deposit a brush load of the wiping varnish onto the near edge then spread it. Here, I’m using an inexpensive, throwaway bristle brush, called a “chip” brush, because I’m not worried about bristles falling out. They will be removed when I wipe off the excess finish.

2. Spread the finish. With a puddle of wiping varnish deposited, spread it end to end. You can use an inexpensive, throwaway, foam brush instead of a bristle brush.
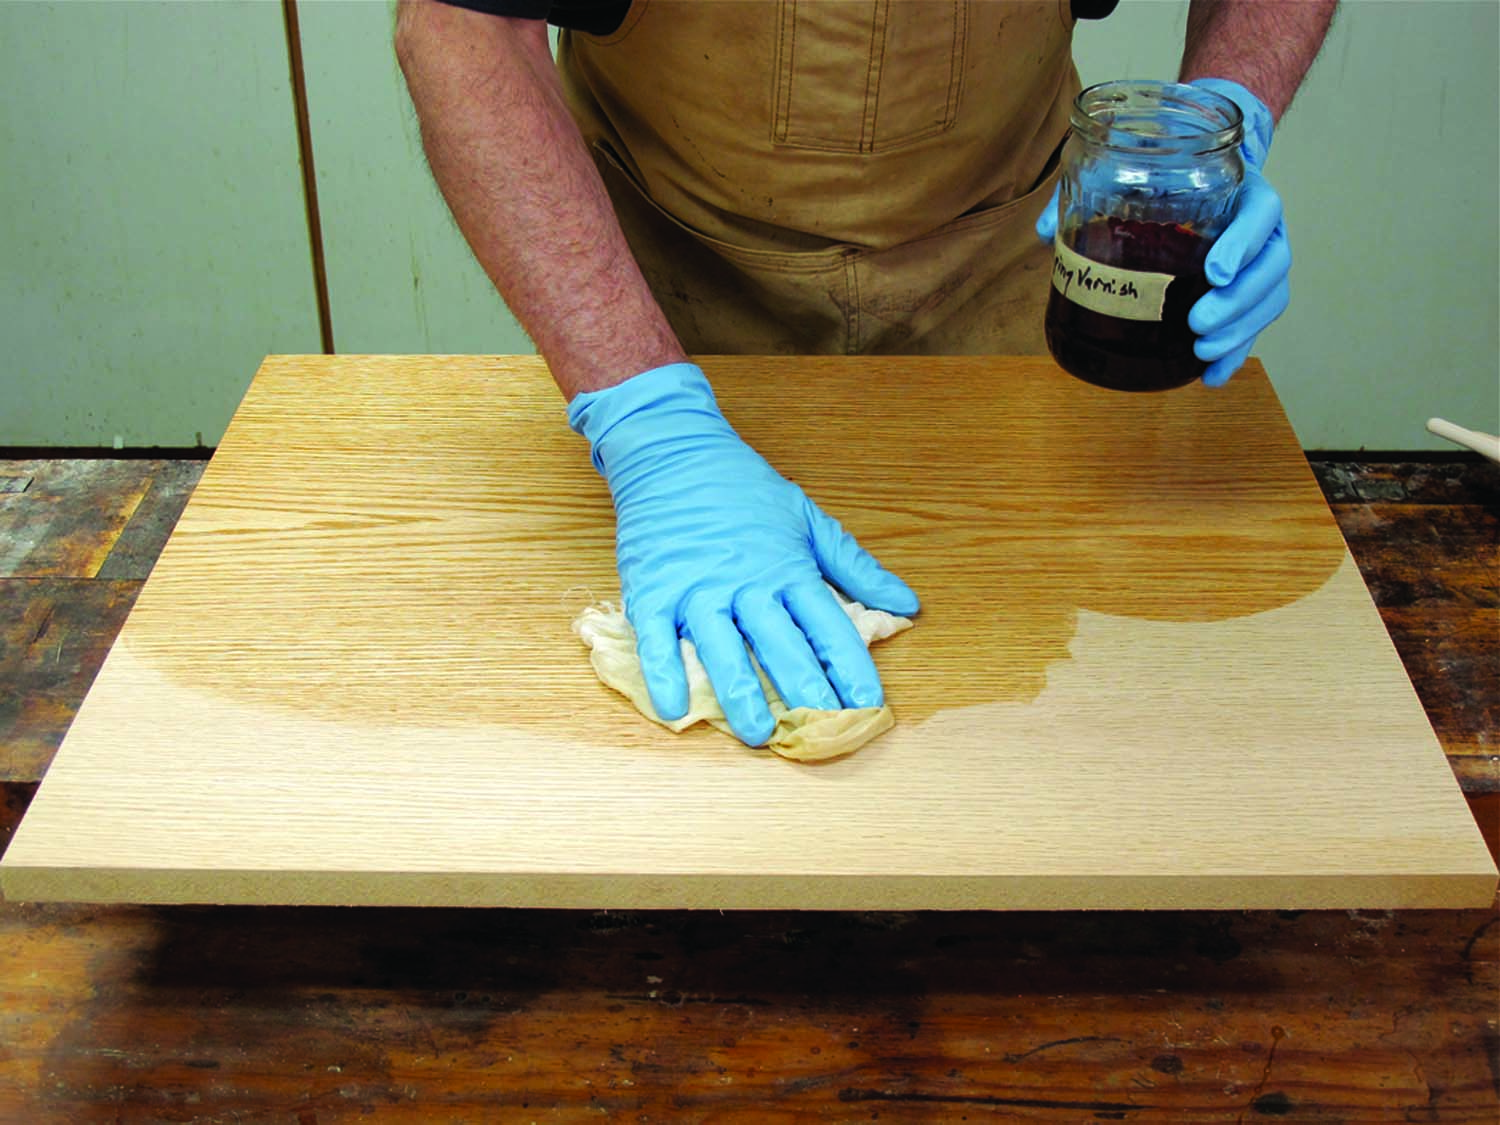
3. Wipe on wiping varnish. The most efficient way to apply wiping varnish when you intend to wipe off all the excess is simply to wipe it on. Wet your rag well with the finish, or pour some finish onto the wood and spread it around with the rag. You want to put on a wet coat so the wiping varnish penetrates well.

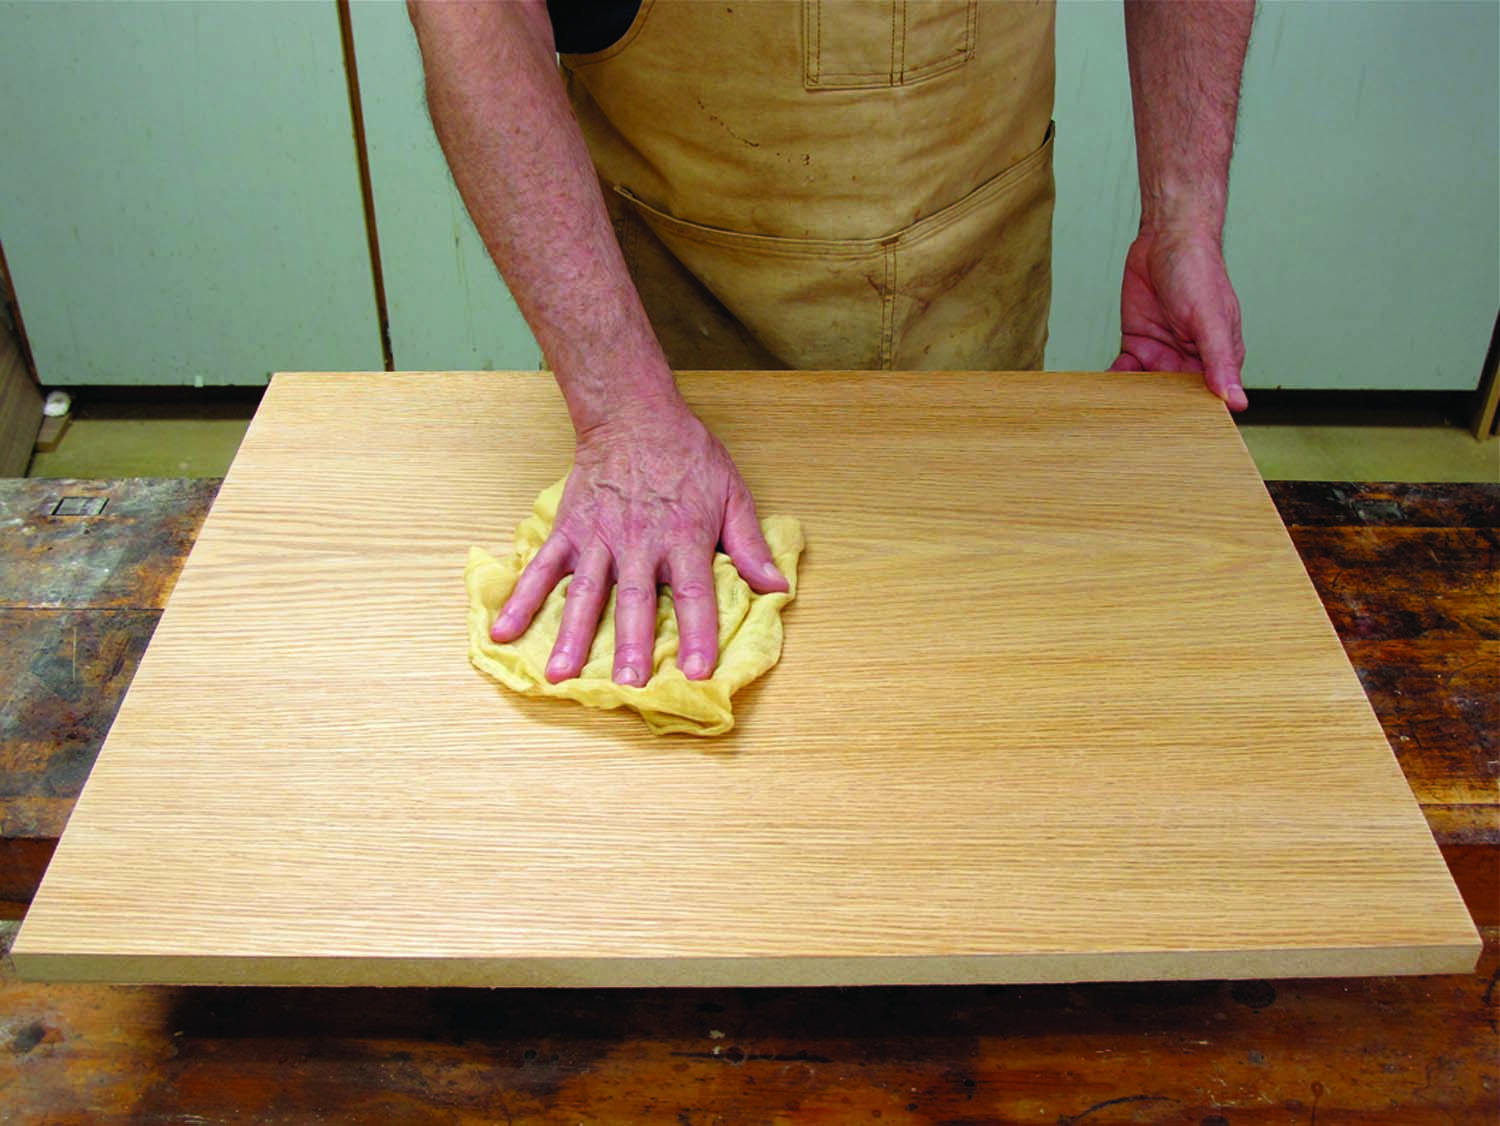
4. Wipe off wiping varnish. With the surface well wetted, wipe off all the excess with a dry cloth. (You could also use a durable paper towel.) There’s no need to scrub the surface. A little dampness won’t hurt anything.

5. Sand first coat. After drying, sand the surface lightly using #320- or #400-grit sandpaper until the finish feels smooth. It shouldn’t take much, usually not more than one or two passes everywhere. There’s no reason to use a flat block to back the sandpaper. Abrading with sandpaper produces much better results than using steel wool or abrasive pads because sandpaper cuts off while the others merely round over.
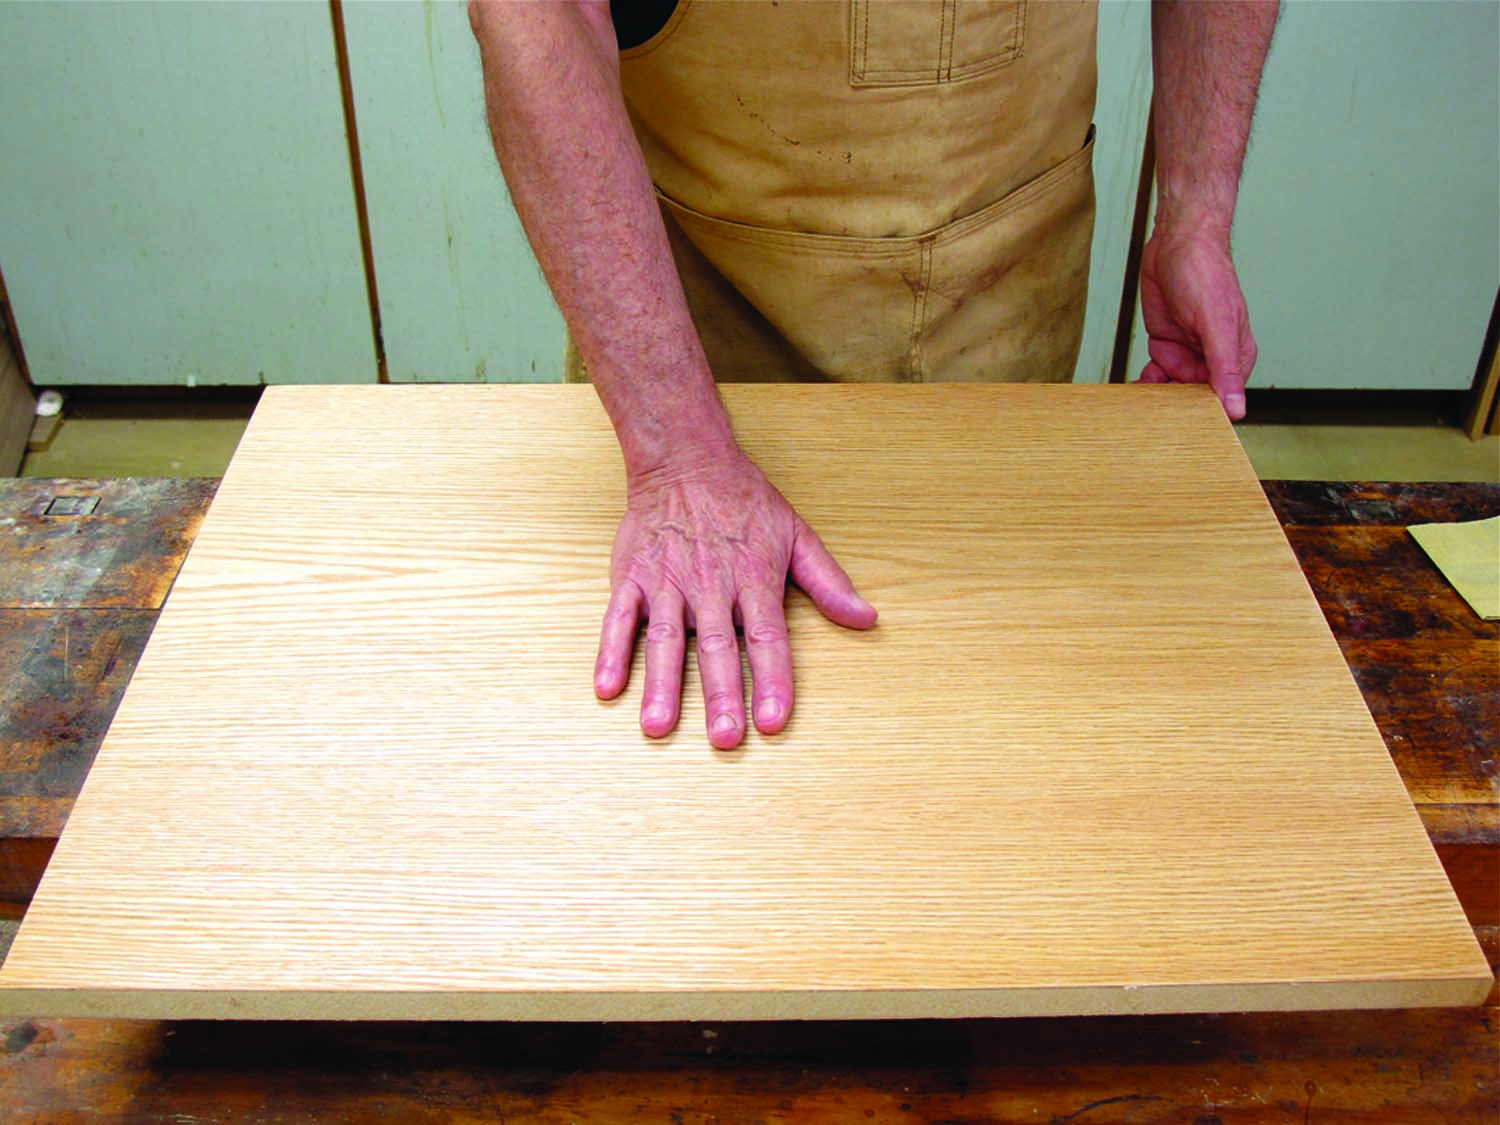
6. Feel for dust. After removing the dust with a vacuum, tack rag or dust brush, wipe over the surface with your hand. You’ll feel if there is any remaining dust and, as long as it’s not much, you’ll remove it with your hand. You can clean off your hand by wiping it on your pants leg.
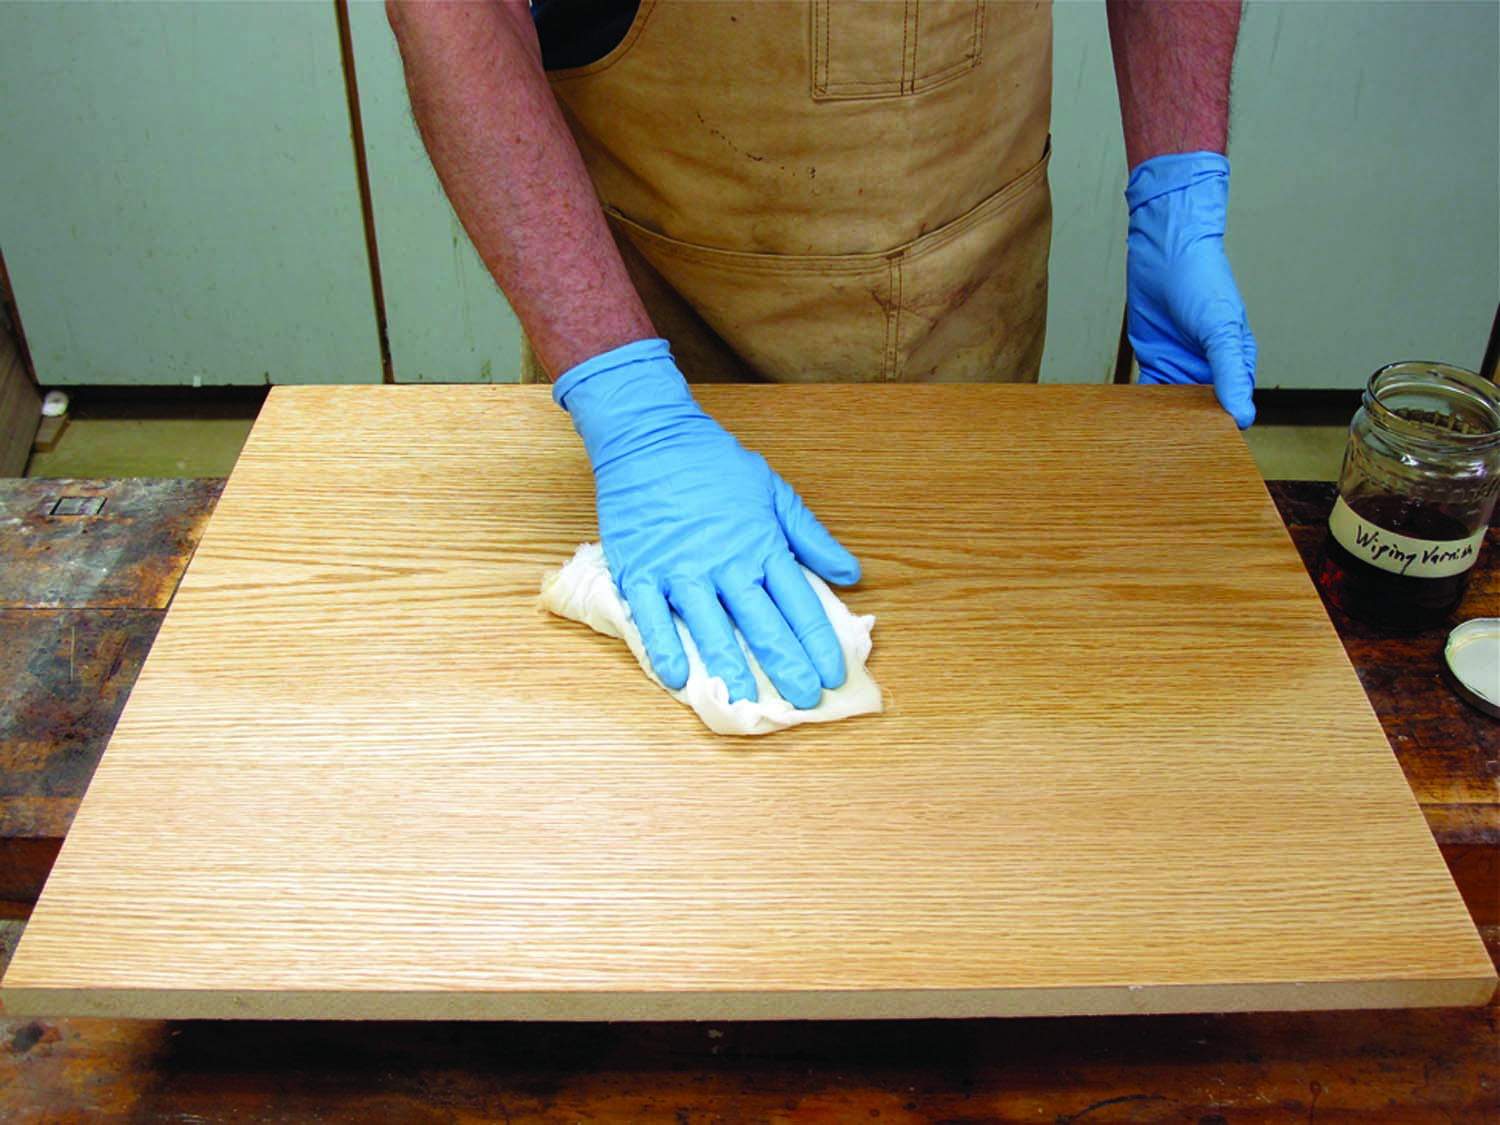
7. Apply more coats. Wipe a damp-to-wet coat of wiping varnish over the entire surface you’re finishing. You don’t need to make these coats as wet as the first one because the finish can no longer soak into the wood.

8. Wipe off after each. Wipe off the excess finish. You can leave the surface a little damp.
‘Dry Brush Excess’ Method
Brush wet coats of wiping varnish onto the wood and remove some of the finish with a dry brush. This method leaves more build than wiping off the excess, but still eliminates the possibility of runs and sags.
First Coat. Brush a wet coat of wiping varnish over the surface as in the wiping-off method. You could also wipe on a wet coat with a cloth.
Sand Smooth. It’s always critical to sand after the first coat so the roughness doesn’t telegraph through each additional coat.
More Coats. All additional coats go on the same as the first. Apply as many as you need to get the look you want, allowing overnight drying for each in a warm room. Be sure to sand each coat smooth before applying each additional coat.
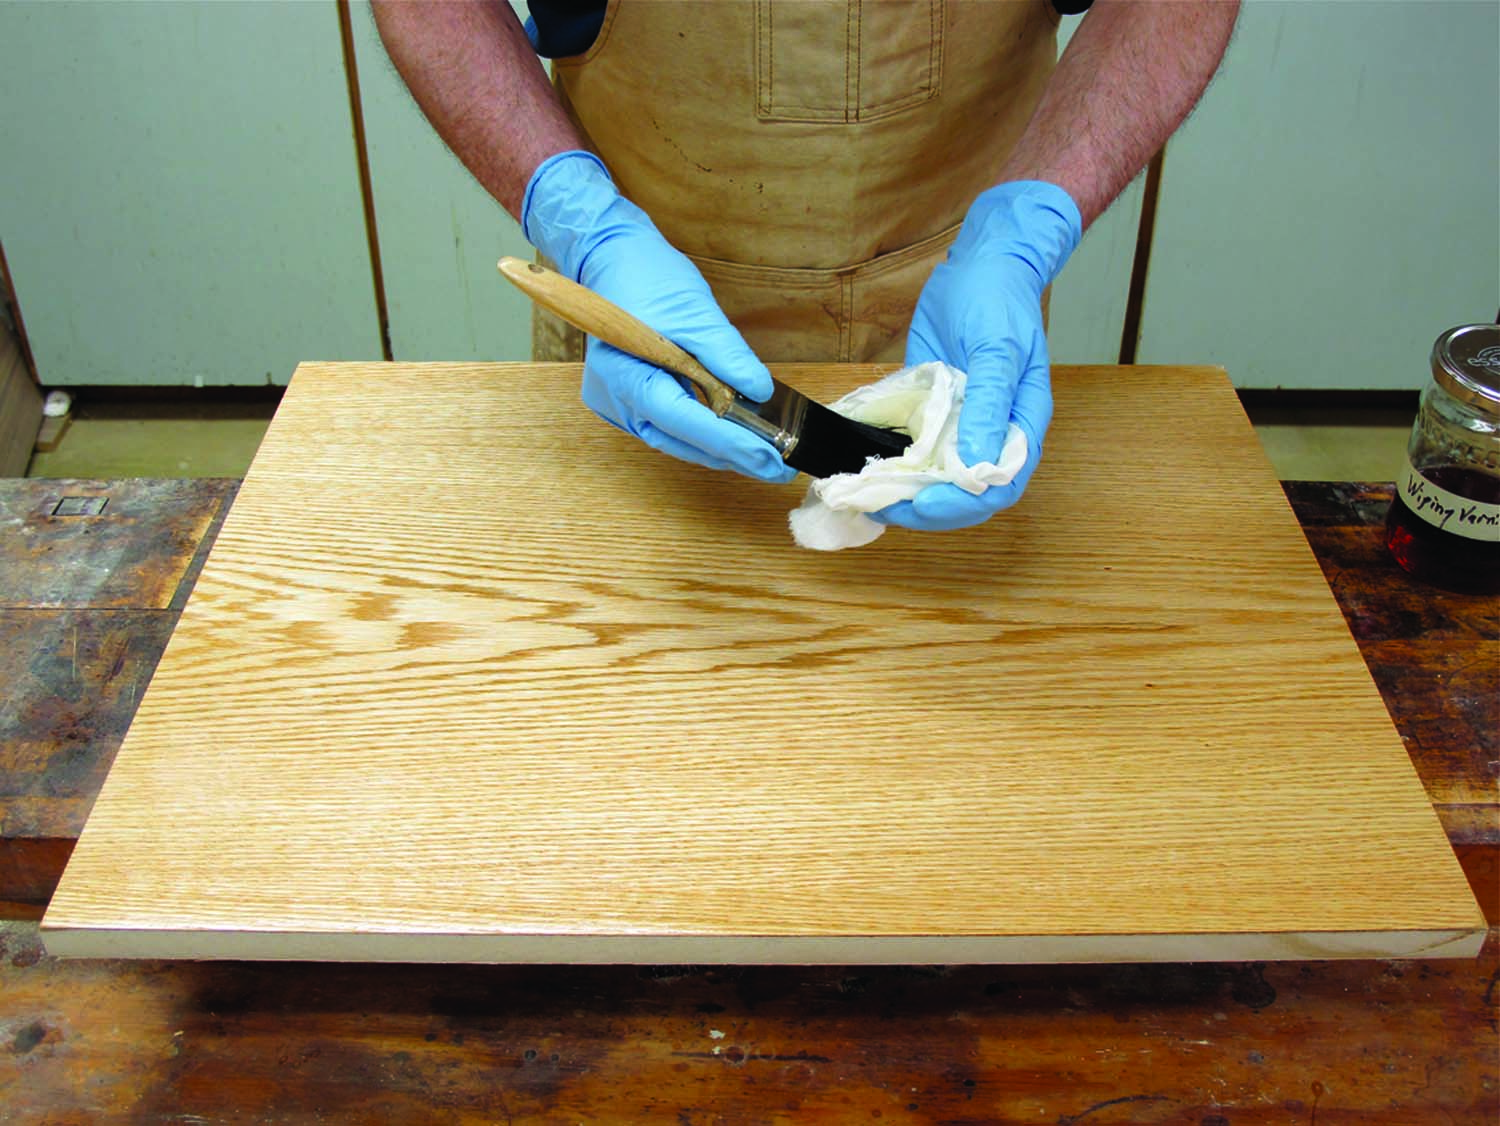
1. ‘Dry brush excess’ method. With the surface wet with wiping varnish, dry your brush on a clean cloth.
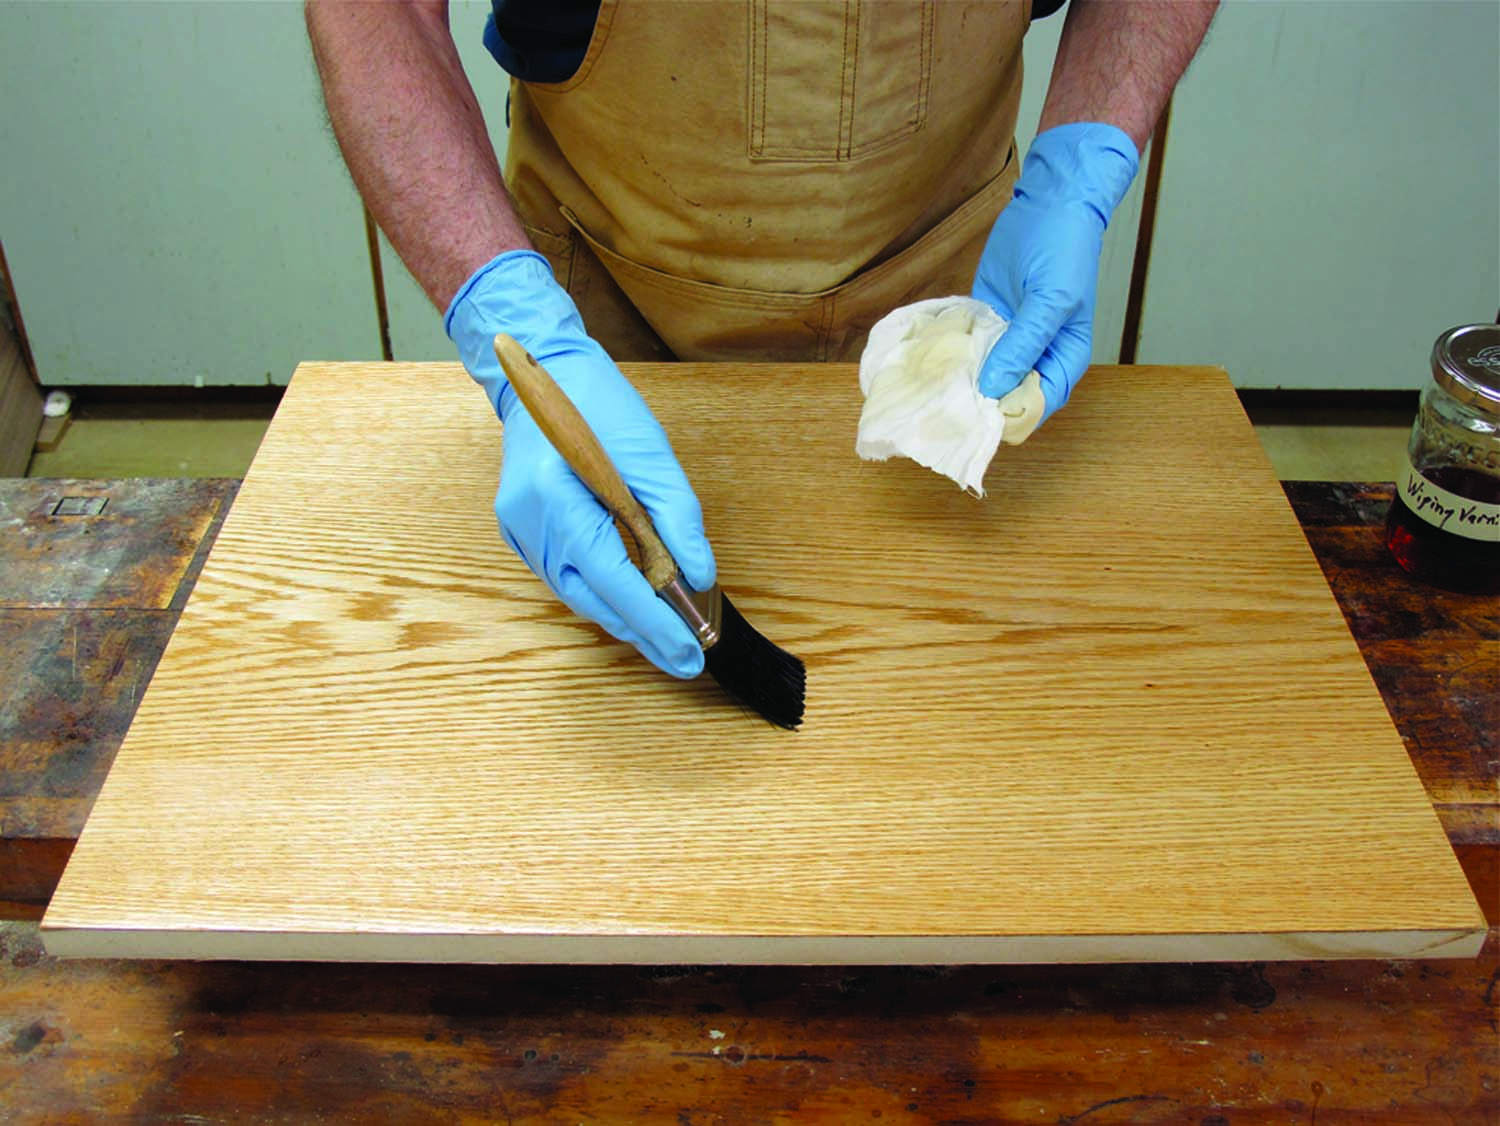
2. Brush off excess.Then brush back over to pick up some of the finish. At the beginning, dry the brush after each pass so you pick up the maximum amount of finish. If you decide to go over the surface a second time, you can make several passes before wiping. It’s best to use a better-quality bristle brush that won’t shed bristles.
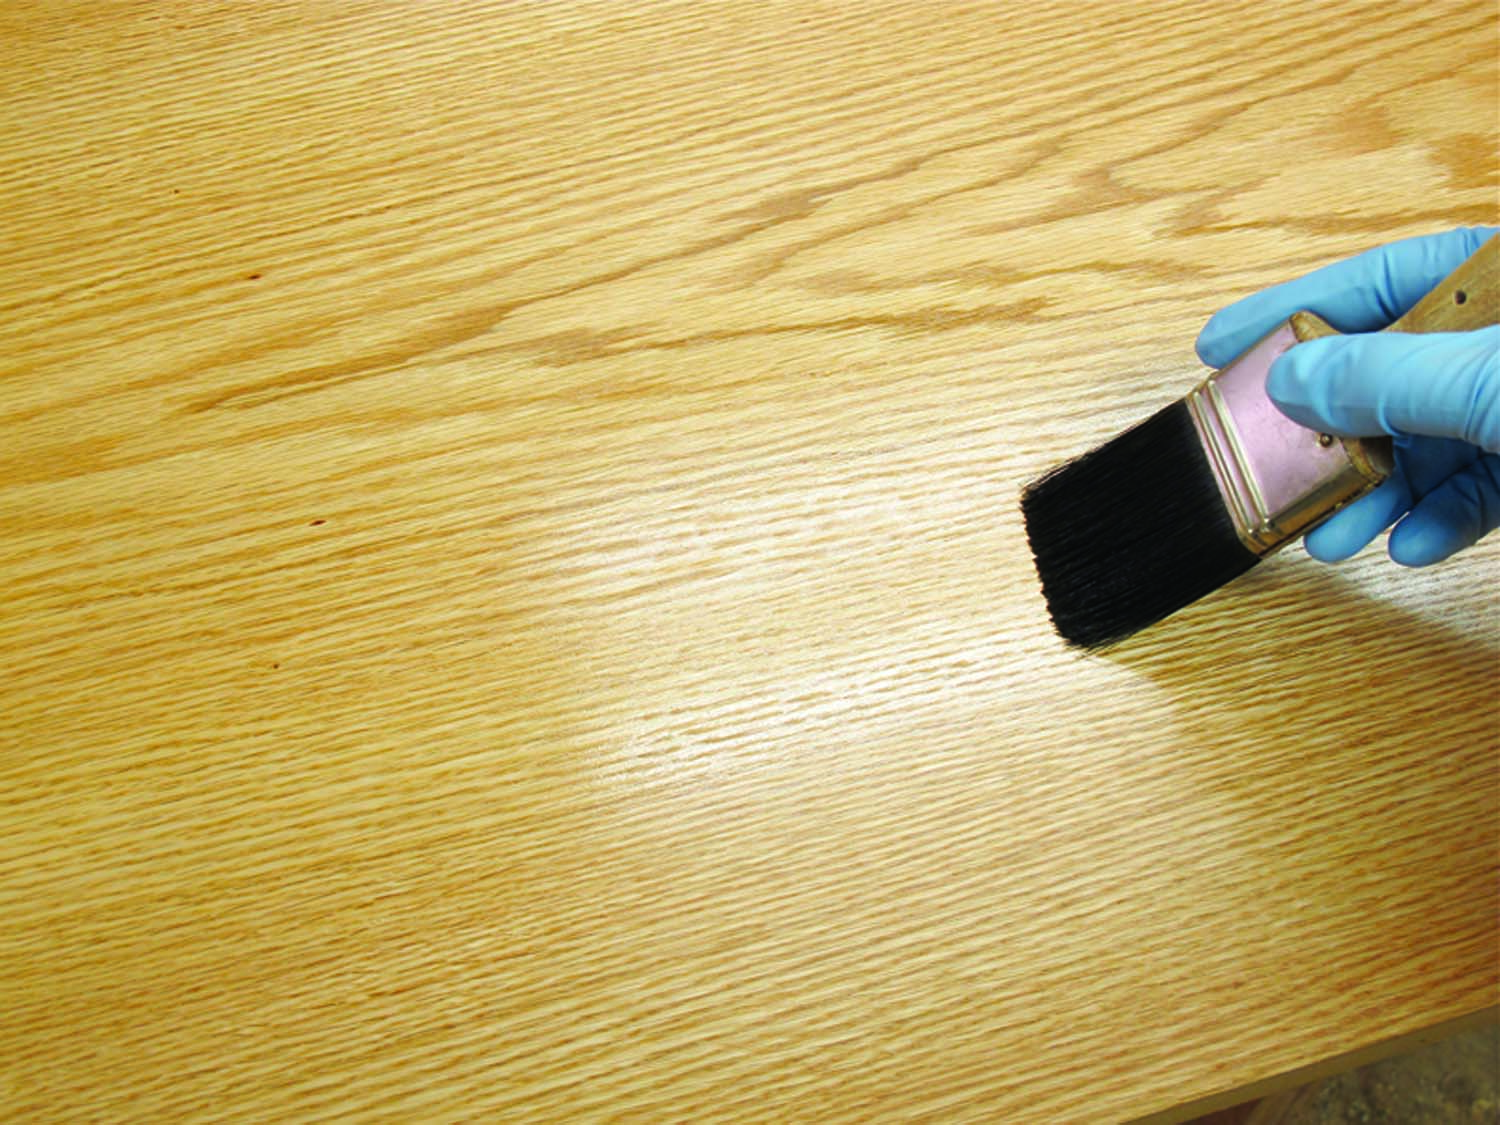
3. Reflected light. Watch what’s happening in a reflected light. Your goal is to get an even thickness of finish without puddles on horizontal surfaces or runs on vertical surfaces.
4. Sand smooth. After it’s dry, sand the surface with #320- or #400-grit sandpaper. You can use just your hand to back the sandpaper. Make two or three passes everywhere until the finish feels smooth. There should be very little dust. You may be able to remove it with just your hand, wiping it on your pants leg. But you can use a vacuum, dust brush or a tack rag, then wipe with your hand to check that all the dust has been removed.
5. More coats. Brush a wet coat of wiping varnish onto the surface. You don’t have to be too careful how you brush because the dry brushing will smooth things out.
6. Dry brush excess. With the entire surface wet, begin lifting some of the wiping varnish by brushing over with a dry brush.
7. Dry the brush. After each pass, dry your brush on a clean cloth. If you decide to dry-brush the surface a second time, you can make more than one pass before drying the brush. You’ll get the feel very quickly.
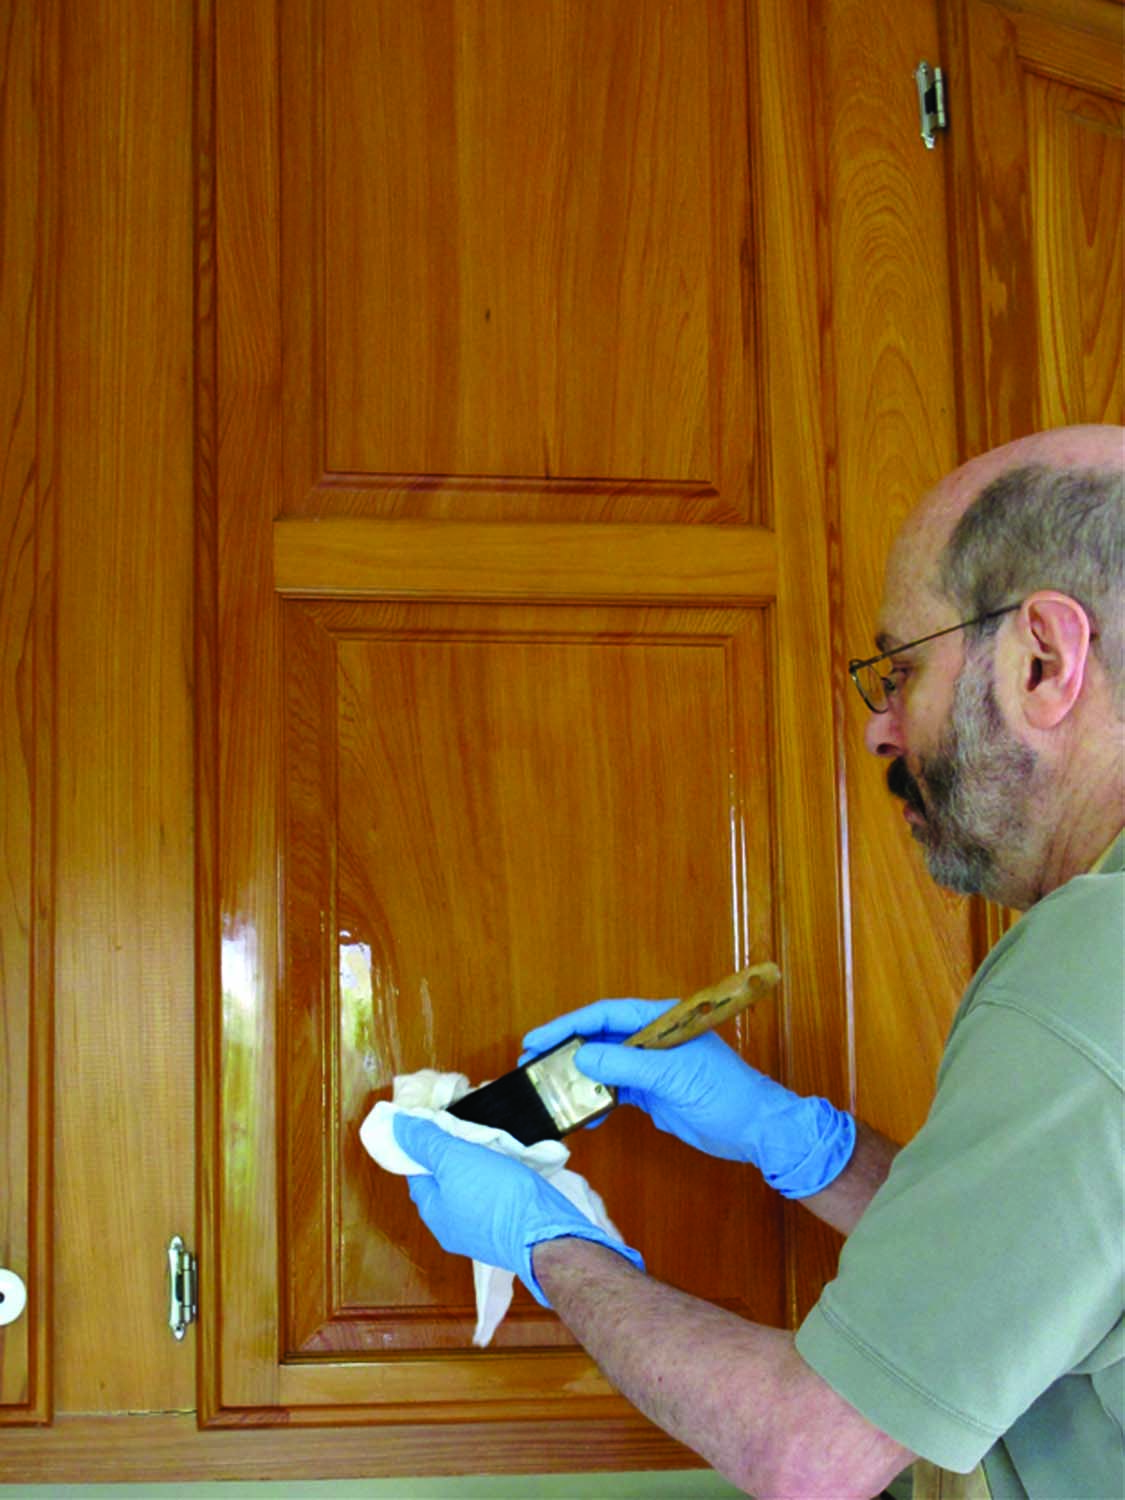
8. Vertical surfaces. The dry-brushing method is perfect for vertical surfaces. You can also wipe off all the excess, of course, but dry brushing leaves a thicker build with each coat without runs or sags. Always watch what is happening in a reflected light (overhead, window or light on a stand) and dry brush to remove any problems you find.
‘Leave Excess’ Method
Brush wet coats of wiping varnish onto the wood and leave them, allowing overnight drying between each. This can be done only on flat horizontal surfaces such as tabletops because of runs and sags. You can always use the dry-brushing technique to remove excess on edges and other connected vertical surfaces to avoid runs.
First Coat. This is a brush-on-and-leave method of applying wiping varnish. So it’s just like brushing full-strength varnish or polyurethane, or brushing paint.
Sand Smooth. The first coat of finish always causes a rough surface. You need to sand this smooth before continuing to the next coat.
More Coats. Brushing and leaving builds the finish much more quickly than wiping off or dry brushing. But dust nibs are more likely because the finish remains tacky longer. Be sure to sand lightly between each coat. You’re finished when you achieve the look you want.
Finish Up. There are always some dust nibs stuck in the last coat of finish. As long as they are small and there aren’t too many of them, you can remove them by rubbing the surface with a brown paper bag. PWM
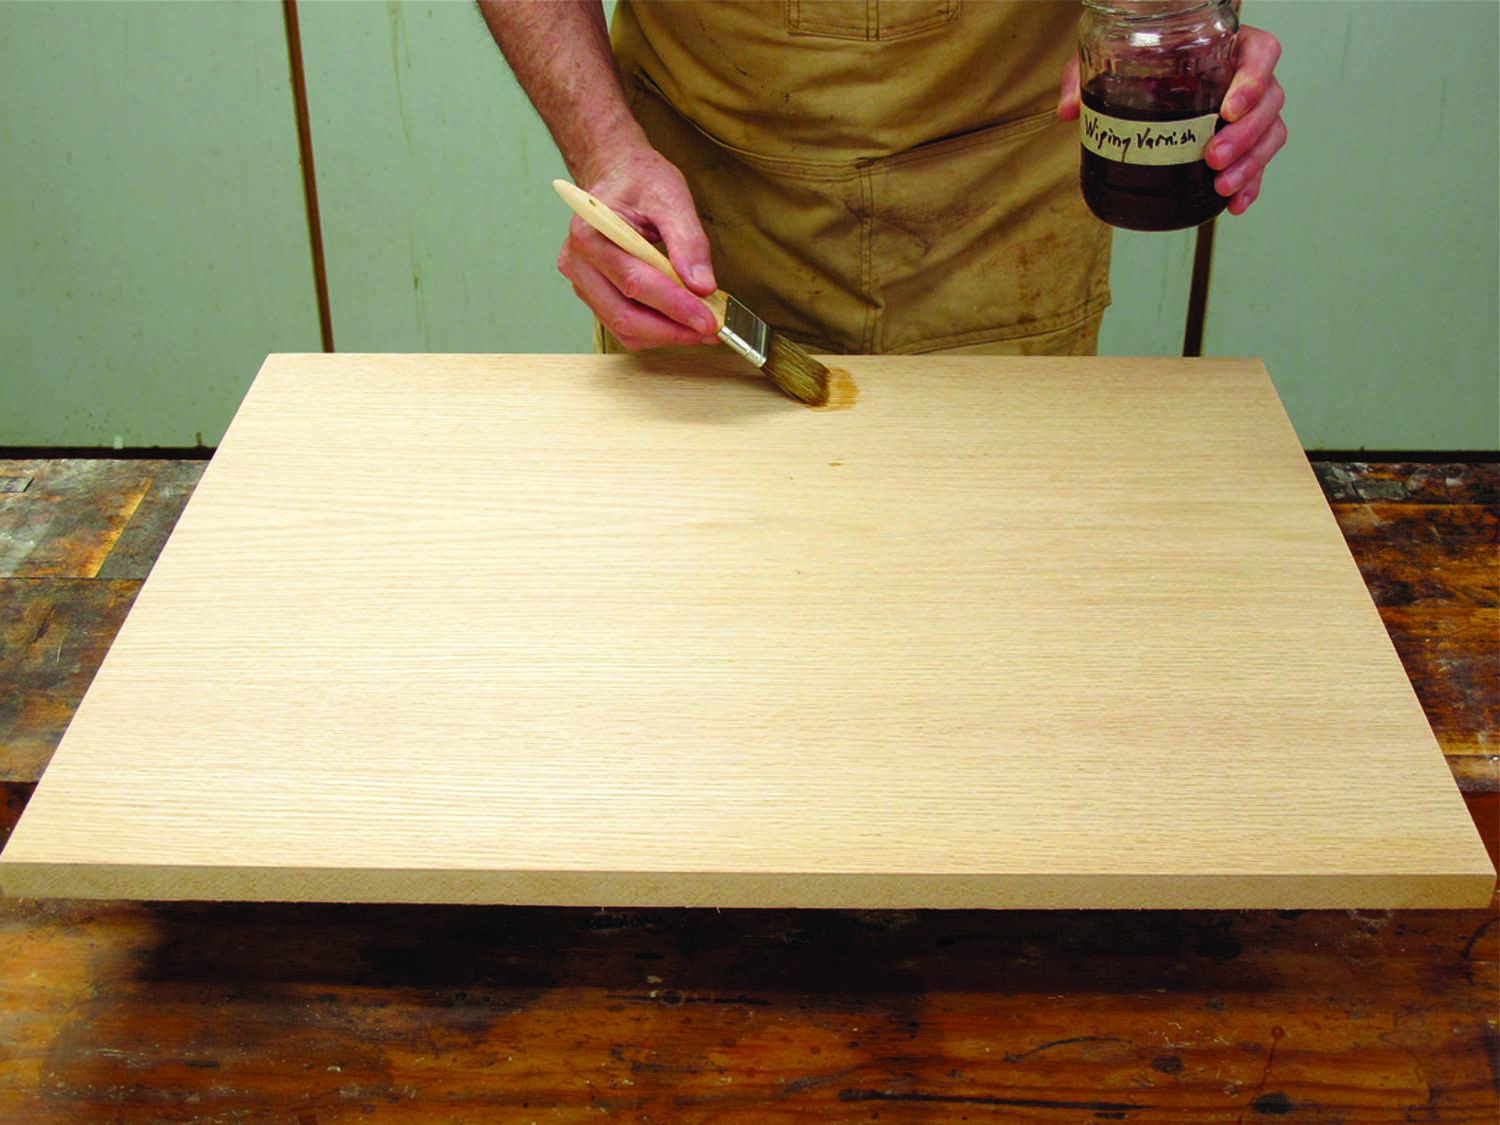
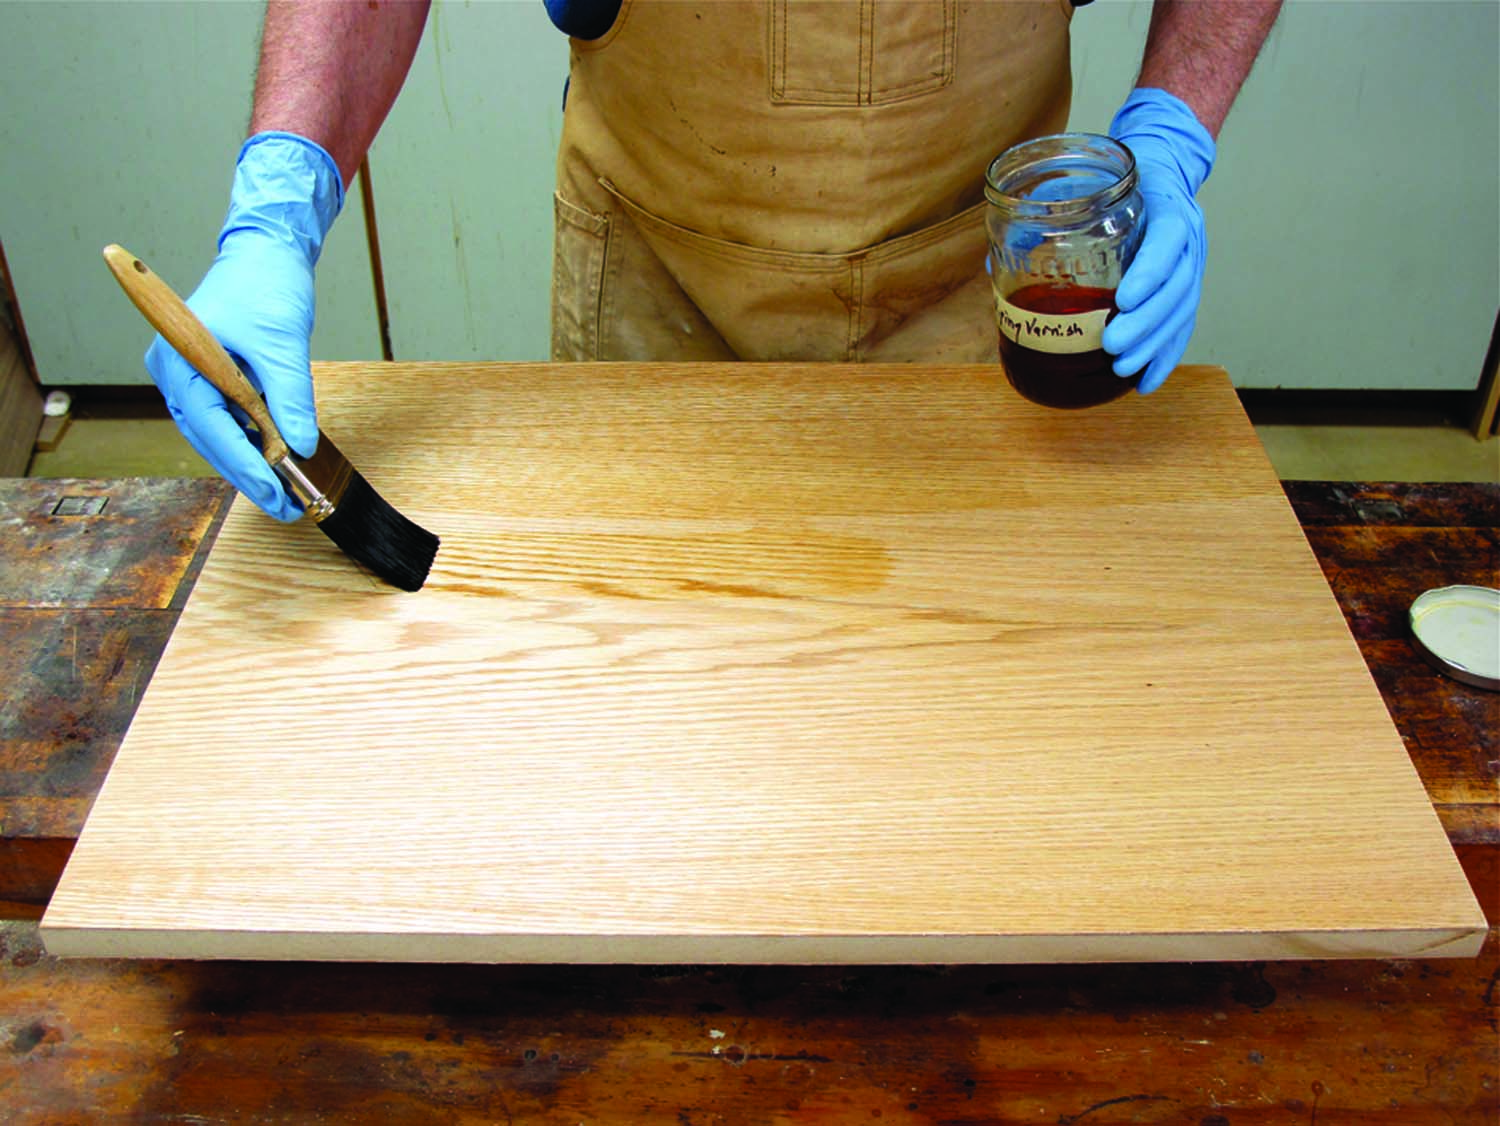
1. ‘Leave excess’ method. Deposit a brush load of wiping varnish onto the near edge of the panel. A “brush load” is the bristles dipped about one-third to one-half way into the wiping varnish, lifted out and plopped down on the wood.
2. Stretching out. Stretch the wiping varnish out edge to edge. You don’t have to be as careful with wiping varnish as you do with full-strength varnish or polyurethane because wiping varnish levels well. You could even brush across the grain and the finish would still level so you don’t see the brush marks.
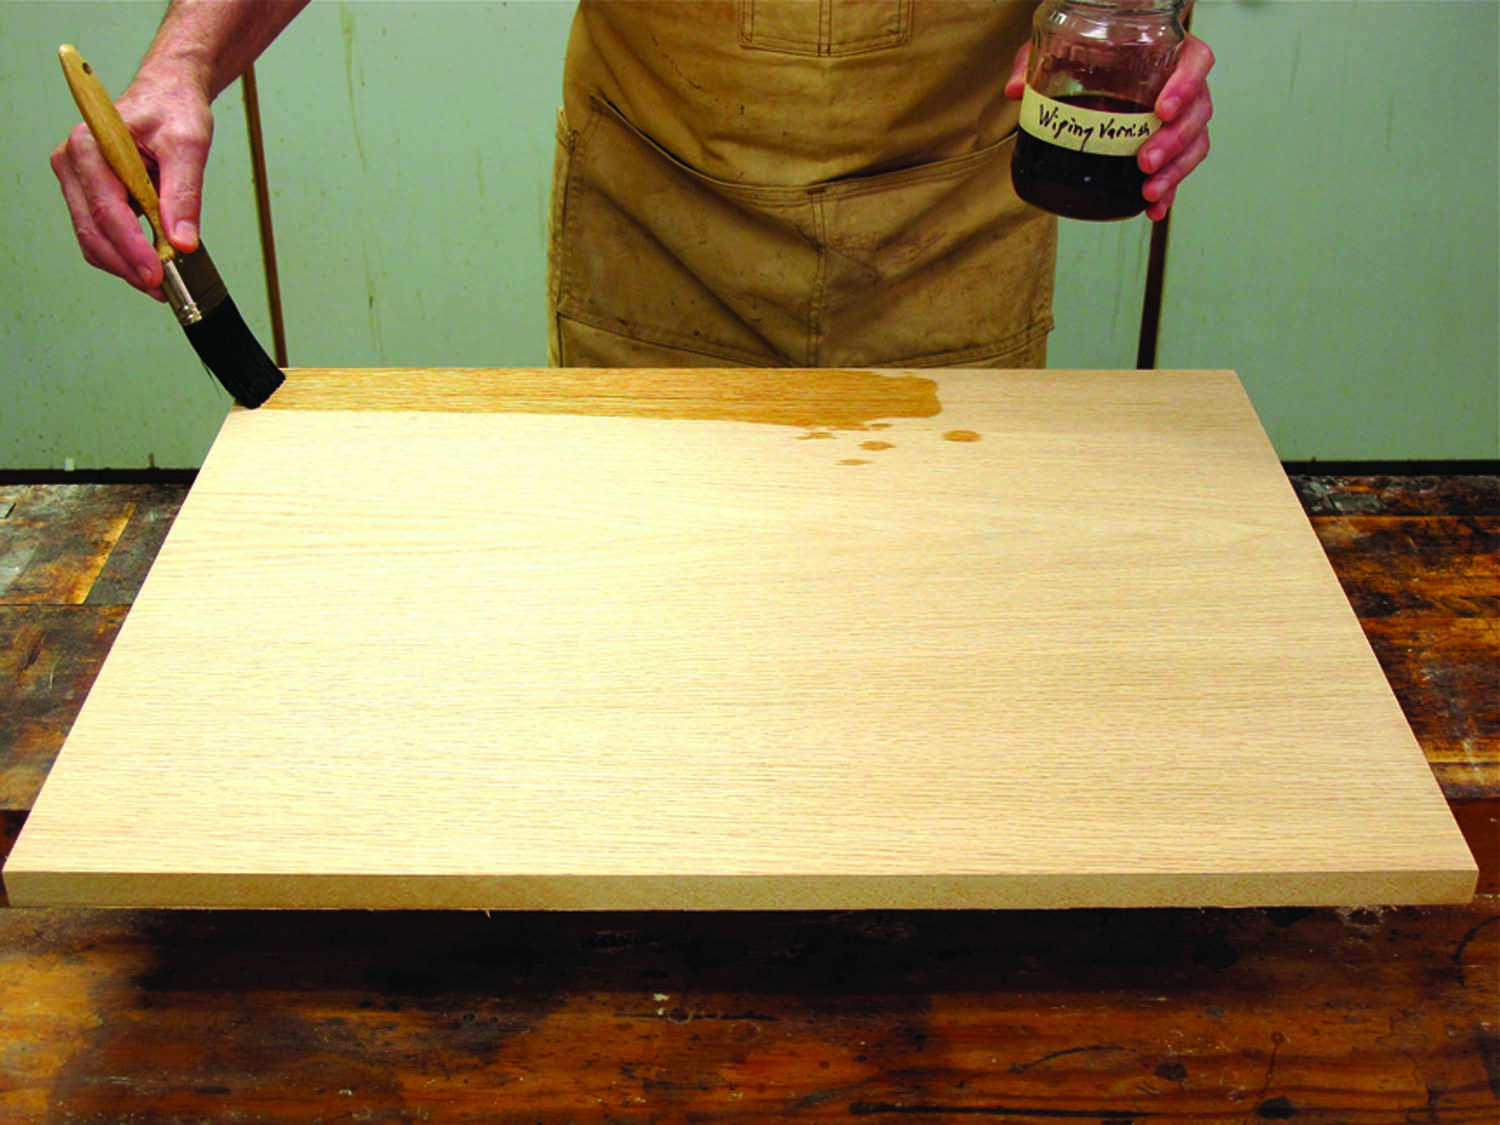
3. Continue as if painting. Continue depositing the wiping varnish and stretching it out across the surface.
4. Airplane landings. So as not to drag the bristles over the edge and cause runs down the side, use airplane-like landings about an inch or so in from each edge and brush across and off the other side.
5. More coats. After drying, sand the surface lightly using #320- or #400-grit sandpaper until the finish feels smooth (right). It shouldn’t take much, usually not more than one or two passes everywhere. There’s no reason to use a flat block to back the sandpaper. (Again, abrading with sandpaper produces much better results than does steel wool or abrasive pads.) Remove the sanding dust with a tack rag, vacuum or dust brush. A tack rag or vacuum is best because brushing kicks dust into the air; the dust can then settle back onto a freshly applied finish and stick to it. Just before applying the next coat, wipe over the surface with your hand. You’ll remove any remaining dust. Continue with more coats until you are happy with the appearance.
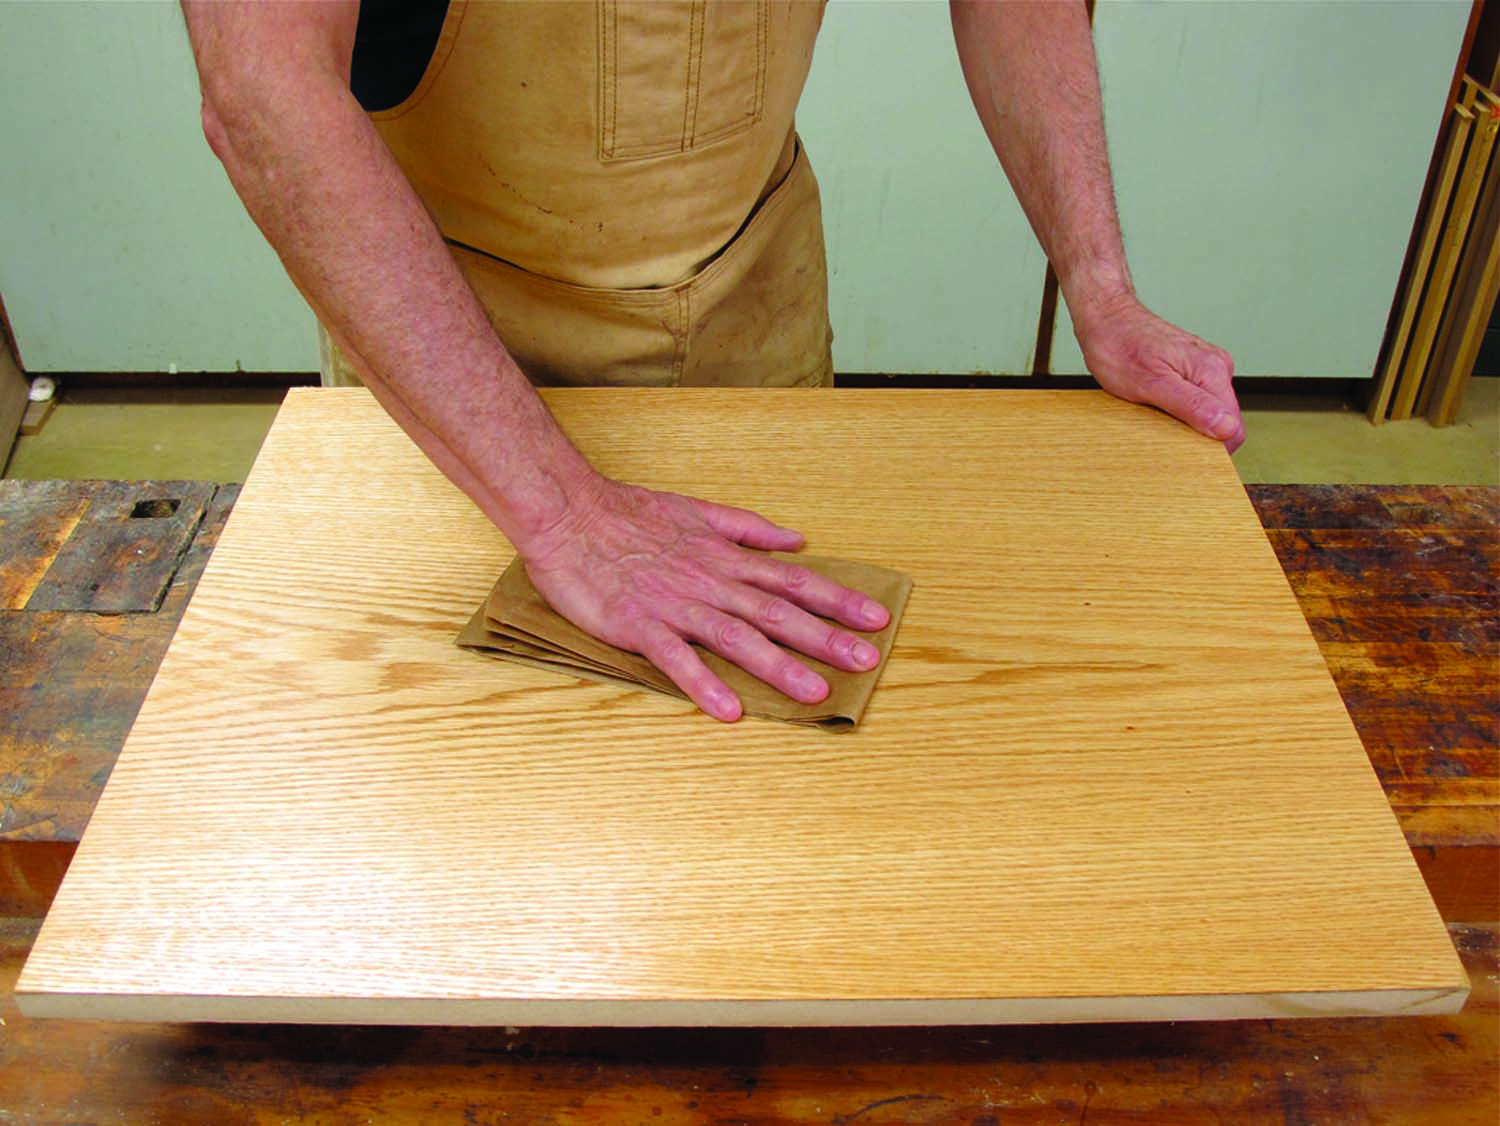
6. Smoothing trick.A brown paper bag works exceptionally well at removing the roughness caused by fine dust nibs stuck to the last coat. Simply fold the bag and rub the surface. To avoid scratches, it’s best to allow the finish to dry to the point that you don’t smell anything when you put your nose against the surface and take a whiff.
This article is excerpted from Bob’s book,
“Wood Finishing 101,” He’s also the author of “Flexner on Finishing” (both Popular Woodworking Books).
Here are some supplies and tools we find essential in our everyday work around the shop. We may receive a commission from sales referred by our links; however, we have carefully selected these products for their usefulness and quality.


So I have learned you can tint varnish. I am using Formby’s tung oil and have 3 coats on an oak (cabinet grade wood) shelf. I want to darken it. What tint can I get or use from home depot or sherwin williams that will work with Formby’s please