


We may receive a commission when you use our affiliate links. However, this does not impact our recommendations.
Knowing how to measure things is one of the keys to improving the accuracy of your work, but taking a measurement and using the result of that measurement to mark your work or set up a tool often leads us down the wrong path, leaving us farther away from making two pieces that fit together just so. Every time the eyes, brain and hands interact with a measuring device and a hunk of wood is an opportunity to make an error, and little errors never cancel each other out, they always combine and multiply.
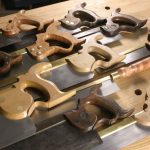
 Here’s an example from a few years ago, making a Greene & Greene style finger-joined drawer. The fingers vary in size and stand proud of the surface about 1/8″. To make the setting for my combination square I didn’t use the numbers. I set one of the pieces flat on the bench, and placed an 1/8″ thick piece of scrap on top. I placed the head of the square on top of the pile, loosened the screw and lowered the blade to the bench top. That gave me the exact distance I wanted (the thickness of the piece plus 1/8″) in a few seconds, and I didn’t have to squint to see any numbers, didn’t have to decide if the thickness was 7/8″ or 55/64″ and didn’t need to add 55/64″ and 1/8″. I set my measuring/marking tool by gauging and moved along expeditiously. I used the square to mark the rest of the pieces. I saved time by not measuring each one, and each mark was in exactly the same place. Consistency is more important than absolute accuracy.
 The next task is to set the height of the blade on the table saw, so that it cuts to the bottom of my layout line. There was a time when I would try to measure the distance between the top of the saw table and the height of the blade. I’ve tried all sorts of things, and the woodworking catalogs are full of devices to complicate the process even further. One day I had a DOH! moment and realized it would be easier to set the blade directly to the layout line. I will be using a jig that’s made from plywood to make the cuts, and my stock will sit on top of the jig. So I place the piece in position on top of a leftover piece from making the jig, move around to the side of the saw so I can look directly at the blade and the line. It’s easy to see when the blade is at top dead center, and when it just reaches the line.
 One of my reasons for having the work ride on top of the jig was to make it easy to see exactly where the cut would be. The jig consists of two pieces screwed together to form an L-shape, and the vertical piece is attached to the saw’s miter gauge. When the jig was ready, I ran it through the saw blade, leaving a kerf in the bottom. I line up the cuts using the kerf and my layout line. I can choose to take the line, leave the line, or split the line and the unequal spacing of the fingers doesn’t slow the process down at all.
Producing good work is mostly problem solving, and one of the keys to working accurately is to solve the right problem, and avoid the creation of new problems.
In the June 2011 issue, I wrote an article about using the combination square. In that article I show you several ways to use the square to avoid measuring and work more accurately. You can buy that issue here in PDF format for instant gratification.
Here are some supplies and tools we find essential in our everyday work around the shop. We may receive a commission from sales referred by our links; however, we have carefully selected these products for their usefulness and quality.


I’m completely with you on this.The rule for me is to use the tape measures and rulers as little as possible, but when you do use them make sure you use the same ones all the way through completion of the same project since almost none of them measure the same.
I discovered the same thing with box joint jigs- either you use calipers for setup with all the inherent measuring errors Bob mentions or you attempt to set a dado blade to a a fixed pin width using using calipers and numerous test cuts. I eventually solved that problem by building a jig where both index pin settings are based on direct transfer of the actual blade kerf, regardless of its width. Setting is eas and almost automatically by turning a single knob- precision with no measuring.
Marking the cut line on the work pieces is fine just for reference, but unnecessary. To adjust the height of the saw blade, just set your sawing jig by the blade of the saw, set the flat end of blade on the jig, and then raise the saw blade until a tooth tip just lightly touches the flat of the try square head. It saves a step, and it’s “less work for mother”.
But, but, officer, I thought I was just going the same speed as everyone else.
🙂
I absolutely agree with this: “Consistency is more important than absolute accuracy.” I used to tell people this when cutting out picture frames to length.
I have many projects that I have never made a measurement on, and they went together fine.
I have to tell you that I very rarely measure anything after my first cut. I generally set up the cut and use a crosscut sled on the table saw with a stop block. And most of my joinery I cut by hand and use a marking gauge. The only real measuring I do is for rip cuts on the table saw. And I found that since I started working this way I’ve been much more accurate.
Hey Bob,
Thanks for the article. Time was when most everything was made using story sticks and dividers. Those skills and tools seem to have faded away, and it’s hard to understand why.