


We may receive a commission when you use our affiliate links. However, this does not impact our recommendations.
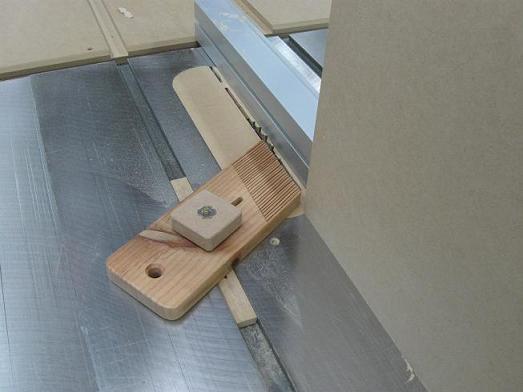
After making the groove on the first rail I think about adding a featherboard to keep workpieces against the rip fence to obtain consistency on the grooves and the shoulders.

Here are the completed on the four rails and the four stiles.

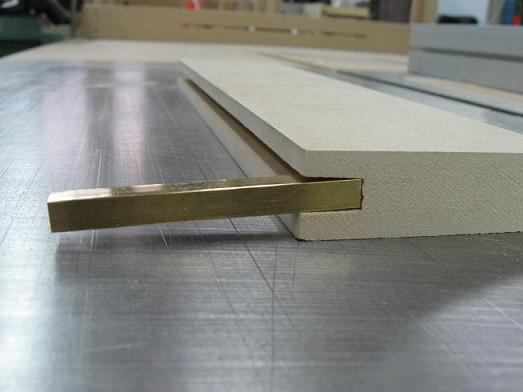
I’m glad about the fact that I thought of checking the first groove I made without the featherboard. As you can see on the picture, this one is too sloppy. For sure that won’t make a strong joint.
I have the bad or the good habit to not disturb a setup until I need the tool or until the task is completed. Fortunatly here I am able to make another groove on a piece of scrap the same thickness and long enough to make another rail. Even the featherboard is in its position.
After making and verified the groove, I cut the rail to the required dimensions.
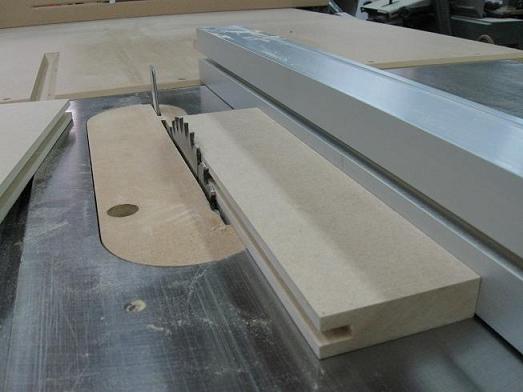
Al last, the four rails are now adequate.

To see the details and photos of all the steps from the begining, click here.
Best,
Serge
http://www.atelierdubricoleur.spaces.live.com
Product Recommendations
Here are some supplies and tools we find essential in our everyday work around the shop. We may receive a commission from sales referred by our links; however, we have carefully selected these products for their usefulness and quality.


Recommended Posts
